Introduction
Welcome to the world of online gaming and streaming! If you’re an avid gamer or streamer, you’ve probably heard of Discord and Twitch – two popular platforms that have revolutionized the way gamers connect and interact with their audience. Discord is a communication app designed specifically for gamers, while Twitch is a leading live streaming platform for gamers and content creators.
Bringing these two platforms together can enhance your gaming experience by allowing you to engage with your community in real-time, notify your Discord server members about your live streams, and even grant special permissions and roles to your loyal fans. In this article, we will walk you through the process of linking your Discord and Twitch accounts, setting up notifications, configuring roles, and more.
Linking Discord and Twitch not only enables seamless communication between your Twitch followers and Discord server members, but it also provides a platform to build a stronger community and increase your reach as a content creator. By following the steps outlined in this guide, you’ll be able to take full advantage of the integration and create an engaging and interactive space for your followers.
Whether you’re a streamer looking to expand your reach or a gamer aiming to connect with like-minded individuals, linking Discord and Twitch is a crucial step in building a vibrant community around your content. So, without further ado, let’s dive into the step-by-step process of connecting your Discord and Twitch accounts and unlocking a world of possibilities.
Step 1: Creating a Discord Server
The first step in linking your Discord and Twitch accounts is to create a Discord server. A Discord server acts as a hub for communication and collaboration among like-minded individuals, whether they are gamers, streamers, or simply enthusiasts of a particular topic.
To create a Discord server, follow these simple steps:
- Open the Discord app or visit the Discord website and sign in with your account credentials.
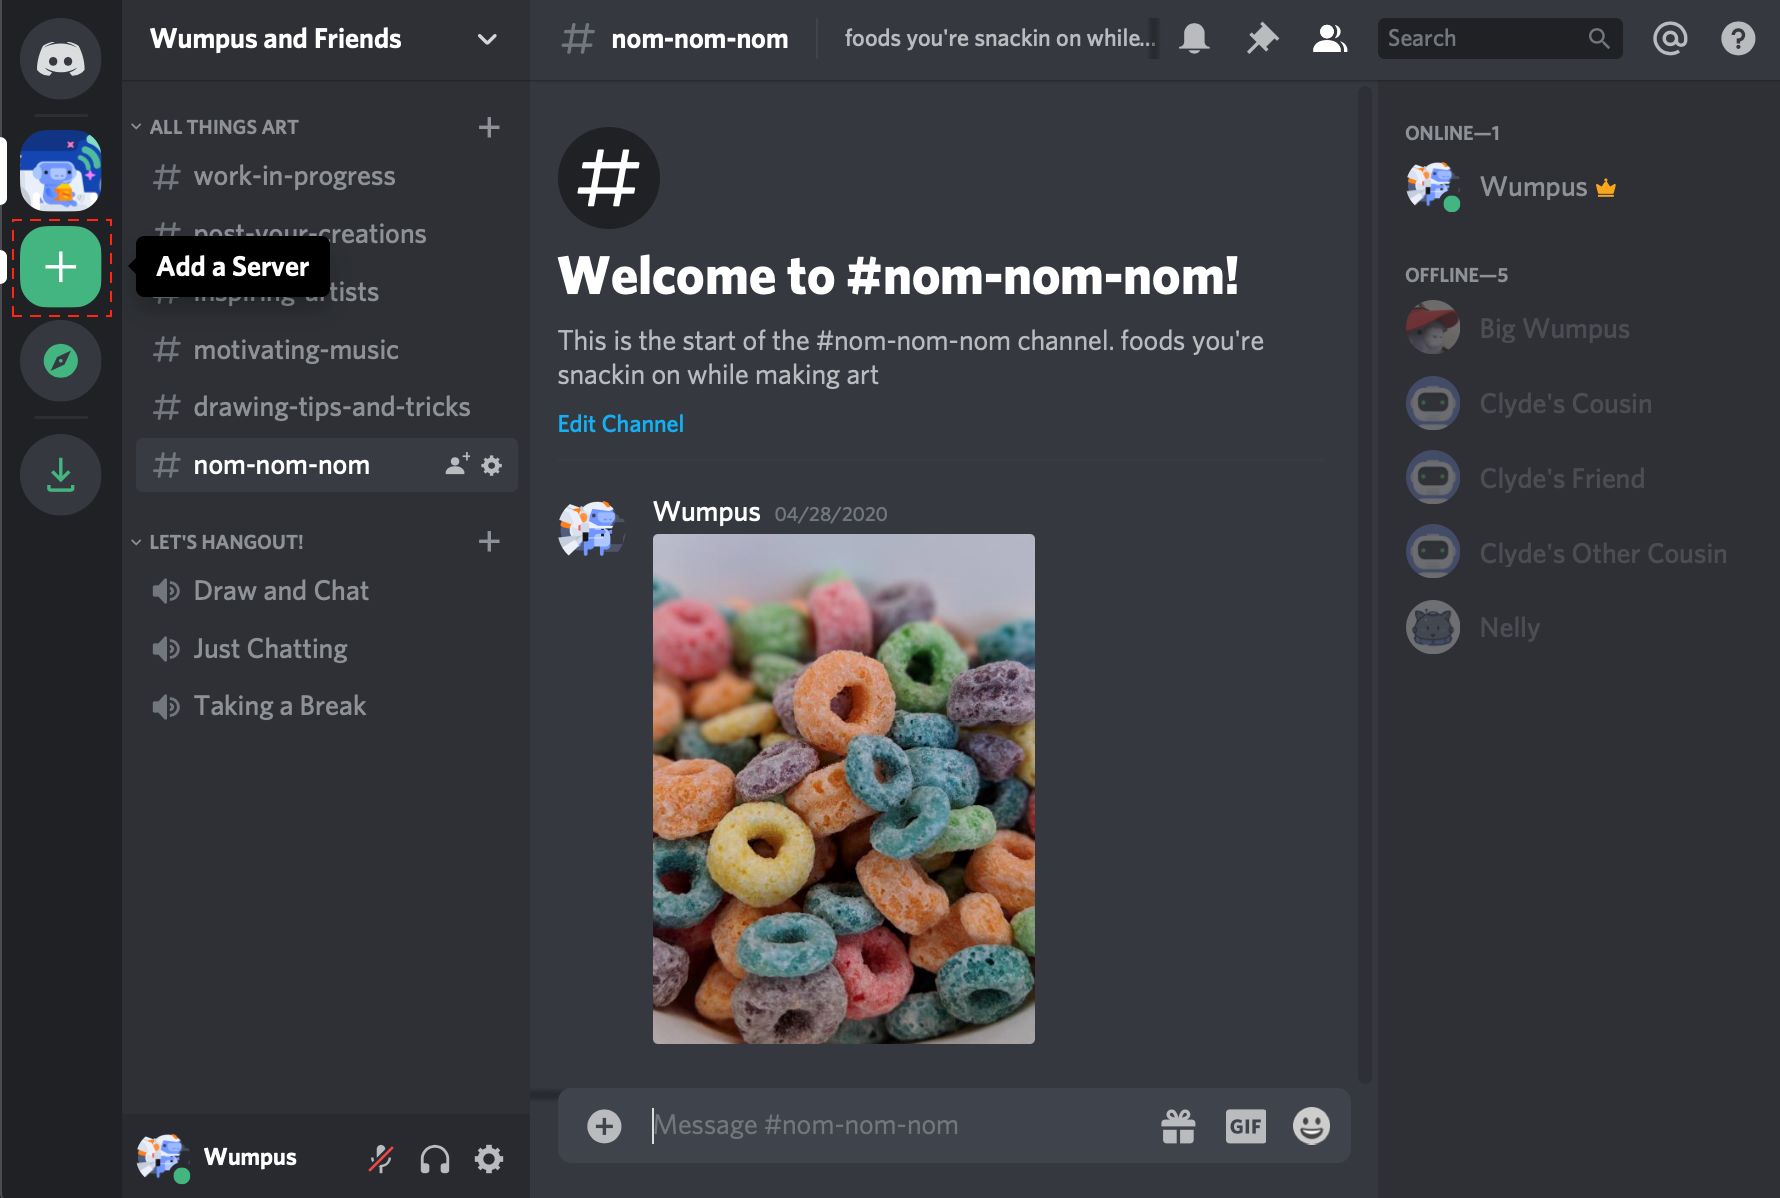
- On the left-hand side of the main interface, you will find a plus (+) button. Click on it to create a new server.
- You will be prompted to choose between creating a server from scratch or joining an existing server. Select the “Create My Own” option to proceed.
- Next, enter a unique name for your server. This can be anything you like, but it’s recommended to choose a name that reflects the theme or purpose of your community.
- Optionally, you can upload a server icon to make your server visually appealing. This can be a logo or image that represents your server’s identity.
- Finally, choose your server’s region from the available options. This determines the server’s physical location for optimal performance.
- Click on the “Create” button, and voila! Your Discord server is now up and running.
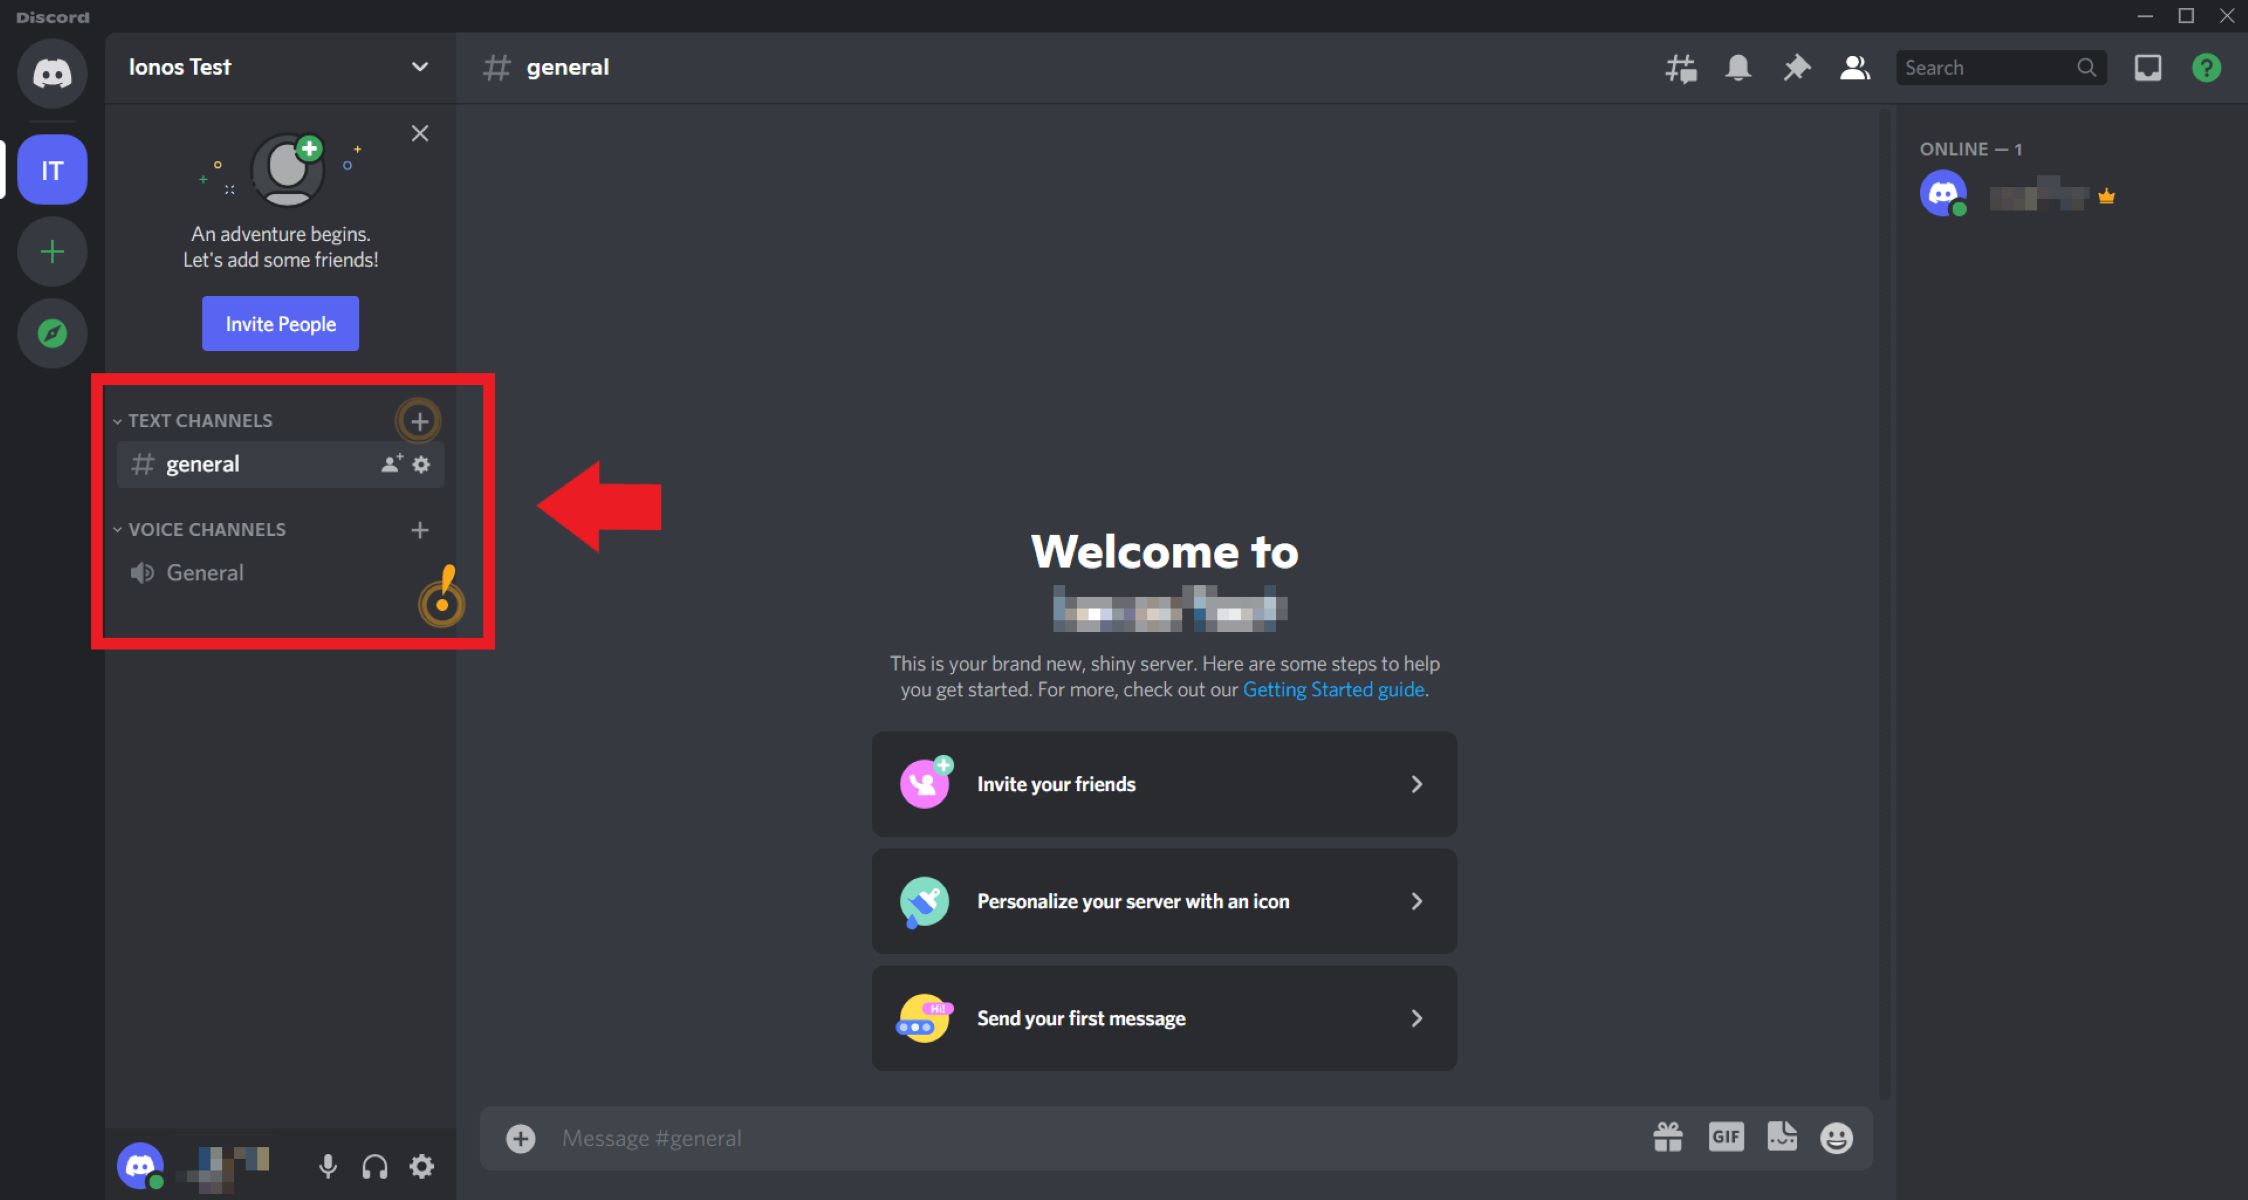
Once your server is created, you can start customizing it to fit your preferences. Explore various features and options such as channels, roles, permission settings, and server settings to tailor your Discord server to suit your needs.
Remember, the success of your Discord server depends on how well you engage and interact with your community members. Create a welcoming atmosphere, establish clear guidelines, and actively participate in discussions to foster a thriving community around your Twitch content.
Now that you have your Discord server up and running, it’s time to move on to the next step and connect your Twitch account for seamless integration.
Step 2: Connecting Twitch and Discord Accounts
Now that you have created your Discord server, it’s time to link your Twitch and Discord accounts to enable cross-platform functionality between the two platforms. Here’s how you can connect Twitch and Discord:
- Open your preferred web browser and navigate to the Twitch website (www.twitch.tv).
- Sign in to your Twitch account with the credentials associated with your streaming channel.
- Click on your profile picture in the top right corner of the screen to open the drop-down menu. Select “Settings” from the available options.
- In the left-hand sidebar of the Settings page, click on “Connections.”
- Scroll down until you find the Discord section and click on the purple “Connect” button.
- A new window will appear, prompting you to authorize Twitch to access your Discord account. Click on the green “Authorize” button to proceed.
- You will then be redirected to Discord, where you will need to grant permissions to Twitch. Select the Discord server you wish to connect to Twitch and click on “Authorize” again.
- After granting the necessary permissions, you will receive a confirmation message stating that your Twitch account is now connected to Discord.
Once the connection is established, you will notice that your Twitch account is visible within the Discord server’s member list, allowing others in the server to easily identify you as a streamer. Moreover, this integration opens up a range of possibilities, such as real-time notifications for when you go live on Twitch, integrating your Twitch emotes and badges into your Discord server, and granting special roles and permissions to your Discord subscribers.
With your Twitch and Discord accounts successfully connected, you’re one step closer to creating a cohesive streaming experience for your community. In the next step, we will explore how to authorize a Discord bot for additional functionality and customization.
Step 3: Authorizing the Discord Bot
Authorizing a Discord bot is an important step in the integration process as it allows you to customize the notifications and functionalities between Twitch and Discord. To authorize a Discord bot, follow these steps:
- Visit the Discord Developer Portal (https://discord.com/developers/applications) and sign in with your Discord account.
- Click on the “New Application” button to create a new application for your bot.
- Provide a unique name for your application and click on “Create” to proceed.
- In the left-hand sidebar, select the “Bot” tab and click on “Add Bot.”
- Confirm your action by clicking on “Yes, do it!”
- Under the “Token” section, click on “Copy” to copy the bot’s token. This token will be needed later to connect your bot to your Discord server.
- Scroll down to the “Bot Permissions” section and select the necessary permissions you want your bot to have. For Twitch integration, it is recommended to grant the “Send Messages,” “Embed Links,” and “Manage Roles” permissions.
- Once you have selected the desired permissions, the corresponding bot URL will be generated in the “Scopes” section. Click on the generated URL and authorize the bot to join your Discord server.
After authorizing the bot, it will have access to your Discord server, allowing it to send messages, manage roles, and perform other specified tasks. You can then customize the bot’s behavior by configuring its settings and defining the notifications you’d like to receive from Twitch.
Back in your Discord server, navigate to the bot section in the Discord Developer Portal and select your bot. From here, you can further customize the bot’s settings and permissions to suit your needs. To establish a connection between your bot and Twitch, you will need a helpful third-party integration called a bot token.
With the bot authorized and configured, you’re ready to move on to the next step and set up notifications for Twitch streams on your Discord server.
Step 4: Setting up Notifications for Twitch Streams
Setting up notifications for Twitch streams on your Discord server is a great way to keep your community informed and engaged. By configuring these notifications, your Discord server members will receive instant updates whenever you go live or post new content on Twitch. Here’s how you can set up Twitch stream notifications:
- Follow the previous steps to navigate to your authorized Discord bot in the Discord Developer Portal.
- Under the “OAuth2” tab, scroll down to the “Scopes” section and select the “bot” checkbox.
- Below the “Scopes” section, you will see a new section called “Bot Permissions.” Tick the necessary permissions for your bot to receive and send notifications, such as “Read Messages,” “Send Messages,” and “Manage Webhooks.”
- A link will be generated in the “Scopes” section. Click on the link to invite the bot to your Discord server.
- Once the bot is in your server, create a new channel specifically dedicated to Twitch notifications. You can name it something like “Twitch Alerts.”
- Return to the Discord Developer Portal and select your bot. Scroll down to the “Token” section and click on “Copy” to copy the bot’s token.
- In your preferred code editor or integrated development environment (IDE), create a script that connects your bot’s token to the Discord server and channels you’ve set up.
- In the script, set up a listener for Twitch event notifications. When your Twitch account goes live or a new stream begins, the bot will detect these events and send notifications to the designated channel on your Discord server.
- Run the script to activate the bot. You should start receiving Twitch stream notifications on your Discord server.
This customization allows you to notify your Discord server members about your live streams, ensuring that they don’t miss out on your gaming sessions or important updates. It’s worth noting that the level of customization and complexity may vary depending on the bot you use and the programming language you’re comfortable with.
With Twitch stream notifications successfully set up on your Discord server, it’s time to move on to the next step and configure roles and permissions to reward and engage your loyal community members.
Step 5: Configuring Roles and Permissions
Configuring roles and permissions in your Discord server is a powerful way to reward and engage your community members. By assigning roles and granting specific permissions, you can establish a hierarchy within your server and provide unique benefits to your Twitch subscribers and active community members. Here’s how you can configure roles and permissions:
- In your Discord server, click on the down arrow next to your server’s name to open the server’s settings menu.
- Select the “Roles” tab from the left-hand sidebar.
- Click on the green “Create Role” button to create a new role. Give it a name and customize its permissions based on your preferences. For example, you can create a role called “Twitch Subscriber” and grant it special permissions.
- Once you’ve created the role, assign it to your Twitch subscribers or specific members who meet certain criteria. You can do this individually or by creating a bot command that automatically assigns roles based on Twitch subscriber status.
- Consider creating additional roles with different levels of permissions to reward loyal and active community members. These roles can provide access to exclusive channels, special chat privileges, or even the ability to use custom emotes.
- Experiment with different role configurations, such as color assignments, name hierarchies, or role rewards for Twitch subscribers with long-term support.
By configuring roles and permissions, you create a sense of exclusivity and incentive for your community members to engage with your content. This fosters a sense of belonging and appreciation among your followers, making them more likely to support your Twitch streams and actively participate in your Discord server.
Additionally, roles and permissions can be utilized to streamline moderation efforts. Assigning specific roles to trusted individuals can help maintain order and ensure a safe and friendly environment for all members of your community.
Remember, the customization of roles and permissions should align with your server’s theme and community values. Regularly review and update role configurations to adapt to the evolving needs and dynamics of your community.
With roles and permissions configured, you have established a well-structured and engaging community on your Discord server. Now, let’s proceed to the final step and test the integration between Twitch and Discord.
Step 6: Testing the Integration
After following the previous steps to link your Discord and Twitch accounts, authorize a Discord bot, set up Twitch stream notifications, and configure roles and permissions, it’s time to test the integration and ensure everything is working smoothly. Here’s how you can test the integration:
- Start a test stream on your Twitch channel to simulate a live stream.
- Check if the bot in your Discord server sends a notification in the designated channel for Twitch alerts. The notification should include details like your username, stream title, and a direct link to your Twitch stream.
- Verify that the roles and permissions are functioning as intended. Members with specific roles should have corresponding privileges and access within the server, such as exclusive channels, emotes, or chat abilities.
- Encourage your community members to provide feedback on the integration and any issues they encounter. This will help ensure a smooth user experience for all server members.
- Monitor the integration over time and make any necessary adjustments based on user feedback and evolving needs. Regular maintenance and updates will ensure the integration continues to enhance your community engagement and streaming experience.
Testing the integration is crucial to identify and rectify any potential issues before you fully rely on the integration for your Twitch streams and community engagement. By ensuring all components work harmoniously, you can provide a seamless and enjoyable experience for your community.
Remember to communicate with your community members about the integration and encourage them to provide feedback. Their insights and suggestions can be valuable in further improving the integration and tailoring it to the needs and preferences of your particular community.
Congratulations! You have successfully linked your Discord and Twitch accounts, set up notifications, configured roles and permissions, and tested the integration. Your community can now enjoy the seamless interaction between both platforms and experience a unified and engaging streaming experience.
Continue exploring the functionalities and capabilities of both Discord and Twitch to further enhance your interactions with your community. Regularly engage with your server members, create compelling content on Twitch, and maintain an active and thriving community to maximize the benefits of the integration.
Conclusion
Linking your Discord and Twitch accounts opens up a world of possibilities for streamers and gamers alike. With seamless communication, real-time notifications, and customization options, you can create a vibrant and engaged community around your Twitch content. In this guide, we have covered the step-by-step process of connecting your Discord and Twitch accounts.
From creating a Discord server and connecting your Twitch and Discord accounts to authorizing a Discord bot, setting up notifications, and configuring roles and permissions, each step plays a vital role in building a strong and interactive community.
By integrating Discord and Twitch, you can provide your community with real-time updates about your Twitch streams, grant special roles and perks to loyal subscribers, and foster a sense of belonging within your Discord server.
Remember to regularly test and maintain the integration to ensure a smooth experience for your community members. Encourage feedback from your followers and adjust the settings as needed to provide the best possible experience for everyone.
As you continue on your streaming journey, make the most of the powerful features and flexibility offered by both Discord and Twitch. Engage with your community, create compelling content, and embrace the opportunities that arise from connecting these platforms.
Now that you have the knowledge and tools to link your Discord and Twitch accounts, it’s time to unlock the full potential of your streaming presence. Build a thriving community, entertain your fans, and establish yourself as a standout streamer in the gaming world.
Good luck and happy streaming!