Introduction
Welcome to the world of aerial photography and videography with the DJI Mini 2! This powerful and compact drone offers an incredible flight experience, stunning image quality, and easy-to-use features. Whether you’re a beginner or an experienced pilot, connecting your DJI Mini 2 properly is essential to take full advantage of its capabilities.
In this guide, we will walk you through the step-by-step process of connecting your DJI Mini 2, ensuring a seamless and successful flight. From unboxing to taking off, we’ll cover all the necessary steps to get you up in the air and capturing amazing footage.
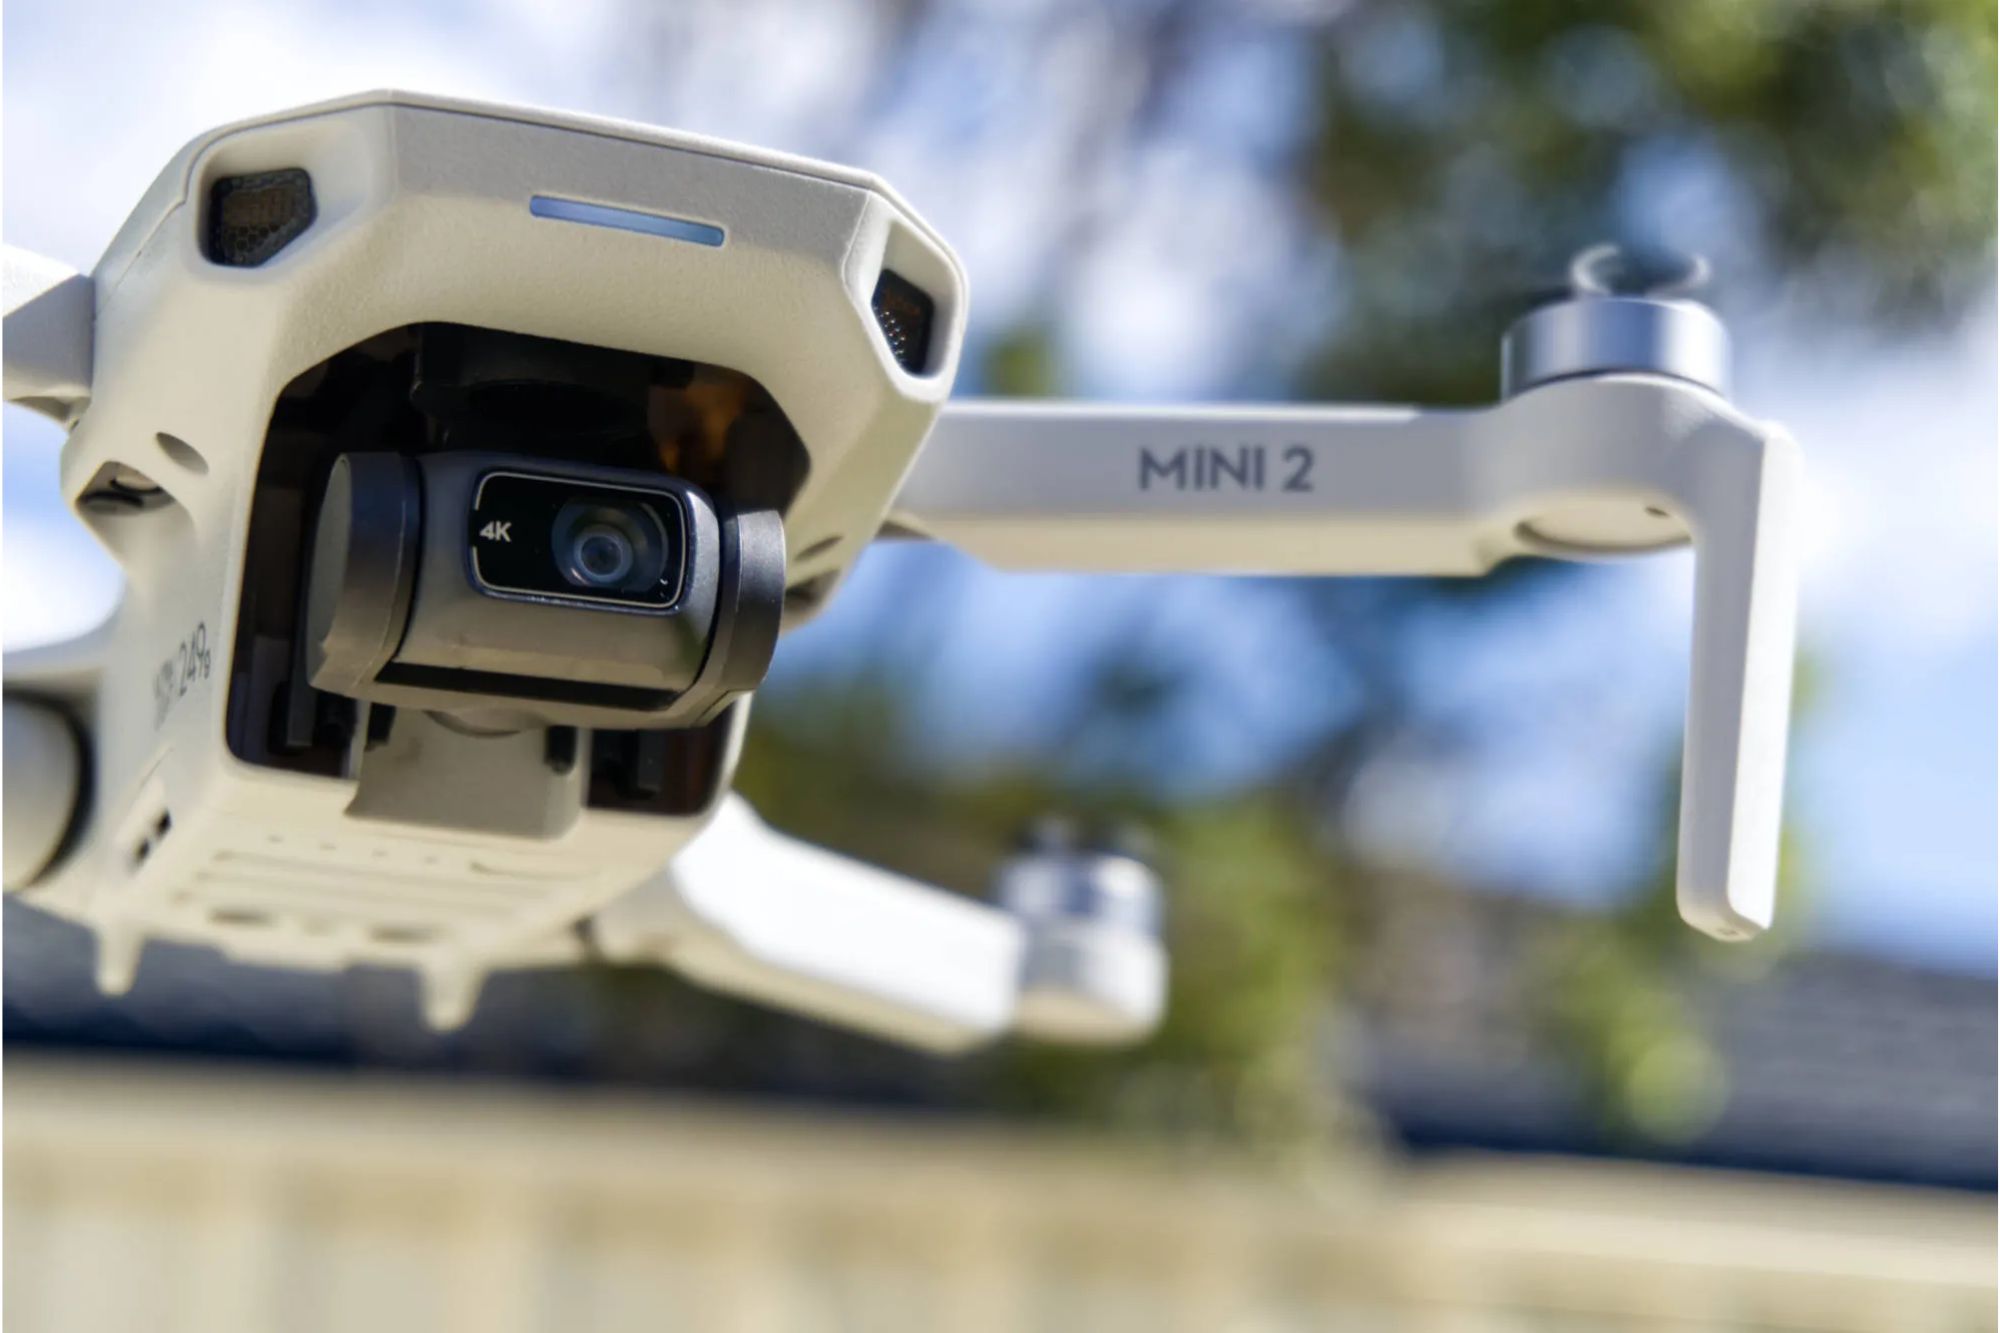
The DJI Mini 2 comes in a sleek and portable design, making it effortless to carry wherever you go. It boasts a range of up to 10 kilometers, a maximum flight time of 31 minutes, and a 4K camera with a three-axis gimbal for outstanding stability and smooth footage. Whether you’re an adventure enthusiast, a content creator, or simply want to explore the world from a different perspective, the DJI Mini 2 is the perfect aerial companion.
So, let’s get started! Follow along with the instructions below to connect your DJI Mini 2 and embark on an exciting aerial journey.
Step 1: Unboxing the DJI Mini 2
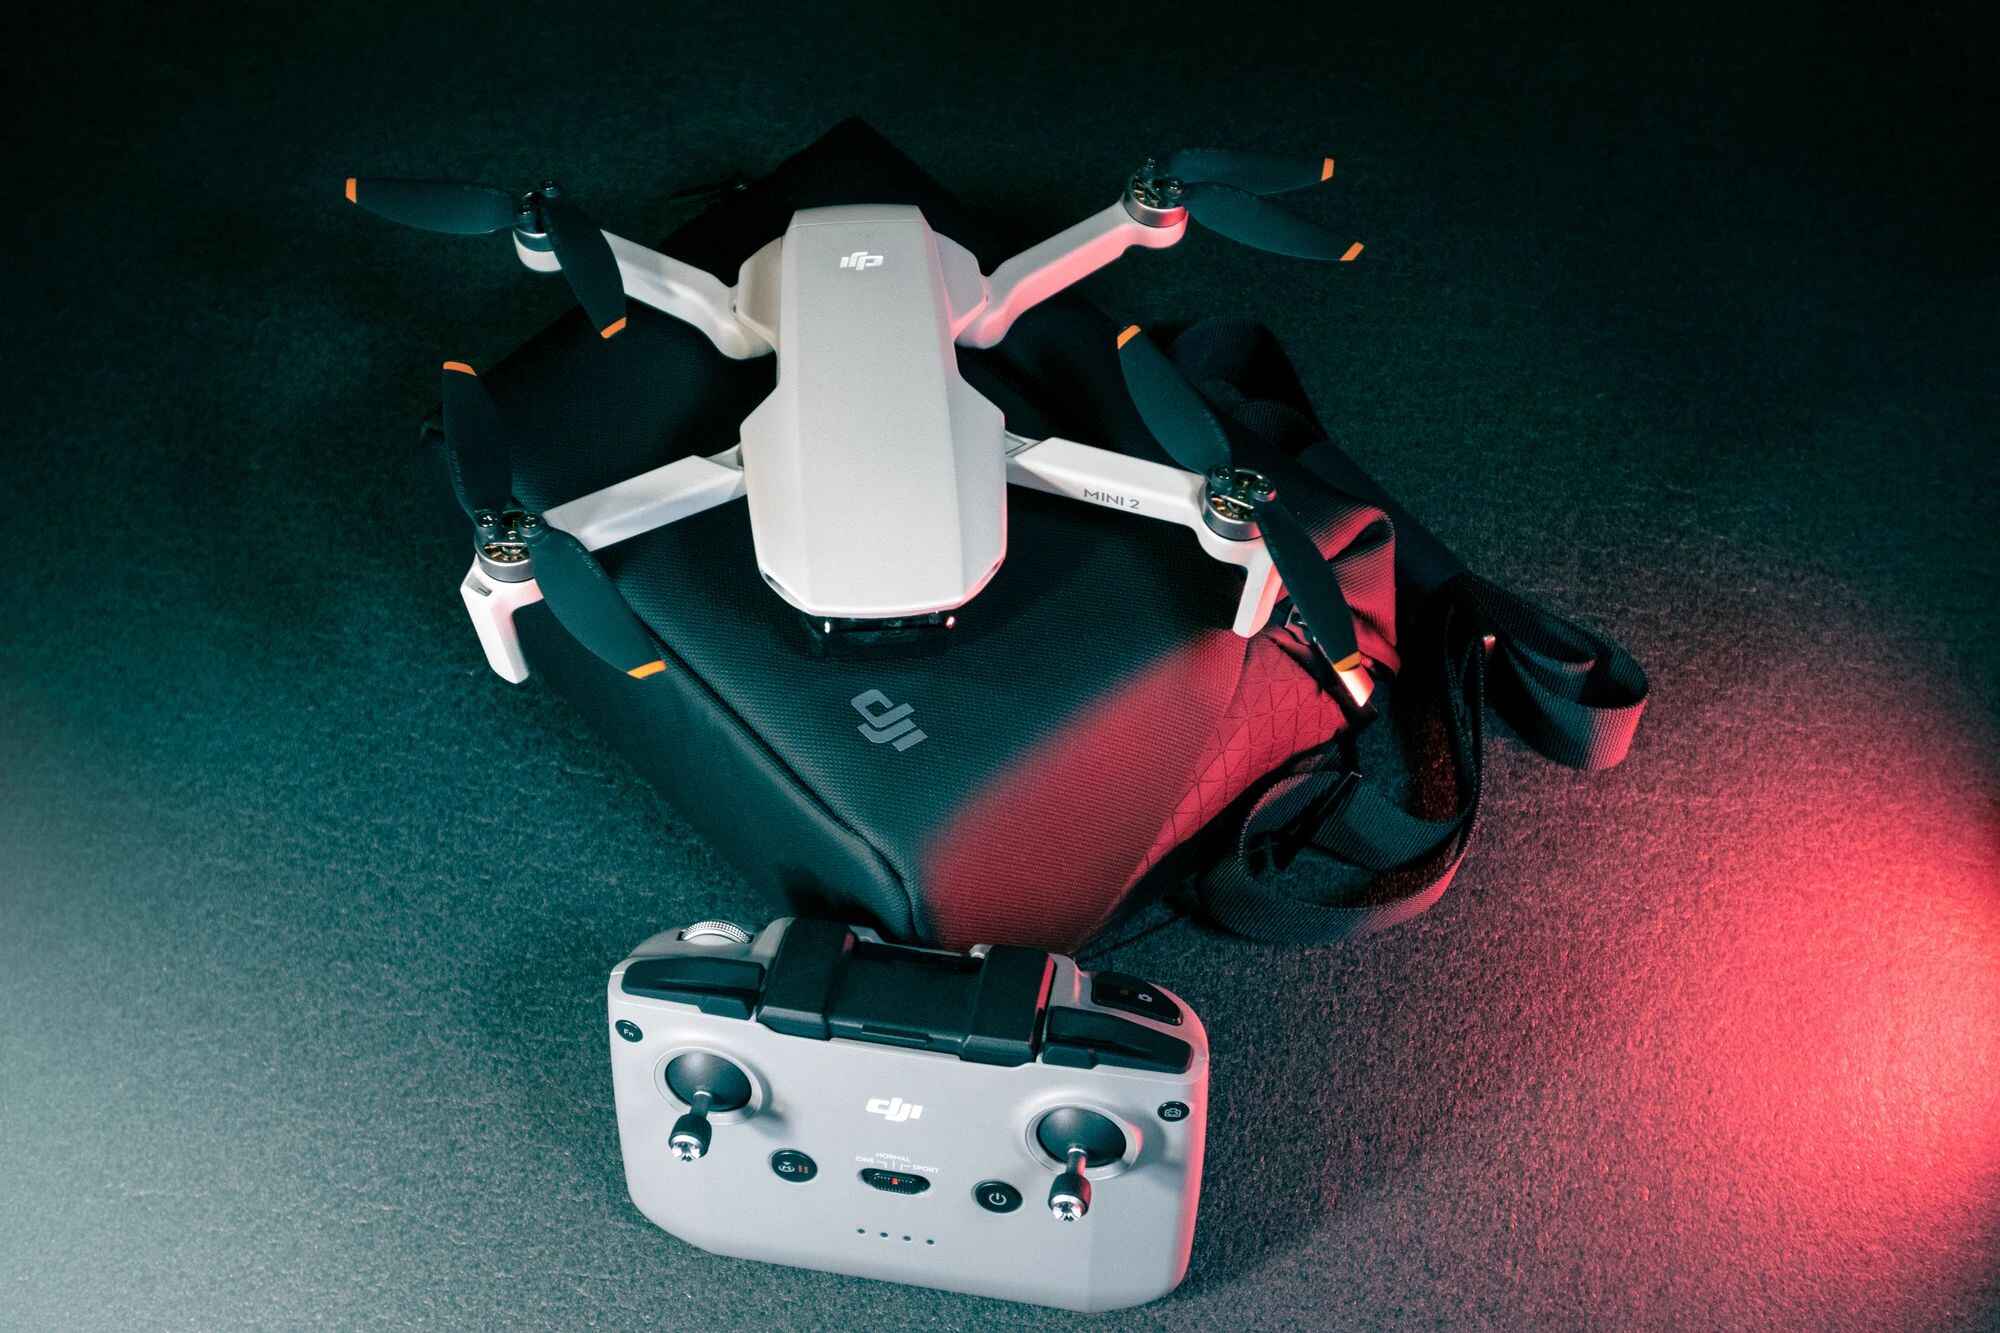
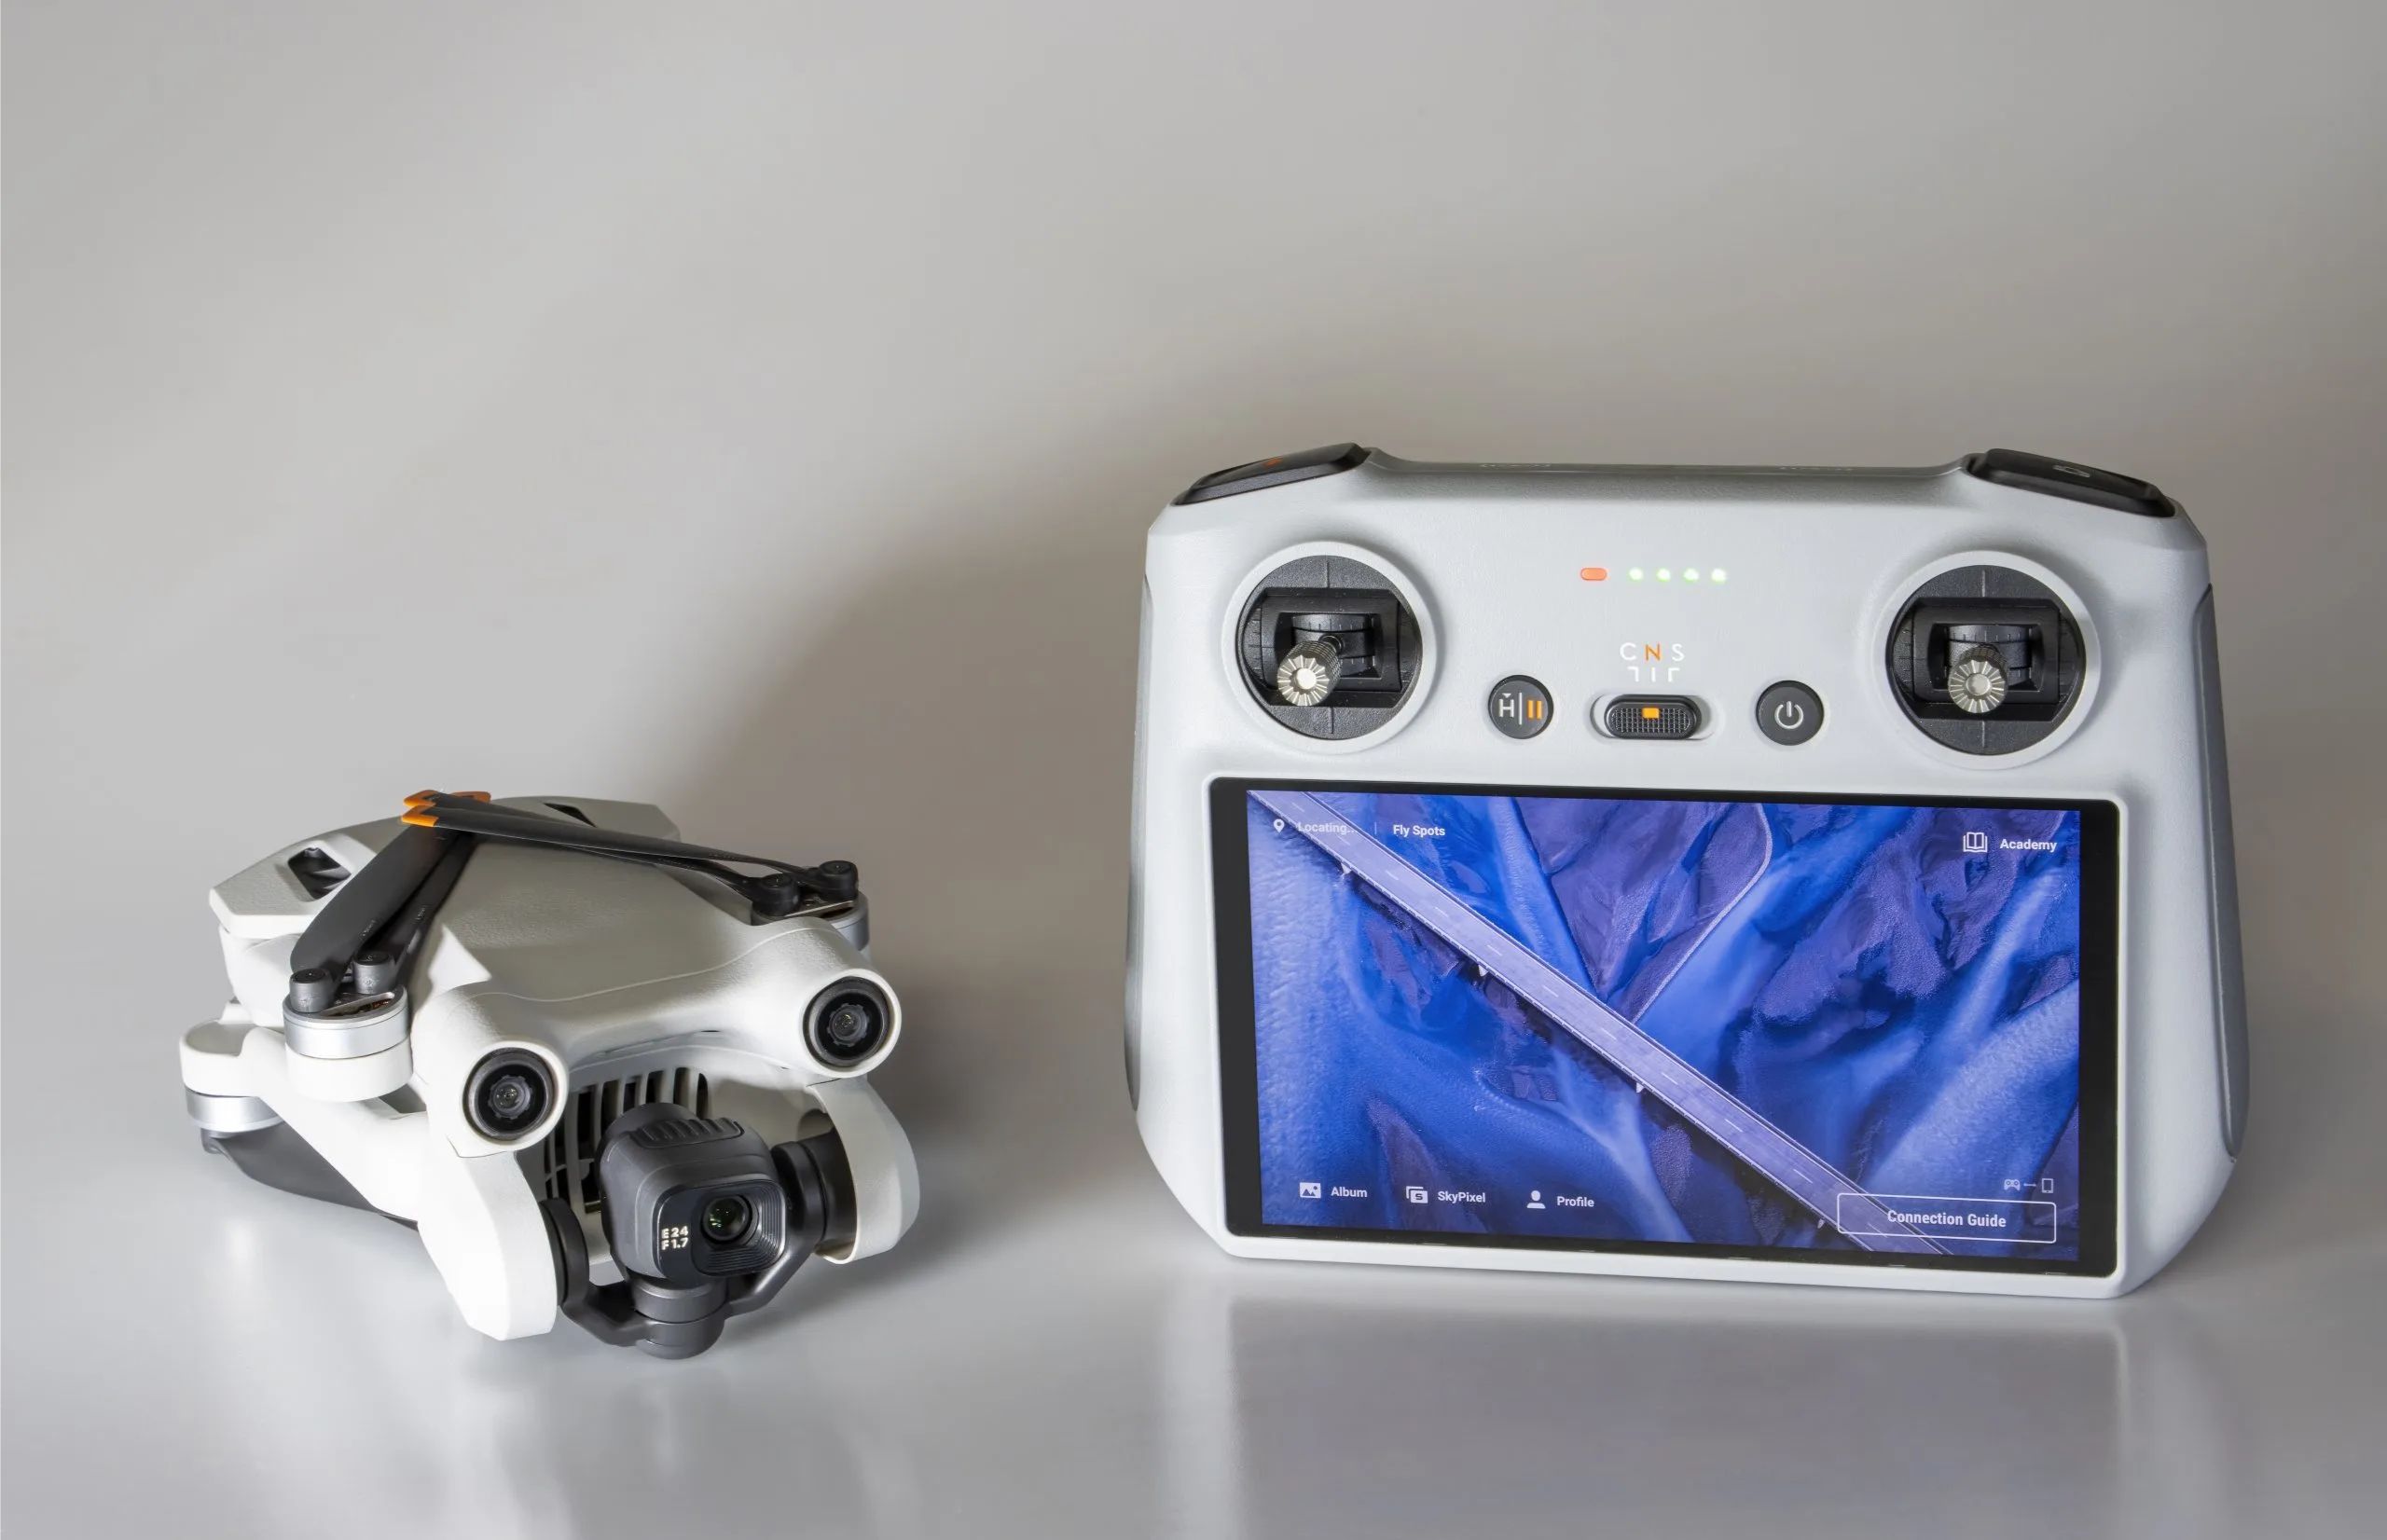
The first step in connecting your DJI Mini 2 is to unbox the drone and ensure that you have all the necessary components. The DJI Mini 2 Fly More Combo package includes the drone itself, a remote controller, multiple batteries, propellers, and various cables.
Start by carefully opening the box and removing all the items. Take a moment to inspect each component and ensure that nothing is damaged. DJI provides excellent packaging, so you can expect everything to be well-protected.
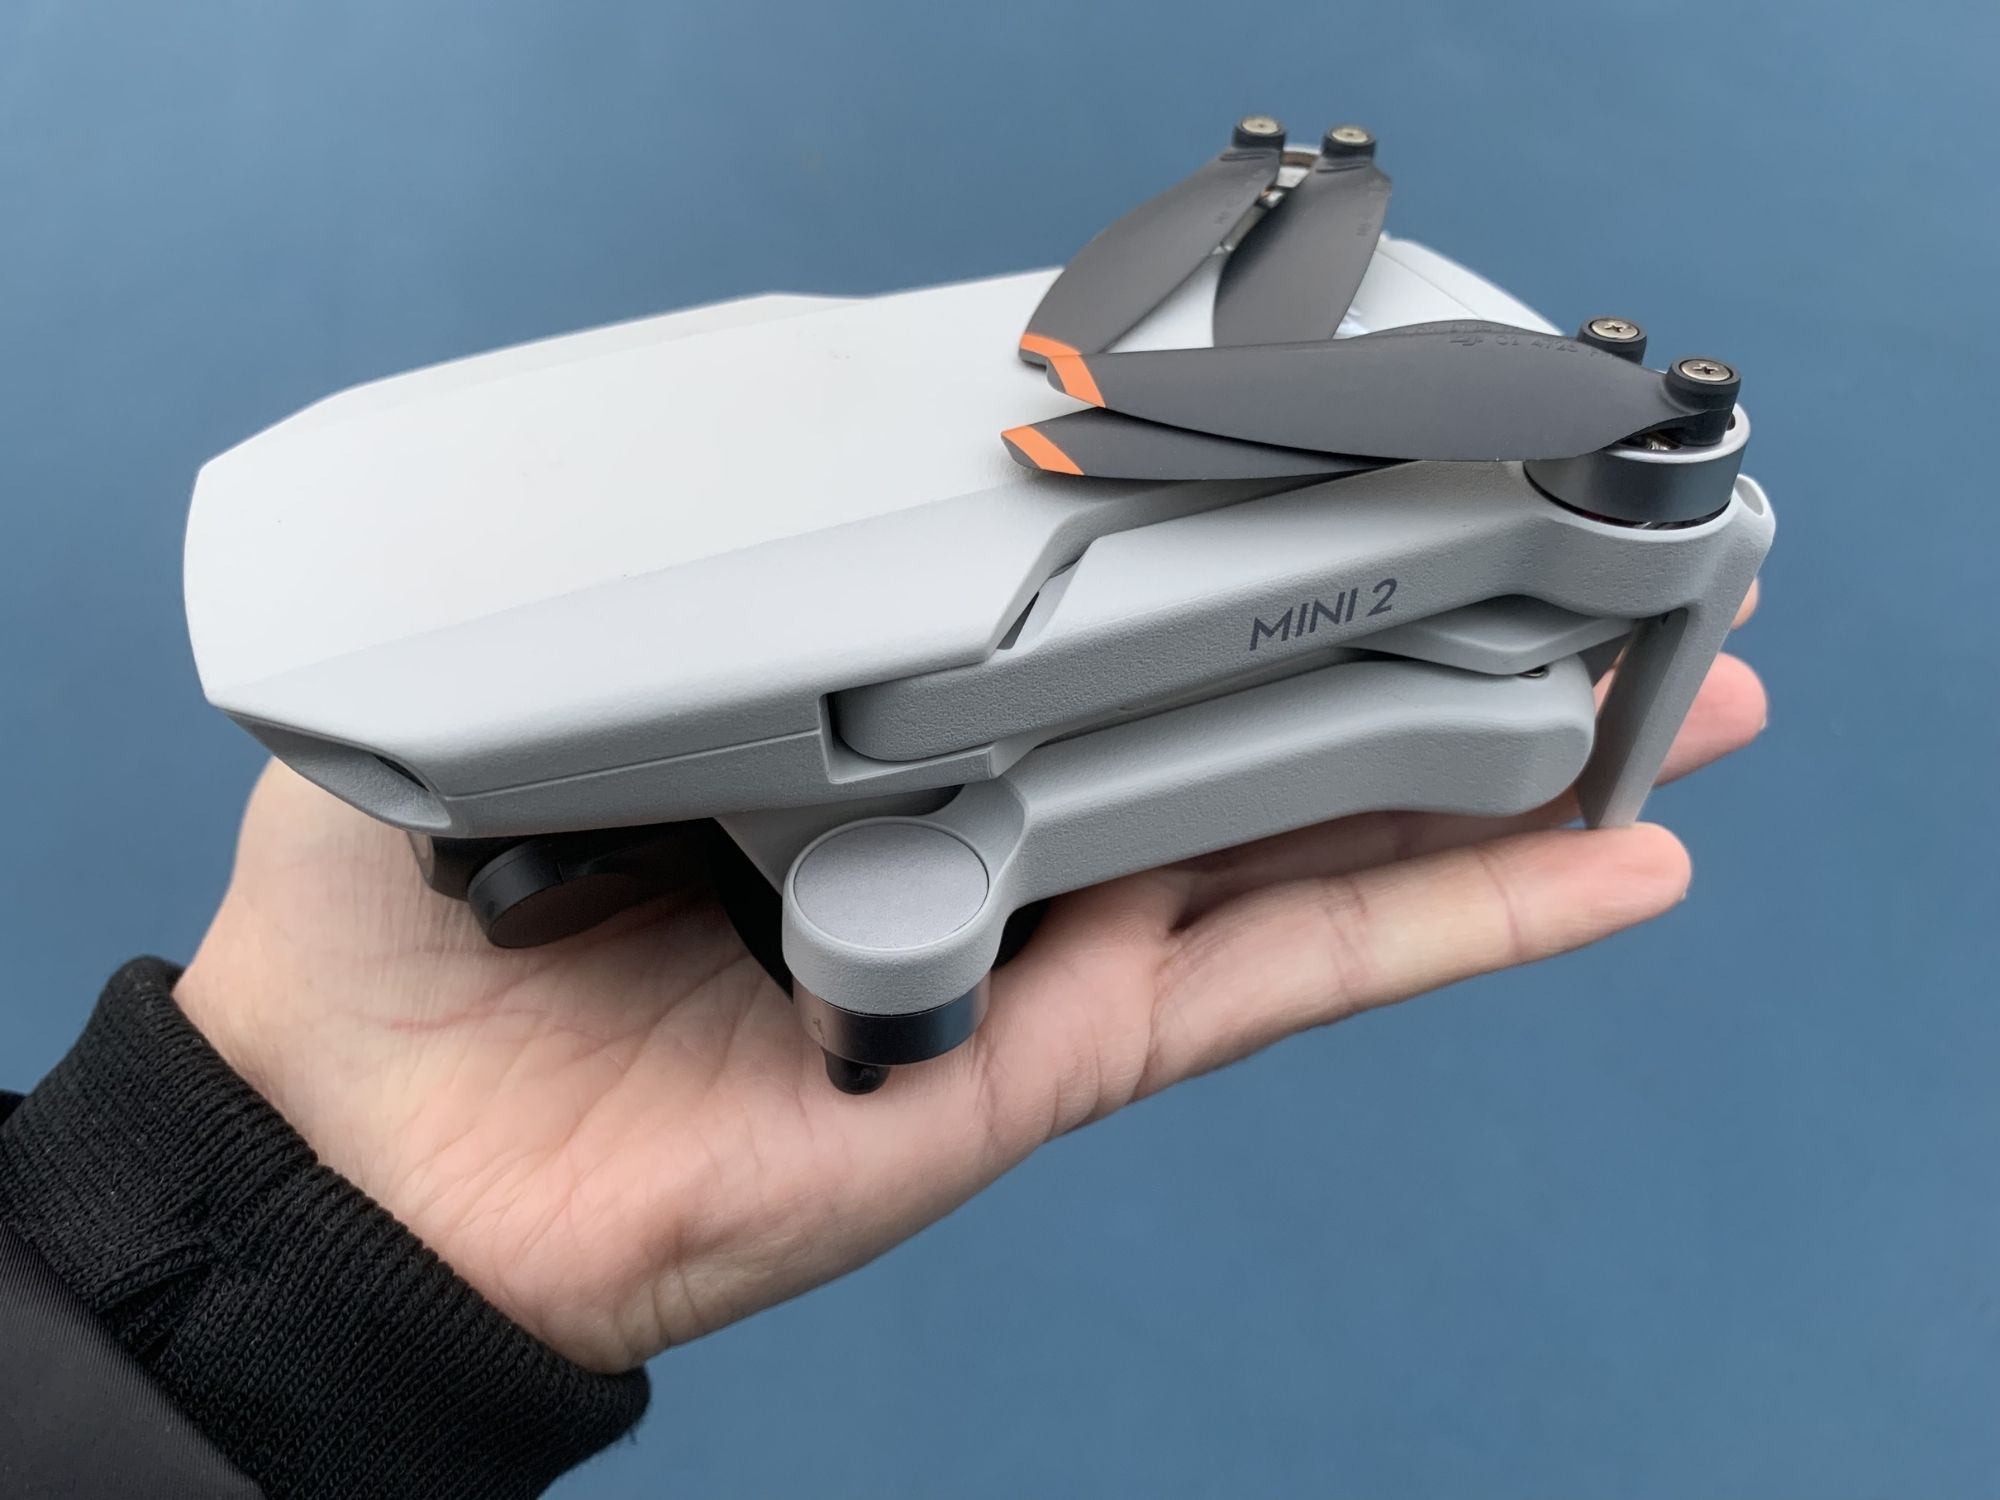
Inside the box, you will find the DJI Mini 2 drone, which is impressively lightweight and compact. It weighs just 249 grams, making it conveniently portable. The drone’s arms and propellers are foldable, allowing further convenience during transport.
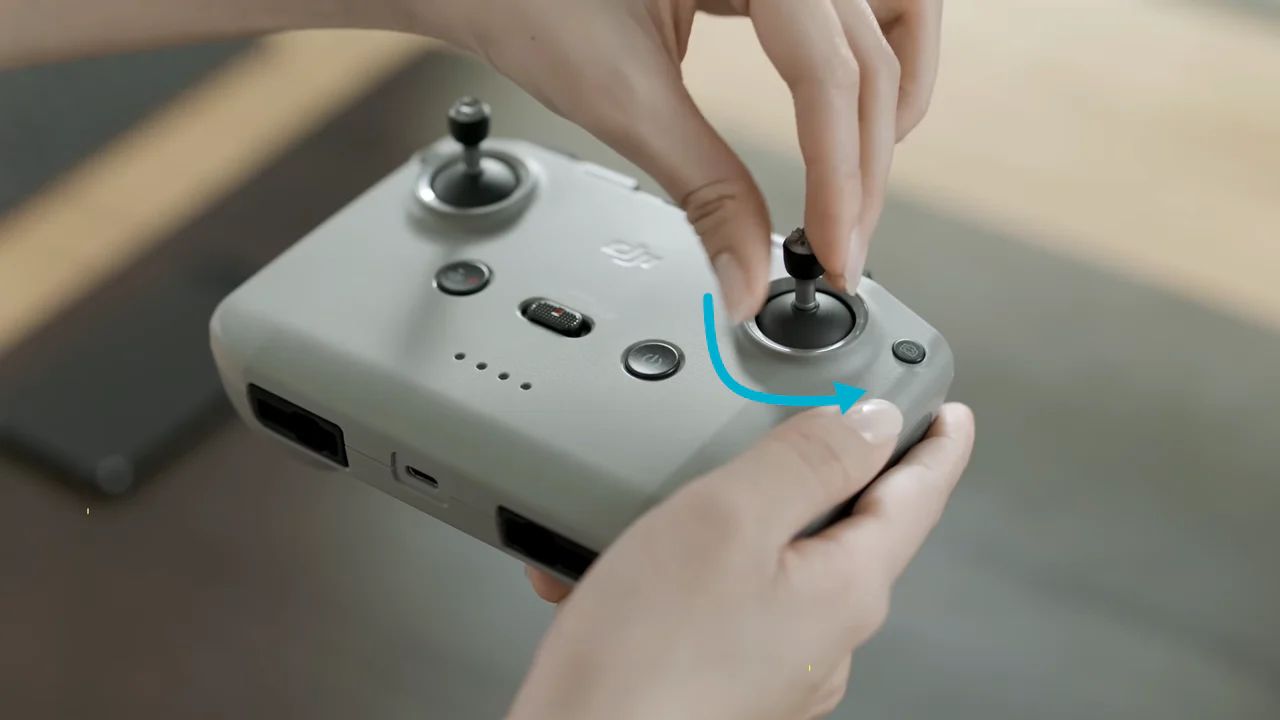
Next, locate the remote controller and the control sticks. The DJI Mini 2’s remote controller has a built-in phone holder, providing a convenient way to mount your device while flying. The control sticks are detachable and can be stored inside the remote controller for easy transport.
You will also find multiple batteries included in the Fly More Combo package. These batteries provide the power for your DJI Mini 2’s flight. With multiple batteries, you can extend your flying time and capture more footage without interruption. Make sure to check each battery’s charge level and charge them if needed before your first flight.
Lastly, locate the propellers included in the package. The DJI Mini 2 uses quick-release propellers, which allow for easy installation and removal. Ensure that the propellers are in good condition and free from any damage.
That’s it for the unboxing process! By now, you should have all the necessary components in front of you. It’s time to move on to the next step and prepare the batteries for your DJI Mini 2.
Step 2: Charging the Batteries
Before your first flight with the DJI Mini 2, it’s crucial to ensure that the batteries are fully charged. Properly charged batteries will provide you with longer flight times and a more enjoyable flying experience. Here’s how to charge the batteries:
1. Take one of the batteries and locate the charging port. It is located on the side of the battery and has a small cover that needs to be opened. Remove the cover and make sure to keep it in a safe place.
2. Connect the provided USB cable to the charging port of the battery. The other end of the cable should be connected to a power source such as a USB wall charger or a computer USB port.
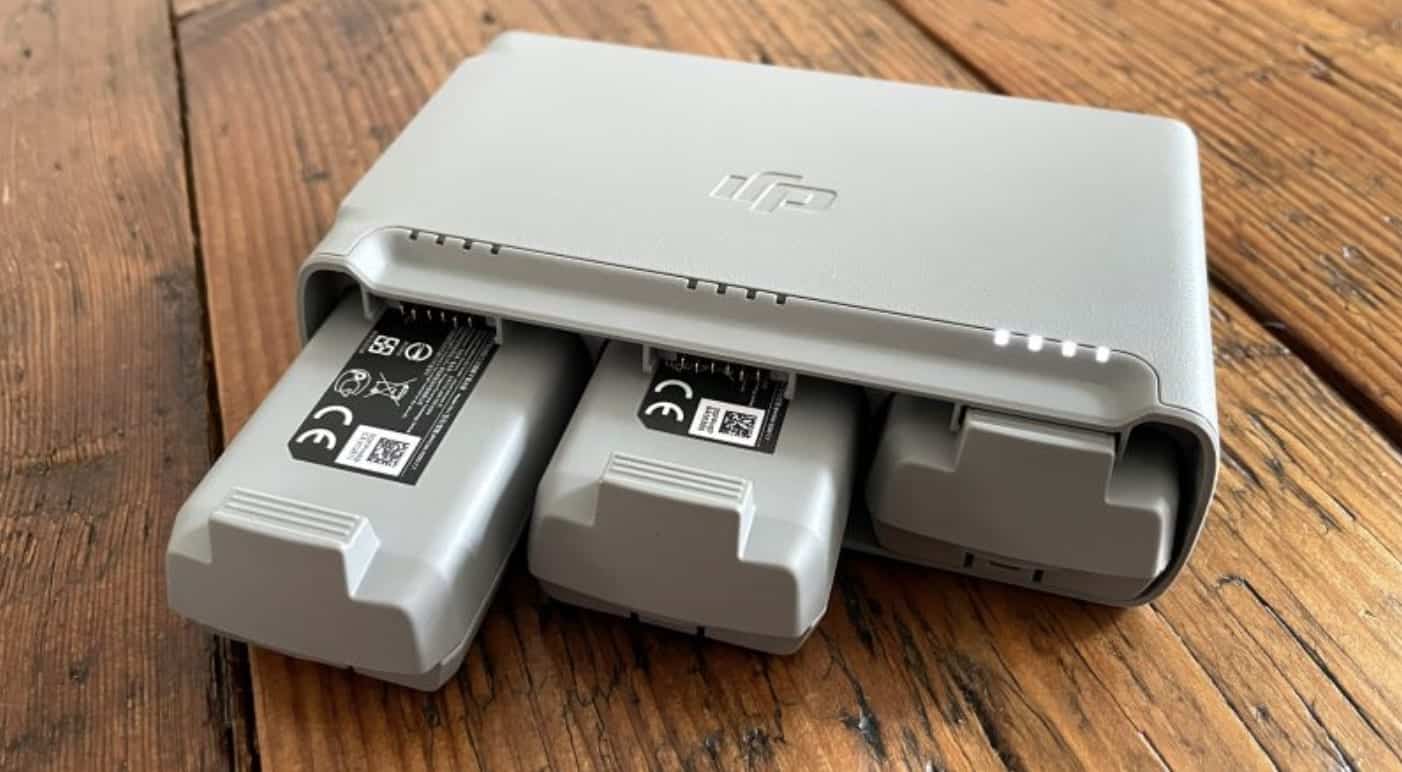
3. Once connected, the battery LED indicators will start blinking, indicating that the charging process has begun. Each LED represents the charging level of the battery. When all four LEDs are solid, it means the battery is fully charged.
4. Repeat the process for each battery included in your DJI Mini 2 Fly More Combo. Charging multiple batteries simultaneously can be possible if you have a multi-port USB charger or use a charging hub specifically designed for the DJI Mini 2 batteries.
5. While the batteries are charging, take this time to read through the user manual and familiarize yourself with the drone’s features and flight modes. This will help you maximize your flight experience and understand the capabilities of the DJI Mini 2.
6. Once the batteries are fully charged, disconnect them from the power source. Replace the cover on the charging port of each battery to protect it from any debris or damage.
Now that you have fully charged batteries, you are one step closer to flying your DJI Mini 2. In the next step, we will guide you through the process of downloading the DJI Fly app, a vital component for connecting and controlling your drone.
Step 3: Downloading the DJI Fly App
To connect and control your DJI Mini 2, you will need to download the DJI Fly app on your mobile device. The DJI Fly app is available for both iOS and Android devices and provides a user-friendly interface for managing your drone’s settings and capturing stunning aerial footage. Follow the steps below to download the app:
1. Open the App Store (for iOS) or Google Play Store (for Android) on your mobile device.
2. In the search bar, type “DJI Fly” and press enter or search.
3. Look for the “DJI Fly” app in the search results and tap on it to access the app’s page.
4. Once you are on the app’s page, tap on the “Download” or “Get” button to start the download process. Make sure you have a stable internet connection to facilitate a smooth download.
5. Depending on your internet speed, the download may take a few moments. Once the download is complete, the app will be automatically installed on your device.
6. Locate the DJI Fly app on your home screen or app drawer and tap on it to launch the application.
Congratulations! You have successfully downloaded the DJI Fly app on your mobile device. The next step is to connect the remote controller of your DJI Mini 2 to your mobile device. This will allow you to control the drone and access advanced features through the app interface. Stay tuned for Step 4 on how to connect the remote controller.
Step 4: Connecting the Remote Controller
Connecting the remote controller of your DJI Mini 2 to your mobile device is an important step to establish a stable and reliable connection between your drone and the DJI Fly app. Here’s how you can connect the remote controller:
1. Ensure that your DJI Mini 2 is powered off and the propellers are securely attached.
2. Open the DJI Fly app on your mobile device and wait for it to load.
3. Turn on the remote controller by pressing and holding the power button on the top until the LED indicators start to flash.
4. On the top edge of the remote controller, locate the USB port. This is where you will connect your mobile device.
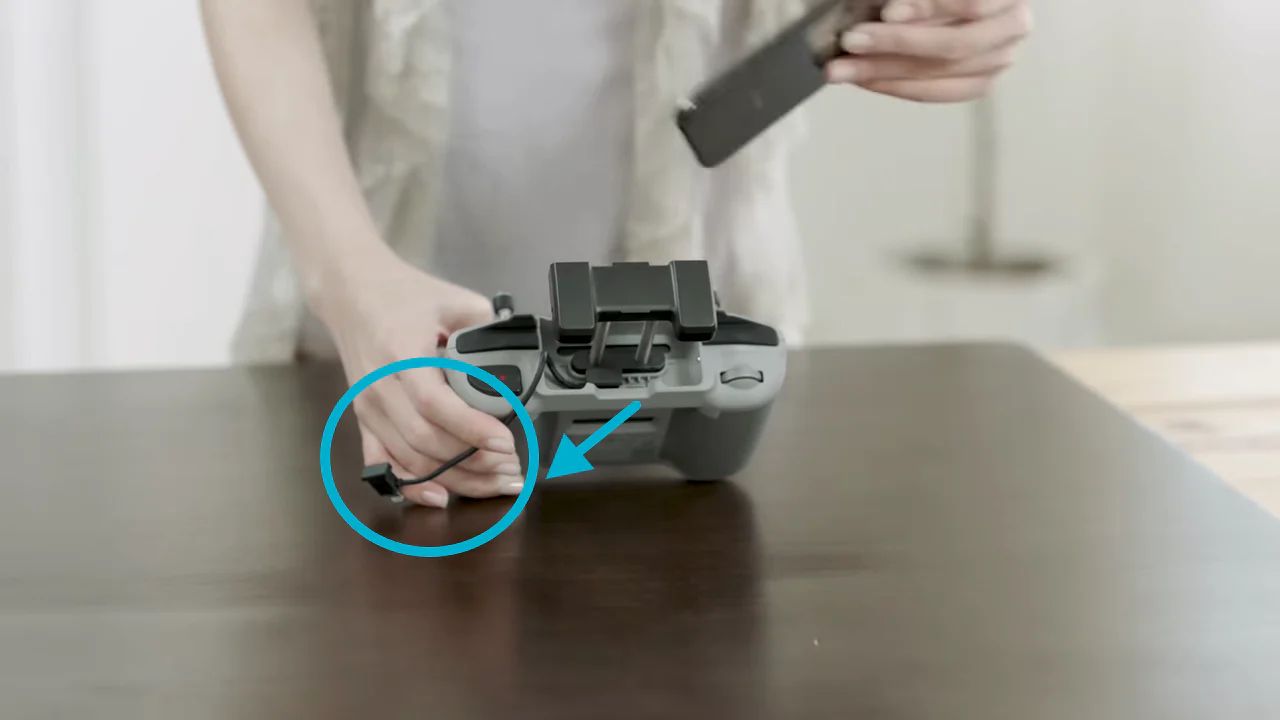
5. Depending on your mobile device’s charging port, you may need to use the included USB-A to USB-C or USB-A to Lightning cable to connect it to the remote controller. Connect the appropriate end of the cable to the USB port on the remote controller and the other end to your mobile device. Ensure a secure connection.
6. Once connected, the remote controller will detect your mobile device, and the DJI Fly app will prompt you to switch to “USB connection.”
7. Follow the on-screen instructions to enable USB debugging and authorize the connection between the remote controller and your mobile device.
8. Once the connection is established, the DJI Fly app will display the live video feed from the DJI Mini 2’s camera, and you will have full control over the drone’s settings and flight parameters through the app interface.
That’s it! You have successfully connected the remote controller of your DJI Mini 2 to your mobile device. Make sure to double-check the connection and ensure that the app is displaying the live video feed from the drone’s camera. In the next step, we will guide you through attaching the propellers to your DJI Mini 2.
Step 5: Attaching the Propellers
Attaching the propellers properly is crucial for the safe and efficient flight of your DJI Mini 2. The propellers help generate lift and stabilize the drone during flight. Here’s how you can attach the propellers to your DJI Mini 2:
1. Start by identifying the propellers labeled “A” and “B.” The propellers are marked with small letters near the hub, indicating which one is for the clockwise (A) and counterclockwise (B) motor.
2. Hold the DJI Mini 2 firmly in one hand with the motor facing upwards. Locate the corresponding motor and propeller attachment point.
3. To attach the propeller, line up the small notch on the propeller with the pin on the motor shaft. Ensure that the propeller blades are facing upwards.
4. Press down gently on the propeller and rotate it in a clockwise direction (for propellers labeled “A”) or counterclockwise direction (for propellers labeled “B”) until it is fully secured on the motor shaft.
5. Repeat the process for the remaining propellers, ensuring that you attach them to their respective motor shafts.
6. After attaching all the propellers, give each one a gentle tug to check if they are securely fastened. If any propeller feels loose, remove it and repeat the attachment process.
Note: The DJI Mini 2’s propellers are designed to be self-tightening during flight. As the motors spin, the propellers will tighten themselves, ensuring a secure connection. However, it’s always a good practice to check the propellers before each flight.
Once you have attached all the propellers and confirmed their tightness, your DJI Mini 2 is ready to take to the skies. In the next step, we will guide you through connecting your mobile device to the remote controller for a seamless control experience.
Step 6: Connecting the Mobile Device to the Remote Controller
To have full control over your DJI Mini 2’s flight and camera settings, it’s important to connect your mobile device to the remote controller. This allows you to access all the features and functions of the DJI Fly app. Here’s how to connect your mobile device to the remote controller:
1. Ensure that both the DJI Mini 2 and the remote controller are powered on.
2. Open the DJI Fly app on your mobile device.
3. On the top edge of the remote controller, locate the mobile device holder. This is where you will mount your mobile device for a secure connection.
4. Expand the mobile device holder and place your mobile device inside, making sure it is positioned securely.
5. Adjust the holder to accommodate the size of your mobile device, ensuring a snug fit.
6. Once your mobile device is mounted, connect it to the remote controller using the appropriate cable for your device’s charging port. The cable should be plugged into the USB port on the remote controller and the corresponding port on your mobile device. Ensure a secure connection.
7. Once connected, the DJI Fly app will detect the remote controller and automatically establish a connection with your mobile device.
8. The DJI Fly app will display the live video feed from the DJI Mini 2’s camera, along with the flight telemetry and control options. You can now control the drone’s flight, adjust camera settings, and access various flight modes through the app interface on your mobile device.
NOTE: It’s essential to ensure a stable and reliable connection between your mobile device and the remote controller for optimal control and transmission of video feed. Make sure the cables are securely connected and that there are no obstructions interfering with the signal.
With your mobile device connected to the remote controller, you are now ready to power on the DJI Mini 2 and establish a connection between the drone and the DJI Fly app. Stay tuned for Step 7 to learn how to power on your DJI Mini 2.
Step 7: Powering on the DJI Mini 2
Before you take flight with your DJI Mini 2, you’ll need to power it on. Here’s how to properly power on your drone:
1. Ensure that the batteries for both the DJI Mini 2 and the remote controller are fully charged.
2. Locate the power button on the DJI Mini 2. It is located on the side of the drone, near the battery compartment.
3. Press and hold the power button for a few seconds until the LED lights on the drone start to illuminate. This indicates that the DJI Mini 2 is powering on.
4. Once powered on, the DJI Mini 2 will perform a self-check, and the LED lights will flash rapidly. Wait for the self-check process to complete, which usually takes a few seconds. During this time, make sure the drone is on a flat and stable surface.
5. Once the self-check is complete, the LED lights on the DJI Mini 2 will emit a steady light pattern, indicating that it is ready for flight.
NOTE: It’s crucial to ensure that the DJI Mini 2 is on a level surface during the power-on process to ensure accurate sensor calibration and stable flight performance.
Once your DJI Mini 2 is powered on and ready, it’s time to establish a connection between the drone and the DJI Fly app on your mobile device. In the next step, we will guide you through the process of connecting the DJI Mini 2 to the DJI Fly app to access its full range of features and settings.
Step 8: Connecting the DJI Mini 2 to the DJI Fly App
In order to have full control over your DJI Mini 2 drone and access its advanced features and settings, you need to establish a connection between the drone and the DJI Fly app on your mobile device. Here’s how to connect the DJI Mini 2 to the DJI Fly app:
1. With your DJI Mini 2 powered on, ensure that your mobile device is connected to the remote controller.
2. Open the DJI Fly app on your mobile device, and ensure that it is up to date with the latest version.
3. In the DJI Fly app, tap on the “Start Flight” button to enter the flight interface.
4. The app will search for nearby drones. Once the DJI Mini 2 is detected, it will be displayed on the screen.
5. Tap on the DJI Mini 2 icon to select it as your designated drone.
6. The DJI Fly app will prompt you to confirm the connection between the app and the DJI Mini 2. Tap “Confirm” to proceed.
7. The app will establish a connection with the DJI Mini 2. This process may take a few moments.
8. Once the connection is successfully established, the DJI Fly app will display the live video feed from the DJI Mini 2’s camera, along with important flight information and settings.
9. Take a moment to familiarize yourself with the app’s interface and explore the different features and flight modes available to you.
With the DJI Mini 2 now connected to the DJI Fly app, you are ready to take control of your drone and unleash its full potential. In the next step, we will guide you through the safety checks and pre-flight preparations necessary to ensure a safe and successful flight experience.
Step 9: Safety Checks and Pre-flight Preparation
Before taking off with your DJI Mini 2, it’s essential to prioritize safety and ensure that you adhere to all necessary precautions. Here are some crucial safety checks and pre-flight preparations to perform:
1. Check the surroundings: Before launching your DJI Mini 2, thoroughly inspect the area where you plan to fly. Ensure there are no obstacles, people, or animals that could pose a risk. Be mindful of any trees, power lines, or restricted airspace in the vicinity.
2. Verify GPS signal: The DJI Mini 2 relies on GPS for accurate positioning and stable flight. Check the DJI Fly app to confirm that the drone has a strong GPS signal before taking off. Avoid flying in areas with poor or obstructed GPS reception.
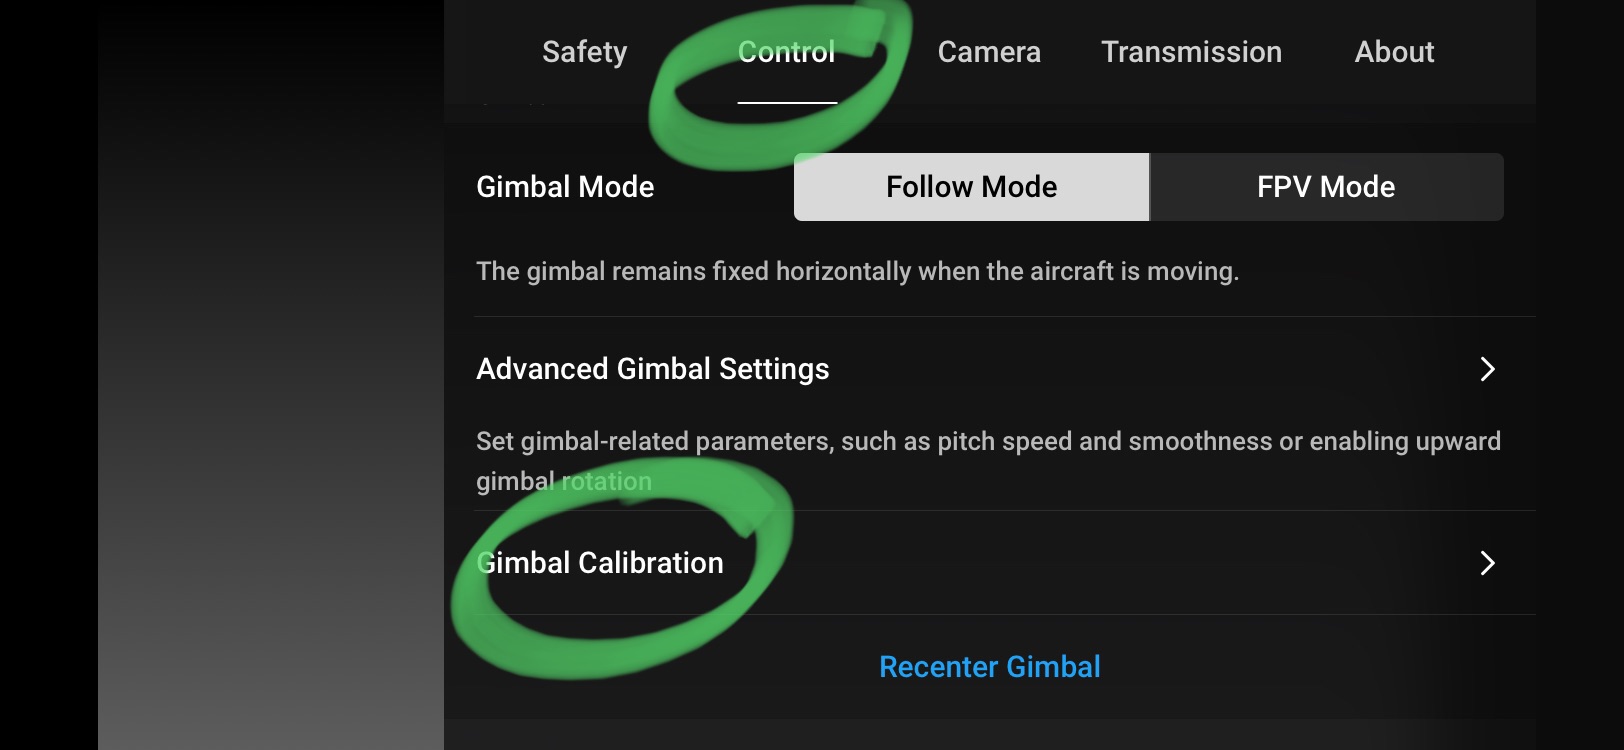
3. Calibrate the compass: To ensure precise navigation, calibrate the compass of the DJI Mini 2. Follow the instructions in the DJI Fly app or refer to the user manual for detailed steps on compass calibration.
4. Ensure battery level: Double-check the battery level of both the DJI Mini 2 and the remote controller. It’s crucial to have sufficient battery life for a safe flight and return-to-home capabilities. Recharge or replace any batteries that have a low charge.
5. Verify propeller attachment: Inspect the propellers to ensure they are securely attached. Give each propeller a gentle tug to confirm that it is firmly in place. Loose or damaged propellers can affect the flight stability and overall performance of the drone.
6. Confirm camera settings: Review and adjust the camera settings through the DJI Fly app to suit your preferences and the desired photography/videography outcome. Pay attention to parameters such as resolution, frame rate, and exposure settings.
7. Understand flight restrictions and regulations: Familiarize yourself with the local drone regulations and flight restrictions in your area. Ensure you comply with all legal requirements and guidelines to avoid any penalties or potential risks.
8. Perform a pre-flight checklist: Before taking off, go through a pre-flight checklist to ensure that you haven’t overlooked any critical aspects. This may include checking for any firmware updates, confirming the remote controller settings, and ensuring the memory card is inserted in the drone.
By prioritizing safety and performing these necessary checks and preparations, you’ll greatly increase the chances of a successful and incident-free flight. Once you’re satisfied with the pre-flight tasks, it’s time to embark on your aerial adventure with the DJI Mini 2.
Step 10: Taking Off and Flying the DJI Mini 2
With all the necessary preparations complete, it’s time to take off and experience the exhilarating flight capabilities of your DJI Mini 2. Follow these steps to safely launch your drone and enjoy your aerial adventure:
1. Ensure that you are in an open and clear area, away from people, buildings, and other obstacles.
2. Double-check that the DJI Mini 2 and the remote controller are both powered on and connected.
3. Hold the remote controller securely with both hands and ensure your fingers are away from the control sticks.
4. On the DJI Fly app, tap the “Takeoff” button or toggle the flight mode switch to initiate the takeoff process.
5. The DJI Mini 2 will ascend to a default altitude, maintaining a stable hover. Monitor the drone’s behavior and ensure it remains steady before proceeding with manual control.
6. Familiarize yourself with the remote controller’s control sticks and their respective functions. Practice gentle adjustments to get a feel for the responsiveness of the drone.
7. Gradually and smoothly maneuver the DJI Mini 2 using the remote controller to explore the area and capture stunning aerial footage. Be mindful of any flight restrictions, obstacles, or changing environmental conditions.
8. Monitor the battery level of the DJI Mini 2 and plan for a safe return-to-home and landing before the battery runs critically low.
9. Take advantage of the various flight modes available on the DJI Mini 2 to experiment with creative shots and capture different perspectives.
10. Fly responsibly and be respectful of others around you. Maintain a safe distance from people, wildlife, and other aircraft.
11. When you’re ready to land, smoothly and gently bring the DJI Mini 2 to a controlled descent. Follow the on-screen instructions in the DJI Fly app to initiate the landing process.
12. Once safely landed, power off the DJI Mini 2 and the remote controller, and disconnect your mobile device.
With these steps, you can confidently take off, fly, and safely operate your DJI Mini 2. Remember to continuously practice responsible drone usage and follow all local regulations and guidelines. Enjoy the freedom of aerial exploration and capturing stunning moments from the sky!