Introduction
Welcome to the world of aerial photography and adventure with the DJI Mini 2. Whether you are an experienced pilot or a beginner taking your first flight, activating your DJI Mini 2 is the first step towards capturing stunning images and videos from the sky. In this guide, we will walk you through the process of activating your DJI Mini 2, ensuring that you are ready to take to the skies safely and confidently.
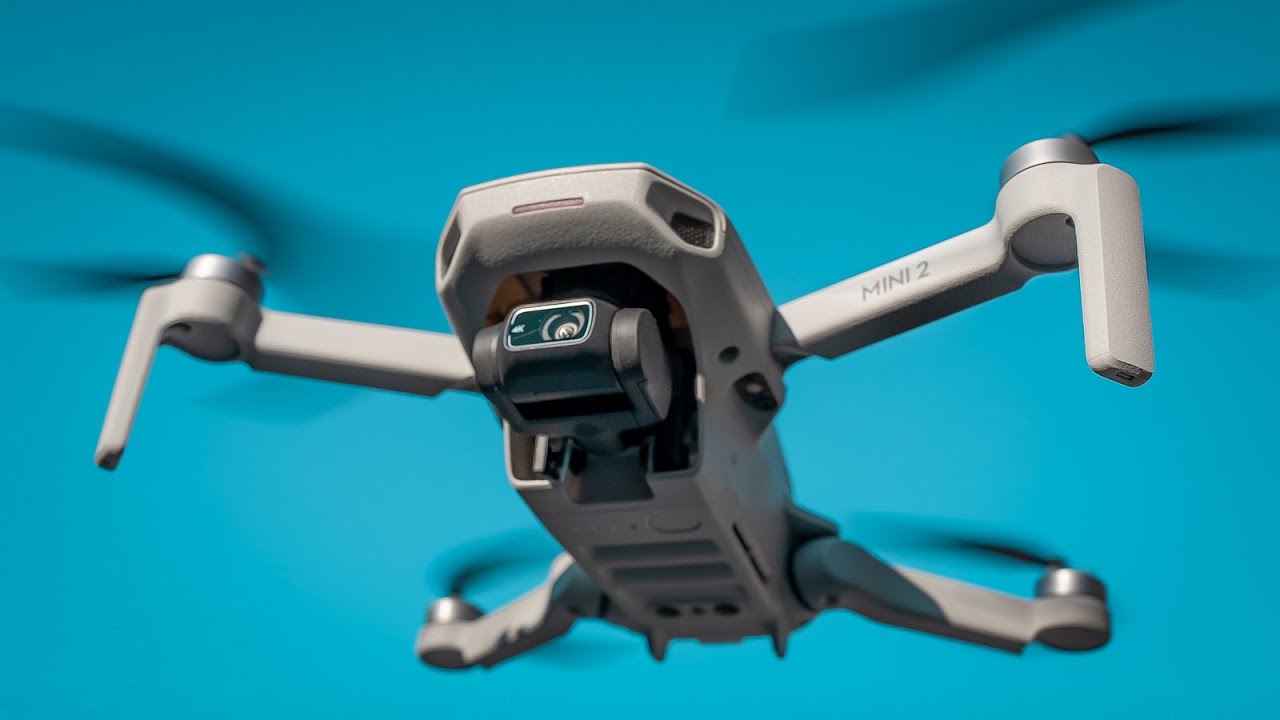
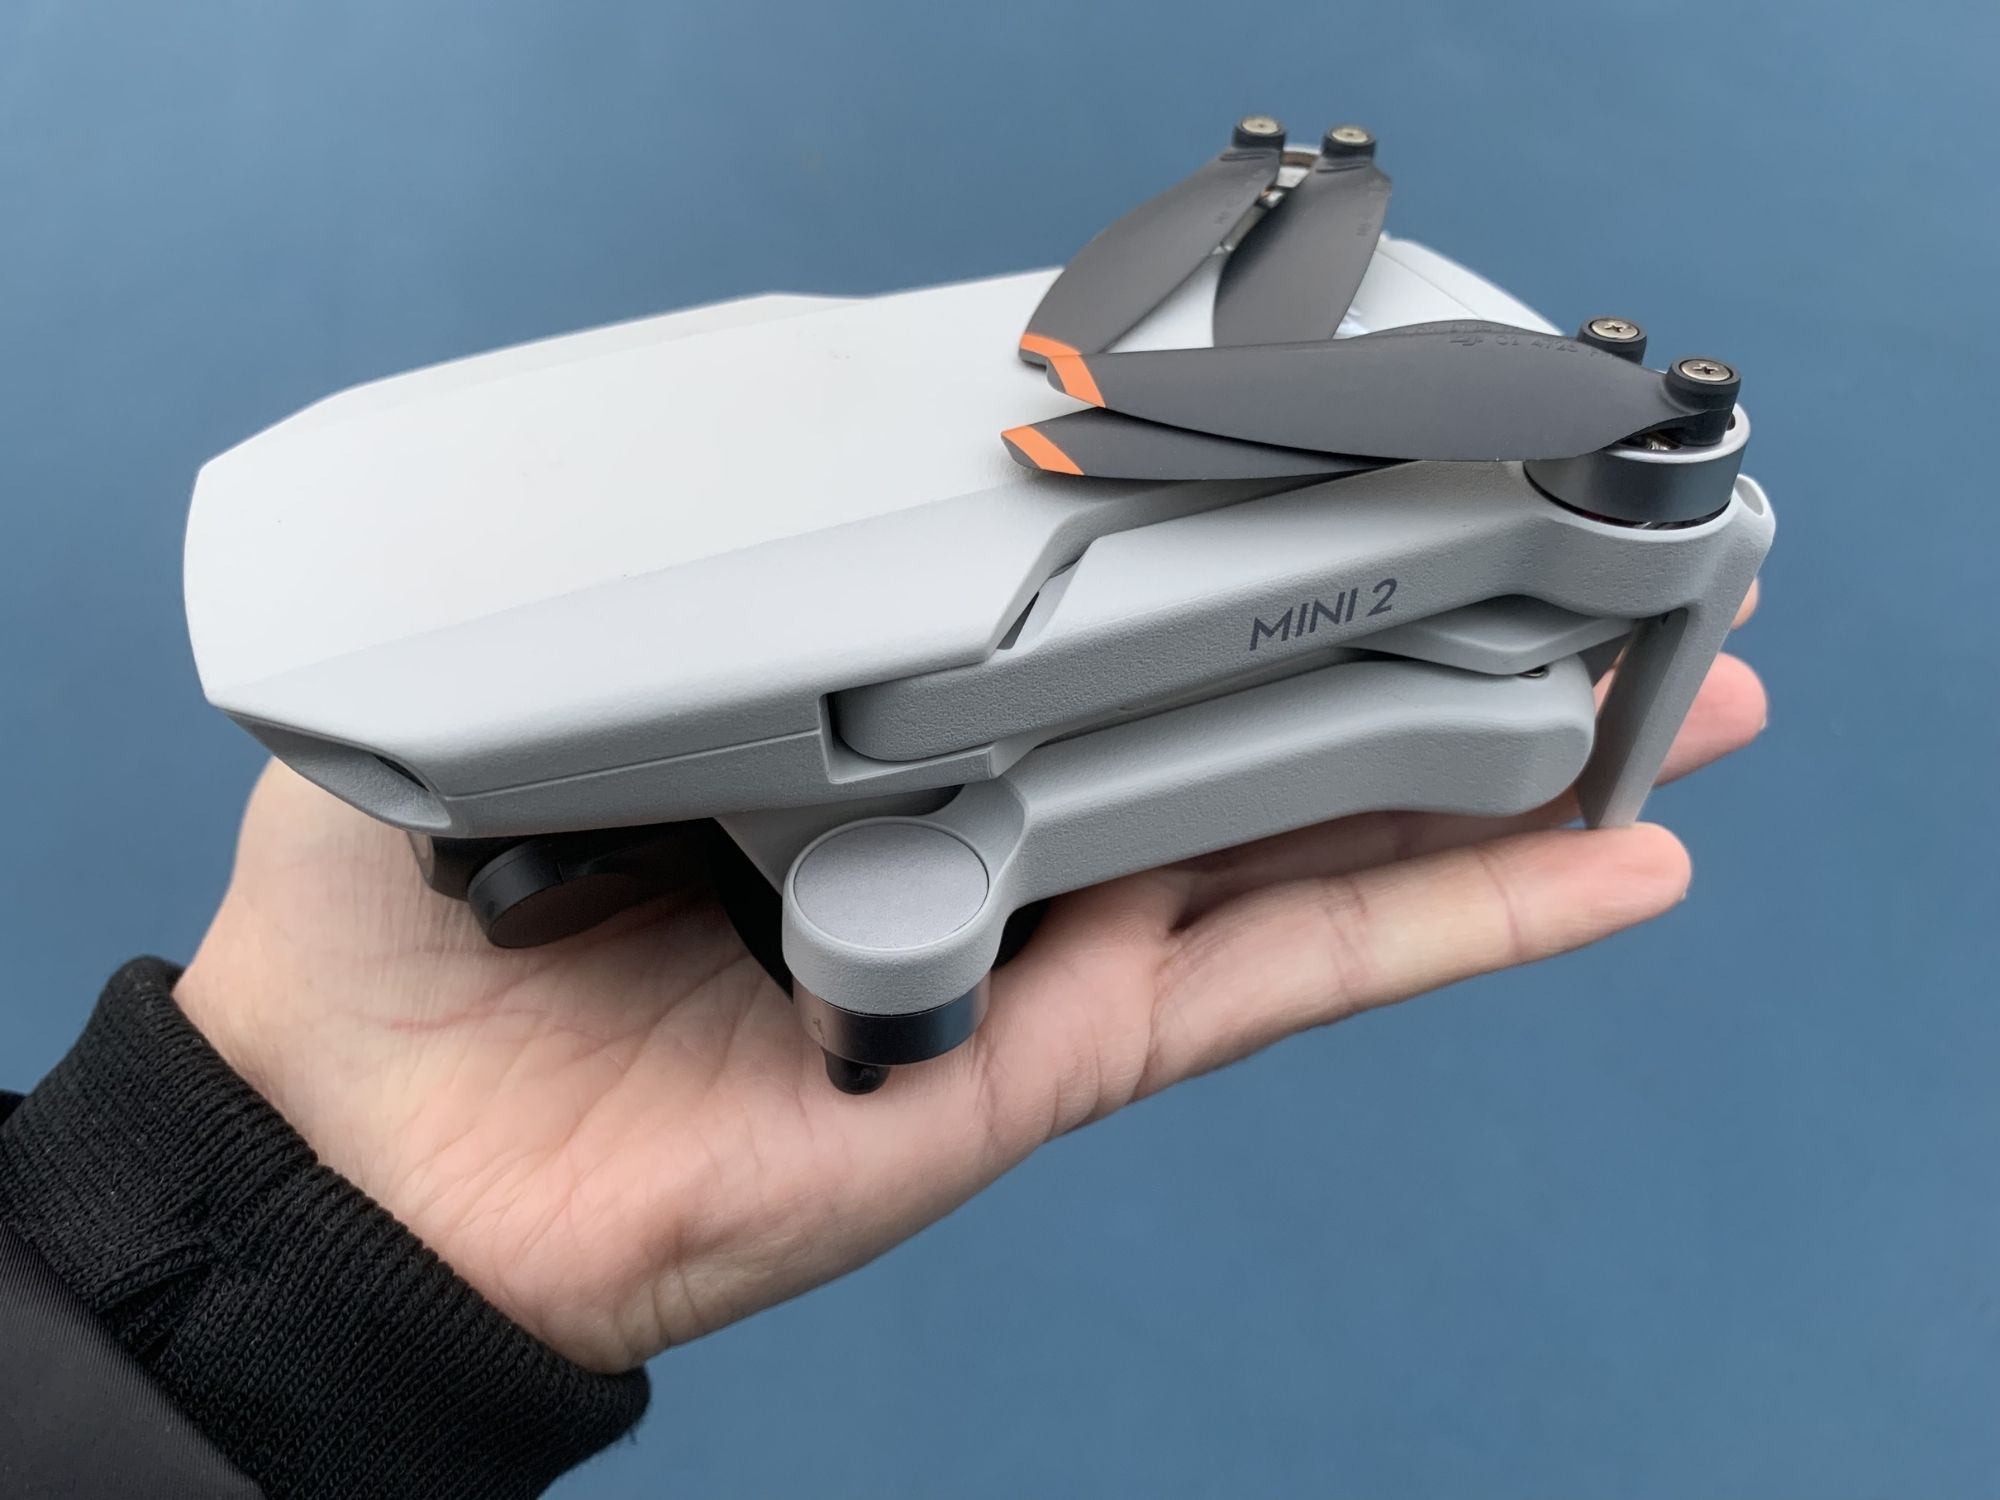
The DJI Mini 2 is a compact and lightweight drone that combines powerful features and intuitive controls. With its impressive flight capabilities and high-resolution camera, it offers enthusiasts and professionals alike the opportunity to capture breathtaking aerial shots.
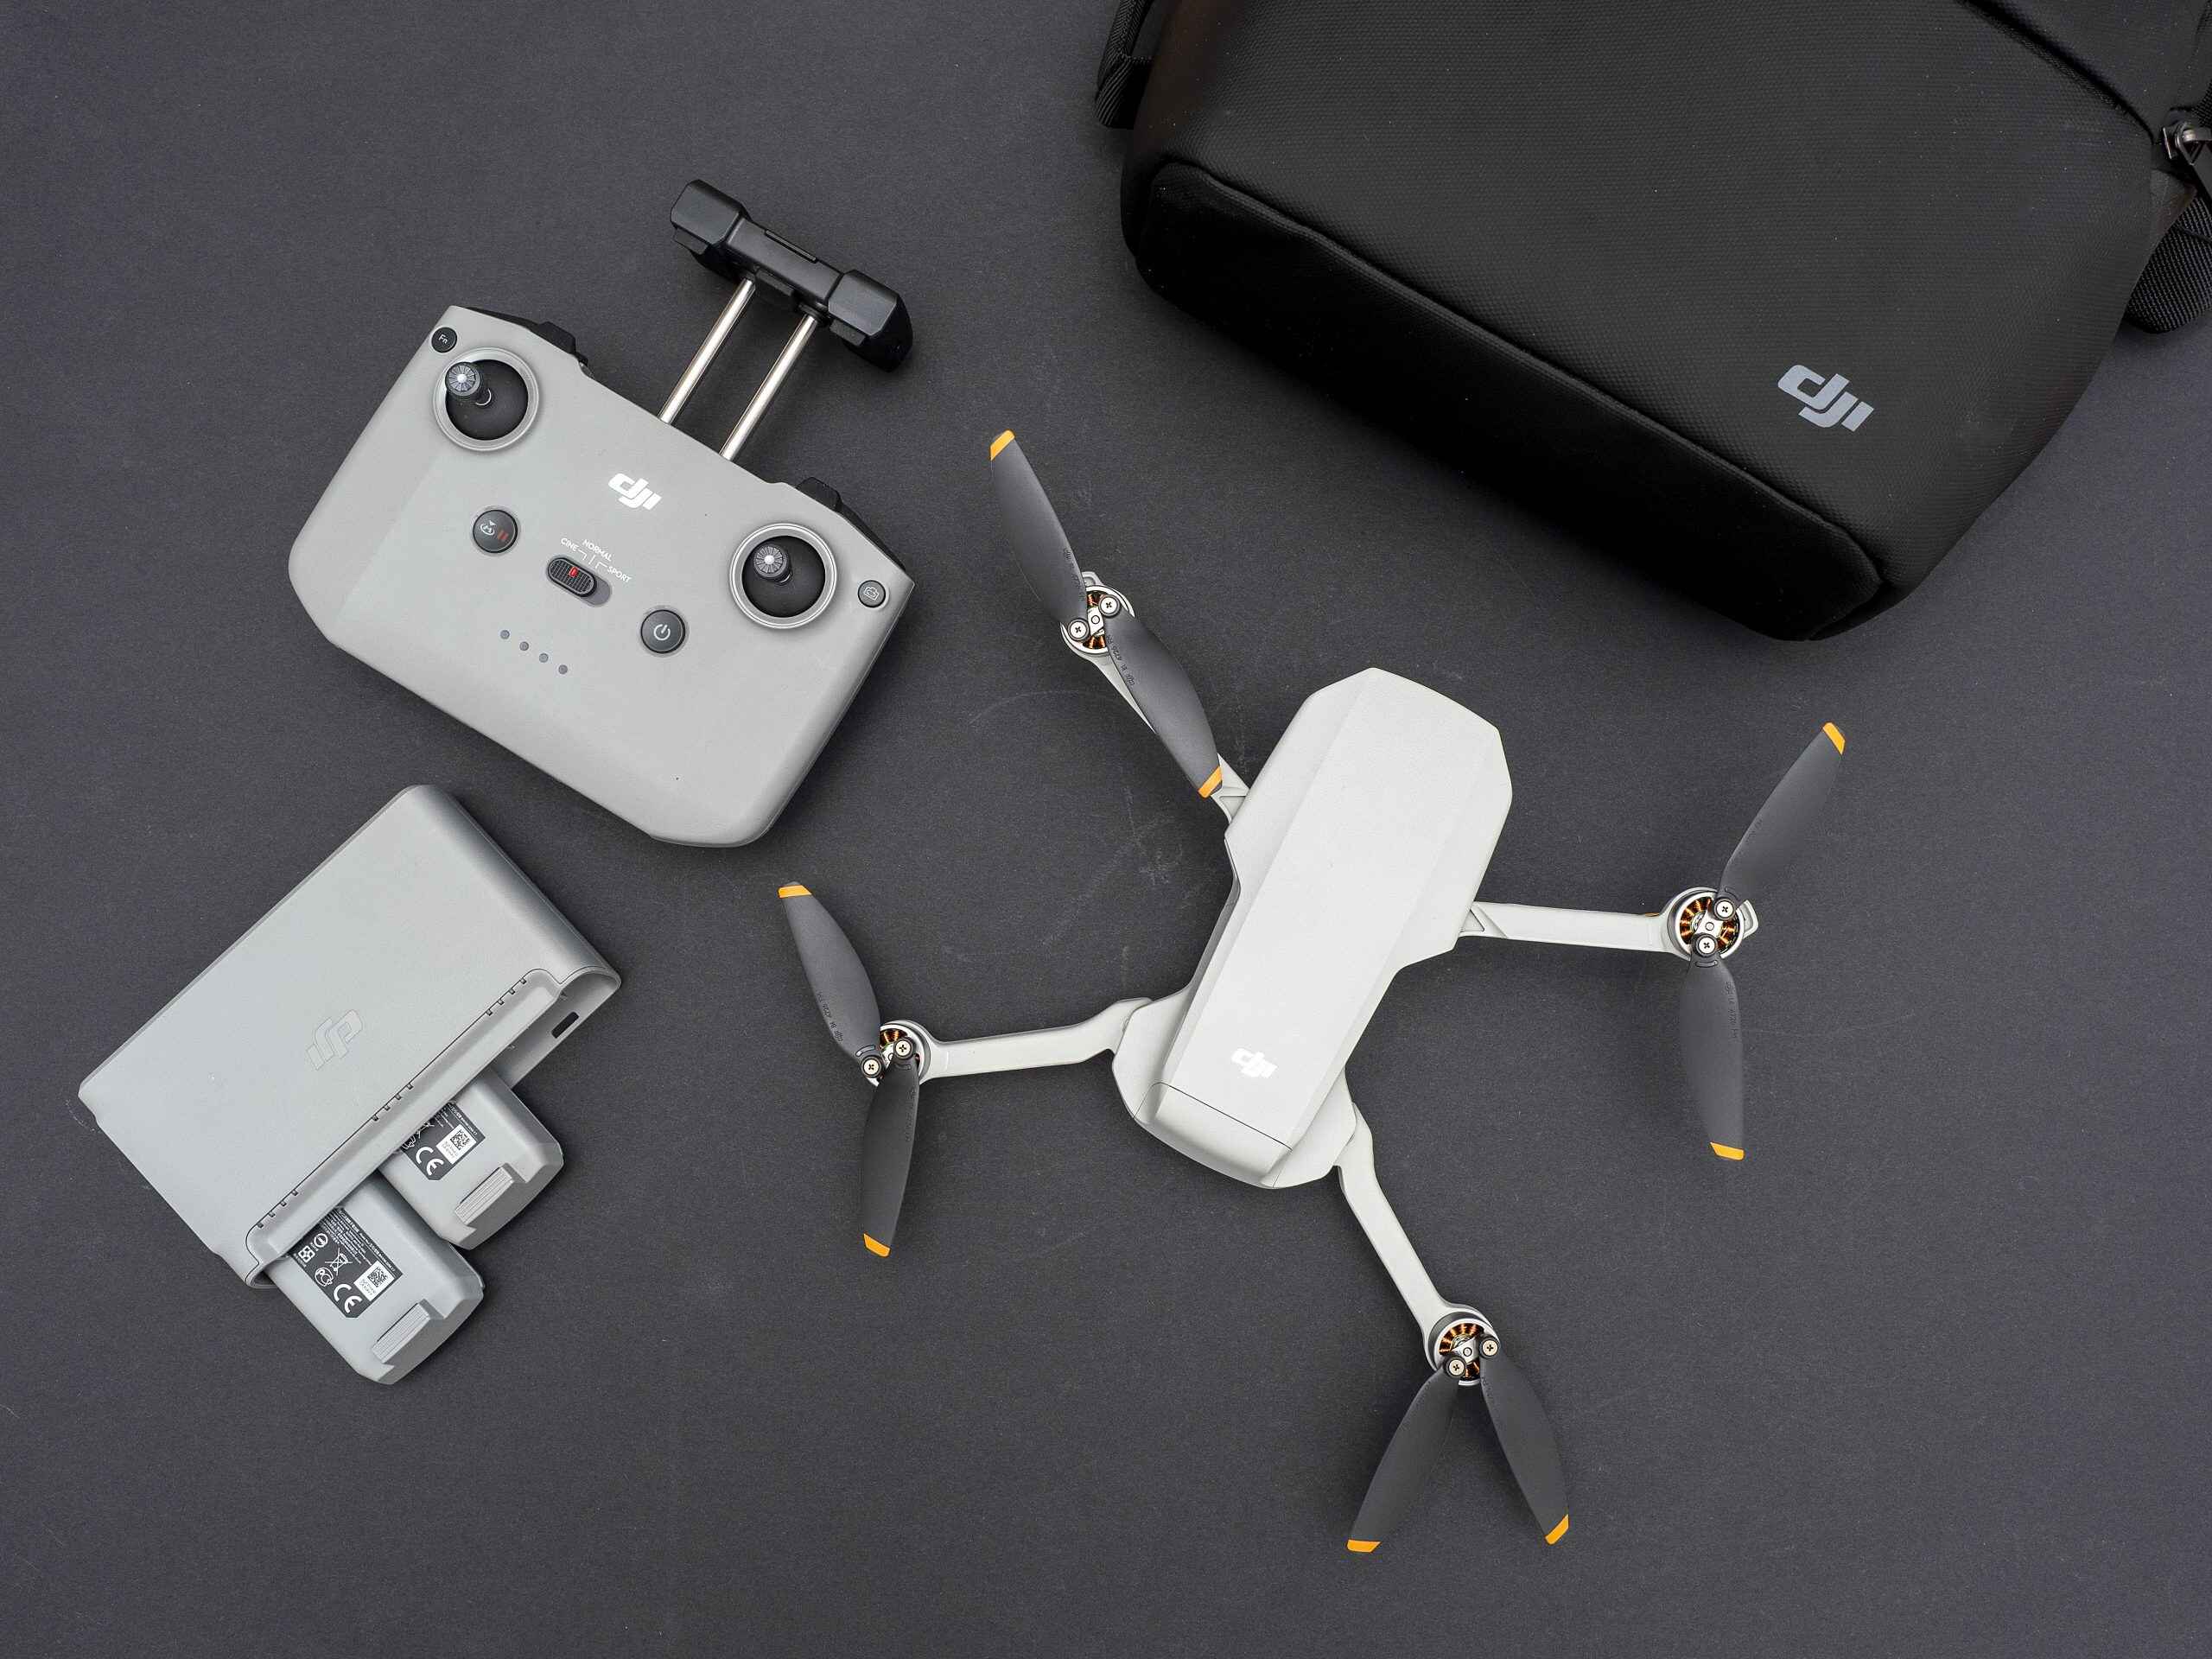
Before you can start flying your DJI Mini 2, there are a few essential steps to take. This includes charging the battery, installing the propellers, inserting a Micro SD card, and downloading the DJI Fly app onto your smartphone. Once these preparations are complete, you will be able to power on your DJI Mini 2, connect it to the remote controller, and activate it using the DJI Fly app.
Activating your DJI Mini 2 is a crucial step that ensures your drone is properly registered and connected to your DJI account. It also enables you to access important features, such as firmware updates and flight status information. By following the steps outlined in this guide, you will be able to activate your DJI Mini 2 quickly and easily, allowing you to embark on your aerial photography adventures.
So, let’s get started with the activation process and unleash the full potential of your DJI Mini 2!
Preparing your DJI Mini 2
Before you take your DJI Mini 2 for a flight, it’s important to ensure that you have completed the necessary preparations to guarantee a safe and successful experience. Here are the essential steps to follow:
Charging the battery: Begin by charging the battery of your DJI Mini 2 using the provided charging cable and power adapter. It’s recommended to fully charge the battery before your first flight to maximize the flight time.
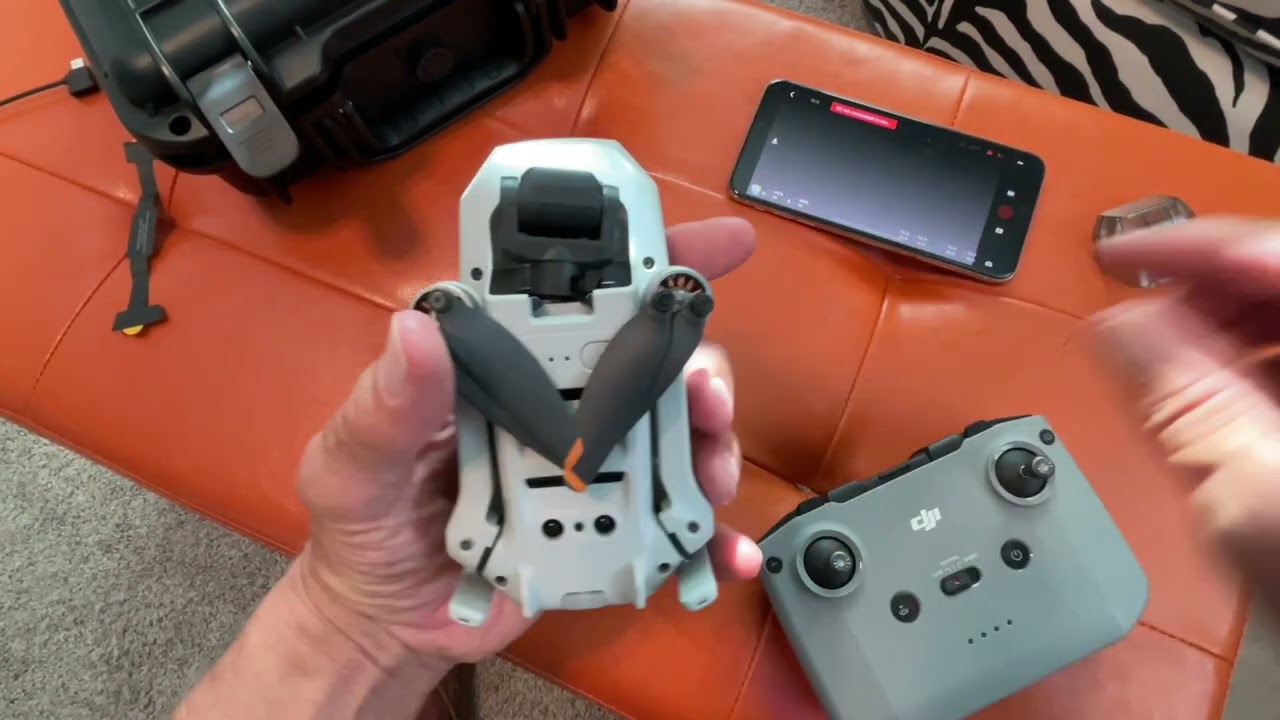
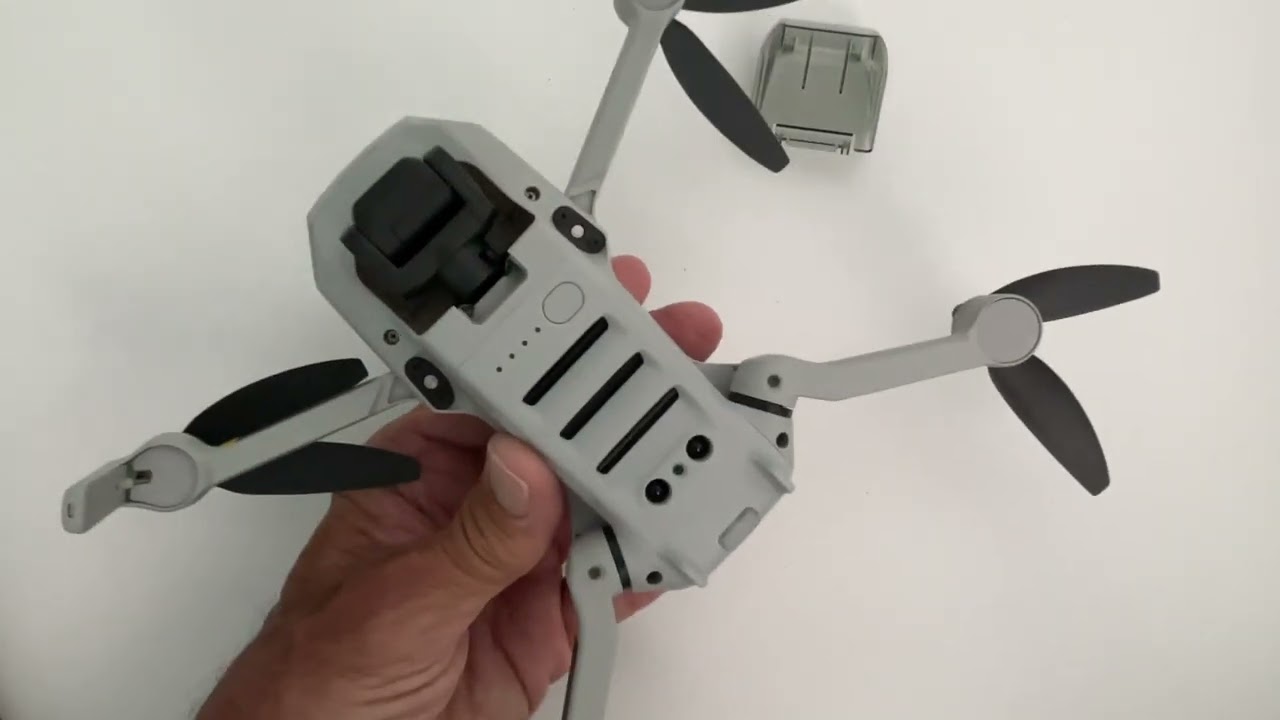
Installing the propellers: Locate the propellers in the DJI Mini 2 package and carefully attach them to the corresponding motor arms. Ensure they are securely fastened by twisting them in a clockwise direction. Make sure to install the propellers in the correct positions, as indicated by the markings on the motor arms.
Inserting the Micro SD card: Locate the Micro SD card slot on the side of the DJI Mini 2 and insert a compatible Micro SD card. Ensure that the card is inserted correctly and securely into the slot to avoid any potential data loss during flight.
Downloading and installing the DJI Fly app: To control and monitor your DJI Mini 2, you will need to download and install the DJI Fly app on your smartphone. You can find this app in the App Store (for iOS users) or the Google Play Store (for Android users). Once installed, open the app and follow the on-screen instructions to create a DJI account if you don’t already have one.
Powering on the DJI Mini 2: Press and hold the power button on your DJI Mini 2 until the propellers start to spin. This indicates that the drone is powered on and ready for flight.
Connecting your smartphone to the remote controller: Open the DJI Fly app on your smartphone and connect it to the DJI Mini 2’s remote controller using the provided USB cable. Follow the instructions on the app to establish a stable connection.
Activating the DJI Mini 2 using the DJI Fly app: Open the DJI Fly app and sign in to your DJI account. Tap on the activation button and follow the prompts to activate your DJI Mini 2. Make sure you have a stable internet connection during the activation process.
Updating the firmware: After activating your DJI Mini 2, it’s essential to check for firmware updates. The DJI Fly app will prompt you if there are any available updates for your drone. Follow the on-screen instructions to download and install the latest firmware to ensure optimal performance.
By completing these preparations, you will be ready to take your DJI Mini 2 for its maiden flight. It’s important to follow all safety guidelines and familiarize yourself with the controls and settings of the drone before launching it into the air. Remember, proper preparation is key to a successful and enjoyable flight experience with your DJI Mini 2.
Charging the Battery
One of the essential steps in preparing your DJI Mini 2 for flight is to charge the battery. Having a fully charged battery ensures that you can enjoy an extended flight time and capture breathtaking aerial shots. Here’s a step-by-step guide on how to charge the battery of your DJI Mini 2:
Step 1: Gather the necessary components
Get the battery, charging cable, and power adapter provided with your DJI Mini 2. Make sure all the components are in good condition before proceeding.
Step 2: Connect the charging cable
Take the charging cable and connect it to the charging port on the battery. You will notice a small, circular charging port on the side of the battery. Align the connector of the charging cable with the charging port and gently push it in until it’s securely connected.
Step 3: Plug in the power adapter
Insert the other end of the charging cable into the power adapter that came with your DJI Mini 2. Then, plug the power adapter into a wall outlet or a USB power source. Ensure that the power source is stable and provides a consistent power supply.
Step 4: Monitor the charging process
Once the battery is connected to the power adapter, the charging process will begin. On the battery itself, you will notice LED indicators. These indicators will illuminate to show the battery’s charging status. Typically, they will light up in a sequence to indicate the level of charge: one LED indicates a low charge, while four LEDs indicate a full charge.
Step 5: Allow the battery to fully charge
It’s recommended to let the battery charge until all the LED indicators are lit, indicating a full charge. This typically takes around 90 minutes, but actual charging time may vary. Avoid disconnecting the battery from the charger before it reaches a full charge to maximize the flight time.
Step 6: Disconnect the battery
Once the battery is fully charged, unplug the power adapter from the wall outlet or USB power source. Then, gently remove the charging cable from the charging port on the battery.
Step 7: Store or insert the battery
If you’re not flying your DJI Mini 2 immediately after charging, it’s essential to store the battery in a cool, dry place. Make sure to keep the battery away from extreme temperatures and avoid exposing it to direct sunlight.
If you’re ready to fly, safely insert the fully charged battery into the designated battery compartment on the drone. Ensure that the battery is securely inserted and properly aligned with the connectors in the compartment.
By following these steps, you can charge the battery of your DJI Mini 2 and be well-prepared for your upcoming aerial adventures. Remember to always prioritize safety and follow the manufacturer’s guidelines when handling and charging the battery.
Installing the Propellers
Properly installing the propellers on your DJI Mini 2 is crucial for safe and stable flight. The propellers are responsible for generating the necessary lift and controlling the drone’s movements. Here’s a step-by-step guide on how to install the propellers:
Step 1: Identify the propellers
Before you begin, familiarize yourself with the propellers provided in the DJI Mini 2 package. You will find two types of propellers: one labeled “A” and the other labeled “B.” Each propeller type is designed to be secured to a specific motor arm on the drone.
Step 2: Attach the propellers to the corresponding motor arms
Start by identifying the motor arms on your DJI Mini 2. Each motor arm has a corresponding label: front left, front right, rear left, and rear right. Match the propellers labeled “A” to the front left and rear right motor arms. Then, match the propellers labeled “B” to the front right and rear left motor arms.
Step 3: Align the propellers with the motor shafts
Hold the propeller labeled “A” or “B” and align it with the motor shaft of the corresponding motor arm. Ensure that the propeller is positioned correctly, with the curved side facing downward and the writing on the propeller facing upward.
Step 4: Secure the propellers by twisting them clockwise
Once you have aligned the propeller with the motor shaft, gently push down on the propeller while twisting it in a clockwise direction. Continue twisting until the propeller is securely fastened to the motor arm. You may hear a click or feel resistance when the propeller is properly installed.
Step 5: Repeat the process for the remaining propellers
Continue following the same process for each of the remaining propellers, ensuring that you match the correct propeller type (“A” or “B”) to the corresponding motor arm. Take your time to securely fasten each propeller before moving on to the next one.
Step 6: Check the propeller installation
After installing all the propellers, visually inspect each one to ensure they are securely attached and properly aligned. Gently give each propeller a slight tug to ensure they are firmly in place. If any propellers feel loose or appear misaligned, remove and reattach them following the same installation process.
Once you have successfully installed the propellers on your DJI Mini 2, you are one step closer to taking to the skies. Remember to regularly check the propellers for any signs of wear or damage. If you notice any cracks, chips, or deformation, replace the propeller immediately to maintain optimal flight performance and safety.
By following these steps, you can confidently install the propellers on your DJI Mini 2 and enjoy smooth and controlled flights for capturing stunning aerial shots.
Inserting the Micro SD Card
The DJI Mini 2 comes equipped with a Micro SD card slot, allowing you to capture and store high-quality photos and videos during your flights. Here’s a step-by-step guide on how to insert the Micro SD card into your DJI Mini 2:
Step 1: Locate the Micro SD card slot
Begin by identifying the Micro SD card slot on your DJI Mini 2. The slot is located on the side of the drone, typically near the battery compartment. It may be covered by a small protective flap or door.
Step 2: Prepare the Micro SD card
Remove the Micro SD card from its packaging and ensure that it is compatible with your DJI Mini 2. The recommended Micro SD card for the DJI Mini 2 is a UHS-I Speed Class 3 or above, with a capacity of up to 256GB. Check the manufacturer’s specifications for more details.
Step 3: Insert the Micro SD card
Gently push the Micro SD card into the slot, ensuring that the card is inserted in the correct orientation. Look for the label or arrow indicating the correct direction for insertion. Use light pressure to push the card until it is fully inserted into the slot.
Step 4: Secure the Micro SD card
After inserting the Micro SD card, you should feel a slight click or resistance indicating that the card is securely in place. Avoid applying excessive force when inserting the card to prevent any potential damage to the card or the drone’s Micro SD card slot.
Step 5: Verify the Micro SD card is recognized
Power on your DJI Mini 2 and access the camera settings through the DJI Fly app on your connected smartphone. Navigate to the storage settings and ensure that the Micro SD card is recognized and displaying its available storage capacity.
Step 6: Format the Micro SD card (optional)
If the Micro SD card is new or has been used on a different device, it is recommended to format it using the DJI Fly app before using it with your DJI Mini 2. Formatting ensures that the Micro SD card is properly configured for optimal performance.
By following these steps, you can easily insert a Micro SD card into your DJI Mini 2 and be ready to capture stunning aerial footage during your flights. Ensure that you handle the Micro SD card with care and store it in a safe place when it is not inserted in the drone, protecting it from dust, moisture, and extreme temperatures.
Downloading and Installing the DJI Fly App
The DJI Fly app is an essential tool for controlling and monitoring your DJI Mini 2 drone. It allows you to access various features, settings, and flight modes to enhance your flying experience. Here’s a step-by-step guide on how to download and install the DJI Fly app:
Step 1: Check your smartphone compatibility
Before proceeding, ensure that your smartphone is compatible with the DJI Fly app. The app is available for both iOS and Android devices. Check the DJI website or refer to the app store compatibility requirements to confirm if your smartphone meets the necessary specifications.
Step 2: Access your app store
Depending on your smartphone’s operating system, open either the App Store (for iOS users) or the Google Play Store (for Android users) on your device. These app stores are pre-installed on most smartphones and will allow you to download third-party applications like the DJI Fly app.
Step 3: Search for the DJI Fly app
Once you have accessed the app store, use the search function to look for the “DJI Fly” app. Ensure that you are downloading the official DJI app developed specifically for the DJI Mini 2 drone.
Step 4: Start the download
Tap on the “Install” or “Get” button to begin the download and installation process. The app will start to download to your smartphone’s internal memory. Make sure you have a stable internet connection to ensure a smooth and uninterrupted download process.
Step 5: Launch the DJI Fly app
Once the DJI Fly app has finished downloading and installing, locate the app icon on your smartphone’s home screen or app drawer. Tap the icon to launch the app.
Step 6: Create a DJI account
If you don’t already have a DJI account, you will be prompted to create one when you open the DJI Fly app. Follow the on-screen instructions to provide the necessary information and complete the registration process. Having a DJI account is essential for activating your DJI Mini 2 and accessing additional features.
Step 7: Connect your smartphone to the remote controller
To establish a connection between your smartphone and the DJI Mini 2’s remote controller, use the USB cable provided with your drone. Connect one end of the cable to your smartphone’s USB port and the other end to the USB port on the remote controller.
Step 8: Launch the DJI Fly app and follow the prompts
Launch the DJI Fly app on your smartphone. The app will guide you through the necessary steps to establish a stable connection with the DJI Mini 2. Follow the on-screen prompts, and ensure that both your smartphone and the remote controller are powered on and within close proximity to each other.
By following these steps, you can easily download and install the DJI Fly app onto your smartphone, enabling you to take full control of your DJI Mini 2 drone. Make sure to keep the app up to date by regularly checking for updates in the app store, as new versions may include performance enhancements and additional features.
Powering on the DJI Mini 2
Before taking flight with your DJI Mini 2, powering on the drone is the essential first step. Here is a step-by-step guide on how to power on your DJI Mini 2:
Step 1: Locate the power button
On the DJI Mini 2, the power button is located on the aircraft’s body. It is typically found near the battery compartment or on top of the drone. Familiarize yourself with the location of the power button before proceeding.
Step 2: Ensure the propellers are clear
Before powering on the drone, make sure that the propellers are clear of any obstructions. Rotate the propellers gently to ensure they spin freely and there are no objects or debris hindering their movement. Ensuring the propellers are unobstructed is crucial for a safe takeoff.
Step 3: Prepare the remote controller
Make sure the remote controller is powered on and connected to your smartphone or mobile device. The remote controller is an essential component for controlling the DJI Mini 2 during flight. Ensure that the controller has a fully charged battery and that it is in good working condition.
Step 4: Press and hold the power button
To power on the DJI Mini 2, press and hold the power button on the drone for a few seconds. You will notice the propellers start to spin and the LED lights on the aircraft will start to illuminate.
Step 5: Wait for initialization
After powering on the DJI Mini 2, you will need to wait for it to complete its initialization process. This typically takes a few seconds as the drone performs its self-checks and establishes a connection with the remote controller and GPS satellites. The DJI Fly app on your smartphone will also display the aircraft’s status during this time.
Step 6: Verify connectivity
Once the DJI Mini 2 has powered on and completed its initialization, check the connection between the drone and the remote controller. The remote controller’s status indicators and the DJI Fly app will confirm the connection status. Ensure that the app displays the necessary information and telemetry data for a safe flight.
Step 7: Confirm flight readiness
Before taking off, perform a final visual inspection of the DJI Mini 2 to ensure that everything is functioning properly. Verify that the GPS signal strength is strong, the battery level is sufficient, and the aircraft’s components are undamaged.
By following these steps, you can successfully power on your DJI Mini 2 and ensure that all systems are functioning correctly. Always prioritize safety by reviewing the pre-flight checklist and familiarizing yourself with the drone’s controls and flight modes before starting your aerial adventure.
Connecting Your Smartphone to the Remote Controller
Connecting your smartphone to the remote controller of your DJI Mini 2 is a crucial step in accessing the full range of features and controls. Here is a step-by-step guide on how to establish a stable connection between your smartphone and the remote controller:
Step 1: Check compatibility
Ensure that your smartphone is compatible with the DJI Fly app and has the necessary operating system requirements. Refer to the DJI website or the app store for the specific compatibility details.
Step 2: Power on the remote controller
Make sure that the remote controller of your DJI Mini 2 is powered on and functioning properly. Check the battery level of the remote controller, ensuring it has enough charge for the duration of your flight. Also, ensure that the antennas on the remote controller are adequately extended for optimal signal reception.
Step 3: Connect the smartphone and remote controller
Using the USB cable that came with your DJI Mini 2, connect one end to the USB port on the remote controller. Then, connect the other end of the cable to the appropriate port on your smartphone. The USB port on the smartphone can vary depending on the model, but it is typically the USB-C or Lightning port.
Step 4: Launch the DJI Fly app
Once the connection between your smartphone and the remote controller is established, launch the DJI Fly app on your smartphone. The app will automatically detect the connected remote controller and display a prompt to establish a connection.
Step 5: Confirm the connection
Follow the on-screen instructions to confirm the connection between your smartphone and the remote controller. This may involve granting permissions for the DJI Fly app to access certain features and functions on your smartphone. If prompted, ensure that you accept these permissions to ensure seamless functionality.
Step 6: Calibrate controls, if required
In some cases, you may need to calibrate the controls on the DJI Fly app to ensure accurate and responsive piloting. Follow the on-screen prompts to perform the control calibration if necessary. This step is critical for precise flight control and maneuvering.
Step 7: Verify the connection status
Once the connection is established, check the connection status on both your smartphone and the remote controller. The DJI Fly app should display the connection icon, indicating a successful connection. Additionally, the remote controller’s status indicators may also provide visual feedback on the connection status.
By following these steps, you can easily connect your smartphone to the remote controller of your DJI Mini 2. This connection allows you to access the full functionality of the DJI Fly app and take control of your drone’s flight, camera settings, and advanced features.
Activating the DJI Mini 2 using the DJI Fly app
Activating your DJI Mini 2 is a crucial step that ensures your drone is registered, connected to your DJI account, and ready for flight. The process of activating your DJI Mini 2 is straightforward when using the DJI Fly app. Here’s a step-by-step guide on how to activate your DJI Mini 2:
Step 1: Launch the DJI Fly app
Ensure that you have downloaded and installed the latest version of the DJI Fly app on your smartphone. Open the app and log in to your DJI account. If you don’t have an account, create one using the provided option.
Step 2: Connect your smartphone to the DJI Mini 2
Power on your DJI Mini 2 and connect your smartphone to the drone’s remote controller using a USB cable. Ensure that the connection is stable and established before proceeding to the next step.
Step 3: Access the activation page
In the DJI Fly app, navigate to the activation page. This page is typically located within the settings or account section of the app’s interface. Tap on the activation option to begin the activation process.
Step 4: Enter your product serial number
Locate the product serial number of your DJI Mini 2. This serial number can usually be found on the packaging or on the drone itself. Enter the serial number accurately into the DJI Fly app when prompted.
Step 5: Connect to the internet
Ensure that your smartphone has an active internet connection. Activation requires a stable internet connection to complete the process successfully. Connect to a reliable Wi-Fi network or use your cellular data.
Step 6: Confirm activation
Review and confirm the activation details in the DJI Fly app. This may include acknowledging the terms and conditions, privacy policy, and any other relevant activation information. Once you have reviewed and agreed to the terms, proceed with the activation process.
Step 7: Wait for activation confirmation
After confirming the activation details, the DJI Fly app will communicate with the DJI servers and initiate the activation process. Wait for the app to complete the activation and provide confirmation that your DJI Mini 2 is successfully activated and ready for flight.
By following these steps, you can activate your DJI Mini 2 quickly and easily using the DJI Fly app. Activation is a necessary step to ensure compliance, access advanced features, and help safeguard your drone. Once activated, you’re ready to take to the sky and embark on exciting aerial adventures!
Updating the Firmware
Regularly updating the firmware of your DJI Mini 2 is crucial for ensuring optimal performance, bug fixes, and accessing new features. DJI frequently releases firmware updates to enhance the functionality and stability of their drones. Here’s a step-by-step guide on how to update the firmware of your DJI Mini 2:
Step 1: Connect your smartphone to the DJI Mini 2
Launch the DJI Fly app on your smartphone and connect it to the DJI Mini 2’s remote controller using the provided USB cable. Ensure that the connection is stable and established before proceeding with the firmware update.
Step 2: Check for firmware updates
In the DJI Fly app, navigate to the settings or firmware update section. The app will automatically check for available firmware updates for your DJI Mini 2. If a firmware update is available, you will receive a notification or see an option to update the firmware.
Step 3: Download the firmware update
If a firmware update is available, tap on the update option to start the download process. Ensure that your smartphone has a stable internet connection as the firmware update file can be quite large. It’s recommended to use a Wi-Fi connection to ensure a smooth and uninterrupted download.
Step 4: Install the firmware update
Once the firmware update file is downloaded, follow the instructions in the DJI Fly app to install it on your DJI Mini 2. This process may involve confirming the installation, accepting terms and conditions, and waiting for the installation to complete.
Step 5: Wait for the update to finish
During the firmware update process, it’s important to wait patiently and avoid interrupting the update. The DJI Fly app will display the progress of the firmware update, and your drone will likely emit various indicator lights and sounds. Allow the update to finish completely before proceeding.
Step 6: Restart your DJI Mini 2
After the firmware update is installed and complete, restart your DJI Mini 2 by powering it off and then on again. This step ensures that the new firmware settings are applied and ready for use during your next flight.
Step 7: Verify the firmware version
After restarting your DJI Mini 2, access the firmware information in the DJI Fly app to verify that the update was successful. If the firmware version displayed matches the updated version, you can be confident that your drone is running the latest firmware.
By following these steps, you can easily update the firmware of your DJI Mini 2 and ensure that your drone is equipped with the latest software enhancements. Regular firmware updates help maintain the performance and reliability of your drone, so it’s essential to check for and install updates whenever they are available.
Calibrating the IMU and Gimbal
Calibrating the IMU (Inertial Measurement Unit) and gimbal of your DJI Mini 2 is an important step to ensure accurate flight control and stable camera performance. Calibration can help eliminate minor drift, improve flight stability, and optimize the gimbal’s performance. Here’s a step-by-step guide on how to calibrate the IMU and gimbal of your DJI Mini 2:
Step 1: Find a suitable location
Choose an open, flat surface outdoors to perform the calibration. Ensure that the area is free from any magnetic or electromagnetic interference, such as metal structures or power lines, to ensure the accuracy of the calibration process.
Step 2: Power on the DJI Mini 2
Power on your DJI Mini 2 and let it initialize. Ensure that the battery is sufficiently charged to complete the calibration process without interruption.
Step 3: Access the calibration options
In the DJI Fly app on your connected smartphone, navigate to the settings or calibration section. Look for the options to calibrate the IMU and gimbal. Follow the instructions provided to proceed with the calibration process for each component.
Step 4: Calibrate the IMU
To calibrate the IMU, place your DJI Mini 2 on a level surface and follow the on-screen instructions. Typically, this involves keeping the drone static while the IMU sensor within the aircraft calibrates itself. Make sure the drone is not disturbed during this process.
Step 5: Calibrate the gimbal
To calibrate the gimbal, ensure that your DJI Mini 2 is powered on and level. Follow the on-screen instructions in the DJI Fly app to start the gimbal calibration process. This typically involves rotating the drone in specific directions to calibrate the gimbal’s axis and ensure stability during flight.
Step 6: Follow the calibration prompts
During the calibration process, carefully follow the prompts provided in the DJI Fly app. These prompts will guide you through the necessary steps to complete the calibration of the IMU and gimbal. Be patient and ensure that each calibration step is performed accurately.
Step 7: Verify calibration success
After completing the calibration process for the IMU and gimbal, check the DJI Fly app for any confirmation messages that indicate successful calibration. Ensure that the IMU and gimbal statuses are displaying as normal and indicate that the calibration process was successful.
By following these steps, you can easily calibrate the IMU and gimbal of your DJI Mini 2. Regular calibration helps maintain optimal flight control and camera performance, ensuring accurate and stable operation during your drone flights. Remember to recalibrate the IMU and gimbal whenever you experience any unusual flight behavior or before important aerial photography sessions.
Setting up and Adjusting the Camera Settings
The DJI Mini 2 is equipped with a high-resolution camera that allows you to capture stunning aerial photos and videos. To get the best results, it’s essential to set up and adjust the camera settings according to your preferences and the shooting conditions. Here’s a step-by-step guide on how to set up and adjust the camera settings of your DJI Mini 2:
Step 1: Open the DJI Fly app
Launch the DJI Fly app on your smartphone and ensure it is connected to your DJI Mini 2’s remote controller. The app provides easy access to the camera settings and allows you to make adjustments conveniently.
Step 2: Access the camera settings
Navigate to the camera settings menu within the DJI Fly app. Typically, this can be accessed by tapping on the camera icon or by navigating through the settings options.
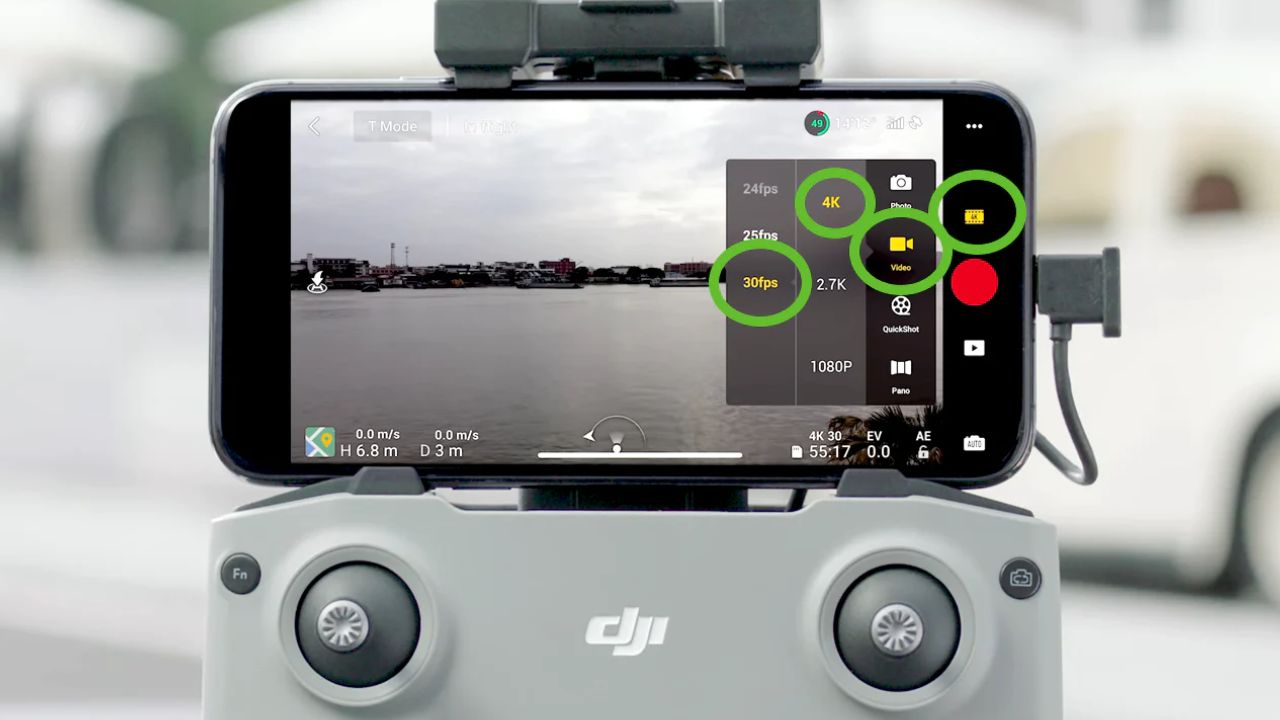
Step 3: Adjust the photo and video settings
You will find a range of options to adjust the camera settings, including resolution, frame rate, photo format, exposure, white balance, and more. Experiment with different settings to achieve the desired effect for your photos and videos.
Step 4: Choose the photo mode
Select the photo mode that best suits your needs. The DJI Mini 2 offers different modes such as single shot, burst mode, interval capture, and more. Each mode has its own advantages and is suitable for different types of photography.
Step 5: Set up the video mode
If you’re planning to shoot videos, choose the appropriate video mode. The DJI Mini 2 supports various video resolutions, including options for 4K, 2.7K, and 1080p, as well as different frame rates. Consider factors such as the desired video quality and storage capacity when selecting the settings.
Step 6: Enable advanced shooting modes
Explore the advanced shooting modes available on the DJI Mini 2, such as HDR, panorama, or hyperlapse. These modes can add unique effects and perspectives to your photos and videos, allowing you to unleash your creativity.
Step 7: Review and test the settings
After adjusting the camera settings, take a moment to review and confirm your selections. Consider the shooting conditions and your desired outcome. Once you’re satisfied, take a test shot or record a sample video to ensure that the settings are producing the desired results.
By following these steps, you can easily set up and adjust the camera settings of your DJI Mini 2. Remember to experiment with different settings and shooting modes to develop your own style and capture stunning aerial imagery for your creative projects.
Choosing a Flight Mode
The DJI Mini 2 offers various flight modes that enhance your flying experience and allow you to capture unique aerial footage. Each flight mode caters to different needs and skill levels. Here’s a guide on how to choose the right flight mode for your DJI Mini 2:
Standard Mode:
The Standard Mode is the default flight mode of the DJI Mini 2. It provides a balanced flight experience suitable for beginners and those who prefer a stable and smooth flight. In this mode, the drone’s movements are more gentle, and the controls are more forgiving, making it easier to fly for newcomers.
Sport Mode:
The Sport Mode is designed for experienced pilots who seek a more dynamic flight experience. In this mode, the DJI Mini 2 becomes more agile and responsive, allowing for faster and more dynamic movements. The higher maximum speed and increased maneuverability make it ideal for capturing fast-paced action shots or dynamic cinematic footage.
CineSmooth Mode:
The CineSmooth Mode is perfect for capturing ultra-smooth cinematic shots. It slows down the drone’s movements and decreases the sensitivity of the controls, resulting in buttery-smooth footage. This mode is especially useful for capturing cinematic shots with slow pans, graceful movements, and cinematic camera motions.
Point of Interest (POI) Mode:
The POI Mode enables the DJI Mini 2 to circle around a selected subject or point of interest automatically. Simply, set the point of interest, adjust the radius and altitude, and let the drone orbit around the subject, capturing captivating footage from different angles. This mode is great for capturing dynamic shots of landmarks, scenery, or even yourself.
Waypoint Mode:
The Waypoint Mode allows you to pre-plan a flight path by setting specific GPS coordinates on the map in the DJI Fly app. The DJI Mini 2 will then autonomously fly along the designated waypoints, capturing footage or images at each waypoint. This mode is ideal for creating consistent, repeatable shots or capturing footage in more complex scenarios.
QuickShots:
The DJI Mini 2 also offers a variety of QuickShot modes, which are automated flight modes that capture pre-programmed aerial shots. These include Dronie, Circle, Helix, Rocket, and Boomerang. Each QuickShot mode enables the drone to fly in a specific pattern to capture dynamic shots with cinematic flair, making it easy to create high-quality videos without requiring advanced piloting skills.
When choosing a flight mode, consider your skill level, the type of shots you want to capture, and the specific requirements of your aerial filming project. Take the time to familiarize yourself with each mode, understand their capabilities, and experiment with different modes to push the creative boundaries of your DJI Mini 2.
Understanding the Flight Controls
Understanding the flight controls of your DJI Mini 2 is crucial for smooth and controlled flights. Familiarizing yourself with the controls allows you to navigate the drone with precision and confidence. Here’s a breakdown of the flight controls for your DJI Mini 2:
Remote Controller:
The remote controller is your primary tool for piloting the DJI Mini 2. It consists of various buttons, joysticks, and switches that control the drone’s movements and camera functions.
Left Stick (Throttle and Yaw):
The left stick, located on the remote controller, controls the throttle and yaw. Pushing the stick up or down adjusts the throttle, controlling the drone’s vertical movement (ascending or descending). Moving the stick left or right adjusts the yaw, rotating the drone clockwise or counterclockwise.
Right Stick (Roll and Pitch):
The right stick controls the roll and pitch of the DJI Mini 2. Pushing the stick up or down adjusts the pitch, tilting the drone forward or backward. Moving the stick left or right adjusts the roll, tilting the drone to the left or right.
Flight Modes Switch:
The flight modes switch on the remote controller allows you to switch between different flight modes, such as Standard, Sport, CineSmooth, Point of Interest (POI), and Waypoint mode. Each mode offers different flight characteristics and capabilities, enabling you to tailor the flight behavior to your needs.
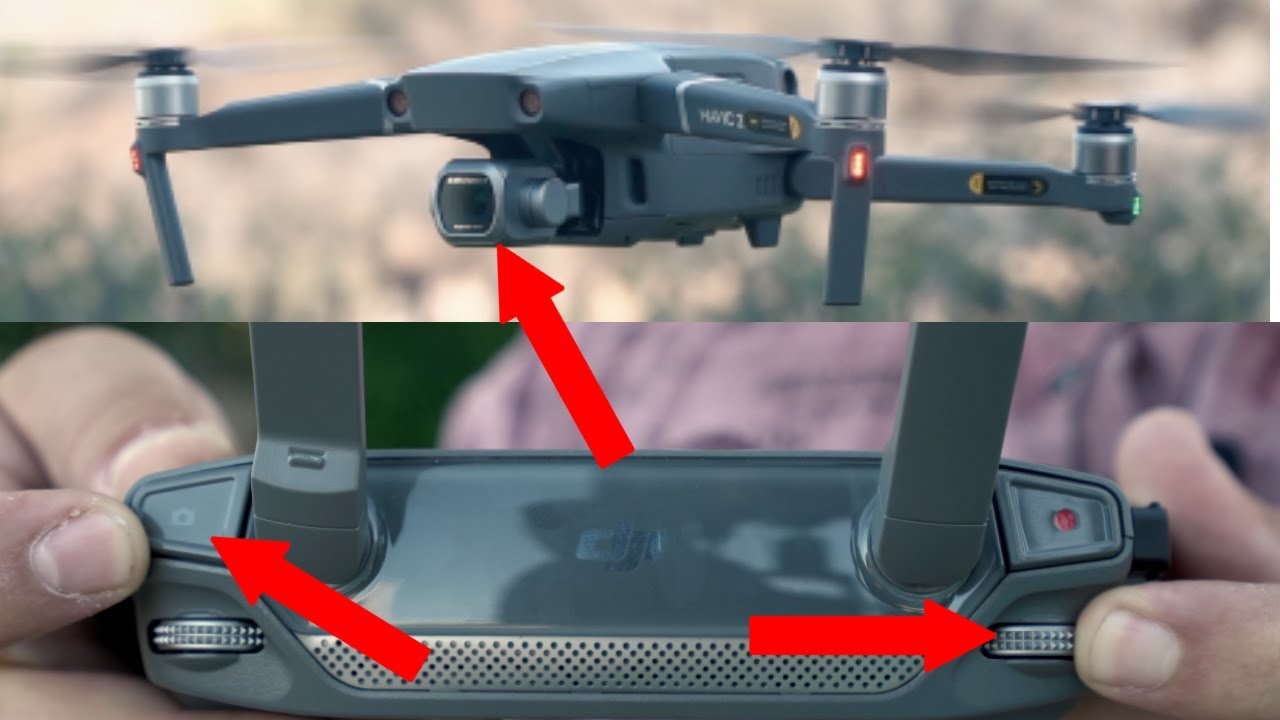
Camera Controls:
The remote controller also includes buttons and switches for controlling the camera functions of the DJI Mini 2. These may include capturing photos, recording videos, adjusting exposure settings, controlling the gimbal tilt or rotation, and activating automated flight modes like QuickShots.
Flight Telemetry:
The DJI Fly app on your connected smartphone provides essential flight telemetry information. This includes details about the drone’s altitude, distance from the remote controller, battery level, GPS signal strength, and other important flight data. Monitoring the telemetry data helps you maintain awareness of the DJI Mini 2’s status during flight.
Practice and Flight Training:
To become comfortable with the flight controls, it’s recommended to practice flying your DJI Mini 2 in an open and safe environment. Start with gentle movements and gradually increase your maneuvering skills. Take the time to understand the drone’s response to different control inputs and become familiar with its capabilities.
Understanding the flight controls of your DJI Mini 2 is essential for safe, precise, and enjoyable flights. Regular practice, experience, and familiarity with the controls will enable you to confidently navigate your drone and capture breathtaking aerial footage.
Taking Off and Landing
Knowing how to properly take off and land your DJI Mini 2 is essential for a safe and controlled flight experience. Here are the steps to follow when taking off and landing your drone:
Taking Off:
1. Find a suitable takeoff location: Choose an open area free from obstacles and overhead obstructions. Select a flat surface to ensure a stable takeoff.
2. Pre-flight check: Before taking off, ensure that the propellers are securely attached and that the battery level is sufficient for the planned flight. Also, double-check that the gimbal and camera are functioning correctly.
3. Power on the DJI Mini 2: Press and hold the power button until the propellers start spinning. Give the drone a few moments to complete its initialization process.
4. Take off gently: Push the left stick on the remote controller upward slowly to increase the throttle and let the DJI Mini 2 ascend. Maintain a smooth and controlled ascent.
5. Hover in place: Once airborne, allow the drone to hover in place for a few moments to ensure stability and proper GPS lock. Take this time to verify that the controls are responsive and the drone is flying smoothly.
Landing:
1. Choose a suitable landing spot: Find a safe and clear location to land your DJI Mini 2. Look for a flat surface away from people, vehicles, and potential hazards.
2. Prepare for descent: Slowly adjust the throttle on the remote controller to descend the drone. Gradually bring it closer to the ground while maintaining a controlled descent.
3. Land gently: As the DJI Mini 2 approaches the landing zone, continue to decrease the throttle until the drone safely touches the ground. Aim for a smooth and gentle landing to prevent any accidental impacts.
4. Power off the drone: Once the drone has landed, power off the DJI Mini 2 by pressing and holding the power button until the propellers stop spinning. This ensures a safe shutdown of the drone’s systems.
Remember to take into account any local regulations and guidelines when selecting your takeoff and landing locations. Always maintain situational awareness and be mindful of your surroundings during these crucial moments of flight. Practicing takeoffs and landings in various conditions will help improve your skills and ensure a safe flight experience with your DJI Mini 2.
Flying the DJI Mini 2
Once you have taken off and familiarized yourself with the flight controls, it’s time to explore the capabilities of your DJI Mini 2. Here are some tips and guidelines for flying your drone:
1. Start with simple maneuvers:
Begin by practicing basic flight maneuvers, such as flying in a straight line, making gentle turns, and adjusting the altitude. This will help you become comfortable with the controls and gain confidence in flying your DJI Mini 2.
2. Maintain visual line of sight:
Always keep your DJI Mini 2 within your visual line of sight during flights. This will allow you to monitor its position, navigate obstacles, and ensure a safe flying experience. Avoid flying beyond your visual range, especially in areas with potential signal interference.
3. Be aware of your surroundings:
Keep a constant awareness of your environment and any potential hazards or obstacles that may pose a risk to your DJI Mini 2. Stay clear of buildings, trees, power lines, and other structures. Also, be considerate of people, wildlife, and other aircraft in the vicinity.
4. Fly in suitable weather conditions:
Choose to fly your DJI Mini 2 in favorable weather conditions. Avoid windy conditions that may affect the stability and maneuverability of the drone. Also, be cautious of rain, snow, or other environmental factors that may potentially damage the drone.
5. Monitor battery level:
Keep a close eye on the battery level of your DJI Mini 2 during flight. Ensure that you have sufficient battery capacity to safely return and land the drone. It’s recommended to set a return-to-home (RTH) altitude that allows the drone to automatically return and land when the battery level reaches a predetermined threshold.
6. Capture stable footage:
To capture smooth and stable footage with your DJI Mini 2, avoid abrupt or jerky movements. Make gradual adjustments to the throttle, yaw, roll, and pitch to achieve stable and cinematic shots. Utilize the CineSmooth mode and consider using a gimbal stabilizer for even smoother footage.
7. Follow local regulations:
Comply with the local regulations and guidelines established by your country’s aviation authority. Familiarize yourself with any restrictions on flying locations, altitude limits, and privacy laws. Always fly responsibly and respect the rules to ensure the safety and privacy of others.
By following these guidelines, you can enjoy a safe and enjoyable flying experience with your DJI Mini 2. Remember that practicing and gaining experience will improve your skills as a drone pilot and enable you to capture stunning aerial footage and photographs.
Landing and Shutting Down the DJI Mini 2
Properly landing and shutting down your DJI Mini 2 is the final step in a safe and successful drone flight. Here are the steps to follow for a smooth landing and shutdown process:
1. Choose a suitable landing spot:
Select a safe and clear area to land your DJI Mini 2. Look for a flat and open space that is free from obstacles, people, and hazards.
2. Prepare for landing:
Safely descend the drone by gradually reducing the throttle on the remote controller. Slowly bring the DJI Mini 2 closer to the ground while maintaining control.
3. Land gently:
As the drone nears the ground, continue to decrease the throttle until the DJI Mini 2 lands gently. Aim for a smooth touchdown to avoid any hard impacts.
4. Power off the drone:
After landing, it’s time to power off the DJI Mini 2. Press and hold the power button on the drone until the propellers come to a complete stop. This ensures a safe shutdown of the drone’s systems.
5. Disconnect the remote controller:
Once the DJI Mini 2 is powered off, disconnect the remote controller from your smartphone or mobile device. Safely remove the USB cable from both the remote controller and your device.
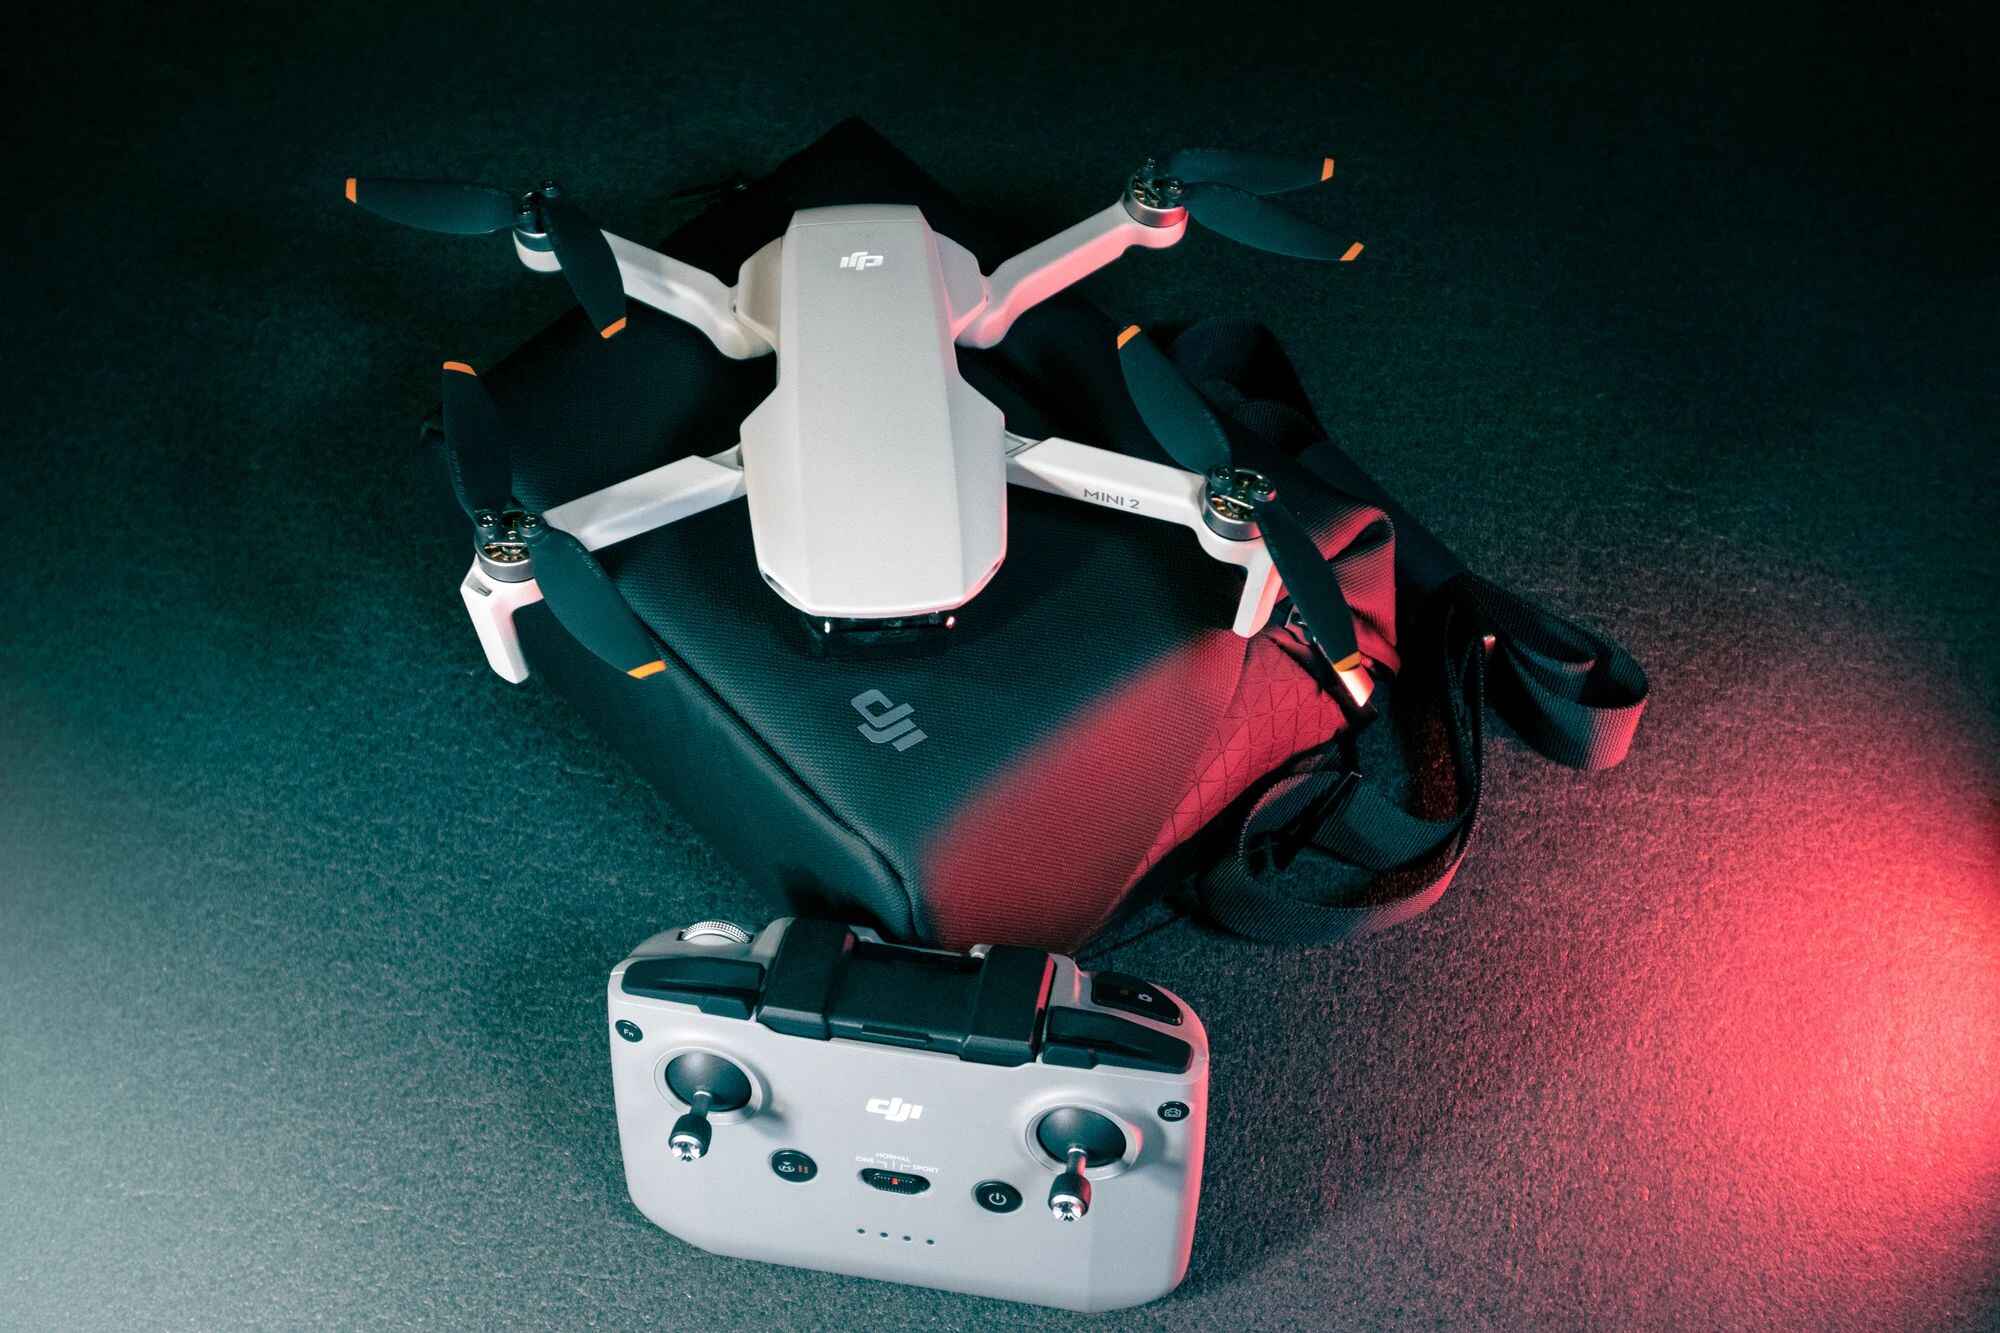
6. Pack up the drone:
Carefully pack up the DJI Mini 2 by folding down the propeller arms and placing it securely in its carrying case or designated storage bag. Make sure all cables and accessories are properly organized and stored.
7. Check for any damage:
After landing and shutting down the DJI Mini 2, perform a visual inspection to ensure that there is no damage to the drone or its components. Look for any signs of wear, dents, or loose connections that may require attention or repair.
By following these steps, you can safely land and shut down your DJI Mini 2 after a flight. Remember to be mindful of your surroundings when landing and always power off the drone before packing it up. Regular maintenance and care will help keep your DJI Mini 2 in optimal condition for future flights.
Conclusion
Congratulations! You have now learned the essential steps for activating, preparing, and flying your DJI Mini 2 drone. By following these guidelines, you can ensure a safe and enjoyable flying experience while capturing stunning aerial shots.
Remember to always prepare your DJI Mini 2 by charging the battery, installing the propellers, and inserting a Micro SD card. Download and install the DJI Fly app to access important features, update the firmware, and adjust camera settings. Properly power on the drone and connect your smartphone to the remote controller to establish a stable connection. Activate the DJI Mini 2 using the app, update the firmware regularly, and calibrate the IMU and gimbal for optimal performance.
Understanding the flight controls is crucial for smooth piloting, and choosing the right flight mode based on your needs and skill level will enhance your flying experience. Take off and land safely, fly in appropriate weather conditions, and respect local regulations and guidelines. By practicing good flight techniques and monitoring battery levels, you can capture stable footage and ensure a safe return to the ground.
Finally, when your flight is over, follow the proper steps to land the DJI Mini 2 gently and safely power it off. Take the time to care for your drone, check for any damage, and store it properly in its designated case or bag.
Now that you’re equipped with the knowledge and skills to operate your DJI Mini 2 effectively, it’s time to take to the skies and explore the endless possibilities of aerial photography and videography. So, get out there, capture breathtaking shots, and enjoy the incredible experience of flying your DJI Mini 2!