Charging the DJI Mini 2
Before taking your DJI Mini 2 drone on its first flight, it’s crucial to ensure that its battery is fully charged. Here’s a step-by-step guide to help you charge your DJI Mini 2:
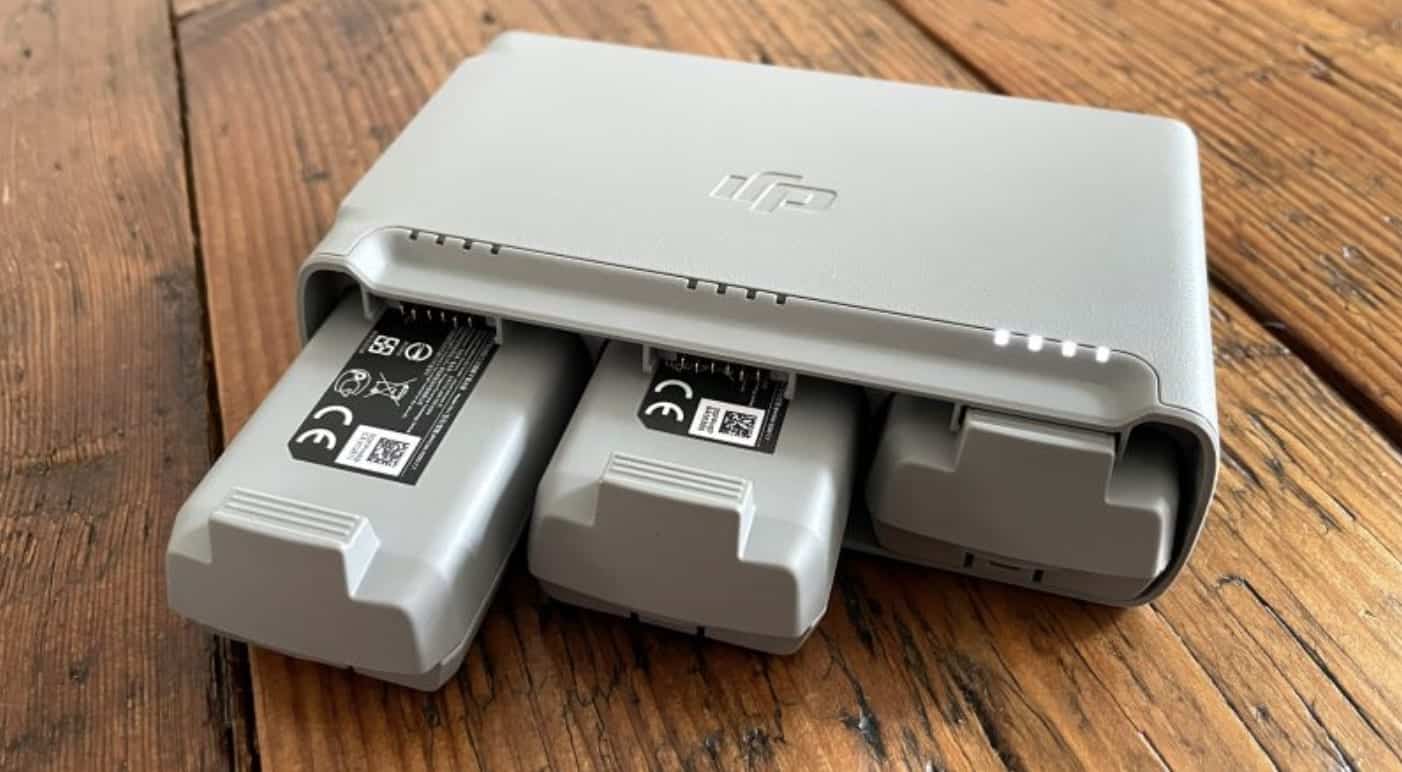
- Unfold the charging hub: Start by unfolding the charging hub and connecting it to a power source. Make sure to use the provided charger and cable for optimal charging performance.
- Connect the batteries: Next, connect the batteries to the charging hub. You can charge up to three batteries simultaneously, allowing you to extend your flight time.
- Check the battery status: The charging hub features LED indicators that display the battery status. Each LED corresponds to an individual battery, allowing you to monitor their charging progress. Once the LED indicator turns solid green, it means the battery is fully charged.
- Disconnect and store the batteries: Once the batteries are fully charged, disconnect them from the charging hub. Remember to store them in a safe and cool place, away from direct sunlight and extreme temperatures.
Keep in mind that the charging time may vary depending on the battery level and the power source you’re using. It’s advisable to charge the batteries overnight or in a well-ventilated area to prevent any potential safety hazards.
Additionally, it’s essential to regularly check and maintain the battery health of your DJI Mini 2. Follow the manufacturer’s guidelines to ensure that the batteries are in optimal condition and avoid any potential performance issues or safety concerns.
By following these steps, you can guarantee that your DJI Mini 2 drone is always ready for your next adventure. Take the time to properly charge and maintain the batteries, and you’ll be able to enjoy longer flights and capture stunning aerial footage with ease.
Setting up the DJI Mini 2 App
The DJI Mini 2 app is an essential tool for controlling your drone, capturing stunning aerial footage, and accessing a range of intelligent flight modes. Here’s a comprehensive guide to help you set up the DJI Mini 2 app:
- Download the app: Start by downloading the DJI Fly app from the App Store or Google Play Store. Ensure that you have a compatible device and a stable internet connection for a smooth downloading process.
- Open the app and create an account: Once the app is successfully installed, open it and follow the on-screen prompts to create a new DJI account. This account will enable you to access additional features and services offered by DJI.
- Connect your smartphone to the remote controller: Use the included USB cable to connect your smartphone to the DJI Mini 2 remote controller. Ensure that the connection is secure and stable.
- Power on the remote controller and drone: Press and hold the power button on the DJI Mini 2 remote controller and the drone simultaneously to power them on. Wait for a moment until they establish a stable connection.
- Launch the app and connect to the drone: Open the DJI Fly app on your smartphone and tap on the Connect button. The app will automatically detect the DJI Mini 2 drone and establish a connection.
- Update firmware if required: Before you start flying, it’s important to ensure that your DJI Mini 2 drone and remote controller have the latest firmware. Follow the on-screen prompts to update the firmware if required.
Once you’ve gone through these setup steps, you’ll have your DJI Mini 2 app ready to go. It’s essential to familiarize yourself with the app’s interface and navigation to make the most of its features. Take some time to explore the different settings, flight modes, and camera controls available to you.
Remember to check for app updates regularly to access the latest features and enhancements provided by DJI. Keeping your app up to date ensures a seamless and enjoyable flying experience with your DJI Mini 2 drone.
Understanding the DJI Mini 2 Remote Controller
The DJI Mini 2 remote controller is the primary interface for controlling your drone during flight. It offers a range of features and functions that allow you to navigate the skies with ease. Here’s a breakdown of the DJI Mini 2 remote controller and its key components:
- Power button: The power button is located at the top of the remote controller. Press and hold it to turn on or off the controller.
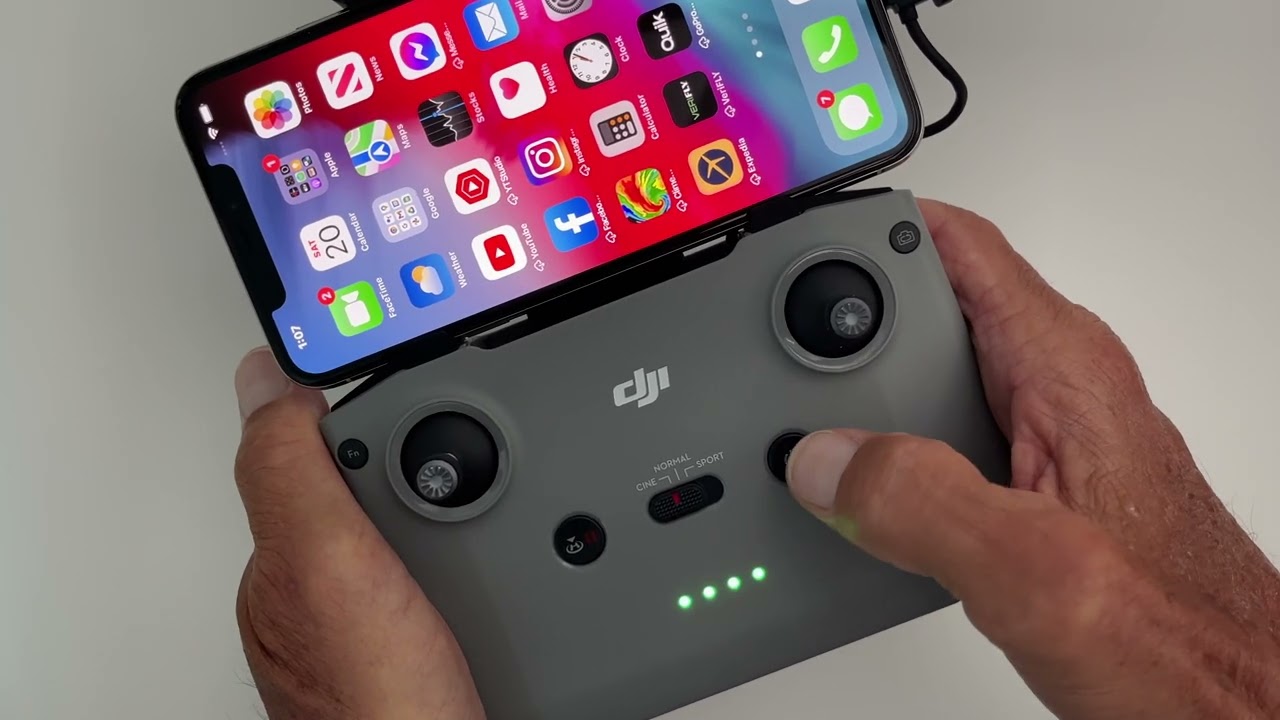
- Control sticks: The control sticks on the remote controller are used to maneuver the drone in different directions. The left stick controls the throttle and yaw, while the right stick controls the pitch and roll.
- Flight mode switch: Located on the side of the remote controller, the flight mode switch allows you to toggle between different flight modes, such as positioning, sport, or cinematic mode. Choose the appropriate mode based on your flying style and desired outcome.
- Camera controls: The remote controller features dedicated buttons for controlling the camera functions. These include the shutter button for capturing photos and the recording button for starting and stopping video recording.
- Intelligent flight controls: The remote controller also provides access to intelligent flight modes, such as QuickShots, which allow you to capture cinematic shots with pre-programmed flight patterns and movements.
- Status indicators: The remote controller is equipped with LED indicators that display the status of various functions, including GPS signal strength, battery level, and remote controller connectivity.
- Phone holder: The remote controller has an adjustable phone holder that securely holds your smartphone while flying. This allows you to view the live feed from the drone’s camera and access the DJI Mini 2 app for additional controls.
Understanding the DJI Mini 2 remote controller is essential for safe and effective flight operations. Familiarize yourself with the different buttons, switches, and indicators to ensure a seamless and enjoyable flying experience.
Always follow the manufacturer’s instructions and guidelines when using the remote controller. Regularly check for firmware updates to access the latest features and improvements provided by DJI. By mastering the remote controller, you’ll be able to unlock the full potential of your DJI Mini 2 drone and capture stunning aerial footage.
Calibrating the DJI Mini 2
Calibrating your DJI Mini 2 drone is an essential step to ensure accurate flight controls and optimal performance. By calibrating the drone, you can effectively eliminate any potential sensor errors or imbalances. Here’s a step-by-step guide to calibrate your DJI Mini 2:
- Select an open area: Find a flat and open space free from any obstacles. It’s preferable to perform the calibration outdoors to obtain a strong GPS signal.
- Power on the drone: Press and hold the power button on the drone until the indicators light up. Wait for the drone to establish a stable connection.
- Connect to the DJI Fly app: Launch the DJI Fly app on your smartphone and connect to the DJI Mini 2 drone using the app’s interface.
- Go to the settings: Once connected, access the drone’s settings within the app. Look for the “Calibrate” or “Settings” section specifically for calibration options.
- Choose the type of calibration: The DJI Mini 2 typically offers two types of calibration: the IMU calibration and the compass calibration.
- IMU calibration: The IMU (Inertial Measurement Unit) calibration ensures accurate sensor readings. Follow the on-screen instructions to perform the IMU calibration, which usually involves keeping the drone in a stable position while the calibration process takes place.
- Compass calibration: The compass calibration is crucial for accurate flight controls and GPS positioning. Follow the on-screen instructions to calibrate the compass by rotating the drone in a specific pattern.
- Complete the calibration: Once the calibration process is complete, the app will notify you. Ensure that you follow any additional instructions provided by the app to finalize the calibration.
It’s important to note that calibration procedures may vary slightly depending on the DJI Mini 2 firmware version and app updates. Always refer to the instructional materials provided by DJI for the most accurate and up-to-date calibration instructions.
By regularly calibrating your DJI Mini 2, you can maintain the accuracy and stability of its flight controls, ensuring a safe and enjoyable flying experience. Remember to calibrate whenever you notice any abnormal flight behavior or after any significant changes to the drone’s firmware or hardware components.
Navigating the DJI Mini 2 Flight Modes
The DJI Mini 2 drone offers a variety of flight modes that cater to different flying styles and capture unique aerial perspectives. Understanding and utilizing these flight modes can enhance your flying experience and enable you to capture stunning footage effortlessly. Here are some of the key flight modes available on the DJI Mini 2:
- Positioning mode: This is the standard flight mode and is suitable for most flying scenarios. The drone utilizes its GPS and visual positioning systems to maintain a stable hover and flight, allowing you to focus on controlling the camera.
- Sport mode: Engaging sport mode unlocks the drone’s full speed potential, enabling faster flight and more agile maneuvers. It’s recommended for capturing action shots or when you want to cover large areas quickly.
- Cinematic mode: Cinematic mode slows down the drone’s movements and controls, resulting in smoother and more cinematic footage. It’s perfect for capturing slow-motion shots or creating dramatic and smooth camera movements.
- QuickShots: QuickShots are pre-programmed flight patterns that allow you to capture complex shots with the touch of a button. These include Dronie, Circle, Helix, Rocket, and Boomerang modes. Each QuickShot provides a unique camera movement and perspective.
- Waypoint mode: Waypoint mode allows you to plan a specific flight path by setting waypoints on the map within the DJI Fly app. The drone will then autonomously fly along the designated route, capturing footage or photos along the way.
When navigating the flight modes, it’s important to familiarize yourself with their respective controls and limitations. Refer to the user manual or DJI’s official documentation for detailed instructions on how to activate and utilize each flight mode.
Experiment with different flight modes to unleash the creative potential of your DJI Mini 2. Whether you’re looking to capture breathtaking aerial landscapes, record thrilling action sequences, or produce cinematic footage, the variety of flight modes available on the DJI Mini 2 will help you achieve your vision with ease and precision.
Taking off and Landing with the DJI Mini 2
Taking off and landing safely are vital aspects of flying your DJI Mini 2. Proper techniques ensure a smooth flight experience and minimize the risk of damage to the drone. Here’s a step-by-step guide on how to take off and land your DJI Mini 2:
Taking Off:
- Choose a suitable location: Select an open area free from obstacles, people, and aircraft. Ensure the ground is level and free from any debris.
- Power on the drone: Press and hold the power button on the drone until the lights on the aircraft illuminate. Wait for the drone to initialize and establish a GPS lock.
- Calibrate the compass: If you haven’t calibrated the compass recently, follow the on-screen instructions in the DJI Fly app to calibrate it before taking off.
- Observe the surroundings: Look for any potential hazards, such as nearby trees, power lines, or buildings. Ensure there is sufficient space for takeoff and a clear flight path.
- Arm the motors: To arm the motors, simultaneously push the control sticks diagonally inward toward the center of the remote controller. The drone’s motors will start spinning at a low speed.
- Take off: Slowly push the throttle stick upward to increase the drone’s altitude. Gradually increase the throttle until the drone reaches a safe flying height.
Landing:
- Select a landing area: Look for a safe and clear area to land the drone. Ensure there are no obstacles or people that may interfere with the landing process.
- Reduce altitude: Gradually decrease the altitude by pulling the throttle stick downward. Slowly descend until the drone is close to the ground.
- Find a suitable landing spot: Aim for a flat surface free from uneven terrain or any potential hazards. Choose a spot where the drone can safely touch down.
- Slowly land the drone: Carefully reduce the throttle until the drone lands gently on the ground. Avoid descending too quickly, as it may result in a hard landing and potential damage to the drone.
- Power off the drone: Once the drone is safely on the ground, press and hold the power button until the lights turn off to power off the drone.
Remember, it’s essential to follow local regulations and guidelines while flying your DJI Mini 2. Always maintain visual line of sight with the drone, be mindful of your surroundings, and exercise caution to ensure a safe flying experience.
By mastering the techniques of taking off and landing, you’ll be able to enjoy the full capabilities of your DJI Mini 2 and capture stunning aerial footage with confidence.
Controlling the DJI Mini 2 in the Air
Once your DJI Mini 2 is airborne, it’s important to have a good understanding of how to control it effectively and safely. Mastering the controls will allow you to navigate through the sky and capture breathtaking aerial footage with precision. Here are some key tips for controlling the DJI Mini 2 in the air:
- Altitude control: Use the throttle control on the remote controller to adjust the altitude of the drone. Push the throttle stick up to ascend and pull it down to descend. Make small and gradual adjustments to maintain a smooth flight.
- Directional control: The control sticks on the remote controller enable you to control the drone’s movement in different directions. The left stick controls the rotation (yaw) of the drone, while the right stick controls the forward/backward movement (pitch) and left/right movement (roll).
- Flight speed: The DJI Mini 2 offers different speed modes based on your flying preferences. Experiment with the different speed settings and select the one that suits your needs and the shooting conditions. It’s recommended to start with a lower speed when you’re still getting familiar with the controls.
- Smooth movements: To achieve cinematic and professional-looking footage, aim for smooth and steady movements with the drone. Try to make gentle and gradual adjustments to the flight controls to avoid jerky or abrupt movements.
- GPS modes: The DJI Mini 2 utilizes GPS technology for precise positioning and stability. When in GPS modes, the drone will automatically maintain its position and resist external forces. This feature allows you to focus more on capturing the perfect shot.
- Obstacle avoidance: While the DJI Mini 2 does not have obstacle avoidance sensors like higher-end models, it’s crucial to remain vigilant and avoid any potential obstacles. Keep a close eye on the drone’s surroundings and maintain a safe distance from any objects.
- Practice and familiarize: The key to becoming a skilled pilot is practice and familiarity with the drone’s controls. Spend time honing your skills in open areas away from obstacles until you feel comfortable and confident in controlling the DJI Mini 2.
Remember to always follow local laws and regulations regarding drone flights in your area. Be mindful of your surroundings, fly responsibly, and prioritize the safety of others.
By mastering the art of controlling the DJI Mini 2, you’ll be able to unleash its full potential and capture stunning aerial footage that will truly wow your audience.
Capturing Photos and Videos with the DJI Mini 2
The DJI Mini 2 is equipped with a high-quality camera that allows you to capture stunning photos and videos from a unique aerial perspective. Here are some tips and techniques for capturing the best shots with your DJI Mini 2:
- Explore different camera modes: The DJI Mini 2 offers various camera modes, including Single Shot, Burst Mode, AEB (Auto Exposure Bracketing), and Timed Shot. Familiarize yourself with these modes and experiment with them to capture different types of shots.
- Compose your shots: Before taking a photo or recording a video, consider the composition of your shot. Look for interesting subjects, leading lines, and balanced framing to create visually appealing images.
- Use the rule of thirds: Implement the rule of thirds by dividing your frame into a 3×3 grid and placing your subject along the lines or at the intersecting points. This technique adds visual interest and balance to your photos.
- Utilize manual camera settings: The DJI Mini 2 allows you to manually adjust camera settings such as ISO, shutter speed, and white balance. Experiment with these settings to achieve your desired exposure and creative effects.
- Utilize intelligent flight modes: The DJI Mini 2 offers intelligent flight modes that can assist you in capturing dynamic shots. QuickShots, for example, enables the drone to automatically execute predefined flight patterns while capturing stunning aerial footage.
- Consider lighting conditions: Pay attention to the lighting conditions when capturing photos and videos. Golden hour (sunrise and sunset) often provides soft and warm light, while midday sunlight can be harsh. Adjust your camera settings accordingly or use ND filters to control exposure.
- Experiment with different angles: Take advantage of the DJI Mini 2’s maneuverability to capture shots from unique perspectives. Try low angles, high angles, and aerial perspectives to add depth and interest to your photos and videos.
- Stabilize your footage: The DJI Mini 2 features built-in stabilization that helps reduce camera shake. However, for smoother footage, consider using a gimbal or post-processing stabilization software.
- Review and edit your footage: After your flight, take the time to review and select the best shots. Use editing software to enhance your images and videos, adjusting elements such as brightness, contrast, saturation, and sharpness to achieve the desired look.
Remember, practice makes perfect. Experiment with different techniques and settings to find your unique style and create captivating visuals with your DJI Mini 2.
Lastly, always fly responsibly, respect privacy regulations, and consider safety guidelines while operating your drone.
Using Intelligent Flight Modes with the DJI Mini 2
The DJI Mini 2 comes equipped with intelligent flight modes that enhance your aerial photography and videography capabilities. These modes automate flight patterns and movements, allowing you to capture stunning shots with ease. Here are some of the intelligent flight modes available with the DJI Mini 2:
- QuickShots: QuickShots are pre-programmed flight modes that enable you to capture professional-grade shots with minimal effort. Choose from a variety of QuickShots, such as Dronie, Circle, Helix, Rocket, and Boomerang, each providing a unique flight pattern and shot composition.
- Orbit: The Orbit mode enables the drone to automatically circle around a selected subject, capturing a cinematic aerial perspective. You can adjust the radius and speed of the orbit to create different visual effects.
- Waypoints: Waypoints mode allows you to plan a specific flight path for the drone by setting waypoints on a map within the DJI Fly app. The drone will automatically fly along the designated route, capturing footage and photos at each waypoint.
- Asteroid: The Asteroid mode combines QuickShots and panorama shots to create a unique visual effect. The drone flies upward and backward, capturing a spherical image of the surroundings and then automatically generates a dynamic video with a pullback effect.
- Point of Interest: In Point of Interest mode, the drone continuously circles around a selected subject or point of interest. You can control the radius, speed, and flight direction, allowing for creative and dramatic shots.
To activate these intelligent flight modes, ensure that you have a stable GPS signal, open space, and a clear view of the surroundings. Access the intelligent flight modes through the DJI Fly app and follow the on-screen instructions to set up and execute the desired shots.
Intelligent flight modes not only provide convenience but also offer the opportunity to capture unique and stunning footage that would otherwise be challenging to achieve manually. Experiment with different modes, combine them with manual camera settings, and unleash your creativity to capture captivating shots with your DJI Mini 2.
Remember to always fly responsibly, respect privacy regulations, and maintain awareness of your surroundings while using intelligent flight modes.
Storing and Transporting the DJI Mini 2
Properly storing and transporting your DJI Mini 2 drone is essential for its longevity and protection. Here are some tips to ensure the safe storage and transportation of your DJI Mini 2:
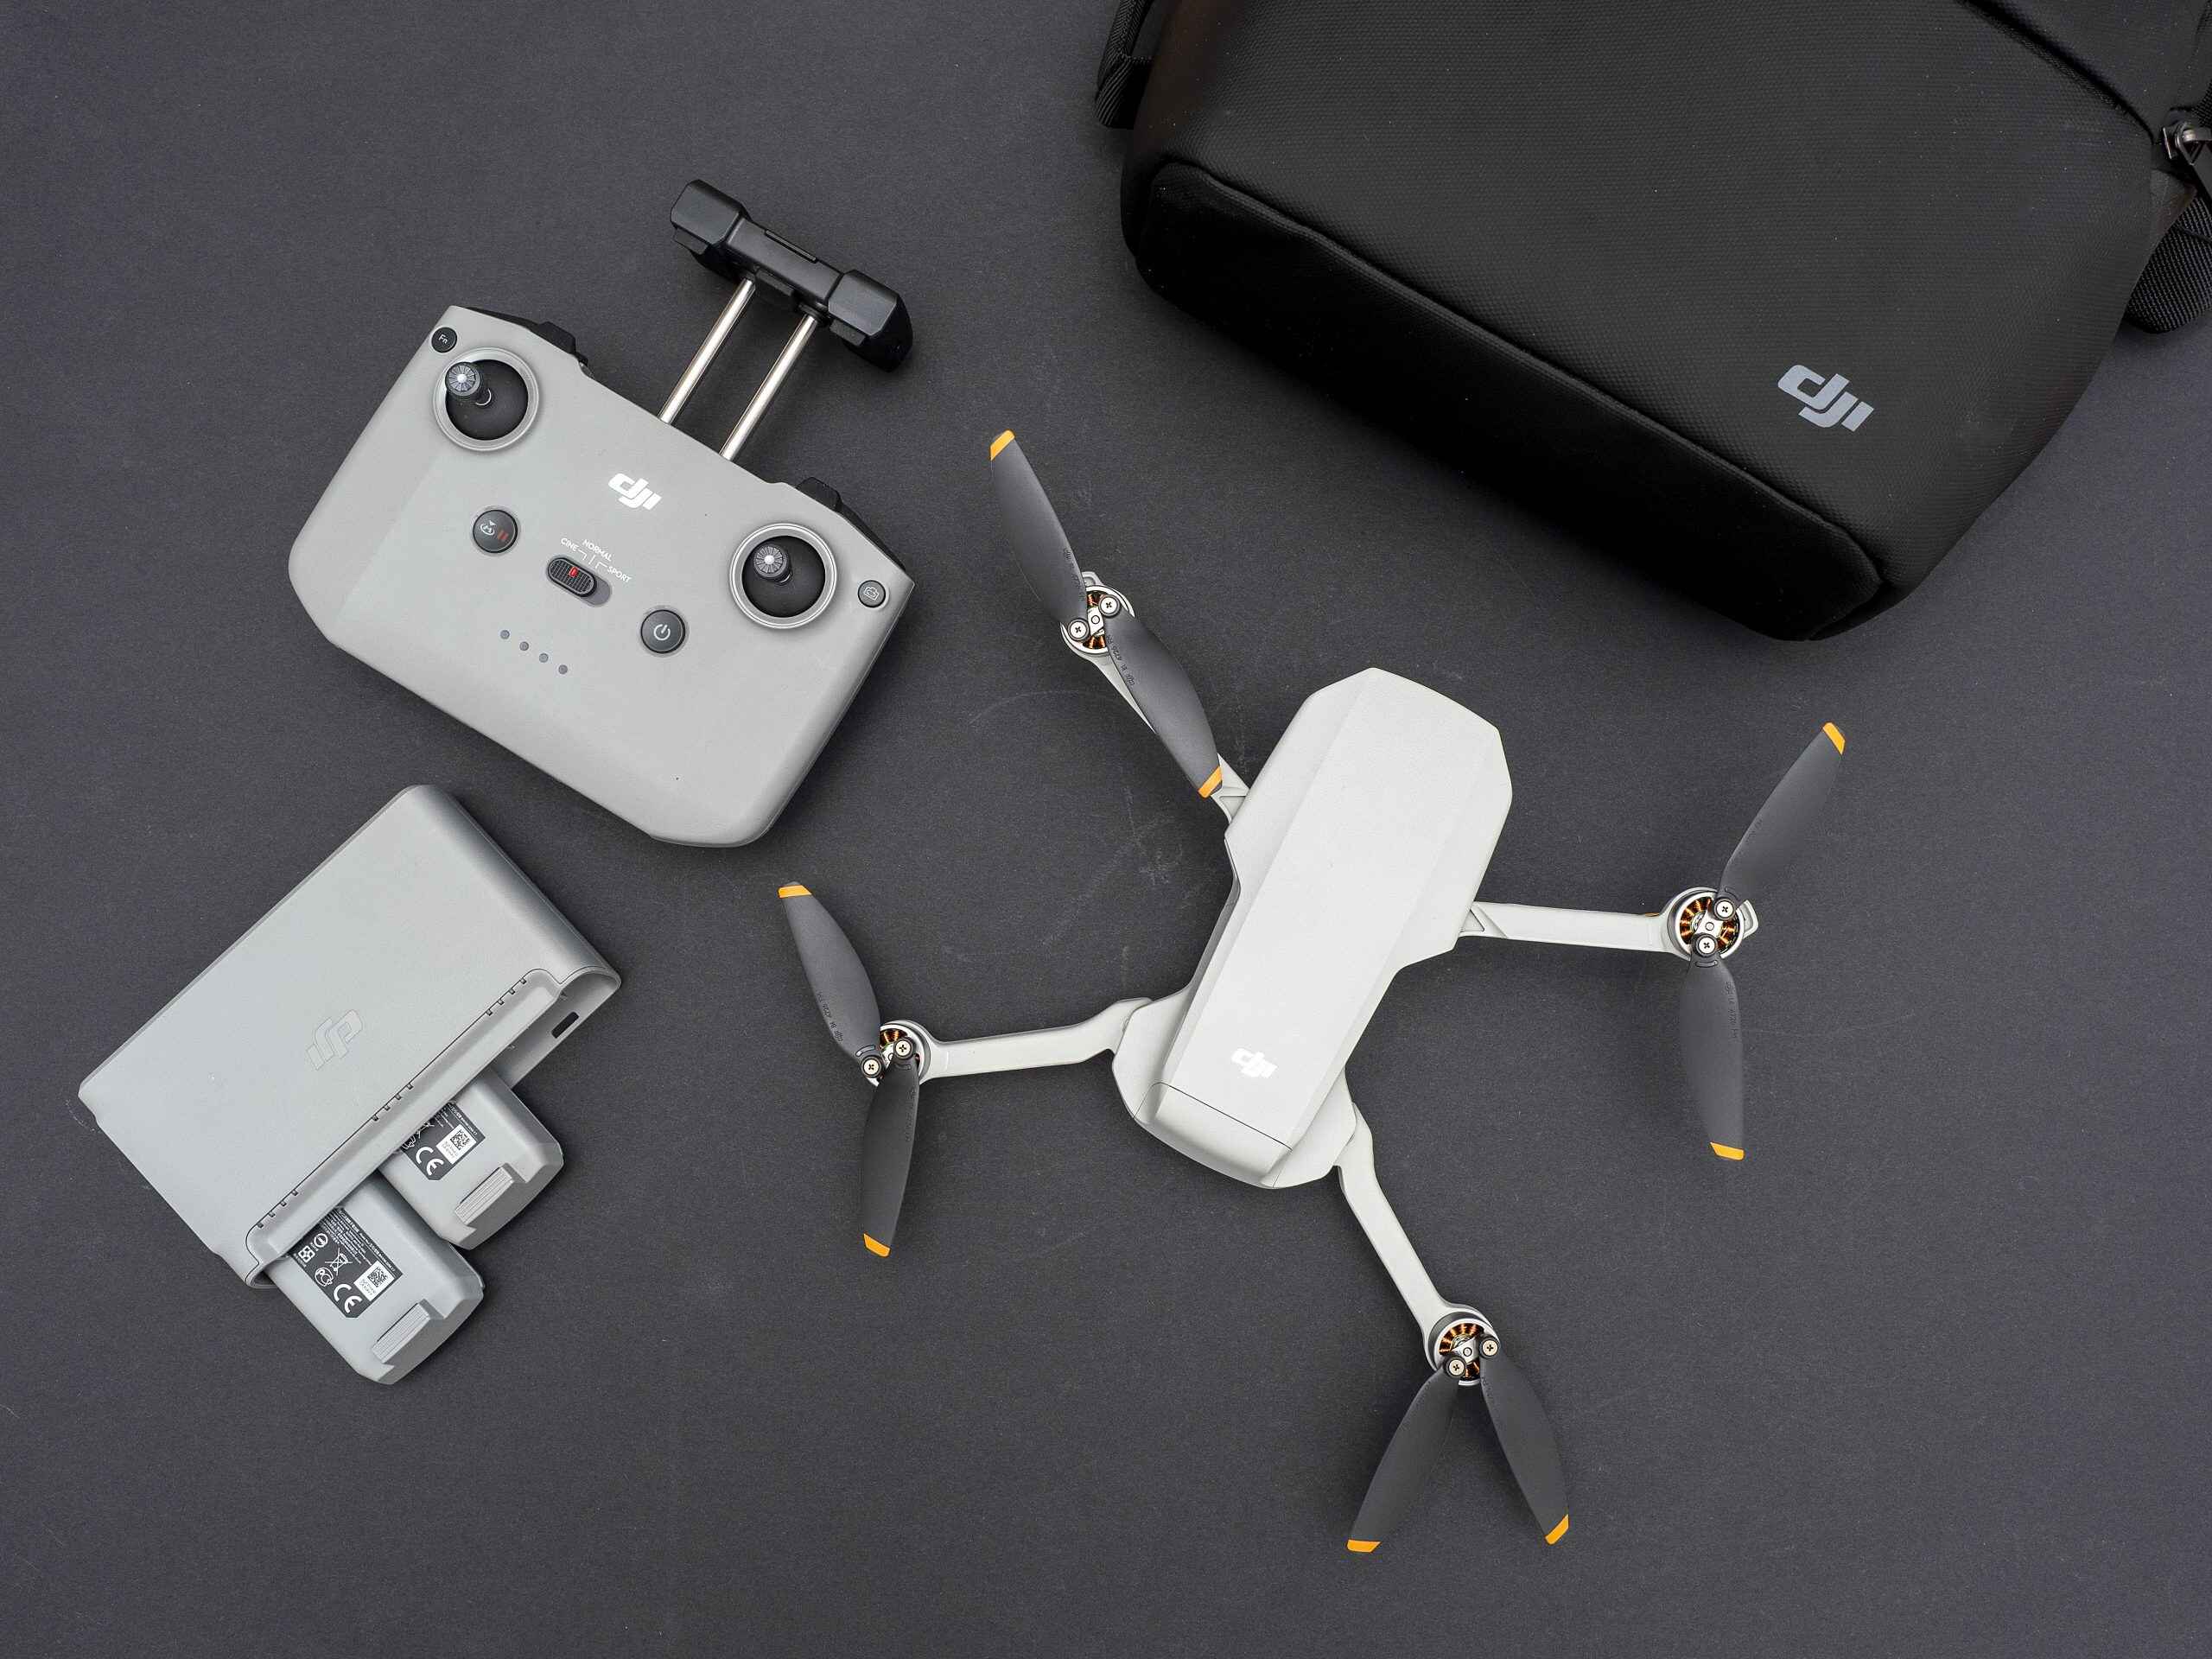
- Invest in a carrying case: Consider purchasing a dedicated carrying case or backpack specifically designed for the DJI Mini 2. These cases provide the necessary protection and compartments to securely store your drone, controller, batteries, and accessories.
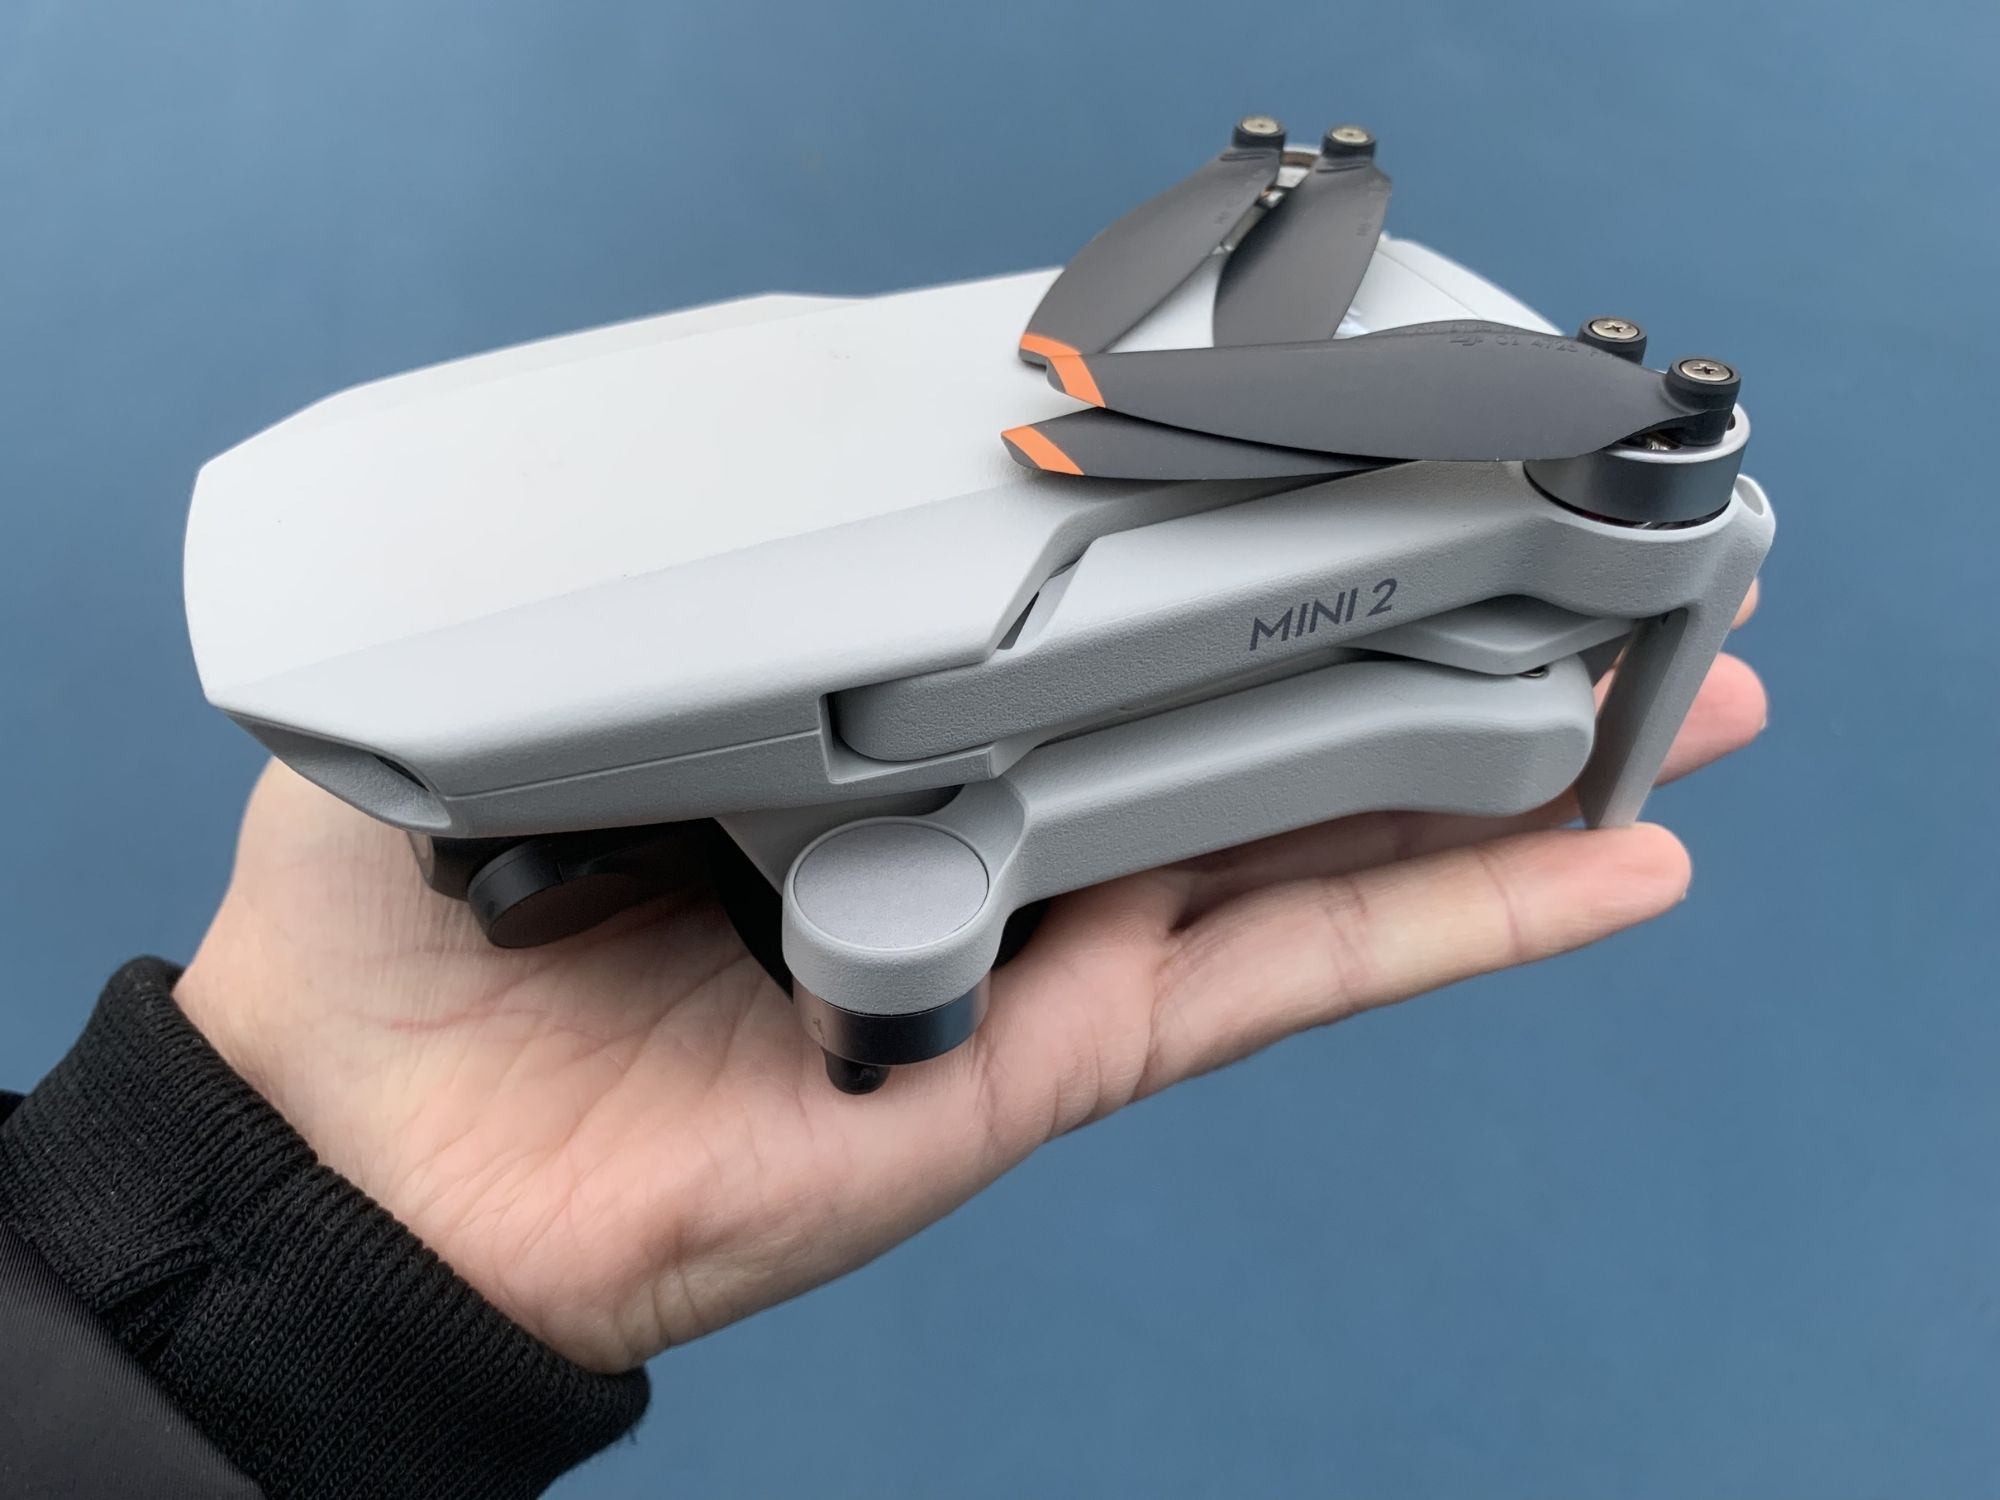
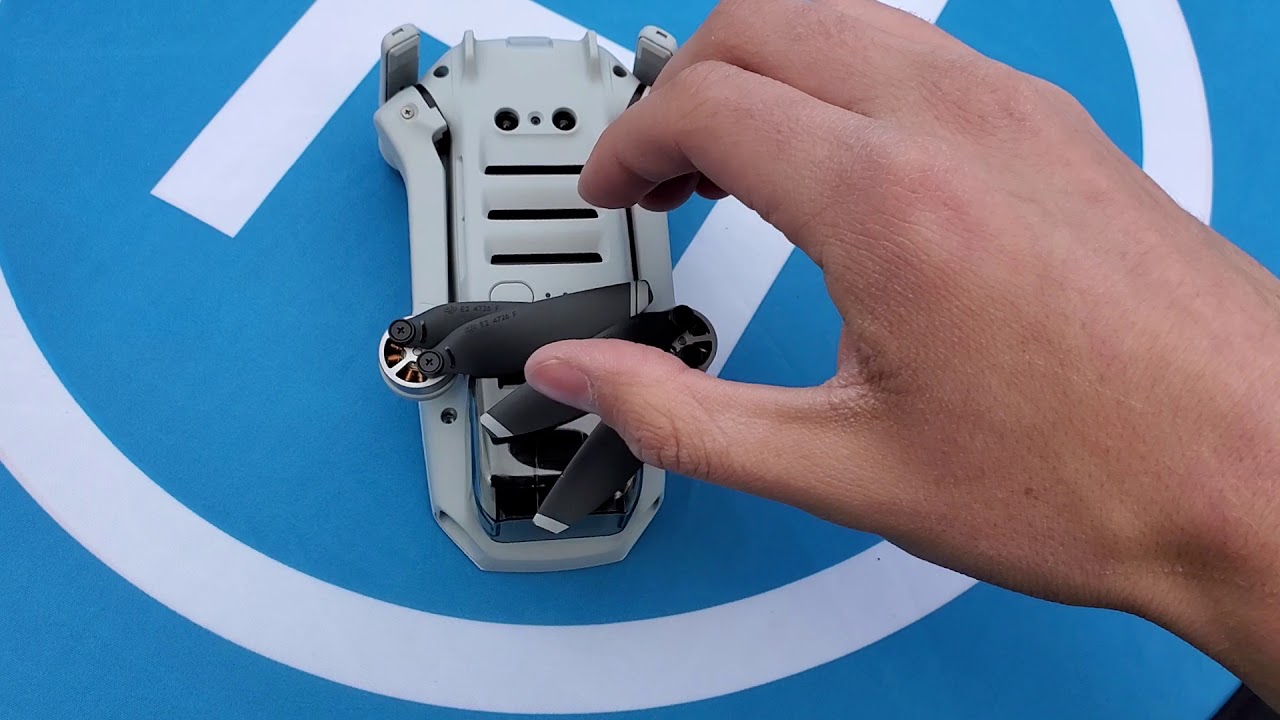
- Secure the propellers: Before storing or transporting the drone, ensure that the propellers are securely fastened. This prevents any damage to the propellers and the drone during movement.
- Remove the battery: If you’re storing the DJI Mini 2 for an extended period or transporting it without a dedicated case, it’s recommended to remove the battery. This ensures safety and prevents any accidental power-on or discharge of the battery.
- Protect the gimbal: The gimbal is a sensitive and critical component of the DJI Mini 2. It’s advisable to use a gimbal lock or protector to keep it secure during storage and transportation. This helps prevent any damage to the gimbal and ensures its stability.
- Keep it in a dry and cool place: Store your DJI Mini 2 in a dry and cool environment, away from direct sunlight and extreme temperatures. This helps maintain the integrity of the drone and its components, preventing any potential damage or malfunctions.
- Ensure firmware updates: It’s recommended to regularly check for firmware updates for your DJI Mini 2. These updates often introduce improvements and bug fixes, ensuring the optimal performance and compatibility of your drone.
- Follow airline regulations: If you’re traveling by air, make sure to familiarize yourself with the airline regulations regarding drone transportation. Most airlines require drones to be carried in your carry-on luggage and may have specific rules regarding battery storage and transportation.
By following these storage and transportation tips, you can protect your DJI Mini 2 and prolong its lifespan, ensuring that it’s always ready for your next flight adventure. Remember to handle the drone and its components with care to prevent any accidental damage or mishaps.
Lastly, it’s essential to familiarize yourself with local regulations and guidelines regarding the use of drones, especially when traveling to different areas, to ensure compliance and responsible drone ownership.
Troubleshooting Common Issues with the DJI Mini 2
While the DJI Mini 2 is an excellent drone, it’s not uncommon to experience minor issues or challenges during operation. Here are some common issues that users may encounter with the DJI Mini 2 and potential troubleshooting steps:
- Weak or unstable connection: If you’re experiencing a weak or unstable connection between the remote controller and the drone, try the following:
- Ensure that the remote controller and drone are within the specified range for connection.
- Check for any interference from nearby objects or sources of electromagnetic signals, such as Wi-Fi routers or power lines.
- Try recalibrating the remote controller and the drone.
- Update the firmware for both the remote controller and drone.
- Inaccurate GPS positioning: If the drone’s GPS positioning is inaccurate or unstable, consider the following steps:
- Ensure that you’re flying the drone in an open area with a clear view of the sky to establish a strong GPS signal.
- Perform a compass calibration to ensure accurate orientation and positioning.
- Check for any nearby sources of interference, such as metal structures or electromagnetic devices, that may impact the GPS signal.
- Update the firmware for both the remote controller and drone.
- Poor battery performance: If you’re experiencing shorter flight times or inconsistent battery performance, consider these troubleshooting steps:
- Ensure that the batteries are fully charged before each flight and that you’re using them within their recommended temperature range.
- Check for any firmware updates for the batteries and apply them if available.
- Avoid flying in extreme weather conditions, as it can negatively impact battery performance.
- Inspect the battery contacts and make sure they are clean and free from debris or damage.
- Unstable video footage: If you’re experiencing shaky or unstable video footage, try the following troubleshooting steps:
- Make sure to update the firmware for both the drone and the camera to ensure optimal performance and stability.
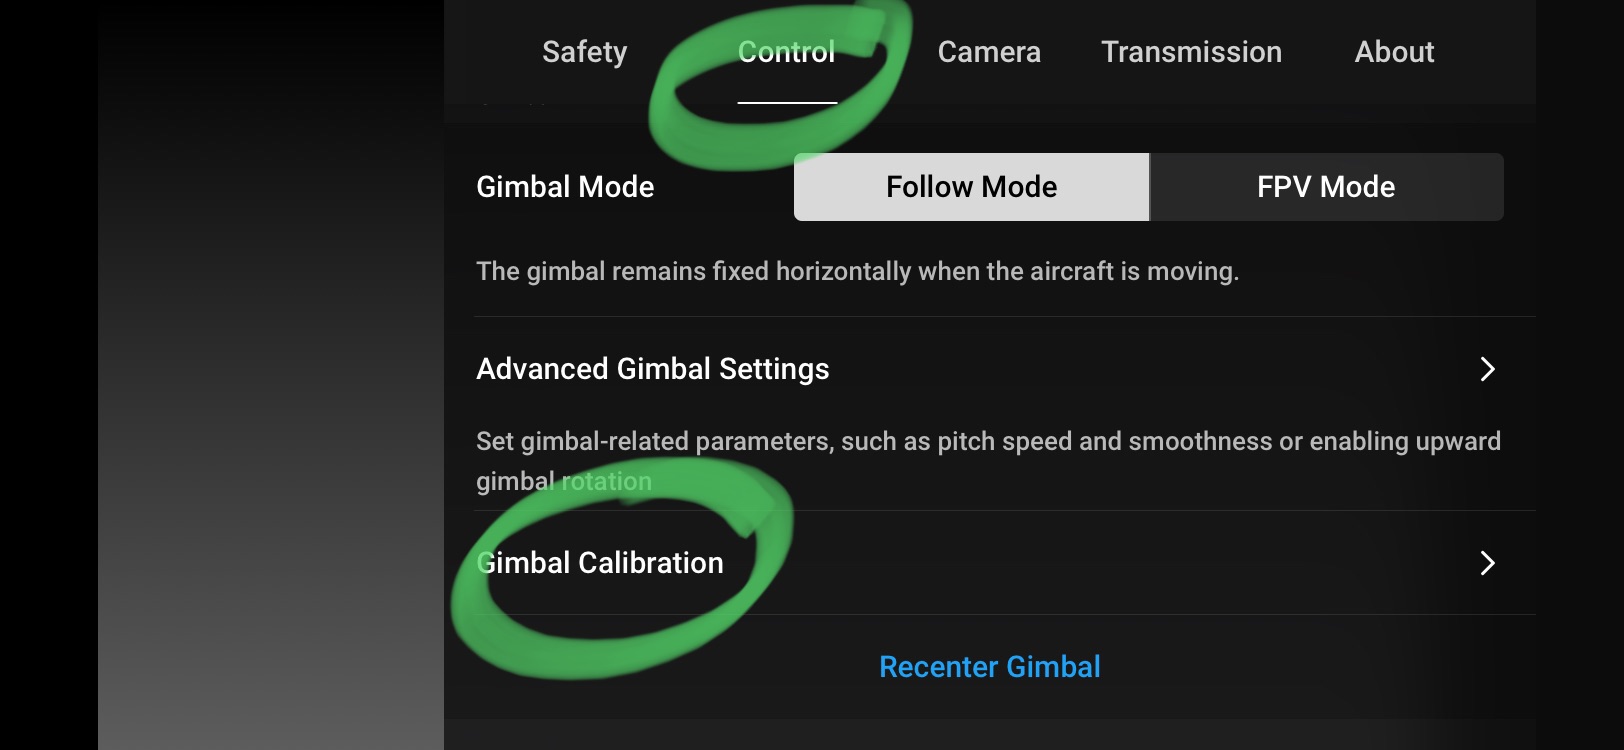
- Check if the gimbal is properly balanced and calibrated. Adjust the gimbal if necessary.
- Avoid flying in windy conditions, as it can cause instability in the footage.
- Consider using post-processing stabilization software to smooth out any remaining camera movements.
If you encounter any persistent issues or problems with your DJI Mini 2 that cannot be resolved through troubleshooting, it’s recommended to reach out to DJI’s customer support for further assistance. They have comprehensive knowledge and resources to help you address any technical issues or concerns.
Remember to always refer to the user manual and follow the recommended guidelines provided by DJI when troubleshooting and operating your DJI Mini 2 drone.
Tips and Tricks for Maximizing Your DJI Mini 2 Experience
The DJI Mini 2 is a powerful and versatile drone that can provide endless opportunities for creative aerial photography and videography. Here are some tips and tricks to help you make the most out of your DJI Mini 2 experience:
- Plan your flights: Before heading out to fly, it’s helpful to plan your flights in advance. Research the location, check for any flight restrictions or regulations, and identify areas of interest to capture captivating footage.
- Learn and practice manual controls: While the intelligent flight modes are convenient, mastering manual controls gives you more flexibility and creative freedom. Practice flying and controlling the drone manually to enhance your piloting skills.
- Experiment with different camera settings: The DJI Mini 2’s camera allows for manual adjustments of settings such as ISO, shutter speed, and white balance. Experiment with different settings to achieve different moods and effects in your photos and videos.
- Utilize the DJI Fly app features: The DJI Fly app offers a range of features that can enhance your flying experience. Take advantage of features such as QuickTransfer to streamline the process of transferring photos and videos to your mobile device.
- Consider ND filters: Neutral Density (ND) filters are useful accessories that help control the amount of light entering the camera. They allow you to capture well-exposed footage in bright conditions and achieve smoother motion blur effects.
- Shoot during golden hour: The period shortly after sunrise or before sunset, known as the golden hour, offers soft and warm lighting for stunning aerial photography and videography. Take advantage of this time of day to capture breathtaking shots.
- Plan for battery management: The DJI Mini 2 comes with multiple batteries, allowing for extended flight time. Plan your flights and battery usage accordingly, keeping track of each battery’s charge level and swapping them out when needed.
- Edit your footage: After capturing your aerial shots, take the time to edit and enhance your footage. Use video editing software to trim clips, add music, apply color grading, and create a captivating final product.
- Join online communities: Connect with other DJI Mini 2 enthusiasts by joining online communities, forums, and social media groups. Share your experiences, learn from others, and gain inspiration from their creative work.
- Always prioritize safety: Safety should be your top priority when flying the DJI Mini 2. Follow local regulations, fly in open areas, maintain line of sight with the drone, and be aware of your surroundings to avoid accidents or incidents.
By incorporating these tips and tricks into your DJI Mini 2 flights, you can elevate your aerial photography and videography skills, capture stunning footage, and unlock the full potential of your drone.
Remember to always fly responsibly, respect privacy regulations, and adhere to the guidelines set forth by DJI to ensure a safe and enjoyable experience with your DJI Mini 2.