Introduction
Welcome to this guide on how to move the camera on your DJI Mini 2. The DJI Mini 2 is a compact and lightweight drone that offers incredible features and capabilities. One of the key features of this drone is its camera system, which allows you to capture stunning aerial shots and videos. In this guide, we will walk you through the steps to effectively move the camera and utilize its various functions.
Whether you are a beginner or an experienced drone enthusiast, understanding how to control and maneuver the camera on the DJI Mini 2 is essential for capturing the perfect shot. By mastering the camera controls, you can unleash your creativity and capture breathtaking footage from unique perspectives.
Before we dive into the details, it’s important to note that the DJI Mini 2 firmware should be up to date. Updating the firmware ensures that you have access to the latest features and fixes any potential issues. Additionally, you will need to connect the remote controller to your mobile device and launch the DJI Fly App to have full control over the camera settings and functions.
In this guide, we will cover everything from basic camera movements to advanced features like gesture control and ActiveTrack. Along the way, we will provide troubleshooting tips to help you overcome any potential challenges you may encounter.
So, without further ado, let’s dive into the world of DJI Mini 2 and explore how to effectively move the camera to capture stunning aerial shots!
Updating Firmware
Before you start using your DJI Mini 2 and moving the camera, it’s essential to ensure that the firmware is up to date. Firmware updates often come with performance improvements, new features, bug fixes, and enhanced stability. To update the firmware, follow these steps:
- Make sure your DJI Mini 2 is fully charged and turned on.
- Connect your mobile device to the remote controller using the appropriate cable.
- Launch the DJI Fly App on your mobile device.
- If an update is available, you will see a notification on the screen. Tap on it to start the update process.
- Ensure that your mobile device has a stable internet connection. The update might take some time depending on your internet speed.
- Follow the on-screen instructions to complete the firmware update. Do not power off the DJI Mini 2 or disconnect your mobile device during the update.
- Once the update is complete, you can verify the firmware version in the DJI Fly App’s settings.
By keeping your DJI Mini 2 firmware up to date, you can take advantage of the latest features that enhance your drone flying and camera capabilities. It’s recommended to periodically check for firmware updates to ensure optimal performance.
In rare cases, firmware updates may encounter issues or fail due to technical glitches. If you face any problems during the update process, refer to the DJI Mini 2 user manual or contact DJI customer support for assistance.
Connecting the Remote Controller
Connecting the remote controller is an essential step before you can control the camera on your DJI Mini 2. The remote controller allows you to have a seamless and responsive connection between your drone and your mobile device. Here’s how you can connect the remote controller:
- Ensure that your DJI Mini 2 is powered off.
- Unfold the antennas on the remote controller, and make sure they are in an upright position.
- Connect your mobile device to the remote controller using the appropriate cable.
- Power on the DJI Mini 2 by pressing and holding the power button for three seconds.
- Open the DJI Fly App on your mobile device.
- The app will automatically detect the connected remote controller. Tap on the “Connect” button to establish a connection.
- Follow the on-screen instructions to complete the connection process.
- Once the connection is established, you will see live video feed from the DJI Mini 2 on your mobile device’s screen.
It’s important to ensure a secure and stable connection between the remote controller and the mobile device. Make sure the cables are properly connected, and there are no obstructions that can interfere with the signal. Always keep the remote controller in close proximity to your mobile device for the best connection.
If you encounter any connectivity issues, try restarting both the remote controller and your mobile device. Additionally, ensure that the DJI Mini 2 and the remote controller have sufficient battery power to maintain a stable connection.
Once the remote controller is successfully connected, you are ready to take control of the DJI Mini 2’s camera and explore its various features and functions.
Launching the DJI Fly App
The DJI Fly App is an essential tool for controlling and configuring the camera settings on your DJI Mini 2. By launching the app on your mobile device, you can have full control over the camera’s functions and access various intelligent flight modes. To launch the DJI Fly App, follow these steps:
- Ensure that your mobile device is connected to the remote controller.
- Power on your DJI Mini 2.
- Locate the DJI Fly App icon on your mobile device’s home screen or app drawer.
- Tap on the DJI Fly App icon to launch it.
- If prompted, grant any necessary permissions, such as access to your device’s location, storage, or camera.
- The app will automatically detect the connected DJI Mini 2 and establish a connection.
- Once the connection is established, you will see the live video feed from the drone’s camera on your mobile device’s screen.
Ensure that you have a stable internet connection on your mobile device to ensure smooth app performance and access to online features. It’s also recommended to regularly check for updates to the DJI Fly App and install them to benefit from bug fixes and new features.
The DJI Fly App provides a user-friendly interface that allows you to access and control various camera settings. You can adjust camera settings like resolution, white balance, exposure, and photo mode directly through the app’s intuitive interface. Exploring the different options within the app will enable you to take full advantage of the DJI Mini 2’s camera capabilities.
With the DJI Fly App launched and connected to your DJI Mini 2, you are ready to explore the camera modes and functionalities to capture stunning aerial shots and videos.
Understanding Camera Modes
The DJI Mini 2 offers a range of camera modes that allow you to capture various types of shots and videos. Understanding these camera modes will help you make the most of your DJI Mini 2’s capabilities. Let’s explore some of the key camera modes:
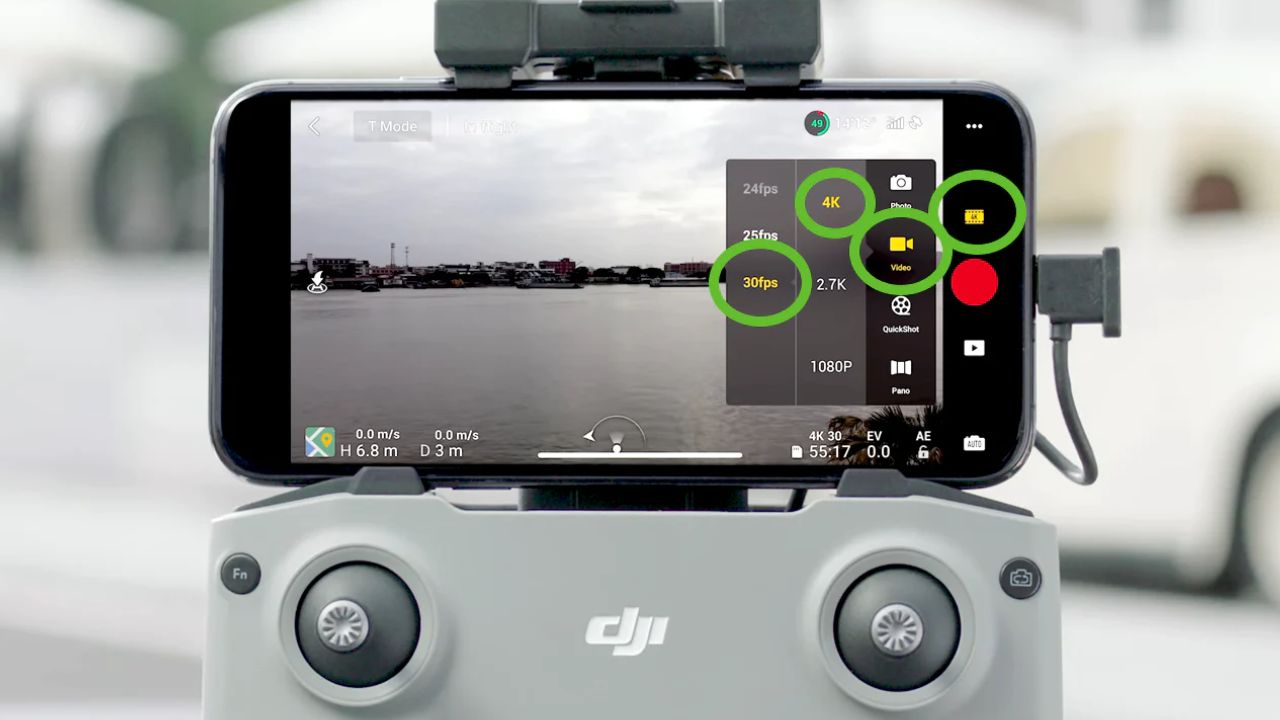
- Photo Mode: In this mode, you can capture high-quality photos using your DJI Mini 2. You can adjust settings like resolution, aspect ratio, and exposure to get the desired results.
- Video Mode: Video mode allows you to shoot smooth and cinematic videos with the DJI Mini 2. You can choose different resolutions, frame rates, and video formats to suit your needs.
- Intelligent Flight Modes: The DJI Mini 2 offers intelligent flight modes that can assist you in capturing unique and dynamic shots. These modes include QuickShot, Dronie, Circle, Helix, and Rocket. These modes automate the flight path and camera movement to create stunning visual effects.
- Manual Mode: Manual mode gives you full control over camera settings like shutter speed, ISO, and aperture. This mode is perfect for advanced users who want precise control over their shots and are familiar with manual camera settings.
- ActiveTrack: ActiveTrack is an intelligent tracking feature that allows the DJI Mini 2 to automatically track a subject. It uses advanced algorithms to keep the subject in the frame while you fly the drone, allowing you to concentrate on capturing the perfect shot.
- Time-Lapse: Time-lapse mode enables you to capture a sequence of photos at set intervals and combine them to create a time-lapse video. This mode is perfect for capturing stunning visuals of landscapes, sunsets, or busy streets.
It’s essential to familiarize yourself with these camera modes and understand their capabilities. Experimenting with different modes will help you unleash your creativity and capture unique and captivating shots.
Keep in mind that some camera modes may require additional setup or configuration. Refer to the user manual or online resources provided by DJI to understand the specific settings and techniques for each mode.
By understanding the various camera modes, you can elevate your aerial photography and videography skills with the DJI Mini 2.
Mastering the Joysticks
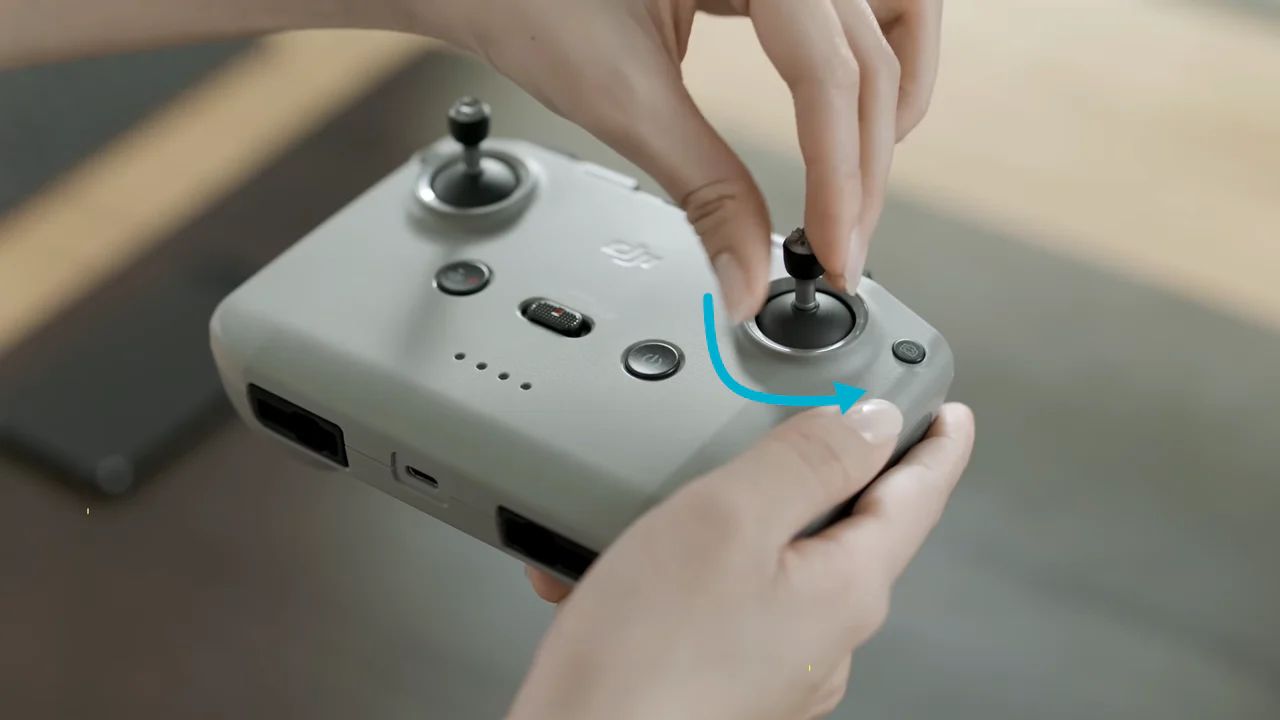
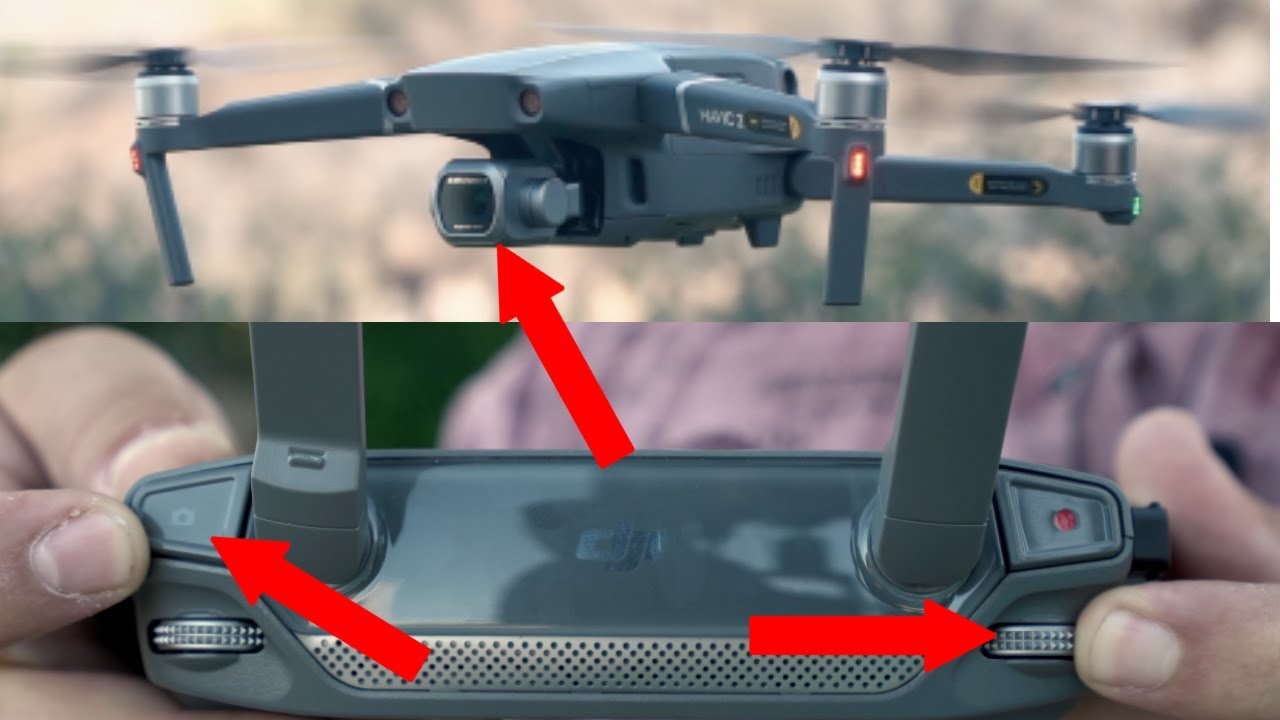
Mastering the joysticks is crucial for effectively controlling the movement of your DJI Mini 2’s camera. The remote controller is equipped with two joysticks that allow you to adjust the camera’s pan and tilt. Here’s how you can effectively use the joysticks:
1. Left Joystick (Vertical Movement):
- Pushing the left joystick up or down will control the vertical movement or tilting of the camera.
- Pushing the joystick up will tilt the camera upwards, while pushing it down will tilt the camera downwards.
- Controlling the vertical movement of the camera helps you capture shots from different angles and perspectives.
2. Right Joystick (Horizontal Movement):
- Moving the right joystick left or right will control the horizontal movement or panning of the camera.
- Moving the joystick to the left will pan the camera towards the left, while moving it to the right will pan the camera towards the right.
- Controlling the horizontal movement of the camera allows you to capture wide-angle shots and follow subjects smoothly.
It’s important to practice and develop a steady hand when using the joysticks. Smooth and gentle movements of the joysticks will result in smoother camera movements and better footage. Try to avoid rapid and jerky movements, as they can affect the stability of the footage.
In addition to the joysticks, the remote controller may have customizable buttons that can be mapped to specific camera functions. Familiarize yourself with these buttons and assign them according to your preferences to quickly access frequently used camera settings.
Remember, practice makes perfect! Spend some time getting used to the joysticks’ sensitivity and responsiveness. Experiment with different combinations of camera movements to understand their impact on your shots. With practice, you will be able to smoothly and confidently maneuver the camera with precision.
By mastering the joysticks, you can take full control of the camera movement and capture the perfect shots and videos with your DJI Mini 2.
Adjusting Gimbal Pitch
Adjusting the gimbal pitch is another important aspect of controlling the camera on your DJI Mini 2. The gimbal pitch refers to the angle at which the camera is tilted. By adjusting the gimbal pitch, you can frame your shot and capture the desired angle. Here’s how you can effectively adjust the gimbal pitch:
1. Using the Joysticks:
- As mentioned earlier, you can use the left joystick on the remote controller to adjust the gimbal pitch. Pushing the joystick up or down will tilt the camera upwards or downwards, respectively.
- Experiment with different angles to find the perfect composition for your shot. Tilt the camera upwards to capture expansive landscapes or downwards to focus on specific subjects.
2. Using the DJI Fly App:
- The DJI Fly App provides an intuitive interface that allows you to adjust the gimbal pitch with precision.
- Launch the DJI Fly App on your mobile device and connect it to your DJI Mini 2.
- Navigate to the camera settings within the app.
- Look for the gimbal pitch control option and use the on-screen controls or sliders to adjust the angle.
- Some advanced features, like ActiveTrack, also provide options to automatically adjust the gimbal pitch based on the subject being tracked.
When adjusting the gimbal pitch, it’s important to do so smoothly and gradually. Sudden or jerky movements can impact the stability of the footage and result in shaky videos. Practice precise and controlled movements to achieve the desired angle and capture steady shots.
Remember to consider the composition and framing of your shot when adjusting the gimbal pitch. Experiment with different angles and perspectives to add depth and creativity to your aerial photography.
By mastering the adjustment of the gimbal pitch, you can capture stunning and well-framed shots with your DJI Mini 2.
Using Gesture Control
Gesture control is an exciting feature available on the DJI Mini 2 that allows you to control the camera using simple hand gestures. This hands-free control feature makes it convenient to capture photos and videos without needing to use the remote controller. Here’s how you can use gesture control:
1. Activating Gesture Control:
- Ensure that the DJI Mini 2 is powered on and has a stable GPS connection.
- Launch the DJI Fly App on your mobile device and connect it to your DJI Mini 2.
- From the app’s home screen, navigate to the camera settings or gesture control options.
- Follow the on-screen instructions to activate gesture control mode.
2. Gesture Control Gestures:
- Once gesture control mode is activated, stand in front of the DJI Mini 2 and make sure it recognizes your face.
- Raise your arm and wave at the camera in a clear and visible manner.
- The DJI Mini 2 will recognize the gesture and enter gesture control mode.
- You can now control the camera by making specific hand gestures:
- Raising and lowering your palm in front of the camera adjusts the altitude of the drone.
- Making a framing gesture with your fingers (forming a rectangle) captures a photo.
- Making a larger framing gesture records a video.
- Moving your hand from side to side pans the camera left or right.
Gesture control offers a convenient and intuitive way to control the camera without needing external devices. It allows you to be in the frame while capturing photos and videos or capture shots from unique perspectives without holding the remote controller.
Keep in mind that gesture control has certain limitations. It may not be suitable in situations with poor lighting or when there are obstacles between you and the drone. It’s always recommended to have a backup remote controller or mobile device to ensure full control over the DJI Mini 2.
By utilizing gesture control, you can take stunning shots and videos with ease and convenience, adding a touch of creativity to your aerial photography experience.
Configuring Gimbal Settings
Configuring the gimbal settings on your DJI Mini 2 allows you to customize and optimize the camera’s performance to suit your specific needs. The gimbal settings control parameters such as gimbal pitch speed, smoothness, and stabilization. Here’s how you can configure the gimbal settings:
1. Launch the DJI Fly App:
- Ensure that your DJI Mini 2 is powered on and connected to the DJI Fly App on your mobile device.
- Open the DJI Fly App and navigate to the camera settings.
2. Adjusting Gimbal Pitch Speed:
- Locate the gimbal pitch speed setting within the camera settings menu.
- Adjust the slider or numerical value to control the speed at which the gimbal moves when adjusting the camera’s pitch.
- A higher value will make the gimbal move more quickly, while a lower value will make the movements smoother and more gradual.
- Experiment with different values to find the right balance based on your shooting needs.
3. Controlling Gimbal Smoothness:
- Some drones, including the DJI Mini 2, offer the option to adjust the gimbal’s smoothness. This setting helps control the stability and fluidity of the camera movements.
- Look for the gimbal smoothness or stabilization setting in the camera settings menu.
- Adjust the slider or select from preset options to set the desired smoothness level.
- A higher smoothness value provides more stabilized footage, while a lower value adds a touch of natural motion.
- Consider the type of shots you want to capture and the level of stability required for your specific situation.
Configuring the gimbal settings allows you to fine-tune the camera movements and adapt them to different shooting scenarios. Whether you need fast and dynamic shots or smooth and cinematic footage, adjusting the gimbal settings accordingly can help you achieve the desired results.
It’s important to note that the available gimbal settings may vary depending on the DJI Mini 2 model and the firmware version. Refer to the user manual or online resources provided by DJI for specific details on the gimbal settings options.
By customizing the gimbal settings, you can optimize the camera performance of your DJI Mini 2 and capture stunning shots and videos with precision and control.
Exploring ActiveTrack
ActiveTrack is a powerful feature available on the DJI Mini 2 that allows you to track and follow a moving subject automatically. With ActiveTrack, you can capture dynamic shots with ease and precision. Here’s how you can explore ActiveTrack:
1. Activating ActiveTrack:
- Ensure that your DJI Mini 2 is connected to the DJI Fly App on your mobile device.
- Launch the DJI Fly App and navigate to the intelligent flight modes or ActiveTrack section.
- Activate ActiveTrack mode and follow the on-screen instructions to set up the tracking.
2. Selecting and Tracking a Subject:
- Use the DJI Fly App’s interface to designate the subject you want to track.
- You can either select the subject on the live video feed by drawing a box around it or tap on the subject directly.
- The DJI Mini 2 will use advanced algorithms to recognize and track the subject automatically.
3. Adjusting ActiveTrack Settings:
- Within the ActiveTrack mode, you can access additional settings to customize the tracking behavior.
- These settings may include tracking speed, distance, and obstacle avoidance.
- Experiment with different settings to find the right balance between smooth tracking and obstacle avoidance.
ActiveTrack is a versatile feature that allows you to track a variety of subjects, including people, vehicles, animals, and more. It enables you to capture stunning footage of moving subjects while keeping them in the frame throughout their motion.
Keep in mind that ActiveTrack has certain limitations, such as tracking effectiveness in low-light conditions or when the subject moves too quickly or erratically. Additionally, it’s crucial to maintain a safe distance and be aware of your surroundings while using ActiveTrack to ensure the safety of both the drone and the subject being tracked.
By exploring ActiveTrack and mastering its usage, you can take your aerial videography to the next level, capturing cinematic and engaging shots effortlessly.
Mounting the Aircraft
Mounting the aircraft properly is a crucial step in preparing your DJI Mini 2 for flight. Proper mounting ensures stability and safety during your drone’s operation. Here are the steps to follow when mounting the aircraft:
1. Find a Suitable Location:
- Before mounting the DJI Mini 2, find a suitable location for takeoff.
- Ensure that the area is clear of obstacles, people, and other potential hazards.
- Choose an open space with enough room for takeoff and landing.
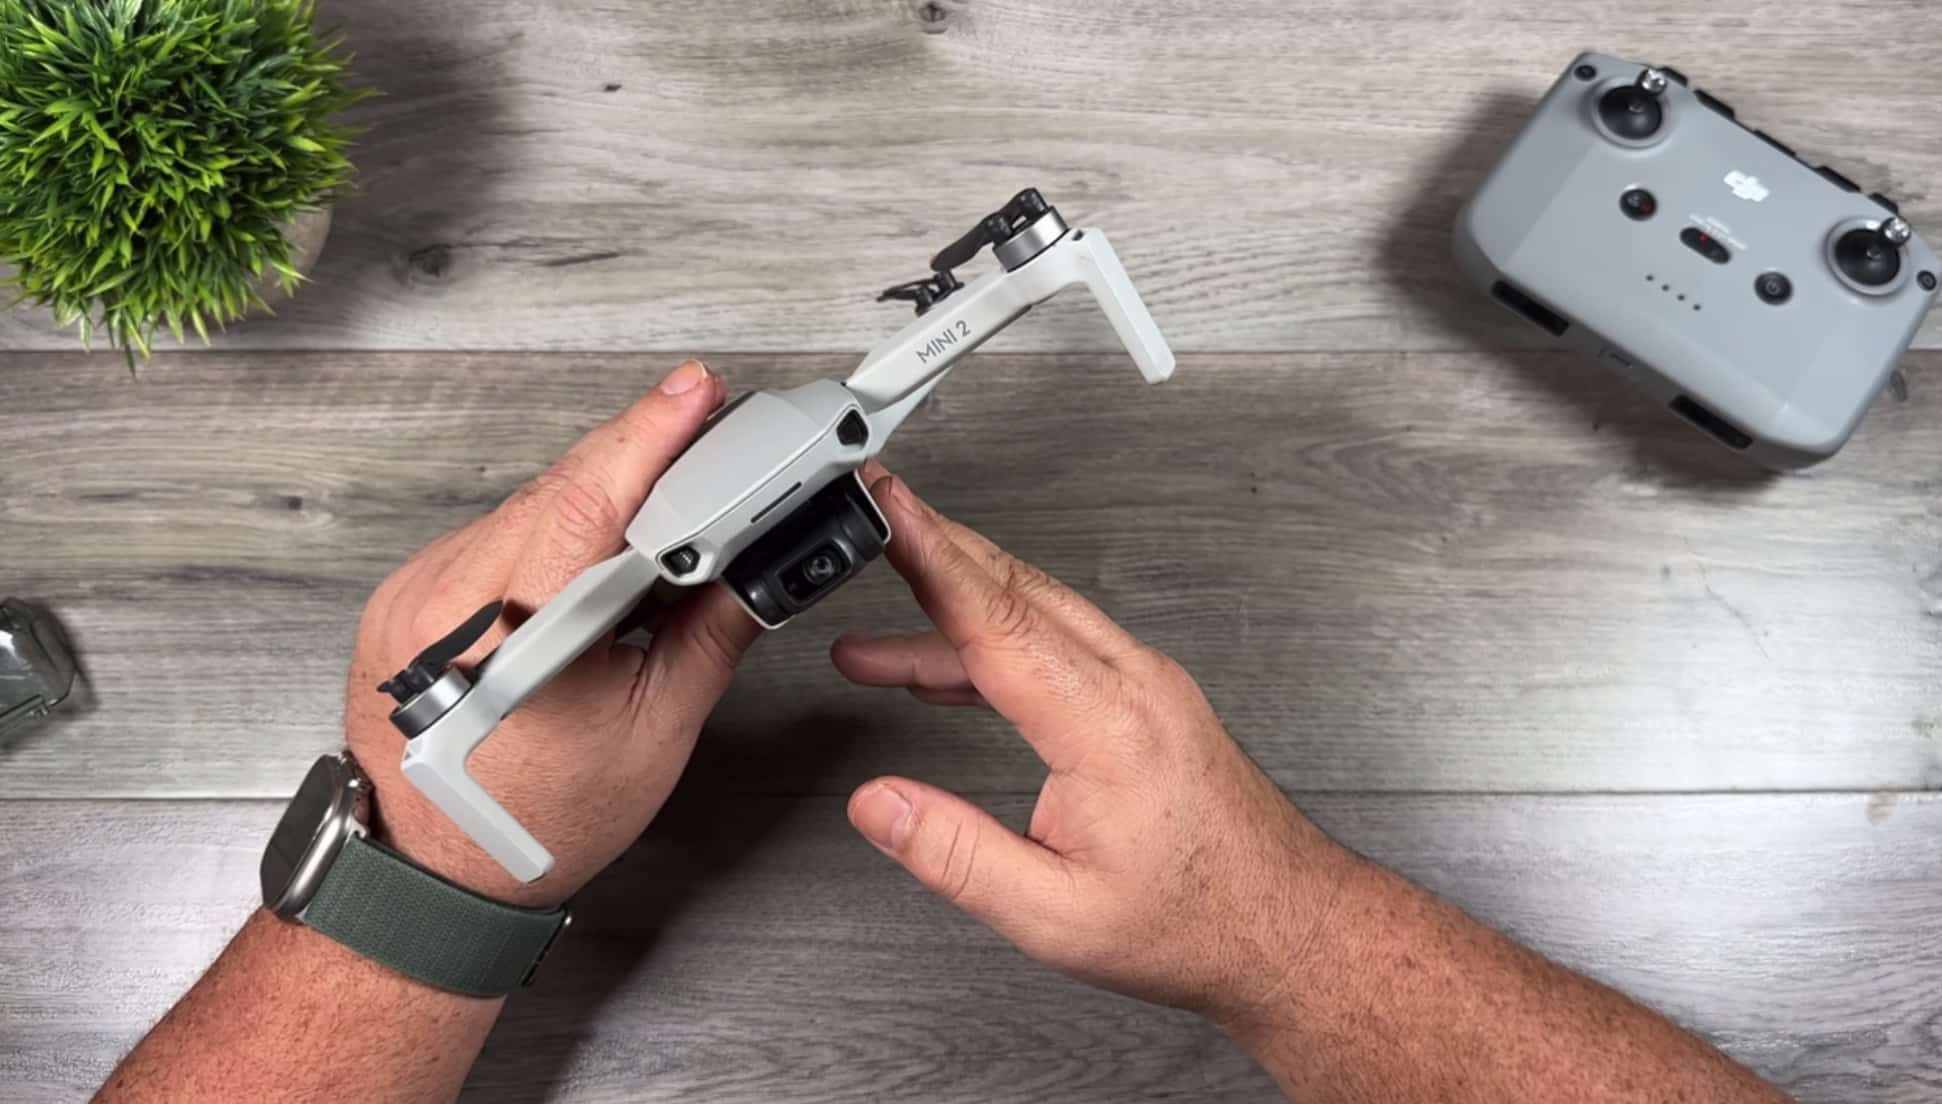
2. Unfold the Arms:
- Hold the DJI Mini 2 firmly and unfold the front and rear arms by gently pulling them outward.
- Make sure the arms are securely locked in place.
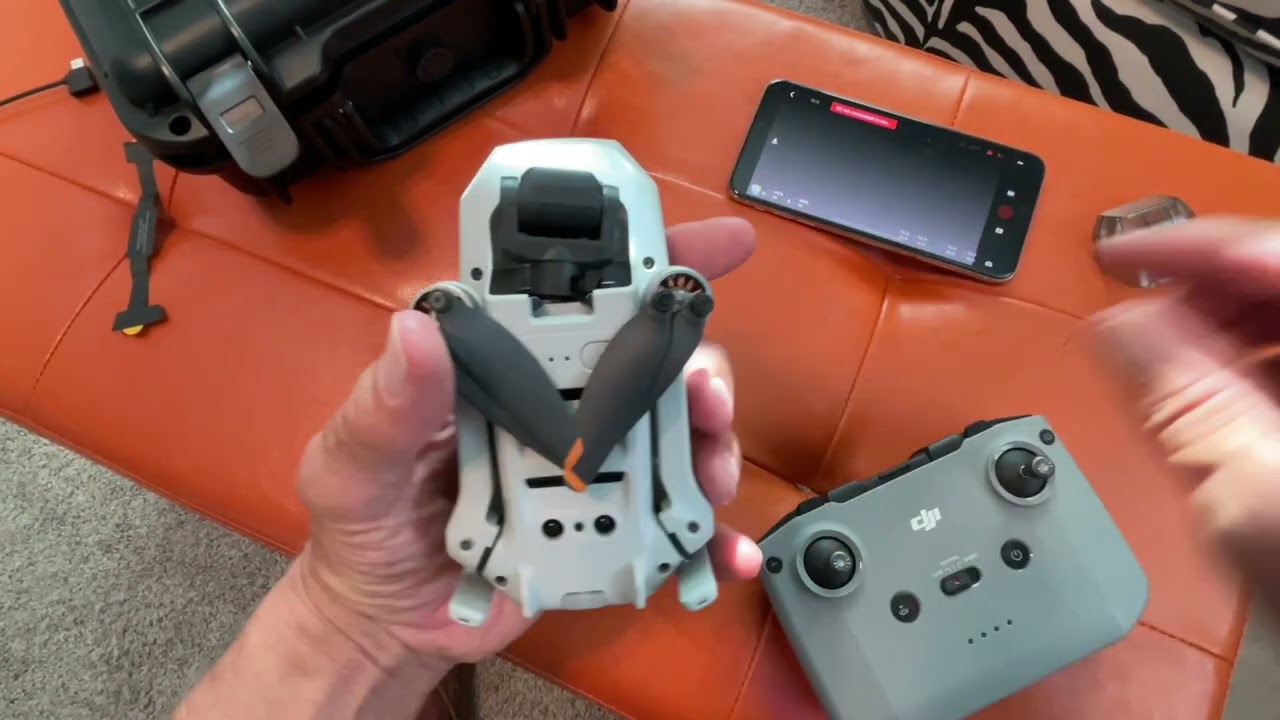
- Ensure that the propellers are attached properly and not damaged.
3. Power on the Drone:
- Press and hold the power button on the DJI Mini 2 until the lights on the aircraft turn on.
- Wait for the drone to finish its self-check process.
- Ensure that the battery level is sufficient for the intended flight duration.
4. Prepare the Remote Controller:
- Ensure that the remote controller is powered on and connected to the DJI Mini 2.
- Check that the mobile device is securely attached and properly connected to the remote controller.
- Verify that you have a stable connection between the remote controller and the DJI Mini 2.
5. Calibrate the Compass (if required):
- If prompted by the DJI Fly App, you may need to calibrate the compass to ensure accurate flight control.
- Follow the on-screen instructions carefully to calibrate the compass properly.
6. Takeoff:
- To take off, push the joystick upward gently or initiate the auto-takeoff feature through the DJI Fly App.
- Ensure that the DJI Mini 2 is ascending smoothly and that it reaches a sufficient altitude.
During the flight, always be mindful of your surrounding environment and adhere to local regulations and guidelines for safe and responsible drone operation. Keep an eye on the battery level and return the DJI Mini 2 to a safe landing when the battery is low.
Remember, proper mounting and preparation ensure a more enjoyable and worry-free flying experience with your DJI Mini 2.
Troubleshooting Tips
While using your DJI Mini 2, you may encounter certain issues or challenges. Here are some troubleshooting tips to help you overcome common problems:
1. Connection Issues:
- If you are experiencing connectivity issues between the remote controller and the DJI Mini 2, try the following steps:
- Ensure that the remote controller and the mobile device are within range and have a clear line of sight.
- Restart both the remote controller and the mobile device and attempt to reconnect.
- Check that the cables connecting the mobile device and the remote controller are securely attached.
- Ensure that the DJI Fly App is up to date with the latest version.
2. Inaccurate GPS Positioning:
- If you notice incorrect or inaccurate GPS positioning, try the following troubleshooting steps:
- Ensure that you are flying in an open area with a clear view of the sky.
- Perform a compass calibration to ensure accurate positioning and flight control.
- Update the firmware of your DJI Mini 2 and the DJI Fly App to the latest versions.
- Avoid areas with electromagnetic interference that may disrupt the GPS signal.
3. Unstable Flight or Shaking:
- If your DJI Mini 2 experiences unstable flight or shaking during operation, consider the following steps:
- Ensure that the propellers are properly installed and not damaged.
- Check for any debris or foreign objects that may be obstructing the propellers.
- Calibrate the gimbal and ensure that it is balanced and functioning correctly.
- Ensure that the DJI Mini 2 is flying in suitable weather conditions without excessive wind.
4. Low Battery or Short Flight Time:
- If you are experiencing short flight times or low battery issues, consider the following tips:
- Ensure that the battery is fully charged before each flight.
- Avoid flying in extreme temperatures, as it can affect the battery performance.
- Reduce flying speed, limit aggressive maneuvers, and avoid excessive use of intelligent flight modes to conserve battery life.
- Consider purchasing extra batteries to extend your flight time.
If you encounter persistent issues or problems with your DJI Mini 2, refer to the user manual or contact DJI customer support for further assistance. They can provide specific troubleshooting steps or arrange repairs if necessary.
By following these troubleshooting tips, you can overcome common challenges and enjoy a smoother and more enjoyable flying experience with your DJI Mini 2.
Conclusion
Congratulations! You have now learned the essential techniques and skills to effectively move and control the camera on your DJI Mini 2. By updating the firmware, connecting the remote controller, launching the DJI Fly App, and exploring the various camera modes, you have unlocked a world of creative possibilities for capturing stunning aerial shots and videos.
By mastering the joysticks, adjusting the gimbal pitch, utilizing gesture control, configuring gimbal settings, exploring ActiveTrack, mounting the aircraft properly, and troubleshooting common issues, you are well-equipped to make the most of your DJI Mini 2’s camera capabilities.
Remember to always fly responsibly and abide by local regulations and guidelines. Be mindful of your surroundings, ensure a secure and stable connection between the drone and the remote controller, and prioritize safety at all times.
Continue to practice and experiment with different techniques and camera settings to hone your skills and capture breathtaking footage. With persistence and creativity, you can capture unique perspectives and memorable moments with your DJI Mini 2.
As you embark on your aerial photography journey, don’t forget to regularly check for firmware updates, stay informed about new features, and explore the wider community of drone enthusiasts who can offer valuable tips and inspiration.
Now, it’s time to unleash your creativity, take flight, and capture the world from a whole new perspective with your DJI Mini 2!