Introduction
Welcome to our guide on how to clear RAM space! If you’ve ever experienced sluggish performance or a lack of responsiveness on your computer, the culprit could be your RAM (Random Access Memory). RAM plays a crucial role in the overall performance of your system, and when it becomes overloaded with unnecessary data, it can negatively impact your computer’s speed and efficiency.
Understanding how RAM works is essential to effectively managing its space. RAM is a type of computer memory that stores data that your computer needs to access quickly. Unlike storage devices such as hard drives or solid-state drives, RAM provides temporary storage that is quickly accessed by the CPU. When you open an application or perform tasks on your computer, the necessary data is transferred from the storage device to the RAM for quick and easy access.
Over time, as you open and close various programs or tabs in your web browser, your RAM can become cluttered with unnecessary data. This can lead to a decrease in performance, as your computer may struggle to allocate sufficient RAM to the tasks you are currently performing. Clearing RAM space regularly is essential to maintain peak performance and ensure a smooth computing experience.
In this guide, we will explore different methods to clear RAM space and optimize its usage. From identifying RAM-hogging processes to adjusting virtual memory settings, we will cover various techniques that can help you free up valuable RAM and accelerate your computer’s performance. Whether you are a casual user or a professional, following these tips will ensure your computer operates at its best.
So, if you’re ready to learn how to clear RAM space and improve your computer’s speed and responsiveness, let’s dive into the different strategies you can employ to effectively manage your system’s memory.
What is RAM?
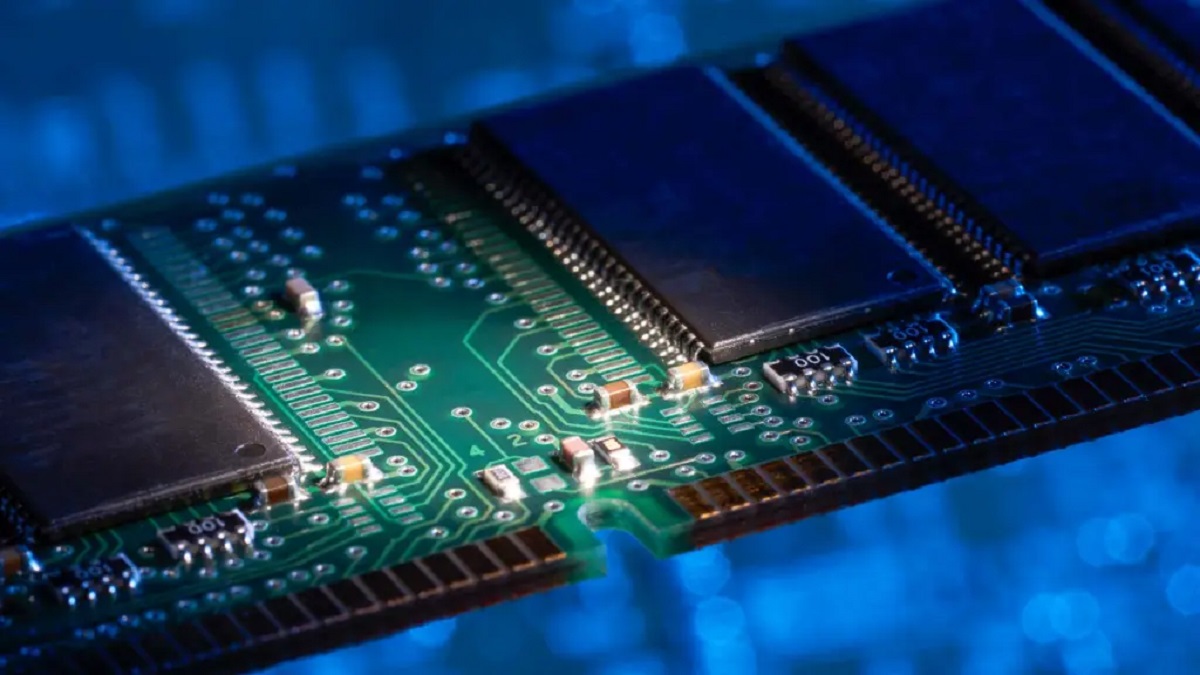
RAM, or Random Access Memory, is a crucial component of your computer that plays a vital role in its overall performance. It serves as a temporary storage space for data that your computer needs to access quickly. Unlike storage devices such as hard drives or solid-state drives (SSDs), which store data for long-term use, RAM provides temporary storage that is quickly accessible by the CPU.
Think of RAM as a workspace or desk where your computer can place data that it needs to actively work with. When you open an application or perform tasks on your computer, the relevant data is transferred from the storage device to the RAM. This allows the CPU to access the data quickly, without having to wait for it to be retrieved from the slower storage devices.
Rather than accessing data sequentially, as is the case with traditional storage devices, RAM allows for random access. This means that data can be retrieved quickly and efficiently, regardless of its location in the memory module. This characteristic of RAM makes it ideal for storing and accessing frequently used data, which ultimately improves the overall performance and speed of your computer.
The size of your computer’s RAM plays a significant role in determining its capabilities. Systems with larger RAM capacities can handle more data and run more applications simultaneously without experiencing performance issues. The amount of RAM you need largely depends on your specific use case. While casual users may find 4 to 8 gigabytes of RAM sufficient for everyday tasks, power users, such as content creators or gamers, may require 16 gigabytes or more to handle resource-intensive applications.
It is important to note that RAM is a volatile type of memory, meaning that it requires continuous power to retain the data stored within it. This is why it is sometimes referred to as “temporary” or “volatile” memory. When you shut down your computer or experience a power outage, the data stored in RAM is lost. Therefore, it is essential to save your work in non-volatile storage devices, such as hard drives or SSDs, to ensure data persistence.
Now that you have a basic understanding of what RAM is and its role in your computer’s performance, let’s explore why it is important to clear RAM space regularly to maintain optimal functionality.
Why is it important to clear RAM space?
Clearing RAM space regularly is vital for maintaining the optimal performance of your computer. As you use your computer, applications and processes consume RAM, and over time, this can lead to a buildup of unnecessary data. Here’s why it is important to clear RAM space:
1. Improved Performance: When your RAM becomes overloaded with unnecessary data, it can cause your computer to slow down. Clearing RAM space frees up memory, allowing your system to allocate resources more efficiently and ensuring that the programs you are actively using have the necessary resources to run smoothly.
2. Faster Responsiveness: A cluttered RAM can result in delayed response times when opening applications or switching between tasks. By clearing RAM space, you provide your computer with more available memory, enabling it to respond quickly to your commands and reducing lag time.
3. Enhanced Multitasking: If you frequently work with multiple applications at once or have numerous browser tabs open, a shortage of available RAM can hinder your ability to multitask effectively. Clearing RAM space allows you to free up memory for concurrent use, enabling you to seamlessly switch between applications and work on multiple tasks simultaneously.
4. Preventing System Crashes: Insufficient RAM can cause your computer to crash, especially when running resource-intensive applications. By regularly clearing RAM space, you reduce the risk of your system running out of memory and experiencing crashes, improving the overall stability of your computer.
5. Efficient Resource Allocation: When there is limited available RAM, your computer may resort to using virtual memory, which involves swapping data between RAM and the hard drive. This process, known as paging, is significantly slower. By clearing RAM space, you reduce the reliance on virtual memory, allowing your computer to access data from the faster RAM directly.
6. Optimal Gaming Experience: Gamers often require ample RAM to ensure smooth gameplay, especially for graphically demanding games. Clearing RAM space before launching a game helps ensure that the game has enough memory allocated to it, minimizing stuttering, lag, and frame rate drops that can hinder the gaming experience.
To summarize, clearing RAM space regularly is crucial for maintaining the performance, responsiveness, and stability of your computer. It allows your system to allocate resources efficiently, enhances multitasking capabilities, and prevents crashes. In the upcoming sections, we will discuss various methods to clear RAM space and optimize its usage on your computer.
Identifying RAM-hogging processes
One of the first steps in clearing RAM space is identifying the processes that are consuming a significant amount of memory. By pinpointing these RAM-hogging processes, you can determine which applications or background tasks are using the most resources and take appropriate action. Here’s how you can identify RAM-hogging processes:
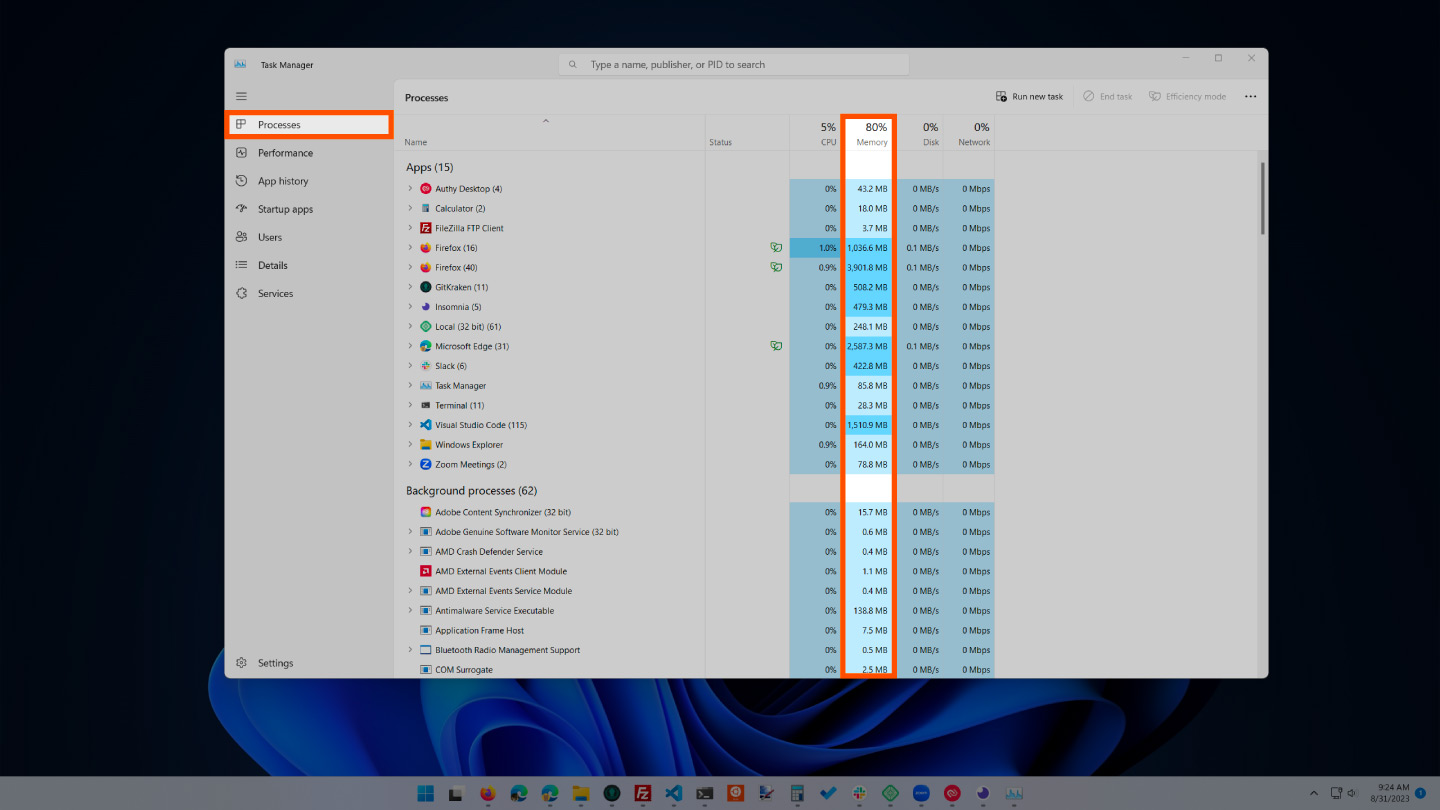
1. Task Manager: On Windows, you can use the Task Manager to monitor and manage active processes. Press Ctrl + Shift + Esc to open the Task Manager, and navigate to the “Processes” or “Details” tab (depending on your Windows version). Sort the processes by memory usage to identify the ones that are consuming the most RAM. Keep an eye out for any outlier processes that are utilizing an unusually high amount of memory.
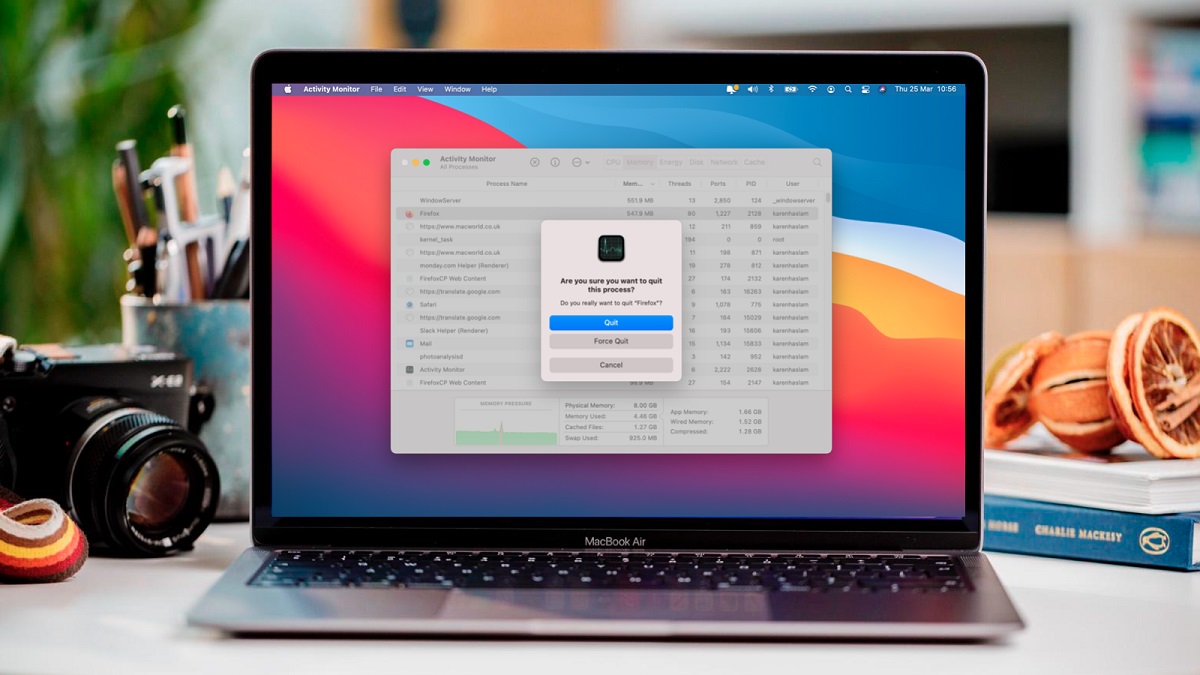
2. Activity Monitor: Mac users can utilize the Activity Monitor to check the memory usage of applications and processes. You can find it by navigating to “Applications” -> “Utilities” -> “Activity Monitor”. In the “Memory” tab, you can view the RAM usage and sort the processes by their memory footprint. Look for any processes that are utilizing a significant amount of memory.
3. Resource Monitor: On Windows, the Resource Monitor provides detailed system information, including memory usage. To open it, press Windows + R to open the Run dialog, type “resmon” and hit enter. In the Resource Monitor, navigate to the “Memory” tab to view the memory usage by individual processes. Look for any processes with high memory usage.
4. Activity Monitor: Linux users can use the built-in System Monitor or equivalent tools to view memory usage. These tools provide comprehensive information about the system’s resources, including RAM usage by processes. Look for processes that are using a considerable amount of memory compared to others.
5. Browser Task Manager: If you notice that your browser is consuming a substantial amount of memory, you can use the built-in task manager to identify memory-intensive tabs or extensions. In most popular browsers, you can access the task manager by pressing Shift + Esc. It allows you to see the memory usage of individual tabs and extensions, making it easier to identify and close any memory-hogging elements.
Identifying RAM-hogging processes is a crucial step in clearing RAM space. Once you have identified the resource-intensive applications or tasks, you can decide whether to close them or find alternatives to reduce their memory usage. In the next sections, we will explore different methods to clear RAM space and improve your computer’s performance.
Restarting your computer
One of the simplest yet effective ways to clear RAM space and improve the performance of your computer is by restarting it. Restarting your computer helps in several ways:
1. Clearing RAM Cache: When you restart your computer, the RAM cache is cleared, freeing up memory that was used by temporary files, background processes, and cached data. This allows your computer to start fresh, with more available RAM for the tasks you want to perform.
2. Closing Unnecessary Programs: Restarting your computer closes all running programs and processes. This ensures that any memory-intensive applications or background tasks that were consuming excessive RAM are terminated. When you log back in, you can choose to open only the necessary programs, optimizing the allocation of RAM resources.
3. Fixing Software Glitches: Sometimes, software glitches or memory leaks can occur, causing certain programs or processes to use an abnormal amount of RAM. Restarting your computer can help resolve these issues and bring your system back to a stable state.
4. Refreshing System Resources: Over time, as you use your computer, system resources may become fragmented or cluttered. Restarting your computer refreshes these resources and ensures that they are properly allocated, leading to improved overall system performance.
To restart your computer, you can follow these steps:
1. Windows: Click on the “Start” button, then click on the power icon. From the options, choose “Restart”. Alternatively, you can press the Windows key, followed by the “R” key, to open the Run dialog. Type “shutdown /r” and hit enter.
2. Mac: Click on the Apple menu in the top-left corner of the screen, then select “Restart”. Another option is to press Ctrl + Eject and then choose the restart option.
3. Linux: Open the terminal and type “sudo reboot” or “sudo shutdown -r now” command, followed by the enter key. Enter your password if prompted.
By restarting your computer, you can clear RAM space and start with a fresh state, allowing your system to allocate resources more efficiently. It is a straightforward and effective method to improve performance in a matter of minutes. However, if you find that you need to frequently restart your computer to maintain optimal performance, it may be worth exploring other methods to optimize your RAM usage, as we will discuss in the upcoming sections.
Closing unnecessary programs and tabs
One of the easiest ways to free up RAM space is by closing unnecessary programs and tabs on your computer. Many of us have a habit of keeping multiple programs and browser tabs open simultaneously, which can quickly consume valuable system memory. By closing unneeded applications and tabs, you can significantly improve your computer’s performance. Here’s how to go about it:
1. Closing Programs: Take a moment to assess the open programs on your taskbar or in your system tray. Identify any applications that you are not actively using and close them. Simply click on the “X” button on the top right corner of the program window or right-click the program icon and choose “Close” or “Exit.” By doing this, you release the associated memory, allowing your computer to allocate resources more efficiently.
2. Closing Browser Tabs: Web browsers, especially if you have many tabs open, can consume a significant amount of RAM. Take a look at your open tabs and close any that are no longer needed. You can simply click on the “X” button on each tab or use the keyboard shortcut Ctrl + W (Windows) or Command + W (Mac) to close the active tab. If you want to keep some tabs for later, consider bookmarking them or using browser extensions that allow you to suspend or unload inactive tabs to reduce memory usage.
3. Managing Background Applications: Some applications may continue to run in the background even after closing their windows. Check your system tray or task manager to identify any unnecessary background applications and close them. Right-click on their respective icons and choose “Quit” or “Exit” to completely close them and free up the associated memory.
4. Prioritizing Resource-Intensive Programs: If you are using resource-intensive applications such as graphic design software or video editing tools, consider closing other non-essential programs beforehand. This ensures that the memory resources are prioritized for the tasks and applications that require them the most.
5. Utilizing Task Manager: If you are unsure which programs or processes are using the most RAM, you can refer to the Task Manager (Windows) or Activity Monitor (Mac). Sort the processes by memory usage to identify the ones that are consuming the most resources. Consider closing or quitting those applications to free up RAM space.
By regularly closing unnecessary programs and tabs, you can reclaim valuable RAM resources, resulting in improved system performance and responsiveness. Additionally, it helps to establish a habit of managing your applications wisely and closing them when they are not in use.
Next, we will discuss another method to optimize your computer’s performance by managing the programs that run automatically when your computer starts up.
Managing startup programs
Managing startup programs is an effective approach to optimize your computer’s performance and free up valuable RAM space. When you start your computer, several programs automatically launch in the background, consuming memory and potentially slowing down your system. By controlling which programs start up with your computer, you can reduce the amount of memory usage and improve startup speed. Here’s how to manage startup programs:
1. Windows:
- Press Ctrl + Shift + Esc to open the Task Manager, then navigate to the “Startup” tab.
- You will see a list of programs that start with your computer. Right-click on any program you want to disable and choose “Disable”.
- Be cautious when disabling startup programs, as some may be necessary for the proper functioning of your computer. Research the programs you are unfamiliar with before disabling them.
2. Mac:
- Go to the Apple menu, then select “System Preferences” followed by “Users & Groups”.
- Click on your username, then choose the “Login Items” tab.
- In the list of items, uncheck the programs you want to stop from launching at startup.
- Again, exercise caution and ensure that you are familiar with the purpose of each program before removing it from startup.
3. Third-Party Tools:
Alternatively, you can use third-party tools such as CCleaner (Windows) or CleanMyMac (Mac) to manage startup programs. These tools provide a user-friendly interface to enable or disable programs from starting up with your computer.
By managing startup programs, you can prevent unnecessary applications from consuming valuable memory right from the moment you boot up your computer. This not only accelerates your system’s startup time but also ensures that the available RAM is better utilized for tasks that you actively perform.
Next, we will discuss uninstalling unnecessary software as another method to clear RAM space and optimize your computer’s performance.
Uninstalling unnecessary software
Uninstalling unnecessary software from your computer is a crucial step in clearing RAM space and optimizing performance. Over time, we tend to accumulate numerous applications that we no longer use or need. These unused programs not only consume disk space but can also run background processes that use up valuable system resources, including RAM. By uninstalling unnecessary software, you can free up memory and improve overall system performance. Here’s how you can do it:
1. Windows:
- Open the Control Panel by searching for it in the Windows Start menu.
- Click on “Programs” or “Programs and Features” (depending on your Windows version).
- You will see a list of installed programs. Scroll through the list and identify any applications that you no longer use or need.
- Click on the program you want to uninstall, then click on “Uninstall” or “Remove”. Follow the on-screen prompts to complete the uninstallation process.
2. Mac:
- Drag unwanted applications from the Applications folder to the Trash bin. Alternatively, right-click on the application and select “Move to Trash”.
- Empty the Trash bin by right-clicking on it and selecting “Empty Trash”.
3. Third-Party Uninstaller Tools:
If you prefer a more streamlined approach, you can use third-party uninstaller tools such as Revo Uninstaller (Windows) or AppCleaner (Mac). These tools help you remove software completely, including associated files and registry entries, ensuring a thorough cleanup.
Regularly reviewing and uninstalling unnecessary software not only frees up RAM space but also declutters your system and improves its performance. Additionally, it can enhance your computer’s security by removing potential vulnerabilities associated with outdated or unsupported applications.
In the next section, we will explore the importance of clearing temporary files and cache to optimize your computer’s performance.
Clearing temporary files and cache
Clearing temporary files and cache is an essential step in optimizing your computer’s performance and freeing up valuable RAM space. Temporary files, as the name suggests, are created temporarily by various applications and can accumulate over time, consuming disk space and potentially impacting system performance. Similarly, cache files store data from websites and applications to improve loading times, but an excessive amount of cache can hog RAM resources. Clearing these files helps to reclaim valuable storage space and enhance the overall speed and responsiveness of your computer. Here’s how to clear temporary files and cache:
1. Windows:
- Press Windows + R to open the Run dialog box, then type “%temp%” and hit enter.
- This will open the Temp folder. Select all the files and folders within it and delete them. Some files may be in use and cannot be deleted; you can skip those.
- In addition to the Temp folder, you can also clear the cache for specific applications or browsers. For example, in Google Chrome, you can go to Settings -> Privacy and security -> Clear browsing data to remove cache and other browsing data.
2. Mac:
- Open Finder and click on “Go” in the menu bar.
- Hold the Option key and click on “Library”.
- In the Library folder, navigate to the “Caches” and “TemporaryItems” folders.
- Select all the files within these folders and move them to Trash or use a cleaning app like CleanMyMac to clear the cache.
3. Browser Cache:
In addition to system-level temporary files, clearing your browser cache regularly is important. Caches in browsers store website data locally, allowing for faster loading times when revisiting the same websites. However, a large cache can consume significant RAM space. Clearing the cache varies depending on the browser you use, but it can typically be found in the browser’s settings or preferences menu.
By regularly clearing temporary files and cache, you can optimize your computer’s performance, free up storage space, and improve the responsiveness of your applications and web browsing. It is recommended to perform this cleanup periodically to maintain an efficient and clutter-free system.
In the next section, we will discuss adjusting virtual memory settings as another method to optimize your computer’s RAM usage.
Adjusting virtual memory settings
Adjusting virtual memory settings is a technique that can help optimize your computer’s RAM usage and improve performance. Virtual memory is a system feature that allows your computer to use a portion of the hard drive as additional memory when the physical RAM becomes overwhelmed. By increasing or adjusting the virtual memory settings, you can ensure that your computer efficiently utilizes both physical RAM and virtual memory. Here’s how to adjust virtual memory settings:
1. Windows:
- Open the Control Panel and navigate to “System” or “System and Security”.
- Click on “Advanced system settings” and go to the “Advanced” tab.
- Under the “Performance” section, click on “Settings”.
- In the Performance Options window, go to the “Advanced” tab.
- Under the “Virtual memory” section, click on “Change”.
- Uncheck the option “Automatically manage paging file size for all drives”.
- Select the drive where you want to change the virtual memory settings.
- Choose either “Custom size” or “System managed size” (recommended).
- If you opt for the custom size, specify the initial and maximum size for the virtual memory.
- Click “Set” and then “OK” to apply the changes.
2. Mac:
- Go to the Apple menu and select “System Preferences”.
- Click on “Memory” or “Memory Management” (depending on your macOS version).
- In the Memory tab, you can adjust the virtual memory settings using the slider or checkboxes.
- For more advanced settings, you can use Terminal to modify the “swapspace” settings.
- Consult your system documentation or the Apple Support website for detailed instructions on adjusting virtual memory settings on your specific Mac model and macOS version.
When adjusting virtual memory settings, it is important to strike a balance to prevent excessive swapping between physical RAM and virtual memory, which can negatively affect performance. If you experience performance issues even after adjusting virtual memory settings, consider upgrading your RAM modules for a substantial improvement in overall system performance.
With the proper adjustment of virtual memory settings, you can optimize your computer’s RAM usage, reduce reliance on virtual memory, and improve the overall speed and responsiveness of your system.
In the final section, we will discuss the option of upgrading your RAM as a long-term solution to enhance your computer’s performance.
Upgrading your RAM
If you’re looking for a long-term solution to enhance your computer’s performance, upgrading your RAM can be a highly effective option. Increasing the amount of RAM in your system provides more memory for your computer to work with, allowing it to handle more tasks and applications simultaneously without experiencing performance bottlenecks. Here’s what you need to know about upgrading your RAM:
1. Determine Compatibility: Before upgrading your RAM, you need to verify the type and maximum capacity of RAM supported by your computer. Check your computer’s specifications or visit the manufacturer’s website for this information. Different computers have different RAM requirements, such as DDR3 or DDR4, and varying capacities, ranging from 4GB to 32GB or more.
2. Purchase the Right RAM Modules: Once you know the compatible RAM type and capacity, purchase the appropriate RAM modules from a reliable source. Consider factors such as brand reputation, warranty, and customer reviews to ensure you get high-quality RAM modules for optimal performance.
3. Installation: Upgrading your RAM typically involves opening your computer’s case and inserting the new RAM modules into the available slots. However, the installation process may vary depending on your computer model. Refer to your computer’s documentation or seek assistance from a professional if you’re unsure about how to install the RAM correctly.
4. Potential Benefits: Upgrading your RAM can significantly improve your computer’s performance, especially if you currently have limited RAM capacity. With more RAM available, your computer can run applications and processes faster, handle more complex tasks, and provide a smoother multitasking experience. This is particularly beneficial for resource-intensive tasks such as video editing, gaming, or running virtual machines.
5. Consult a Professional: If you’re uncertain about upgrading your RAM yourself or need assistance with choosing the right modules, consider consulting a computer professional or taking your computer to a reputable service center. They can guide you through the process and ensure a successful RAM upgrade.
Upgrading your RAM is a reliable and cost-effective way to boost your computer’s performance, especially if you find yourself frequently running out of memory or experiencing slowdowns when using resource-intensive applications. It is a long-term solution that can significantly extend the lifespan and usability of your computer.
In the next section, we will provide a summary of the key points discussed in this guide on how to clear RAM space and optimize your computer’s performance.
Summary
In this guide, we have explored various methods to clear RAM space and optimize your computer’s performance. Let’s recap the key points covered:
We began by understanding what RAM is and its importance in the overall functioning of your computer. RAM provides temporary storage for data that the CPU needs to access quickly, and a cluttered RAM can lead to sluggish performance.
We then discussed why it is important to clear RAM space regularly. Clearing RAM improves performance, responsiveness, multitasking capabilities, and helps prevent system crashes. It allows for efficient resource allocation and delivers an optimal gaming experience.
We explored methods to identify RAM-hogging processes, such as using the Task Manager, Activity Monitor, or the browser task manager. This enables you to identify and close resource-intensive applications that consume a significant amount of memory.
Restarting your computer is a simple but effective way to clear RAM space. It closes unnecessary programs, clears RAM cache, and refreshes system resources.
Closing unnecessary programs and browser tabs is another crucial step. This frees up RAM resources and enhances system performance. Managing startup programs ensures that only essential applications launch when you start your computer.
Uninstalling unnecessary software declutters your system and reduces memory usage. Clearing temporary files and cache helps free up disk space and improves overall speed.
Adjusting virtual memory settings allows you to optimize the usage of RAM and virtual memory, striking a balance between them for optimal performance.
Finally, upgrading your RAM provides a long-term solution to enhance your computer’s performance. It increases the available memory and allows for smoother multitasking and handling of resource-intensive tasks.
By applying these methods, you can clear RAM space, improve performance, and experience a more efficient and responsive computing experience.
We hope that this guide has provided you with valuable insights and practical steps to optimize your computer’s RAM usage. Remember to regularly employ these techniques to maintain an optimal computing experience.


