Why Clear Ram on Android?
RAM, which stands for Random Access Memory, is a crucial component of every Android device. It is the temporary storage space where your phone’s operating system and running applications store data for faster access. However, over time, your device’s RAM can become cluttered with unnecessary data, causing it to slow down and affect overall performance.
Clearing the RAM on your Android device is a simple yet effective way to address this issue. When you clear the RAM, you essentially free up the memory space that was occupied by idle processes and apps that are running in the background. This leads to improved performance, faster app launches, and smoother multitasking.
One of the main reasons why you may want to consider clearing the RAM on your Android device is to free up memory for apps that you’re actively using. When you switch between multiple apps or perform resource-intensive tasks like gaming or video editing, having more available RAM can ensure that your device runs smoothly without any lag.
Another reason to clear the RAM is to resolve issues with app crashes or freezes. Sometimes, when an app becomes unresponsive or crashes frequently, it could be due to insufficient RAM. Clearing the RAM can help resolve this problem by giving the app a fresh start and preventing it from hogging resources.
Furthermore, clearing the RAM can also help improve battery life. When your device’s RAM is overcrowded, it requires more power to maintain the background processes and keep everything running smoothly. By freeing up RAM, you reduce the workload on your device’s battery, resulting in longer battery life.
Lastly, clearing the RAM can provide a refreshing boost to your device’s overall performance. It helps remove temporary files, cache, and other unnecessary data that can accumulate and slow down your device over time. By regularly clearing the RAM, you can keep your Android device running smoothly and efficiently.
How Does RAM Work on Android?
RAM, short for Random Access Memory, plays a crucial role in the operation of an Android device. It is a type of volatile memory that allows your device to quickly access and store data that is actively used by the operating system and running applications.
When you open an app on your Android device, it is loaded into the RAM. The app’s code, data, and resources are temporarily stored in the RAM for quicker access. This way, when you navigate through the app or perform various tasks, the required data can be accessed and processed swiftly, resulting in a seamless user experience.
Android devices have a specific amount of RAM installed, typically ranging from 1GB to 12GB or more, depending on the device’s specifications. The available RAM determines the multitasking capabilities and overall performance of your device. The more RAM your device has, the more apps and processes it can handle simultaneously without experiencing slowdowns or lag.
Android’s operating system, combined with various background processes and active apps, continuously consumes a portion of your device’s RAM. This is why you may notice that some of the available RAM is already in use, even when you haven’t launched any apps yourself.
When your device’s RAM is near its maximum capacity, it may start swapping data between the RAM and the storage disk, which can significantly slow down performance. This is where clearing the RAM becomes beneficial. By clearing the RAM, you free up memory that was occupied by unnecessary or idle processes, allowing your device to allocate more RAM to the apps and tasks you want to prioritize.
It’s important to note that clearing the RAM does not delete any data or files from your device. It simply resets the RAM by removing temporary data and unnecessary background processes. The next time you open an app, it will load fresh data into the RAM, improving responsiveness and reducing the chances of crashes or freezes.
Overall, RAM is a vital component of your Android device, providing the necessary temporary storage for fast and efficient data access. By understanding how RAM works and regularly clearing it when needed, you can optimize your device’s performance and ensure a smooth and responsive user experience.
Clearing RAM vs Clearing Cache: What’s the Difference?
When it comes to optimizing the performance of your Android device, you might come across the terms “clearing RAM” and “clearing cache.” While both processes aim to improve device performance, they have different functions and effects.
RAM (Random Access Memory) and cache are two separate components that store different types of data in your device:
RAM: RAM is the temporary storage space where your device’s operating system and running apps store data that is actively used. Clearing RAM involves freeing up the memory space that is occupied by idle processes and background apps, which can help improve device performance and multitasking capabilities.
Cache: Cache, on the other hand, stores temporary files and data that apps and websites use to load content faster. When you visit a website or use an app for the first time, certain elements, such as images or CSS files, are saved in the cache. Clearing the cache removes these stored files, requiring the app or website to load them again from scratch, potentially improving loading times and reducing storage usage.
While clearing the cache primarily affects the storage space on your device, clearing the RAM directly impacts the device’s performance. Clearing the cache can be useful if you’re experiencing app or website glitches, outdated content, or if your device is running low on storage space.
It’s important to note that clearing the cache does not delete any personal data or affect app settings. However, it may require apps and websites to download data again, resulting in slightly longer loading times the next time you access them.
In contrast, clearing the RAM resets the active memory used by your device’s operating system and running apps. This can alleviate performance issues caused by insufficient memory, delays in app launching, and overall sluggishness.
While clearing the cache can be done on a per-app basis through the device’s settings, clearing the RAM is typically achieved by using the device’s system tools or third-party RAM cleaner apps.
In summary, clearing RAM and clearing cache serve different purposes. Clearing RAM helps optimize device performance and multitasking capabilities by freeing up memory occupied by idle processes, while clearing cache primarily aims to improve loading times and free up storage space. Depending on your device’s specific needs, you may find it beneficial to perform both actions periodically.
Benefits of Clearing RAM
Clearing the RAM on your Android device can bring several benefits that contribute to a smoother and more efficient user experience. Here are some advantages of clearing the RAM:
Improved Device Performance: One of the main benefits of clearing the RAM is enhanced device performance. By freeing up memory that was occupied by idle processes and background apps, you allow your device to allocate more resources to the apps and tasks you’re actively using. This leads to faster app launches, smoother multitasking, and reduced lag or slowdowns.
Reduced App Crashes and Freezes: Clearing the RAM can help resolve issues with app crashes or freezes. When an app becomes unresponsive or crashes frequently, it may be due to limited available memory. By clearing the RAM, you provide a fresh start for the app, allowing it to utilize a greater portion of the RAM and preventing it from hogging resources, thereby reducing the likelihood of crashes and freezes.
Increased Battery Life: Overcrowded RAM requires more power to maintain background processes and keep everything running smoothly. By freeing up memory through RAM clearing, you reduce the workload on your device’s battery. This ultimately leads to improved battery life, as your device doesn’t have to work as hard to manage various tasks and background processes.
Optimized Multitasking: If you frequently switch between multiple apps or perform resource-intensive tasks, having more available RAM can greatly enhance multitasking capabilities. Clearing the RAM ensures that there is sufficient memory to handle the demands of concurrent app usage, allowing you to seamlessly navigate between apps without experiencing significant slowdowns or delays.
Improved Storage Space: Although clearing the RAM won’t directly free up storage space, it indirectly contributes to optimized storage utilization. By preventing background apps and processes from consuming excessive memory, you ensure that your device’s storage resources are mainly dedicated to storing important files, photos, videos, and app data.
Refreshing Device Performance: Regularly clearing the RAM is like giving your Android device a refreshing boost. It removes temporary files, cache, and other unnecessary data that can accumulate and slow down your device over time. By clearing the RAM, you maintain your device’s optimal performance and prevent performance degradation caused by memory congestion.
To make the most of these benefits, it is recommended to clear the RAM periodically or whenever you notice a decrease in device performance. Whether you use the built-in system tools or rely on third-party RAM cleaner apps, taking the time to clear the RAM can significantly enhance your Android experience.
Step-by-Step Guide: How to Clear RAM on Android
Clearing the RAM on your Android device is a simple process that can help optimize its performance. Here’s a step-by-step guide on how to clear RAM on Android:
Step 1: Open the Recent Apps Menu: On most Android devices, you can access the Recent Apps menu by tapping the square or rectangular button at the bottom of the screen. This button is usually located on the right side of the Home button.
Step 2: Navigate to the Active Apps: In the Recent Apps menu, you’ll see a list of your recently used apps. Swipe left or right to navigate through the apps and locate the one you want to close to free up RAM.
Step 3: Clear an App from RAM: To clear a specific app from RAM, swipe it either up, left, or right, depending on your device’s interface. This action will close the app and free up the memory it was using.
Step 4: Clear Multiple Apps: If you want to clear multiple apps from RAM simultaneously, you can use the “Clear All” or “Close All” option, usually indicated by an “X” or trash bin icon. This option closes all the apps in the Recent Apps menu to free up a significant amount of RAM.
Step 5: Verify RAM Cleared: After clearing the RAM, you can verify if the process was successful. Open the Recent Apps menu again and ensure that the apps you closed are no longer listed as active. This indicates that the RAM associated with those apps has been freed up.
It’s important to note that clearing the RAM in this manner doesn’t permanently terminate or uninstall the apps. It simply removes them from the active memory, allowing them to be reloaded the next time you open them.
If your Android device doesn’t have a dedicated Recent Apps button or if you prefer a more automated approach, you can also use third-party apps designed specifically for RAM cleaning. These apps provide additional features and often offer a one-tap solution to clear the RAM on your device.
Remember to regularly clear the RAM on your Android device to maintain optimal performance and ensure efficient multitasking capabilities. By freeing up memory, you can enjoy a faster and smoother user experience on your Android device.
Method 1: Using the Recent Apps Button
One of the simplest and most common methods to clear RAM on an Android device is by using the built-in Recent Apps button. Follow these steps:
Step 1: Open the Recent Apps Menu: Look for the square or rectangular button at the bottom of your device’s screen, usually located on the right side of the Home button. Tap this button to open the Recent Apps menu.
Step 2: Navigate to the Active Apps: In the Recent Apps menu, you’ll see a list of your recently used apps. Swipe left or right to navigate through the apps and locate the ones you want to close to free up RAM.
Step 3: Clear an App from RAM: To clear a specific app from RAM, swipe it either up, left, or right, depending on your device’s interface. This action will close the app and free up the memory it was using.
Step 4: Clear Multiple Apps: If you want to clear multiple apps from RAM simultaneously, you can use the “Clear All” or “Close All” option, usually indicated by an “X” or trash bin icon. Tapping this option will close all the apps in the Recent Apps menu and free up a significant amount of RAM.
Step 5: Verify RAM Cleared: To confirm that the RAM has been cleared, open the Recent Apps menu once again and ensure that the apps you closed are no longer listed as active. This indicates that the RAM associated with those apps has been freed up.
The Recent Apps button is a quick and convenient way to clear RAM on Android devices. However, please note that this method only removes apps from the active memory and doesn’t permanently uninstall them. The apps will still be available to use; they will be reloaded into the RAM when you open them again.
Remember to regularly clear the RAM using the Recent Apps button, especially when you notice your device’s performance slowing down or experiencing lag. By freeing up RAM, you can boost your device’s performance, improve multitasking capabilities, and enhance the overall user experience on your Android device.
Method 2: Using the Settings Menu
If your Android device doesn’t have a dedicated Recent Apps button or if you prefer a more manual approach, you can clear RAM using the Settings menu. Follow these steps:
Step 1: Open the Settings Menu: Locate the Settings app on your Android device. You can usually find it in the app drawer or by swiping down from the top of the screen and tapping the gear icon.
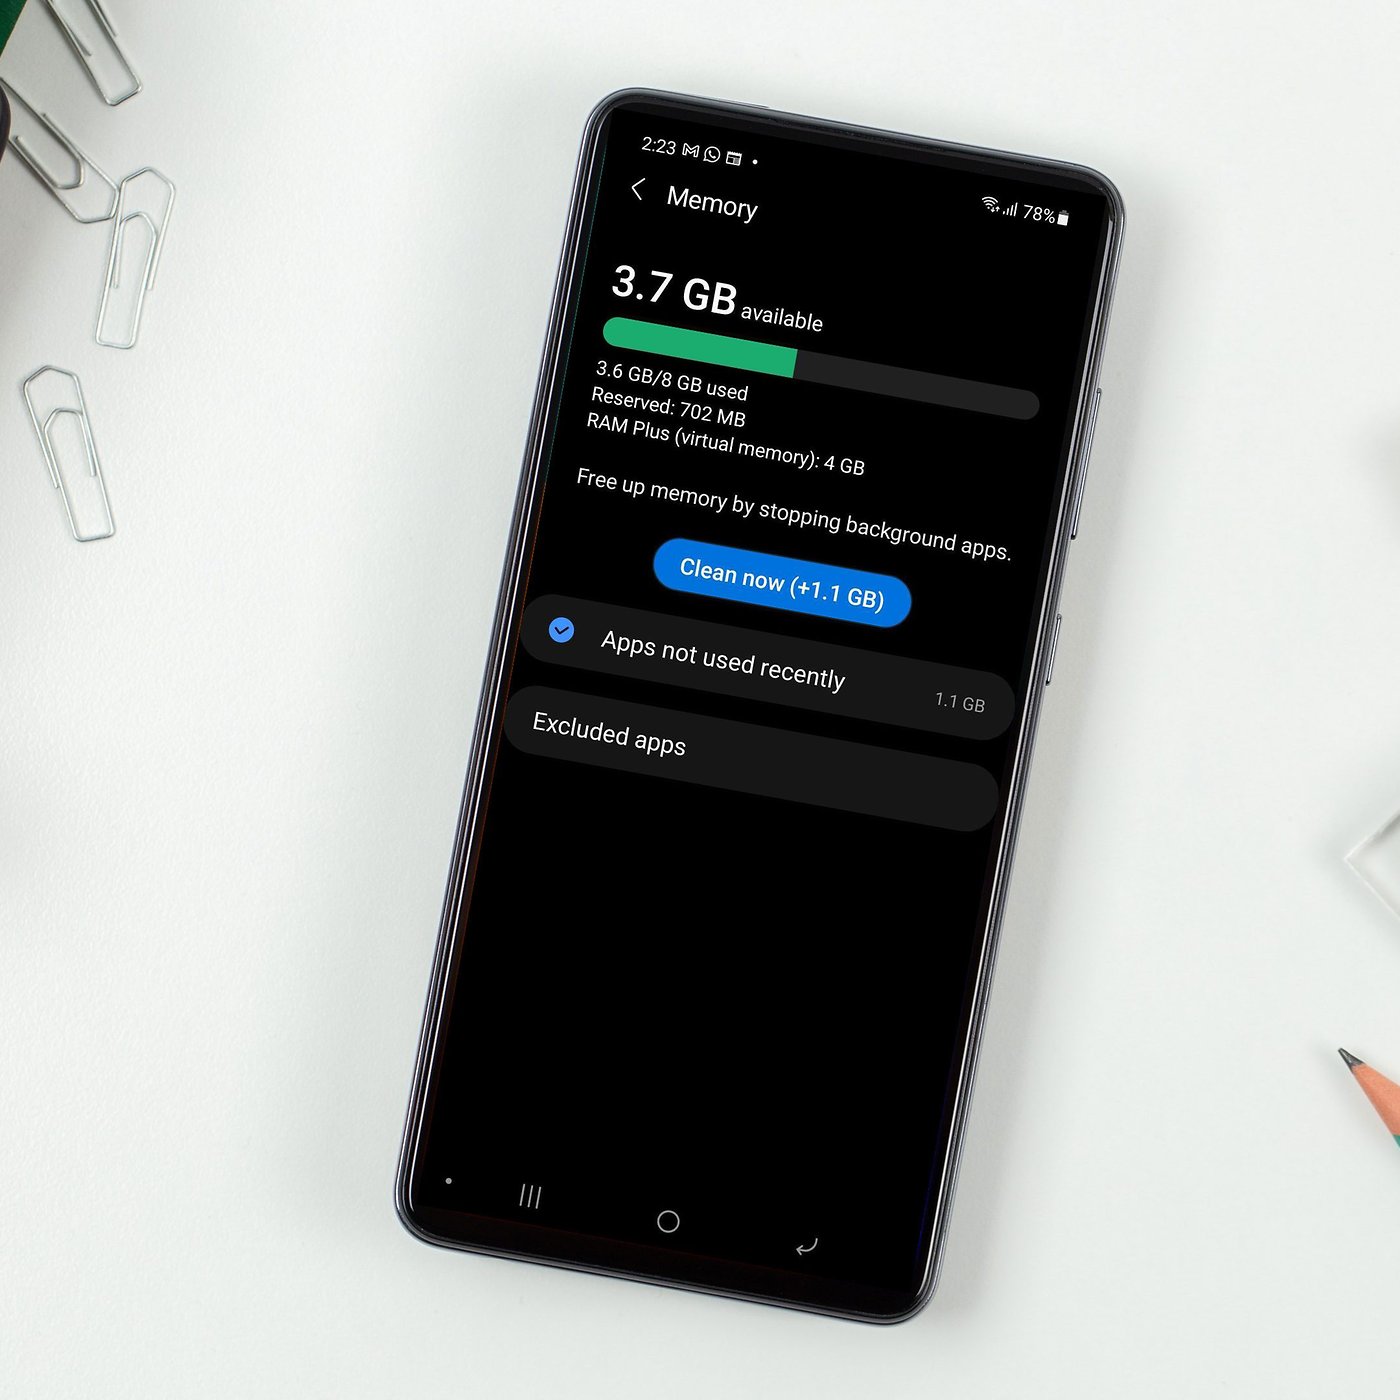
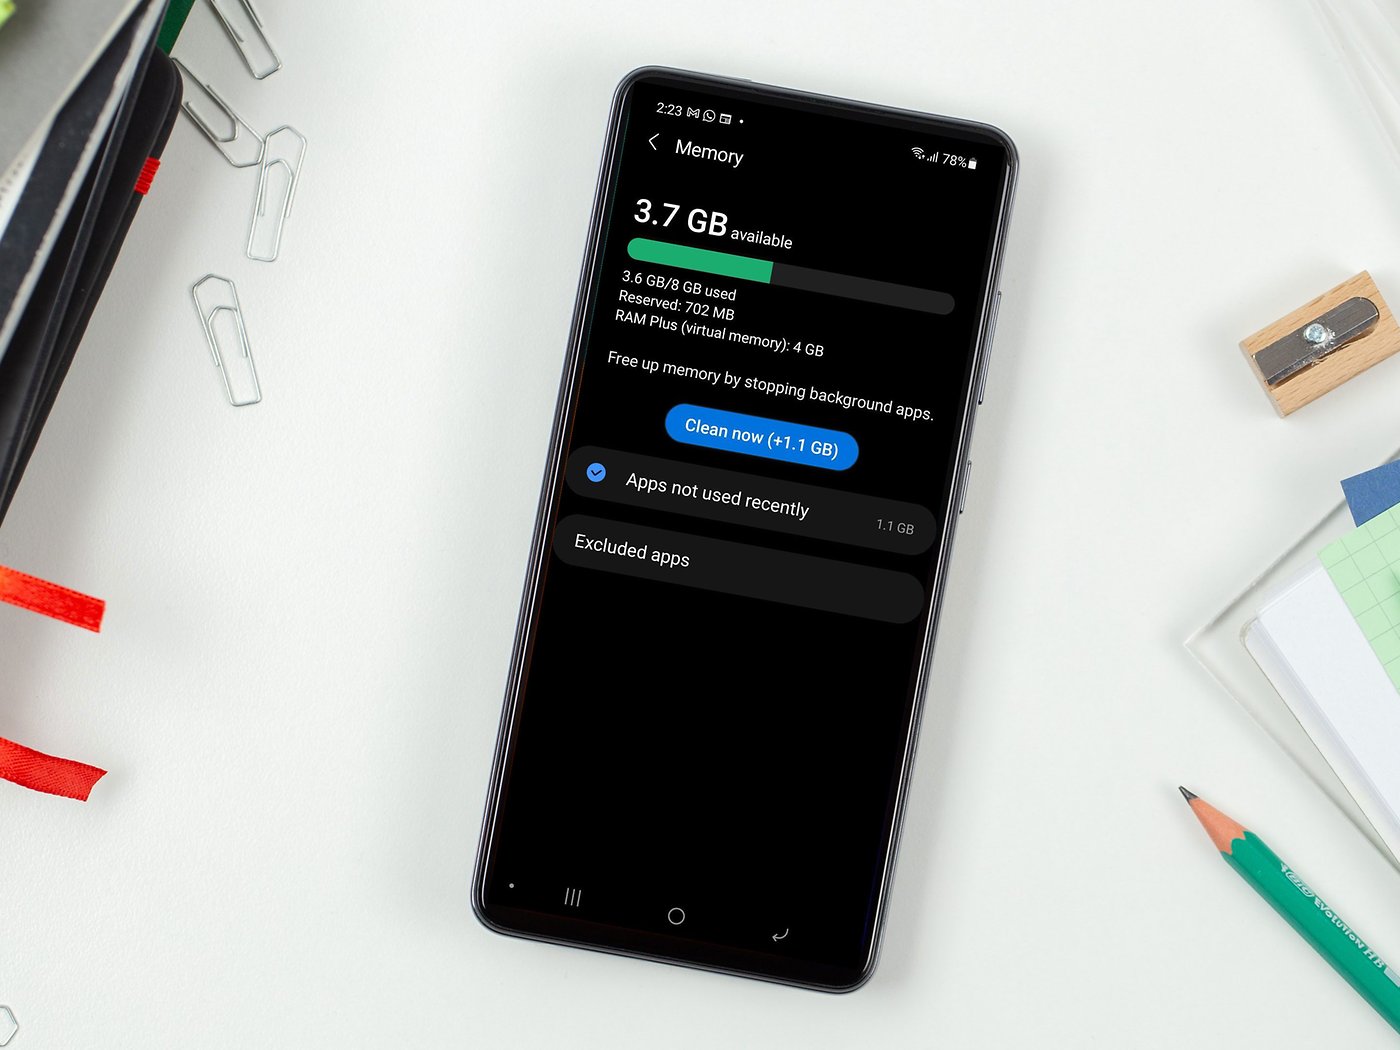
Step 2: Access the Memory or Storage Section: In the Settings menu, look for the “Memory” or “Storage” section. The location and name may vary slightly depending on your device’s manufacturer and Android version.
Step 3: Clear Cached Data: Within the Memory or Storage section, you’ll find an option to clear the cached data on your device. Cached data includes temporary files and data from apps and websites that are stored to improve loading times. Tap on this option and confirm your decision to clear the cached data.
Step 4: Clear RAM: Some devices may also have a separate option to clear the RAM in the Memory or Storage section. If available, tap on this option to clear the RAM. Confirm your decision if prompted.
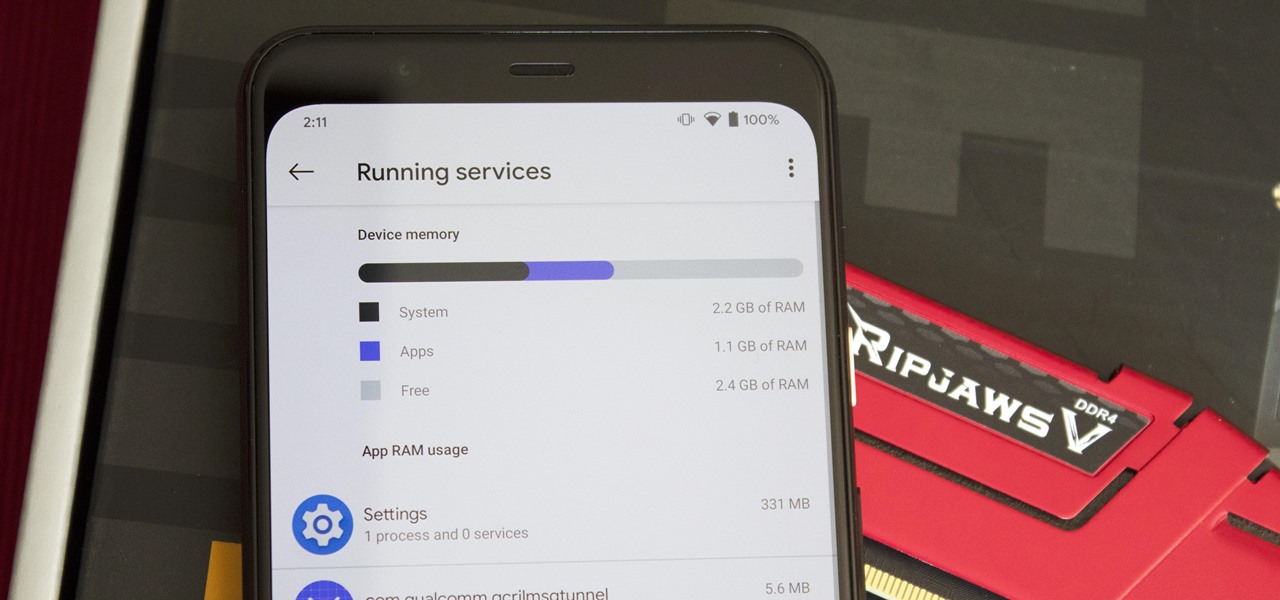
Step 5: Verify RAM Cleared: To ensure that the RAM has been successfully cleared, return to the home screen and observe if your device’s performance has improved. You can also check the available RAM in the device’s settings to see if the amount of free memory has increased.
Using the Settings menu to clear RAM provides a more comprehensive approach as it allows you to clear not only the active memory but also the cached data on your device. Clearing cached data can help optimize storage space and improve overall performance.
Note that the steps provided may vary slightly depending on your device and Android version. It’s always a good idea to refer to your device’s user manual or online support resources for more specific instructions.
Regularly clearing RAM and cached data using the Settings menu can help keep your Android device running smoothly and efficiently, especially if you notice sluggishness or performance issues. By optimizing the allocation of memory and storage resources, you can enjoy a better user experience on your Android device.
Method 3: Using a Third-Party App
If you prefer a more automated and convenient solution to clear RAM on your Android device, you can use a third-party app specifically designed for RAM cleaning. Follow these steps:
Step 1: Choose a Reliable RAM Cleaner App: Go to the Google Play Store and search for “RAM cleaner” or “RAM booster” apps. Read reviews and look for highly-rated and trustworthy apps. Some popular options include CCleaner, AVG Cleaner, and All-In-One Toolbox.
Step 2: Install and Launch the App: After selecting an app, download and install it on your device. Open the app once installed.
Step 3: Grant Necessary Permissions: Depending on the app, you may need to grant certain permissions for it to work effectively. These permissions may include accessing usage statistics, optimizing device settings, and closing background apps. Follow the on-screen prompts to grant the necessary permissions.
Step 4: Run the RAM Cleaning Tool: Once you’ve granted the necessary permissions, look for the RAM cleaning or optimization feature within the app. It may be labeled as “Boost” or “Clean RAM.” Tap this option to initiate the RAM cleaning process.
Step 5: Wait for Completion: The app will start analyzing your device’s RAM usage and identify unnecessary processes and apps. It will then proceed to clear the RAM by closing these background processes. Wait for the process to complete, which may take a few moments.
Step 6: Verify RAM Cleared: After the RAM cleaning process finishes, return to your device’s home screen and observe if the performance has improved. You can also check the available RAM in your device’s settings to see if the amount of free memory has increased.
Using a third-party app for RAM cleaning offers the advantage of automation and added features. These apps often provide additional tools and optimizations, such as junk file removal, battery optimization, and CPU management.
Remember to choose a reputable and trustworthy app from the Google Play Store and read user reviews to ensure its reliability. Be cautious when granting permissions to the app and consider the app’s privacy policy before proceeding.
Regularly using a reliable third-party RAM cleaner app can help keep your Android device running optimally, freeing up memory for smooth multitasking and improved performance.
Best RAM Cleaner Apps for Android
There are several RAM cleaner apps available for Android that can help optimize your device’s performance and free up memory. Here are some of the best RAM cleaner apps to consider:
1. CCleaner: CCleaner is a popular app known for its comprehensive cleaning capabilities. Apart from clearing RAM, it can also remove junk files, cache, and residual data, freeing up storage space and optimizing performance.
2. AVG Cleaner: AVG Cleaner offers a combination of RAM cleaning, junk file removal, and battery optimization. It can help clear RAM, identify unnecessary processes, and improve overall device performance.
3. All-In-One Toolbox: All-In-One Toolbox is a powerful app that offers a wide range of optimization features. It includes RAM cleaning, junk file removal, app management, CPU cooling, and more. It provides multiple tools in one app for thorough device optimization.
4. Clean Master: Clean Master is another popular choice for optimizing Android devices. It offers RAM cleaning, junk file removal, app management, antivirus scanning, and device boosting features to enhance performance and free up memory.
5. DU Speed Booster: DU Speed Booster is a comprehensive app that includes RAM cleaning, junk file removal, app management, battery optimization, and CPU cooling. It offers a range of features to improve device performance and speed.
6. Greenify: Greenify focuses on optimizing device performance by hibernating apps to prevent them from running in the background. By hibernating apps, Greenify can help reduce RAM usage and improve battery life.
7. SD Maid: SD Maid is a versatile app that combines RAM cleaning with file management features. It helps clear RAM, remove junk files, manage app data, and optimize file storage to improve overall device performance.
When choosing a RAM cleaner app, consider factors such as user reviews, features, interface usability, and compatibility with your Android device. It’s important to note that while RAM cleaner apps can be helpful, they should be used in conjunction with other optimization practices, such as clearing cache, managing apps, and regularly restarting your device.
Remember, clearing RAM alone may not solve all performance issues, and it’s always a good idea to backup your important data before using any optimization tool.
By using one of these reliable RAM cleaner apps for Android, you can efficiently manage your device’s memory, enhance performance, and enjoy a smoother and more responsive user experience.
Additional Tips to Optimize and Manage RAM on Android
In addition to clearing RAM using the methods mentioned earlier, there are other steps you can take to optimize and manage RAM on your Android device. Consider these tips to ensure more efficient memory usage:
1. Limit Background Processes: Minimize the number of apps running in the background. This can be done by closing unused apps manually or using built-in features like “Background Restriction” or “Battery Optimization” on your device. Restricting background processes reduces RAM usage and improves overall performance.
2. Uninstall Unnecessary Apps: Regularly review and uninstall apps that you no longer use. Unused apps still consume RAM resources and may run background processes, impacting device performance. Removing unnecessary apps frees up valuable RAM space.
3. Disable or Limit App Notifications: App notifications can consume system resources, including RAM. Disable or limit notifications for apps that you don’t need immediate updates from, reducing unnecessary background processes and freeing up memory.
4. Use Lite Versions of Apps: Consider using lite versions or alternative apps that use fewer system resources. Lite versions are often designed to be more lightweight, consuming less RAM and reducing the strain on your device’s memory.
5. Clear App Cache Regularly: In addition to clearing RAM, regularly clear app caches. App cache can accumulate over time, taking up valuable storage space and potentially impacting RAM usage. You can clear app cache individually through app settings or use the device’s system settings to clear cache for multiple apps at once.
6. Keep Your Device Updated: Ensure that your Android device is running the latest available software updates. System updates often include performance enhancements and bug fixes that can help optimize RAM usage and improve overall device performance.
7. Restart Your Device Regularly: Restarting your device periodically clears the RAM and refreshes system processes. It can help resolve temporary performance issues caused by excessive RAM usage or background processes.
8. Avoid Live Wallpapers and Widgets: Live wallpapers and widgets constantly run in the background, consuming system resources, including RAM. Consider using static wallpapers and limit the number of active widgets to conserve RAM.
9. Manage Sync and Background Data: Limit or disable automatic syncing and background data usage for apps that you don’t need to constantly update or access. This reduces the strain on RAM and conserves battery life.
10. Perform Factory Reset as a Last Resort: If your device significantly lags or experiences persistent performance issues, and other optimization measures don’t provide satisfactory results, you can consider performing a factory reset. This erases all data on your device and reinstalls the operating system, effectively resetting the device to its default state.
By implementing these additional tips, you can effectively manage your device’s RAM usage, improve performance, and ensure a smoother user experience on your Android device.
Does Clearing RAM Really Improve Android Performance?
Clearing RAM on an Android device is often touted as a method to improve performance, but does it truly deliver noticeable benefits? The answer is not black and white. While clearing RAM can provide temporary performance improvements, the overall impact may vary depending on various factors.
Clearing RAM can be particularly beneficial when your device has limited available memory and is experiencing slowdowns due to insufficient RAM for the apps and tasks you’re using. By freeing up memory, you allow your device to allocate more resources to the active processes, resulting in improved responsiveness, faster app launches, and smoother multitasking.
However, clearing RAM does not magically boost your device’s processing power or increase its available physical RAM. It simply helps optimize memory usage by removing unnecessary background processes and freeing up space for more critical tasks. If your device’s RAM is already ample, clearing RAM may have a minimal impact on performance.
It’s important to note that clearing RAM alone is just one part of optimizing Android performance. Factors such as app optimization, storage management, and system settings also play significant roles in overall device performance.
Regularly clearing RAM can be especially helpful when specific apps are causing performance issues or exhibiting instability. By clearing the RAM, you force those apps to reload fresh data into memory, potentially resolving glitches or crashes caused by corrupted or cached data.
However, it’s worth mentioning that modern Android operating systems are designed to efficiently manage RAM usage and prioritize system resources. The operating system is responsible for prioritizing memory allocation and automatically closing unnecessary background processes when necessary. In this case, manually clearing RAM may have limited impact, as the operating system is already effective in managing memory resources.
To optimize Android performance, a holistic approach that includes other performance-enhancing practices should be considered. These practices include clearing cache, managing apps, limiting background activities, and optimizing storage space.
Ultimately, while clearing RAM may provide temporary performance improvements, its impact can vary depending on factors such as the device’s RAM capacity, the specific apps and processes running, and the overall optimization of the device. Experimenting with clearing RAM and other performance optimization techniques can help you determine what works best for your particular device and usage patterns.
In summary, while clearing RAM can potentially improve Android performance in certain scenarios, it is not a one-size-fits-all solution. It is just one piece of the puzzle when it comes to optimizing device performance and ensuring a smooth user experience on your Android device.
Final Thoughts
Optimizing RAM usage is an important aspect of maintaining a smooth and responsive Android device. By understanding how RAM works and implementing effective strategies to manage and clear RAM, you can enhance device performance and improve your overall user experience.
Clearing RAM can provide immediate benefits, such as faster app launches, smoother multitasking, and improved device responsiveness. It is particularly useful when your device has limited RAM or when specific apps are causing performance issues.
However, it’s essential to remember that clearing RAM is just one piece of the puzzle when it comes to optimizing Android performance. It should be used in conjunction with other best practices, such as clearing cache, managing apps, and regularly restarting your device.
Additionally, while built-in methods and third-party apps can help clear RAM, it’s important to exercise caution when granting permissions or installing unfamiliar apps. Always choose reputable apps from trusted developers and stay informed about the potential risks and privacy implications.
Furthermore, it’s worth noting that Android devices are designed to efficiently manage RAM on their own. The operating system intelligently allocates memory resources based on app usage and automatically closes unnecessary background processes. In many cases, the operating system’s built-in memory management is sufficient to maintain device performance without manual intervention.
Ultimately, the effectiveness of clearing RAM and other optimization techniques can vary depending on device specifications, usage patterns, and other individual factors. It’s recommended to experiment with different methods and strategies to find what works best for your specific device and requirements.
By taking a proactive approach to manage and optimize RAM usage, you can ensure that your Android device operates at its full potential. Regularly clearing RAM, limiting background processes, uninstalling unused apps, and keeping your device updated are all steps toward maintaining a smooth and efficient user experience.
Remember that maintaining a clutter-free and well-optimized device can go a long way in improving not just performance but also battery life, storage utilization, and overall satisfaction with your Android device.