Introduction
Welcome to this guide on how to clear RAM space on Windows 7. If you have been experiencing slow performance or lag on your computer, it might be due to the lack of available Random Access Memory (RAM) space. RAM is a crucial component of your device as it stores data that is actively being used by the operating system and applications.
When you have too many programs running or using excessive memory, your computer’s performance can suffer. Clearing up RAM space can help improve the speed and responsiveness of your Windows 7 computer, allowing you to work more efficiently and enjoy a smoother user experience.
In this article, we will explore various methods that you can employ to clear RAM space on your Windows 7 system. From using the Task Manager to disabling startup programs and clearing temporary files, we will cover multiple approaches that can help free up RAM and optimize your computer’s performance.
It’s important to note that clearing RAM space may not necessarily provide a drastic improvement in performance if your computer has adequate RAM to begin with. However, if you often find yourself running multiple resource-intensive applications or your computer has limited RAM capacity, these methods can help you maximize the available resources and enhance your system’s performance.
So, if you’re tired of sluggish performance and want to boost your Windows 7 computer’s speed, continue reading to learn how to clear RAM space effectively. Let’s dive in!
The Importance of Clearing RAM Space
Clearing RAM space on your Windows 7 computer is crucial for several reasons. When your RAM is overloaded with data, your computer’s performance can suffer significantly. By regularly clearing RAM space, you can reap the following benefits:
- Improved Speed and Responsiveness: When your RAM is cluttered with unnecessary data, it becomes harder for your system to access the necessary information quickly. By clearing RAM space, you allow your computer to allocate resources more efficiently, resulting in improved speed and responsiveness.
- Prevention of System Freezes and Crashes: Insufficient RAM space can lead to system freezes or crashes, especially when running memory-intensive applications or multitasking. By freeing up RAM, you minimize the risk of these issues occurring and ensure a more stable computing experience.
- Enhanced Multitasking Ability: If you frequently multitask on your computer, having adequate available RAM space is essential. Clearing RAM space allows your system to allocate resources more effectively, enabling you to switch between applications smoothly and without delays.
- Optimized Gaming Performance: Gamers often require significant amounts of RAM to run resource-intensive games smoothly. By clearing RAM space, you provide your gaming applications with the necessary resources, resulting in improved gameplay performance and reduced lag.
- Prevention of System Slowdowns: Over time, as you install and uninstall programs, temporary files and background processes can accumulate, consuming valuable RAM space. Clearing RAM helps remove unnecessary data and prevents system slowdowns caused by memory bloat.
It’s important to note that clearing RAM space alone might not solve all performance issues if your computer has other underlying problems, such as a slow hard disk drive or an outdated operating system. However, it is a significant step you can take to optimize your computer’s performance, especially when dealing with limited RAM capacity or excessive memory usage by applications.
Now that we understand the importance of clearing RAM space, let’s explore various methods you can use to accomplish this on your Windows 7 computer.
Method 1: Using the Task Manager
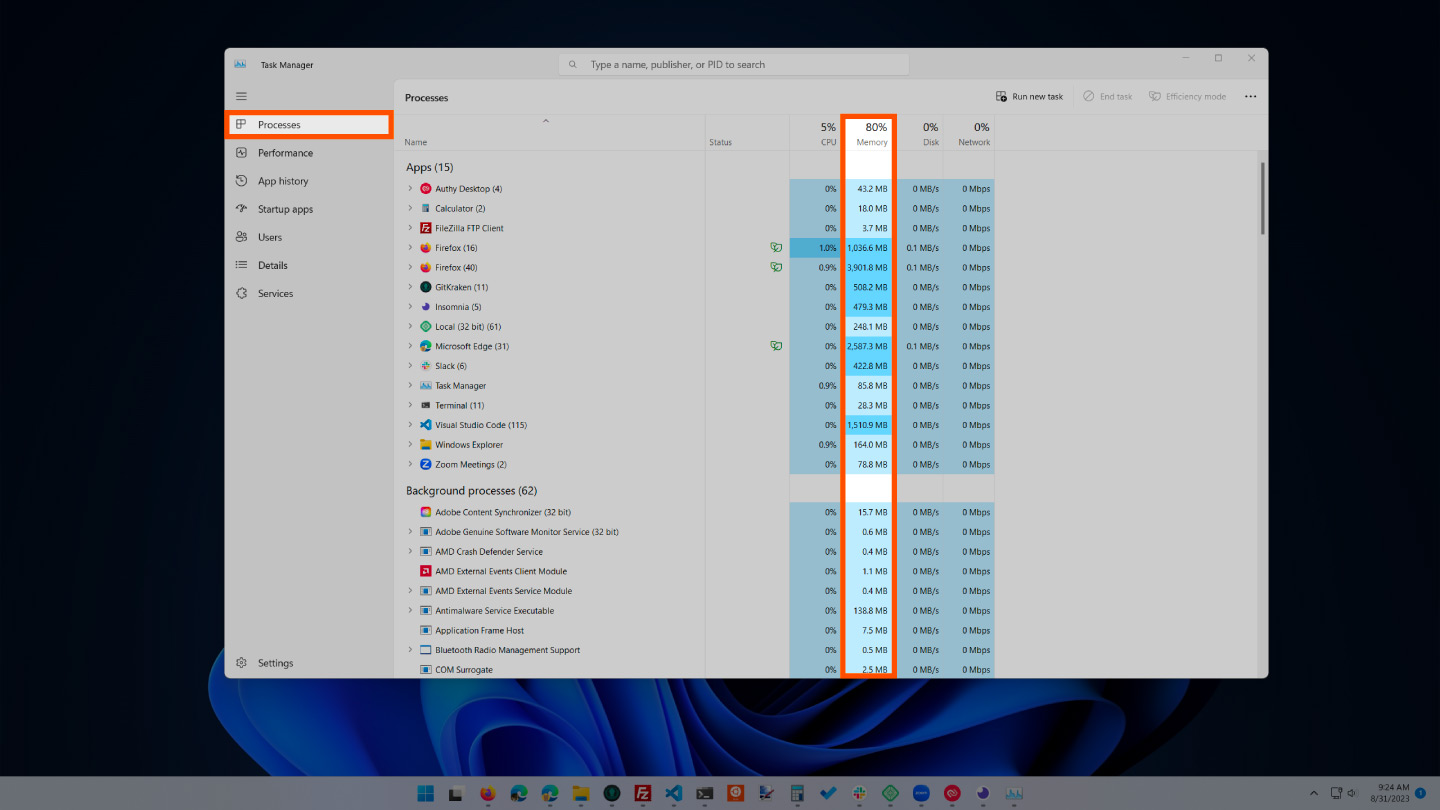
One of the easiest and most effective ways to clear RAM space on your Windows 7 computer is by using the built-in Task Manager. The Task Manager allows you to monitor and manage the processes running on your system, including those consuming excessive memory.
Here’s how you can use the Task Manager to clear RAM space:
- Open the Task Manager: To open the Task Manager, you can right-click on the taskbar at the bottom of your screen and select “Task Manager” from the context menu. Alternatively, you can press
Ctrl+Shift+Escon your keyboard. - Go to the “Processes” Tab: Once the Task Manager is open, navigate to the “Processes” tab. Here, you’ll see a list of all the processes currently running on your system.
- Sort by Memory Usage: To identify processes that are consuming a significant amount of memory, click on the “Memory” column header. This will sort the processes in descending order based on their memory usage.
- End High-Memory Processes: Look for processes that are using a large amount of memory and are not essential to your current needs. Select those processes and click on the “End Process” button to terminate them. Be cautious while ending processes and avoid terminating any critical system processes.
- Check the RAM Usage: After terminating high-memory processes, monitor the RAM usage in the Task Manager’s performance tab. You should see a decrease in memory usage and a corresponding increase in available RAM space.
By using the Task Manager and terminating memory-intensive processes, you can free up valuable RAM space and improve your computer’s overall performance. However, keep in mind that terminating processes may close applications or tasks you still need, so use this method judiciously.
Now that you know how to clear RAM space using the Task Manager, let’s explore another method: disabling startup programs.
Method 2: Disabling Startup Programs
Another effective way to clear RAM space on your Windows 7 computer is by disabling unnecessary startup programs. When you boot up your computer, certain programs automatically start running in the background, consuming valuable resources, including RAM.
Follow these steps to disable startup programs and free up RAM space:
- Open the System Configuration Utility: Press the
Windowskey +Ron your keyboard to open the Run dialog box. Typemsconfigand hit Enter to launch the System Configuration utility. - Navigate to the Startup Tab: In the System Configuration utility, click on the “Startup” tab to view the list of programs that launch during startup.
- Disable Unnecessary Startup Programs: Carefully review the list of programs and uncheck the ones that you don’t need to start automatically with your computer. Be cautious not to disable any critical programs or drivers required for your system’s normal operation.
- Apply and Restart: Once you have unchecked the unnecessary startup programs, click on the “Apply” button and then select “OK.” You will be prompted to restart your computer for the changes to take effect.
- Check RAM Usage: After restarting your computer, open the Task Manager and monitor the RAM usage. You should notice a decrease in memory usage, as the disabled startup programs are no longer consuming resources.
Disabling unnecessary startup programs not only helps free up RAM space but also allows your computer to boot up faster. By minimizing the number of programs running in the background, you can optimize your system’s performance and allocate more RAM to the applications you actively use.
Keep in mind that some programs may add themselves back to the startup list over time, so it’s a good practice to periodically review and disable any newly added startup programs.
Now that you have learned how to disable startup programs, let’s explore another method: clearing temporary files.
Method 3: Clearing Temporary Files
Temporary files are created by various applications and processes on your computer, and they can accumulate over time, taking up valuable disk space and RAM. Clearing these temporary files can help free up both storage and memory resources, resulting in improved performance on your Windows 7 computer.
Here’s how you can clear temporary files:
- Open Disk Cleanup: Click on the
Startbutton, go toAll Programs, thenAccessories,System Tools, and finally selectDisk Cleanup. - Select the Drive: In the Disk Cleanup dialog box, select the drive where your operating system is installed (usually
C:) and clickOK. - Choose File Types to Clean: Disk Cleanup will scan your drive and present a list of file types that can be removed. Select the file types you want to clean, such as temporary files, temporary internet files, and system error memory dump files.
- Start the Cleanup Process: Click on the
OKbutton to start the cleanup process. Disk Cleanup will remove the selected files, freeing up space on your hard drive and potentially clearing some RAM space as well. - Confirm Deletion: You may be prompted to confirm the deletion of certain files. Review the files listed and click on
Delete Filesto proceed.
Clearing temporary files not only helps increase available disk space but also aids in freeing up RAM, as fewer temporary files are taking up memory. This can result in improved performance, faster application loading times, and smoother overall system operation.
It’s worth noting that the Disk Cleanup tool provided by Windows only clears certain types of temporary files. Some applications may create their own temporary files or cache data in different locations. In such cases, it’s advisable to check the settings or options within those specific applications and clear their temporary files if necessary.
Now that you know how to clear temporary files, let’s move on to our next method: increasing virtual memory.
Method 4: Increasing Virtual Memory
Virtual memory is a feature in Windows that allows your computer to use a portion of the hard drive space as supplemental memory when the physical RAM is running low. By increasing the virtual memory allocation, you can provide additional memory resources to your Windows 7 computer, which can help improve performance and prevent system slowdowns.
Follow these steps to increase virtual memory:
- Open the System Properties: Right-click on the
Computericon on your desktop or in the Start menu, and selectProperties. Alternatively, you can pressWindowskey +Pause/Breakon your keyboard to open the System Properties window. - Access Advanced System Settings: In the System Properties window, click on the
Advancedtab, and then click on theSettingsbutton under thePerformancesection. - Navigate to the Virtual Memory Settings: In the Performance Options window, go to the
Advancedtab, and under theVirtual Memorysection, click on theChangebutton. - Adjust the Virtual Memory Size: In the Virtual Memory window, uncheck the
"Automatically manage paging file size for all drives"option if it’s checked. Select theC:drive (or the drive where your operating system is installed) and choose theCustom sizeoption. - Set the Initial and Maximum Size: Specify the initial size and maximum size for the virtual memory. The initial size should be set to the recommended value, which is typically equal to the amount of installed RAM on your system. For the maximum size, you can set it to a higher value, such as 1.5 times the installed RAM or a specific value based on your requirements.
- Apply the Changes: After setting the virtual memory sizes, click on the
Setbutton, then clickOKto apply the changes. - Restart Your Computer: To make the new virtual memory settings take effect, restart your computer.
By increasing the virtual memory allocation, you provide Windows with more memory resources to use when needed, thus reducing the reliance on physical RAM. This can help improve performance, especially when running memory-intensive applications or multitasking.
Keep in mind that setting the virtual memory size too high or too low can negatively impact performance. It’s recommended to follow the recommended values or consult the documentation of your computer or operating system for optimal settings.
Now that you know how to increase virtual memory, let’s explore our final method: removing unwanted software.
Method 5: Removing Unwanted Software
Over time, your Windows 7 computer may accumulate a collection of unwanted or unnecessary software that takes up valuable disk space and consumes system resources, including RAM. Removing these unwanted programs can help free up storage space and improve overall system performance.
Here’s how you can remove unwanted software:
- Open the Control Panel: Click on the
Startbutton, then selectControl Panelfrom the menu. - Access the Programs and Features: In the Control Panel, click on
ProgramsorPrograms and Features, depending on your view settings. - View Installed Programs: In the Programs and Features window, you’ll see a list of all the programs installed on your computer. This list may take a few moments to populate.
- Choose Unwanted Software: Scroll through the list and identify the programs that you no longer need or use. Look for software that you installed unintentionally, software that came pre-installed on your computer and is not essential, or software that you haven’t used in a long time.
- Uninstall the Software: To remove a program, select it from the list and click on the
Uninstallbutton. Follow the on-screen instructions to complete the uninstallation process. Be cautious during this step and avoid uninstalling any critical system programs or software you are unsure about. - Repeat for Other Unwanted Software: Repeat the uninstallation process for all the unwanted software listed. Take your time to carefully review each program before uninstalling to ensure you’re not removing anything important.
By removing unwanted software, you not only free up disk space but also reduce the strain on your computer’s resources, including RAM. This can lead to improved performance, faster startup times, and a more organized and efficient system.
It is a good practice to regularly review and uninstall unused or unnecessary software to keep your computer tidy and optimize its performance. Additionally, consider using a reputable uninstaller program that can help identify and remove leftover files and registry entries when uninstalling programs.
Now that you know how to remove unwanted software, let’s wrap up our methods for clearing RAM space on Windows 7.
Conclusion
Clearing RAM space on your Windows 7 computer is essential for optimizing system performance and ensuring a smoother user experience. In this guide, we explored five methods that can help you free up RAM and improve your computer’s overall performance.
We started by using the Task Manager to identify and terminate memory-intensive processes. By selectively ending resource-hogging tasks, you can reclaim valuable RAM space and enhance system responsiveness.
Disabling unnecessary startup programs was another effective method we covered. By preventing unnecessary applications from launching at startup, you can reduce the strain on your computer’s resources and allocate more RAM to the tasks you actively use.
Clearing temporary files is a crucial step in minimizing disk space usage and clearing RAM space. By using the Disk Cleanup utility, you can remove temporary and unnecessary files, freeing up both storage and memory resources.
Increasing virtual memory can also help improve performance when your physical RAM is running low. By allocating additional disk space as supplemental memory, you provide your computer with a larger memory pool, reducing the risk of system slowdowns.
Finally, removing unwanted software can significantly impact your computer’s performance. By uninstalling programs you no longer need or use, you can free up valuable disk space and release memory resources, allowing your system to operate more efficiently.
Remember, it’s important to employ a combination of these methods based on your specific needs and system requirements. Regularly clearing RAM space and optimizing system resources can help you maintain a fast and responsive Windows 7 computer.
We hope this guide has provided you with valuable insights and steps to optimize your computer’s performance by clearing RAM space. Implement these methods, and you’ll experience improved speed, responsiveness, and overall efficiency in your computing tasks.