Introduction
Welcome to our guide on how to download skins from Skindex! Skins are a popular way to personalize your online presence and express your individuality. Whether you want to change the appearance of your character in a game or showcase your style on a social platform, Skindex is a fantastic resource for finding and downloading a wide range of skins.
Skindex is a user-friendly website that offers a vast collection of skins created by talented artists from around the world. With thousands of skins available, you can browse through different categories and themes to find the perfect look for your character.
In this guide, we will walk you through the step-by-step process of how to download skins from Skindex. Whether you’re a seasoned gamer or a beginner exploring the world of skins for the first time, we’ve got you covered.
By the end of this guide, you’ll be equipped with the knowledge and skills to navigate the Skindex website smoothly, locate the ideal skin for your needs, and effortlessly download it to use in your favorite games or platforms.
So, without further ado, let’s dive into the wonderful world of skins and discover how you can enhance your online presence with Skindex!
Step 1: Go to the Skindex website
The first step in downloading skins from Skindex is to visit their website. Open your preferred web browser and type in the URL https://www.minecraftskins.com/.
Once you’re on the Skindex website, you’ll be greeted with a user-friendly interface that showcases a wide array of skin options. Whether you’re interested in game-themed skins, trendy designs, or unique character creations, Skindex has it all.
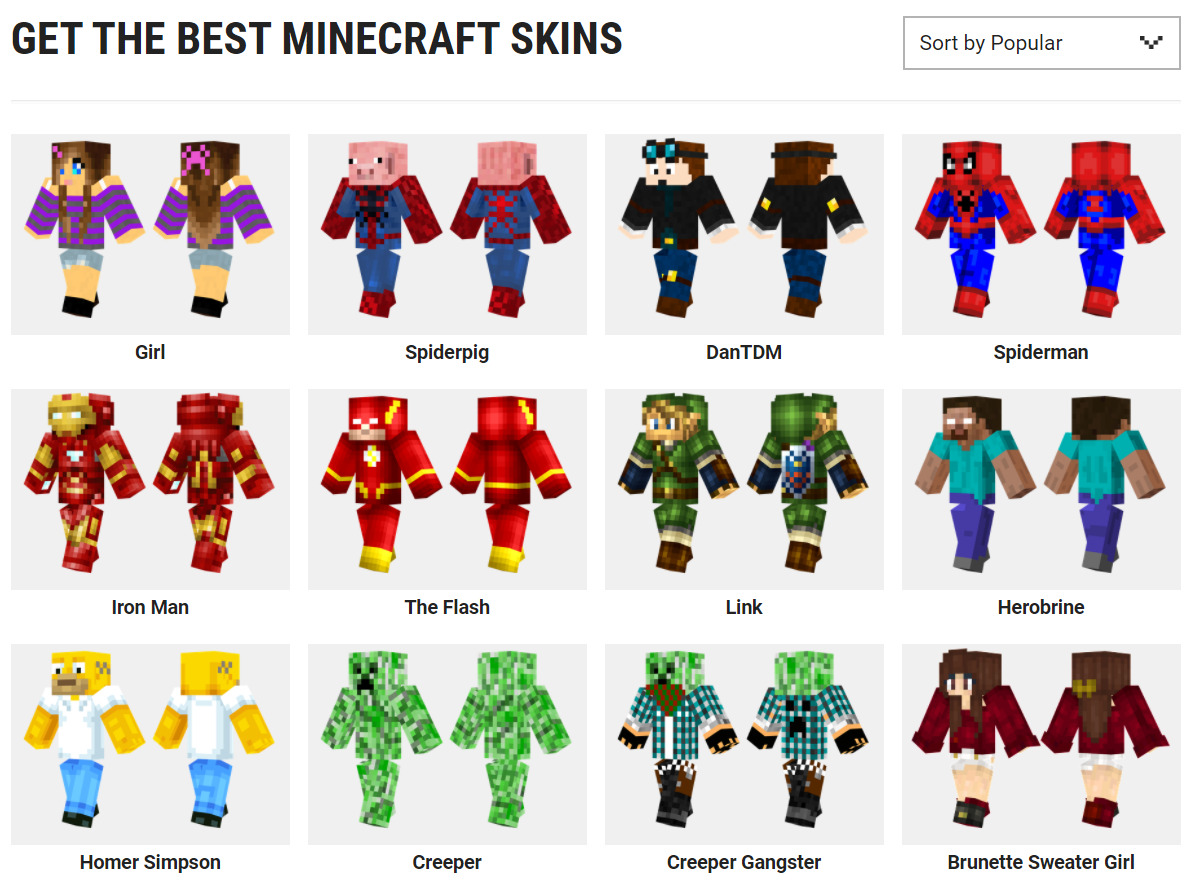
Navigating the Skindex website is a breeze. You’ll find a search bar at the top of the page, allowing you to enter specific keywords or themes to quickly find relevant skins. Below the search bar, you’ll see various categories and tags to assist you in narrowing down your search.
Take some time to explore the different categories and tags on the Skindex website. This will help you discover popular skins, new releases, and trending designs that other users are enjoying. From superheroes and animals to fantasy and retro themes, the possibilities for customization are endless.
Skindex also provides a convenient “Latest Skins” section, where you can find recently uploaded skins. This is a great way to stay up-to-date with the newest releases and ensure that you’re always at the cutting edge of skin fashion.
Now that you’re familiar with the Skindex website and its various features, it’s time to move on to the next step: browsing for the perfect skin. Get ready to dive into a world of creative possibilities!
Step 2: Browse for a skin
Now that you’re on the Skindex website, it’s time to start browsing for the perfect skin. Skindex offers various ways to discover skins that match your preferences.
One of the easiest options is to use the search bar at the top of the page. If you have a specific theme or character in mind, simply type in relevant keywords and hit enter. Skindex will then display a list of skins that match your search terms.
If you’re open to exploring different options, you can also browse through the categories and tags available on the website. Clicking on a specific category or tag will take you to a page dedicated to that particular theme. For example, if you’re a fan of Minecraft, you can click on the “Minecraft” category to view a wide range of Minecraft-themed skins.
Another great way to discover skins is by checking out the “Community” section on Skindex. This section features skins created by other users. You can sort the skins based on popularity, views, and downloads to find the most loved designs.
When browsing for skins, don’t forget to take advantage of the preview feature. Most skins on Skindex come with a preview image, allowing you to get a glimpse of how the skin will look on your character. This can help you make a more informed decision before downloading.
While browsing, you might come across skins that catch your eye but aren’t quite what you were looking for. In that case, don’t hesitate to explore the “Related Skins” section or use the “Random Skin” option to stumble upon hidden gems that might surprise you.
Remember to take your time and enjoy the process of browsing through the vast catalog of skins on Skindex. With numerous options available, there’s a skin out there that perfectly represents your style and personality. Once you’ve found a skin that speaks to you, it’s time to move on to the next step: selecting and downloading the skin.
Step 3: Select the skin you want
After browsing through the wide selection of skins on Skindex, you’ve likely found one that piques your interest. Now it’s time to select the skin and prepare it for download.
When you come across a skin that you like, simply click on it to access the skin’s dedicated page. Here, you’ll find more detailed information about the skin, including the creator’s name, upload date, and a larger preview image to get a better look at the design.
Take some time to examine the skin closely. Pay attention to the finer details, such as the colors, shading, and overall style. This will help you ensure that the skin aligns with your preferences and meets your expectations.
If you’re satisfied with the skin and want to proceed with downloading it, look for the “Download” button or link on the skin’s page. Typically, it’s prominently displayed and labeled as “Download Skin” or something similar.
Before clicking the download button, it’s crucial to double-check the licensing terms associated with the skin. Some skins may have specific copyright restrictions or terms of use that you need to adhere to. Make sure you read and respect the creator’s guidelines to avoid any potential issues.
Additionally, if you wish to support the skin’s creator, keep an eye out for any options to donate or show appreciation for their work. Many skin creators invest a great deal of time and effort into their designs, so your support can go a long way in encouraging them to continue creating amazing content.
Once you’ve confirmed that the skin’s licensing and usage terms align with your needs, go ahead and click the “Download” button. Skindex will then prompt you to save the skin file to your device.
Now that you’ve successfully chosen and downloaded the desired skin from Skindex, it’s time for the final step: applying the skin to your character or platform of choice.
Step 4: Download the skin
With the skin selected and its details reviewed, it’s time to download and save the skin to use on your character or platform.
After clicking the “Download” button on the skin’s page, a dialogue box will appear on your screen. This box will prompt you to choose a location on your device where you want to save the skin file. Select a convenient location, such as your desktop or a designated folder, for easy access.
Depending on your browser settings, the skin file may be automatically downloaded to the default “Downloads” folder. If this happens, you can locate the file in that folder or use your browser’s download history to find it.
Once the skin file is successfully downloaded and saved, you can now proceed to apply it to your character or platform. The exact process may vary depending on the game or platform you are using.
If you’re playing a game that supports custom skins, such as Minecraft, locate the folder where the game’s files are stored. Look for a specific folder dedicated to skins or character customization. Then, simply drag and drop the downloaded skin file into that folder.
If you’re using a platform or website that allows skin customization, such as a social media profile or avatar creator, navigate to the settings or profile section. Look for an option to upload or select a custom skin, and then choose the downloaded skin file from your device.
Once you’ve applied the skin to your character or platform, it should be visible in the game or on your profile. Take a moment to admire your new look and enjoy the personalized touch that the skin brings.
Remember, if you wish to change your skin in the future, you can always revisit Skindex and download a new one. The process remains the same, allowing you to explore new designs and keep your character or profile fresh and exciting.
Congratulations! You have successfully downloaded and applied a skin from Skindex. Now go ahead and show off your unique style to the world!
Conclusion
Congratulations on completing our guide on how to download skins from Skindex! We hope this step-by-step tutorial has helped you navigate the Skindex website with ease and find the perfect skin to express your individuality.
The Skindex website offers a vast collection of skins created by talented artists from around the world. By following the steps outlined in this guide, you were able to explore different categories, browse through trending designs, and discover skins that match your preferences.
Remember to take your time when browsing for skins on Skindex, as there is an abundance of options available. Utilize the search bar, explore different categories and tags, and don’t forget to check out the “Community” section to find skins created by other users.
Once you’ve found a skin that captures your attention, selecting and downloading it is a simple process. Review the skin’s details, ensure that you comply with the licensing terms, and click the “Download” button. Save the skin file to your device and apply it to your character or platform following the specific instructions for the game or platform you are using.
Now, you can enjoy a personalized online presence with your new skin. Whether you’re playing games or showcasing your style on social platforms, the downloaded skin from Skindex adds a unique touch to your avatar or profile.
Remember, creativity knows no bounds, and Skindex offers an ever-growing collection of skins to suit your preferences. Feel free to revisit the Skindex website whenever you’re looking for a fresh look or a new skin for customization.
Thank you for joining us on this journey through the world of skins and downloading from Skindex. We hope you continue to explore and enjoy the endless possibilities that Skindex has to offer.


