Introduction
Immersing oneself in the world of Minecraft is an experience like no other. Whether you are exploring vast landscapes, building impressive structures, or interacting with other players, customization is key to expressing your unique personality. One of the most exciting ways to personalize your Minecraft experience is by downloading and applying Minecraft skins.
Minecraft skins are graphical overlays that allow players to change the appearance of their in-game character, also known as a player model or avatar. These skins can transform your character into anything you can imagine, from superheroes to mythical creatures, and even real-life celebrities. With the ability to showcase your individuality, Minecraft skins add a fun and personal touch to your gaming experience.
While the process of downloading Minecraft skins may seem daunting at first, it is actually quite simple. In this article, we will guide you through the step-by-step process of downloading and applying Minecraft skins for the Education Edition of Minecraft, allowing educators and students to add a touch of creativity to their virtual classrooms.
By the end of this guide, you will be able to access a wide range of captivating Minecraft skins, empowering you to express your unique style and imagination within Education Edition. So, let’s dive in and discover the wonderful world of Minecraft skins!
What are Minecraft skins?
In the world of Minecraft, skins refer to the texture or image that covers the player model, essentially determining the look and appearance of your in-game character. Skins define the facial features, hair color, clothing, and overall visual representation of your avatar. They allow you to stand out from the crowd, showcasing your style and personality.
Minecraft skins come in many forms, ranging from simple and minimalistic designs to intricate and highly detailed creations. Whether you want to resemble your favorite fictional character or create a unique identity of your own, Minecraft skins offer endless possibilities for customization.
Creating Minecraft skins requires a basic understanding of graphic design and image editing tools. However, most players opt to download pre-made skins created by talented artists and developers from various online platforms. These platforms are vast treasure troves of creativity, offering a wide selection of skins to suit any preference.
Skins can be inspired by popular culture, movies, video games, or even original designs. From superheroes to animals, historical figures to fantasy creatures – the options are truly limitless. With such a vibrant and diverse community, Minecraft skins have become an integral part of the game, fostering creativity and enabling players to express their unique individuality.
It’s worth noting that Minecraft skins only affect the appearance of your character and do not grant any additional abilities or benefits in the game. They are purely cosmetic enhancements designed to customize your avatar and make your gameplay experience more enjoyable and personally meaningful.
Now that we understand what Minecraft skins are and their significance in the game, let’s explore how to download and apply these fantastic visual enhancements for Education Edition.
Why use Minecraft skins?
Using Minecraft skins offers numerous benefits and adds a whole new level of enjoyment to your Minecraft experience. Here are a few reasons why incorporating skins into your gameplay can truly enhance your time in the blocky world:
1. Personalization: Minecraft skins allow you to express your unique personality and style. With a vast array of skins available, you can transform your character into virtually anything, from your favorite character in a movie or TV show to a representation of your own imagination. Skins give you the freedom to make your Minecraft avatar truly reflect who you are.
2. Creativity: Minecraft is known for its creative potential, and adding customized skins takes that creativity to the next level. With a wide range of designs and themes to choose from, or even the ability to create your own, using skins allows you to explore your imagination and bring your ideas to life in the game.
3. Community Engagement: Minecraft has a thriving community of players who share and showcase their creativity through skins. By using skins, you can connect with other players, participate in skin contests, and even contribute your own designs. It fosters a sense of community and allows you to be part of a larger creative network.
4. Roleplay and Immersion: Whether you want to become a swashbuckling pirate, a fearless knight, or a mischievous goblin, Minecraft skins can help you fully immerse yourself in the role you want to play. By visually transforming your character, skins enhance the immersion and make your in-game adventures even more exciting.
5. Teaching Tool: In an educational setting, Minecraft skins can be used as a teaching tool. Students can create and customize skins to represent historical figures, characters from literature, or scientific concepts. Incorporating skins into the learning experience adds an element of fun and engagement, making the educational content more accessible and interactive.
Using Minecraft skins is a fantastic way to personalize your gaming experience, tap into your creativity, engage with the community, enhance roleplaying opportunities, and even facilitate learning. Now that you understand why skins are worth using, let’s delve into the process of downloading Minecraft skins specifically for the Education Edition of Minecraft.
How to download Minecraft skins for Education Edition
Downloading Minecraft skins for Education Edition is a straightforward process that allows you to customize the appearance of your in-game character. To get started, follow these step-by-step instructions:
Step 1: Find a trusted website for Minecraft skins
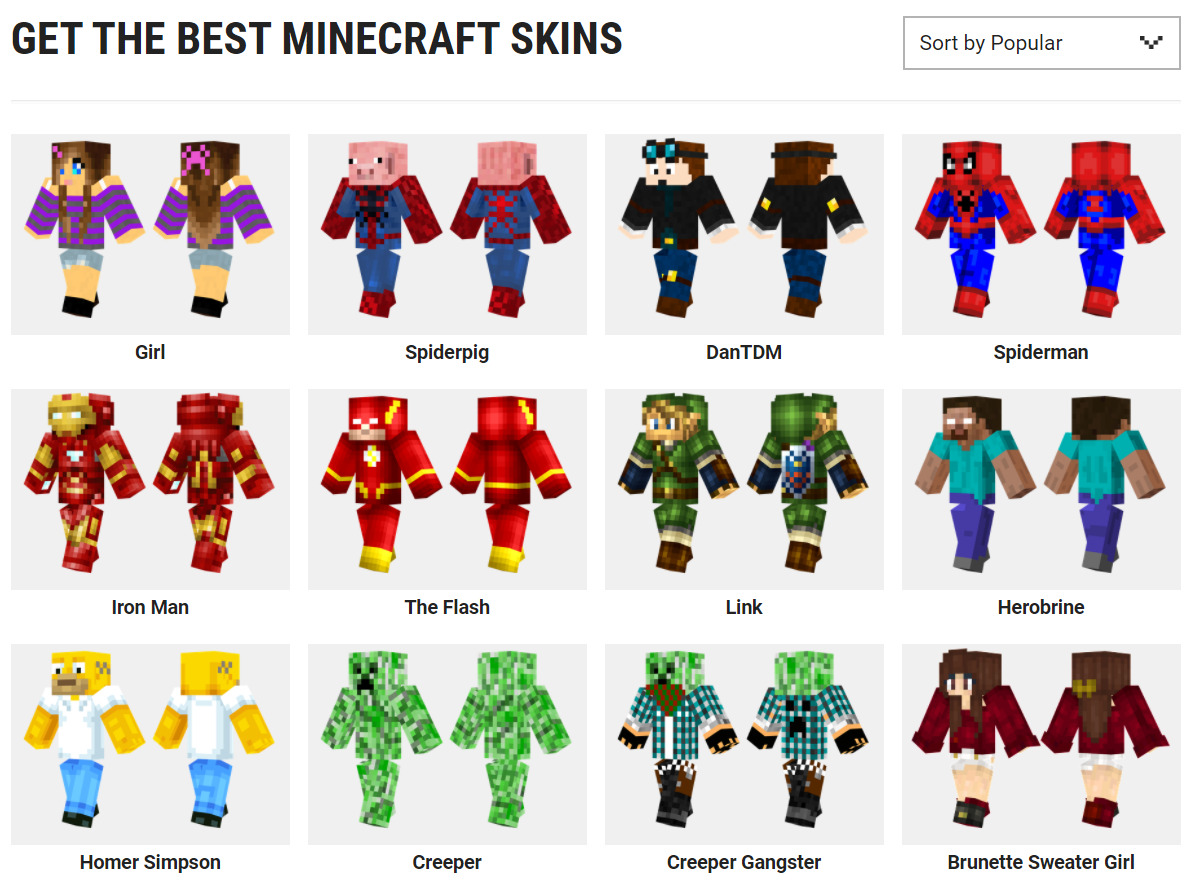
The first step is to search for a reliable and reputable website that provides Minecraft skins. Make sure to choose a trusted source to ensure the skins are safe and free from any malicious software or viruses. Popular platforms such as Minecraft Skins, Planet Minecraft, and The Skindex are excellent options to consider.
Step 2: Choose a skin you like
Browse through the wide selection of skins available on the chosen website. You can use filters and categories to narrow down your search or simply explore different themes and designs. Take your time to find a skin that resonates with your personal preferences or educational needs. Once you find the perfect skin, click on it for more details.
Step 3: Download the skin file
On the skin’s details page, look for the download button or link. Click on it to initiate the download process. The skin file will typically be in the PNG format, which is the standard file type for Minecraft skins. Save the file to a location on your computer where you can easily retrieve it later.
Step 4: Import the skin into Education Edition
Launch Minecraft Education Edition and open the Character Creator. In the Character Creator menu, select the “Owned” tab, then click on the “Import” button. This will allow you to import your downloaded skin file into the game.
Step 5: Apply the skin to your character
Once the skin is imported, find it in the “Owned” tab, select it, and click on the “Apply” button to assign the skin to your character. The changes will take effect immediately, and you will now see your character transformed with the new skin.
That’s it! You have successfully downloaded and applied a Minecraft skin for Education Edition. Feel free to experiment with different skins and change them as often as you like to keep your Minecraft experience fresh and exciting.
If you encounter any issues during the process, refer to the troubleshooting section below for common solutions.
Step 1: Find a trusted website for Minecraft skins
When it comes to downloading Minecraft skins, it is crucial to find a trusted and reliable website. With countless options available on the internet, it’s essential to choose a platform that offers safe and high-quality skins. Follow these guidelines to find a reputable website for Minecraft skins:
1. Research and read reviews: Start by conducting a bit of research to identify popular and well-established websites known for providing Minecraft skins. Look for user reviews and feedback to get an idea of the site’s reputation. This step will help ensure that you are using a trusted source.
2. Check the website’s security: Prioritize websites that have secure HTTPS connections. You can verify this by checking for the lock icon next to the website’s URL in your browser’s address bar. Secure connections protect your personal information and minimize the risk of encountering malware or viruses.
3. Evaluate the website’s design and functionality: A professional and user-friendly website design often indicates a more reliable source. Look for websites that are easy to navigate, visually appealing, and provide clear instructions on how to download and apply Minecraft skins.
4. Check for a large selection of skins: A reputable website will offer a wide range of skins to suit various preferences and interests. This ensures that you have ample options to choose from and can find a skin that truly resonates with you or meets your educational needs for Minecraft Education Edition.
5. Look for community engagement: Websites with active communities foster a sense of trust and reliability. Check if the website offers features such as user ratings, comments, or forums where players can interact and share their experiences. This community engagement demonstrates the website’s commitment to providing a positive experience for users.
6. Verify sources for submitted skins: Some websites allow users to submit their own skins. In such cases, it is crucial to ensure that the skins are screened and moderated to maintain quality and prevent the distribution of inappropriate or harmful content. Look for websites that have a review process or community reporting system to maintain a safe and enjoyable environment for users.
By following these guidelines, you can find trustworthy websites that offer a wide selection of high-quality Minecraft skins. Remember, it’s always better to be cautious and spend a few extra minutes researching before downloading any files to ensure a safe and enjoyable Minecraft skinning experience.
Step 2: Choose a skin you like
Once you have found a trusted website for Minecraft skins, it’s time to browse through the extensive collection and select a skin that resonates with you or meets the specific requirements for your Minecraft Education Edition experience. Here’s how to choose the perfect Minecraft skin:
1. Explore different categories: Most websites categorize their skins based on themes, such as superheroes, animals, fantasy, historical figures, or video game characters. Start by exploring different categories that align with your interests or the educational context you are working with. This will help narrow down your search and make it easier to find the right skin.
2. Utilize search filters: Many websites offer search filters to refine your search further. Filters can include options such as gender, style (cartoon, realistic, etc.), popularity, and more. Utilize these filters to narrow down your options and find a skin that matches your preferences or fits your educational needs.
3. Preview the skins: Before making a final decision, take advantage of any skin preview options provided by the website. This allows you to get a visual representation of how the skin will look on your Minecraft character. Consider factors like facial features, clothing, colors, and overall design to ensure it aligns with your vision.
4. Read user reviews and ratings: If available, take the time to read user reviews and ratings for the skins you are considering. This can provide insight into the quality and user satisfaction of the skin. Look out for positive reviews and high ratings to help guide your decision-making process.
5. Consider the context: If you’re using Minecraft Education Edition for educational purposes, consider selecting a skin that aligns with the theme or subject you are teaching. For example, if you’re teaching a lesson on the solar system, a skin representing an astronaut or celestial bodies could be fitting.
6. Trust your intuition: Ultimately, selecting a Minecraft skin is a personal choice. Trust your instincts and choose a skin that you genuinely like or feel excited about. Remember, the goal is to have fun and enjoy customizing your Minecraft experience to reflect your preferences and interests.
By following these steps, you can confidently choose a Minecraft skin that suits your style, educational needs, or desired character appearance. Once you have found the perfect skin, it’s time to move on to the next step: downloading the skin file.
Step 3: Download the skin file
Now that you have chosen the perfect Minecraft skin, it’s time to download the skin file to your computer. This file will be used to import and apply the skin to your in-game character. Follow these steps to download the skin file:
1. Locate the download button: On the website where you found your desired skin, locate the download button or link associated with the skin you want to download. This button is typically labeled as “Download” or indicated by an arrow pointing downwards.
2. Click on the download button: Once you have found the download button for the desired skin, click on it to initiate the download process. Depending on your browser settings, a prompt may appear asking you to confirm the download. Click “Save” or “Save As” to proceed.
3. Choose a location: A window will appear allowing you to choose a location on your computer where you want to save the skin file. Select a location that is easily accessible, such as your desktop or a designated folder. Remember the location where you save the file for future reference.
4. Wait for the download to complete: The skin file may vary in size depending on its complexity and quality. Larger files may take longer to download, so be patient and wait for the download to complete. The progress may be indicated by a download bar or a percentage display.
5. Verify the downloaded file: Once the download is complete, navigate to the location where you saved the skin file. Right-click on the file and select “Open” or “Preview” to verify that the downloaded file is in the correct format and corresponds to the desired skin you selected. In Minecraft, skins are typically saved as PNG files.
6. Keep the downloaded file: It’s essential to keep the downloaded skin file in a safe location on your computer. This allows you to easily locate and import the file into Minecraft Education Edition whenever you want to change or update your character’s appearance.
Now that you have successfully downloaded the Minecraft skin file, you are ready to move on to the next step: importing the skin into Education Edition. Follow the instructions provided in the next section to continue the process for a seamless customization experience.
Step 4: Import the skin into Education Edition
With the Minecraft skin file downloaded to your computer, it’s time to import the skin into Minecraft Education Edition. Follow these step-by-step instructions to complete the import successfully:
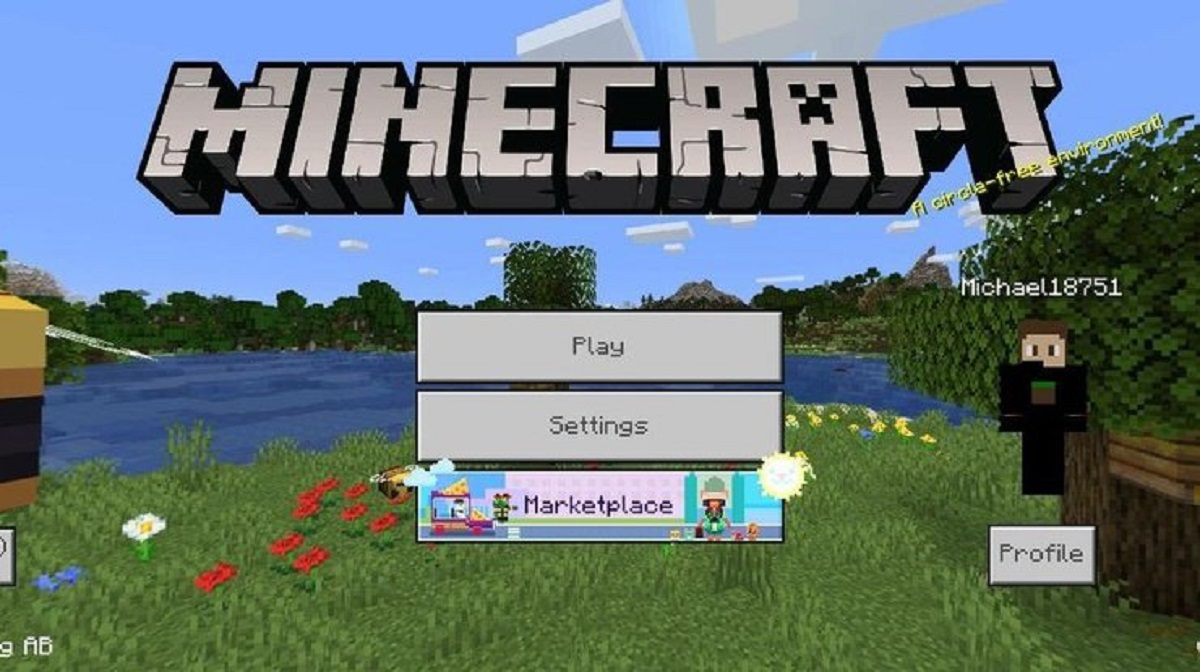
1. Launch Minecraft Education Edition: Start by launching Minecraft Education Edition on your computer. Wait for the game to fully load and bring you to the main menu. Make sure you are logged in with the appropriate credentials if required.
2. Open the Character Creator: In the main menu of Minecraft Education Edition, locate and click on the “Character Creator” button. This will open up the Character Creator interface, which allows you to modify your character’s appearance, including importing skins.
3. Navigate to the “Owned” tab: Within the Character Creator, you will see different tabs at the top of the screen. Click on the “Owned” tab to access the section where you can manage and import your own custom skins.
4. Click on the “Import” button: In the “Owned” tab, you will find an “Import” button. Click on this button to initiate the process of importing your downloaded skin file into Minecraft Education Edition. A file browser window will appear, allowing you to locate and select the downloaded skin file.
5. Locate and select the skin file: In the file browser window, navigate to the location where you saved the downloaded skin file. Once you have located the file, click on it to select it, and then click “Open” or “Import” to confirm your selection and proceed with the import process.
6. Wait for the skin to import: After clicking “Open” or “Import,” Minecraft Education Edition will process and import the skin file. Depending on the size of the file, this process may take a few seconds. Be patient and wait for the import to complete before moving on to the next step.
7. Locate the skin in the “Owned” tab: Once the skin import is complete, you should see the newly imported skin appear in the “Owned” tab of the Character Creator. It will now be available for you to apply and use for your in-game character.
8. Test the skin: To ensure that the skin has been successfully imported, you can click on the newly imported skin in the “Owned” tab and preview it on the character model. This allows you to see how the skin will look on your character before applying it.
Now that you have imported the Minecraft skin into Education Edition, it’s time to move on to the final step: applying the skin to your character. This will complete the process and allow you to see the new skin in your Minecraft gameplay.
Step 5: Apply the skin to your character
After successfully importing the Minecraft skin into Education Edition, the next step is to apply the skin to your in-game character. Follow these steps to complete the process:
1. Open the Character Creator: Launch Minecraft Education Edition and navigate to the main menu. Click on the “Character Creator” button to access the Character Creator interface where you can customize your character’s appearance.
2. Select the “Owned” tab: Within the Character Creator, locate and click on the “Owned” tab. This tab contains all the skins that you have imported and can apply to your character.
3. Choose the imported skin: Scroll through the skins displayed in the “Owned” tab until you find the imported skin that you want to apply to your character. Click on the skin to select it.
4. Apply the skin: After selecting the imported skin, you will see an “Apply” button. Click on this button to apply the skin to your character. Once applied, your character’s appearance will be instantly updated with the new skin.
5. Preview your character: Take a moment to preview your character’s new skin in the Character Creator interface. This will allow you to see how the skin looks on your character before entering the game world.
6. Start or join a game: Once you are satisfied with the applied skin, exit the Character Creator and either start a new game or join an existing game in Minecraft Education Edition. You will now see your character in the game world showcasing the newly applied skin.
7. Enjoy your customized character: With the skin applied, you can now enjoy playing Minecraft with your personalized and unique character. Explore the virtual world, engage in educational activities, or collaborate with others, all while showcasing your customized appearance.
Remember, you can always return to the Character Creator interface at any time to change or update your character’s skin. This allows you to experiment with different skins and continuously customize your character to match your preferences or educational requirements.
Now that you have successfully applied the Minecraft skin to your character, you can fully immerse yourself in the game and enjoy the customized visual experience. Good luck and have fun exploring Minecraft Education Edition with your personalized character!
Troubleshooting common issues with Minecraft skins
While downloading and applying Minecraft skins can be a straightforward process, you may encounter some common issues along the way. Here are a few troubleshooting tips to help you overcome potential problems:
1. Skin not importing: If you are experiencing difficulties importing a skin into Minecraft Education Edition, double-check that the file you downloaded is in the correct format. Skins should be in PNG format for Minecraft. Also, ensure that you are following the correct import process outlined in the previous steps. If the issue persists, try re-downloading the skin from a different source.
2. Skin not displaying correctly: After applying a skin, if you notice that it is not displaying correctly on your character, there may be compatibility issues. Confirm that the skin is compatible with the version of Minecraft Education Edition you are using. Additionally, ensure that the skin file is not damaged or corrupted by trying to re-import it or using a different skin filename.
3. Skins not visible in multiplayer: If you are playing multiplayer in Minecraft Education Edition and find that your skin is not visible to other players or vice versa, ensure that all players have properly imported and applied the skin. Also, check that the server you are playing on allows custom skins and has not disabled them. Consult the server’s rules or contact the server administrator for assistance.
4. Skin conflicts with another mod or resource pack: If you have other mods or resource packs installed in Minecraft Education Edition, conflicts between skins and these modifications can occur. Try removing or disabling other mods or resource packs temporarily to see if the skin displays correctly. If the issue is resolved, you may need to investigate compatibility issues between the skin and the conflicting mod or resource pack.
5. Skin file size too large: Minecraft has limitations on skin file size. If the skin you are trying to import exceeds the allowed size, it may not import or display properly. Check the file size of the skin and ensure it adheres to the size limits set by Minecraft Education Edition. If necessary, use an image editing tool to resize the skin file before importing it.
6. Skin file path or location: If you are unable to locate or import the skin file into Minecraft Education Edition, check the file path or location where you saved the skin. Ensure that the file is accessible and in a location that can be easily located by the game. If needed, move the skin file to a different directory or folder and try importing it again.
If you are still experiencing difficulties despite following these troubleshooting tips, consult the Minecraft Education Edition support documentation or reach out to their customer support for further assistance. Remember, patience and persistence are key when it comes to resolving any issues that may arise during the skin customization process.
Conclusion
Customizing your Minecraft experience with unique and creative skins is a fantastic way to express your personality, engage in roleplaying, and enhance your enjoyment of the game. Whether you’re a student looking to add some fun to your virtual classroom in Minecraft Education Edition or a player seeking personalization in the standard edition, downloading and applying Minecraft skins is a simple and rewarding process.
In this guide, we have walked through the step-by-step process of downloading and applying Minecraft skins for Education Edition. We discussed the importance of finding a trusted website, choosing a skin that resonates with you, downloading the skin file, importing it into Education Edition, and applying it to your character. By following these steps, you can easily elevate your Minecraft experience and make it uniquely yours.
Minecraft skins allow you to differentiate your character, unleash your creativity, engage with the Minecraft community, immerse yourself in roleplaying, and even use them as teaching tools in an educational setting. The possibilities are endless, and the only limits are your imagination and the availability of skins on trustworthy websites.
Remember, should you encounter any common issues while downloading or applying Minecraft skins, utilize the troubleshooting tips provided to overcome them. And don’t hesitate to consult the Minecraft Education Edition support documentation or reach out to their customer support for further assistance if needed.
Now that you have acquired the knowledge and skills to personalize your Minecraft adventure, it’s time to dive into the vast collection of Minecraft skins and create a character that truly reflects your style, interests, or educational goals. Get out there and let your customized Minecraft journey begin!