How to Make Your Own Minecraft Skin
Do you want to express your creativity and stand out in the world of Minecraft? One of the best ways to do so is by creating your own Minecraft skin! Customizing your character’s appearance with a unique skin is not only fun but also allows you to showcase your individuality. In this blog post, we will guide you through the process of making your own Minecraft skin. So, let’s dive in and unleash your imagination!
Key Takeaways:
- Minecraft skins allow you to customize your character’s appearance.
- Creating your own Minecraft skin offers a unique way to express your creativity.
Step 1: Inspiration and Planning
Before diving into the skin-making process, take some time to brainstorm and gather inspiration for your Minecraft character’s look. Consider the style, colors, and theme you want to incorporate. This will help you create a skin that truly represents your vision. Here are a few tips to get you started:
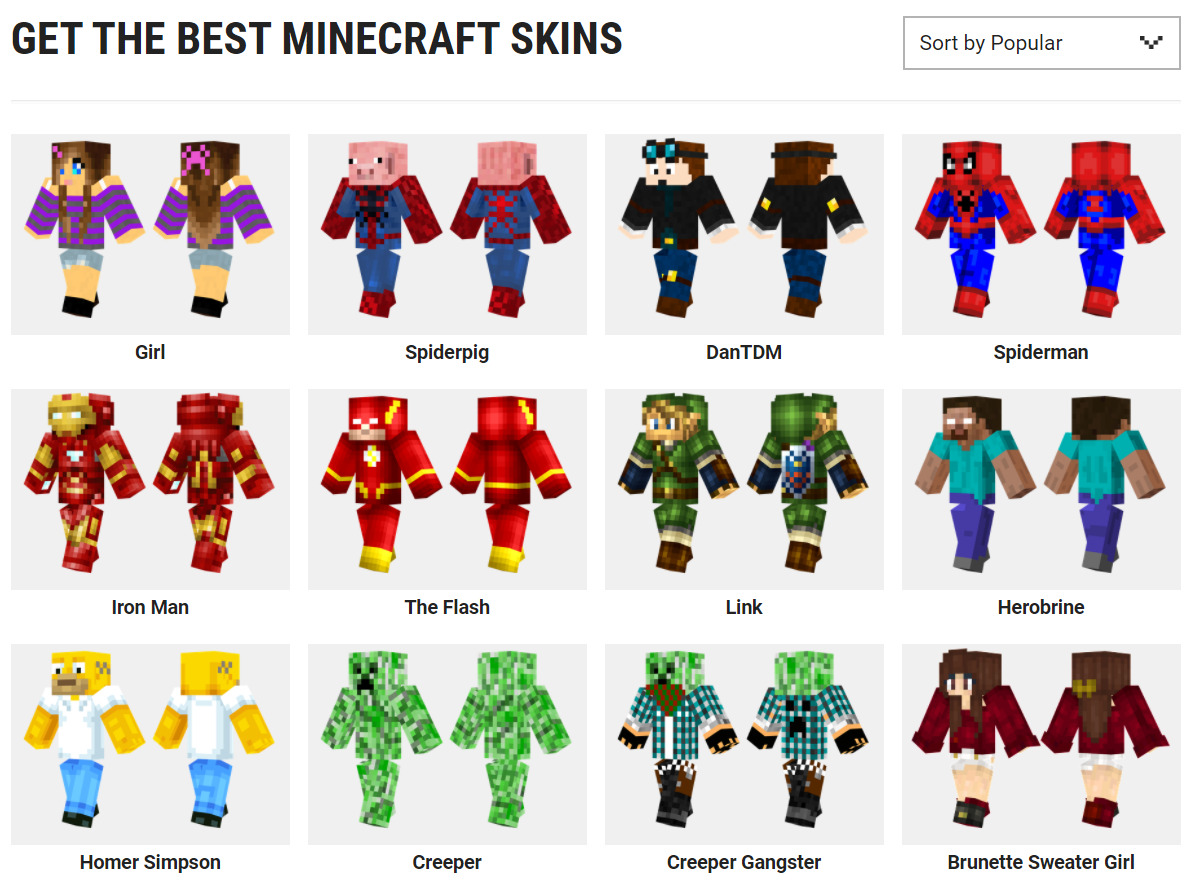
- Check out online galleries and forums where Minecraft players share their custom skins.
- Look for characters from your favorite movies, games, or books that inspire you.
- Sketch or make a list of ideas for your skin’s design and color palette.
Step 2: Choose Your Skin Editor
There are various skin editors available online that make it easy to create and modify Minecraft skins. Here are a few popular ones:
- Novaskin: A user-friendly web-based editor with pre-made templates and an intuitive interface.
- Skindex: An online repository of user-created skins, where you can also edit and create your own.
- MCSkinEdit: A downloadable program that offers advanced features for experienced skin creators.
Choose the editor that suits your needs and preferences. Once you’ve selected your editor, it’s time to move on to the next step.
Step 3: Design and Color Your Skin
This is where the fun really begins! Using your chosen skin editor, start designing and coloring your Minecraft skin. You can choose to start from scratch or utilize the features provided by the editor, such as templates or pre-existing elements. Here are a few tips to help you along the way:
- Add details: Fine-tune your skin by adding shading, highlights, and textures to make it more visually appealing.
- Use layers: Take advantage of the layering function in your skin editor to add depth and complexity to your design.
- Experiment and iterate: Don’t be afraid to experiment with different ideas and colors. Feel free to make adjustments until you are satisfied with the final result.
Step 4: Save and Apply Your Minecraft Skin
Once you have finished creating your Minecraft skin, it’s time to save and apply it to your character. Follow these simple steps:
- Save your skin as a PNG file on your computer.
- Go to the official Minecraft website and log in to your account.
- Click on the “Profile” tab and navigate to the “Skin” section.
- Upload your saved skin PNG file.
- Click “Save” and voila! Your Minecraft character will now sport your custom-made skin.
Unleash Your Creativity!
Designing your own Minecraft skin offers endless possibilities to let your creativity run wild. From superheroes to mythical creatures or even a version of yourself, the choice is yours! With the step-by-step guide provided in this blog post, you are now equipped with the knowledge to create a unique Minecraft skin that reflects your personality and style. So what are you waiting for? Grab your virtual paintbrush and start bringing your imagination to life in the world of Minecraft!