Introduction
Welcome to the world of music! Whether you’re a music enthusiast or just looking to expand your iTunes library, transferring music from your phone to iTunes is a great way to consolidate all your favorite tracks in one place. With iTunes, you can easily organize, sync, and access your music collection across various devices. In this guide, we’ll walk you through the step-by-step process of downloading music from your phone to iTunes, so you can enjoy your favorite tunes on your computer or other Apple devices.
Sharing music between your phone and iTunes not only allows you to free up storage on your device, but it also gives you the flexibility to create playlists, edit track information, and take advantage of all the features that iTunes has to offer. Whether you have purchased music from the iTunes Store or have downloaded songs from other sources, you can effortlessly transfer them to your iTunes library. So, let’s not waste any time and dive into the simple steps you need to follow to download music from your phone to iTunes.
Step 1: Connect Your Phone to Your Computer
The first step in transferring music from your phone to iTunes is to establish a connection between your phone and your computer. To do this, you will need to use a USB cable that is compatible with your phone. Here’s a detailed guide on how to connect your phone to your computer:
- Locate the USB port on your computer. It is usually found on the sides or back of your computer tower or along the edges of your laptop.
- Take the USB cable and plug one end into the USB port on your computer.
- Now, take the other end of the USB cable and plug it into the charging port or data port on your phone. Make sure it is securely connected.
- Once the connection is established, your phone should prompt you with options for USB connection. Select the option that allows for file transfer or media sync.
- Your computer may display a notification or prompt, acknowledging the connected phone. Follow any on-screen instructions to proceed.
It’s important to ensure that your phone is unlocked before making the connection, as some devices may not establish a connection if the phone is locked. Once the connection is successfully established, you’re ready to move on to the next step.
Step 2: Open iTunes
Now that your phone is connected to your computer, it’s time to open iTunes. iTunes is a free software developed by Apple that serves as a media management and playback tool. It allows you to organize and play your music collection, create playlists, and sync your library with your Apple devices. Follow these steps to open iTunes:
- If you’re using a Windows computer, click on the “Start” button in the bottom left corner of your screen. Then, search for “iTunes” in the search bar and click on the app when it appears in the search results. If you’re using a Mac, you can find iTunes in your Applications folder or access it from the Dock.
- Once you’ve found the iTunes app, click on it to open it. The iTunes interface will launch, showing your music library, playlists, and other options.
- If this is your first time opening iTunes, you may be prompted to agree to the terms and conditions of the software. Read through the terms and conditions, and then click on the “Agree” or “Accept” button to proceed.
- After agreeing to the terms and conditions, iTunes will load your library and display the main interface. You’re now ready to start transferring music from your phone to iTunes.
It’s important to have the latest version of iTunes installed on your computer to ensure a smooth transfer process. If you don’t have iTunes installed, you can download it from the official Apple website and follow the installation instructions provided. With iTunes open and ready, let’s move on to the next step where we will transfer purchased music from your phone to iTunes.
Step 3: Transfer Purchased Music from Phone to iTunes
If you have purchased music from the iTunes Store or any other platform using your phone, you can easily transfer it to your iTunes library. Here’s how to do it:
- In iTunes, click on the “File” tab located at the top left corner of the screen. From the drop-down menu, select “Add File to Library” or “Add Folder to Library” depending on whether you want to transfer individual songs or a whole folder of music.
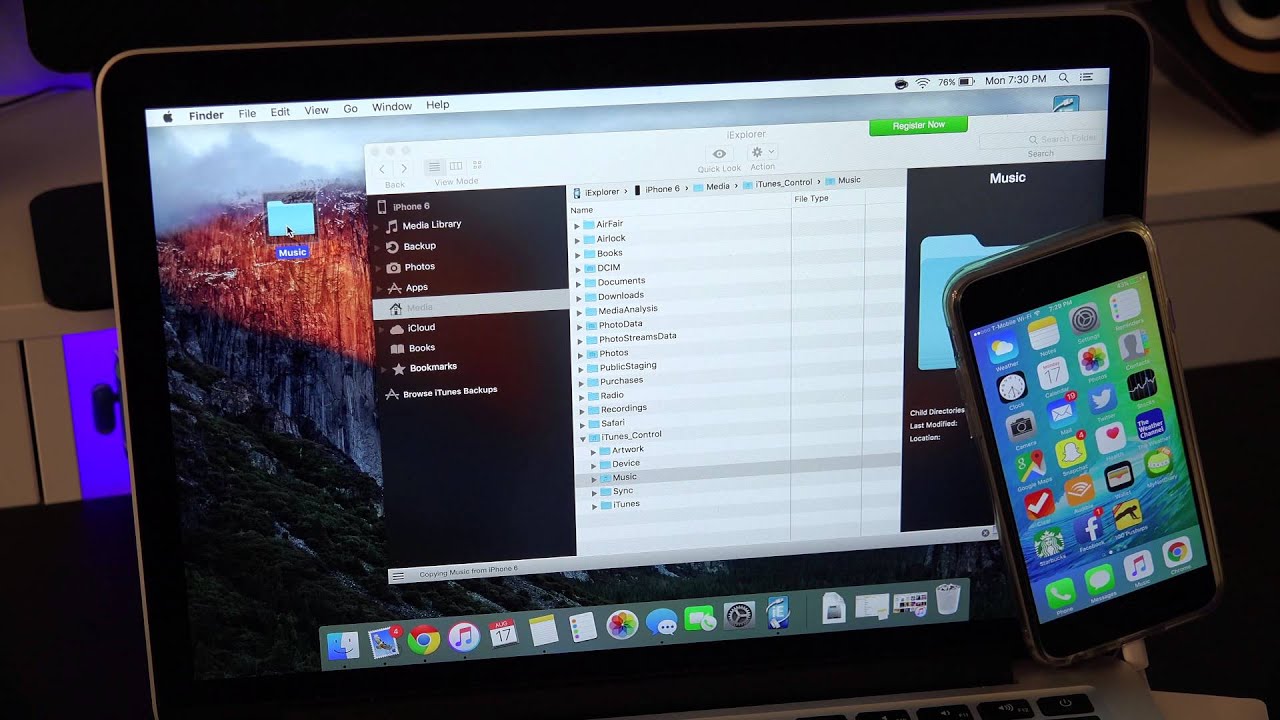
- A file browser window will appear. Navigate to the location on your phone where the purchased music is stored. This is typically in the “Music” or “iTunes” folder.
- Select the desired music files or folder and click on the “Open” button. iTunes will then import the selected music into your library.
- You should now see the transferred music in your iTunes library under the “Songs” tab. You can sort, organize, and create playlists with your newly imported music.
It’s worth noting that this method only works for music that has been purchased using your Apple ID or downloaded from sources that are compatible with iTunes. If you have music that was obtained from other platforms or sources, follow the next step to import non-purchased music from your phone to iTunes.
Step 4: Import Non-Purchased Music from Phone to iTunes
If you have music on your phone that was obtained from sources other than the iTunes Store, such as ripped CDs, downloaded MP3s, or music acquired from third-party apps, you can still import it into your iTunes library. Here’s how to import non-purchased music from your phone to iTunes:
- In iTunes, click on the “File” tab located at the top left corner of the screen. From the drop-down menu, select “Add File to Library” or “Add Folder to Library” depending on whether you want to import individual songs or a whole folder of music.
- A file browser window will appear. Navigate to the location on your phone where the non-purchased music files are stored.
- Select the desired music files or folder and click on the “Open” button. iTunes will then import the selected music into your library.
- The imported music will now be available in your iTunes library under the “Songs” tab. You can organize, edit, and create playlists with the newly imported songs.
It’s important to note that iTunes supports a wide range of audio file formats, including MP3, AAC, WAV, and more. However, if you have music in unsupported formats, iTunes may not be able to play or import them. In such cases, you may need to convert the files to a compatible format using third-party software before importing them into iTunes.
By following these steps, you can easily import non-purchased music from your phone to your iTunes library, ensuring that all your favorite songs are in one centralized location.
Step 5: Sync iTunes Library with Your Phone
After transferring your music from your phone to iTunes, the final step is to sync your iTunes library with your phone. Syncing ensures that all your newly added music, as well as any changes made to playlists or metadata, are reflected on your phone. Follow these steps to sync your iTunes library:
- Connect your phone to your computer using the same USB cable you used in Step 1.
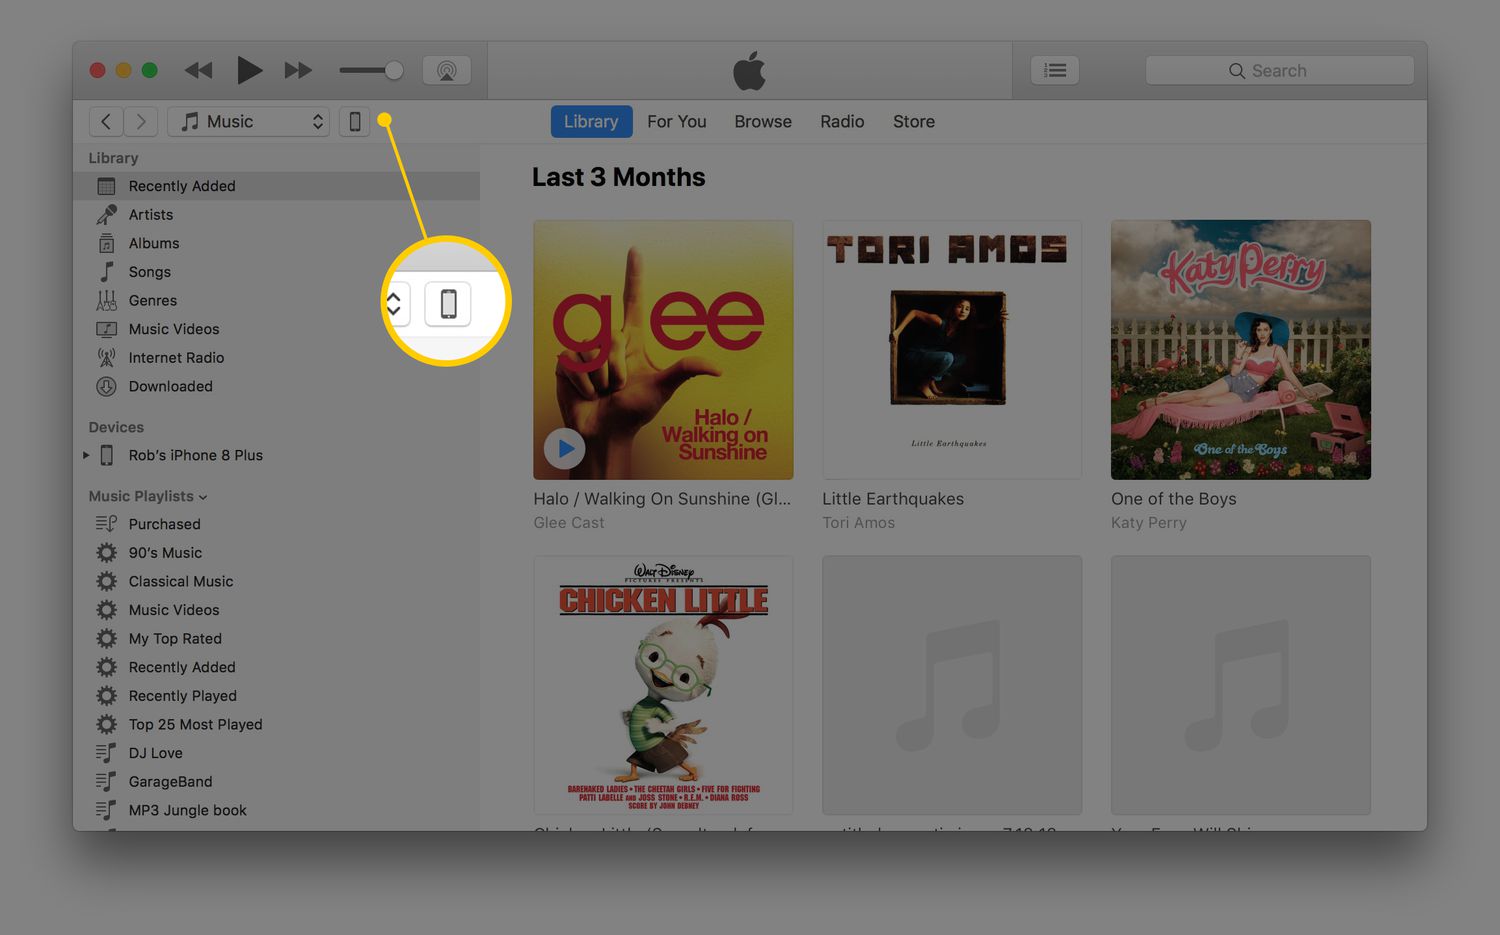
- In iTunes, click on the phone icon located in the upper-left corner of the screen. This will take you to the Summary page for your device.
- In the left-hand sidebar, you’ll find various options for syncing your content. To sync your music library, click on the “Music” tab.
- Select the option to “Sync Music” and choose whether you want to sync your entire library or selected playlists, artists, albums, or genres.
- Once you’ve made your selections, click on the “Apply” or “Sync” button to start the synchronization process.
Depending on the size of your music library and the speed of your computer and phone, the syncing process may take some time to complete. It’s important to have a stable internet connection and sufficient storage space on your phone for the sync to be successful.
Once the sync is complete, you can disconnect your phone from your computer and enjoy your newly transferred music on your device. You can now listen to your favorite songs, create playlists, and enjoy a seamless music experience wherever you go.
Keep in mind that syncing your iTunes library will not only transfer music but also other media such as podcasts, audiobooks, and videos, depending on the settings you choose. Adjust the sync options based on your preferences to ensure a personalized experience.
With your iTunes library now synced with your phone, you have successfully completed the process of transferring your music from your phone to iTunes and ensuring that your music collection is up to date across all your devices.
Conclusion
Congratulations! You have learned how to download music from your phone to iTunes, allowing you to organize and enjoy your music collection on your computer or other Apple devices. By following the steps outlined in this guide, you can easily transfer purchased music as well as non-purchased music from your phone to iTunes.
Remember to connect your phone to your computer using a compatible USB cable and open iTunes to begin the transfer process. You can transfer purchased music by selecting the “Add File to Library” or “Add Folder to Library” option in iTunes. For non-purchased music, locate the files or folders on your phone and import them into your iTunes library.
Once you have transferred your music to iTunes, don’t forget to sync your iTunes library with your phone to ensure that all the changes and additions are reflected on your device. The syncing process allows you to enjoy your latest music additions and keep your library updated.
With your music now safely stored in your iTunes library, you have the freedom to create playlists, edit track information, and explore the various features that iTunes has to offer. Whether you’re a music lover, a DJ, or simply enjoy having your favorite songs at your fingertips, this guide has provided you with the necessary knowledge to easily download music from your phone to iTunes.
So, go ahead and start transferring your music collection to iTunes. Take advantage of the ability to access your music library from any of your Apple devices, ensuring that your favorite songs are always just a click away.
Enjoy the incredible world of music with iTunes!