Inserting the SD Card
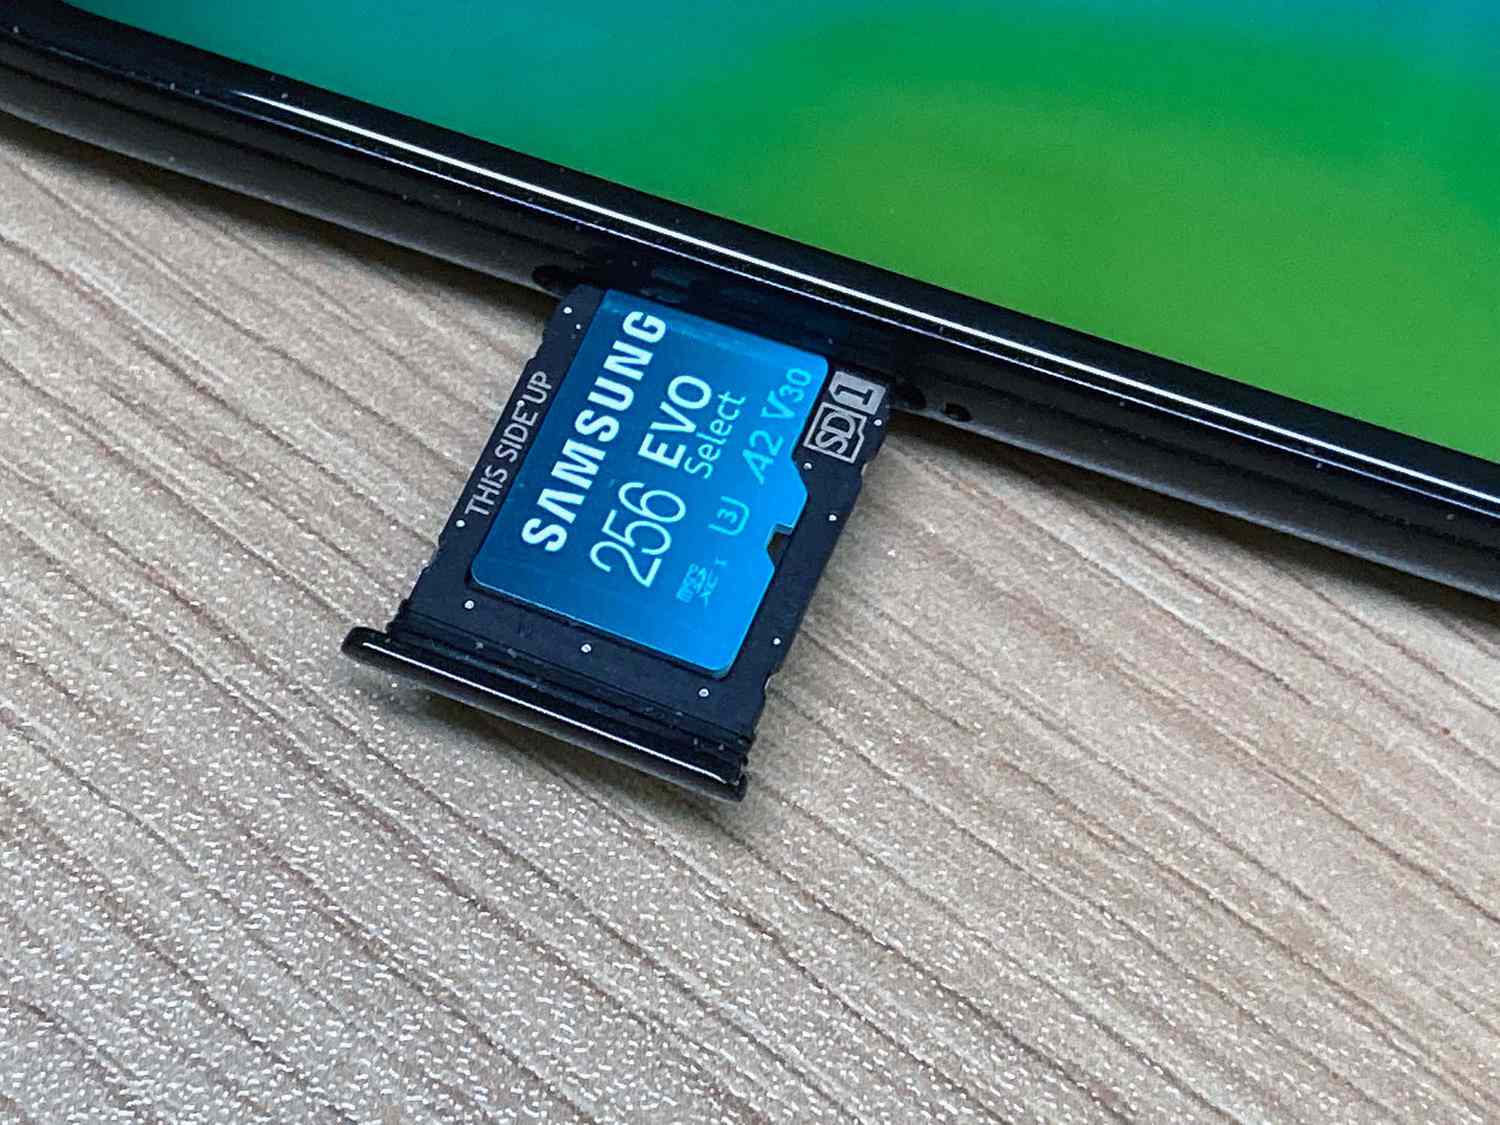
Are you ready to expand the storage capacity of your Samsung device? One of the easiest ways to do so is by inserting an SD card. This allows you to store more photos, videos, music, and other files without worrying about running out of space. Here’s a step-by-step guide on how to insert an SD card into your Samsung device:
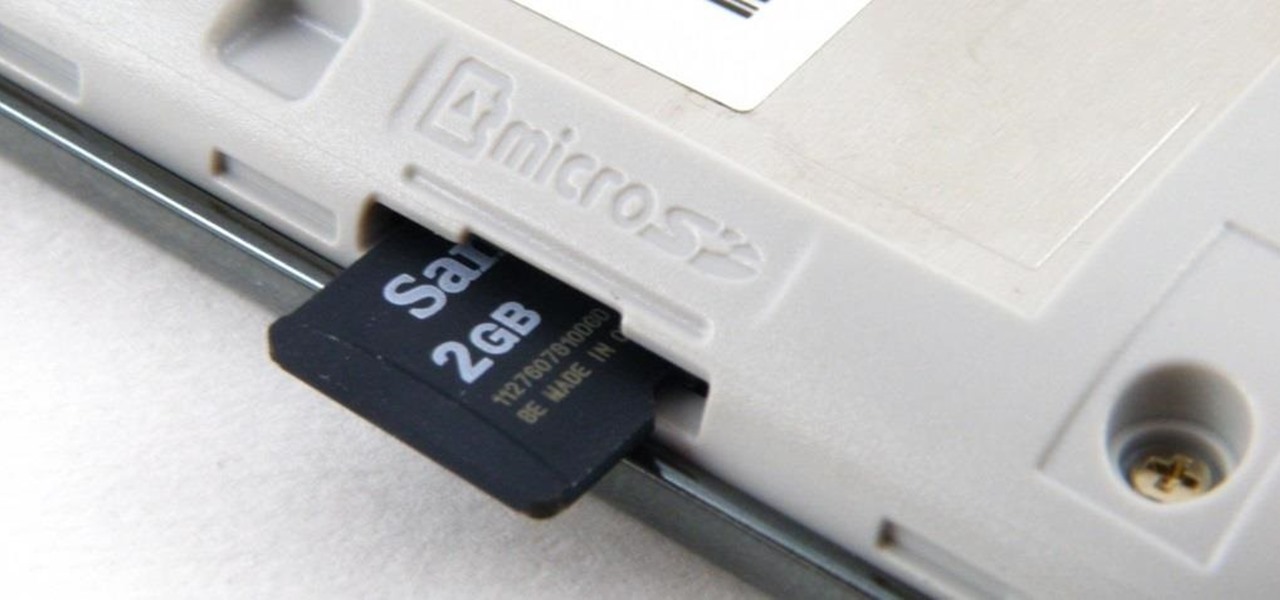
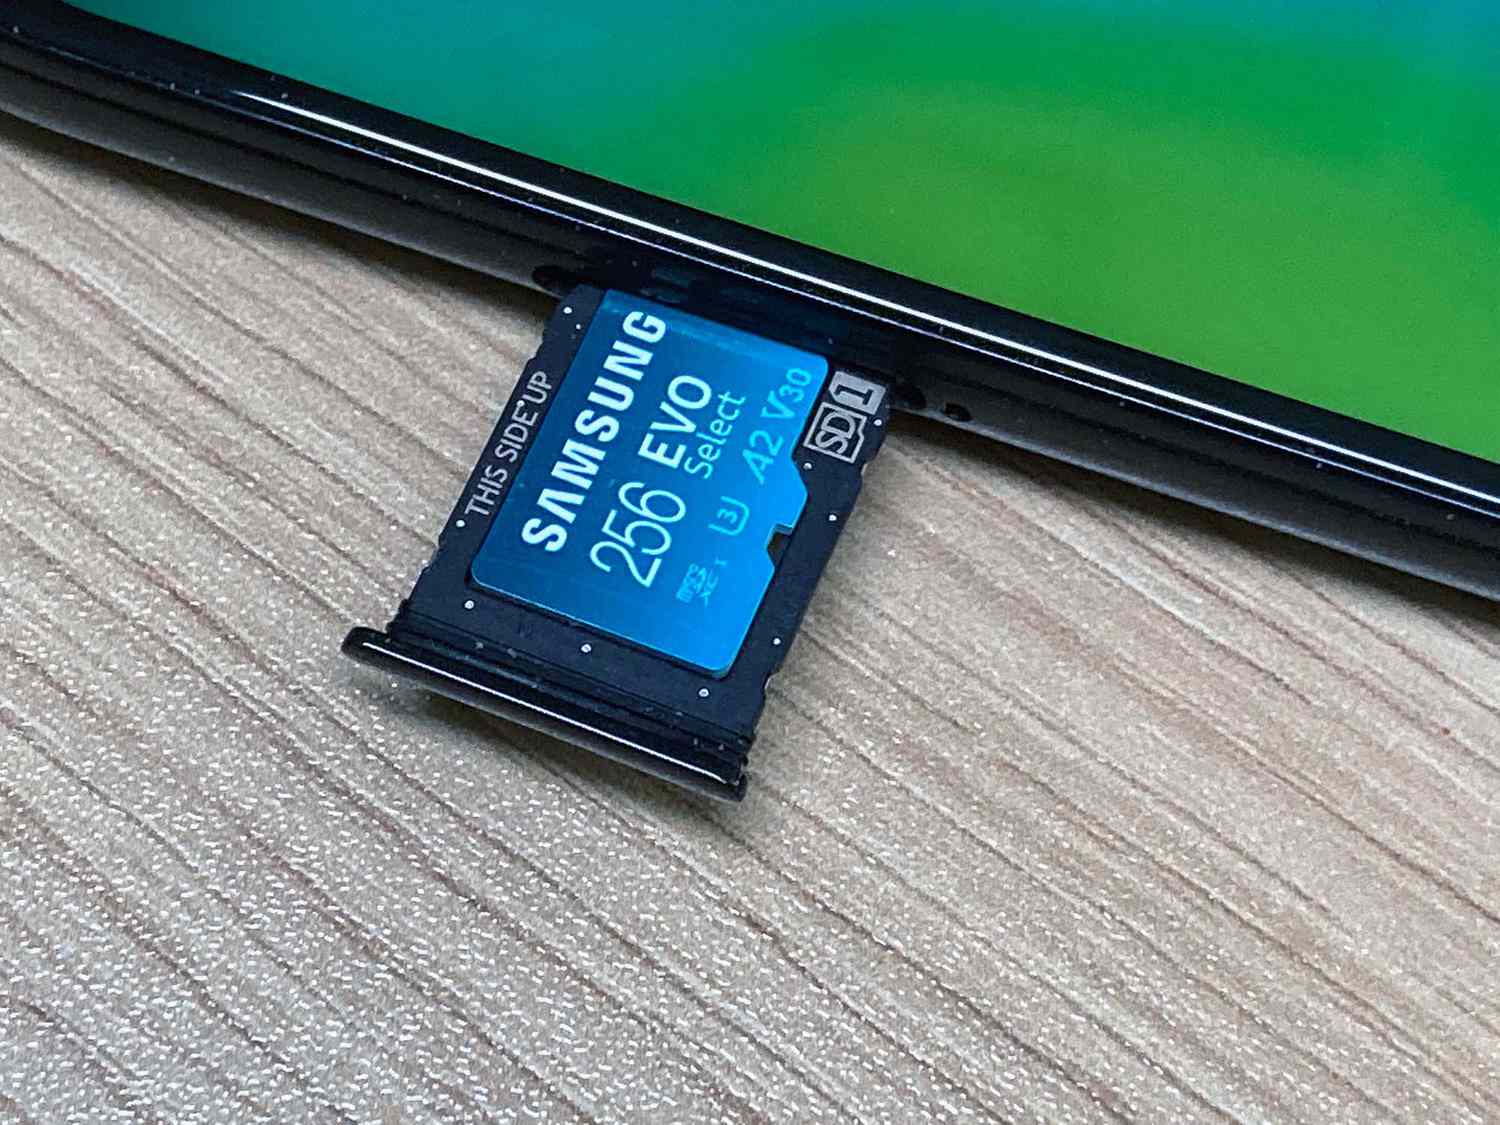
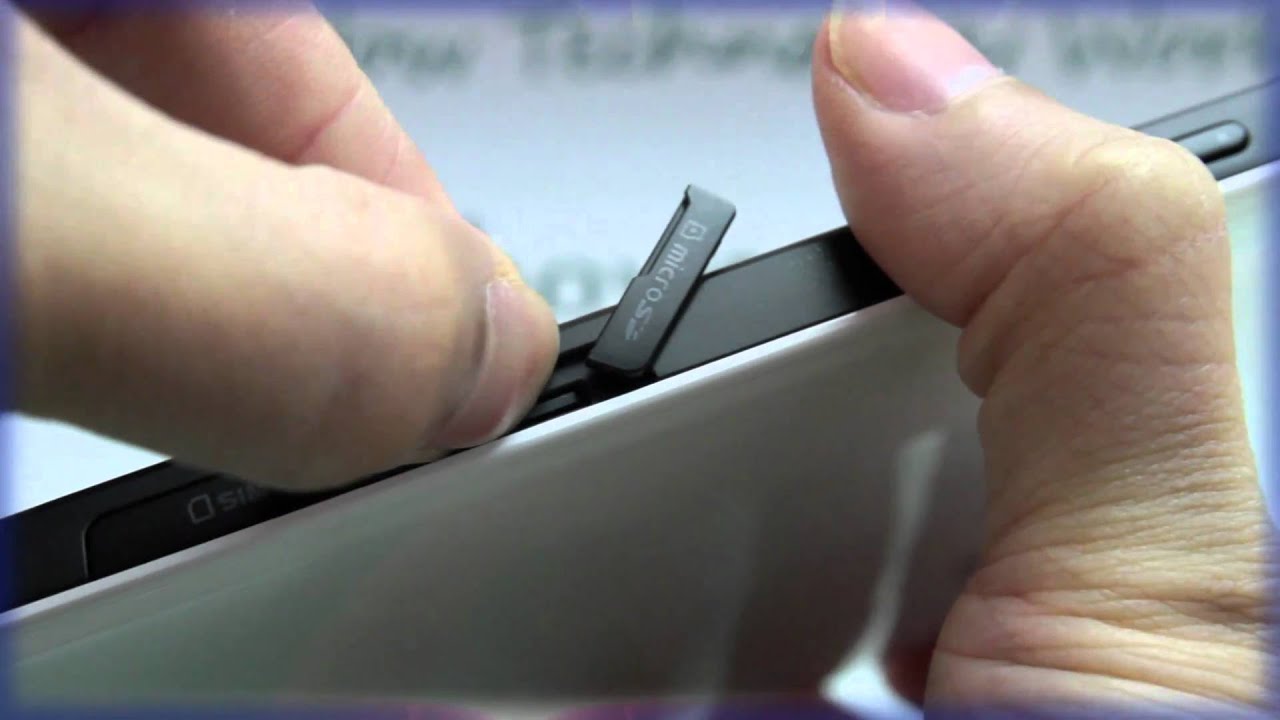
- Locate the SD card slot on your device. On most Samsung devices, the slot is typically found on the side of the device or under the back cover.
- If your device has a removable back cover, power off your device and carefully remove the cover.
- Identify the SD card slot and align the gold contacts on the SD card with the contacts in the slot.
- Gently insert the SD card into the slot, making sure it is secure.
- If you removed the back cover, carefully reattach it.
- Power on your device and wait for it to recognize the SD card.
- Once the SD card is recognized, you can begin using it to store files and data.
It’s important to note that not all Samsung devices have a removable back cover. In some cases, the SD card slot may be located on the side of the device. If you’re unsure about the location of the SD card slot on your specific Samsung device, refer to the user manual or the manufacturer’s website for guidance.
By following these simple steps, you can easily insert an SD card into your Samsung device and expand its storage capacity. Whether you want to store more photos, videos, or music, an SD card provides a convenient solution to keep your device running smoothly without worrying about running out of space.
Formatting the SD Card
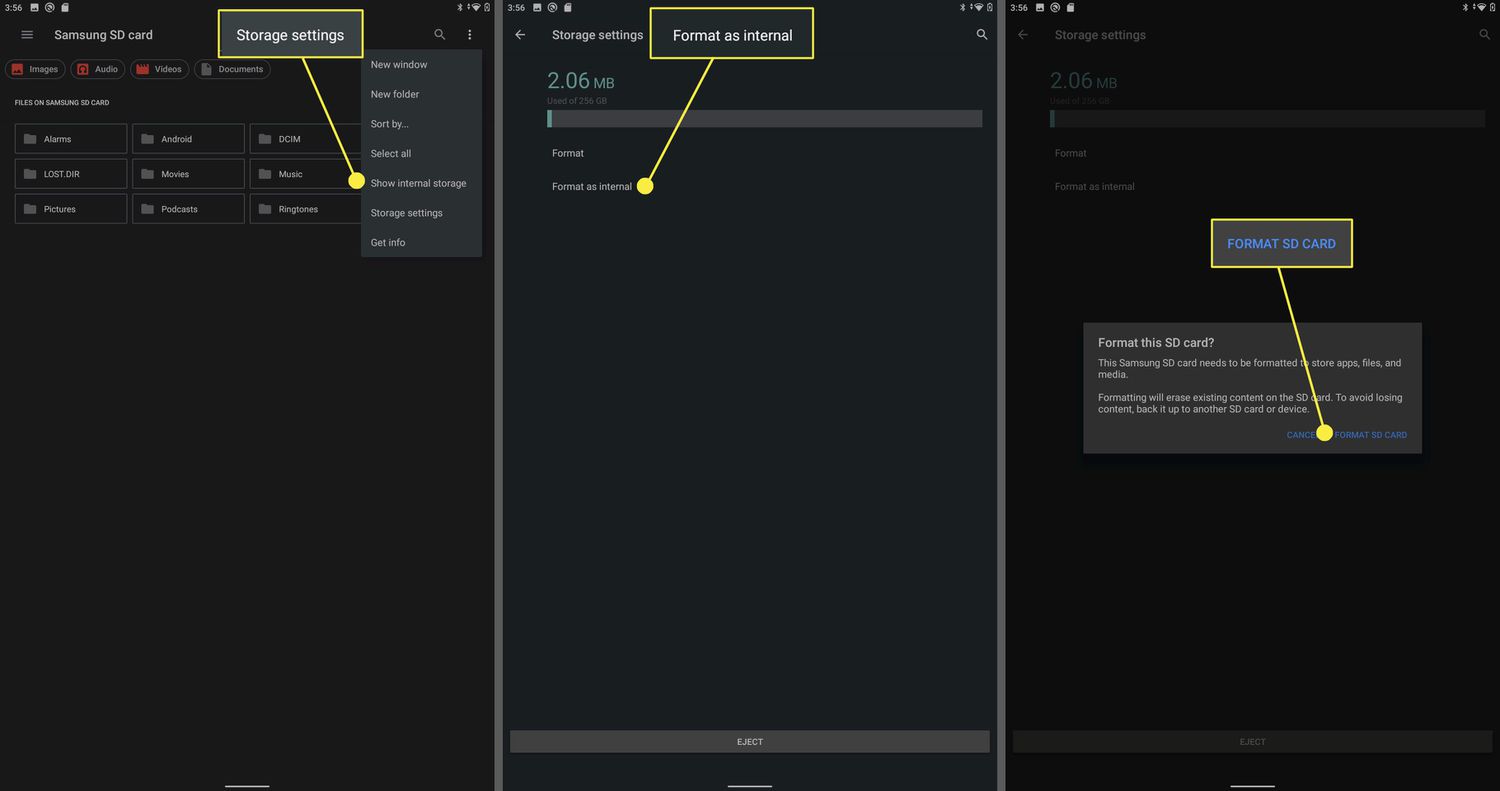
Before you start using a new SD card on your Samsung device, it’s essential to format it. Formatting prepares the SD card for use and ensures compatibility with your device. Here’s how you can format your SD card:
- Go to the Settings menu on your Samsung device.
- Scroll down and tap on “Device care” or “Device maintenance,” depending on your device model.
- Tap on “Storage” or “Storage settings.”
- Select “SD card” from the list.
- Tap on the three-dot menu icon in the top-right corner of the screen.
- Choose “Format” or “Format as internal” (if applicable).
- Read the on-screen instructions carefully, as formatting will erase all data on the SD card.
- Confirm your decision to format the SD card.
- Wait for the formatting process to complete. This may take a few minutes.
Formatting the SD card ensures that it is correctly set up for use, and any previous data or file system errors are resolved. It also allows your Samsung device to create the necessary file structure on the SD card for optimal performance.
Keep in mind that formatting the SD card will erase all data stored on it. Therefore, if you have any important files or documents, make sure to back them up before proceeding with the formatting process.
Once the formatting is complete, your SD card is ready to be used with your Samsung device. You can start storing files, installing apps, and utilizing the additional storage space it provides. Formatting the SD card ensures a smooth and efficient user experience, allowing you to maximize the benefits of expanding your device’s storage capacity.
Changing Default Storage Location
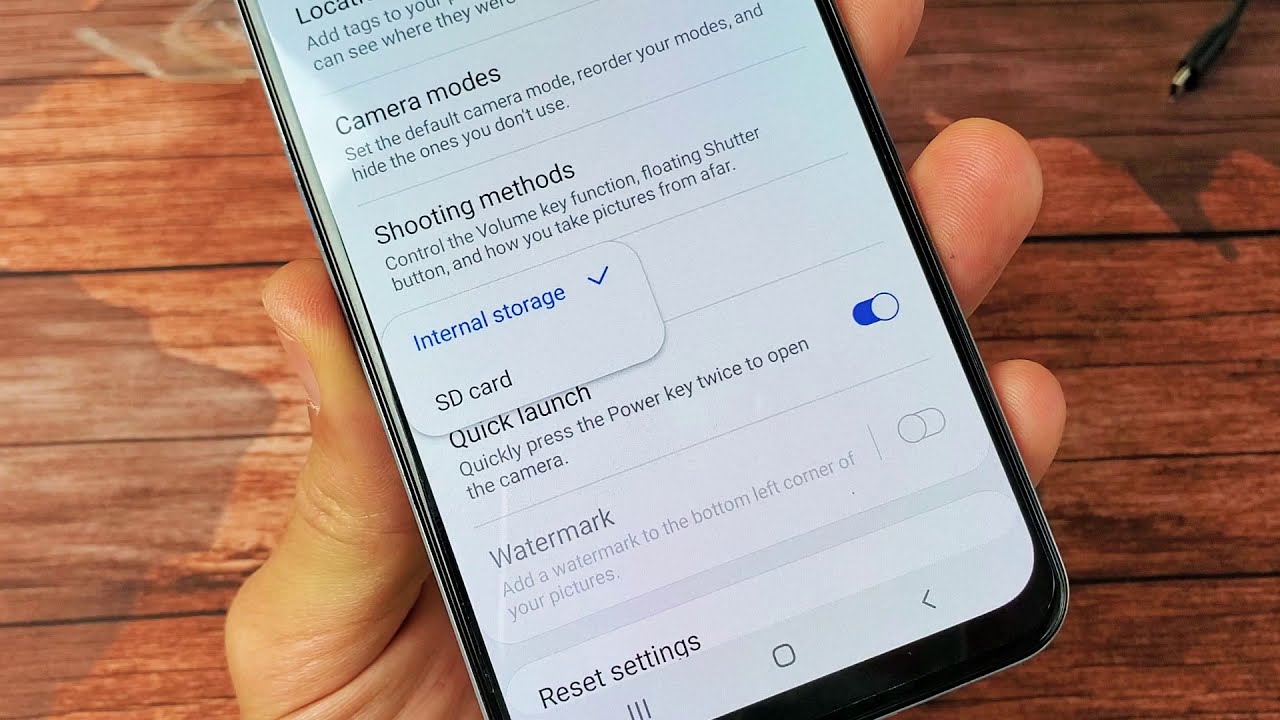
By default, Samsung devices store photos, videos, and other files in the internal storage. However, if you have an SD card inserted, you can change the default storage location to save space on your device. Here’s how you can change the default storage location on your Samsung device:
- Open the Camera app or any other app that allows you to save files.
- Access the settings within the app. This can usually be done by tapping on the gear icon or navigating through the options menu.
- Look for the “Storage” or “Storage location” setting.
- Select “SD card” as the default storage location.
- Save the changes, and any new files will now be stored in the SD card instead of the internal storage.
Changing the default storage location can help free up space on your device’s internal memory, especially if you frequently capture photos and videos or download large files. Utilizing the SD card for storage can also improve the overall performance of your Samsung device by reducing the burden on the internal storage.
It’s important to note that not all apps may have the option to change the default storage location. Some apps, such as system apps or certain pre-installed apps, may only allow files to be saved to the internal storage. In such cases, you can manually move the files to the SD card using the built-in file manager or a third-party file management app.
By changing the default storage location on your Samsung device, you can make efficient use of your SD card’s storage capacity and effectively manage your device’s internal memory, ensuring that you always have enough space for your files and apps.
Moving Apps to the SD Card
Running out of internal storage space on your Samsung device? You can alleviate this issue by moving apps from the internal storage to the SD card. Moving apps to the SD card not only frees up space but also allows you to keep your device running smoothly. Here’s how you can move apps to the SD card:
- Go to the Settings menu on your Samsung device.
- Scroll down and tap on “Apps” or “Applications,” depending on your device model.
- Select the app that you want to move to the SD card.
- Tap on “Storage” or “Storage usage.”
- If the “Change” or “Move to SD card” option is available, tap on it to move the app to the SD card.
- Wait for the app to be moved to the SD card. This process may take a few moments.
It’s important to note that not all apps can be moved to the SD card. Some system apps or apps that provide critical functions may not have the option to be moved. Additionally, certain apps may function differently or experience reduced performance when running from the SD card. Therefore, it’s recommended to only move apps that aren’t frequently used or don’t require high-performance capabilities.
The ability to move apps to the SD card may vary depending on your device model and Android version. If the option to move apps to the SD card is not available on your Samsung device, consider clearing the cache or uninstalling unnecessary apps to free up space on the internal storage.
By moving apps to the SD card, you can effectively manage your device’s storage and optimize its performance. It allows you to maintain a clutter-free internal storage while utilizing the SD card’s ample space for storing apps and other files.
Transferring Photos and Videos to the SD Card
If you have a large collection of photos and videos on your Samsung device, you can free up valuable internal storage by transferring them to the SD card. This not only creates more space on your device but also allows you to conveniently access your media files from the SD card. Here’s how you can transfer photos and videos to the SD card:
- Open the Gallery app or any other app that stores your photos and videos.
- Select the photos and videos that you want to transfer to the SD card. You can do this by tapping on each item or using the “Select all” option.
- Tap on the share icon or the options menu (usually indicated by three dots) and choose the “Move” or “Move to SD card” option.
- Wait for the transfer process to complete. This may take some time depending on the size of the files being transferred.
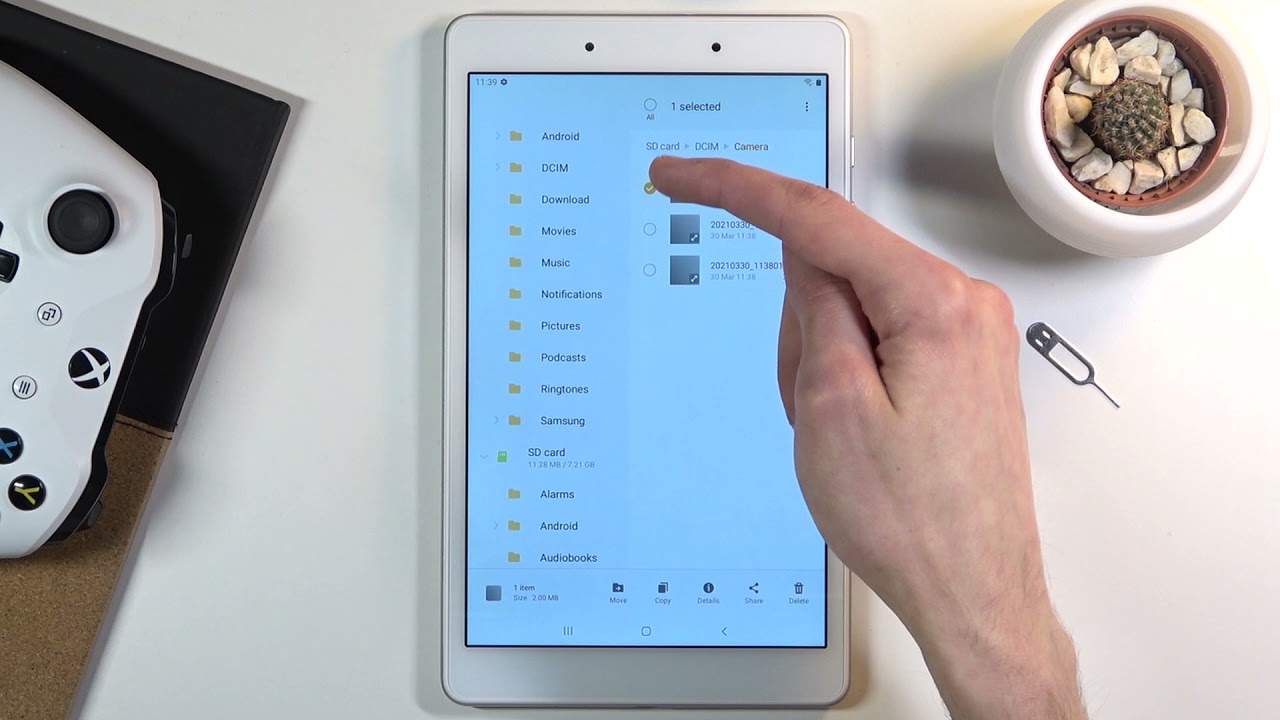
Alternatively, you can use a file manager app to transfer photos and videos to the SD card. Simply navigate to the folder containing your media files, select the desired items, and choose the option to move or cut them to the SD card location.
It’s important to verify that the transferred photos and videos are successfully saved to the SD card. You can do this by checking the respective folder on the SD card using the file manager app or opening the Gallery app and confirming that the files are accessible from the SD card.
Remember to regularly back up your photos and videos to a separate storage location, such as cloud storage or a computer, to prevent any data loss in case the SD card becomes inaccessible or damaged.
By transferring your photos and videos to the SD card, you can ensure ample space on your device’s internal storage while keeping your media easily accessible. This allows you to capture more memories without worrying about running out of storage space on your Samsung device.
Backing Up Data from the SD Card
Backing up the data stored on your SD card is crucial to ensure that you don’t lose valuable files in case of damage, theft, or accidental deletion. By regularly backing up your data, you can have a copy stored in a safe location, providing peace of mind and the ability to restore your files whenever needed. Here’s how you can back up data from the SD card on your Samsung device:
- Connect your Samsung device to a computer using a USB cable.
- Select the option to enable File Transfer or Media Transfer Mode on your device.
- On your computer, open File Explorer (Windows) or Finder (Mac).
- Locate your device in the list of connected devices or drives.
- Double-click on your device to access its storage.
- Navigate to the SD card folder and select the files or folders you want to back up.
- Copy and paste the selected files or folders to a desired location on your computer.
- Wait for the data transfer process to complete. This may take some time depending on the size of the files being backed up.
Alternatively, you can also use third-party backup applications that offer the ability to automatically back up your SD card data to cloud storage services or external hard drives. These applications provide a convenient and automated way to keep your files safe and easily restorable.
Regularly backing up your SD card data is essential for safeguarding your photos, videos, documents, and other important files. Consider setting up a recurring backup schedule to ensure that you always have the most up-to-date copies of your data stored safely.
Remember to periodically verify the integrity of your backup files and ensure that they are accessible and can be restored if needed. Additionally, consider keeping your backup files in multiple locations for added redundancy and protection.
By taking the time to back up your data from the SD card, you can prevent the loss of valuable files and ensure that you have a secure and recoverable copy of your data. This allows you to confidently use the SD card for storing files without worrying about any potential data loss scenarios.
Troubleshooting SD Card Issues
While SD cards are reliable storage solutions, they can encounter occasional issues. If you encounter any problems with your SD card on your Samsung device, here are some troubleshooting steps you can take to resolve them:
- Restart your device: Sometimes, a simple restart can fix minor software glitches that may be causing issues with the SD card.
- Check the SD card connection: Ensure that the SD card is properly inserted and seated securely in the SD card slot. If the card isn’t inserted correctly, remove it and reinsert it firmly.
- Clean the SD card and slot: Dust or debris can sometimes hinder the connection between the SD card and the device. Use a soft cloth or compressed air to clean both the SD card and the card slot.
- Try the SD card on another device: Insert the SD card into another compatible device to determine if the issue is with the card or the device. If the card works on another device, the problem may lie with your Samsung device.
- Format the SD card: If the SD card is not being recognized or is experiencing issues, consider formatting it. Formatting erases all data, so ensure that you have a backup of important files before proceeding. To format the SD card, go to Settings > Device care > Storage > SD card > Format.
- Update device software: Ensure that your Samsung device is running the latest software version. Software updates often include bug fixes and improvements that can resolve compatibility issues with SD cards.
- Try a different SD card: If you have access to another SD card, insert it into your device to check if the issue is specific to the card or the device. This will help determine if the SD card itself is faulty.
If none of the above steps resolves the problem, consider contacting customer support or visiting a authorized service center to further diagnose and address the SD card issue on your Samsung device.
Remember to handle SD cards with care, avoid exposing them to extreme temperatures, and keep them away from water or physical damage to ensure their longevity and optimal performance.
By following these troubleshooting steps, you can resolve common SD card issues and ensure a smooth and reliable experience when using an SD card with your Samsung device.
Removing the SD Card Safely
When it comes time to remove your SD card from your Samsung device, it’s important to do so safely to avoid any potential data loss or damage to the card. Here are the steps to follow for safe removal of the SD card:
- Ensure that your device is powered off. This will prevent any data transfer or potential file corruption during the removal process.
- If your device has a removable back cover, carefully remove it to access the SD card slot. If the SD card slot is located on the side of the device, skip this step.
- Locate the SD card slot on your device. It is usually marked with an icon or labeled “SD card”.
- Gently push the SD card inward until you feel a slight click or the card is partially ejected from the slot.
- Once the SD card is partially ejected, use your fingers or a pair of tweezers to carefully pull it out of the slot. Be cautious not to apply excessive force or bend the card.
- If you removed the back cover, reattach it securely.
It’s important to note that removing the SD card while the device is still powered on or when data is being transferred can result in data corruption or loss. Always ensure that your device is powered off before removing the SD card to prevent any potential issues.
Additionally, avoid handling the SD card with dirty or wet hands, as this may cause damage to the card or introduce foreign substances that can interfere with its performance.
If you no longer need the SD card or plan to replace it with a new one, consider securely wiping the card or formatting it to remove any personal or sensitive data that may be stored on it. This will help protect your privacy and ensure that the card is ready for future use or disposal.
By following these steps, you can safely remove the SD card from your Samsung device, minimizing the risk of data loss or damage and ensuring the longevity of the card.


