Introduction
Welcome to this guide on how to use an SD card on your Samsung tablet. SD cards are a convenient and versatile storage solution that can expand the capacity of your tablet, allowing you to store more photos, videos, documents, and other files. Whether you want to transfer files from your tablet to the SD card, or simply want to access files stored on the SD card directly from your tablet, this guide will provide you with step-by-step instructions on how to do so.
SD cards, short for Secure Digital cards, come in different sizes and capacities. They are widely used in various electronic devices, including tablets, smartphones, digital cameras, and more. They are easy to carry and offer an affordable way to expand your device’s storage capabilities.
In this guide, we’ll walk you through the process of preparing and inserting the SD card into your Samsung tablet, checking for compatibility, formatting the card, transferring files, managing files on the SD card, and troubleshooting common issues that may arise.
Before we dive into the details, it’s important to note that the steps outlined in this guide may vary slightly depending on the specific model and software version of your Samsung tablet. It is always recommended to consult your tablet’s user manual or visit the official Samsung support website for model-specific instructions.
Now, let’s get started with understanding SD cards and how to prepare them for use on your Samsung tablet.
Understanding SD Cards
Before we begin using an SD card on your Samsung tablet, it’s important to have a basic understanding of what SD cards are and how they work.
SD cards are small, portable storage devices that are used to store and transfer data. They come in various sizes, including the standard SD card, microSD card, and miniSD card. These cards use flash memory technology, allowing them to retain data even when power is removed.
SD cards have different storage capacities, ranging from a few gigabytes to multiple terabytes. The storage capacity you choose will depend on your needs and the amount of data you plan to store on the card.
When it comes to using an SD card on your Samsung tablet, there are a few key things to keep in mind:
- Compatibility: Not all Samsung tablets are built to support SD cards. Before purchasing an SD card, make sure to check the specifications and compatibility of your tablet. This information can usually be found in the tablet’s user manual or on the manufacturer’s website.
- Formatting: SD cards typically come pre-formatted with a file system that may not be compatible with your tablet. Formatting the SD card to the appropriate file system ensures that it can be recognized and used by your tablet.
- Read/Write Speeds: Different SD cards offer varying read and write speeds. If you plan on storing and accessing large files, such as high-resolution videos or RAW images, consider investing in an SD card with faster read and write speeds to ensure smooth performance.
Now that you have a better understanding of SD cards and their compatibility and formatting requirements, let’s move on to the next section, where we’ll discuss how to prepare the SD card for use on your Samsung tablet.
Preparing the SD Card for Use
Before you can start using an SD card on your Samsung tablet, you need to prepare it for use. This involves a few simple steps to ensure that the SD card is ready to be inserted into your tablet and recognized by the system.
Here’s how you can prepare the SD card for use:
- Backup your data: If you have any important data on the SD card, such as photos, videos, or documents, it’s important to back them up before proceeding. This will ensure that your data is safe in case anything goes wrong during the preparation process.
- Insert the SD card: Locate the SD card slot on your Samsung tablet. Depending on the model, the slot may be on the side, bottom, or back of the tablet. Carefully insert the SD card into the slot, making sure it is securely seated.
- Check for compatibility: Once the SD card is inserted, your tablet will automatically check for compatibility. If the card is compatible, your tablet will prompt you to format it. If the card is not compatible, you may need to try a different card or consult the user manual for further instructions.
- Format the SD card: Formatting the SD card is an important step to ensure that it can be recognized and used by your tablet. To format the SD card, go to the Settings menu on your tablet, navigate to the Storage or Memory section, select the SD card, and choose the Format option. Follow the on-screen instructions to complete the formatting process.
Once the SD card is formatted, it is now ready to be used on your Samsung tablet. You can start transferring files to the SD card or accessing files stored on the card directly from your tablet.
Keep in mind that formatting the SD card will erase all the data stored on it. Therefore, it’s important to make sure you have backed up any important data before proceeding with the formatting process.
Now that you have prepared the SD card for use, let’s move on to the next section, where we’ll discuss how to insert the SD card into your Samsung tablet.
Inserting the SD Card into Your Samsung Tablet
Now that you have prepared the SD card for use, it’s time to insert it into your Samsung tablet. The process may vary slightly depending on the model of your tablet, but the general steps are as follows:
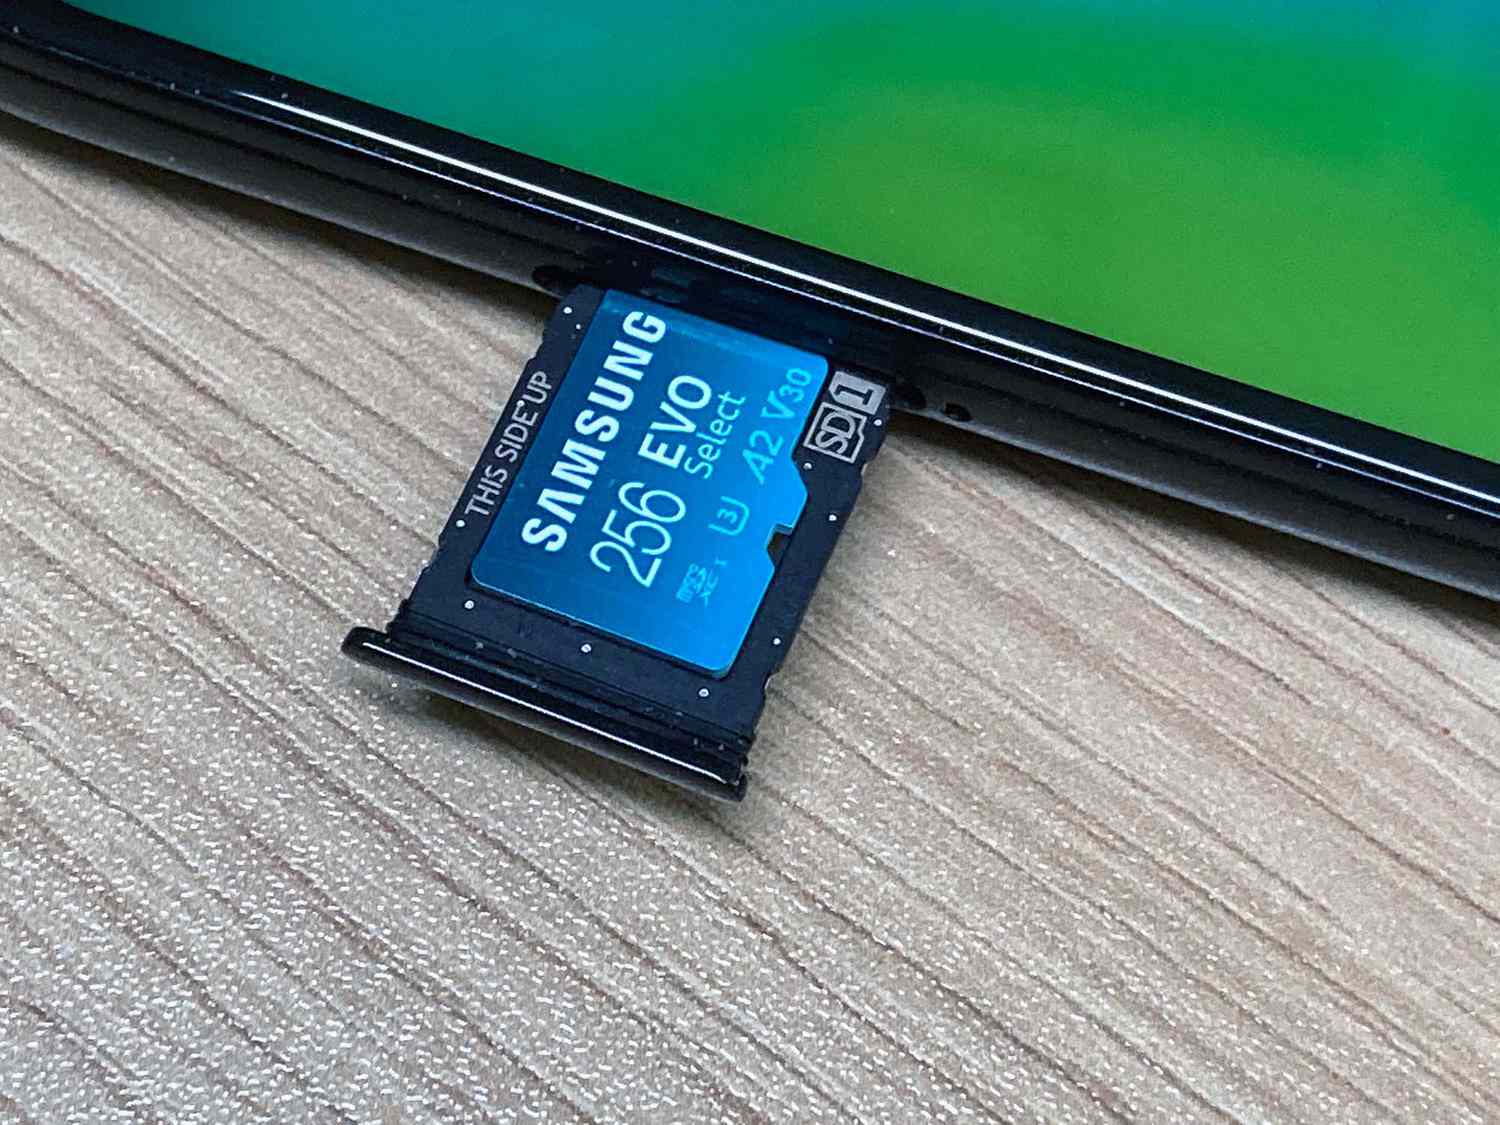
- Locate the SD card slot: The SD card slot on your Samsung tablet is typically located on the side, bottom, or back of the device. Take a moment to familiarize yourself with the location of the slot.
- Power off your tablet: Before inserting or removing the SD card, it’s always a good idea to power off your tablet completely. This prevents any data corruption or damage to the card.
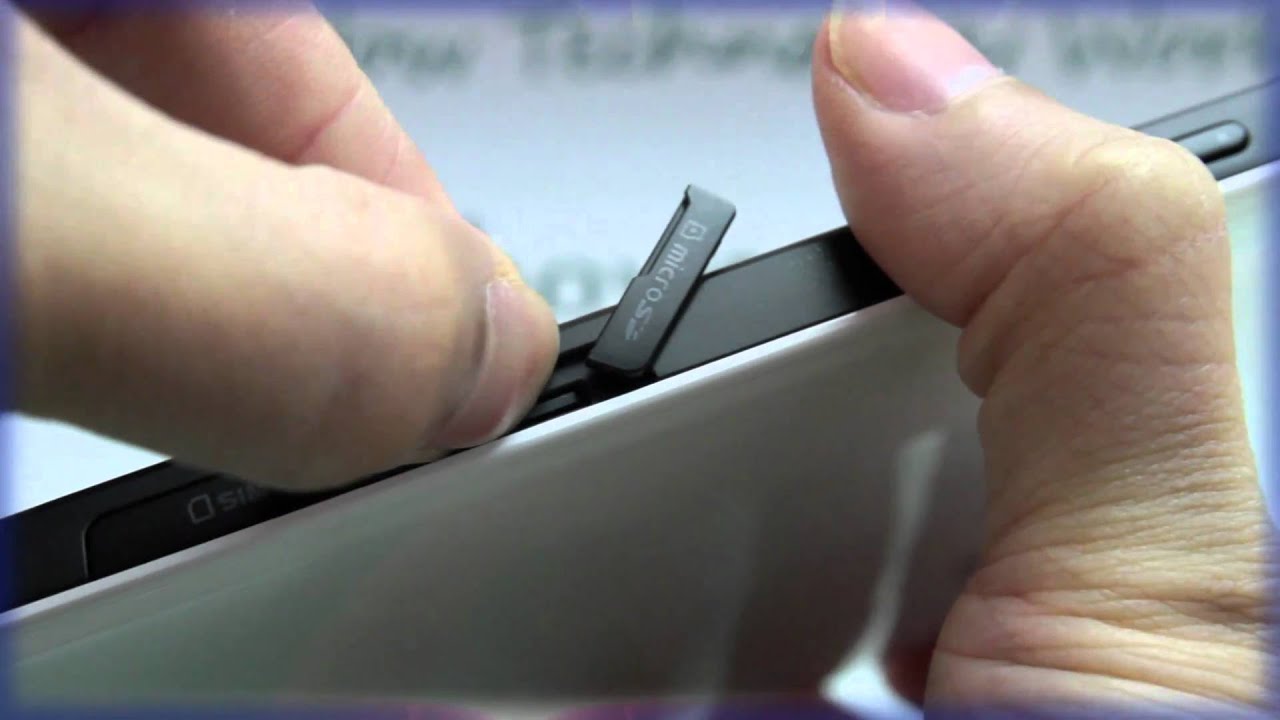
- Open the SD card slot: Depending on your tablet model, the SD card slot may be covered by a small flap or exposed. Use your fingers or a small tool to open the slot.
- Insert the SD card: Take the SD card and align it with the slot. Ensure that the gold contacts on the card are facing down and match the orientation of the slot. Gently push the card into the slot until it clicks into place.
- Close the SD card slot: If your tablet has a flap covering the SD card slot, securely close it. This will protect the card from dust and accidental removal.
Once the SD card is inserted, you can power on your tablet. The system will automatically detect the SD card and make it available for use.
If the SD card is compatible with your tablet, a notification may appear on the screen asking you to format the card. Follow the on-screen instructions to format the SD card, which will prepare it for use on your tablet.
It’s worth noting that some Samsung tablets support hot-swapping of SD cards, which means you can insert or remove the card while the tablet is powered on. However, it is recommended to power off your tablet before making any changes to the SD card to ensure the safety of your data and the card itself.
Now that the SD card is securely inserted into your Samsung tablet, let’s move on to the next section, where we’ll discuss how to check SD card compatibility and format the card if needed.
Checking SD Card Compatibility
Before using an SD card on your Samsung tablet, it’s essential to ensure that the card is compatible with your device. Although most Samsung tablets support SD cards, it’s always wise to double-check to avoid any potential issues.
Here are the steps to check the compatibility of an SD card with your Samsung tablet:
- Refer to the user manual: The user manual that came with your tablet should provide information about the types and capacities of SD cards that are compatible with your specific tablet model. Look for the specifications section or the storage expansion section.
- Check the tablet’s official website: Visit Samsung’s official website and navigate to the support or specifications page for your tablet model. Look for the storage expansion section, which will provide details about the compatible SD card types and capacities.
- Use a compatibility tool: Some SD card manufacturers or third-party websites offer compatibility tools where you can input your tablet model and receive a list of compatible SD cards. These tools can be helpful in quickly determining which SD cards will work best with your tablet.
- Reputable SD card brands: Stick to reputable and well-known brands when purchasing an SD card. Brands like SanDisk, Samsung, Kingston, and Lexar are generally reliable and widely compatible with various devices, including Samsung tablets.
Once you have verified the compatibility of the SD card with your Samsung tablet, proceed with inserting the card into the SD card slot. The tablet will automatically detect the card and prompt you to format it if needed.
It’s worth noting that using an incompatible SD card with your tablet may result in errors, issues with file management, or even damage to the card or the tablet itself. Therefore, it’s crucial to ensure that you are using a compatible SD card to have a seamless experience.
Now that you have checked the compatibility of the SD card, let’s move on to the next section, where we’ll discuss how to format the card to make it compatible with your Samsung tablet.
Formatting the SD Card
Formatting the SD card is an essential step to ensure that it can be recognized and used by your Samsung tablet. Formatting prepares the card by creating the necessary file system and directory structure to store and manage files effectively.
Follow these steps to format the SD card on your Samsung tablet:
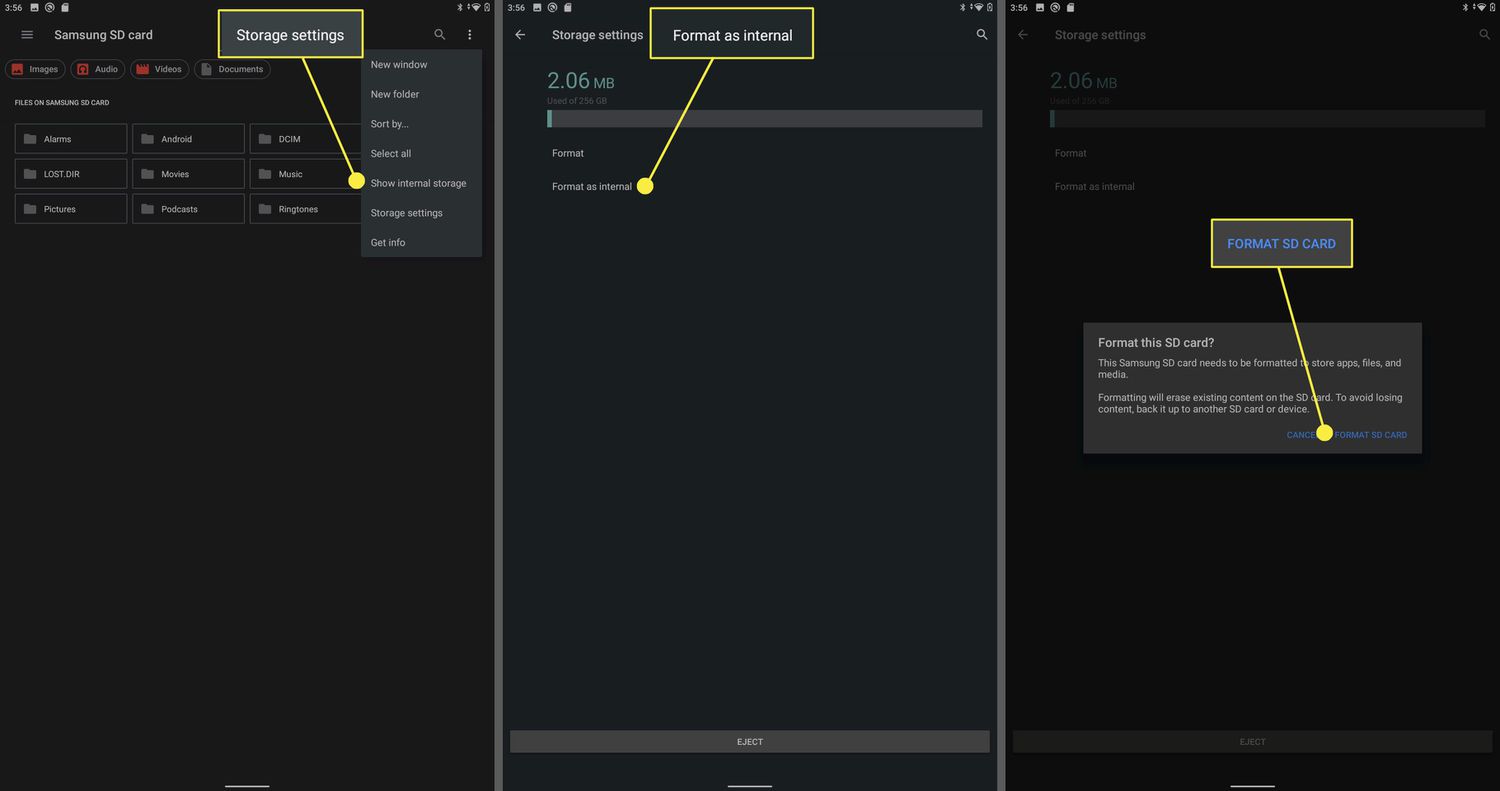
- Open the Settings menu: Swipe down from the top of the screen to access the notification panel, then tap the “Settings” gear icon.
- Navigate to Storage: In the Settings menu, scroll down and tap on the “Storage” or “Device care” option. This might vary slightly depending on your tablet model and software version.
- Select the SD card: In the storage options, locate the section that displays your SD card information. Tap on the SD card to access its settings.
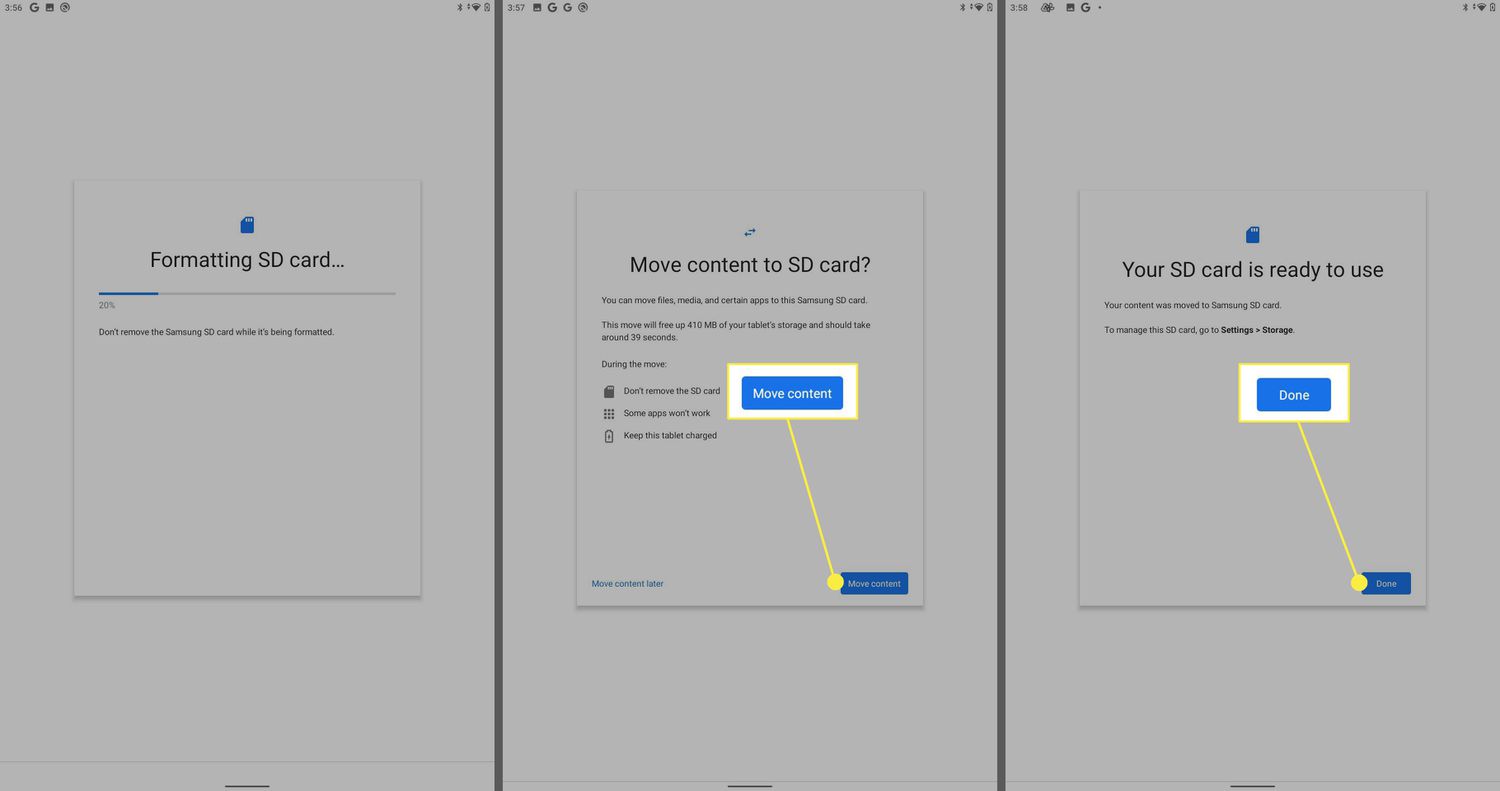
- Initiate the format: Look for an option that says “Format” or “Format SD Card” and tap on it. You might receive a warning message about erasing all data on the card. Confirm your choice by tapping “Format” or “Erase everything.”
- Wait for the formatting process: The tablet will begin the formatting process, which may take a few moments. Avoid removing the SD card or turning off the tablet during this process to prevent data corruption.
- Complete the formatting: Once the formatting is complete, you will receive a notification informing you that the SD card is ready for use. You can now start transferring files to the card or accessing files stored on the card directly from your tablet.
It’s important to note that formatting the SD card erases all the data stored on it. Therefore, ensure that you have backed up any important data before proceeding with the formatting process.
If you encounter any issues during formatting, such as a message stating that the card cannot be formatted or errors occurring, try removing the SD card, rebooting your tablet, and then reinserting the card. If the problem persists, you may want to try formatting the SD card using a different device or using a computer with an SD card reader.
Now that you have formatted the SD card successfully, it is ready to be used on your Samsung tablet. In the next section, we’ll discuss how to transfer files to the SD card and manage files stored on the card.
Transferring Files to the SD Card
Now that you have prepared and formatted your SD card, it’s time to transfer files to it. Whether you want to free up space on your tablet’s internal storage or simply want to keep your files organized, transferring files to the SD card is a straightforward process:
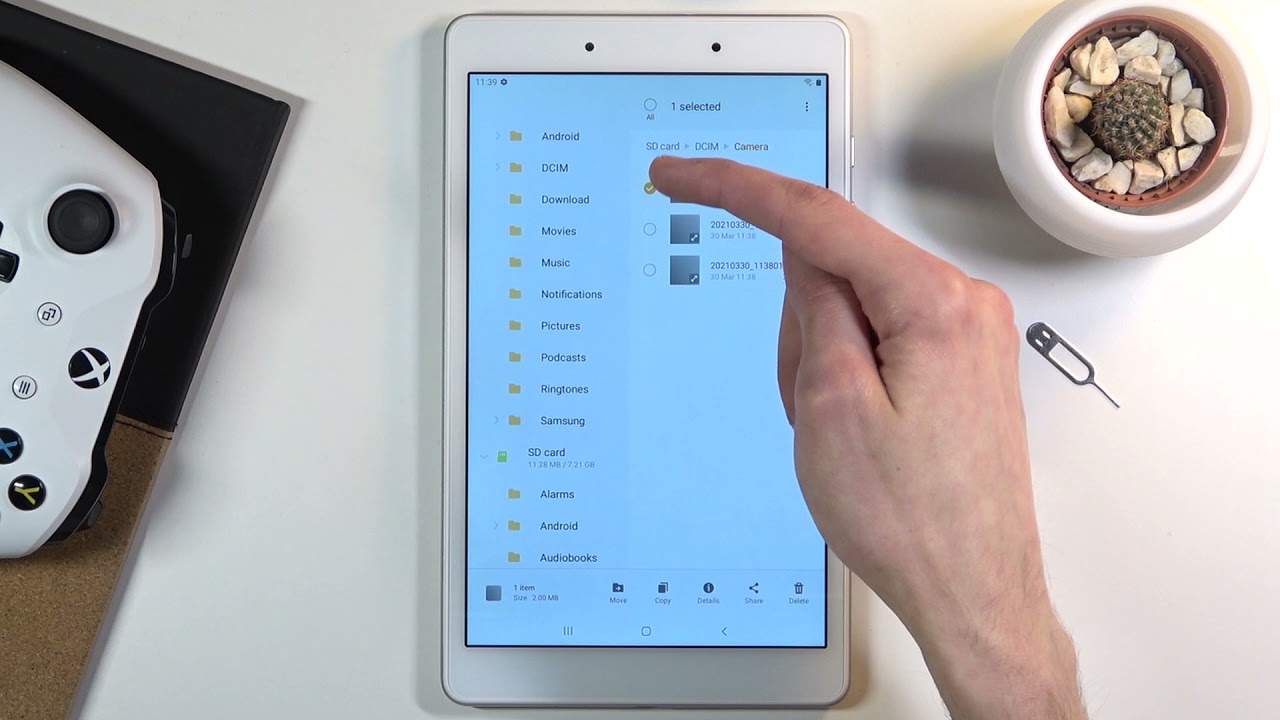
- Open the File Manager: On your Samsung tablet, open the File Manager app. This app allows you to navigate and manage files stored on your tablet and external storage devices.
- Select the files to transfer: Navigate to the location of the files you want to transfer. You can select multiple files by long-pressing on a file and then tapping on additional files to select them.
- Initiate the transfer: Once you have selected the files, tap on the “Move” or “Copy” button. The exact wording may vary depending on your File Manager app.
- Select the destination: In the file browser window, navigate to the SD card location where you want to transfer the files. This is usually denoted as the SD card or an external storage option. Tap on the desired folder to select it as the destination.
- Complete the transfer: Tap on the “Move” or “Copy” button to initiate the transfer process. The files will be transferred from the internal storage of your tablet to the selected location on the SD card.
The time taken for the transfer will depend on the file sizes and the speed of both the tablet’s internal storage and the SD card. It’s important to ensure that your tablet has sufficient battery charge or is connected to a power source during the transfer to avoid any interruptions.
After the transfer is complete, you can verify that the files are successfully transferred by navigating to the location on the SD card where you moved them to. You should be able to access and open the files directly from the SD card using appropriate apps on your tablet.
It’s worth mentioning that you can also transfer files to the SD card using a computer. To do this, connect your tablet to the computer via USB, select the option to transfer files or use the appropriate software provided by Samsung. Then, simply drag and drop the files from your computer to the SD card folder on your tablet.
Now that you know how to transfer files to the SD card, let’s move on to the next section, where we’ll discuss how to manage the files stored on the SD card.
Managing Files on the SD Card
Once you have transferred files to your SD card on your Samsung tablet, it’s important to know how to manage and organize those files effectively. Managing files on the SD card allows you to locate, rename, delete, and perform other actions on them as needed. Here are some tips for managing files on your SD card:
- File Manager App: Use the File Manager app on your Samsung tablet to navigate and manage files stored on the SD card. The app provides a user-friendly interface to view and perform various file operations.
- Navigating through Folders: The File Manager app enables you to navigate through different folders and subfolders on the SD card. You can tap on a folder to open it and view the files contained within.
- Copying and Moving Files: Similar to transferring files, you can use the File Manager app to copy or move files between folders on the SD card. Long-press on a file, select the desired action (copy or move), navigate to the destination folder, and initiate the action.
- Renaming Files: If you want to change the filename of a file on the SD card, select the file in the File Manager app, tap on the “Rename” option, and enter the new name for the file.
- Deleting Files: To delete files from the SD card, select the files you wish to remove in the File Manager app and tap on the “Delete” option. Confirm the deletion when prompted.
- Creating Folders: If you want to organize your files into specific folders, you can create new folders on the SD card using the File Manager app. Tap on the “New Folder” option, enter the desired name for the folder, and it will be created.
- Sorting and Filtering: The File Manager app may provide options to sort and filter files based on different criteria, such as name, size, date, and file type. Utilize these features to easily locate and manage your files.
By effectively managing the files on your SD card, you can keep your data organized, easily access the files you need, and free up space when necessary. Regularly reviewing and organizing your files on the SD card can help ensure efficient storage and prevent clutter.
It’s important to note that removing the SD card from your tablet while files are being accessed or transferred may result in data corruption or loss. Always ensure that you properly eject the SD card from your tablet before physically removing it to avoid any potential issues.
Now that you know how to manage files on your SD card, let’s move on to the next section, where we’ll discuss how to safely eject the SD card from your Samsung tablet.
Ejecting the SD Card
When you’re finished using the SD card on your Samsung tablet, it’s important to properly eject it before physically removing it from the device. Ejecting the SD card ensures that all data has been safely written and that there are no ongoing processes or file transfers that could be interrupted. Here’s how to safely eject your SD card:
- Closing applications: Before ejecting the SD card, make sure that you have closed any apps or processes that may be accessing files on the card. This will prevent any data corruption or loss.
- Open the Settings menu: Swipe down from the top of your tablet’s screen to open the notification panel, then tap the gear icon to access the Settings menu.
- Navigate to Storage: In the Settings menu, scroll down and tap on the “Storage” or “Device care” option, depending on your tablet model and software version.
- Select the SD card: Tap on the section that displays information about your SD card. This will open the settings and options related to the SD card’s storage.
- Choose “Eject” or “Unmount”: Look for an option that says “Eject” or “Unmount,” usually located at the top of the SD card settings. Tap on this option to initiate the ejection process.
- Confirm the ejection: A confirmation dialog will appear to ensure that you want to eject the SD card. Tap “OK” or “Eject” to proceed.
- Wait for completion: The tablet will now unmount the SD card, ensuring that all data has been safely written. Wait until you receive a notification indicating that the SD card has been safely ejected before physically removing it from the tablet.
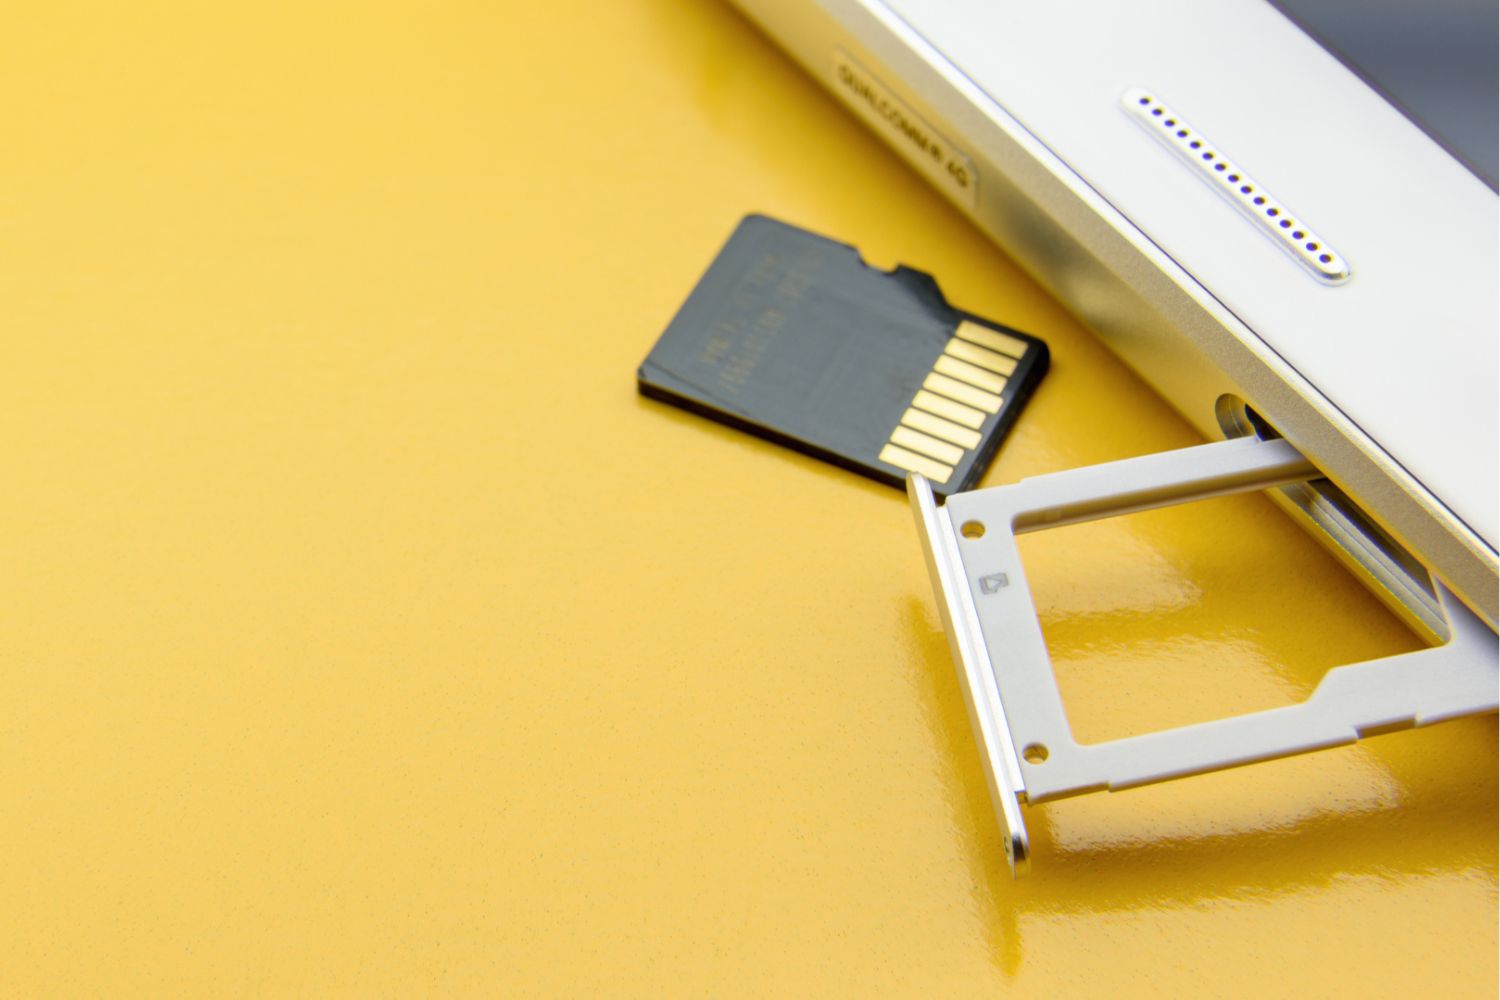
After you have safely ejected the SD card, you can gently remove it from the SD card slot of your Samsung tablet. Take care to handle the card carefully and avoid touching the gold contacts to prevent any damage.
Ejecting the SD card ensures that you can remove it from your tablet without risking data loss or damage to the card. Failure to properly eject the SD card may result in file corruption or incomplete transfers, making the data on the card inaccessible or possibly even causing the card to become unreadable.
Now that you know how to safely eject the SD card, you can remove it from your Samsung tablet when necessary. In the next section, we’ll discuss some common troubleshooting steps for SD card issues that you may encounter.
Troubleshooting Common SD Card Issues
While using an SD card on your Samsung tablet, you may encounter some common issues. Here are a few troubleshooting steps to help you resolve these issues:
- SD Card Not Detected: If your tablet does not recognize the SD card, try removing and reinserting the card to ensure it is seated properly. If the issue persists, check for any physical damage on the SD card or the card slot. You may also want to try inserting the SD card into another device or using a different SD card on your tablet to determine if the problem lies with the card or the tablet.
- Formatting Errors: If you encounter errors while formatting the SD card, ensure that the card is compatible with your tablet. You can also try using a different file system format, such as FAT32 or exFAT, during the formatting process. If formatting errors persist, it’s possible that the card may be faulty and may require replacement.
- File Corruption: In some cases, files on the SD card may become corrupted, making them inaccessible. Use the File Manager app to scan for and repair corrupted files if your tablet offers this feature. Alternatively, you can try connecting the SD card to a computer and using file recovery software to retrieve the corrupted files.
- Slow Performance: If you notice that the SD card’s read or write speeds have decreased significantly, first ensure that the card is not nearing its maximum capacity. If the card is still slow, you can try formatting it to optimize performance or consider upgrading to a faster SD card with better read and write speeds.
- Unexpected File Deletion: If files on the SD card are unexpectedly deleted, ensure that you have not accidentally deleted them. You can also check the trash or recycle bin on your tablet or computer to see if the files can be restored. To prevent accidental file deletion, it’s recommended to regularly back up your SD card data.
If you continue to experience issues with your SD card despite troubleshooting, it may be necessary to replace the card or seek technical support from the manufacturer or a professional technician. Additionally, always ensure that you are using quality SD cards from reputable brands to minimize the risk of encountering issues.
By following these troubleshooting steps, you can address common SD card issues and ensure smooth and reliable performance when using an SD card with your Samsung tablet.
Now that we’ve covered troubleshooting, let’s summarize the information we’ve discussed so far in the next section.
Conclusion
Using an SD card on your Samsung tablet can greatly expand your device’s storage capacity and provide convenient access to your files. In this guide, we covered the essential steps for successfully using an SD card on your tablet.
We began by understanding the basics of SD cards, including their types, capacities, and compatibility considerations. Knowing the compatibility of your tablet with different SD card types is crucial to ensure a seamless experience.
We then discussed the steps to prepare the SD card for use, including backing up data, inserting the card into the tablet, and formatting it to the appropriate file system. Proper preparation is essential to ensure that the SD card can be recognized and utilized by your Samsung tablet.
Next, we covered how to transfer files to the SD card, allowing you to free up space on your tablet’s internal storage and keep your files organized on the expandable SD card. We also explored how to manage files on the SD card, including renaming, copying, moving, and deleting them using the File Manager app.
We then discussed the importance of safely ejecting the SD card from your tablet to avoid data loss or damage to the card. Following the proper ejection process ensures that all data has been securely written and that there are no ongoing processes related to the SD card.
Finally, we provided troubleshooting tips to address common SD card issues such as detection problems, formatting errors, file corruption, slow performance, and unexpected file deletion. These troubleshooting steps can help you resolve issues that may arise when using an SD card on your Samsung tablet.
By following the steps and tips outlined in this guide, you can make the most of your SD card and seamlessly integrate it into your Samsung tablet workflow. Whether you’re using the SD card to store photos, videos, documents, or other files, you now have the knowledge to effectively utilize this versatile storage solution.
Remember to always refer to your tablet’s user manual or consult the official Samsung support resources for model-specific instructions and guidance. By doing so, you’ll ensure that you’re following the most accurate and up-to-date information for your specific tablet model.