Introduction
Welcome to our guide on how to make the SD card the default storage on your Samsung tablet. With the increasing amount of data we store on our devices, the limited internal storage space of tablets can quickly become a headache. But fear not, as Samsung tablets provide the option to use an external SD card as the default storage for your apps, photos, videos, and more.
Having the SD card as the default storage can significantly increase the available space on your tablet, allowing you to download more apps, capture more photos, and record more videos without worrying about running out of storage. Additionally, using the SD card as the default storage can help you keep your tablet’s performance smooth and avoid lags caused by insufficient internal storage.
In this guide, we will walk you through the step-by-step process of making the SD card the default storage on your Samsung tablet. We will cover everything from inserting and formatting the SD card to changing the default storage option and transferring data to the SD card. We will also provide some additional tips and troubleshooting steps to help you make the most out of your SD card storage.
Before we dive into the detailed steps, it’s important to note that the process may slightly vary depending on the model and operating system of your Samsung tablet. However, the general steps should be applicable to most Samsung tablets. If you encounter any difficulties or have specific questions, make sure to refer to the user manual of your tablet or seek assistance from Samsung’s support team.
Now, let’s get started and free up some precious internal storage by making the SD card the default storage option on your Samsung tablet!
Why Should You Make SD Card Default Storage on Samsung Tablet?
Many Samsung tablet users find themselves constantly struggling with limited internal storage space. As the number of apps, photos, videos, and files we accumulate keeps growing, it becomes imperative to find a solution that allows us to store more without compromising the performance of our tablets. Making the SD card the default storage option on your Samsung tablet can offer several benefits:
- Increased Storage Capacity: The primary advantage of using the SD card as the default storage is the significant increase in available storage space. By transferring apps, media files, and other data to the SD card, you can make room for additional apps and files on your tablet without worrying about running out of space.
- Seamless App Management: With the SD card as the default storage, you can smoothly manage your apps without the constant need to uninstall or juggle between different apps due to limited space. This means you can install and update new apps without any restrictions.
- Easy Media Management: Storing photos, videos, and music on the SD card allows you to effortlessly capture and save memories without concerns about storage limitations. You can enjoy capturing high-resolution photos and recording videos without having to sacrifice quality or delete existing files.
- Improved Performance: By offloading data to the SD card, you can free up valuable internal storage space, which helps in maintaining the overall performance of your Samsung tablet. Increased available space minimizes the chances of lag or slow processing, allowing your tablet to run smoothly.
- Convenience and Flexibility: Having the SD card as the default storage option provides convenience and flexibility in managing your files. You can easily plug the SD card into a computer or other compatible devices to transfer and access your data without the need for complex syncing or cloud services.
While there are clear advantages to making the SD card the default storage option on your Samsung tablet, it is important to remember that not all apps can be moved to the SD card due to system restrictions. Some apps may require internal storage for proper functioning. However, for apps that allow transfer, you can reap the benefits of utilizing the SD card as the default storage option.
Now that you understand the advantages of making the SD card the default storage on your Samsung tablet, let’s proceed with the step-by-step instructions to help you accomplish this and maximize your tablet’s storage capabilities!
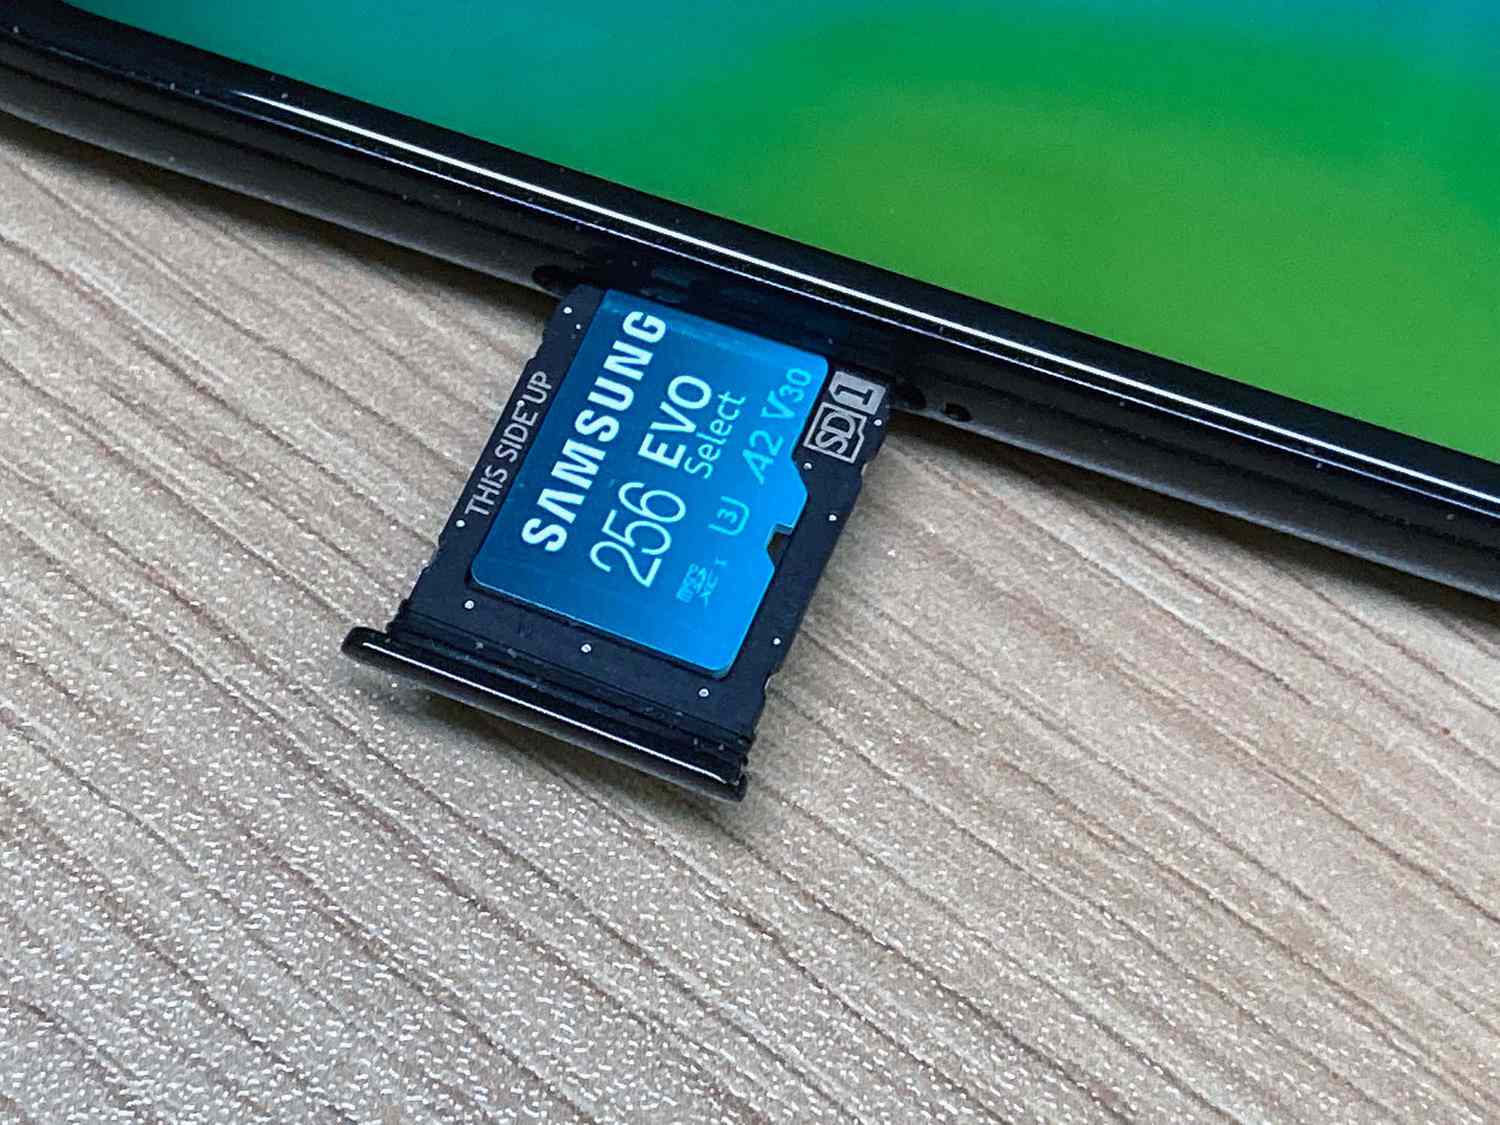
Step 1: Inserting and Mounting the SD Card
The first step to making the SD card the default storage on your Samsung tablet is to ensure that the card is properly inserted and mounted. Follow these steps:
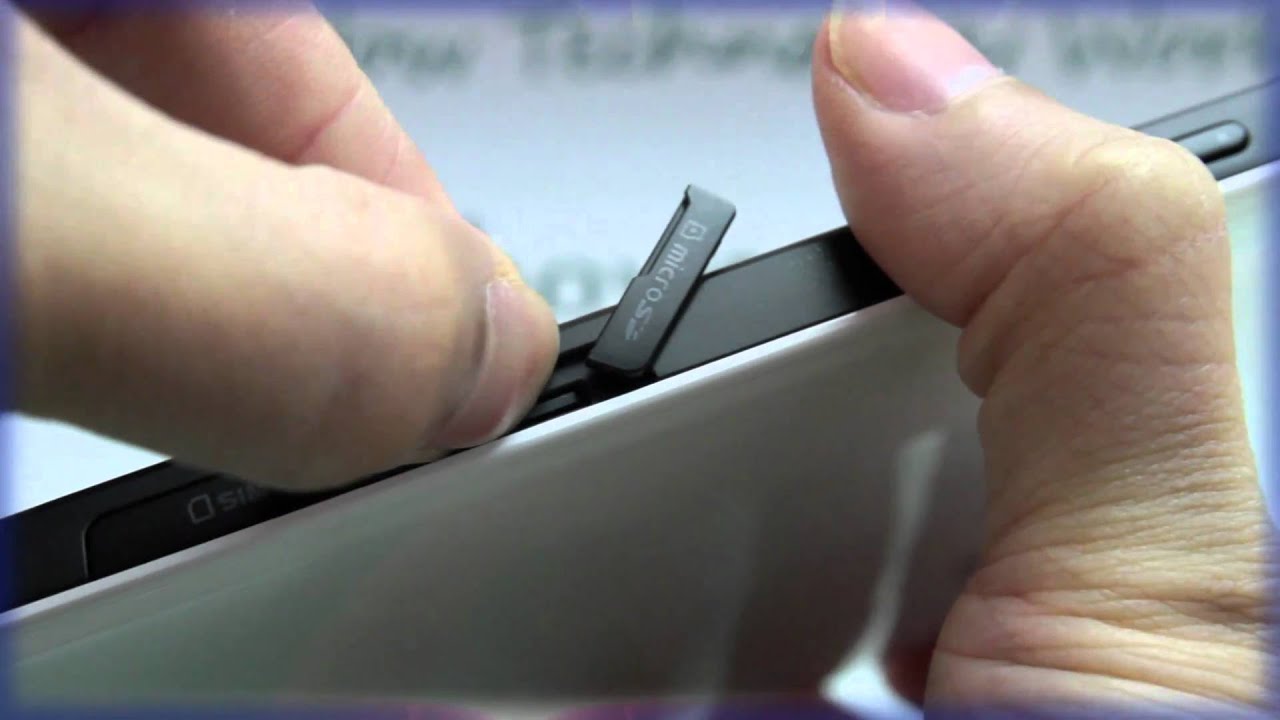
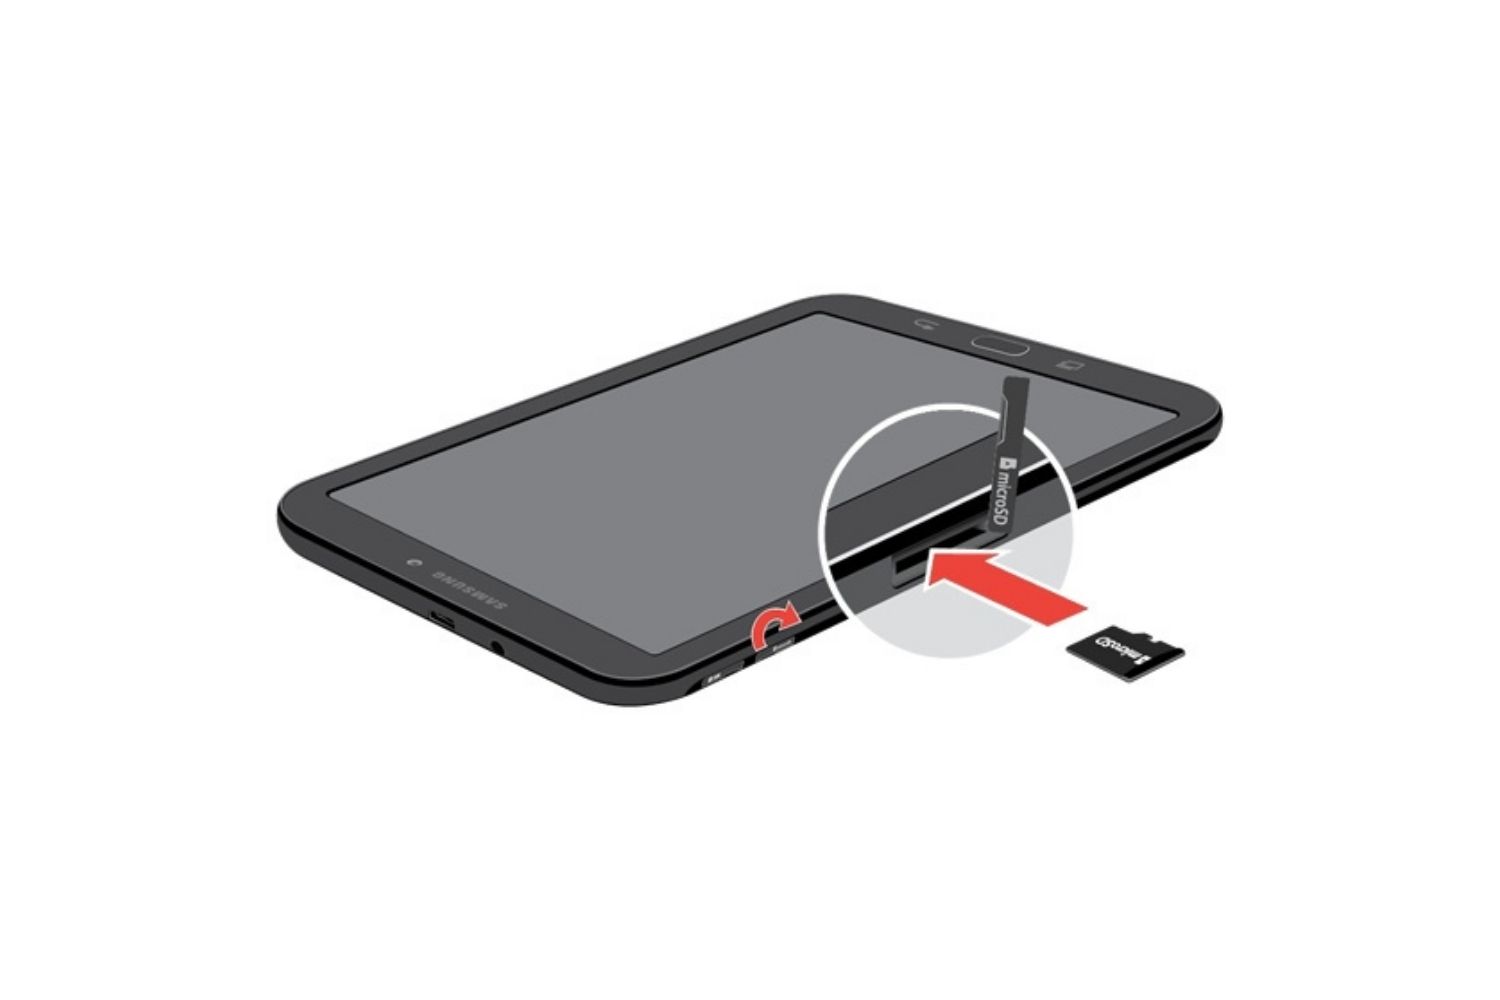
- Locate the SD Card Slot: Depending on the model of your Samsung tablet, the SD card slot may be located on the side or at the back of the device. Refer to your tablet’s user manual or manufacturer’s website to find the exact location.
- Turn Off the Tablet: Before inserting or removing the SD card, it is recommended to turn off your tablet to prevent any potential data loss or damage to the card.
- Insert the SD Card: With the tablet turned off, gently insert the SD card into the designated slot. Ensure that you insert it in the correct orientation as indicated by the markings on the card and the slot itself.
- Power On the Tablet: Once the SD card is securely inserted, power on your tablet. The device should automatically detect the card.
- Mount the SD Card: In some cases, the tablet may not immediately recognize the SD card. To mount the card manually, go to ‘Settings’ and select ‘Storage’. From there, you should see an option to ‘Mount SD Card. Tap on it to initiate the mounting process.
- Verify SD Card Status: After the card is mounted, go back to the ‘Storage’ settings to ensure that the tablet is detecting the SD card and displaying the available storage space.
Once you have successfully inserted and mounted the SD card, you are ready to proceed to the next step of formatting the card to ensure compatibility with your Samsung tablet. Keep in mind that formatting the SD card will erase all existing data on it, so it is essential to backup any important files before proceeding.
Now that the SD card is properly inserted and mounted in your Samsung tablet, let’s move on to the next step of formatting it for optimal performance and compatibility!
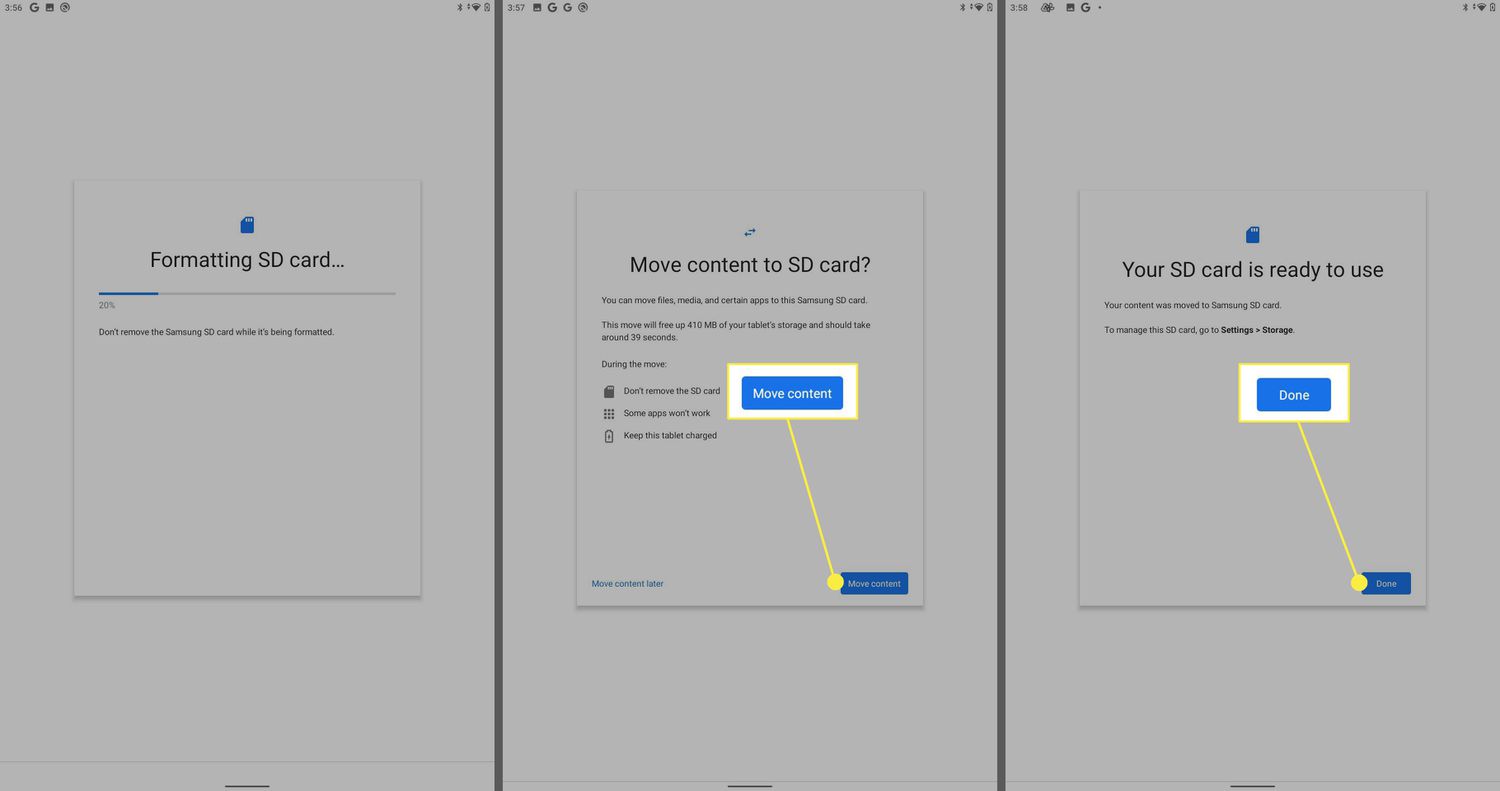
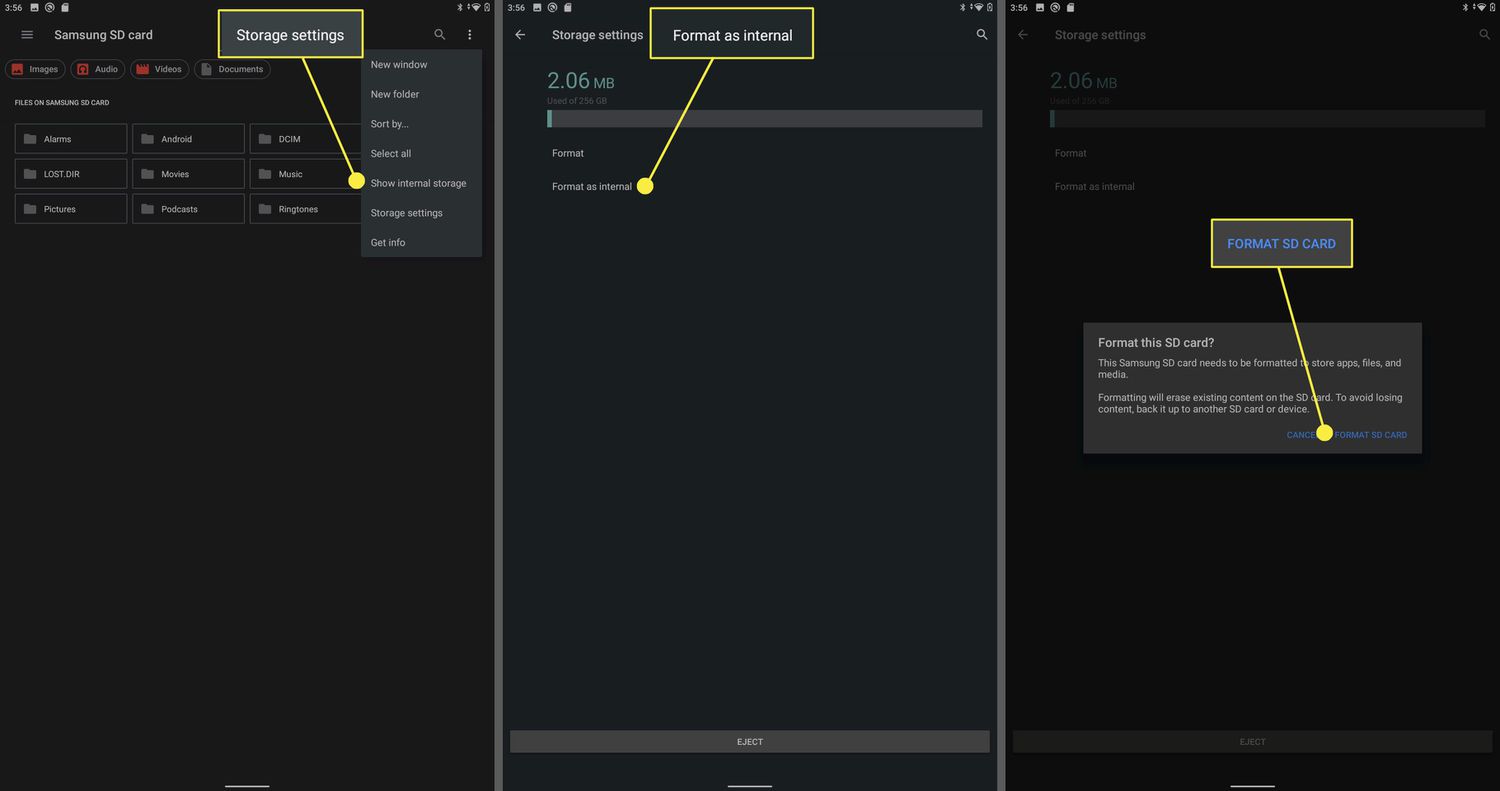
Step 2: Formatting the SD Card
Formatting the SD card is an important step to ensure compatibility and optimal performance on your Samsung tablet. Follow these steps to format the SD card:
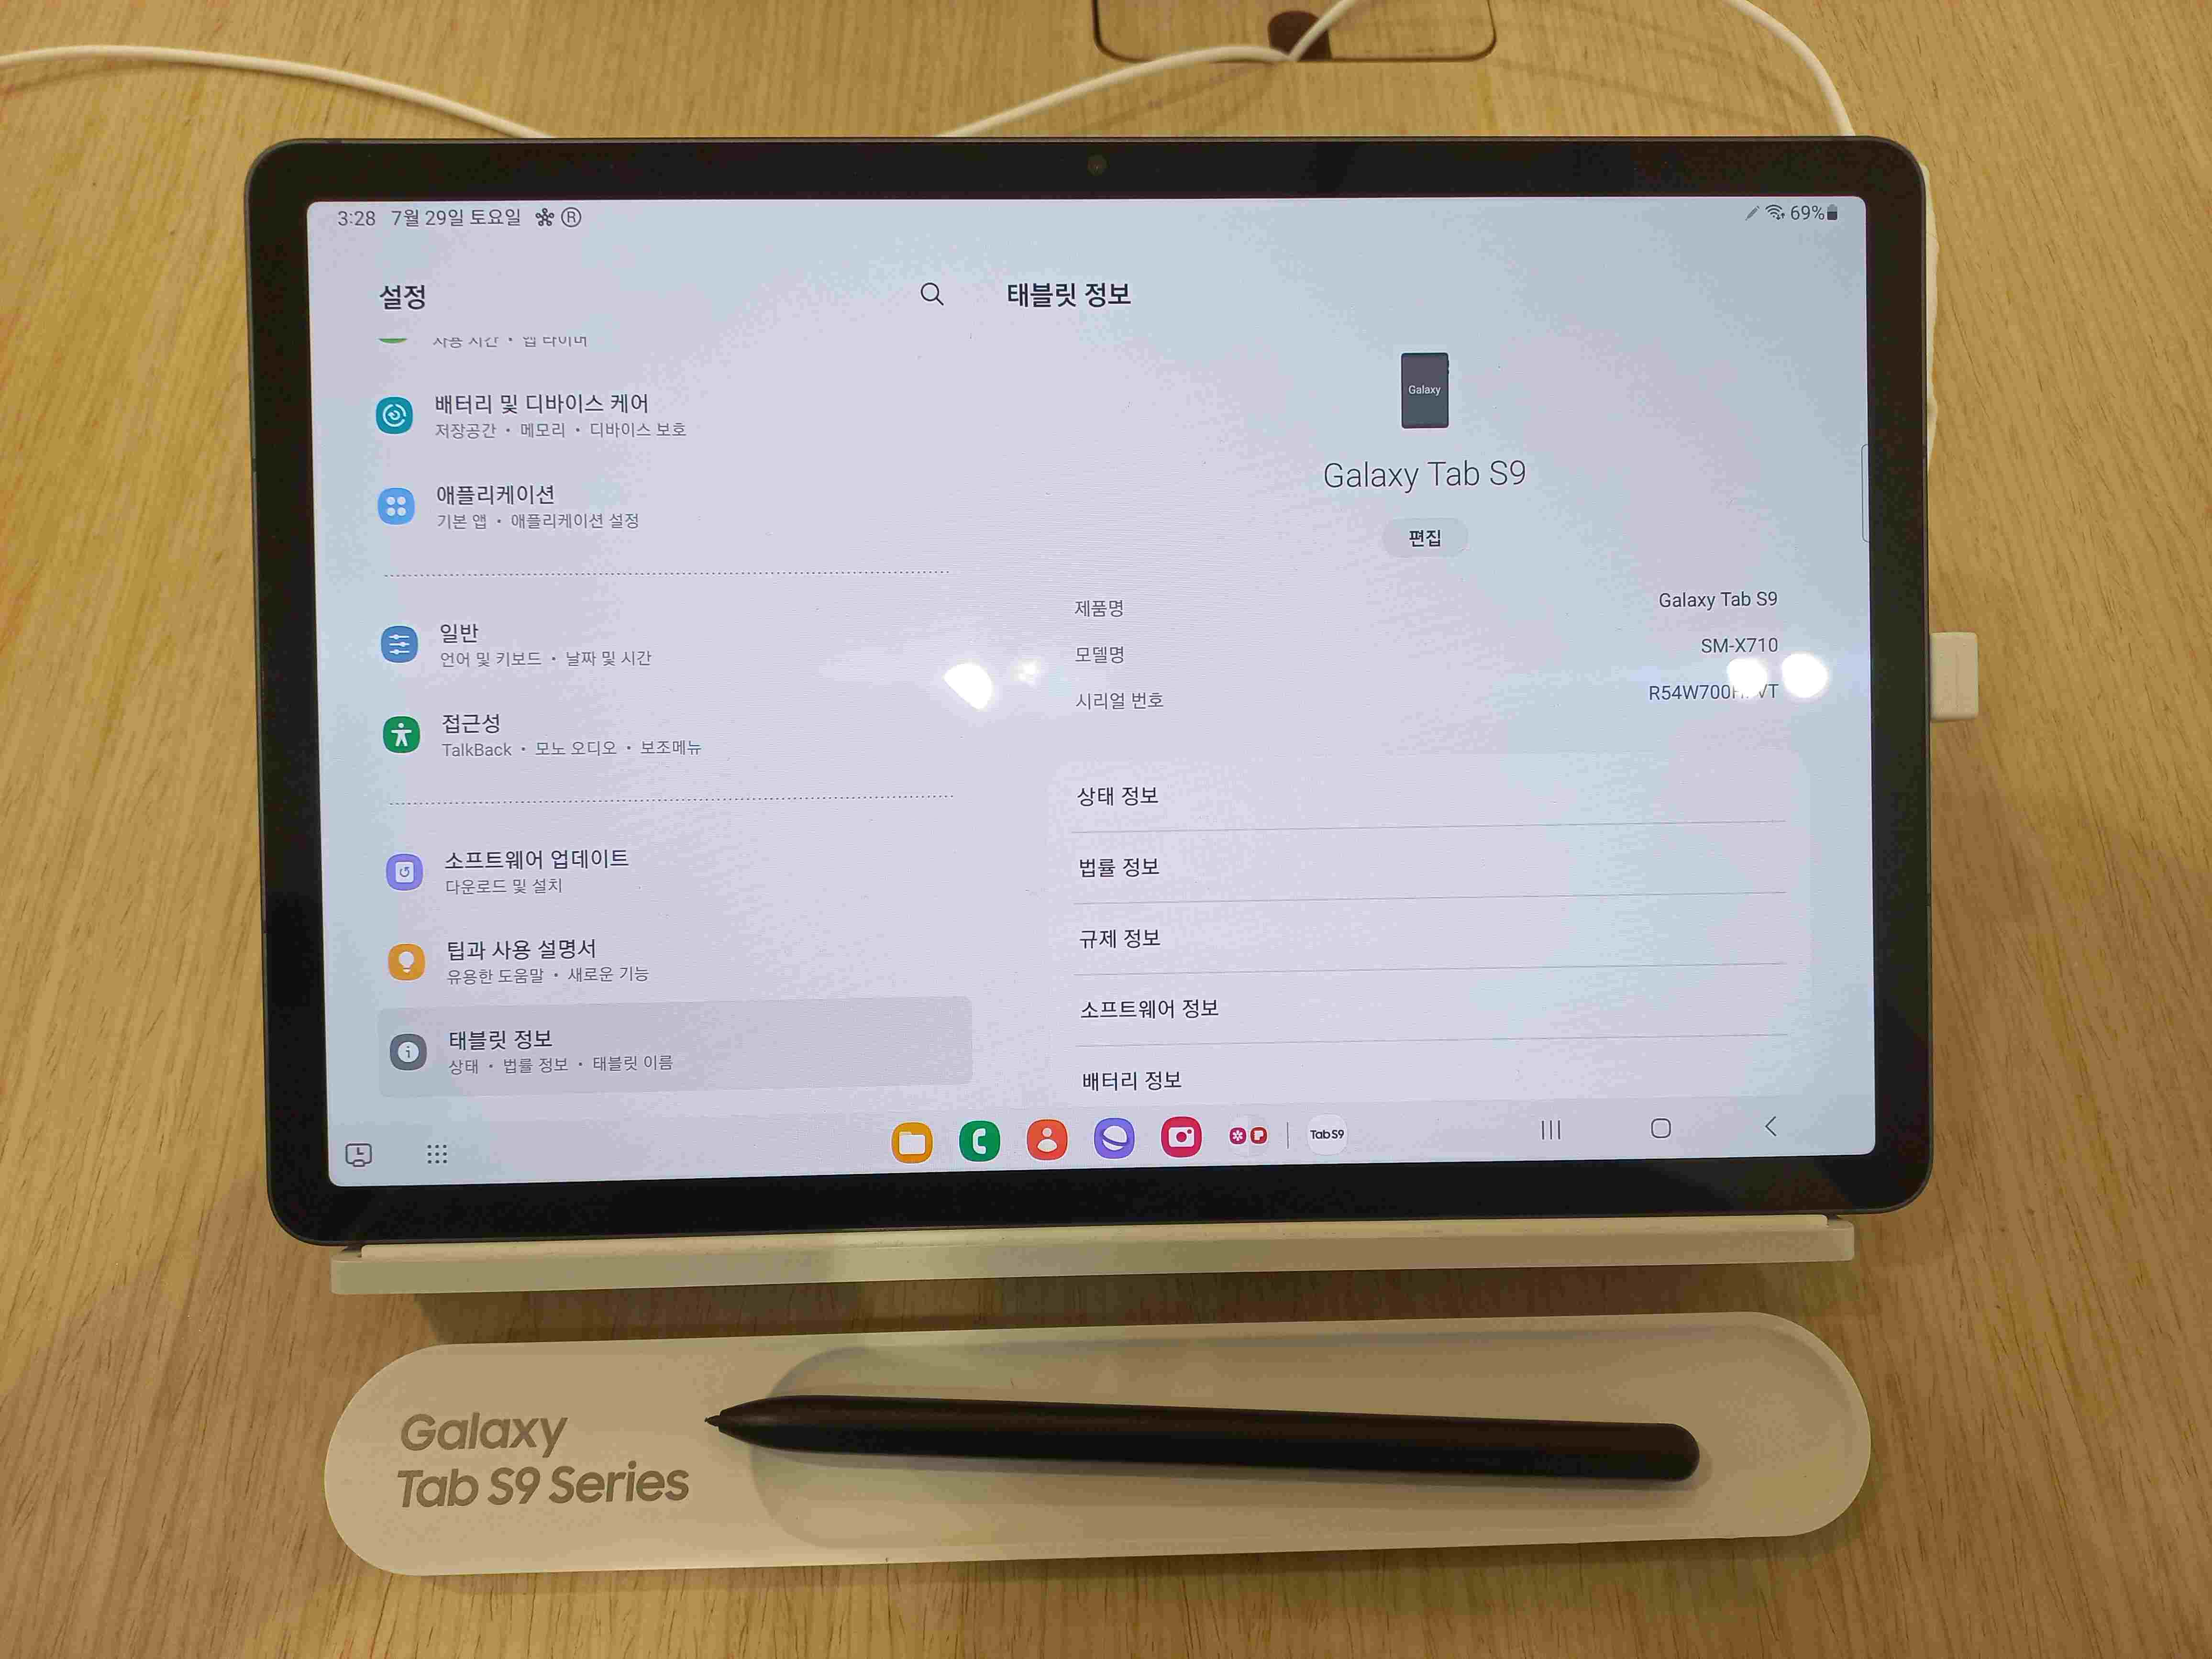
- Open Settings: Go to the ‘Settings’ app on your Samsung tablet. You can usually find it in your app drawer or by swiping down on the screen and tapping the gear icon in the notification panel.
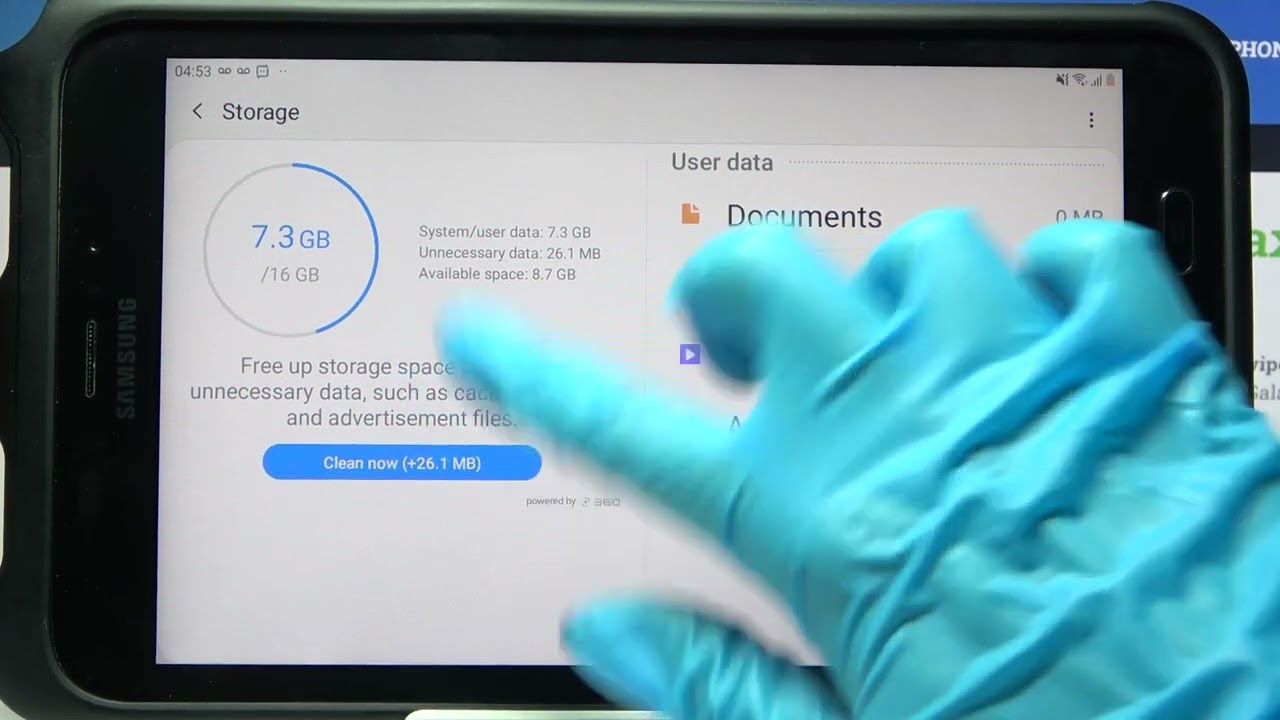
- Select Device Maintenance or Storage: Depending on the model of your tablet and the operating system version, the option may be labeled as ‘Device Care’, ‘Device Maintenance’, or ‘Storage’. Tap on the appropriate option to proceed.
- Access Storage Settings: Look for the ‘Storage’ or ‘Storage Settings’ option within the Device Maintenance or Storage menu. Tap on it to open the storage settings.
- Choose SD Card: In the storage settings, you will see the option to select the SD card as the storage location. Tap on the SD card option or the name of the card to access its settings.
- Format SD Card: Within the SD card settings, you should find an option to format the card. Tap on the ‘Format’ or ‘Format SD Card‘ button to initiate the formatting process.
- Confirm Formatting: A confirmation message will appear stating that formatting the SD card will erase all data. Make sure you have backed up any important files as this process will delete all existing data on the card. If you are ready to proceed, tap on ‘Format’ or ‘Confirm’ to start the formatting.
- Wait for Formatting to Complete: The formatting process may take a few minutes depending on the size of your SD card. Do not remove the card or turn off the tablet during this time.
- Format Complete: Once the formatting is complete, you will see a notification confirming the successful formatting of the SD card. You can now proceed to the next step of changing the default storage option.
By formatting the SD card, you are ensuring that it is properly prepared for use as the default storage on your Samsung tablet. This step also helps in resolving any compatibility issues and ensures smooth performance when storing and accessing data on the card.
With the SD card properly formatted, let’s move on to the next step of changing the default storage option on your Samsung tablet!
Step 3: Changing the Default Storage Option
Once you have inserted and formatted the SD card, the next step is to change the default storage option on your Samsung tablet. Follow these steps to make the SD card the default storage:
- Open Settings: Access the ‘Settings’ app on your Samsung tablet. You can usually find it in your app drawer or by swiping down on the screen and tapping the gear icon in the notification panel.
- Select Device Maintenance or Storage: Look for the option labeled as ‘Device Care’, ‘Device Maintenance’, or ‘Storage’ depending on your tablet model and operating system version. Tap on it to proceed.
- Access Storage Settings: Within the Device Maintenance or Storage menu, scroll down and locate the ‘Storage’ or ‘Storage Settings’ option. Tap on it to open the storage settings.
- Change Default Storage: In the storage settings, you will find an option to change the default storage location. Different Samsung tablet models may have varied wording for this option, such as ‘Default Storage Location’ or ‘Storage Location.’ Tap on it to proceed.
- Select SD Card as Default Storage: Within the Default Storage Location settings, choose the option to set the SD card as the default storage location. It may be labeled as ‘SD Card’ or ‘External Storage’. Tap on it to select the SD card.
- Confirm Change: After selecting the SD card as the default storage location, a confirmation message will appear. It will inform you that all newly installed apps and files will be stored on the SD card. Tap on ‘OK’ or ‘Confirm’ to finalize the change.
- Restart the Tablet: Once the change is confirmed, it is recommended to restart your Samsung tablet. This will ensure that the new default storage settings take effect.
By changing the default storage option to the SD card, you are instructing your Samsung tablet to save new apps, photos, videos, and other files directly to the SD card. This helps to maximize the available space on your tablet’s internal storage and ensures a smooth and efficient user experience.
Now that you have successfully changed the default storage option to the SD card, let’s move on to the next step of transferring existing data and files to the SD card.
Step 4: Choosing the SD Card as the Default Storage
Now that you have made the SD card the default storage option on your Samsung tablet, it is time to ensure that all new data is automatically saved to the SD card. Follow these steps to confirm and choose the SD card as the default storage:
- Open Settings: Access the ‘Settings’ app on your Samsung tablet by tapping on the gear icon in the notification panel or locating it in the app drawer.
- Select Apps or Application Manager: Depending on your tablet model and operating system version, the option may be labeled as ‘Apps’, ‘Application Manager’, or ‘Applications’. Tap on it to proceed.
- Choose App Settings: Within the Apps or Application Manager menu, locate and tap on the particular app for which you want to change the default storage location.
- Tap on Storage: In the app settings, you will find an option labeled as ‘Storage’. Tap on it to access the storage settings for that specific app.
- Change Storage Location: Within the Storage settings, you will have the option to change the storage location for the app. It may be labeled as ‘Storage Location’, ‘Storage Usage’, or similar. Tap on it to proceed.
- Select SD Card: From the available options, choose the SD card as the storage location for the app. It may be labeled as ‘SD Card’ or ‘External Storage’. Tap on it to select the SD card.
- Repeat for Other Apps: If you want to change the storage location for other apps, repeat the above steps for each app individually. Keep in mind that not all apps may allow you to change the storage location.
- Verify Storage Location: After changing the storage location for each desired app, go back to the app settings or storage settings to ensure that the SD card is selected as the storage location for that app.
By choosing the SD card as the default storage for specific apps, you are ensuring that new data generated by these apps, such as photos, videos, documents, and downloads, are automatically saved to the SD card. This will help to optimize the usage of your tablet’s internal storage and keep it clutter-free.
It is important to note that not all apps provide the option to change the storage location. Some apps may require internal storage for proper functioning. However, by following the above steps, you can maximize the usage of the SD card storage for the apps that allow it.
Now that you have successfully chosen the SD card as the default storage for your desired apps, let’s move on to the next step of transferring existing data and files to the SD card.
Step 5: Transferring Data to the SD Card
With the SD card set as the default storage and chosen for specific apps, the next step is to transfer existing data and files from your Samsung tablet’s internal storage to the SD card. Follow these steps to transfer data to the SD card:
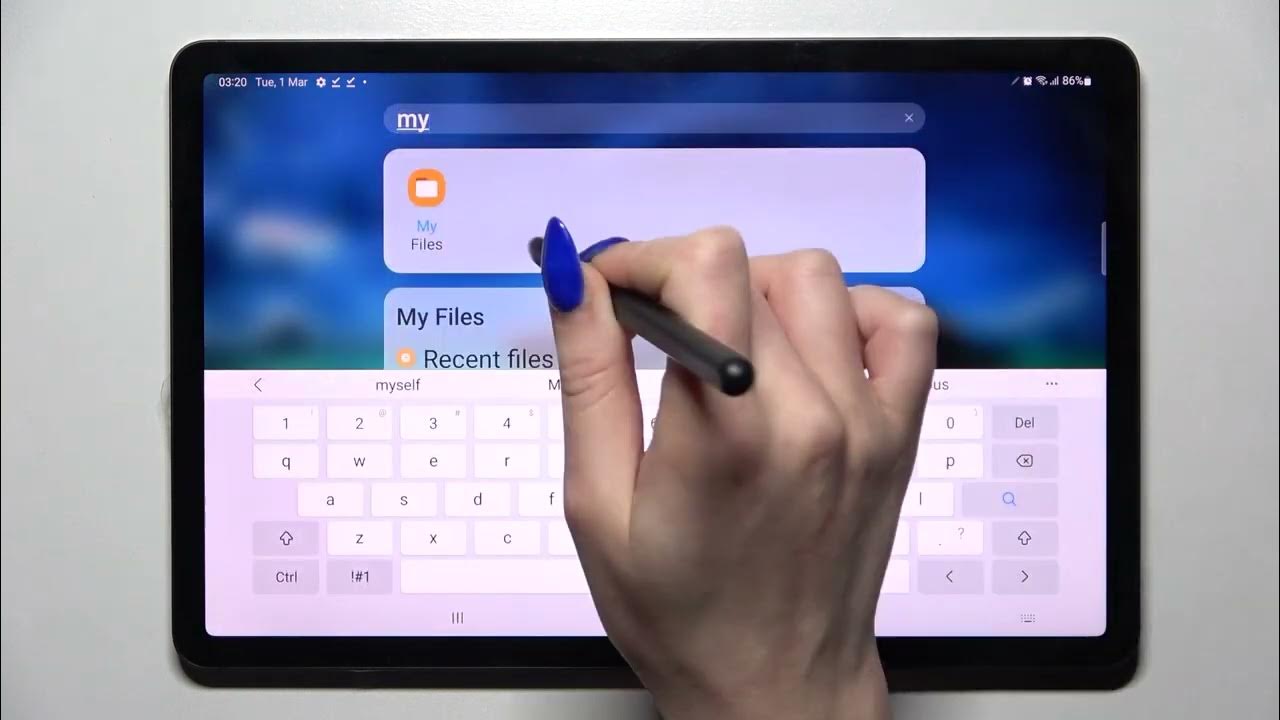
- Open the File Manager: Locate and open the file manager app on your Samsung tablet. If you don’t have a built-in file manager, you can download one from the Play Store.
- Navigate to Internal Storage: In the file manager, navigate to the internal storage of your tablet. This is where all the files and data currently reside.
- Select Files to Transfer: Long-press on the files or folders you want to transfer to the SD card. You can select multiple files or folders at once by tapping on the checkboxes next to them.
- Tap on Move or Copy: Once you have selected the files or folders, tap on either the ‘Move’ or ‘Copy’ option in the file manager. The difference between the two is that ‘Move’ will transfer the files to the SD card and delete them from the internal storage, while ‘Copy’ will duplicate the files onto the SD card, leaving the original files in the internal storage.
- Navigate to SD Card: In the file manager, navigate to the SD card storage. This is where the files will be moved or copied to.
- Paste the Files: Tap on the ‘Paste’ option in the file manager to transfer or copy the selected files from the internal storage to the SD card. The files will be transferred or copied to the selected location on the SD card.
- Verify Transfer: After the transfer process is complete, go to the SD card storage in the file manager to ensure that the files are successfully moved or copied and are now stored on the SD card.
- Repeat for Other Files: If you have more files to transfer, repeat the above steps to transfer them to the SD card. Take your time to organize and manage the files on the SD card to optimize storage and make it easier to locate data in the future.
By transferring data and files to the SD card, you are freeing up space on your tablet’s internal storage and utilizing the ample storage capacity provided by the SD card. This can include photos, videos, documents, music, and other files that are taking up space on your device.
Remember to periodically check your tablet’s internal storage and continue transferring files to the SD card to maintain optimal performance and ensure you have enough space for new downloads and media.
Now that you have successfully transferred data and files to the SD card, let’s move on to the next step of managing storage on the SD card.
Step 6: Managing Storage on the SD Card
Managing storage on the SD card is essential to ensure its optimal performance and to keep your Samsung tablet running smoothly. Follow these steps to effectively manage storage on the SD card:
- Regularly Clean and Organize Files: Periodically go through the files on your SD card and remove any unnecessary or duplicate files. This will help free up storage space and keep your files organized.
- Use a File Manager: Utilize a file manager app to easily navigate and manage files on the SD card. You can move, copy, and delete files as needed, ensuring efficient storage management.
- Backup Important Files: Create backups of important files on external storage or cloud services to avoid data loss in case of any unforeseen circumstances or issues with the SD card.
- Regularly Check Storage Usage: Keep an eye on the storage usage of your SD card. This will help you track how much space is available and whether any apps or files are using excessive storage.
- Clear App Caches: Some apps store temporary files or caches that can accumulate and take up storage space. Clearing app caches regularly can free up space on the SD card.
- Remove Unwanted Apps: Uninstall any apps on the SD card that you no longer use or need. This will help save space and improve performance.
- Be Mindful of Download Locations: When downloading files or media from the internet, ensure that you select the SD card as the download location to avoid unnecessarily using the tablet’s internal storage.
By effectively managing storage on the SD card, you can optimize its usage, ensure smooth performance, and make the most out of the available storage space. Regularly monitoring and maintaining the SD card’s storage will help you avoid storage limitations and keep your Samsung tablet running efficiently.
Now that you know how to manage storage on the SD card, let’s move on to the next step, where we’ll provide some additional tips and troubleshooting guidance for a seamless experience.
Step 7: Additional Tips and Troubleshooting
In this final step, we will provide you with some additional tips and troubleshooting guidance to ensure a smooth experience with the SD card as the default storage on your Samsung tablet:
- Use a High-Quality SD Card: Invest in a high-quality and reliable SD card to ensure better performance and durability. Lower quality cards may have slower transfer speeds and may be prone to data corruption.
- Backup Your SD Card: Just like internal storage, it’s important to regularly backup the contents of your SD card. This will safeguard your data in case the card becomes corrupted or fails.
- Keep Your SD Card Secure: Treat your SD card carefully and avoid exposing it to extreme temperatures, moisture, or physical damage. Handle it with clean hands and store it in a protective case when not in use.
- Update Your Device: Keep your Samsung tablet’s software and firmware up to date. Installing the latest updates can improve compatibility and resolve any known issues related to using an SD card as the default storage.
- Ensure App Compatibility: Some apps may not be fully compatible with being stored on the SD card. If you encounter any issues, try moving the app back to internal storage or contacting the app developer for guidance.
- Remove and Re-insert the SD Card: If you experience any difficulties with accessing or transferring data to the SD card, try removing the card and re-inserting it. This can help resolve any connection or detection issues.
- Factory Reset as Last Resort: If you encounter persistent issues with the SD card or the default storage, performing a factory reset on your tablet can be a last resort solution. However, remember to back up all your important data before proceeding, as a factory reset will erase all data on your tablet.
By following these additional tips and troubleshooting steps, you can ensure a smooth and trouble-free experience with the SD card as the default storage on your Samsung tablet.
Congratulations! You now have all the tools and knowledge to make the most out of the SD card as the default storage on your Samsung tablet. By following these steps and guidelines, you can enjoy ample storage space and a seamless user experience.
Conclusion
Managing storage on your Samsung tablet can be a frustrating task, but by making the SD card the default storage option, you can overcome the limitations of internal storage and enjoy the benefits of increased space and improved performance.
In this guide, we have walked you through the step-by-step process of inserting and mounting the SD card, formatting it, changing the default storage option, transferring data to the SD card, managing storage, and provided additional tips and troubleshooting guidance. By following these steps, you can optimize the usage of your Samsung tablet’s storage and ensure a seamless user experience.
Remember to regularly clean and organize files on the SD card, use a reliable and high-quality SD card, backup important data, update your device, and be mindful of app compatibility. Troubleshoot any issues by removing and re-inserting the SD card or performing a factory reset as a last resort.
Utilizing the SD card as the default storage on your Samsung tablet allows you to store more apps, photos, videos, and files, while keeping your tablet’s performance smooth and avoiding storage limitations. It provides convenience, flexibility, and improved management of your data.
We hope that this guide has helped you successfully make the SD card the default storage on your Samsung tablet. Enjoy the expanded storage space, and make the most out of your device without the worry of running out of space.
Thank you for choosing our guide, and happy exploring on your Samsung tablet!