Why Mounting an SD Card is Important
Having the ability to mount an SD card is crucial for anyone who uses devices that rely on removable storage. An SD card, or Secure Digital card, is a compact memory card that can be inserted into various electronic devices such as smartphones, cameras, tablets, and digital audio players. When you mount an SD card, you are essentially making it accessible and ready for use by the device.
Mounting an SD card allows you to expand the storage capacity of your device, enabling you to store more files, photos, videos, and documents. This is especially useful if your device has limited internal storage space. With a mounted SD card, you can easily transfer files between devices or store backups of important data.
Furthermore, mounting an SD card allows you to enjoy additional features and functionality. Many devices, such as smartphones and cameras, automatically detect and use the SD card for storing photos, videos, and app data. For instance, with a mounted SD card, you can capture high-resolution photos without worrying about running out of storage space on your device.
Another important reason to mount an SD card is the convenience of accessing and managing your files. Once the SD card is properly mounted, you can seamlessly browse through its contents using the device’s file explorer or media player. This makes it easy to organize your files, create folders, and manage your media library.
In addition to expanding storage capacity and providing extra functionality, mounting an SD card also offers a layer of security. By storing important files or personal data on the SD card, you can protect them from being lost or corrupted if something were to happen to your device. This is particularly advantageous in situations where you need to perform a factory reset or replace a malfunctioning device.
Ultimately, mounting an SD card is a simple yet essential task that enhances the usability and versatility of your electronic devices. By unlocking the potential of this portable storage medium, you can enjoy increased storage space, seamless file management, and added convenience. So, whether you’re a photography enthusiast, a music lover, or simply need extra storage for your files, take advantage of the benefits of mounting an SD card and make the most out of your devices.
Step 1: Gather the Necessary Materials
Before you can mount an SD card, you’ll need to gather a few essential materials. Having these items ready will ensure a smooth and hassle-free process. Here’s what you’ll need:
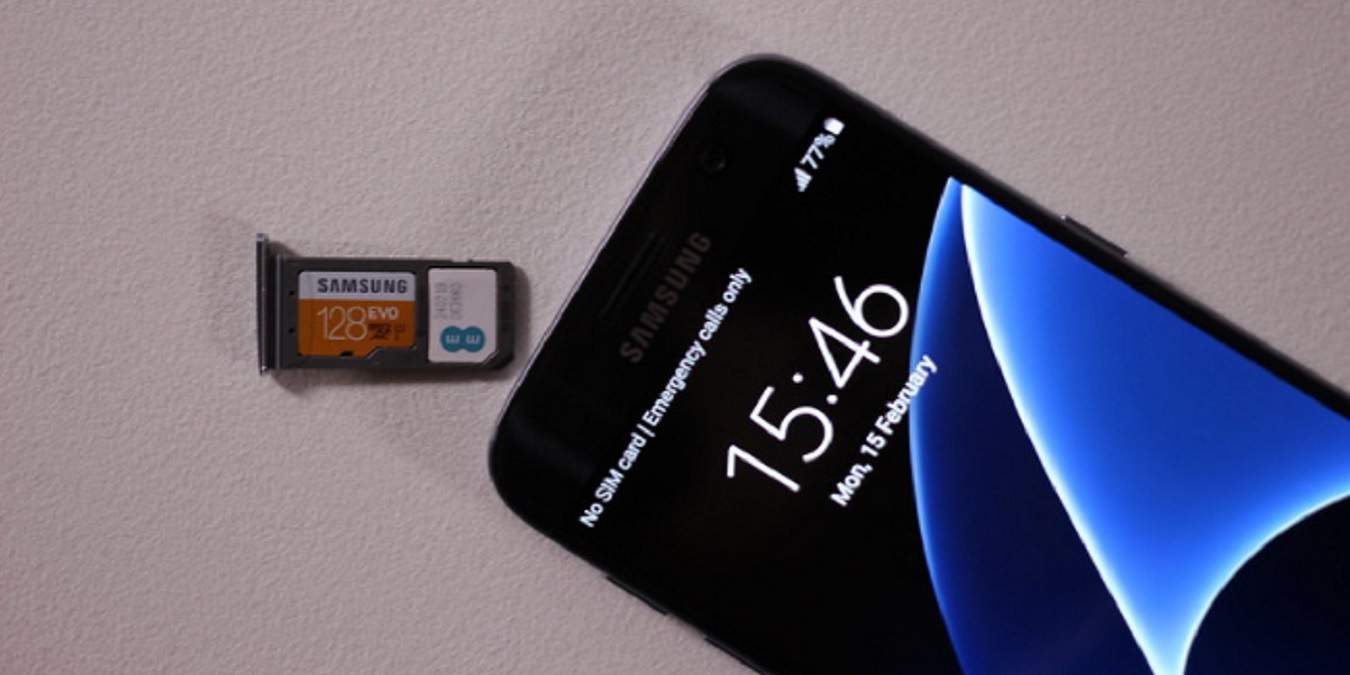
- SD card: Ensure you have an SD card available for mounting. The capacity of the SD card will depend on your storage needs.
- Device: You’ll need the device that you want to mount the SD card on, such as a smartphone, camera, tablet, or digital audio player.
- USB cable (optional): If you’re planning to mount the SD card on a device that supports external storage via a USB connection, a USB cable may be necessary to establish the connection.
- SD card adapter or card reader: If your computer or device doesn’t have an SD card slot, you’ll need an SD card adapter or card reader to connect the SD card to your device.
- Computer (optional): If you plan on mounting the SD card on a computer, make sure you have access to a computer with an SD card slot or a card reader.
By ensuring that you have all the necessary materials ready, you can proceed to the next steps with confidence. Gathering the materials in advance will save you time and frustration during the mounting process, allowing you to quickly access and utilize your SD card’s storage capacity.
Step 2: Prepare the SD Card
Before mounting an SD card, it’s important to properly prepare the card to ensure optimal performance and compatibility. Taking the time to prepare the SD card will help minimize any potential issues that may arise during the mounting process. Follow these steps to prepare your SD card:
- Check compatibility: Make sure that the SD card you’re using is compatible with your device. Check the device’s manual or specifications to determine the supported SD card types and capacities.
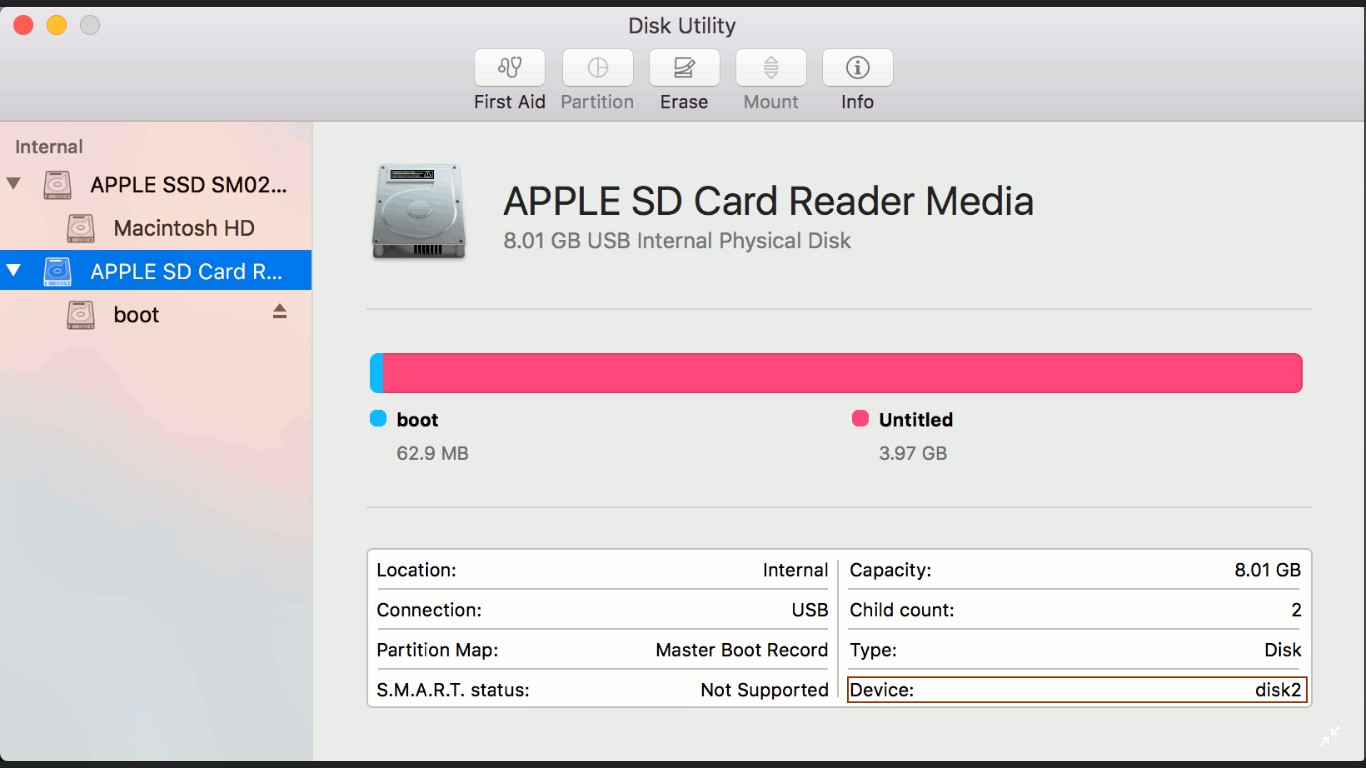
- Format the SD card: If the SD card has been used before or if it’s brand new, it’s recommended to format it. Formatting erases any existing data and establishes a file system that is compatible with your device. To format the SD card, insert it into your computer or device and access the formatting options through the device’s settings menu or the computer’s disk management utility.
- Safely remove the SD card: Whether you format the SD card or not, it’s important to safely remove it from the computer or device after any data transfers or modifications. This helps prevent data corruption and ensures a clean disconnection.
- Properly handle the SD card: When handling the SD card, avoid touching the metal contacts or exposing it to extreme heat or moisture. These precautions help protect the integrity of the card and prevent potential damage.
By preparing your SD card before mounting it, you can avoid potential compatibility issues and ensure that it functions properly with your device. Formatting the card and handling it with care will help maintain its longevity and performance, allowing you to make the most out of your portable storage solution.
Step 3: Insert the SD Card into the Device
Now that you have prepared the SD card, it’s time to insert it into the device where you want to mount it. Follow these steps to properly insert the SD card:
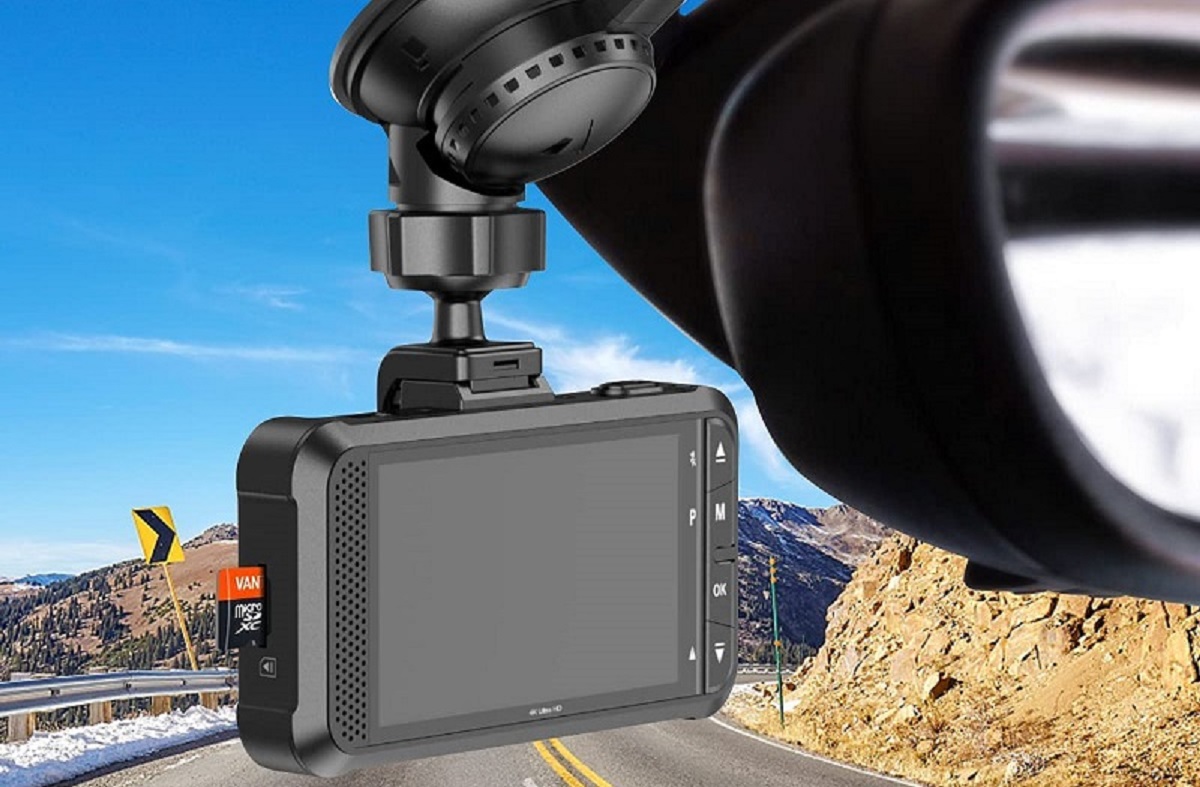
- Locate the SD card slot: Locate the SD card slot on your device. This slot is typically located on the side or back of smartphones, or on the bottom or side of tablets, cameras, and digital audio players. If you’re unsure about the location of the SD card slot, refer to the device’s manual for guidance.
- Power off the device (optional): Some devices may require you to power off before inserting or removing the SD card. Refer to the device’s manual to determine if this step is necessary.
- Insert the SD card: Gently insert the SD card into the slot. Make sure to align the card with the proper orientation indicated on the device or the card slot. Apply gentle pressure until the card is securely inserted and sits flush with the device.
- Power on the device (if applicable): If you powered off the device in the previous step, power it back on now. Give the device a few moments to recognize the newly inserted SD card.
It’s important to handle the SD card with care when inserting it into the device. Avoid applying excessive force or inserting the card in the wrong orientation, as this can potentially damage the card or the device’s SD card slot. Taking these precautions will help ensure a secure and proper connection between the SD card and the device, allowing for successful mounting in the next steps.
Step 4: Locate the SD Card Mount Point
After inserting the SD card into the device, the next step is to locate the mount point for the SD card. The mount point is the specific location within the device’s file system where the SD card will be recognized and accessed. Here’s how to locate the mount point:
- Access the device’s settings: Open the settings menu on your device. The location of this menu may vary depending on the device’s operating system and user interface.
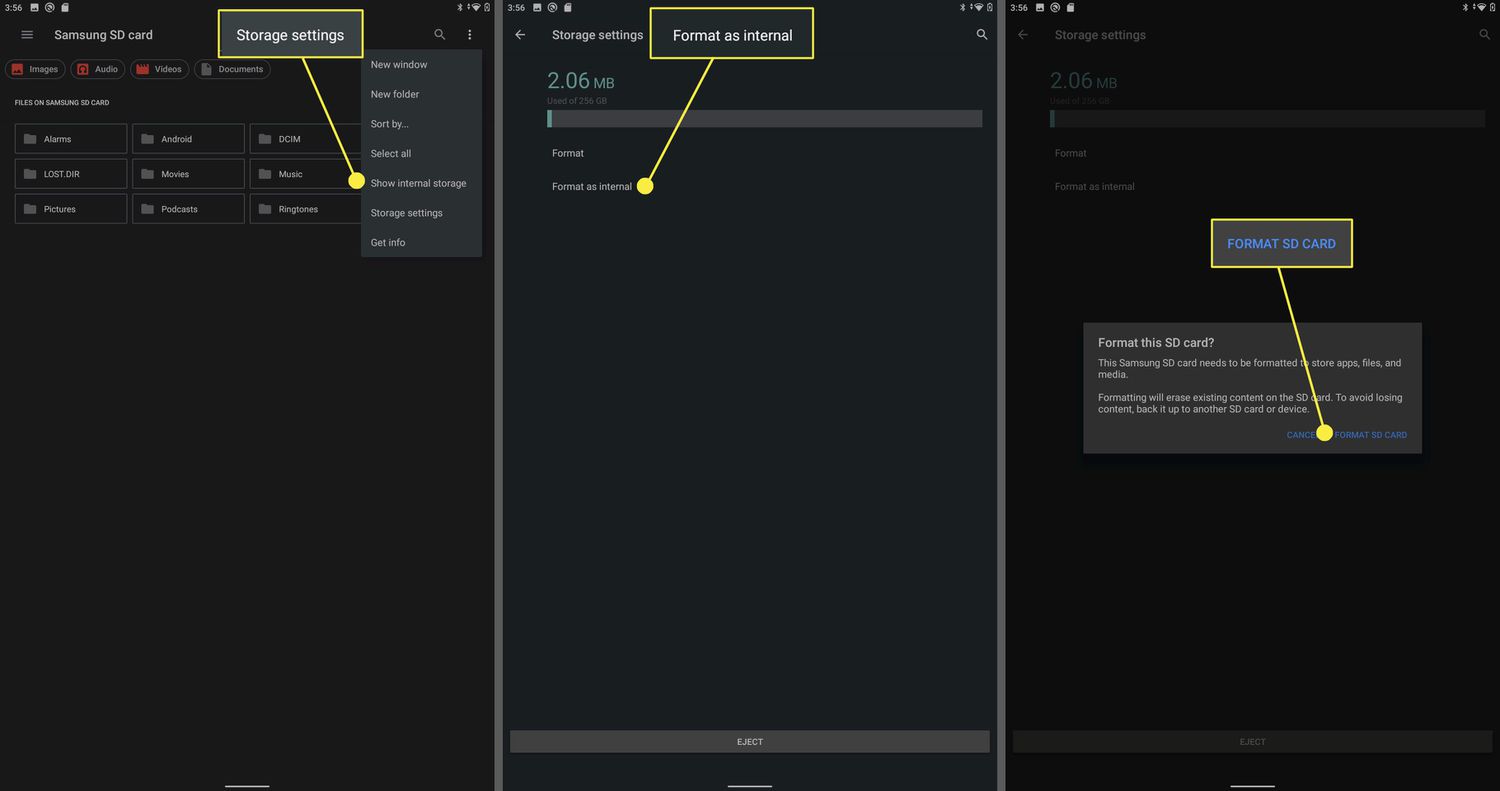
- Navigate to the storage settings: Inside the settings menu, look for the “Storage” or “Storage and USB” option. This option may be found under different sections or categories, such as “Device”, “Memory”, or “Storage & Backup”.
- Locate the SD card storage: Within the storage settings, you should be able to see the SD card listed as a separate storage source. It may be identified with a label such as “SD card”, “External storage”, or the specific brand or model name of the SD card.
- Take note of the mount point: Once you have located the SD card storage, take note of the mount point or the path associated with it. This will be a reference point for accessing and managing the SD card’s contents.
It’s worth mentioning that the process of locating the mount point can vary depending on the device and operating system. The steps outlined above provide a general guide, but it’s recommended to refer to the specific instructions provided by the device’s manufacturer or consult the device’s manual for accurate information.
By successfully locating the mount point, you are now ready to proceed to the next step of mounting the SD card and making it accessible for use on your device.
Step 5: Mount the SD Card
With the SD card inserted and the mount point located, it’s time to mount the SD card on your device. Mounting the SD card allows the device to recognize and access the storage space provided by the card. Here’s how to mount the SD card:
- Access the device’s settings: Open the settings menu on your device.
- Navigate to the storage settings: Look for the “Storage” or “Storage and USB” option. This is the same menu you accessed in the previous step to locate the mount point.
- Select the SD card storage: Within the storage settings, locate the SD card storage that you identified earlier.
- Tap on the mount option: Tap on the “Mount” or “Mount SD card” option to initiate the mounting process. The device will now attempt to establish a connection with the SD card and make it accessible for use.
- Wait for the SD card to be mounted: Depending on the device and the size of the SD card, it may take a few moments for the card to be mounted. During this time, the device will be configuring the connection and setting up the necessary file system structures.
- Confirm the SD card is mounted: Once the mount process is complete, you should see a notification or indication that the SD card has been successfully mounted and is ready for use.
It’s important to note that the exact steps and options for mounting the SD card may vary depending on the device and its operating system. Some devices may automatically mount the SD card upon insertion, while others may require manual intervention. Refer to the specific instructions provided by the device’s manufacturer or consult the device’s manual for accurate information.
Once the SD card is mounted, you can start enjoying the expanded storage capacity and the enhanced functionality it provides on your device. Whether it’s storing files, capturing photos and videos, or running apps, the mounted SD card becomes an integral part of your device’s storage system.
Step 6: Verify the SD Card is Mounted
After mounting the SD card on your device, it’s important to verify that the card is properly recognized and mounted. Verifying the mounting status ensures that the SD card is ready for use and that you can start utilizing its storage capacity. Here’s how to verify the SD card is mounted:
- Access the device’s settings: Open the settings menu on your device.
- Navigate to the storage settings: Look for the “Storage” or “Storage and USB” option. This is the same menu you accessed in the previous steps to locate and mount the SD card.
- Confirm the SD card status: Within the storage settings, locate the SD card storage. It should now show as “Mounted” or “Connected”. This indicates that the SD card is recognized and ready for use.
- View storage details: If available, you can also view additional details about the SD card storage, such as the total capacity, available space, and file system type. This information can help verify that the SD card is mounted correctly.
- Test functionality: To ensure the SD card is functioning properly, you can perform a quick test. This can involve transferring a small file, capturing a photo, or accessing media files stored on the SD card. If the test is successful, it confirms that the SD card is mounted and functioning as expected.
By verifying that the SD card is mounted, you can have peace of mind knowing that the device has successfully recognized and established a connection with the card. This step is essential to ensure that you can effectively use the expanded storage capacity provided by the SD card and enjoy its benefits without any issues.
Step 7: Safely Unmount the SD Card
When you no longer need to use the SD card or want to remove it from your device, it’s important to safely unmount it. Safely unmounting the SD card ensures that all data is properly saved, and any ongoing processes or file operations involving the card are completed. Here’s how to safely unmount an SD card:
- Access the device’s settings: Open the settings menu on your device.
- Navigate to the storage settings: Look for the “Storage” or “Storage and USB” option. This is the same menu you accessed in the previous steps to locate and mount the SD card.
- Locate the SD card storage: Within the storage settings, locate the SD card storage that you have mounted.
- Tap on the unmount option: Tap on the “Unmount” or “Unmount SD card” option to initiate the unmounting process. This will safely disconnect the SD card from the device.
- Wait until the SD card is unmounted: The device will now begin the unmounting process, ensuring that any ongoing file operations are completed. It may take a few moments for the SD card to be safely unmounted.
- Confirm the SD card is unmounted: Once the unmount process is complete, you should see a notification or indication that the SD card has been successfully unmounted. This confirms that the SD card is no longer connected or accessible on the device.
- Safely remove the SD card: After confirming the SD card is unmounted, you can safely remove it from the device’s SD card slot. Gently push the card out of the slot and handle it with care.
It’s crucial to always follow the proper unmounting procedure to avoid potential data corruption or damage to the SD card. Abruptly removing the card without unmounting it can lead to data loss or SD card errors.
By safely unmounting the SD card, you can ensure that all files and data are properly saved and that the card can be safely removed from the device without any adverse effects. This step helps maintain the integrity and longevity of both the SD card and your device.