Introduction
Welcome to this guide on how to use an SD card on your Samsung tablet. If you’ve been looking for ways to expand your device’s storage capacity and conveniently manage your files, an SD card can be a great solution. Whether you want to store more photos, videos, or documents, or if you’re just looking for a way to free up space on your tablet’s internal memory, using an SD card is a simple and effective option.
Samsung tablets, like many other Android devices, offer support for external storage via SD cards. This means you can easily add an SD card to your tablet and access it as a separate storage option for your files. By following a few simple steps, you’ll be able to insert the SD card, format it, and start transferring files to it in no time.
In this guide, we’ll walk you through the process of using an SD card on your Samsung tablet. We’ll cover everything from checking the compatibility of your tablet to safely removing the SD card when needed. So let’s get started on maximizing your tablet’s storage capacity and making the most of your device!
Step 1: Checking the Compatibility
Before you can start using an SD card on your Samsung tablet, it’s essential to ensure that your device supports external storage. Most Samsung tablets come with a dedicated slot for an SD card, but it’s always a good idea to double-check.
To check the compatibility of your tablet with an SD card, you can follow these simple steps:
- Locate the slot: Look for a small flap or tray on the side or back of your tablet. This is where you’ll insert the SD card. If you don’t see a slot, it’s likely that your tablet doesn’t support external storage.
- Read the user manual: If you’re unsure about the location of the SD card slot or need more information about its compatibility, consult the user manual that came with your tablet. The manual will provide detailed instructions and specifications for your specific model.
- Check the manufacturer’s website: Visit the Samsung website and navigate to the support section. Look for information about your tablet model and its compatibility with SD cards. You may find specific recommendations or limitations regarding supported SD card types or sizes.
- Test with a compatible SD card: If you already have an SD card that you’re planning to use, you can insert it into your tablet’s slot and see if it is recognized. If your tablet detects the card, it means it is compatible. Otherwise, you may need to consider purchasing a different SD card that is compatible with your tablet.
By verifying the compatibility of your Samsung tablet with an SD card, you can ensure a smooth and hassle-free experience when using external storage. Once you’ve confirmed that your tablet supports SD cards, you’re ready to move on to the next step: inserting the SD card into your device.
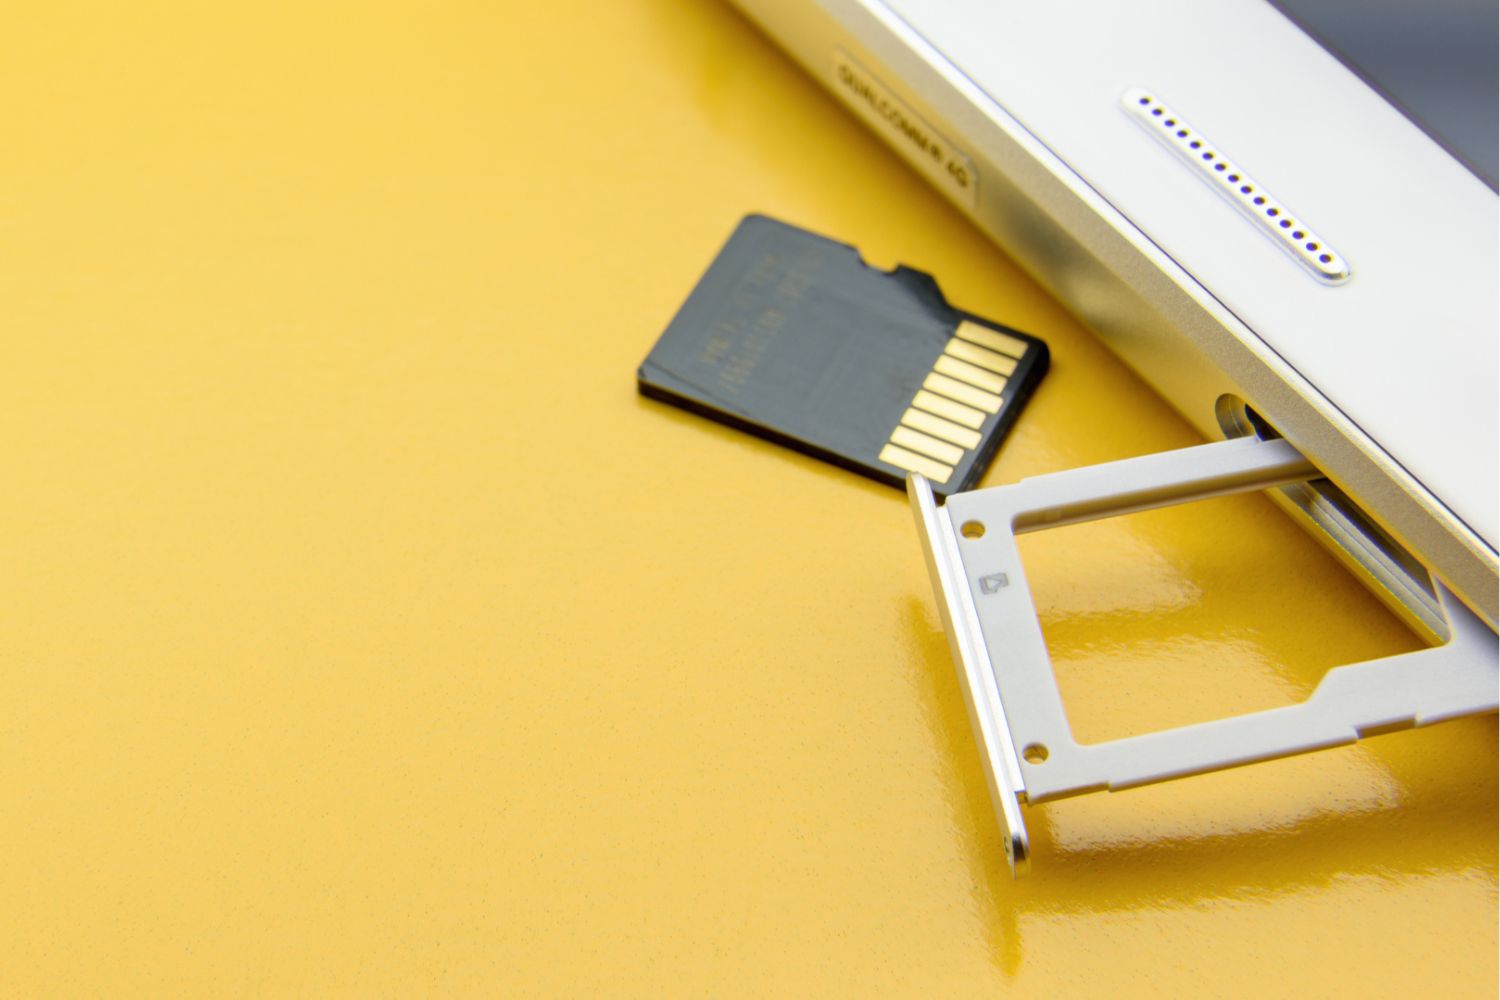
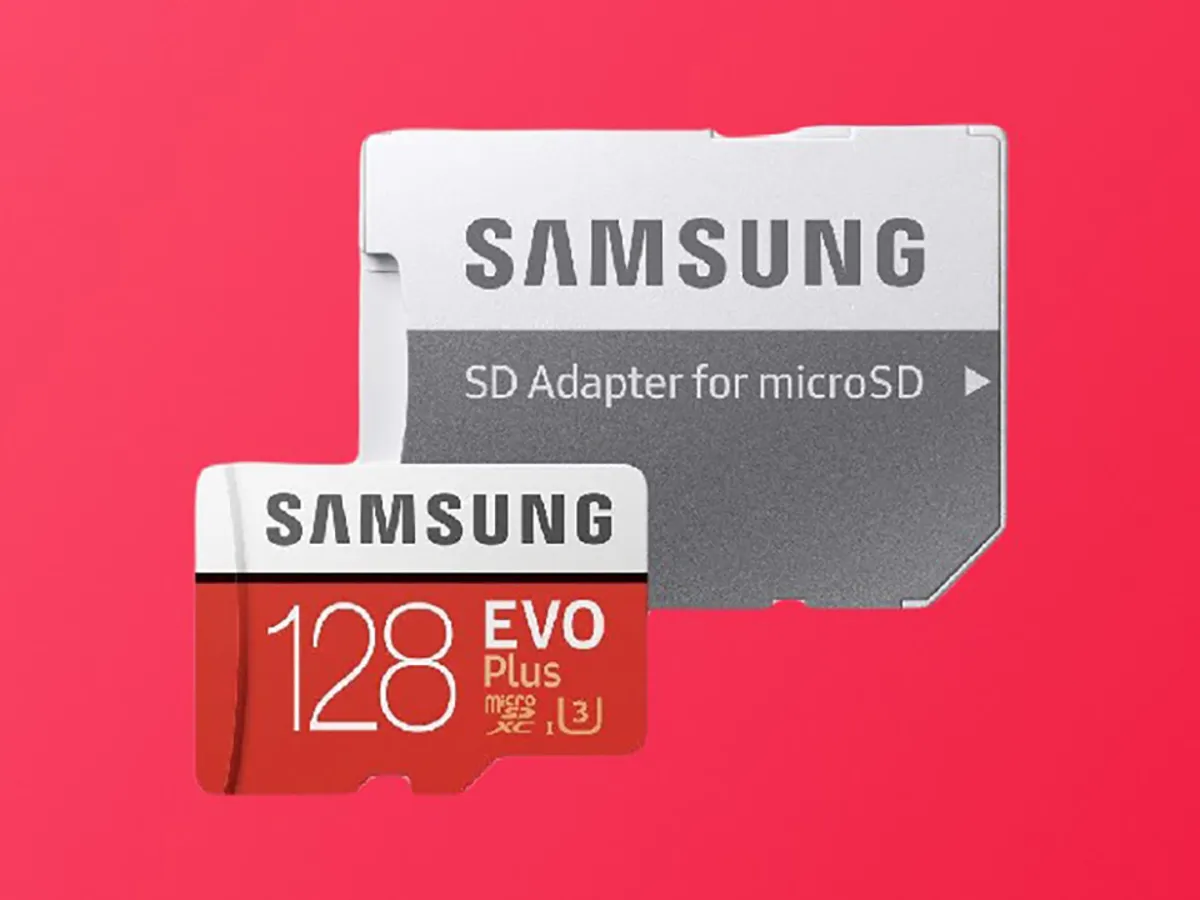
Step 2: Inserting the SD Card
Now that you’ve confirmed the compatibility of your Samsung tablet with an SD card, it’s time to insert the card into your device. Follow these steps to seamlessly insert the SD card:
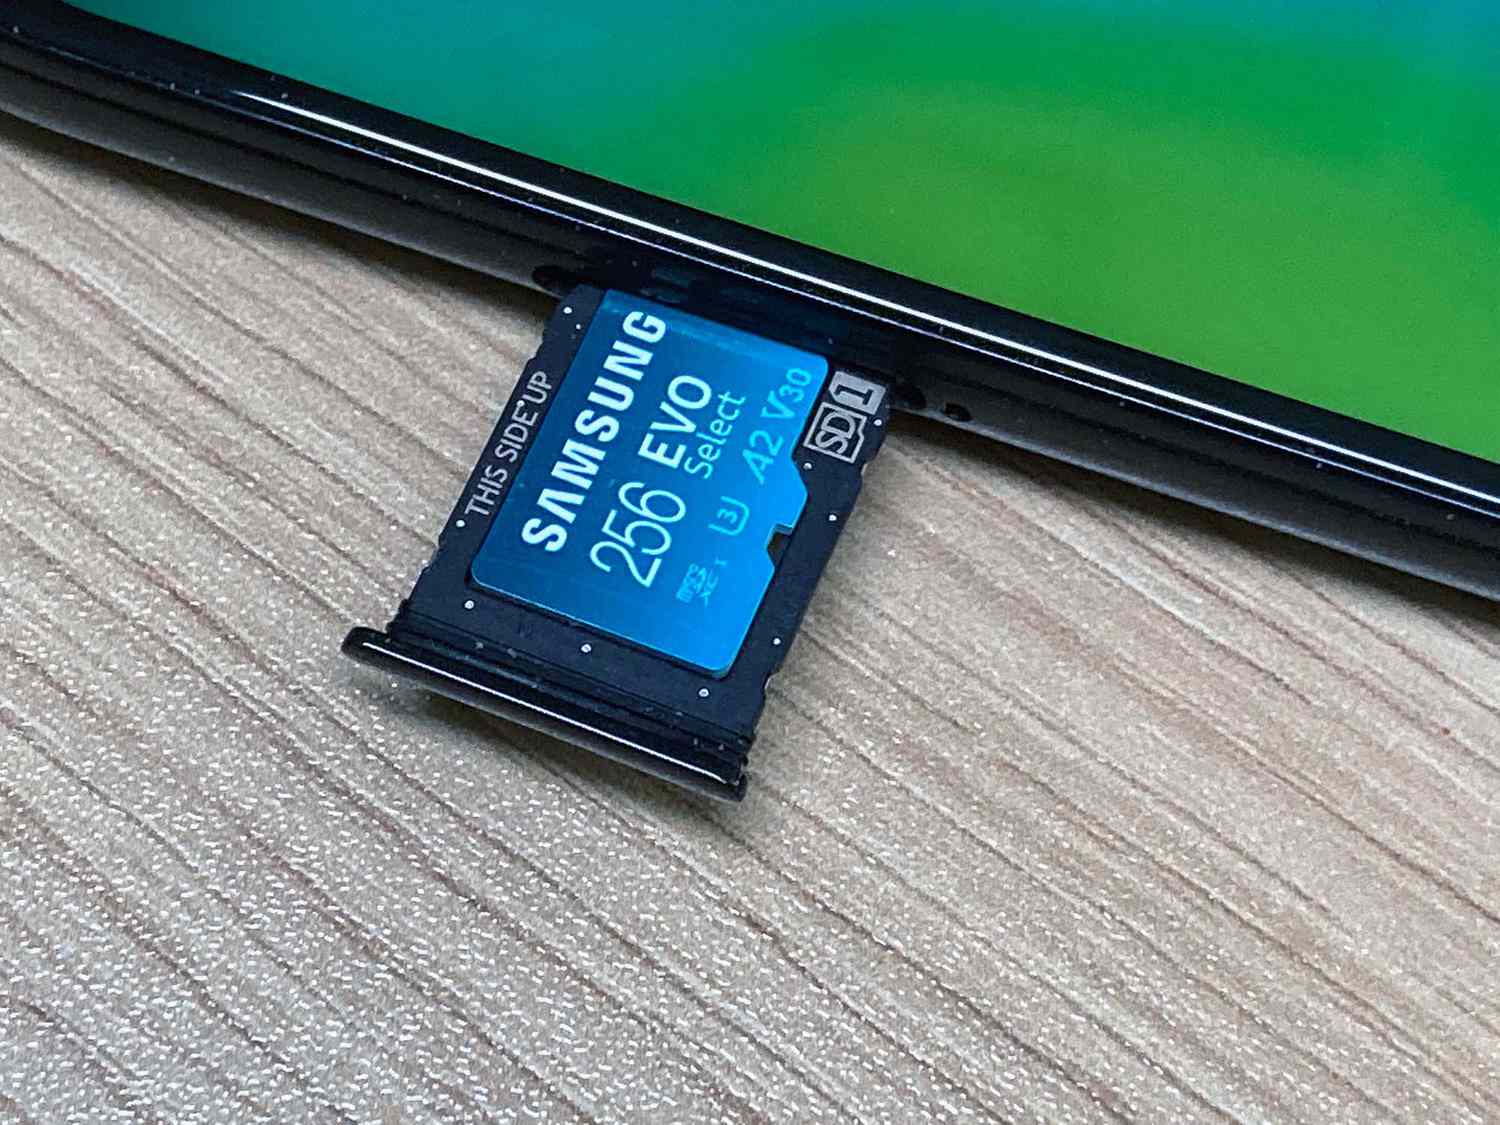
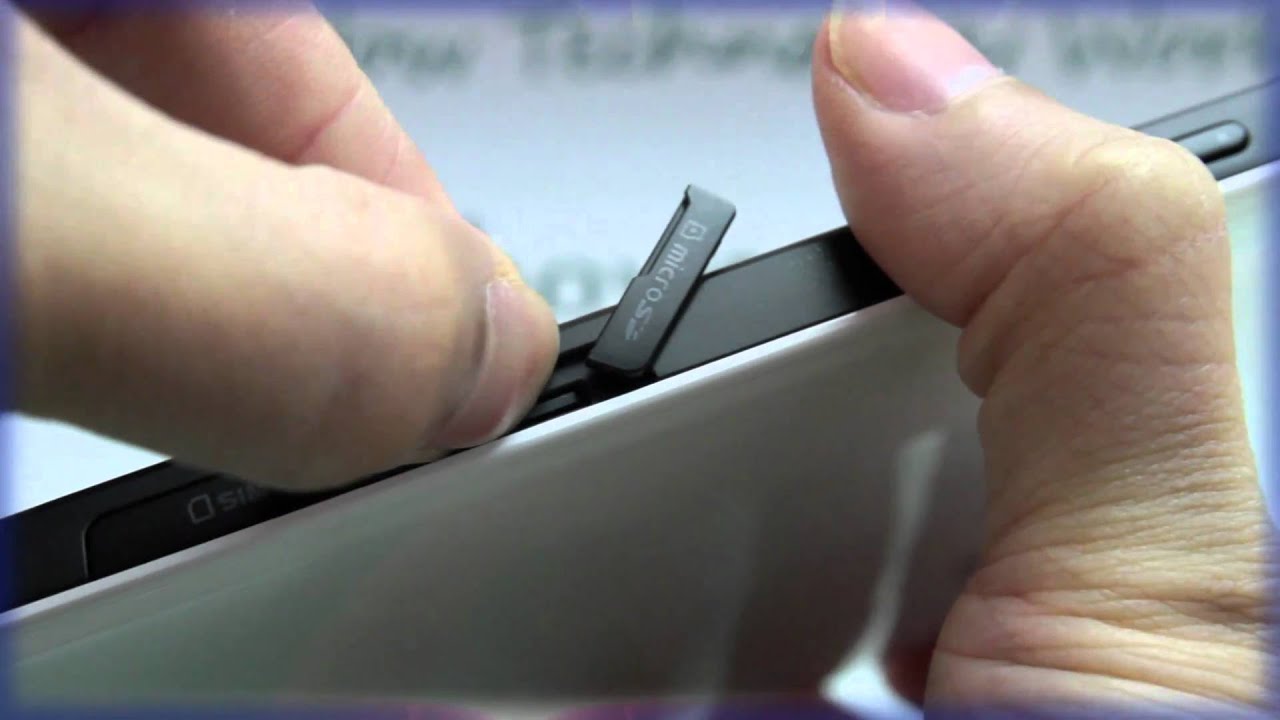
- Locate the SD card slot: Look for a small flap or tray on the side or back of your tablet. This is where the SD card will be inserted. Some tablets may have the slot on the same side as the power or volume buttons, so be cautious when inserting the card.
- Turn off your tablet: It’s always a good practice to turn off your tablet before inserting or removing an SD card. This ensures that no data is corrupted during the process.
- Open the SD card slot: If your tablet has a flap covering the slot, gently open it using your fingers or a small tool. Be careful not to apply too much force to avoid damaging the flap or the tablet.
- Insert the SD card: Take your SD card and carefully align it with the slot. The card should have a label or notch indicating the correct orientation to insert it. Push the card gently into the slot until it is fully inserted.
- Close the SD card slot: If your tablet has a flap covering the slot, close it securely to ensure the SD card remains in place. Make sure it clicks into position for a snug fit.
Once you have successfully inserted the SD card into your Samsung tablet, you can proceed to the next step of formatting the card to prepare it for use. Formatting ensures that the card is compatible with your tablet and sets up the necessary file system for storing your files.
Step 3: Formatting the SD Card
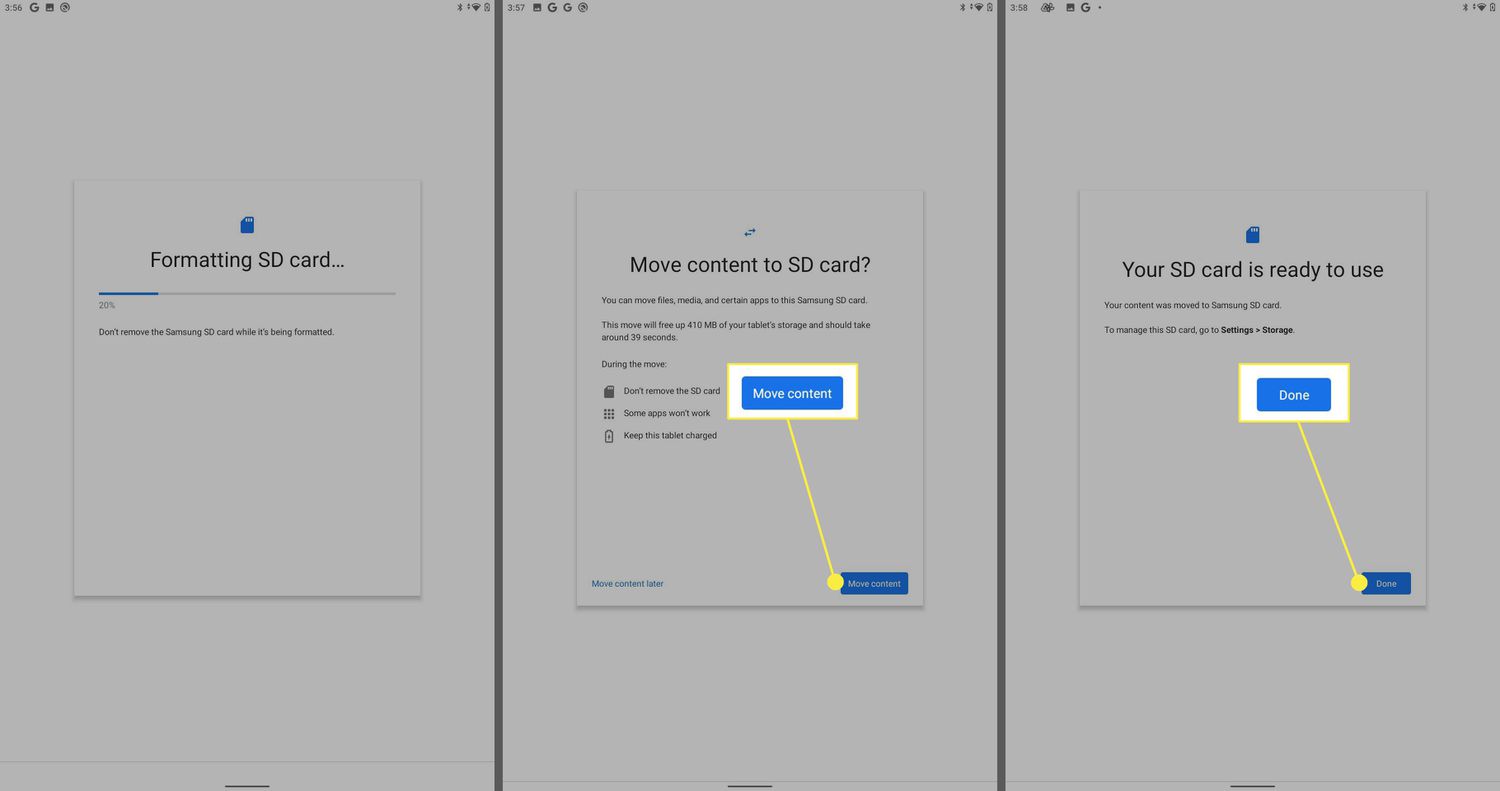
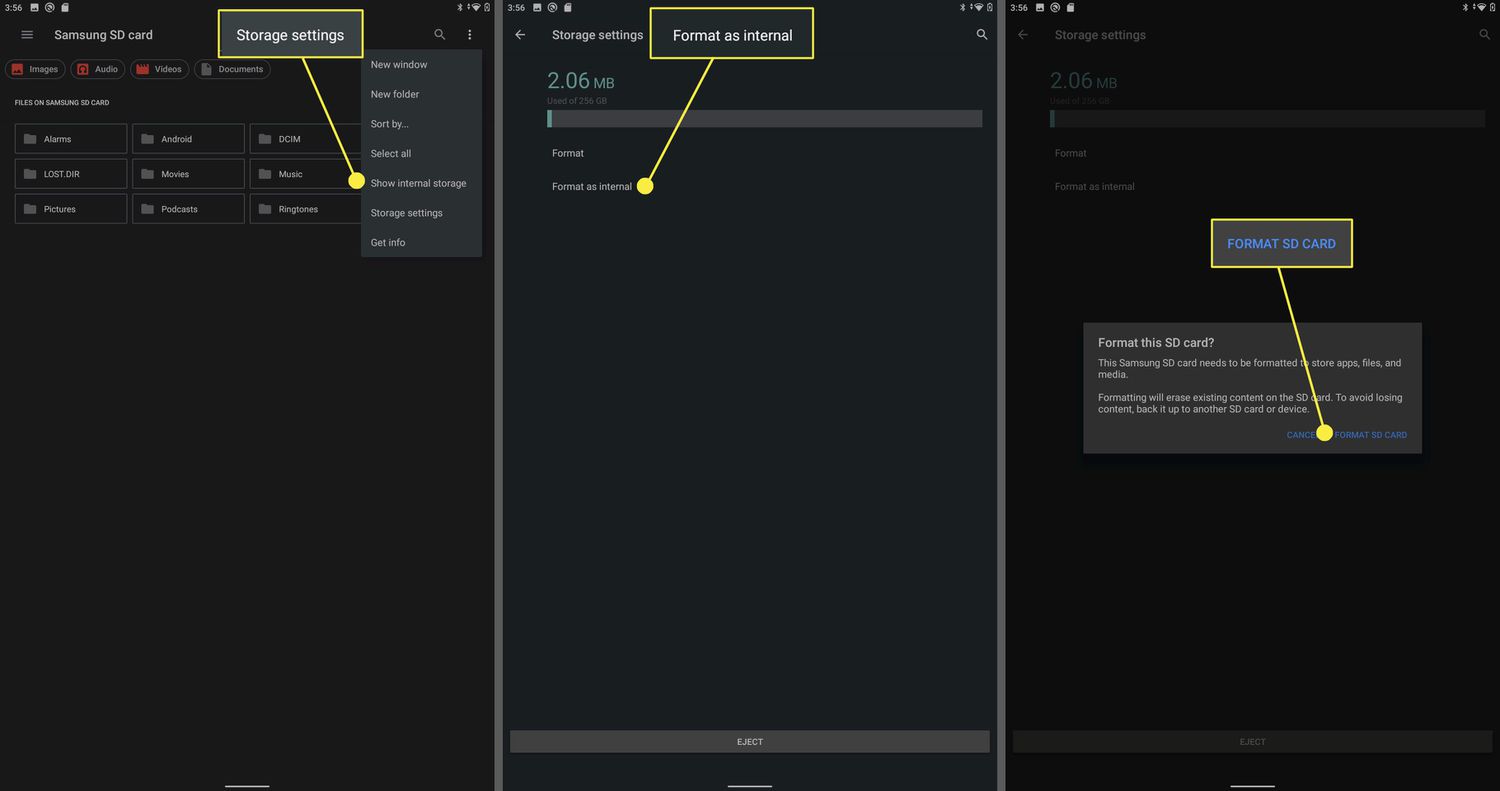
After inserting the SD card into your Samsung tablet, the next step is to format the card. Formatting prepares the SD card for use by creating the necessary file system structure. Follow these steps to format your SD card on a Samsung tablet:
- Open the Settings menu: Swipe down from the top of your tablet’s screen to access the notification panel. From there, tap on the gear icon to open the Settings menu.
- Select Device Care or Storage: Depending on the version of the Samsung tablet’s software, you may find the storage options under either “Device Care” or “Storage” in the Settings menu. Tap on the respective option to proceed.
- Tap on Storage: In the storage settings, you should see both the internal storage of your tablet and the newly inserted SD card. Tap on the SD card option to access its specific settings.
- Tap on Format: Within the SD card settings, you will find the option to format the card. It may be labeled as “Format SD card” or simply “Format. Tap on this option to begin the formatting process.
- Confirm the formatting: A warning message will appear, informing you that all data on the SD card will be erased during the formatting process. If you have any important data on the SD card, make sure to back it up before proceeding. To confirm the formatting, tap on “Format” or “Erase” (depending on your tablet model).
- Wait for the formatting to complete: The formatting process may take a few moments. Avoid removing the SD card or turning off your tablet during this time. Once the process is complete, you will receive a notification or see a confirmation message on your screen.
By formatting the SD card, you ensure that it is fully compatible with your Samsung tablet. This step prepares the card for storing and accessing your files effectively. Now that your SD card is formatted, you can move on to the next step: selecting SD card storage as the default option.
Step 4: Selecting SD Card Storage
Now that you have successfully formatted your SD card on your Samsung tablet, it’s time to set the SD card as the default storage option. This will ensure that any new files or data you save will automatically be stored on the SD card instead of the internal storage. Follow these steps to select SD card storage:
- Open the Settings menu: Access the Settings menu by swiping down from the top of your tablet’s screen and tapping on the gear icon.
- Select Device Care or Storage: Look for the “Device Care” or “Storage” option in the Settings menu. Tap on it to proceed.
- Tap on Storage: In the storage settings, you will see both the internal storage and the SD card. Tap on the SD card option to access its specific settings.
- Set as default storage: Look for an option that allows you to set the SD card as the default storage location. This option may be labeled as “Change” or “Storage Location.” Tap on it to proceed.
- Select SD card: A list of available storage options will appear. Select the SD card from the list to set it as the default storage location for your tablet.
- Confirm the selection: You may receive a warning message informing you about the potential limitations or consequences of using the SD card as default storage. Read the message and tap “OK” to confirm the selection.
Now that you have set your SD card as the default storage option, any new files or data you save on your Samsung tablet will be stored directly on the SD card. This helps free up space on your tablet’s internal storage and allows you to maximize the storage capacity of your device. Next, we will discuss how to transfer files to the SD card.
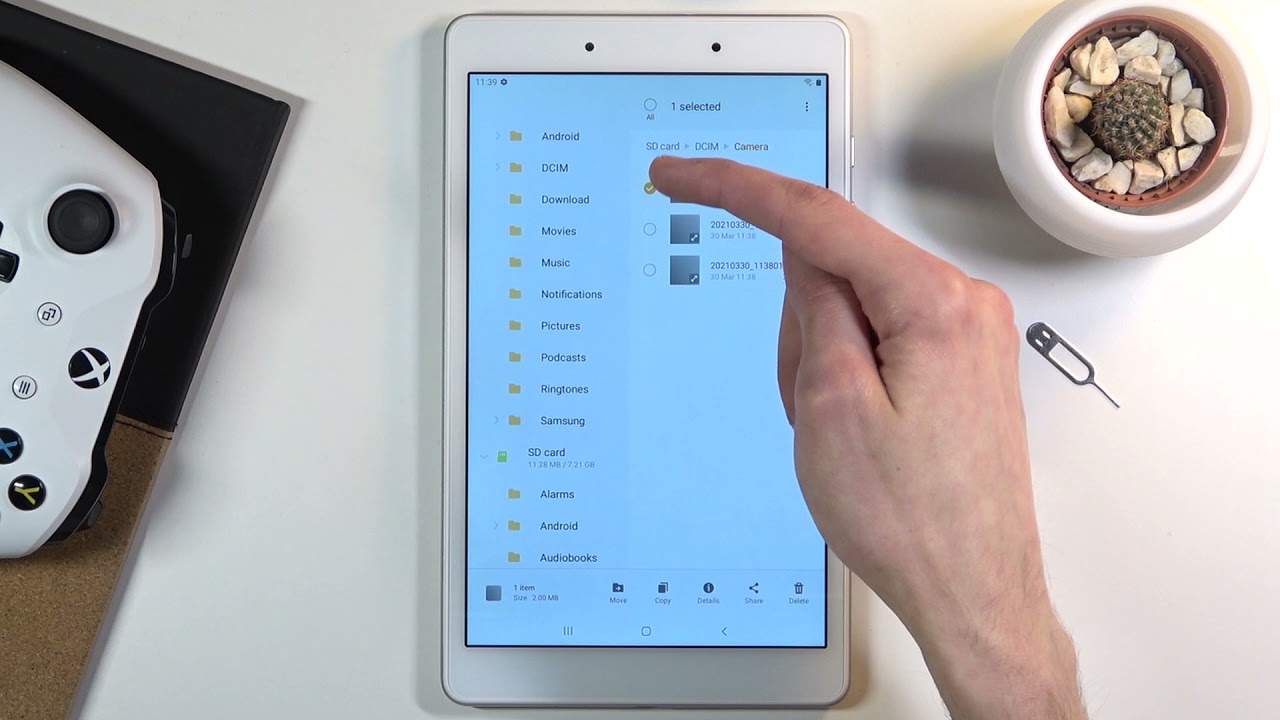
Step 5: Transferring Files to the SD Card
Now that you have set your SD card as the default storage option on your Samsung tablet, it’s time to start transferring files to your newly formatted SD card. Whether you want to move photos, videos, documents, or any other type of files, follow these steps to transfer them to the SD card:
- Open the file manager: Locate the file manager app on your tablet. This app allows you to browse and manage the files stored on your device.
- Navigate to the files you want to transfer: Use the file manager to navigate to the files you wish to transfer to the SD card. These could be files stored in the internal storage or on another external storage device.
- Select the files: Once you have located the files, tap and hold on one file to activate the multi-selection mode. Select all the files you want to transfer to the SD card by tapping on them one by one or using the select all option.
- Choose the SD card as the destination: With the files selected, look for a menu or option that allows you to move or copy the files. When prompted to choose a destination, select the SD card or the folder within the SD card where you want to transfer the files.
- Start the file transfer: Once you have selected the destination, tap on the move or copy button to initiate the file transfer process. The files will be transferred from the internal storage or other external storage to the SD card.
- Monitor the transfer process: Depending on the size and number of files being transferred, the process may take some time. Keep an eye on the progress to ensure that all files are transferred successfully.
By following these steps, you can easily transfer your files to the SD card on your Samsung tablet. This not only helps in organizing your files but also frees up space on your tablet’s internal storage, ensuring smooth and efficient performance for your device. Now that you have transferred your files, let’s move on to the final step: safely removing the SD card when needed.
Step 6: Removing the SD Card Safely
At times, you may need to remove the SD card from your Samsung tablet for various reasons, such as transferring files to another device or changing the SD card itself. It is essential to follow the proper steps to ensure that you remove the SD card safely without causing any data loss or damage. Here’s how you can safely remove the SD card:
- Close all apps and files: Before removing the SD card, make sure that you close all the apps and files that may be using it. This prevents any data from being corrupted or lost during the removal process.
- Unmount the SD card: Access the Settings menu on your tablet and navigate to the storage settings. Find the option to unmount or eject the SD card. Tap on it to safely disconnect the SD card from your tablet.
- Physically remove the SD card: Once you have unmounted the SD card, locate the slot on your tablet where the card is inserted. Carefully push the SD card with your finger or a small tool to release it from the slot. Gently pull out the SD card from the slot.
It is crucial to handle the SD card with care while removing it from the tablet. Avoid applying excessive force or bending the card, as this can lead to physical damage or loss of data.
If you want to use the SD card again in the future, it’s a good idea to store it in a protective case or a safe place to prevent any physical damage or loss. Additionally, make sure to follow the manufacturer’s guidelines for storage and handling to maintain the longevity of the SD card.
By following these simple steps, you can safely remove the SD card from your Samsung tablet whenever necessary, preserving your data and the integrity of the card itself. Now that you’re familiar with the process of using an SD card on your Samsung tablet, you can enjoy the benefits of expanded storage and efficient file management.
Conclusion
Congratulations! You have successfully learned how to use an SD card on your Samsung tablet. By following the steps outlined in this guide, you can now expand your tablet’s storage capacity and organize your files more efficiently. Whether you want to store photos, videos, documents, or any other type of data, the SD card provides a convenient and flexible solution.
We began by checking the compatibility of your tablet with an SD card and ensured that it had a dedicated slot for external storage. After confirming compatibility, you learned how to insert the SD card into your tablet securely. Then, we moved on to formatting the SD card, which prepares it for use and sets up the necessary file system structure.
Once the SD card was formatted, you discovered how to select it as the default storage option on your Samsung tablet. This step ensures that any new files you save will be stored directly on the SD card, freeing up space on your tablet’s internal storage.
Next, you learned how to transfer files to the SD card using the file manager on your tablet. This allows you to organize and manage your files effectively, while also maximizing your tablet’s storage capacity. Finally, we covered the importance of safely removing the SD card when needed, to prevent data loss or damage.
With the knowledge gained from this guide, you can now make the most of your Samsung tablet’s storage capabilities. Whether you’re a photography enthusiast, a movie lover, or simply need extra space for your documents, the SD card offers a practical solution to meet your storage needs.
Remember to handle your SD card with care, store it in a safe place when not in use, and follow the manufacturer’s guidelines for maintenance and storage. By doing so, you can ensure the longevity of the SD card and enjoy uninterrupted access to your files.
Thank you for following this guide on how to use an SD card on your Samsung tablet. We hope that it has been informative and helpful in expanding your tablet’s storage capacity. Enjoy your newfound storage space and efficient file management!