Introduction
In today’s digital age, managing storage space on our devices has become a constant struggle. With the ever-increasing size of applications, photos, videos, and documents, finding enough internal storage can be challenging. Thankfully, many smartphones and tablets now offer the option of expanding storage capacity using an SD card. But did you know that you can take it a step further and use an SD card as internal storage?
Using an SD card as internal storage can bring numerous benefits, such as increased storage space for apps, photos, videos, and other files. It allows you to store more content without having to worry about running out of space on your device. Additionally, it can help improve the performance and speed of your device by offloading some of the data storage tasks to the SD card.
Before diving into the details of how to use an SD card as internal storage, it’s essential to understand that not all devices support this feature. Some older devices or lower-end models may not have the necessary hardware or software support for utilizing an SD card as internal storage. Therefore, the first step is to check the compatibility of your device.
If your device supports using an SD card as internal storage, the next step is to format the SD card. Formatting the SD card will erase all data on it, so it’s crucial to back up any important files before proceeding. Once the SD card is formatted, it can be set up as internal storage following a few simple steps in the device settings.
After setting up the SD card as internal storage, you can transfer apps and data from the device’s internal storage to the SD card. This process will free up space on the internal storage, making room for more apps and files. It’s important to note that not all apps can be moved to the SD card, as some system apps and certain app data may be restricted from being moved.
Managing your storage space becomes essential when using an SD card as internal storage. Regularly reviewing your storage usage and clearing unnecessary files can help keep your device running smoothly. Additionally, if you need to remove the SD card from your device, it’s crucial to safely eject it to avoid any data loss or corruption.
In this guide, we will walk you through the process of using an SD card as internal storage, from checking compatibility to managing your storage space effectively. So, let’s get started and unlock the full potential of your device’s storage capacity.
Benefits of using an SD card as internal storage
Using an SD card as internal storage can bring several significant benefits to your device. Let’s explore some of the advantages that this feature offers:
- Increased storage capacity: One of the primary benefits of using an SD card as internal storage is the ability to expand the storage capacity of your device. With an SD card, you can have more space to store apps, photos, videos, music, and other files without worrying about running out of storage.
- Flexibility and versatility: By utilizing an SD card as internal storage, you gain more flexibility in managing your device’s storage. You can easily install and update apps directly on the SD card, freeing up space on the internal storage for other essential files. This flexibility allows you to customize storage allocation according to your needs.
- Improved performance: Using an SD card as internal storage can help improve the performance of your device. By offloading some of the storage tasks to the SD card, it reduces the burden on the device’s internal storage, resulting in faster app launches, smoother multitasking, and overall enhanced user experience.
- Seamless data transfer: Transferring files and data between devices becomes seamless when using an SD card as internal storage. You can easily swap the SD card between compatible devices, ensuring that your important files and data are accessible wherever you go.
- Cost-effective solution: Instead of purchasing a new device with larger internal storage, using an SD card as internal storage offers a cost-effective solution. SD cards are relatively inexpensive compared to the price difference between devices with higher internal storage capacities.
- Backup and restore capabilities: When using an SD card as internal storage, you have the option to back up your files and data more conveniently. You can simply remove the SD card and transfer it to another device or storage device to keep your data safe and protected.
By taking advantage of using an SD card as internal storage, you can maximize the storage capacity of your device, enhance its performance, and have more control over managing your files and data. It’s a practical solution that allows you to enjoy the benefits of a larger storage capacity without the need for costly device upgrades. Whether you’re an avid photographer, a heavy app user, or simply in need of more space, utilizing an SD card as internal storage is a game-changer. So, let’s move forward and learn how to check the compatibility of your device.
Checking compatibility of your device
Before using an SD card as internal storage, it’s crucial to ensure that your device supports this feature. Not all devices have the necessary hardware and software requirements to utilize an SD card in this manner. Here are the steps to check the compatibility of your device:
- Check the device specifications: Start by referring to your device’s user manual or visiting the manufacturer’s website to find information about the device’s storage options. Look for any mention of expandable storage or the ability to use an SD card as internal storage.
- Device settings: Navigate to your device’s settings menu and look for the storage or memory option. Depending on your device, it may be listed under “Storage,” “Device Storage,” or “Memory.”
- Storage type: In the storage settings, you should see information about the internal storage capacity and any available SD card slots. Look for details about using an SD card as internal storage or adoptable storage.
- Storage configurations: Some devices may offer different storage configurations, such as dual SIM slots and a dedicated SD card slot. In such cases, make sure that using an SD card as internal storage does not conflict with any other functionality.
- Manufacturer support: If you’re still unsure about the compatibility of your device, reach out to the manufacturer’s customer support or visit their support website. They should be able to provide you with concrete information regarding your device’s compatibility with using an SD card as internal storage.
By following these steps, you can determine whether or not your device supports using an SD card as internal storage. If your device is compatible, you can proceed with formatting the SD card in preparation for setting it up as internal storage.
It’s essential to note that some devices may have limitations or restrictions when using an SD card as internal storage. For example, certain apps or app data may not be transferrable to the SD card due to restrictions by the app developers or the operating system. Additionally, adopting an SD card as internal storage may limit its usage on other devices or require reformatting if you decide to use it externally again.
Now that you know how to check the compatibility of your device, let’s move on to the next step: formatting the SD card to prepare it for use as internal storage.
Formatting the SD card
Before using an SD card as internal storage, you need to format it to prepare it for this purpose. Formatting the SD card is a straightforward process, but it’s important to note that it will erase all data on the card. Therefore, it’s crucial to back up any important files before proceeding. Here’s how to format an SD card:
- Back up your data: Connect the SD card to your computer using an SD card reader, or use the built-in SD card slot if available. Copy any important files from the SD card to a safe location on your computer or an external storage device.
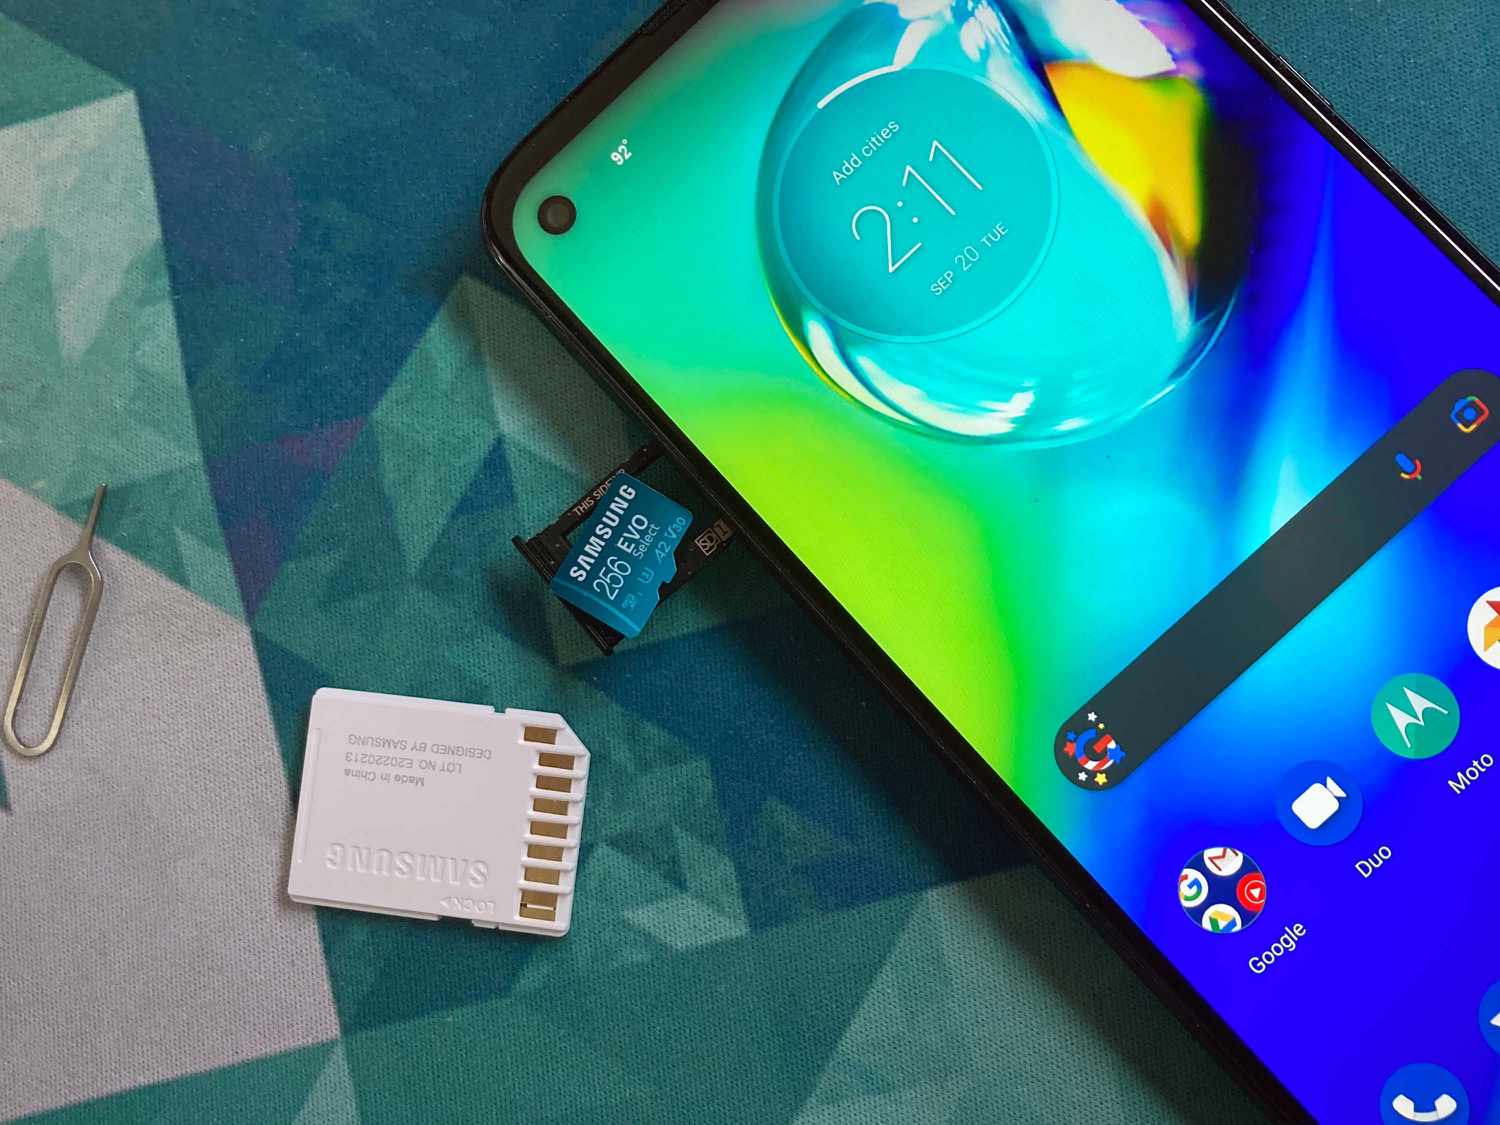
- Insert the SD card: Insert the SD card into your device’s SD card slot. Ensure that it is inserted properly and securely.
- Access the storage settings: Go to your device’s settings and find the storage or memory option. This may be listed under “Storage,” “Device Storage,” or “Memory.”
- Select the SD card: In the storage settings, you should see the internal storage and the inserted SD card. Tap on the SD card option to access the SD card settings.
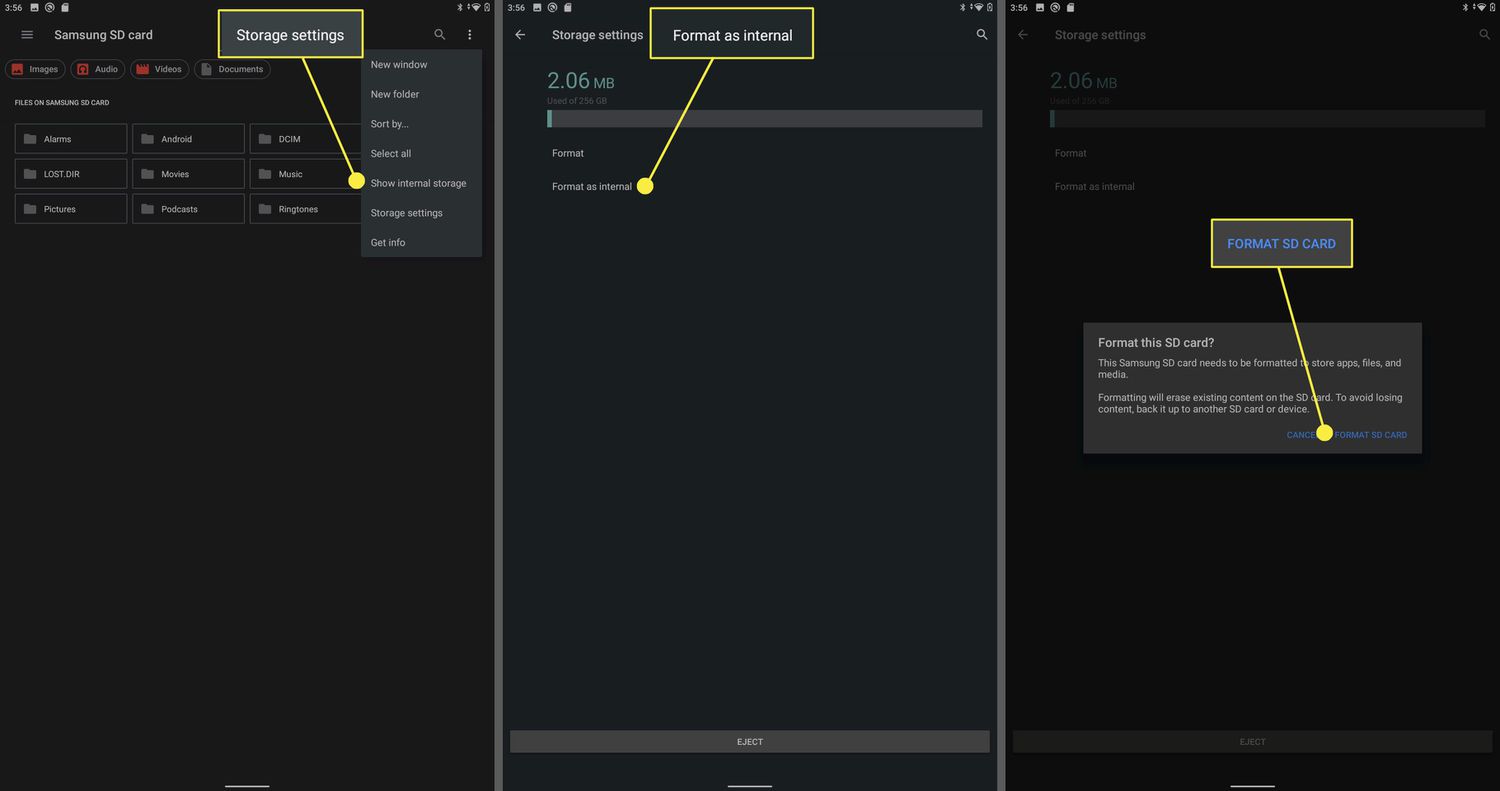
- Format the SD card: Look for the option to format the SD card. This may be labeled as “Format SD Card,” “Erase SD Card,” or something similar. Tap on the option to initiate the formatting process.
- Confirm the format: A confirmation prompt will appear, warning you that all data on the SD card will be erased. Make sure you have backed up your data and then confirm the format.
- Wait for the formatting to complete: The formatting process may take a few moments to complete. Do not remove the SD card or interrupt the process until it is finished.
Once the formatting process is complete, your SD card is ready to be set up as internal storage. Formatting the SD card ensures that it is compatible with your device and sets it up to be used for storing apps and data. Remember, formatting the SD card will erase all data on it, so it’s important to have a backup of any files you want to keep.
Now that the SD card is formatted, we can move on to the next step: setting it up as internal storage.
Setting up the SD card as internal storage
Now that you have formatted the SD card, you can proceed with setting it up as internal storage. This process will allocate the SD card as additional storage space for your device. Here’s how to set up the SD card as internal storage:
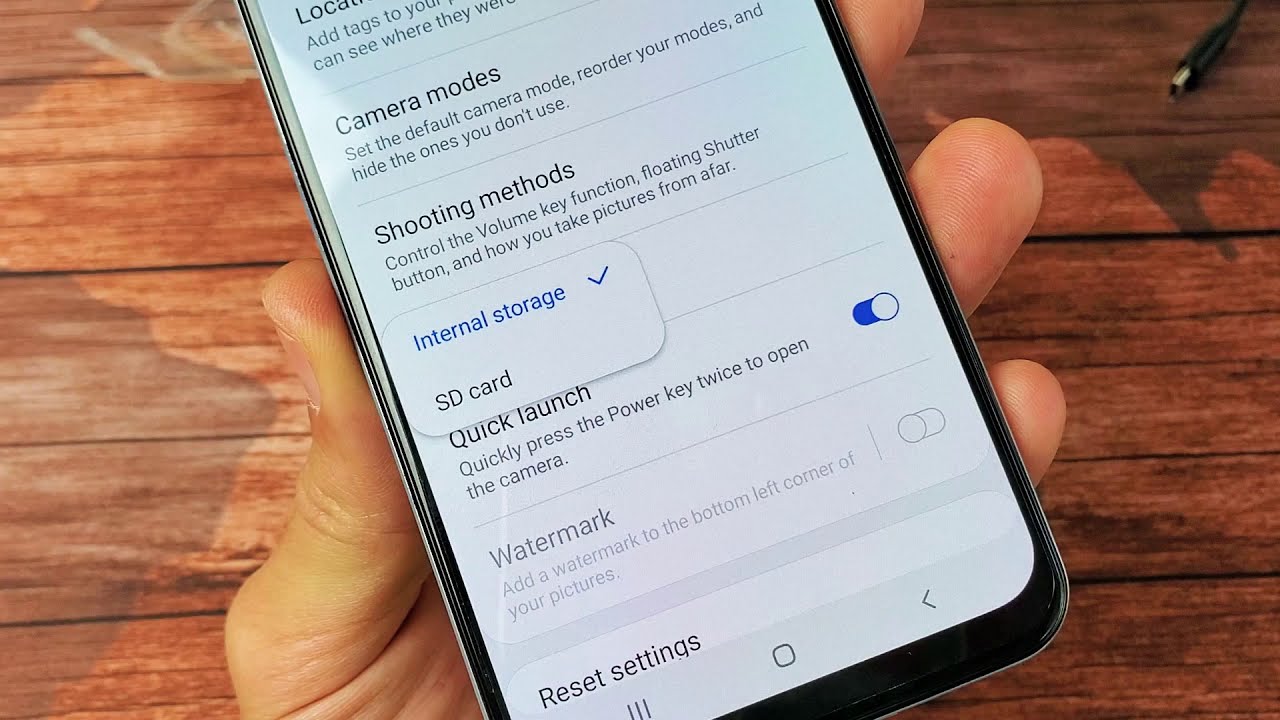
- Access the storage settings: Go to your device’s settings menu and find the storage or memory option. This may be listed under “Storage,” “Device Storage,” or “Memory.”
- Select the SD card: In the storage settings, you should see the internal storage and the inserted SD card. Tap on the SD card option to access the SD card settings.
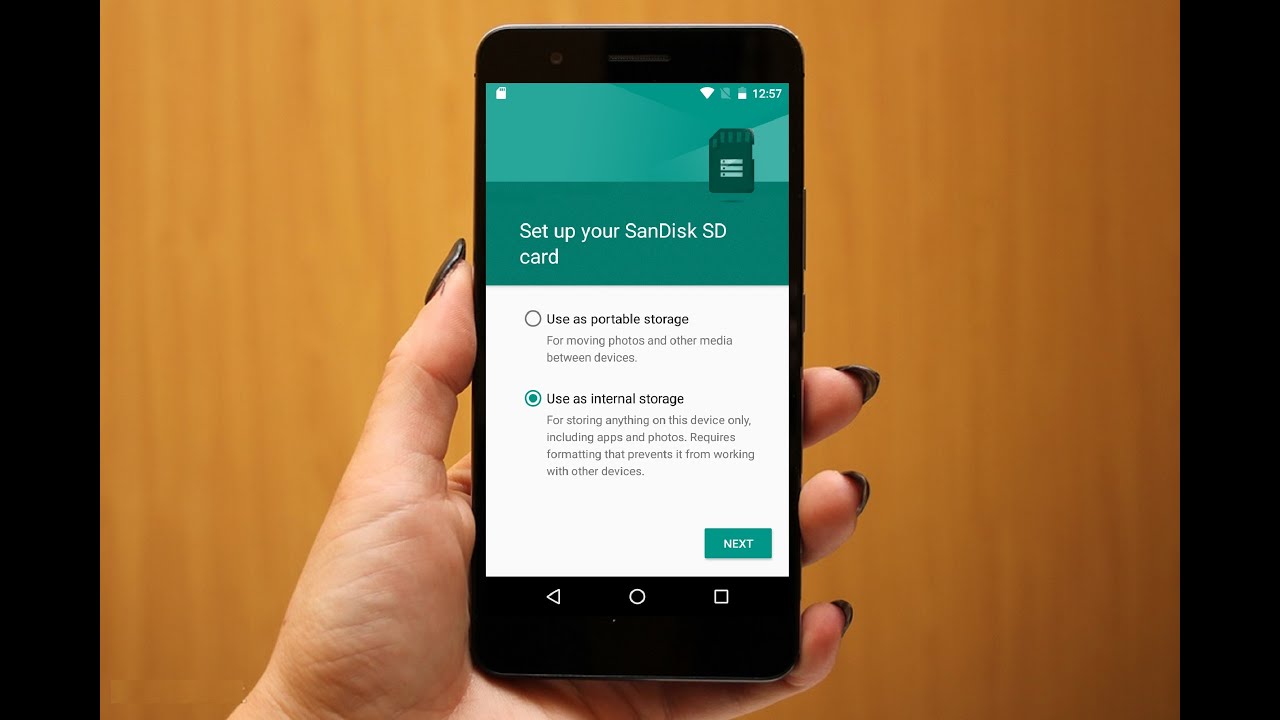
- Set up as internal storage: Look for the option to set up the SD card as internal storage. This may be labeled as “Format as internal,” “Use as internal storage,” or something similar. Tap on the option to initiate the setup process.
- Read the warning: A warning message will appear, explaining that formatting the SD card will erase all data on it and that it will become encrypted and only compatible with your device. Make sure you have backed up any data you want to keep and understand the implications before proceeding.
- Confirm the setup: If you agree with the warning message, tap on the option to confirm the setup. The device will then begin encrypting and preparing the SD card for use as internal storage.
- Wait for the setup to complete: The setup process may take some time, depending on the size and speed of the SD card. Do not remove the SD card or interrupt the process until it is finished.
Once the setup is complete, your SD card will be configured as internal storage for your device. This means that any apps, photos, videos, and other files you download or save will be stored on the SD card, freeing up space on the device’s internal storage.
It’s important to note that once the SD card is set up as internal storage, it becomes encrypted and tied to your device. This means that you won’t be able to remove and access the SD card on other devices without reformatting it. Also, keep in mind that some system apps and certain app data may still be stored on the internal storage and cannot be moved to the SD card.
Now that the SD card is set up as internal storage, we can move on to the next step: transferring apps and data to the SD card.
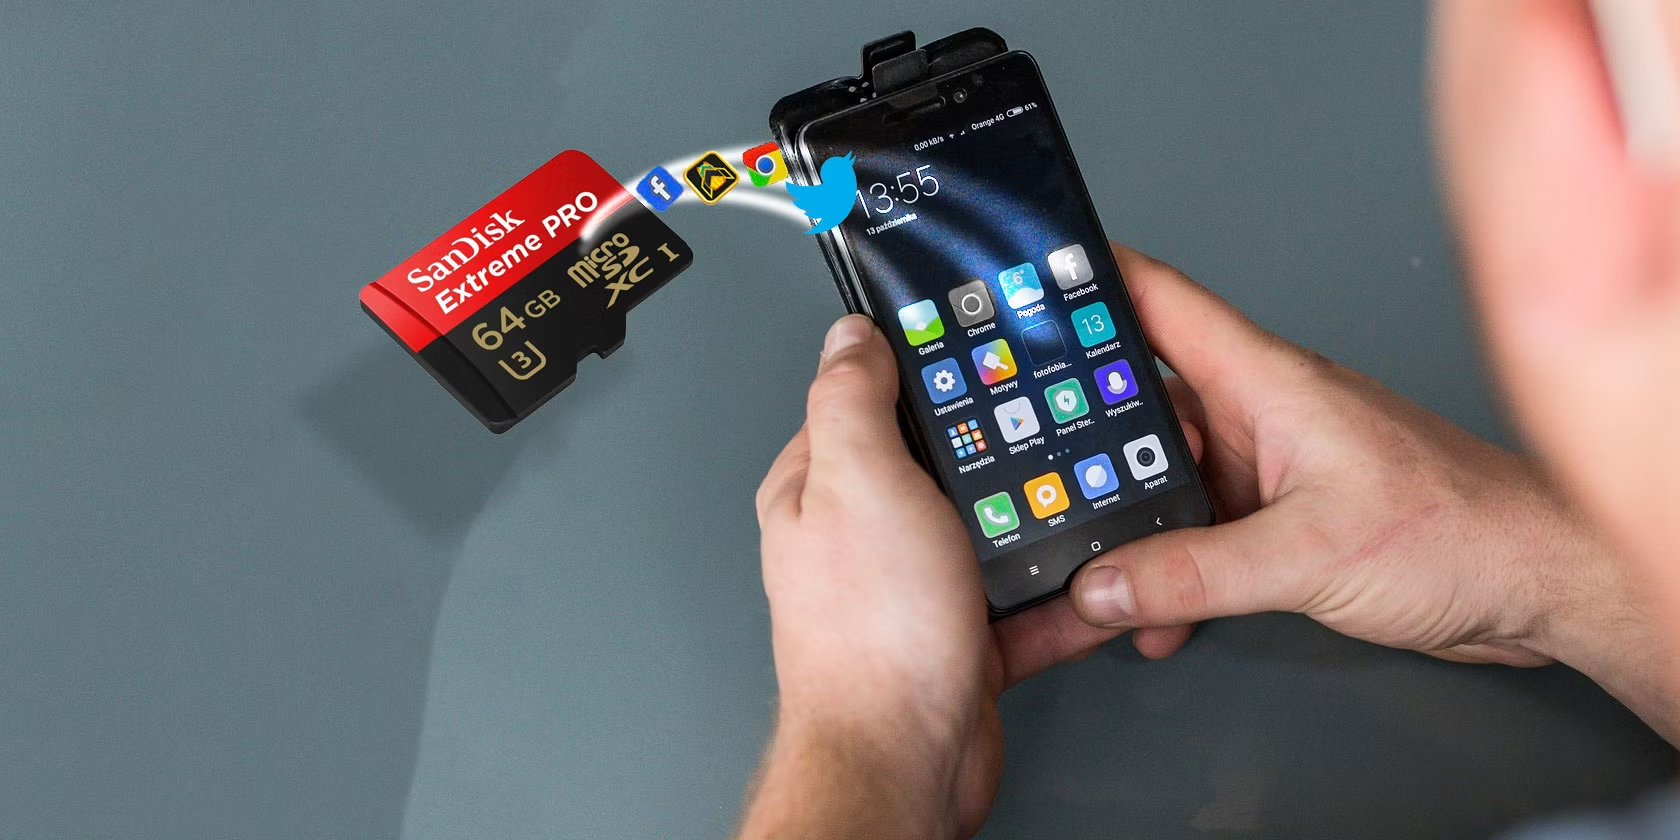
Transferring apps and data to the SD card
Now that the SD card is set up as internal storage, you can start transferring apps and data from the device’s internal storage to the SD card. This will free up space on the internal storage and allow you to store more apps and files. Here’s how to transfer apps and data to the SD card:
- Access the app settings: Go to your device’s settings menu and find the “Apps” or “Applications” option. This may vary depending on your device and the version of your operating system.
- Select the app: From the list of apps installed on your device, select the app you want to move to the SD card. Keep in mind that not all apps can be moved, as some system apps and certain app data may be restricted.
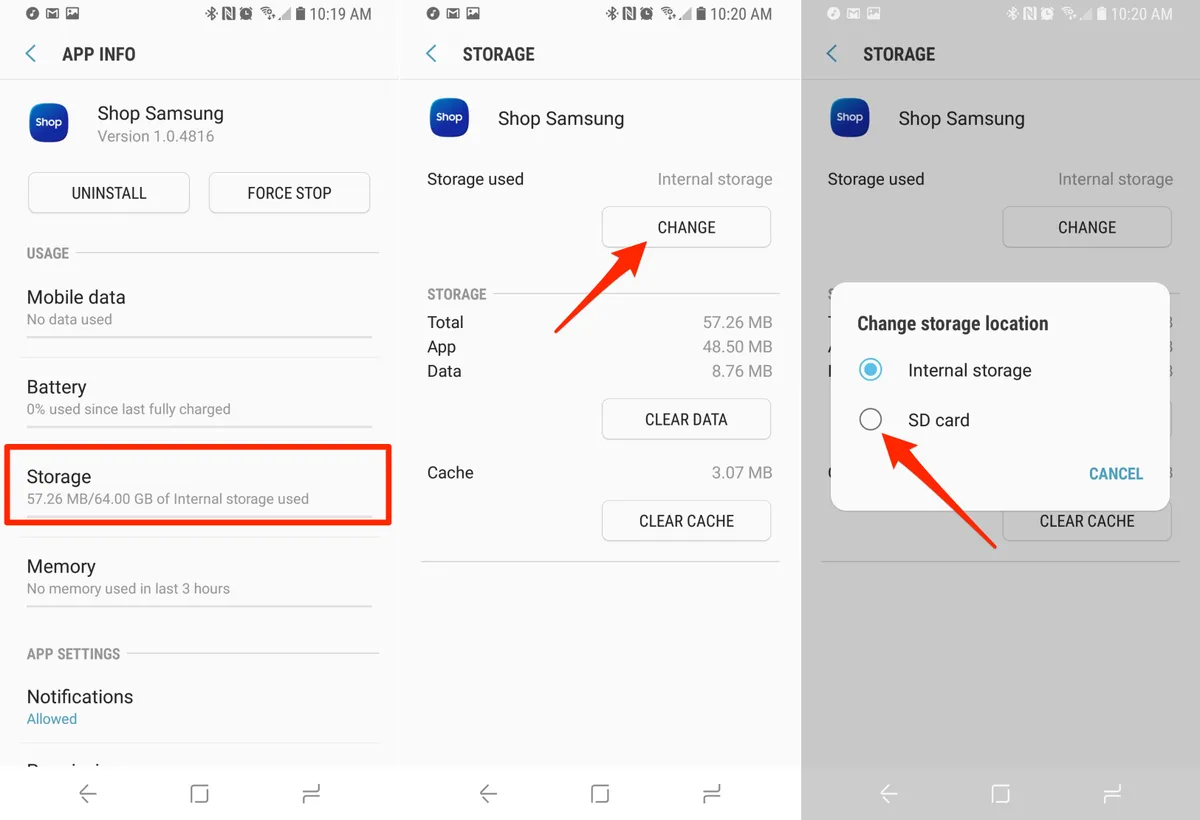
- Open app details: In the app settings, you should see the details of the selected app. Look for the option to “Move to SD card” or “Storage.”
- Move app to SD card: Tap on the option to move the app to the SD card. The device will then begin transferring the app and its associated data to the SD card.
- Repeat for other apps: Repeat the process for each app you want to move to the SD card. Take note that some apps may not have the option to move to the SD card, as it depends on the app developer’s restrictions.
- Manage app data: In some cases, even if the app itself cannot be moved, you can still move some of its data to the SD card. This option is often available within the app settings under “Storage” or a similar label. Move any eligible app data to the SD card to free up space on the internal storage.
When transferring apps and data to the SD card, it’s important to keep in mind that the performance of certain apps may be affected. Apps stored on the SD card may take slightly longer to load compared to those stored on the device’s internal storage. However, the impact on performance varies depending on the speed and quality of your SD card.
Furthermore, it’s worth noting that when updating apps, they will be automatically installed on the device’s internal storage. Therefore, you may need to periodically check your app settings and move them back to the SD card if you want to maintain storage efficiency. Additionally, transferring apps and data to the SD card may not be reversible in some cases, so it’s important to consider this before making any changes.
Now that you have learned how to transfer apps and data to the SD card, you can effectively manage your storage space and optimize the usage of your device’s internal storage. However, it’s important to regularly review and manage your storage to ensure optimal performance. In the next section, we will explore some tips for managing your storage space effectively.
Managing your storage space
Managing your storage space effectively is crucial when using an SD card as internal storage. By regularly reviewing and organizing your files and apps, you can ensure optimal performance and make the most out of your device’s storage capacity. Here are some tips for managing your storage space:
- Regularly review and delete unnecessary files: Take the time to review your files and delete any unnecessary photos, videos, documents, or other files that are taking up valuable storage space. This will help free up space on both the internal storage and the SD card.
- Use cloud storage services: Consider using cloud storage services such as Google Drive, Dropbox, or iCloud to store your files. By uploading your files to the cloud, you can free up storage space on your device while still having easy access to your files whenever you need them.
- Clear app cache and data: Some apps create temporary files or cached data that can accumulate over time and take up valuable storage space. Periodically clear the cache and data of apps that you no longer use or those that are consuming a significant amount of storage.
- Moving large files to the SD card: If you have large files such as videos or high-resolution photos, consider moving them to the SD card to free up space on the internal storage. This can be done by connecting your device to a computer and manually transferring the files to the SD card.
- Manage app installations: Keep an eye on the number of apps installed on your device. Uninstall any apps that you no longer use or rarely use to free up storage space. Remember, you can always reinstall them later if needed.
- Utilize storage management tools: Some devices offer built-in storage management tools that can help you identify large files, unnecessary files, and app usage. Use these tools to get insights into your storage usage and take appropriate actions to optimize your storage space.
By implementing these strategies, you can effectively manage your storage space and ensure smooth performance on your device. Regularly reviewing and organizing your files and apps will not only create more space for new content but also contribute to a clutter-free and efficient device experience.
Remember that maintaining a balance between freeing up storage space and keeping essential files and apps is crucial. Be mindful of the space you have available and regularly assess your storage usage to avoid running out of space or experiencing performance issues on your device.
In the next section, we will discuss the proper way to remove the SD card from your device safely to avoid any data loss or corruption.
Removing the SD card safely
If you need to remove the SD card from your device, it’s important to do so safely to avoid any data loss or corruption. Here are the steps to safely remove the SD card from your device:
- Check for ongoing operations: Before removing the SD card, ensure that there are no ongoing operations or transfers involving the SD card. This includes any file transfers, app updates, or background processes.
- Unmount the SD card: To safely remove the SD card, you need to unmount it first. Go to your device’s settings and find the storage or memory option. Tap on the SD card option and look for the option to unmount or eject the SD card.
- Confirm unmounting: A confirmation prompt will appear, notifying you that unmounting the SD card will prevent apps from accessing it. Make sure you have saved any important work or data before confirming the unmounting process.
- Remove the SD card: Once the SD card is successfully unmounted, gently remove it from the device’s SD card slot. Avoid applying excessive force or improper handling to prevent any damage to the card or the device.
It’s crucial to remember that once the SD card is removed, any apps or data stored on it will no longer be accessible on your device. Therefore, it’s essential to have a backup of any important files before removing the SD card.
If you want to use the SD card on another device or as additional storage on your computer, you may need to reformat it to ensure compatibility. However, reformatting will erase all data on the SD card, so make sure you have a backup before proceeding with reformatting.
By following these steps, you can safely remove the SD card from your device without the risk of data loss or corruption. Always handle the SD card with care and be mindful of the proper procedures to protect your files and ensure the long-term durability of the card and your device.
Now that you know how to remove the SD card safely, let’s summarize what we have learned in this guide and wrap up the discussion.
Conclusion
Using an SD card as internal storage can be a game-changer when it comes to managing storage space on your device. It allows you to expand your storage capacity, increase performance, and have more control over managing your files and data. Throughout this guide, we have covered the steps involved in using an SD card as internal storage, including checking compatibility, formatting the SD card, setting it up, transferring apps and data, and managing storage space effectively.
By following these steps, you can optimize your device’s storage, make the most out of the available space, and avoid the frustration of running out of storage. Whether you’re an avid app user, a content creator, or someone who simply needs additional storage, utilizing an SD card as internal storage provides a cost-effective solution to expand your device’s capabilities.
However, it’s important to remember that not all devices support this feature, so checking compatibility is crucial before proceeding. Additionally, be cautious when formatting the SD card, as it will erase all data, and ensure that you have backup copies of important files. Regularly reviewing and managing storage space is vital for optimal performance and efficiency. By deleting unnecessary files, utilizing cloud storage, and managing your app installations, you can maintain a well-organized and efficient storage system.
Lastly, when removing the SD card from your device, always do so safely to avoid any data loss or corruption. Take the necessary steps to unmount the SD card and handle it with care. If you plan to use the SD card on another device, reformatting may be required, but be aware that this will erase all data on the card.
Now that you have a comprehensive understanding of how to use an SD card as internal storage, you are ready to unleash the full potential of your device. By following the steps and implementing the tips provided in this guide, you can enhance your storage capacity, improve device performance, and enjoy a more efficient and enjoyable user experience.
So, go ahead and unlock the possibilities with your expanded storage space. Start managing your files and apps effectively, and make the most out of your device’s capabilities. Happy storage management!