Why switch to SD card storage?
If you’re facing the constant dilemma of limited storage space on your device, switching to SD card storage can be a game-changer. With an SD card, you can significantly expand your storage capacity and keep your device running smoothly. Here are a few reasons why you should consider making the switch:
- More space for your data: One of the main advantages of an SD card is the additional storage it provides. Whether it’s photos, videos, music, or documents, having extra space allows you to save more files without worrying about running out of room. This is especially useful if your device has limited internal storage.
- Organized storage: By using an SD card, you can keep your device’s internal storage clutter-free. This way, you’ll have a dedicated space for your media files and can easily manage them. This organization not only makes it easier to find and access your content but also improves the overall performance of your device.
- Portability: SD cards are small and lightweight, making them highly portable. You can easily transfer your SD card between devices, such as smartphones, tablets, cameras, or laptops, making it convenient to access your data wherever you go. This flexibility is especially beneficial for individuals who frequently travel or work on multiple devices.
- Backup and security: By utilizing an SD card for storage, you have the option to create backups of your important files. This serves as an extra layer of protection, ensuring that your valuable data is safe even if your device is lost, damaged, or undergoes a factory reset. You can also keep sensitive files on your SD card and remove it from your device when needed, adding an extra level of security to your data.
Incorporating SD card storage into your device not only provides practical benefits but also adds convenience and flexibility to your digital life. With the ability to expand your storage capacity and easily transfer data, you can enjoy a more seamless and hassle-free experience. So, if you find yourself constantly running out of space or looking for better organization and backup options, switching to SD card storage may just be the solution you’ve been searching for.
Prepare your SD card
Before you can start using your SD card for storage, there are a few preparation steps you’ll need to follow. These steps may vary slightly depending on your device and operating system, but here are some general guidelines to get you started:
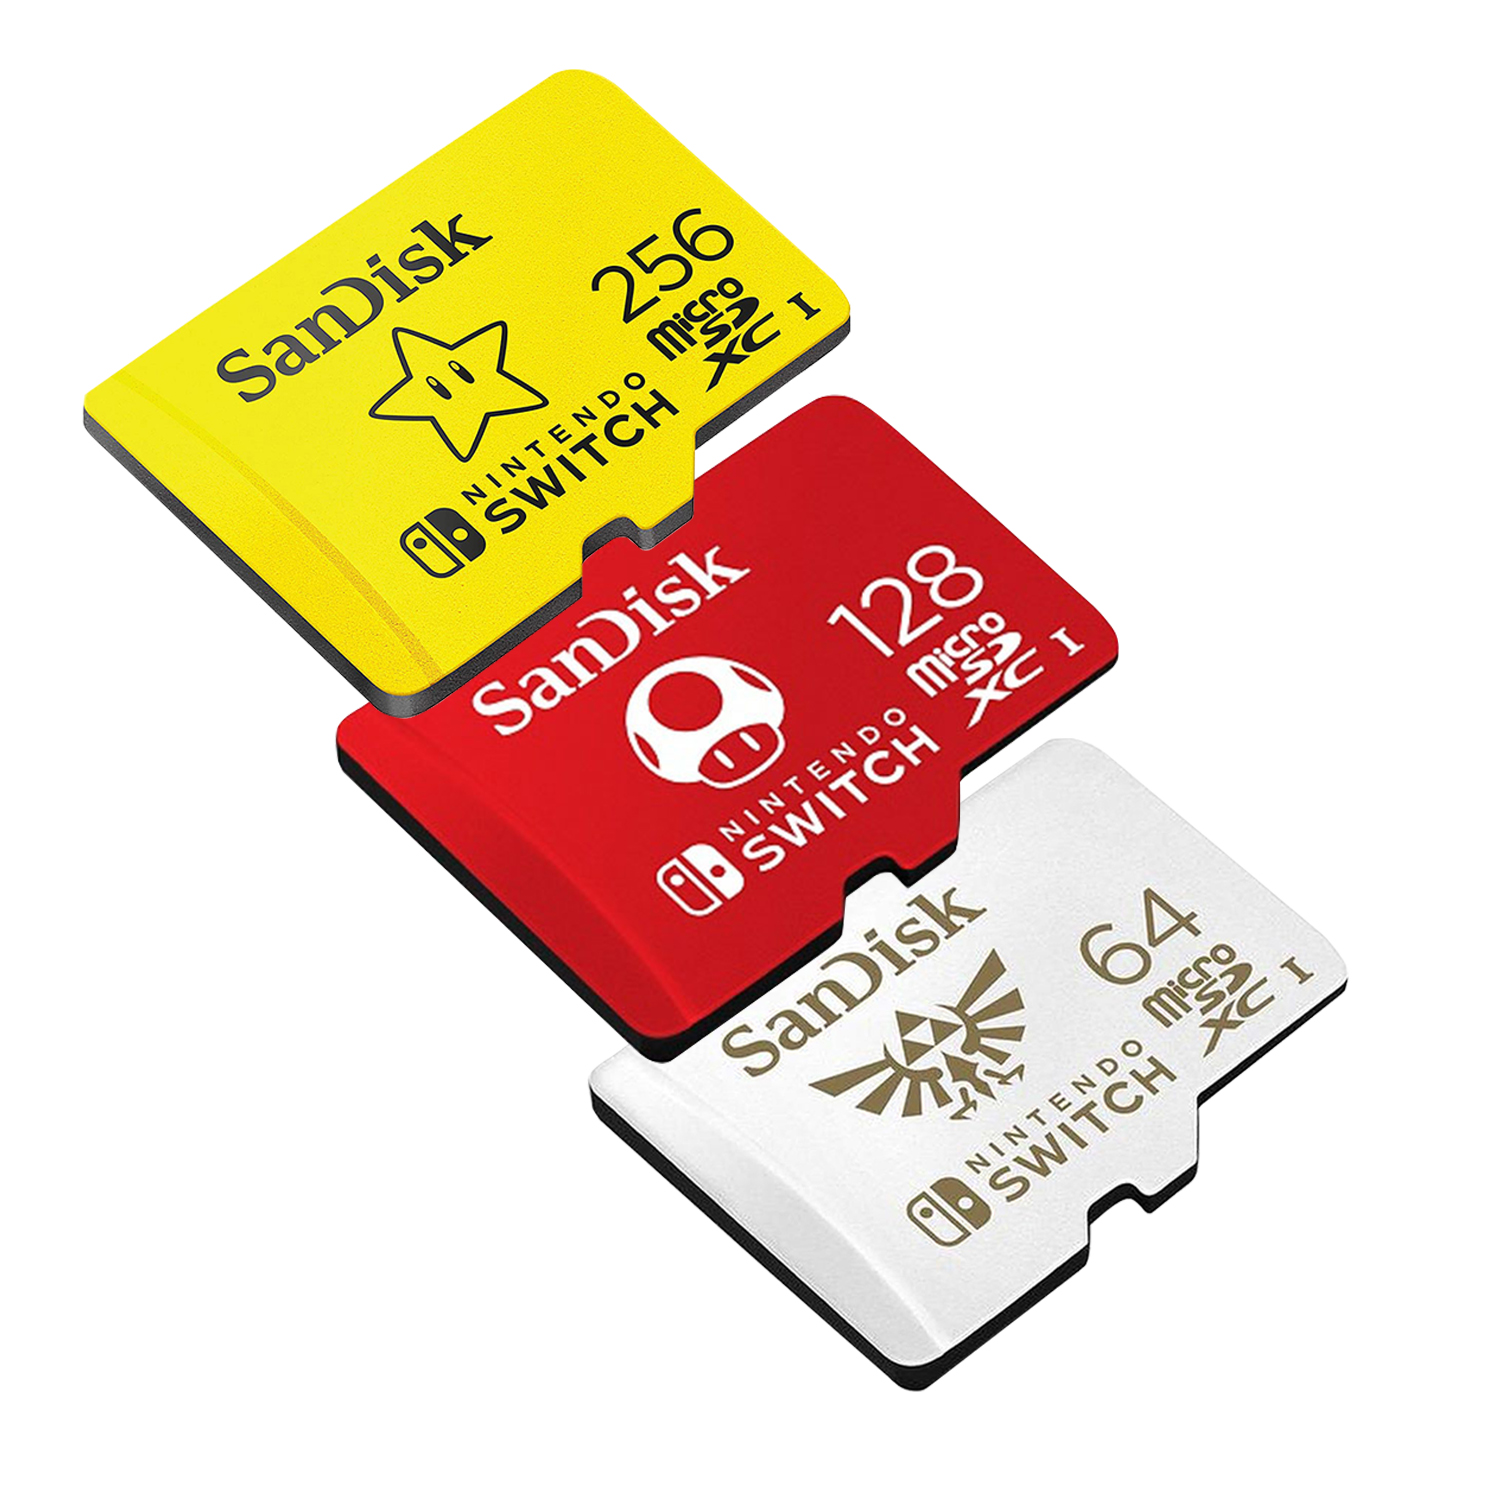
- Choose a compatible SD card: Not all SD cards are created equal, so it’s important to select one that is compatible with your device. Check your device’s manual or specifications to determine the type and maximum capacity of the SD card it supports.
- Format the SD card: To ensure optimal performance and compatibility, it’s recommended to format your SD card before using it. Most devices have an option in the settings menu to format the SD card. Make sure to back up any important data on the card before formatting, as the process will delete all existing files.
- Transfer existing data: If you already have data stored on your device’s internal storage that you want to move to the SD card, you can do so using the built-in file manager or a third-party file transfer app. Simply select the files or folders you want to move and choose the option to move them to the SD card.
- Set default storage location: To ensure that new files are automatically saved to the SD card, you’ll need to set it as the default storage location. This option can usually be found in the settings menu under “Storage” or “Storage & USB.” Select the SD card as the default storage, and any new data, such as photos, videos, or app downloads, will be saved directly to the SD card.
Once you’ve completed these steps, your SD card will be ready to use as additional storage for your device. Remember to regularly check the available space on your SD card and transfer or delete files as needed to free up storage.
It’s worth noting that not all apps can be moved to an SD card. Some apps, particularly system apps, may require storage on the device’s internal memory. However, many apps, especially those that primarily store media files, can be moved to the SD card to free up internal storage space.
By properly preparing your SD card and configuring your device to use it as storage, you can make the most out of the additional space and enjoy a more seamless and expanded storage experience.
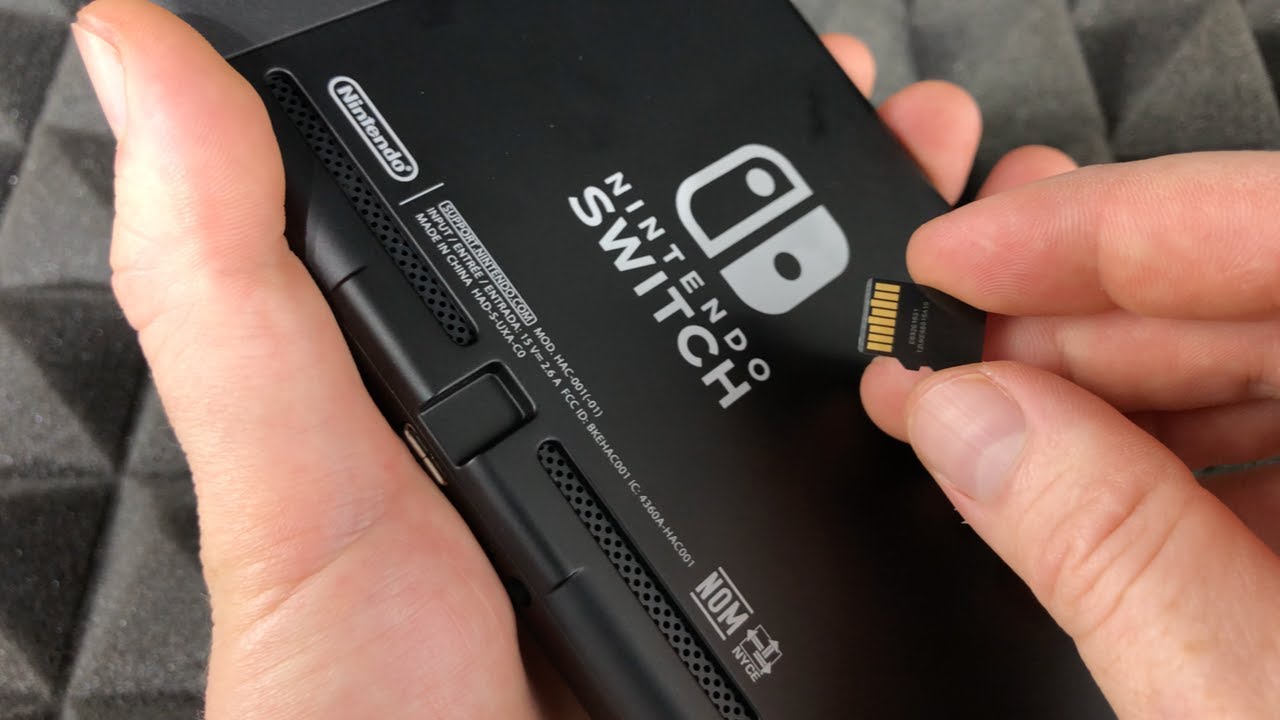
Step-by-step guide for Android
If you’re using an Android device and want to switch to SD card storage, here’s a step-by-step guide to help you set it up:
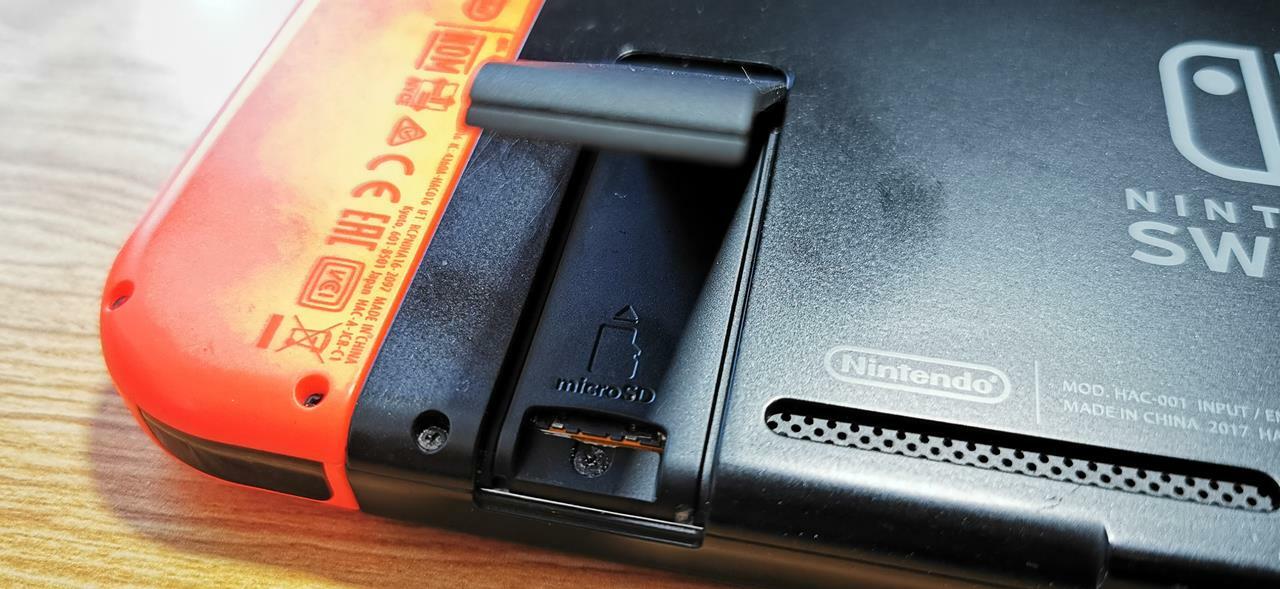
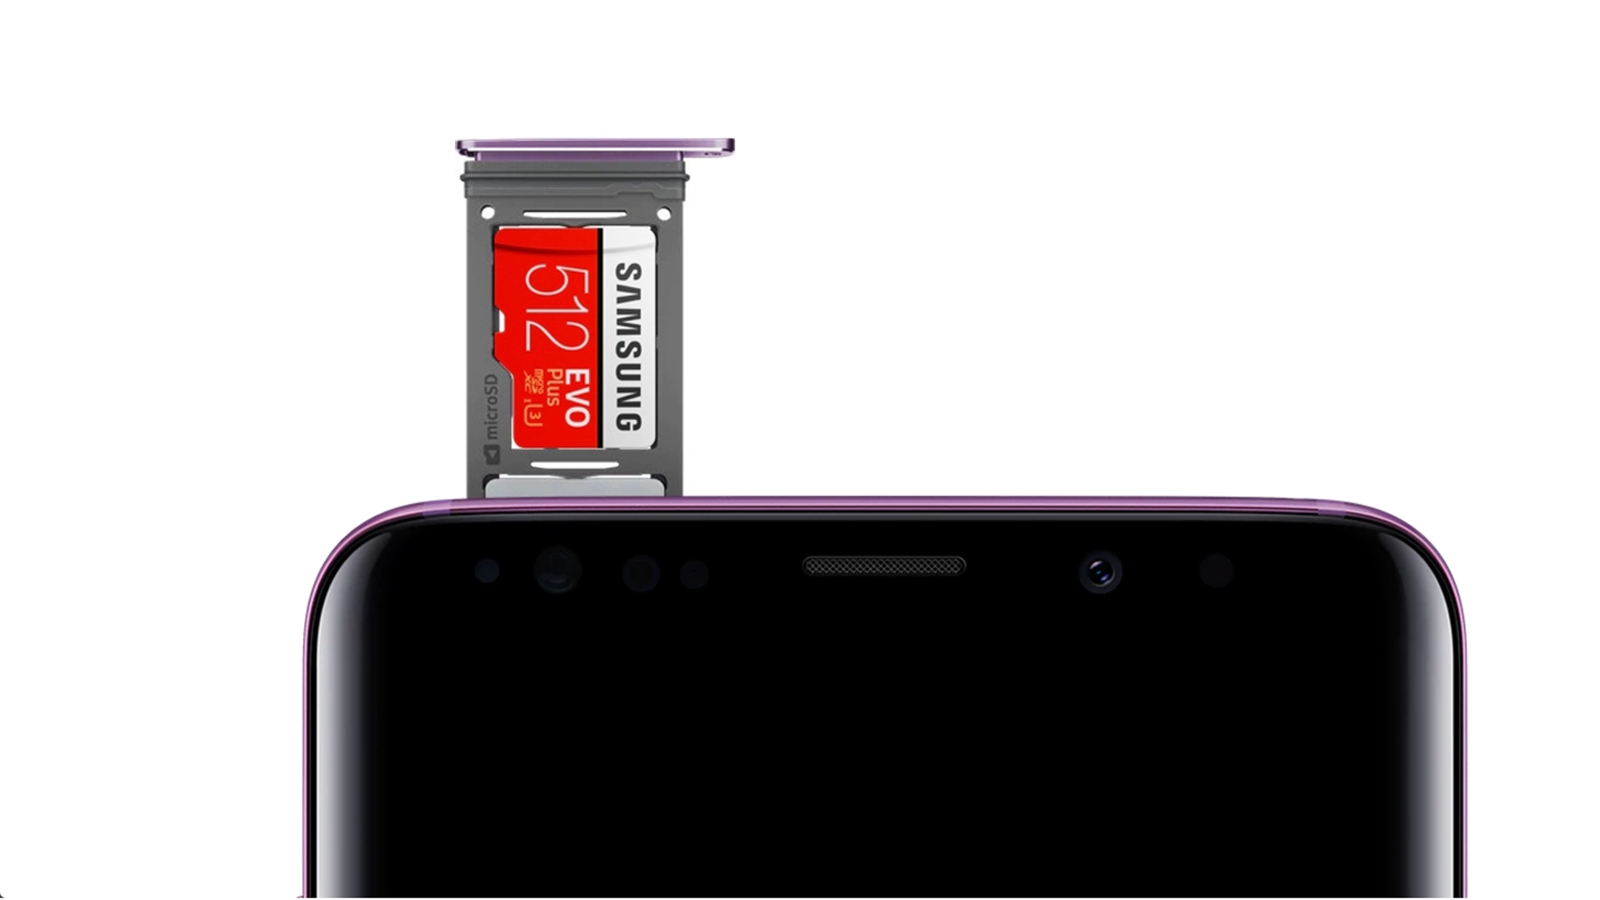
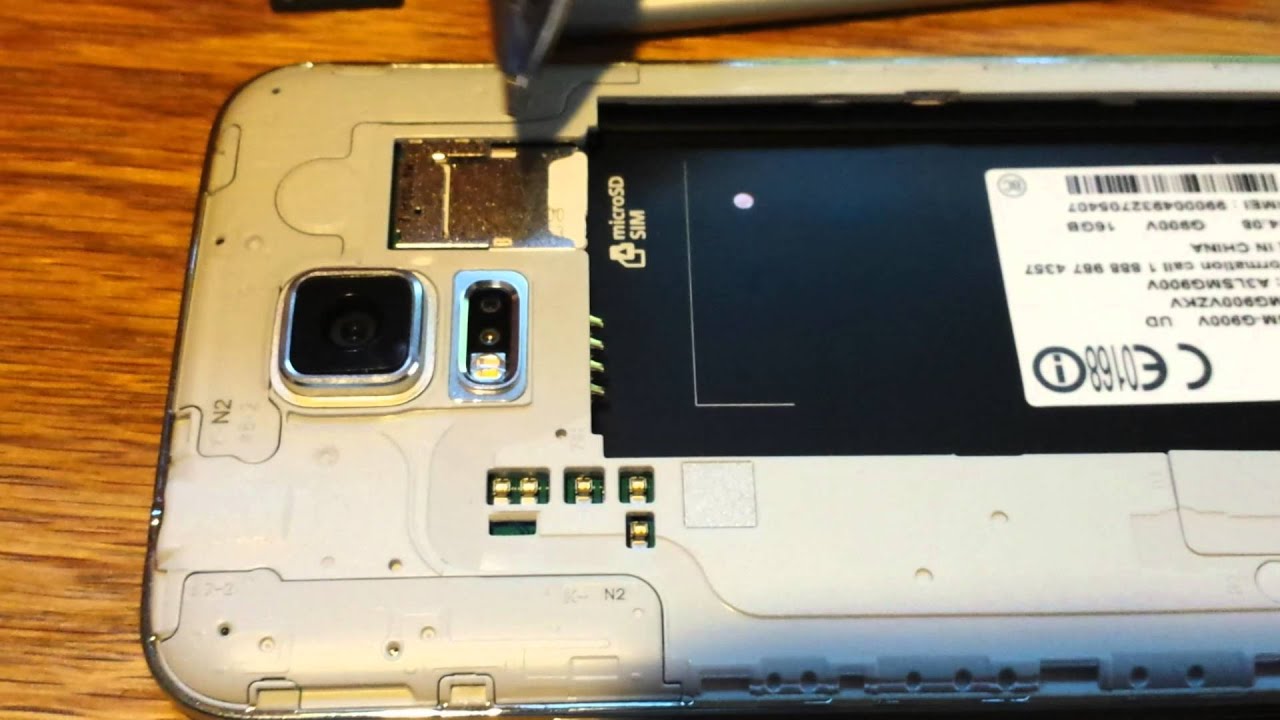
- Insert the SD card: Power off your device and locate the SD card slot. Carefully insert the SD card into the slot, making sure it is properly seated.
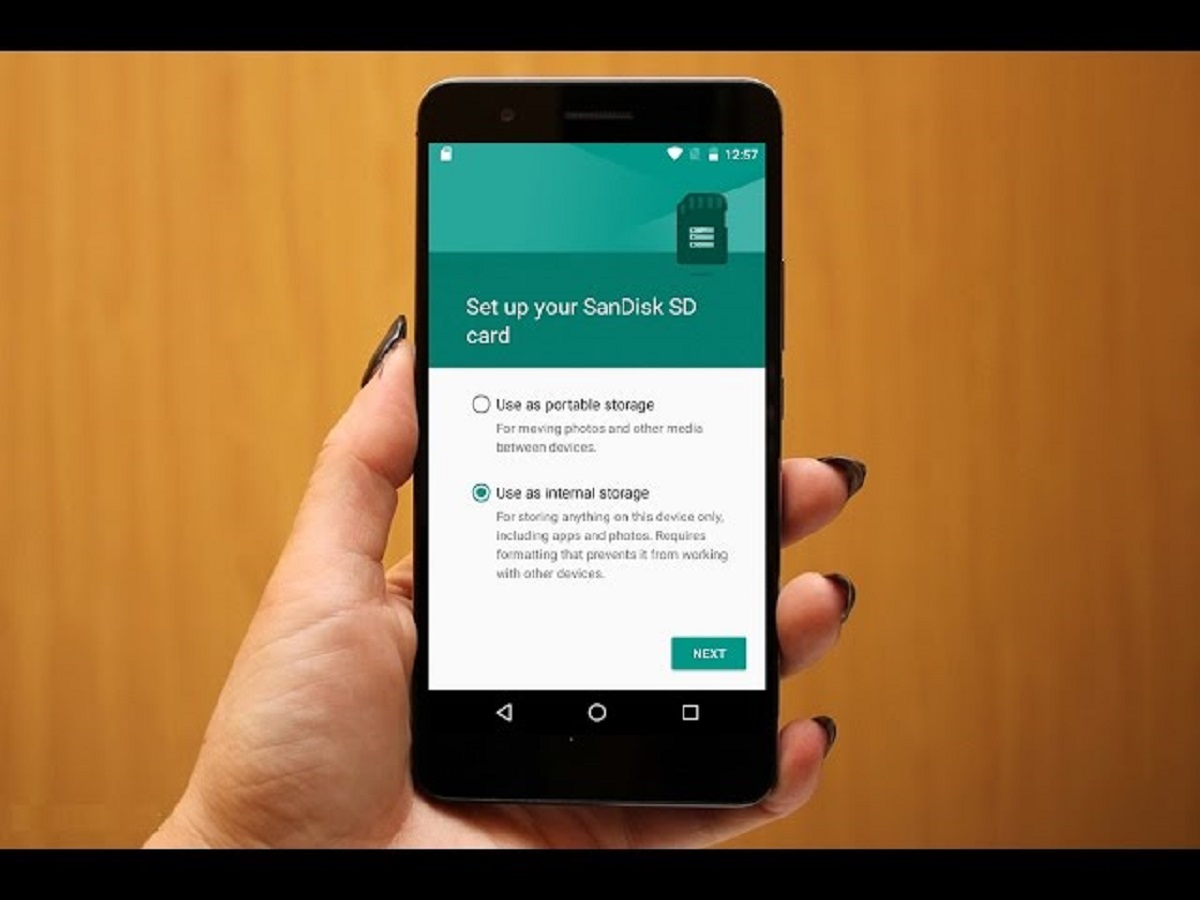
- Format the SD card: Power on your device and navigate to the settings menu. Look for the “Storage” or “Storage & USB” option and select it. Find the option to format the SD card and follow the prompts to complete the formatting process.
- Set default storage: In the settings menu, look for the option to set the default storage location. Choose the SD card as the default storage option, and new data will be saved to the SD card by default.
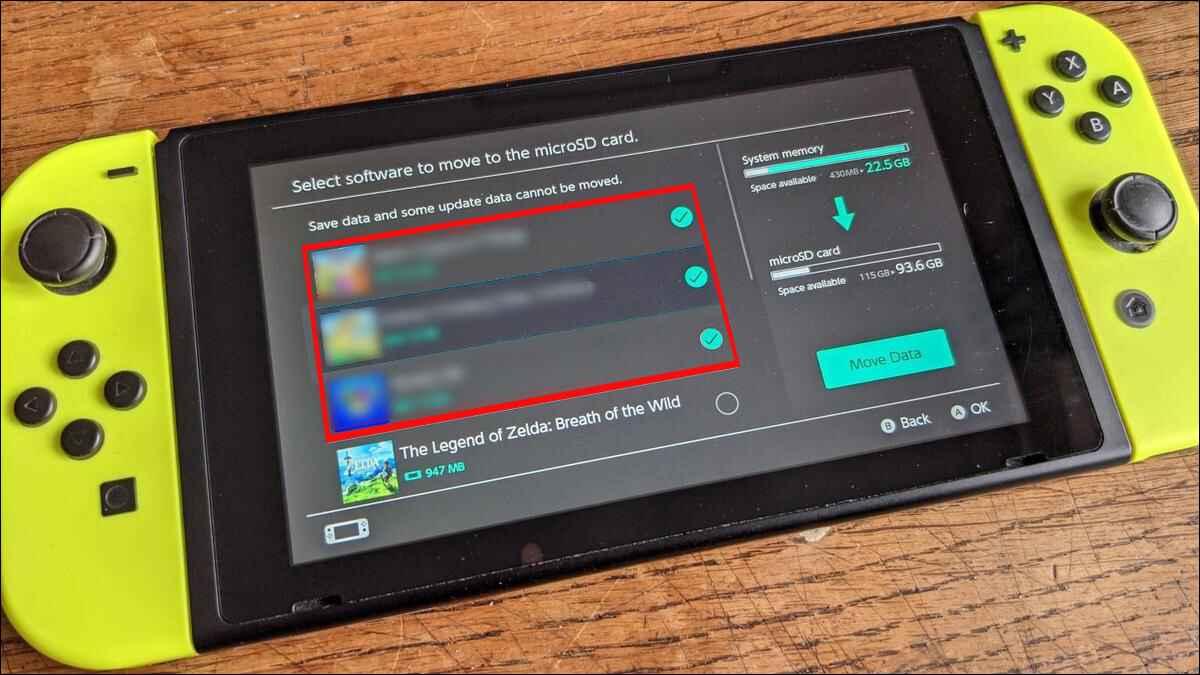
- Move existing data: To move existing data, such as photos, videos, or files, from your device’s internal storage to the SD card, use the built-in file manager or a third-party file transfer app. Select the files or folders you want to move and choose the option to move them to the SD card.
- Manage your SD card storage: To keep track of your SD card storage usage and manage files, you can use the file manager app on your device. With this app, you can view and organize files, as well as transfer or delete them as needed to free up space.
It’s important to note that not all apps can be moved to the SD card. Some apps are designed to stay on the device’s internal storage. However, you can still benefit from using the SD card for media files, documents, and other data that can be stored externally.
By following these simple steps, you can easily switch to SD card storage on your Android device and enjoy the convenience of expanded storage capacity.
Step-by-step guide for iPhone
Switching to SD card storage on an iPhone isn’t as straightforward as on Android devices, as iPhones do not have built-in SD card slots. However, there are still options available to expand your storage capacity. Here’s a step-by-step guide to help you:
- External storage device: Get an external storage device that is compatible with your iPhone. There are several options available, such as Lightning-compatible SD card readers or flash drives that connect to the Lightning port.
- Connect the external storage: Connect the external storage device to your iPhone using the appropriate cable or adapter. Make sure it is securely connected.
- Download the companion app: Some external storage devices may require you to download a companion app from the App Store. Follow the instructions provided with the device to download and install the app on your iPhone.
- Transfer files to the external storage: Once the external storage device is connected and the companion app is installed, you can use the app to transfer files from your iPhone’s internal storage to the external storage. This can usually be done through the file management feature of the companion app.
- Access files from external storage: With the files transferred to the external storage, you can now access them directly from the app or use them in other apps on your iPhone. Just make sure the external storage device is connected whenever you need to access the files.
It’s important to note that the process may vary depending on the specific external storage device and companion app you choose. Make sure to follow the instructions provided with your device for the best results.
While the process of using external storage on an iPhone may not be as seamless as on Android devices, it still provides an option to expand your storage capacity and keep your files easily accessible.
By following these steps, you can make use of external storage devices to increase your storage space on your iPhone and enjoy the convenience of having extra room for your files.
Step-by-step guide for Windows Phone
If you own a Windows Phone and want to switch to SD card storage, here’s a step-by-step guide to help you through the process:
- Insert the SD card: Turn off your Windows Phone and locate the SD card slot. Carefully insert the SD card into the slot, ensuring that it is inserted correctly.
- Format the SD card: Power on your Windows Phone and go to the settings menu. Look for the “Storage Sense” option and select it. Find the option to format the SD card and follow the on-screen prompts to complete the formatting process. Formatting the SD card will erase all data currently stored on it, so make sure to back up any important files before proceeding.
- Set default storage location: In the “Storage Sense” menu, you can set the default storage location for different types of files. Choose the SD card as the default storage location for apps, documents, pictures, videos, and music, or select specific file types to be saved to the SD card.
- Transfer existing data: To move existing files from your Windows Phone’s internal storage to the SD card, you can use the built-in file manager app. Open the file manager and select the files or folders you want to move. Choose the option to move them to the SD card, and the files will be transferred.
- Manage storage: To manage your SD card storage and track its usage, go to the “Storage Sense” menu. Here, you can see how much space is available on your SD card and manage files by moving or deleting them as needed.
By following these steps, you can easily switch to SD card storage on your Windows Phone and enjoy the benefits of expanded storage capacity.
It’s worth noting that not all apps can be moved to the SD card on a Windows Phone. Some apps may require storage on the device’s internal memory. However, moving media files, documents, and other data to the SD card can free up valuable space on your device.
With the ability to expand your storage capacity, you can make the most out of your Windows Phone and keep your files organized and easily accessible.
Troubleshooting common issues
While switching to SD card storage can bring numerous benefits, you may encounter some common issues along the way. Here are a few troubleshooting tips to help you resolve them:
- SD card not detected: If your device doesn’t recognize the SD card, try removing and reinserting it to ensure a proper connection. If the issue persists, check if the SD card is compatible and properly formatted for your device. Additionally, try using a different SD card to see if the problem lies with the card itself.
- Files not transferring: If you’re having trouble transferring files to the SD card, double-check that the card has enough available space. Sometimes there may be limitations on the size or type of files that can be transferred. Ensure that the files are not restricted by any copyright protection or DRM measures.
- Slow performance: If you notice slower performance or lag when accessing files on the SD card, it may be due to the card’s speed capabilities. Consider using a higher-speed SD card, such as a Class 10 or UHS-I card, to improve performance.
- Corrupted files: In the event of corrupted files on the SD card, try using a file recovery tool or connecting the card to a computer to recover the files. It’s also a good practice to regularly back up your data to prevent loss in case of corruption or card failure.
- Incompatibility with apps: Certain apps may not be compatible with SD card storage and require internal storage for proper functioning. If you encounter issues with specific apps, try moving them back to the device’s internal storage to resolve any compatibility problems.
If you’re still experiencing difficulties after attempting these troubleshooting steps, it may be helpful to consult your device’s user manual or seek assistance from the manufacturer’s support team for further guidance.
By addressing these common issues, you can overcome any hurdles in utilizing SD card storage and ensure a smooth and efficient experience with your expanded storage capacity.
Conclusion
Switching from internal storage to SD card storage can be a valuable solution for those facing limited storage capacity on their devices. Whether you’re using an Android, iPhone, or Windows Phone, the process can help you expand your storage space and better organize your files.
By switching to SD card storage, you can enjoy benefits such as increased storage capacity, improved device performance, and enhanced data security. With more space available, you can store a larger number of files, including photos, videos, music, and documents, without worrying about storage constraints.
While the specific steps may vary depending on your device and operating system, the general process involves preparing the SD card, setting it as the default storage location, and transferring existing data to the card. It’s important to note that not all apps can be moved to an SD card, so it’s essential to manage storage effectively and choose which files to store on the card.
Throughout the process, it’s common to encounter issues such as SD card detection problems, file transfer complications, slow performance, or compatibility challenges with certain apps. However, by following troubleshooting steps and seeking support when needed, you can overcome these obstacles and enjoy a seamless SD card storage experience.
In conclusion, the switch to SD card storage offers a practical solution to expand storage capacity and organize files for smoother device performance. By making the most of external storage options, you can optimize your device’s capabilities and enjoy the convenience of additional space for your files.