Introduction
Have you been struggling with limited storage space on your device due to an overwhelming number of pictures? Moving pictures to an SD card can be a great solution to free up space and organize your files more efficiently. In this guide, we will walk you through the steps to successfully transfer your pictures from your device’s internal storage to an SD card.
As technology advances, smartphones and tablets come equipped with onboard storage to store various types of media. However, the capacity of internal storage may be limited, and over time, pictures can accumulate and consume a significant amount of space. By utilizing an SD card, you can expand your device’s storage capacity and conveniently access your pictures whenever needed.
It’s important to note that not all devices support external storage via an SD card. Before diving into the process, we will guide you through checking if your device is compatible with an SD card. Additionally, we will go over the steps to properly insert the SD card into your device and enable it as external storage.
Once the SD card is successfully integrated, we will explain how to move your pictures from the internal storage to the SD card. This process ensures that your files are securely transferred and readily available on the new storage medium.
Lastly, we will touch on the importance of verifying that the pictures have been successfully moved to the SD card, as well as provide instructions on how to safely unmount the SD card from your device.
By following this step-by-step guide, you will not only gain more storage space on your device but also improve your overall file management. Let’s dive into the process and learn how to efficiently move your pictures to an SD card!
Step 1: Checking if your device supports SD card
Before you can proceed with moving your pictures to an SD card, it is important to ensure that your device supports external storage via an SD card. Here’s how you can check:
1. Start by searching for the specifications of your device. This information can usually be found on the manufacturer’s website or in the user manual. Look specifically for details about external storage or SD card compatibility.
2. If you have trouble finding the specifications, you can also consult the customer support of your device’s manufacturer for assistance. They will be able to provide you with accurate information about whether your device supports an SD card.
3. Another way to determine SD card compatibility is by checking the physical components of your device. Look for a slot or tray that is designed to accommodate an SD card. This may be located on the side, back, or beneath the battery cover of your device.
4. If your device has a removable back cover, open it to locate the battery. Some devices have the SD card slot placed adjacent to the battery.
5. If your device is equipped with a SIM card slot, it’s essential to note that some devices offer a hybrid slot that can accommodate either a SIM card or an SD card. In such cases, you’ll need to utilize the slot properly to enable external storage functionality.
Once you have confirmed that your device supports an SD card, you can proceed to the next step of the process. If your device does not support external storage, consider alternative methods to free up space on your device, such as transferring pictures to a computer or using cloud storage services.
Now that you are aware of the SD card compatibility of your device, let’s move on to the next step: inserting the SD card into your device.
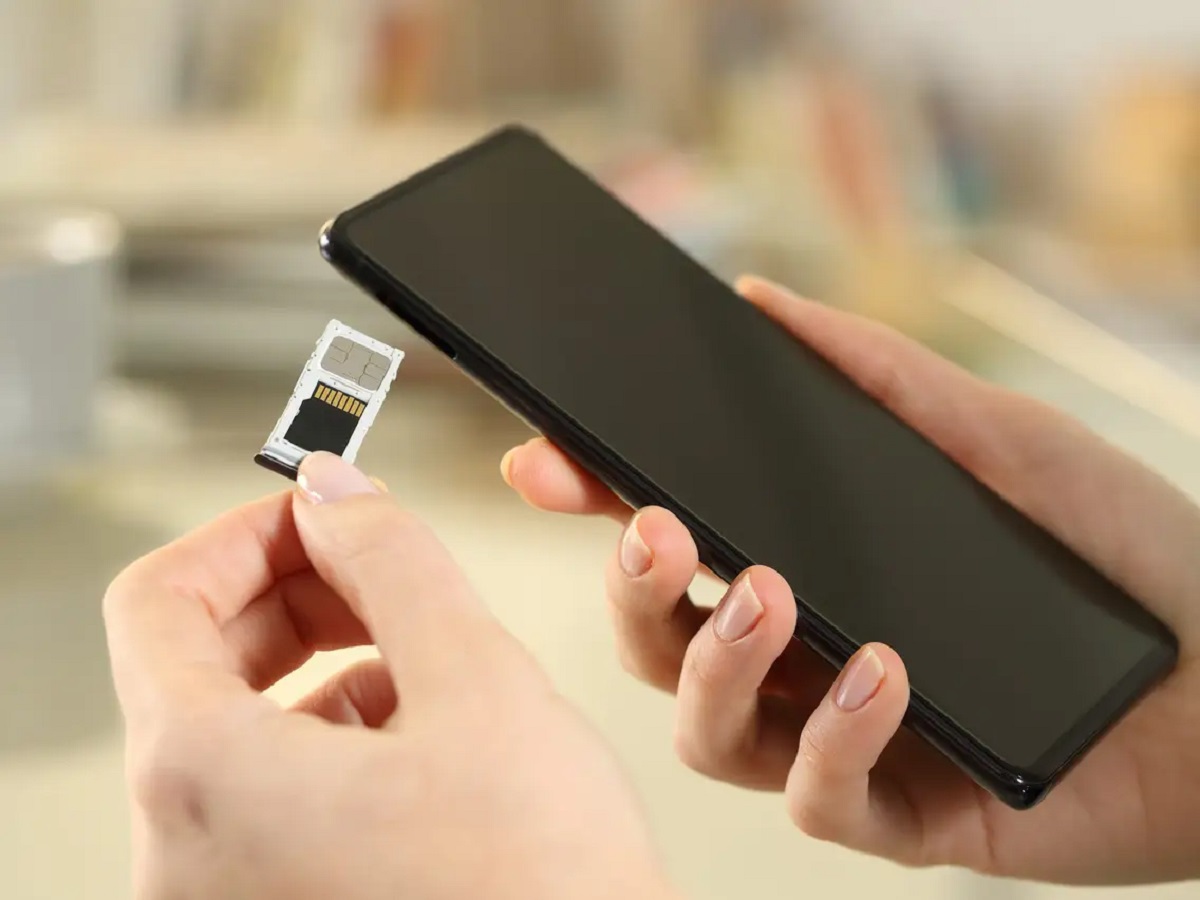
Step 2: Inserting the SD card into your device
Once you have confirmed that your device supports an SD card, it’s time to physically insert the card into your device. Follow these steps to properly insert the SD card:
1. Power off your device. This is an important precautionary measure to prevent any damage to the SD card or your device during the insertion process.
2. Locate the SD card slot on your device. The slot is typically found on the side, back, or beneath the battery cover of your device.
3. If your device has a removable back cover, carefully remove it by following the instructions provided by the manufacturer. In some cases, you may need to use a small tool, such as a SIM card ejector tool or a paperclip, to open the slot.
4. Once the slot is accessible, gently insert the SD card into the appropriate slot. Pay attention to the correct orientation of the card. There is usually a diagram near the slot indicating the proper alignment, such as which way the metal contacts should face.
5. Push the card gently until it fits securely into the slot. Take care not to apply excessive force, as it may damage the card or the slot.
6. If your device has a SIM card slot that doubles as an SD card slot, you may need to choose which one you want to use. In such cases, follow the instructions provided by the manufacturer to select the SD card option.
7. Once the SD card is properly inserted, replace the back cover if applicable and power on your device.
Your device should now recognize the SD card as external storage. However, depending on your device and operating system, you may need to perform some additional steps to enable the SD card as external storage. We will cover this in the next step.
Now that the SD card is inserted correctly, let’s proceed to the next step: enabling the SD card as external storage.
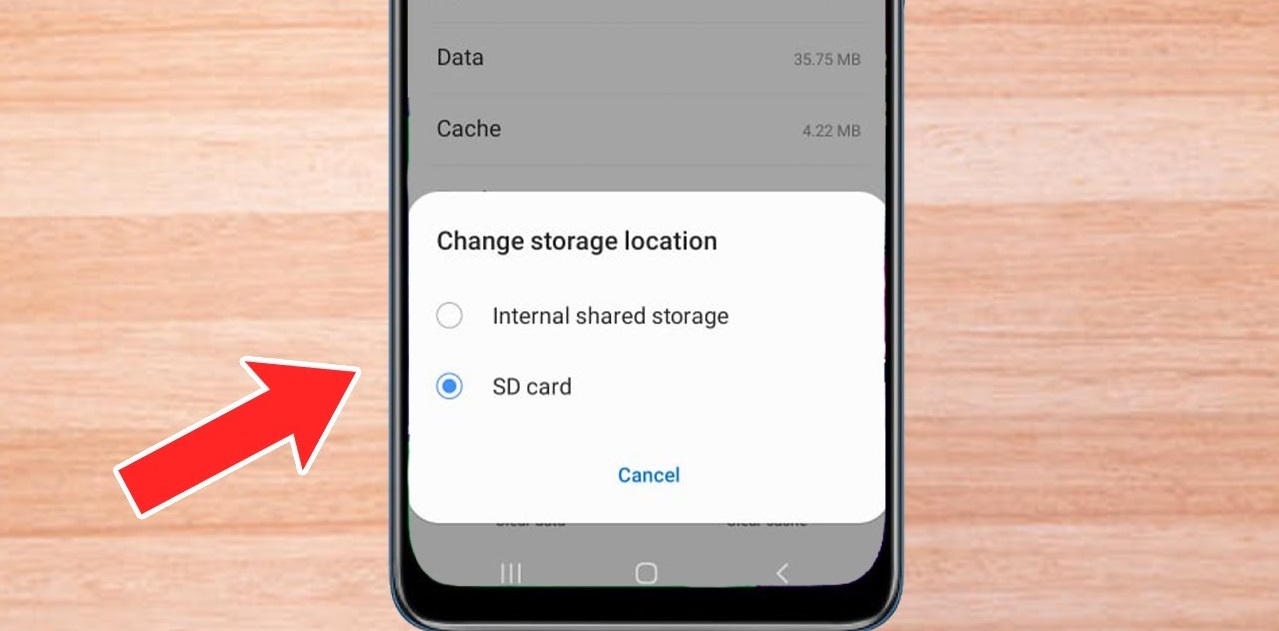
Step 3: Enabling the SD card as external storage
After successfully inserting the SD card into your device, you need to enable it as external storage to ensure that your device recognizes and utilizes it properly. The steps for enabling the SD card may vary depending on the device and operating system. Here are some general guidelines:
1. Open the settings menu on your device. You can usually access this by tapping on the gear icon in the app drawer or by swiping down from the top of the screen and selecting the gear icon from the notification panel.
2. Look for the “Storage” or “Device storage” option in the settings menu. This may be located under the “System” or “Device” section, or it might have a separate category of its own.
3. Within the storage settings, you should see an option related to the SD card. It may be labeled as “SD card,” “External storage,” or something similar.
4. Tap on the SD card option to access its settings. Here, you may find an option to “Mount” or “Format” the SD card. If the SD card is new or has been used in a different device before, you might need to format it to ensure compatibility with your device.
5. Follow the instructions provided by your device to format the SD card if necessary. Be aware that formatting the SD card will erase all data stored on it, so make sure to back up any important files beforehand.
6. Once the formatting process is complete, you may need to manually enable the SD card as external storage. Look for a toggle switch or an option that allows you to enable the SD card.
7. After enabling the SD card as external storage, your device will allocate the necessary space for storing files, including pictures, on the SD card. This means that when you take photos or download files, they will be automatically saved to the SD card rather than the internal storage.
Keep in mind that the terminology and steps may vary slightly depending on your device’s manufacturer and the version of the operating system. If you encounter any difficulties or inconsistencies, refer to your device’s user manual or contact customer support for assistance.
Now that you have enabled the SD card as external storage, it’s time to move your pictures from the internal storage to the SD card. We will cover this process in the next step.
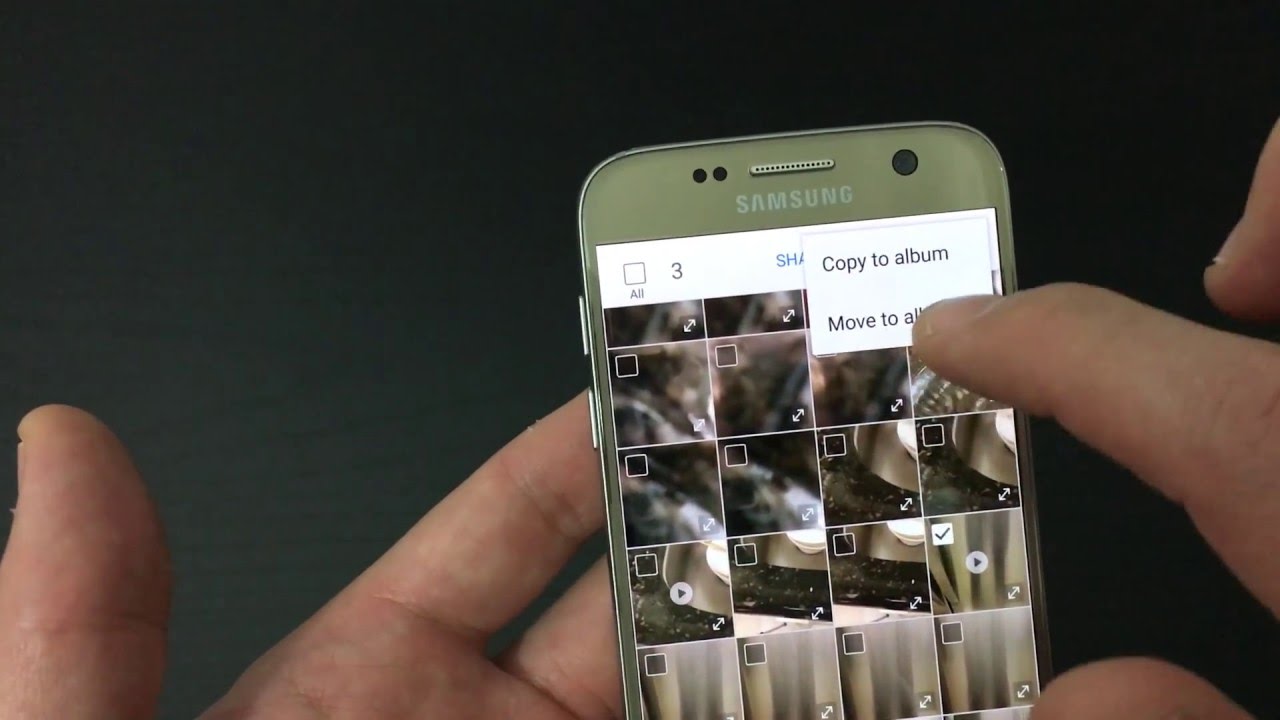
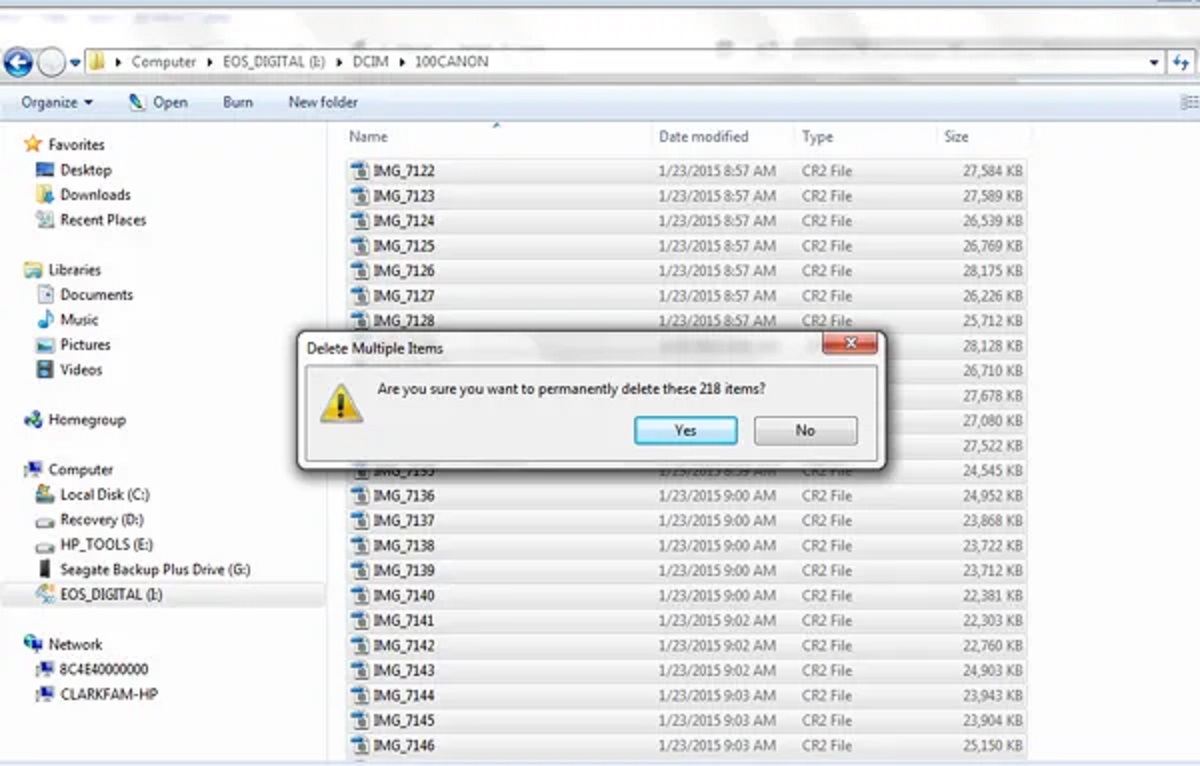
Step 4: Moving pictures from internal storage to SD card
Now that you have successfully enabled the SD card as external storage, it’s time to transfer your pictures from the device’s internal storage to the SD card. Here’s how you can do it:
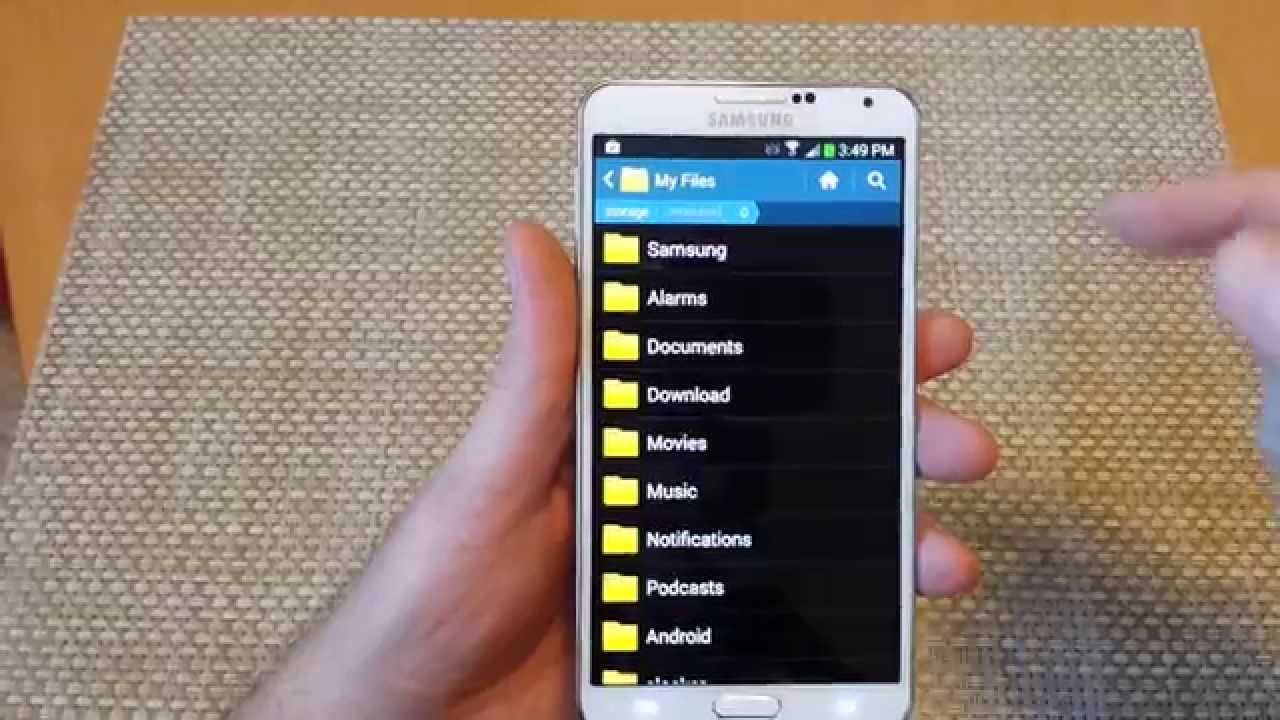
1. Open the “File Manager” or “File Explorer” app on your device. This app allows you to navigate through the internal storage and SD card.
2. Navigate to the location where your pictures are currently stored. This could be in a folder named “Pictures,” “Camera,” or in any other location where pictures are typically saved.
3. Select the pictures you want to move to the SD card. You can do this by long-pressing on a picture to activate the selection mode, then tapping on the additional pictures you want to include.
4. Once the desired pictures are selected, look for an option to “Move” or “Cut” the pictures. This option is usually represented by an icon with scissors or an arrow pointing to the right.
5. After selecting the “Move” or “Cut” option, navigate to the SD card location where you want to transfer the pictures. This could be a pre-existing folder on the SD card or a new folder that you create specifically for storing pictures.
6. Tap on the destination folder to access it, then select the “Paste” option to transfer the pictures from the internal storage to the SD card.
7. Depending on the number and size of the pictures, the transfer process may take some time. Avoid interrupting the process or closing the file manager app until the transfer is complete.
8. Once the transfer is finished, you can go to the SD card location you chose and verify that the pictures have been successfully moved. They should now be stored on the SD card rather than the device’s internal storage.
It’s important to note that some devices offer additional features that allow you to set the SD card as the default storage location for pictures. If this option is available on your device, consider enabling it so that future pictures are automatically saved to the SD card.
Now that your pictures have been moved to the SD card, you can enjoy the additional storage space and organized file management. Let’s move on to the next step to ensure that the pictures have been successfully transferred.
Step 5: Verifying the pictures have been successfully moved
After moving your pictures from the internal storage to the SD card, it is crucial to verify that the transfer was successful. Here are a few simple steps to ensure that your pictures are now stored on the SD card:
1. Open the “Gallery” or “Photos” app on your device. This is the default app for viewing and managing pictures.
2. Navigate to the location where your pictures are stored. Depending on the app and the device, this could be a specific album, a “Pictures” folder, or a “Camera Roll” folder.
3. Scroll through the pictures and check if the transferred photos are visible. If you can see the pictures and they appear as expected, it indicates that the transfer to the SD card was successful.
4. You can open individual pictures to ensure that they are fully accessible and not displaying any errors or issues. This helps ensure the integrity and completeness of the transferred photos.
5. If your device allows you to view the storage details for each picture, you can check this information to verify that the pictures are indeed stored on the SD card rather than the internal storage.
6. Repeat this process for multiple albums or folders if you have organized your pictures in different locations.
If you encounter any issues or if the transferred pictures are not visible in the gallery app, it’s possible that the transfer was not completed successfully. In such cases, retrace your steps and try moving the pictures again ensuring that you select the appropriate folders and properly paste them into the SD card location.
Remember, it’s always a good practice to regularly back up your pictures, especially when making significant changes to storage locations. Consider creating a backup of your pictures on a computer or using cloud storage services to ensure their safety.
Now that you have verified that the pictures have been successfully moved to the SD card, we can proceed to the final step: safely unmounting the SD card.
Step 6: Safely unmounting the SD card
Before you physically remove the SD card from your device, it is crucial to properly unmount it to prevent any data corruption or loss. Follow these steps to safely unmount the SD card:
1. Open the settings menu on your device. You can typically access this by tapping on the gear icon in the app drawer or by swiping down from the top of the screen and selecting the gear icon from the notification panel.
2. Look for the “Storage” or “Device storage” option in the settings menu. This may be located under the “System” or “Device” section, or it might have a separate category of its own.
3. Within the storage settings, you should find the option related to the SD card. It may be labeled as “SD card,” “External storage,” or something similar.
4. Tap on the SD card option to access its settings.
5. Look for an option to “Unmount” or “Eject” the SD card. This option is typically represented by an icon with a downward arrow or a similar symbol.
6. Once you tap on the “Unmount” or “Eject” option, your device will prepare the SD card for removal.
7. After unmounting the SD card, you will receive a notification indicating that it is safe to remove the card from your device.
8. Gently remove the SD card from the slot or tray. If your device has a removable back cover, you may need to open it again to access the SD card slot.
By following the proper unmounting procedure, you ensure that all data is written and saved to the SD card before physically removing it. This helps prevent potential data corruption or loss.
Remember, it is always a good practice to power off your device before removing or inserting the SD card to avoid any problems or damage to the card or your device.
Now that you have safely unmounted the SD card, you can store it in a secure place or insert it into another device as needed. Congratulations! You have successfully moved your pictures to the SD card, freeing up valuable internal storage space and organizing your files more efficiently.
Conclusion
Moving pictures to an SD card is a simple and effective way to free up storage space on your device while ensuring that your precious memories are safely stored. By following the step-by-step guide outlined in this article, you can transfer your pictures from the internal storage to the SD card with ease.
We began by checking if your device supports an SD card and walked you through the process of inserting the card into your device. Then, we enabled the SD card as external storage and explored how to move your pictures from the internal storage to the SD card. We emphasized the importance of verifying the successful transfer of your pictures and provided instructions on how to safely unmount the SD card when needed.
With the pictures safely stored on the SD card, you can now enjoy the benefits of additional storage space and better file management. Remember to regularly back up your pictures, especially when you make significant changes to storage locations.
Keep in mind that the specific steps may vary slightly depending on your device and operating system. It is always a good practice to consult your device’s user manual or reach out to customer support for device-specific instructions.
By moving pictures to an SD card, you can not only optimize the performance of your device but also ensure that your memories are easily accessible and protected. Enjoy the extra storage space and organized file management that the SD card brings!