Introduction
Welcome to this guide on how to move pictures to an SD card! If your device’s internal storage is running low on space, transferring your pictures to an SD card can help free up valuable memory and ensure that you have enough storage for new photos. Whether you’re using an Android or iOS device, the process is relatively straightforward.
With the ever-increasing quality of smartphone cameras, it’s easy to amass a large collection of pictures over time. From family events to adventures and everything in between, our photo libraries can quickly fill up, leaving us with limited space on our devices. That’s where an SD card comes in handy.
An SD card, also known as a secure digital card, is a small portable storage device that can be inserted into compatible electronic devices to expand their storage capacity. By moving your pictures from your device’s internal storage to an SD card, you can free up space for other important files and applications.
Whether you want to transfer a few select pictures or your entire photo gallery, this guide will walk you through the step-by-step process. We’ll cover how to access the Gallery app, select the pictures you want to move, and how to initiate the transfer to the SD card.
Before we begin, it’s important to note that the specific steps may vary slightly depending on the device and operating system you’re using. However, the general principles and concepts remain the same. Now, let’s dive in and learn how to move your pictures to an SD card!
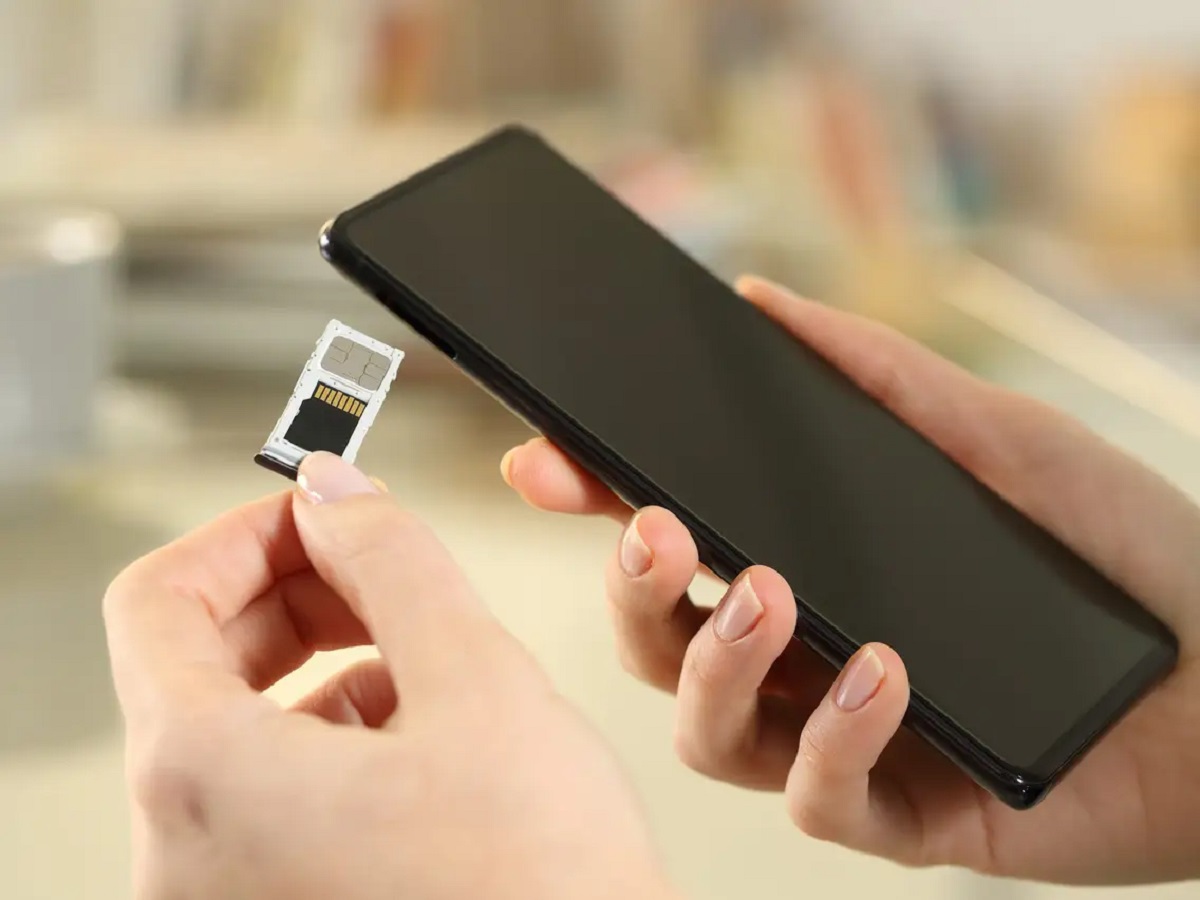
Step 1: Insert the SD card
The first step in moving your pictures to an SD card is to ensure that the card is properly inserted into your device. Depending on your device, the location of the SD card slot may vary. Generally, it can be found either on the side or the back of your device.
Start by locating the SD card slot and carefully insert the SD card into the corresponding slot. Ensure that the contacts on the card are facing downwards and that the card is inserted fully until it clicks into place. This ensures a secure connection and prevents the card from accidentally coming loose.
If you’re unsure about the location of the SD card slot or how to insert the card correctly, consult your device’s manual or check the manufacturer’s website for guidance. It’s essential to handle the card with care and avoid touching the metal contacts to prevent any damage.
Once you’ve inserted the SD card, give it a gentle push to ensure that it is securely in place. You can now move on to the next step, where we’ll explore how to access the Gallery app on your device.
Step 2: Open the Gallery app
After inserting the SD card, the next step is to open the Gallery app on your device. The Gallery app is where you can access and manage all the photos and videos stored on your device.
The location and appearance of the Gallery app may vary depending on your device’s operating system, but it is typically represented by an icon with the image of a stack of photos or a film reel. Look for this icon on your device’s home screen or within the app drawer.
Once you’ve located the Gallery app, simply tap on the icon to open it. It may take a moment to load, depending on the number of photos and videos stored on your device. Once the Gallery app is open, you’ll be able to see all the pictures and videos stored in your device’s internal storage.
At this stage, you may notice that some pictures are already stored on the SD card if you have previously moved them. To view the contents of the SD card within the Gallery app, you may need to navigate to a specific folder or select a tab for external storage or SD card.
Now that you have successfully opened the Gallery app, you’re ready to proceed to the next step, where we’ll learn how to select the pictures you want to move to the SD card.
Step 3: Select the pictures you want to move
Now that you have the Gallery app open, it’s time to select the pictures you want to move to the SD card. You may choose to transfer individual photos, select multiple photos at once, or even move entire albums. The process may vary slightly depending on your device and its specific gallery interface, but the general steps remain similar across most devices.
Start by browsing through your photo library within the Gallery app. You can scroll through the images, or if your device supports it, use gestures like pinch-to-zoom to zoom in on specific sections of the gallery.
To select a single photo, tap on it once. The photo may briefly highlight or be outlined to indicate that it has been selected. If you want to select multiple photos, tap and hold on one photo until it is selected, and then continue tapping on the additional photos to add them to your selection.
To select an entire album, some devices may offer an option to long-press on the album’s thumbnail or use a select-all feature. If none of these options are available, you can manually select each photo within the album.
As you’re making your selections, you may want to keep in mind the available storage space on your SD card. Ensure that you have enough space to accommodate the selected pictures. You can check the size of each photo or album by tapping on the information or details icon, typically represented by an “i” or “…” symbol.
Once you have finished selecting the pictures, you’re ready to move on to the next step, where we’ll explore how to access the options menu to move the selected photos to the SD card.
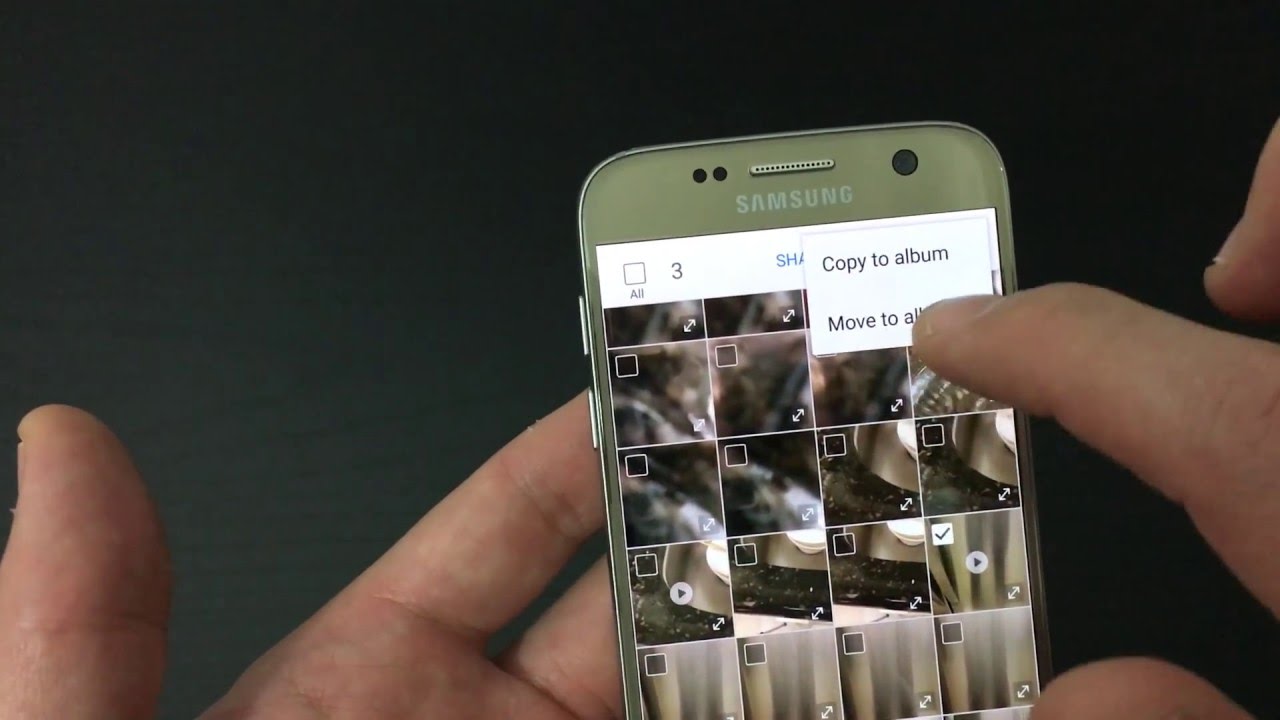
Step 4: Tap on the options menu
After selecting the pictures you want to move in the Gallery app, the next step is to access the options menu. This menu typically provides a range of actions and settings that you can perform on the selected photos, including moving them to the SD card.
To access the options menu, look for the three-dot icon or a similar symbol in the corner of the screen. This icon is usually located either at the top or bottom of the Gallery app interface. Once you’ve located the options menu icon, tap on it to open the menu.
On some devices, instead of a three-dot icon, you may see the word “More” or an icon with horizontal lines. Regardless of the icon’s appearance, tapping on it will reveal a dropdown menu or a list of options.
Once the options menu is open, you may need to scroll through the list to find the specific action you’re looking for. Look for options related to managing or transferring photos, such as “Move” or “Move to SD Card.” Different devices and versions of the Gallery app may use slightly different terms, so keep an eye out for variations of these options.
In some cases, you may not find a direct option to move the selected photos within the options menu. Instead, you may encounter an option to “Share” the photos, which can be used to move them to the SD card indirectly. Selecting this option will open up various sharing methods, including the option to save the photos to the SD card.
Once you’ve identified the appropriate option in the menu, you’re ready to proceed to the next step, where we’ll learn how to choose the “Move to SD card” action and initiate the transfer process.
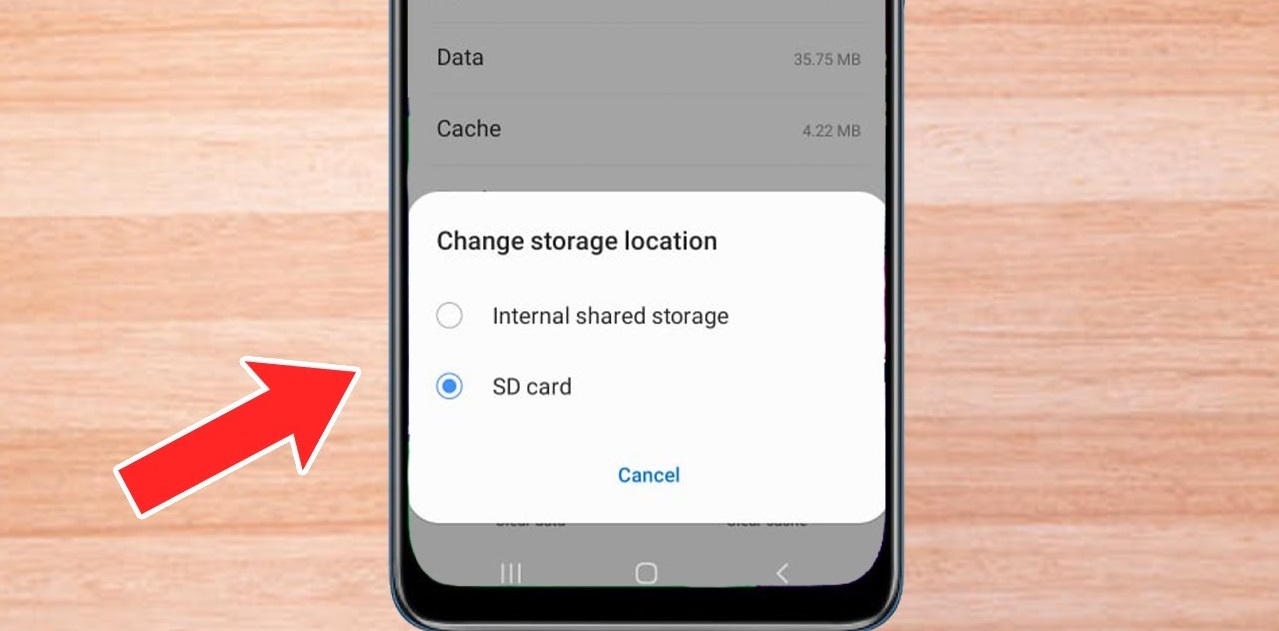
Step 5: Choose “Move to SD card”
After accessing the options menu in the Gallery app, the next step is to choose the “Move to SD card” option. This action will initiate the transfer process and move the selected photos from your device’s internal storage to the SD card.
Scroll through the options menu until you find the “Move to SD card” option. It may be listed under a sub-menu or located directly within the main menu. Once you’ve located the option, tap on it to select it.
After selecting the “Move to SD card” option, you may be prompted to confirm the action. This confirmation step helps prevent accidental transfers and ensures that you’re intentionally moving the photos to the SD card. Read the confirmation message carefully and tap on the “Confirm” or “Move” button to proceed.
At this point, the Gallery app will begin the process of transferring the selected photos to the SD card. The duration of the transfer will depend on the number and size of the photos, as well as the speed of your device and SD card. Be patient and avoid interrupting the process while it’s in progress.
Some devices may show a progress bar or provide an estimate of the time remaining for the transfer. Additionally, you may receive notifications or prompts informing you about the ongoing transfer. Once the transfer is complete, you’ll be ready to move on to the next step.
Note that moving the photos to the SD card does not delete them from your device’s internal storage. Instead, it creates a duplicate copy of the photos on the SD card while retaining the original copies in the internal storage. This allows you to have the pictures accessible from both locations.
With the photos successfully moved to the SD card, you’re now ready to proceed to the next step, where we’ll wait for the transfer to complete before concluding the process.
Step 6: Confirm the move
After selecting the “Move to SD card” option in the Gallery app, the next step is to confirm the move. This confirmation step ensures that you’re intentionally transferring the selected photos from your device’s internal storage to the SD card.
Once you tap on the “Move to SD card” option, a confirmation message or prompt may appear on your screen. The message will typically ask you to confirm whether you want to proceed with the move. This additional step helps prevent accidental transfers and allows you to double-check your selection.
Read the confirmation message carefully and ensure that it accurately reflects your intention to move the selected photos to the SD card. If you have any doubts or want to review your selection, you can go back or cancel the action at this stage.
If you’re satisfied with your selection and want to proceed with the move, tap on the “Confirm” or “Move” button to initiate the transfer process. Once you confirm, the Gallery app will begin the process of transferring the selected photos to the SD card.
Depending on the number and size of the photos, as well as the speed of your device and SD card, the confirmation process may take a few moments to complete. During this time, avoid interrupting the process or exiting the Gallery app.
Some devices may display a progress bar or provide an estimate of the time remaining for the transfer to complete. You may also receive notifications or prompts indicating that the move is in progress. Be patient and allow the Gallery app to finish the transfer.
Once the move is complete, you’re ready to move on to the final step, where we’ll wait for the transfer to complete before concluding the process.
Step 7: Wait for the transfer to complete
After confirming the move of selected photos to the SD card in the Gallery app, the next step is to wait for the transfer to complete. The transfer duration will depend on the number and size of the photos as well as the speed of your device and SD card.
During the transfer, it’s important to be patient and avoid interrupting the process. You may see a progress bar or receive notifications indicating the status of the transfer. Additionally, some devices may provide an estimate of the remaining time for the transfer to complete.
While the transfer is in progress, it’s advisable to keep your device plugged in or ensure that it has sufficient battery life. This will prevent any interruptions or unexpected shutdowns that could potentially disrupt the transfer process.
It’s worth noting that some devices may allow you to continue using your device while the transfer is ongoing. However, it’s generally recommended to avoid using memory-intensive apps or performing resource-heavy tasks during this time to ensure optimal performance and a smooth transfer process.
Once the transfer is complete, you’ll receive a notification or message confirming that the selected photos have been successfully moved to the SD card. At this point, you can safely disconnect the device from any connected cables, if applicable.
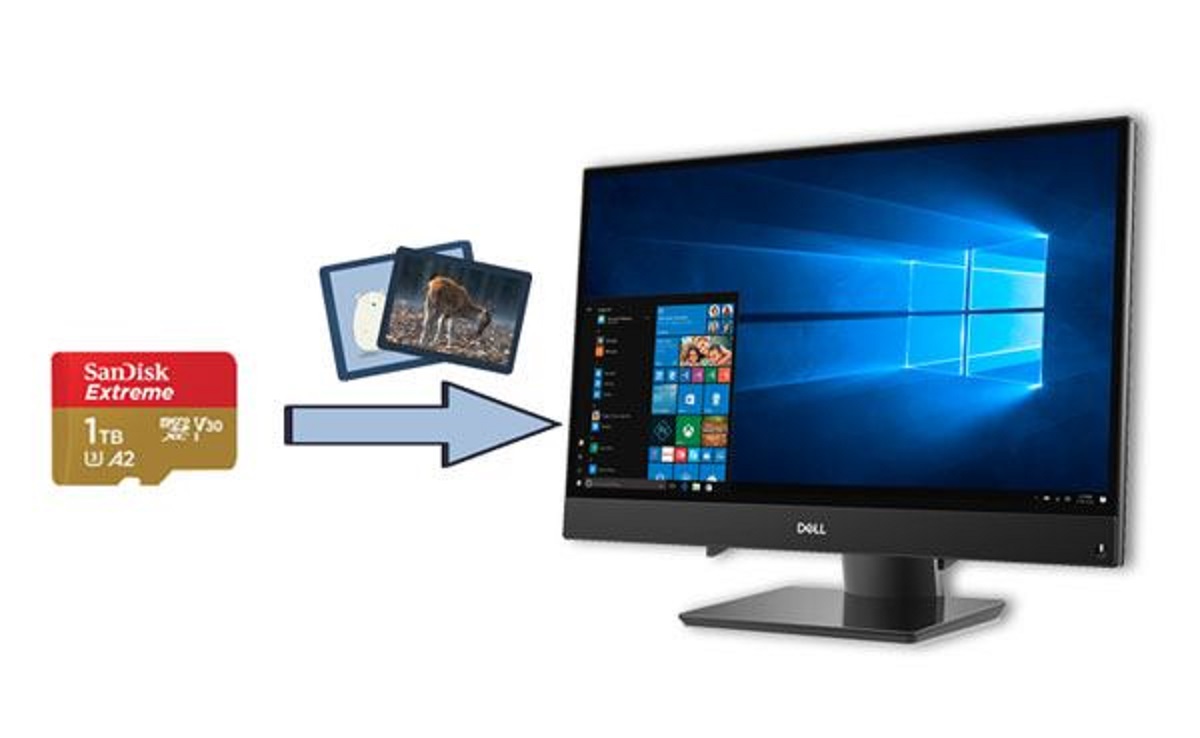
It’s important to verify that the photos have indeed been transferred to the SD card. Open the Gallery app or use a file manager app to navigate to the SD card storage location and check if the transferred photos are present. They should now be accessible from the SD card, freeing up space in your device’s internal storage.
With the transfer complete, you’ve successfully moved your selected photos to the SD card. Now you can enjoy the additional storage space on your device and continue capturing more memories without worrying about running out of storage!
Conclusion
Congratulations on successfully moving your pictures to an SD card! By following the steps outlined in this guide, you have freed up valuable storage space on your device’s internal memory and ensured that you have ample room for new photos and videos.
The process of transferring pictures to an SD card may vary slightly depending on the device and operating system you’re using. However, the general steps remain consistent – from inserting the SD card and opening the Gallery app to selecting the pictures, accessing the options menu, and confirming the move.
Remember to handle the SD card with care, ensuring it is properly inserted and seated securely in its slot. Be patient during the transfer process, allowing the Gallery app to complete the move without interruption. And always double-check that your photos have been successfully transferred to the SD card before disconnecting or removing it from your device.
Moving pictures to an SD card is an effective way to manage and organize your photo library. It provides a reliable backup and prevents the risk of losing precious memories due to device malfunctions or accidents.
Now that you’ve mastered the art of moving pictures to an SD card, you can enjoy the benefits of a clutter-free device and continue capturing beautiful moments without worrying about storage limitations.
Thank you for following along with this guide. We hope it has been helpful in guiding you through the process of moving your pictures to an SD card. Happy photographing!