Introduction
Welcome to this guide on how to move pictures to an SD card on your Galaxy S7. If you are running out of storage space on your device or simply want to free up memory for other apps and files, moving your pictures to an SD card can be an effective solution.
With the Samsung Galaxy S7, you have the flexibility to expand your storage space by using a compatible SD card. This allows you to store a large number of photos, videos, and other files without worrying about filling up your phone’s internal memory.
In this step-by-step tutorial, we will walk you through the process of moving pictures from your Galaxy S7 to an SD card, ensuring that all your precious memories are safely stored while creating more room for new ones.
Before we dive into the steps, it’s important to note that not all Galaxy S7 models support external SD card storage. Therefore, the first thing you need to do is check if your device is compatible with an SD card.
If you are ready to proceed, let’s get started and learn how to move your pictures to an SD card on your Samsung Galaxy S7.
Why Move Pics to SD Card?
There are several reasons why moving your pictures to an SD card on your Galaxy S7 can be beneficial:
- Free up Internal Storage: The built-in storage on your Galaxy S7 can fill up quickly, especially if you take a lot of photos or videos. By moving your pictures to an SD card, you can free up valuable internal storage, allowing your device to run smoother and faster.
- Expand Storage Capacity: One of the advantages of using an SD card is the ability to expand your storage capacity. With a compatible SD card, you can store thousands of pictures without worrying about running out of space. This is particularly useful if you have a large collection of photos or if you frequently capture high-resolution images.
- Backup and Recovery: By transferring your pictures to an SD card, you create a backup copy that is separate from your phone’s internal storage. In the event that your phone experiences issues or needs to be reset, your pictures will remain safe on the SD card, allowing for easy recovery without the risk of losing precious memories.
- Easy File Transfer: If you want to transfer your pictures to another device or computer, having them stored on an SD card simplifies the process. You can easily remove the SD card from your Galaxy S7 and insert it into another device or use a card reader to transfer the files without the need for complicated software or cloud storage.
- Organizational Convenience: When you move your pictures to an SD card, you can create folders and organize them in a way that makes sense to you. Whether you want to sort them by date, event, or any other criteria, having them stored on an SD card provides flexibility and convenience for easy access and navigation.
Moving your pictures to an SD card on your Galaxy S7 offers numerous benefits, providing you with additional storage space, peace of mind, and easy file management. Now that you understand the advantages, let’s move on to the step-by-step process of transferring your pictures to an SD card.
Step 1: Check if your Galaxy S7 supports SD card
Before you begin moving your pictures to an SD card, you need to verify if your Galaxy S7 model supports external SD card storage. Here’s how to check:
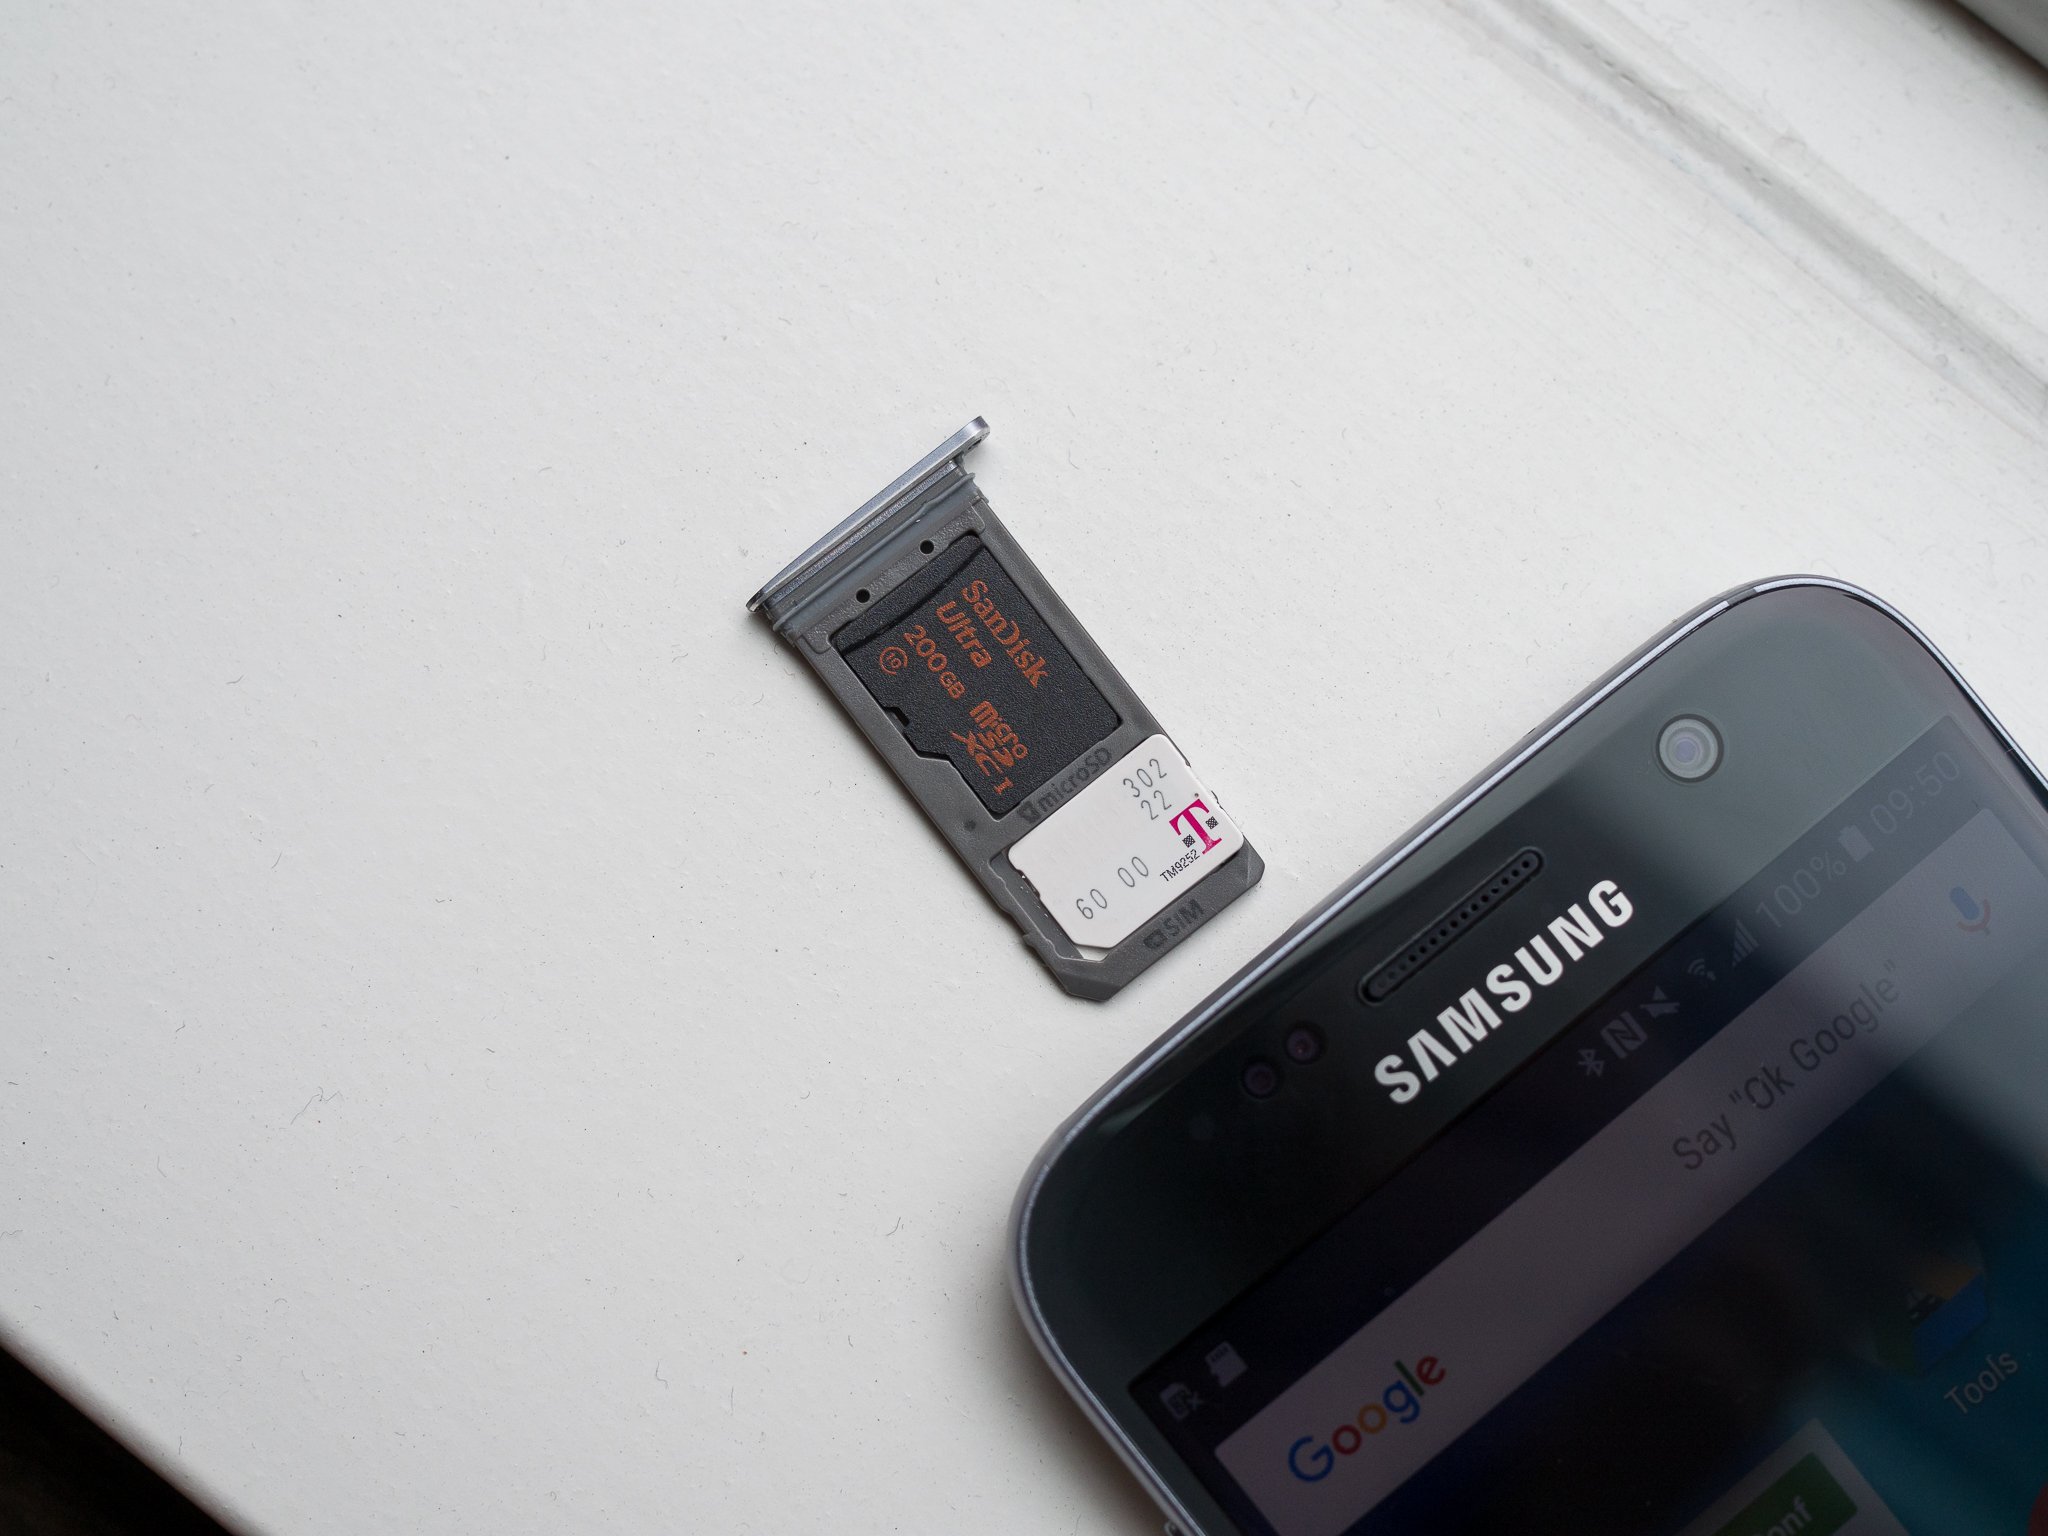
- Locate the SIM card tray on your Galaxy S7. This is usually situated on the top or side of the device, depending on the model.
- Use a SIM card removal tool, a paperclip, or a small pin to gently push into the small hole next to the SIM card tray. Apply a slight amount of pressure until the tray pops out.
- Remove the SIM card tray and inspect the area where the tray was located. You should see two slots: one for the SIM card and another for the SD card.
- If you see an empty slot for an SD card, it means that your Galaxy S7 model supports external SD card storage.
- If there is no slot for an SD card, unfortunately, your device does not have the capability to use an SD card. In this case, you will need to explore alternative methods to free up storage space, such as deleting unwanted files or transferring pictures to a computer or cloud storage.
It’s essential to ensure that your Galaxy S7 supports an SD card before proceeding with the next steps. This will avoid any frustration or confusion during the process. If your device is compatible, you can proceed to the next step of inserting the SD card into your Galaxy S7.
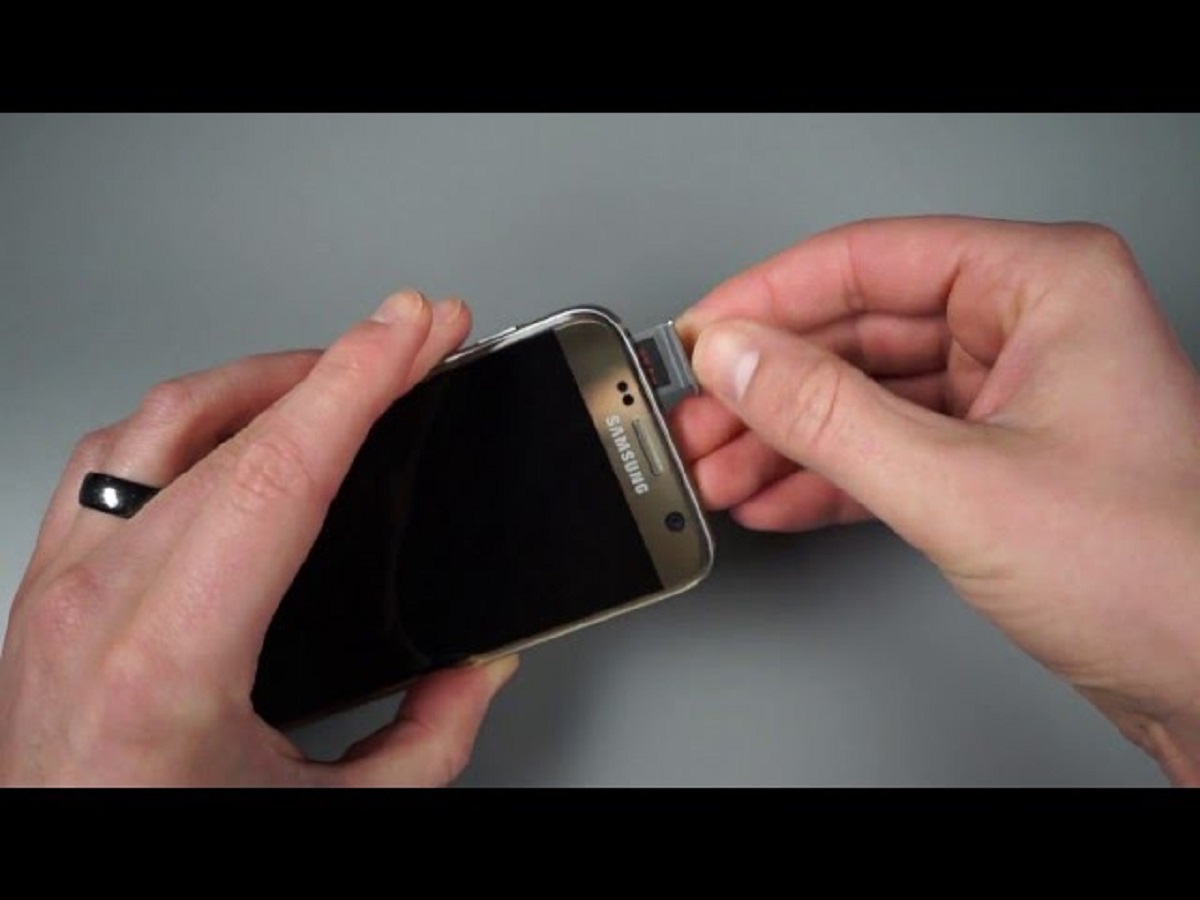
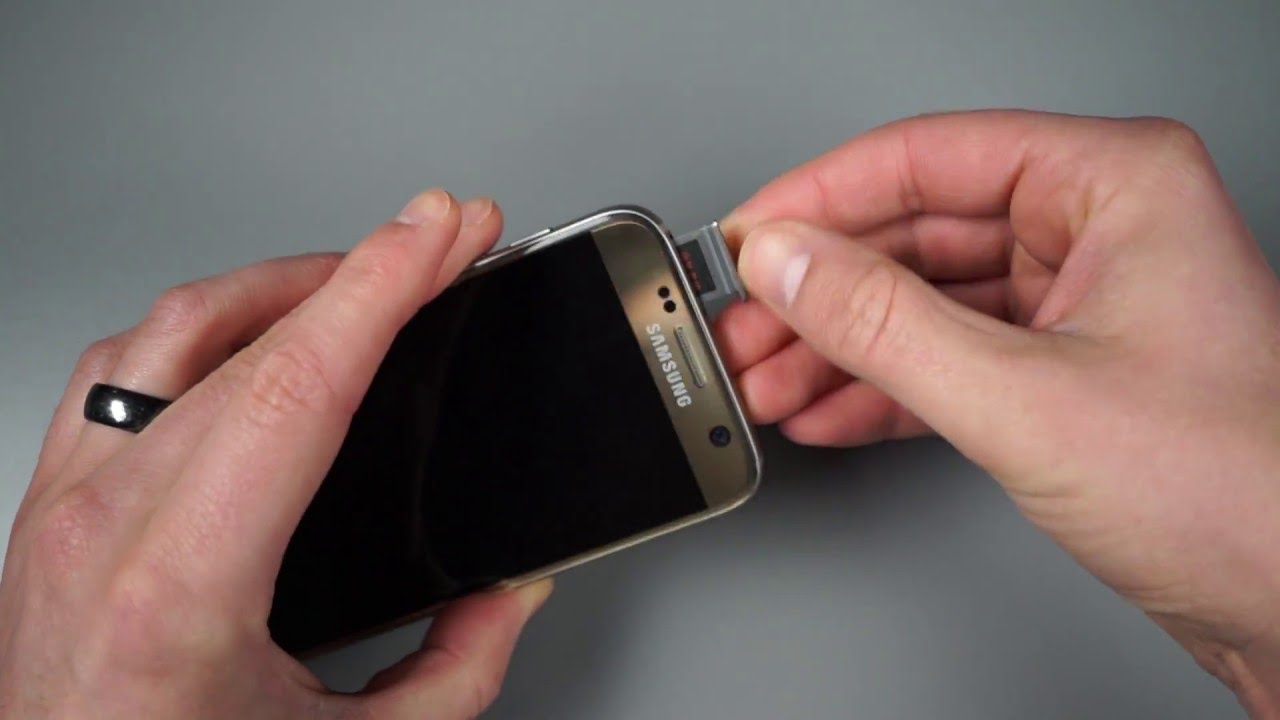
Step 2: Insert the SD card
Once you have confirmed that your Galaxy S7 supports an SD card, you can proceed with inserting the SD card into your device. Follow these steps:
- Locate the SIM card tray on your Galaxy S7. This is usually situated on the top or side of the device, depending on the model.
- Use a SIM card removal tool, a paperclip, or a small pin to gently push into the small hole next to the SIM card tray. Apply a slight amount of pressure until the tray pops out.
- Remove the SIM card tray from the device.
- Insert the SD card into the slot labeled “SD”, ensuring that the gold contacts on the SD card are facing down.
- Gently push the SIM card tray back into the device until it clicks into place.
It’s important to handle the SD card with care to avoid any damage. Avoid touching the gold contacts on the SD card and make sure it is properly inserted into the slot. Once the SD card is inserted, you can proceed to the next step of formatting the SD card (optional).
Step 3: Format the SD card (optional)
Formatting the SD card on your Galaxy S7 is an optional step, but it is recommended to ensure compatibility and optimize the storage space. Here’s how you can format the SD card:
- Go to the home screen of your Galaxy S7 by pressing the Home button.
- Swipe down from the top of the screen to open the notification panel.
- Tap the gear-shaped icon to access the settings of your device.
- Scroll down and tap on “Storage” or “Device care” (depending on your device’s settings).
- Tap on “SD card” or “Portable storage” to view the SD card settings.
- Tap on the three-dot menu icon located at the top-right corner of the screen.
- From the dropdown menu, select “Storage settings” or “Format” (the exact option may vary).
- Review the information provided about formatting the SD card. Formatting will permanently erase all data on the SD card, so make sure you have backed up any important files.
- If you are ready to proceed, tap on “Format” or “Erase SD card”.
- Wait for the formatting process to complete. This may take a few minutes.
- Once the formatting is finished, you can tap on “Done” to exit the settings.
Formatting the SD card prepares it for use with your Galaxy S7, ensuring that it is compatible and ready to store your pictures and other files. However, keep in mind that formatting will erase all data on the SD card, so make sure you have backed up any important files beforehand.
If you prefer to skip the formatting step or if you have already formatted the SD card on a different device, you can proceed to the next step of opening the Gallery app.
Step 4: Open the Gallery app
With the SD card inserted and, if desired, formatted, you can now open the Gallery app on your Galaxy S7 to begin the process of moving your pictures. Here’s how:
- Locate the Gallery app icon on your home screen or in the app drawer. The icon resembles a collection of photos.
- Tap on the Gallery app icon to open it.
- Once the Gallery app is open, you will see a grid of thumbnails representing your pictures.
- You can browse through the pictures by swiping up or down on the screen.
- If you want to view pictures in a specific folder, tap on the three-line menu icon located in the top-left corner of the screen.
- From the menu options that appear, tap on “Folders” or “Albums”.
- Select the desired folder or album that contains the pictures you want to move. The folder or album will open, displaying the pictures within.
- Take a moment to browse through the pictures to ensure you have selected the correct ones for moving.
The Gallery app is your gateway to accessing and managing your pictures on your Galaxy S7. Once you have opened the app and selected the desired folder or album, you are now ready to move the pictures to the SD card, which we will cover in the next step.
Step 5: Select the pictures you want to move
After opening the Gallery app on your Galaxy S7, you need to select the pictures you want to move to the SD card. Follow these steps:
- Within the open folder or album, you will see thumbnails of all the pictures it contains.
- Tap on the first picture you want to move. This will select the picture and display it in full screen.
- To select additional pictures, swipe left or right on the screen to view the next or previous picture.
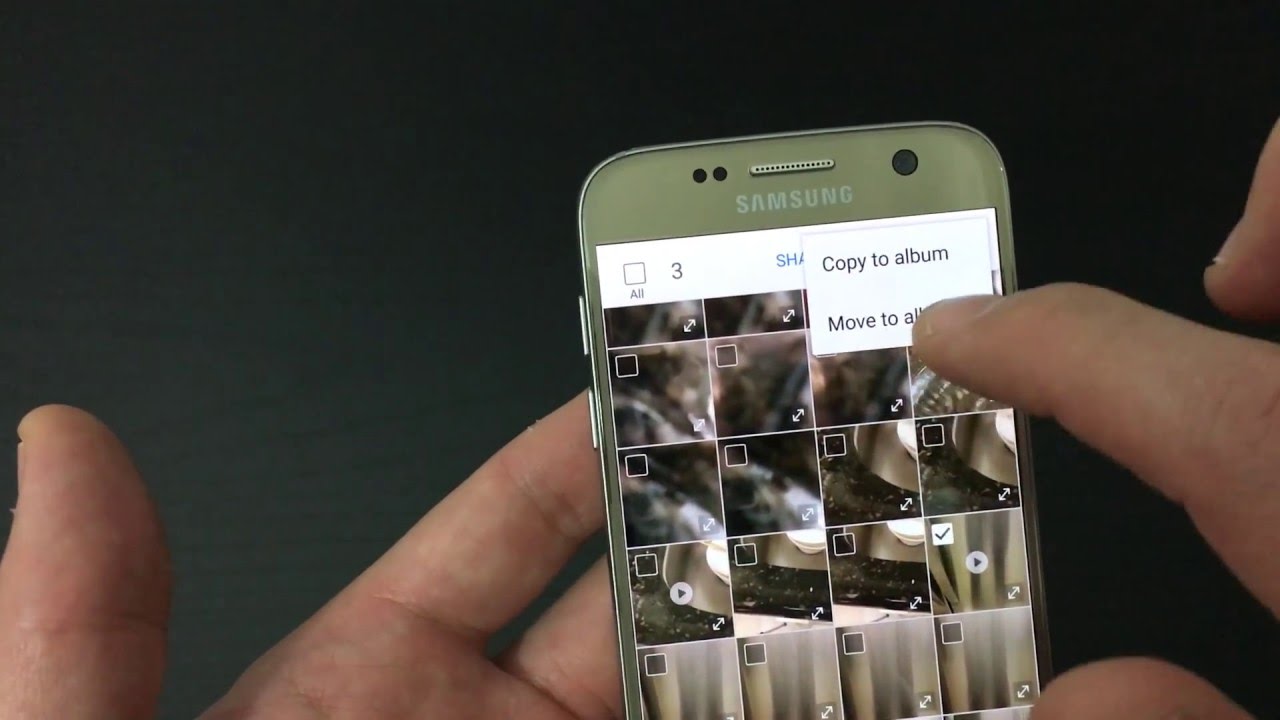
- If you want to select multiple pictures at once, tap on the check mark or selection icon that appears on each picture as you swipe through them. This will add them to your selection.
- You can also tap and hold on a picture to enable selection mode. Once in selection mode, you can tap on additional pictures to add them to your selection.
- Continue selecting pictures until you have chosen all the ones you want to move to the SD card.
- If you accidentally select a picture that you don’t want to move, simply tap on the check mark or selection icon again to deselect it.
- Take a moment to review your selection and ensure that you have chosen all the desired pictures before proceeding to the next step.
Selecting the pictures you want to move may take some time, depending on the number of pictures in the folder or album. Once you have made your selection, you are ready to move the pictures to the SD card, which we will cover in the next step.
Step 6: Move the pictures to SD card
With the desired pictures selected in the Gallery app on your Galaxy S7, it’s time to move them to the SD card. Follow these steps:
- Once you have selected the pictures you want to move, tap on the share icon, usually represented by a square with an upward arrow, located at the bottom or top of the screen.
- A menu will appear with various sharing options. Look for the option that says “Move” or “Move to SD card” and tap on it.
- Depending on the number of pictures you are moving and their file sizes, the process may take a few seconds or longer.
- Once the pictures have been successfully moved to the SD card, you may see a confirmation message or a notification indicating the completion of the process.
- If you encounter any issues during the move process, such as insufficient storage space on the SD card, you may need to free up space on the SD card or use a different SD card with more storage capacity.
- Take a moment to double-check and confirm that the pictures have been moved to the SD card by checking the original folder or album in the Gallery app. The pictures should no longer appear in that location.
It’s important to note that moving the pictures to the SD card does not delete them from your Galaxy S7. Instead, it creates a copy of the pictures on the SD card while retaining the original versions on your device.
You have now successfully moved the selected pictures to the SD card. To ensure that the pictures have been moved and to avoid any potential issues, we will verify the relocation in the next step.
Step 7: Verify the pictures are moved
After moving your pictures to the SD card on your Galaxy S7, it’s important to verify that the relocation was successful. Here’s how you can do so:
- Open the Gallery app on your Galaxy S7.
- Navigate to the original folder or album where the pictures were located before the move.
- Confirm that the pictures you moved are no longer visible in that folder or album.
- To ensure that the pictures have been successfully moved to the SD card, navigate to the SD card in the Gallery app.
- Look for a folder or album specifically labeled as “SD card” or “External storage”. Open that folder or album.
- Check if the pictures you moved are now visible in the SD card folder or album.
- Tap on individual pictures to view them and confirm that they have been successfully relocated to the SD card.
- If you do not see the pictures in the SD card folder or album, double-check that the move process was completed successfully in the previous step.
- If you encounter any issues or if the pictures are not appearing in the SD card folder or album, you may need to repeat the move process or seek further assistance to troubleshoot the issue.
It’s crucial to verify that the pictures have been moved to the SD card to ensure that you have successfully freed up storage space on your Galaxy S7. Taking the time to double-check the relocation will give you peace of mind and help you keep your pictures organized and easily accessible.
Congratulations! You have completed the process of moving pictures to an SD card on your Galaxy S7. Enjoy the additional storage capacity and continued capture of precious memories on your device.
Conclusion
Moving pictures to an SD card on your Galaxy S7 can provide numerous benefits, such as freeing up internal storage, expanding storage capacity, creating backups, facilitating easy file transfers, and offering organizational convenience. With the step-by-step guide provided in this article, you can successfully move your pictures to an SD card and enjoy the added flexibility and storage space on your device.
Starting with the initial step of checking if your Galaxy S7 supports an SD card, you confirmed compatibility and then proceeded to insert and, if desired, format the SD card. Opening the Gallery app allowed you to select the pictures you wanted to move to the SD card, followed by the actual movement of the selected pictures. Finally, you verified the relocation by checking both the original folder and the SD card folder in the Gallery app.
It is important to note that the process described in this guide may vary slightly depending on your specific device model and software version. If you encounter any issues or have questions, it is recommended to consult your device’s user manual or contact Samsung support for further assistance.
By moving your pictures to an SD card, you can optimize your Galaxy S7’s storage capacity, ensure the safety of your precious memories, and have the convenience of accessing and managing your pictures with ease. Enjoy your newfound storage space and continue capturing and cherishing those special moments on your device!