Introduction
Inserting a SIM card into your Samsung Galaxy S7 is a fundamental step in setting up your device for mobile connectivity. Whether you're upgrading to a new phone or simply replacing your SIM card, it's essential to understand the process to ensure a smooth transition. By following a few simple steps, you can quickly and easily insert your SIM card into your Galaxy S7, allowing you to stay connected with friends, family, and the digital world at large.
The SIM card serves as the gateway to your mobile network, enabling you to make calls, send texts, and access mobile data. Without a properly inserted SIM card, your phone would be unable to connect to your carrier's network, limiting its functionality. Therefore, understanding how to insert and manage your SIM card is crucial for maximizing the utility of your Galaxy S7.
In this comprehensive guide, we will walk you through the step-by-step process of inserting a SIM card into your Galaxy S7. From locating the SIM card tray to properly inserting the SIM card, we'll cover everything you need to know to complete this essential task. By the end of this guide, you'll be equipped with the knowledge and confidence to effortlessly manage your SIM card, ensuring that your Galaxy S7 is fully equipped to keep you connected wherever you go. Let's dive in and get started on this essential process!
Step 1: Locate the SIM card tray
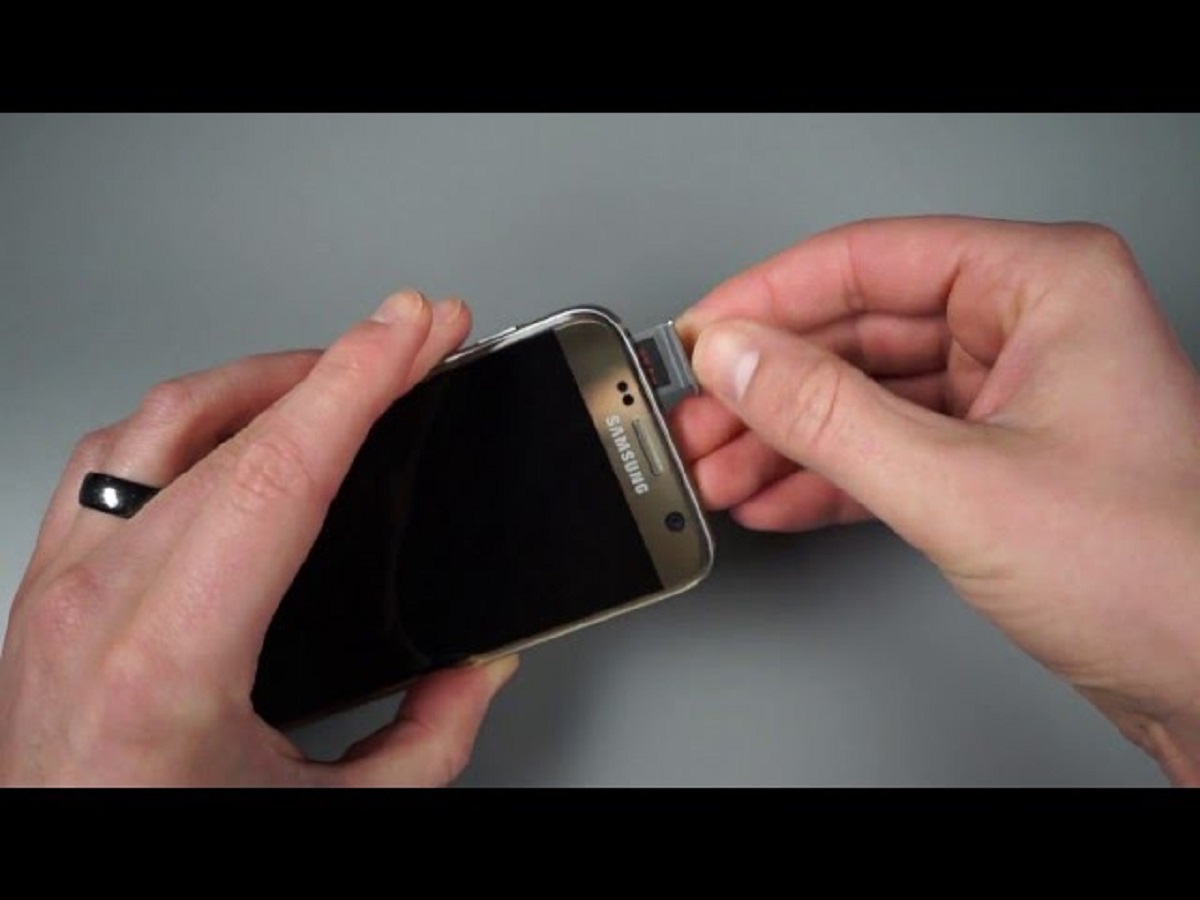
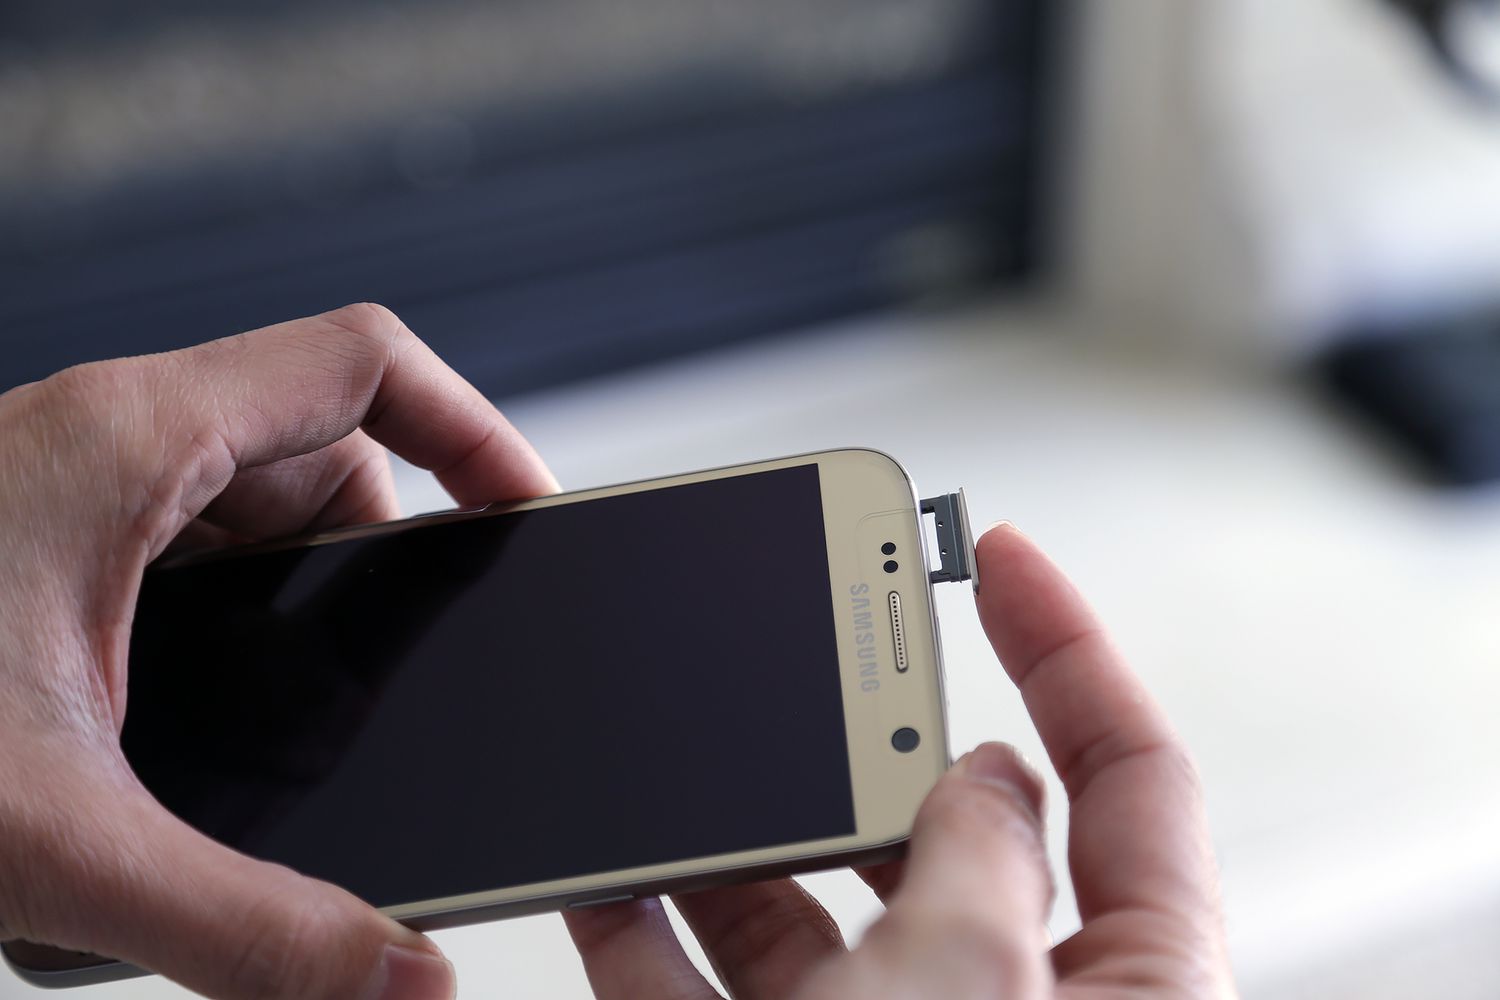
The first step in inserting a SIM card into your Samsung Galaxy S7 is to locate the SIM card tray. The SIM card tray is a small, rectangular slot typically found on the side of the device. On the Galaxy S7, the SIM card tray is located on the top edge of the phone, near the power button. To access the SIM card tray, you will need a SIM eject tool, which is usually included in the packaging of your device. If you don't have the SIM eject tool, a small paperclip can be used as an alternative.
Once you have the SIM eject tool or paperclip in hand, look for the small pinhole on the top edge of your Galaxy S7. This pinhole is where you will insert the SIM eject tool to release the SIM card tray. Gently insert the SIM eject tool into the pinhole and apply a small amount of pressure. You should feel a slight resistance, indicating that the SIM card tray is being released.
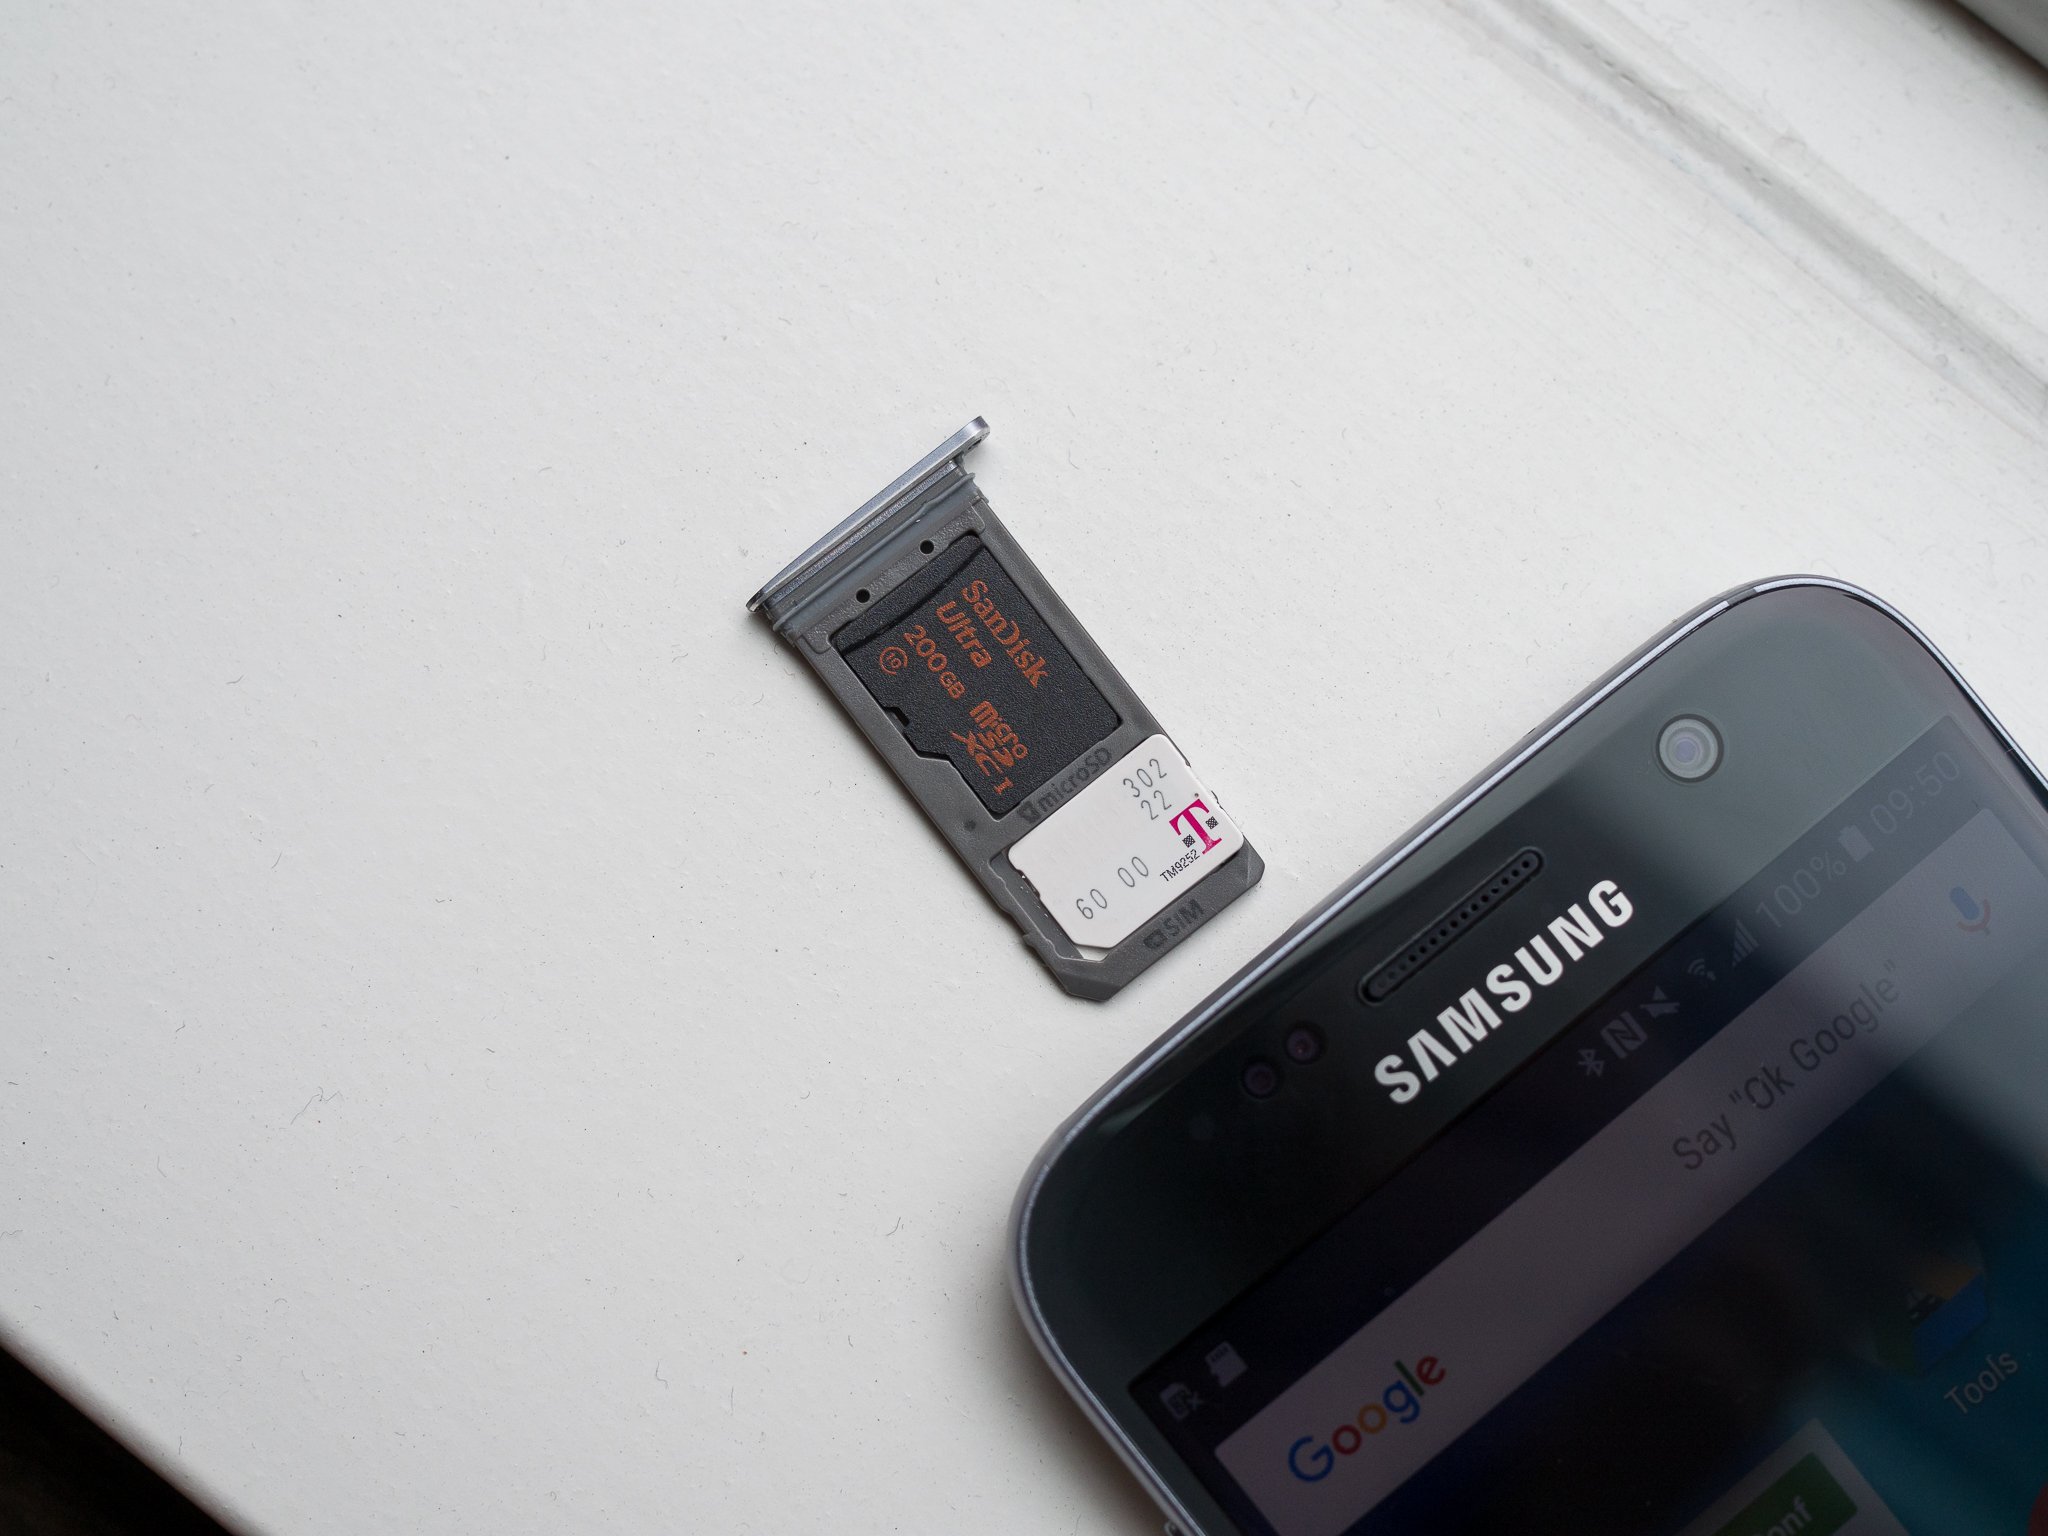
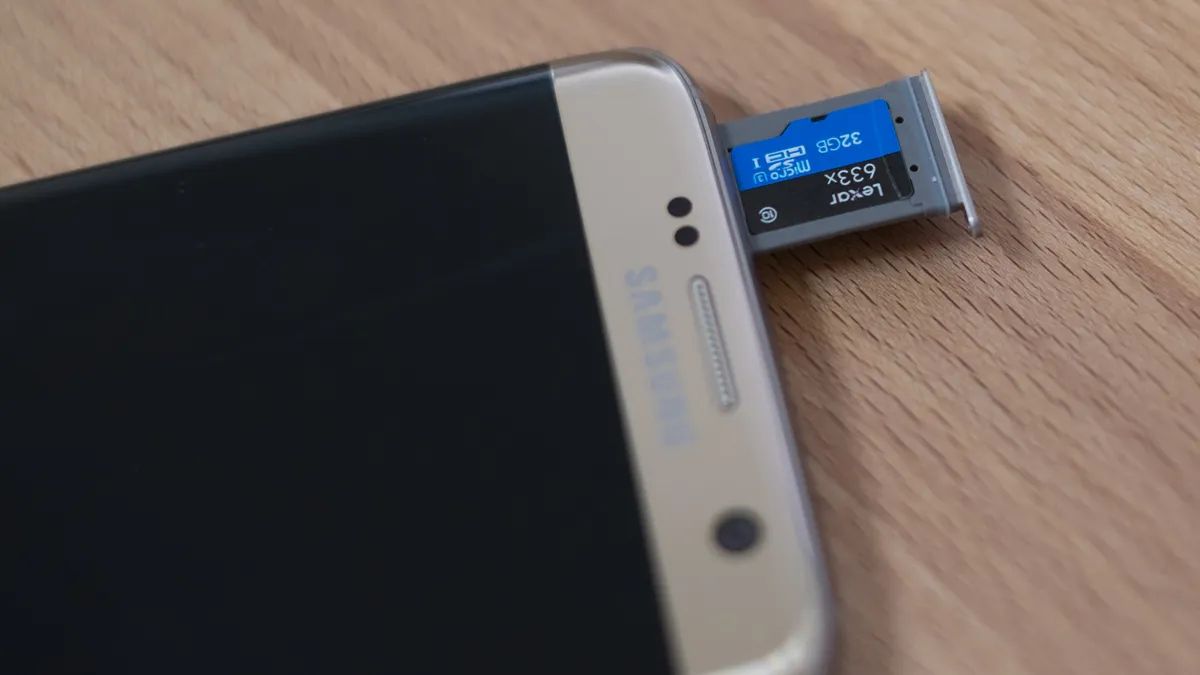
After the SIM card tray has been released, carefully pull it out from the phone. The SIM card tray will contain one or two slots, depending on your device model. In the case of the Galaxy S7, it typically has two slots – one for the SIM card and another for a microSD card for expanded storage.
Locating the SIM card tray is the crucial first step in the process of inserting a SIM card into your Galaxy S7. By identifying the tray and understanding how to access it, you are well on your way to completing this essential task. With the SIM card tray in hand, you can proceed to the next step of inserting the SIM card, which will be covered in detail in the following section.
By successfully locating the SIM card tray, you have taken the initial step towards ensuring that your Galaxy S7 is equipped with the necessary components for seamless mobile connectivity. With this knowledge in mind, let's move on to the next step in the process of inserting your SIM card into the Samsung Galaxy S7.
Step 2: Insert the SIM eject tool
With the SIM card tray in hand, the next step in the process of inserting a SIM card into your Samsung Galaxy S7 is to insert the SIM eject tool into the designated pinhole. This pinhole is strategically located on the top edge of the device, adjacent to the SIM card tray. Using the SIM eject tool, or a suitable alternative such as a paperclip, is essential for releasing the SIM card tray and gaining access to the slot where the SIM card will be placed.
To begin, take the SIM eject tool and carefully insert it into the pinhole on the top edge of your Galaxy S7. Apply gentle pressure to the tool, ensuring that it is inserted straight into the pinhole. As you do this, you may feel a slight resistance, indicating that the mechanism holding the SIM card tray in place is being released. It's important to exercise caution and avoid using excessive force, as this could potentially damage the internal components of the device.
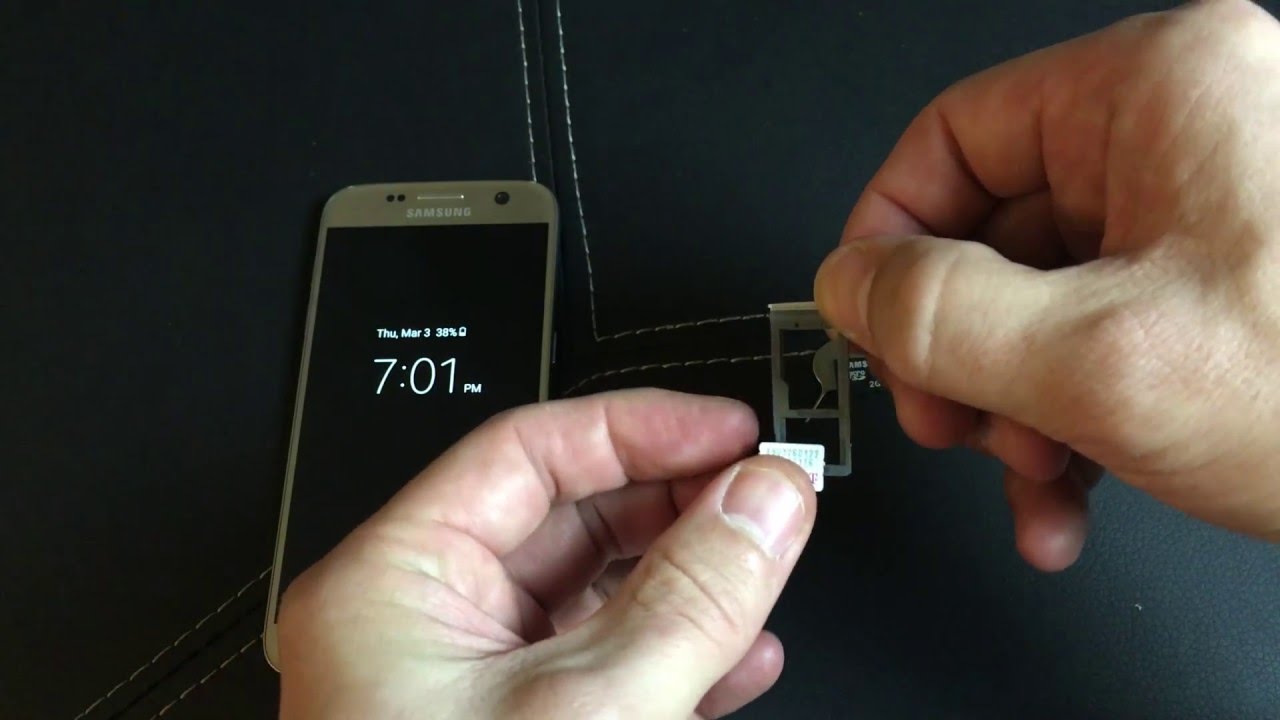
As the SIM eject tool is inserted into the pinhole, you should notice the SIM card tray beginning to protrude from the phone. Once the tray has been partially released, gently pull it out from the device, taking care not to force it or cause any unnecessary strain. With the SIM card tray now accessible, you are one step closer to completing the process of inserting your SIM card into the Galaxy S7.
By successfully inserting the SIM eject tool into the pinhole and releasing the SIM card tray, you have made significant progress in preparing your Galaxy S7 for the insertion of the SIM card. This step is crucial for gaining access to the SIM card slot within the tray, where the SIM card will be securely placed. With the SIM card tray now removed from the device, you are ready to proceed to the next step of removing the tray and preparing to insert the SIM card.
With the SIM card tray released, you are now equipped with the necessary access to continue the process of inserting your SIM card into the Samsung Galaxy S7. This marks a pivotal stage in the overall process, bringing you closer to fully integrating the SIM card with your device and ensuring seamless mobile connectivity. Let's move forward to the subsequent step, where we will delve into the process of removing the SIM card tray and preparing to place the SIM card into the designated slot.
Step 3: Remove the SIM card tray
After successfully releasing the SIM card tray using the SIM eject tool, the next crucial step in the process of inserting a SIM card into your Samsung Galaxy S7 is to remove the SIM card tray from the device. With the tray now accessible, you can proceed to carefully remove it in preparation for placing the SIM card securely within the designated slot.
To remove the SIM card tray, gently pull it out from the device, ensuring a smooth and controlled motion. It's important to exercise caution and avoid applying excessive force, as the SIM card tray is designed to be easily removable with minimal effort. By pulling the tray out steadily and evenly, you can prevent any potential damage to the device and ensure a seamless continuation of the insertion process.
As you remove the SIM card tray, take note of the arrangement of the slots within the tray. In the case of the Galaxy S7, the SIM card slot is typically located above the microSD card slot. By familiarizing yourself with the layout of the tray, you can effectively position the SIM card in the correct slot during the subsequent step.
Once the SIM card tray has been fully removed from the device, inspect it to ensure that the slots are free from any debris or obstructions. It's essential to maintain a clean and unobstructed environment within the tray to facilitate the smooth insertion of the SIM card. If necessary, gently wipe the tray with a soft, dry cloth to remove any dust or particles that may have accumulated.
By successfully removing the SIM card tray from your Galaxy S7, you have reached a pivotal stage in the process of preparing your device for the insertion of the SIM card. With the tray now in your hands, you are ready to proceed to the next step of placing the SIM card into the designated slot within the tray.
The successful removal of the SIM card tray signifies a significant milestone in the overall process, bringing you one step closer to seamlessly integrating your SIM card with your Samsung Galaxy S7. With the tray now in your possession, you are well-prepared to advance to the subsequent step, where we will delve into the process of securely placing the SIM card into the designated slot within the tray.
Step 4: Place the SIM card in the tray
With the SIM card tray in your possession, the next critical step in the process of inserting a SIM card into your Samsung Galaxy S7 is to place the SIM card securely within the designated slot in the tray. Before proceeding, it's essential to ensure that the SIM card is compatible with your device and that it aligns with the required specifications. The Galaxy S7 utilizes a nano-SIM card, which is the smallest SIM card size available. It's important to verify that your SIM card is a nano-SIM to guarantee compatibility with the Galaxy S7.
To place the SIM card in the tray, carefully position the card within the corresponding slot, ensuring that it aligns with the shape and dimensions of the slot. The SIM card will typically feature a notched corner, which corresponds to the orientation of the slot within the tray. Align the notched corner of the SIM card with the corresponding notch in the slot, ensuring a proper fit.
As you place the SIM card in the tray, it's crucial to handle the card with care to prevent any damage or bending. The metal contacts on the back of the SIM card should be facing downward, in direct contact with the contacts within the slot. This alignment ensures that the SIM card can establish a secure connection with the device's internal components, facilitating seamless communication with the mobile network.
Once the SIM card is positioned within the slot, gently press down on the card to ensure that it is securely seated within the tray. It's important to exert gentle and even pressure to avoid any potential damage to the SIM card or the tray. By firmly securing the SIM card in place, you can minimize the risk of disconnection or instability during use.
With the SIM card now securely placed within the tray, take a moment to inspect the alignment and positioning of the card. Verify that the card sits flush within the slot and that the contacts are in full contact with the corresponding connectors. This visual inspection ensures that the SIM card is properly seated and ready for reinsertion into the device.
By successfully placing the SIM card in the tray, you have reached a pivotal stage in the process of inserting a SIM card into your Samsung Galaxy S7. With the SIM card securely positioned within the tray, you are now prepared to proceed to the final step of reinserting the SIM card tray into the device, as we will explore in the following section.
Step 5: Reinsert the SIM card tray
With the SIM card securely placed within the tray, the final step in the process of inserting a SIM card into your Samsung Galaxy S7 is to reinsert the SIM card tray back into the device. This step is crucial for ensuring that the SIM card is properly integrated with the device, allowing for seamless connectivity to your mobile network.
To reinsert the SIM card tray, carefully align the tray with the corresponding slot on the top edge of your Galaxy S7. Take note of the orientation of the tray to ensure that it is positioned correctly, with the SIM card slot facing downward. Align the tray with the slot, ensuring a smooth and even fit to avoid any potential resistance.
Once the tray is aligned with the slot, gently slide it back into the device, maintaining a steady and controlled motion. It's important to proceed with caution and avoid applying excessive force, as the tray should slide back into place with minimal effort. By maintaining a gentle and even pressure, you can ensure that the tray reinserts smoothly and securely.
As the tray is reinserted into the device, you may feel a slight click or resistance, indicating that the tray is being securely positioned within the slot. This tactile feedback signifies that the tray has been properly reinserted and is ready for use. Once the tray is fully inserted, take a moment to verify that it sits flush with the device, with no protrusions or misalignments.
After reinserting the SIM card tray, take a moment to power on your Galaxy S7 and verify that the device recognizes the SIM card. Upon powering on the device, you should see indications of network connectivity, such as signal bars or carrier information, confirming that the SIM card has been successfully integrated with your Galaxy S7.
By successfully reinserting the SIM card tray and verifying the recognition of the SIM card, you have completed the process of inserting a SIM card into your Samsung Galaxy S7. With the SIM card securely in place, your device is now fully equipped to keep you connected to your mobile network, enabling you to make calls, send texts, and access mobile data with ease.
This marks the completion of the essential process of inserting a SIM card into your Samsung Galaxy S7, ensuring that your device is fully equipped for seamless mobile connectivity. With the SIM card securely integrated, you can now enjoy the full functionality of your Galaxy S7, staying connected wherever you go.
Conclusion
Congratulations! You have successfully completed the essential process of inserting a SIM card into your Samsung Galaxy S7. By following the step-by-step guide outlined in this comprehensive tutorial, you have gained the knowledge and confidence to manage your SIM card effectively, ensuring seamless connectivity and access to your mobile network.
The process of inserting a SIM card into your Galaxy S7 may initially seem daunting, but with the right guidance, it becomes a straightforward and manageable task. From locating the SIM card tray to securely placing the SIM card and reinserting the tray into the device, each step is crucial for ensuring a smooth and successful integration of the SIM card with your Galaxy S7.
By familiarizing yourself with the intricacies of managing the SIM card, you have empowered yourself to make the most of your device's mobile capabilities. Whether you're upgrading to a new phone, replacing your SIM card, or simply exploring the functionalities of your Galaxy S7, understanding the process of inserting a SIM card is essential for seamless mobile connectivity.
With the SIM card securely integrated into your Galaxy S7, you can now enjoy the full range of features and services offered by your mobile network. From making calls and sending texts to accessing mobile data and staying connected on the go, your Galaxy S7 is now fully equipped to meet your communication needs.
As you continue to explore the capabilities of your device, remember that managing your SIM card is an integral part of maintaining a reliable and efficient mobile connection. Whether it's staying in touch with loved ones, conducting business on the go, or simply enjoying the convenience of mobile communication, your Galaxy S7, with its properly inserted SIM card, is your gateway to a connected world.
In conclusion, mastering the process of inserting a SIM card into your Samsung Galaxy S7 is a valuable skill that enhances your overall mobile experience. By completing this essential task, you have taken a significant step towards maximizing the utility of your device and ensuring that it remains an indispensable tool in your daily life. Stay connected, stay informed, and enjoy the seamless mobile experience that your Galaxy S7 has to offer.