Introduction
Welcome to the world of tablets, where users can enjoy the convenience of portable technology at their fingertips. One of the key features of many tablets is the ability to expand storage using an SD card. Whether you want to store more photos, videos, or documents, inserting an SD card into your tablet can boost its storage capacity and allow you to carry more digital content with you on the go.
In this article, we will guide you through the process of inserting an SD card into your tablet. We will provide step-by-step instructions to ensure a smooth and successful installation. So whether you’re a tech-savvy individual or a novice in the gadget world, you’ll find this guide helpful and easy to follow.
Before we dive into the process, it’s important to note that different tablet models may have slightly different ways of inserting an SD card. However, the basic principles generally remain the same. We will provide you with a comprehensive overview that should cover most tablet models, but it’s always a good idea to refer to your device’s user manual for specific instructions, if available.
Now, let’s get started and have your tablet ready to accommodate that extra storage space! But first, make sure you have an SD card on hand that is compatible with your tablet. Check your device’s user manual or contact the manufacturer to determine the appropriate SD card size and type supported by your tablet.
Step 1: Locate the SD Card Slot
The first step in inserting an SD card into your tablet is to locate the SD card slot. The location of the slot may vary depending on the make and model of your tablet, but it is commonly found on the sides or back of the device. Look for a small rectangular or square-shaped slot with a small symbol indicating an SD card.
If you’re having trouble finding the SD card slot, consult your tablet’s user manual for specific instructions and illustrations. The manual will provide detailed information about the location and appearance of the SD card slot for your specific tablet model.
Once you have located the SD card slot, make sure your tablet is powered off before proceeding to the next step. Powering off your tablet ensures that there is no risk of data loss or damage to the SD card during the insertion and removal process.
Now that you know where the SD card slot is located and have powered off your tablet, you’re ready to move on to the next step of the process.
Step 2: Power off the Tablet
Before you start inserting an SD card into your tablet, it is essential to power off the device. This step is crucial to avoid any potential data loss or damage to the SD card during the installation process.
To power off your tablet, locate the power button, which is typically found on the side or top of the device. Press and hold the power button until a prompt appears on the screen, allowing you to power off the tablet. Follow the on-screen instructions to shut down your device completely.
It is important to ensure that your tablet is completely powered off, as any remaining power could cause issues when inserting or removing the SD card. Take a moment to double-check that your tablet’s screen is blank and unresponsive before moving on to the next step.
Once your tablet is powered off, you can proceed to the next step with confidence, knowing that you’ve taken the necessary precautions to protect your data and your device.
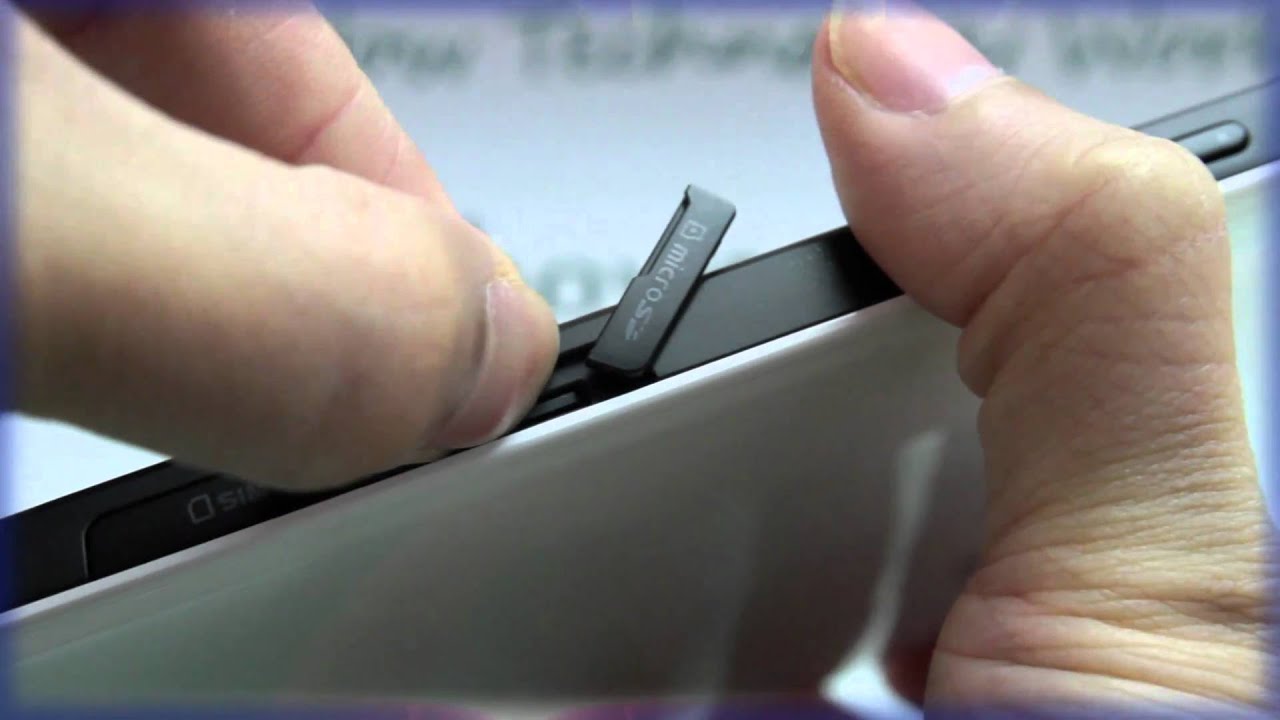
Step 3: Remove the SD Card Slot Cover
Now that your tablet is powered off, it’s time to remove the SD card slot cover. The SD card slot cover is designed to protect the slot from dust, debris, and accidental removal of the SD card.
Locate the SD card slot cover on your tablet. It is usually a small flap or door on the side or back of the device. Carefully examine the cover to determine if it has any locks or fasteners holding it in place.
If the cover has locks or fasteners, follow the manufacturer’s instructions or use a small tool, such as a paperclip or SIM card removal tool, to unlock or release it. Gently apply pressure, and the cover should pop open, revealing the SD card slot underneath.
For some tablets, the SD card slot cover may be a simple flap that can be lifted or peeled back without any locks or fasteners. In this case, carefully lift the cover or peel it back to expose the SD card slot.
It’s important to handle the SD card slot cover with care to avoid damaging it or the tablet. If the cover is not removable or detachable, do not force it open. Consult your tablet’s user manual or contact the manufacturer for further guidance.
Once the SD card slot cover is removed, you’re ready to proceed to the next step and insert the SD card into the slot.
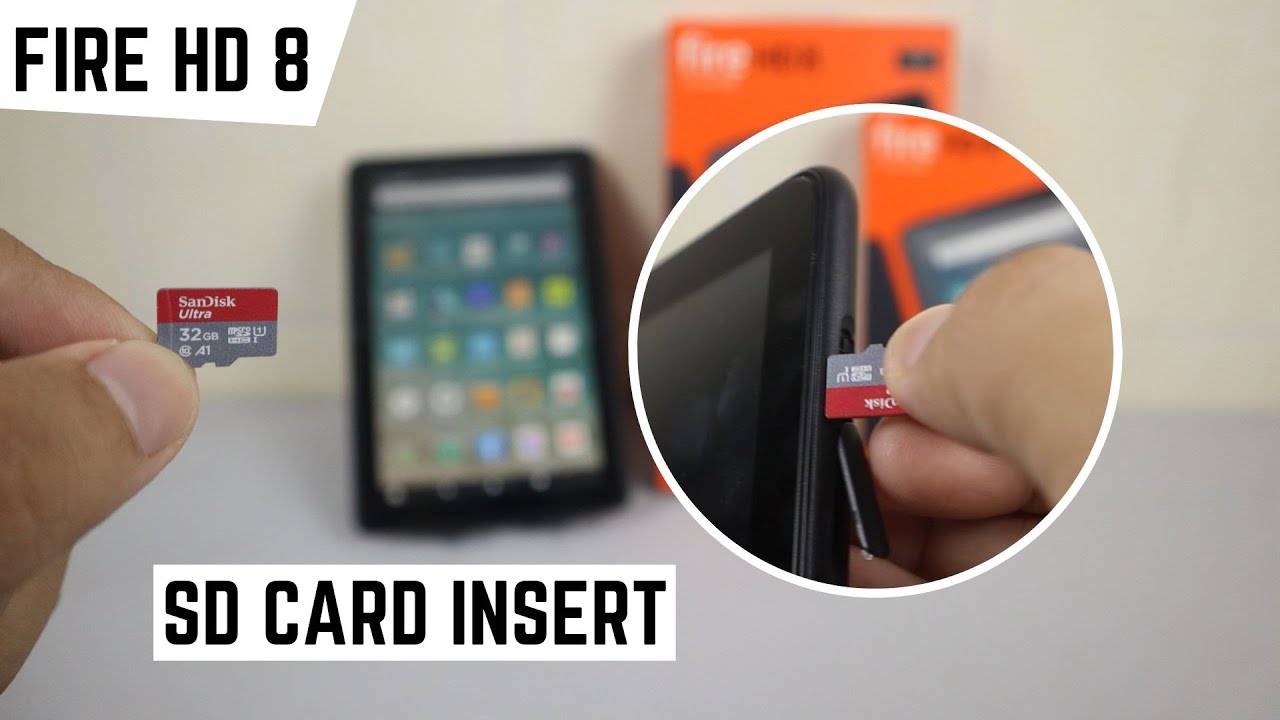
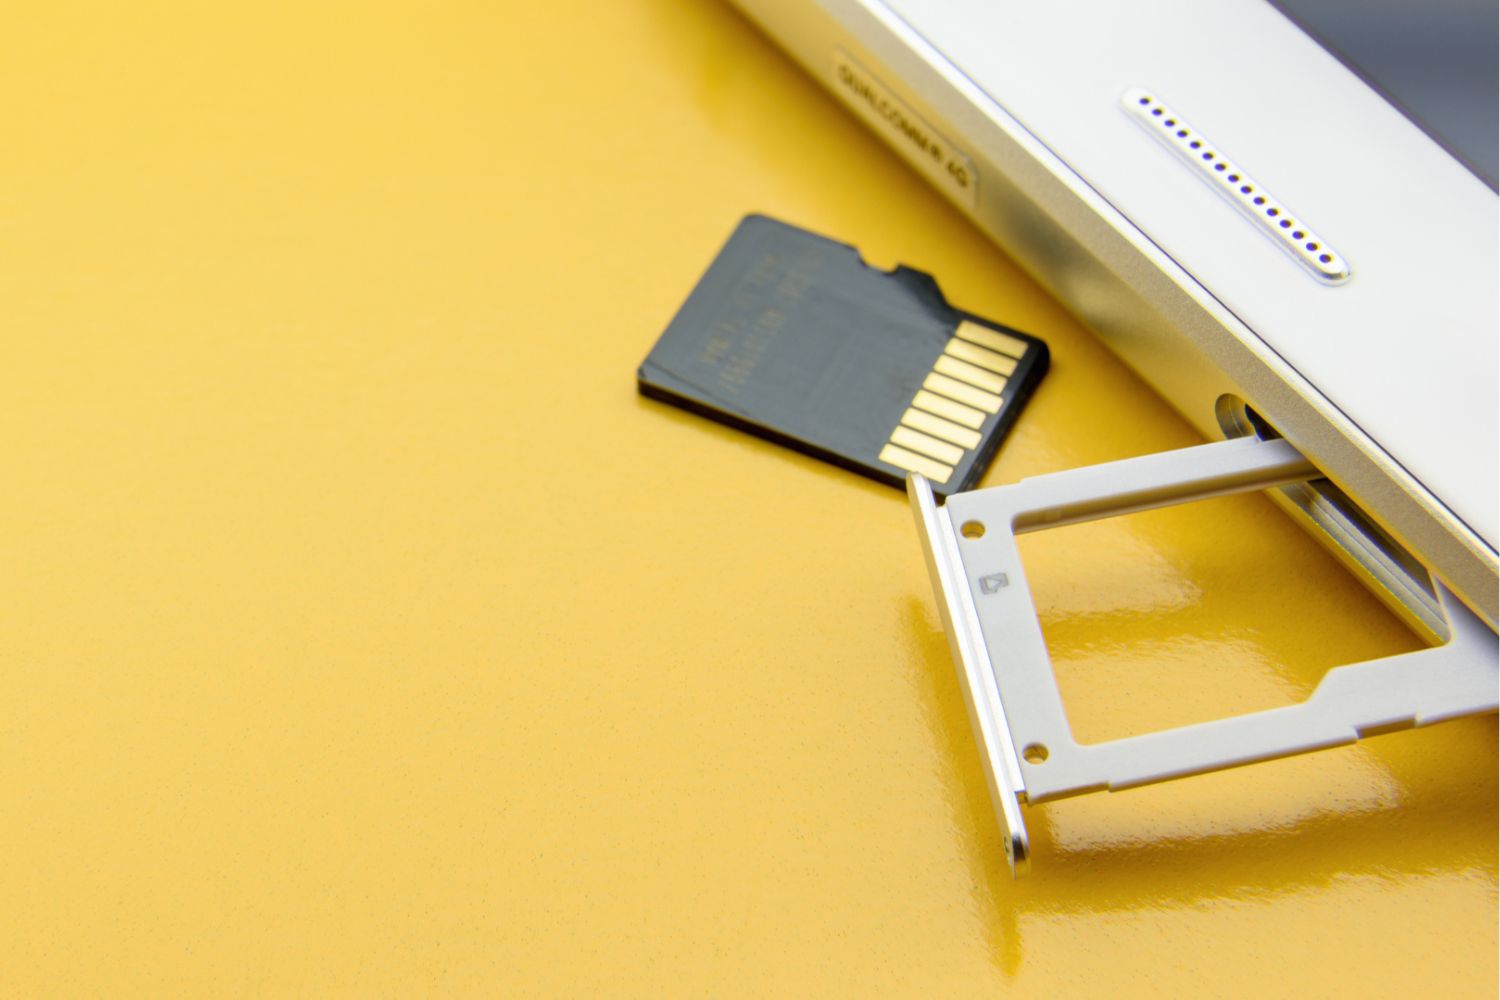
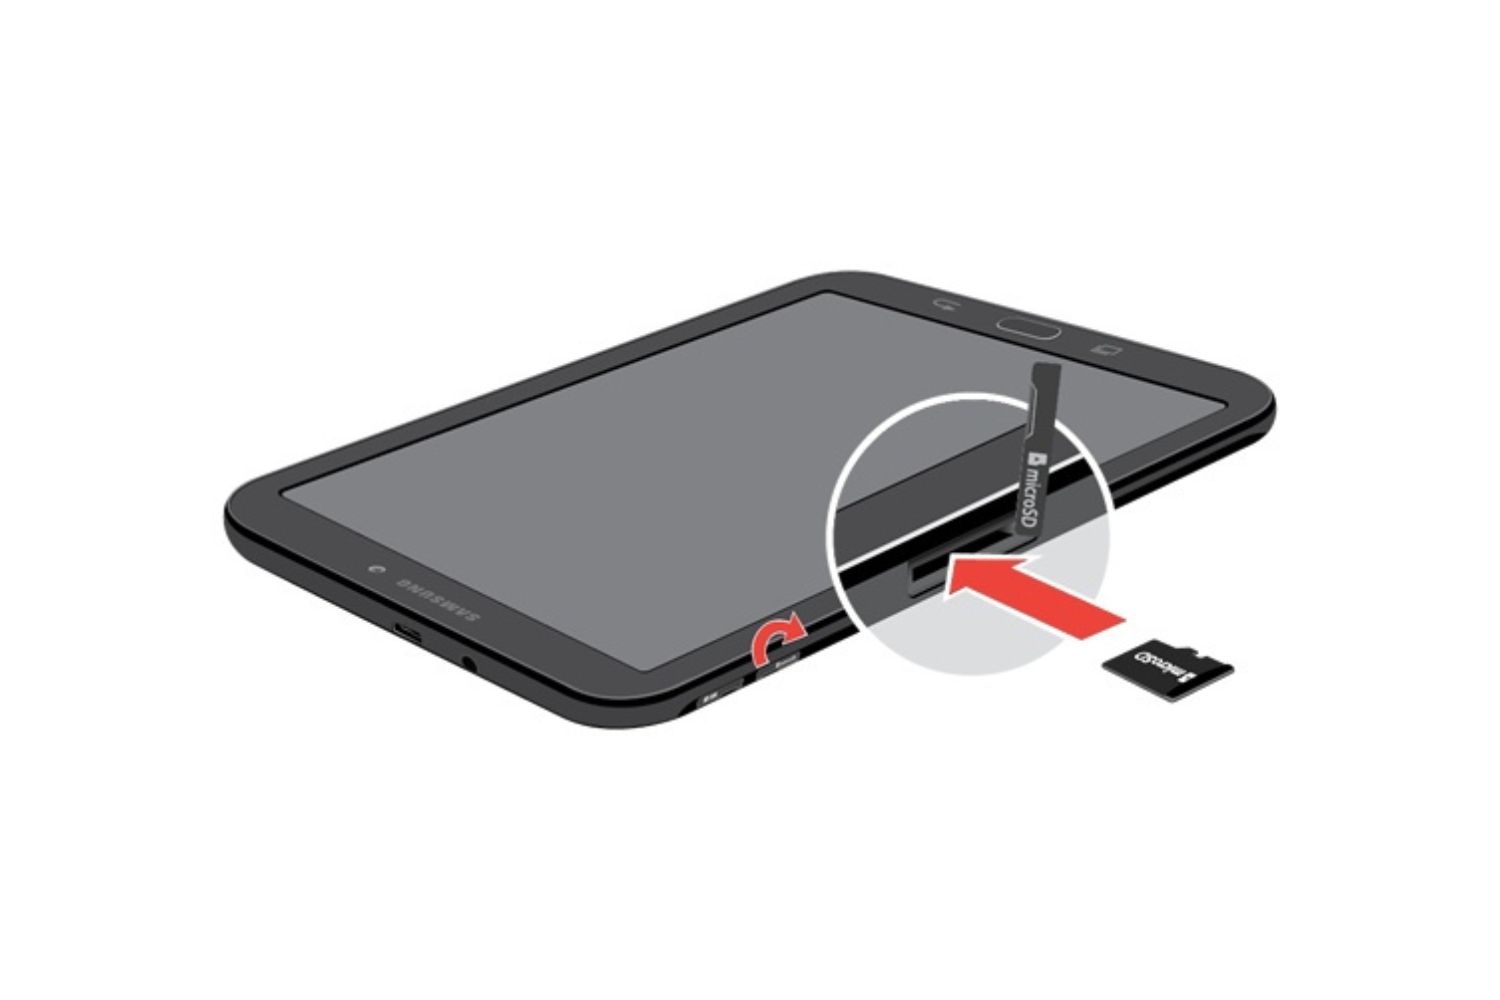
Step 4: Insert the SD Card
With the SD card slot cover removed, it’s time to insert the SD card into the slot. Follow these steps to ensure a proper installation:
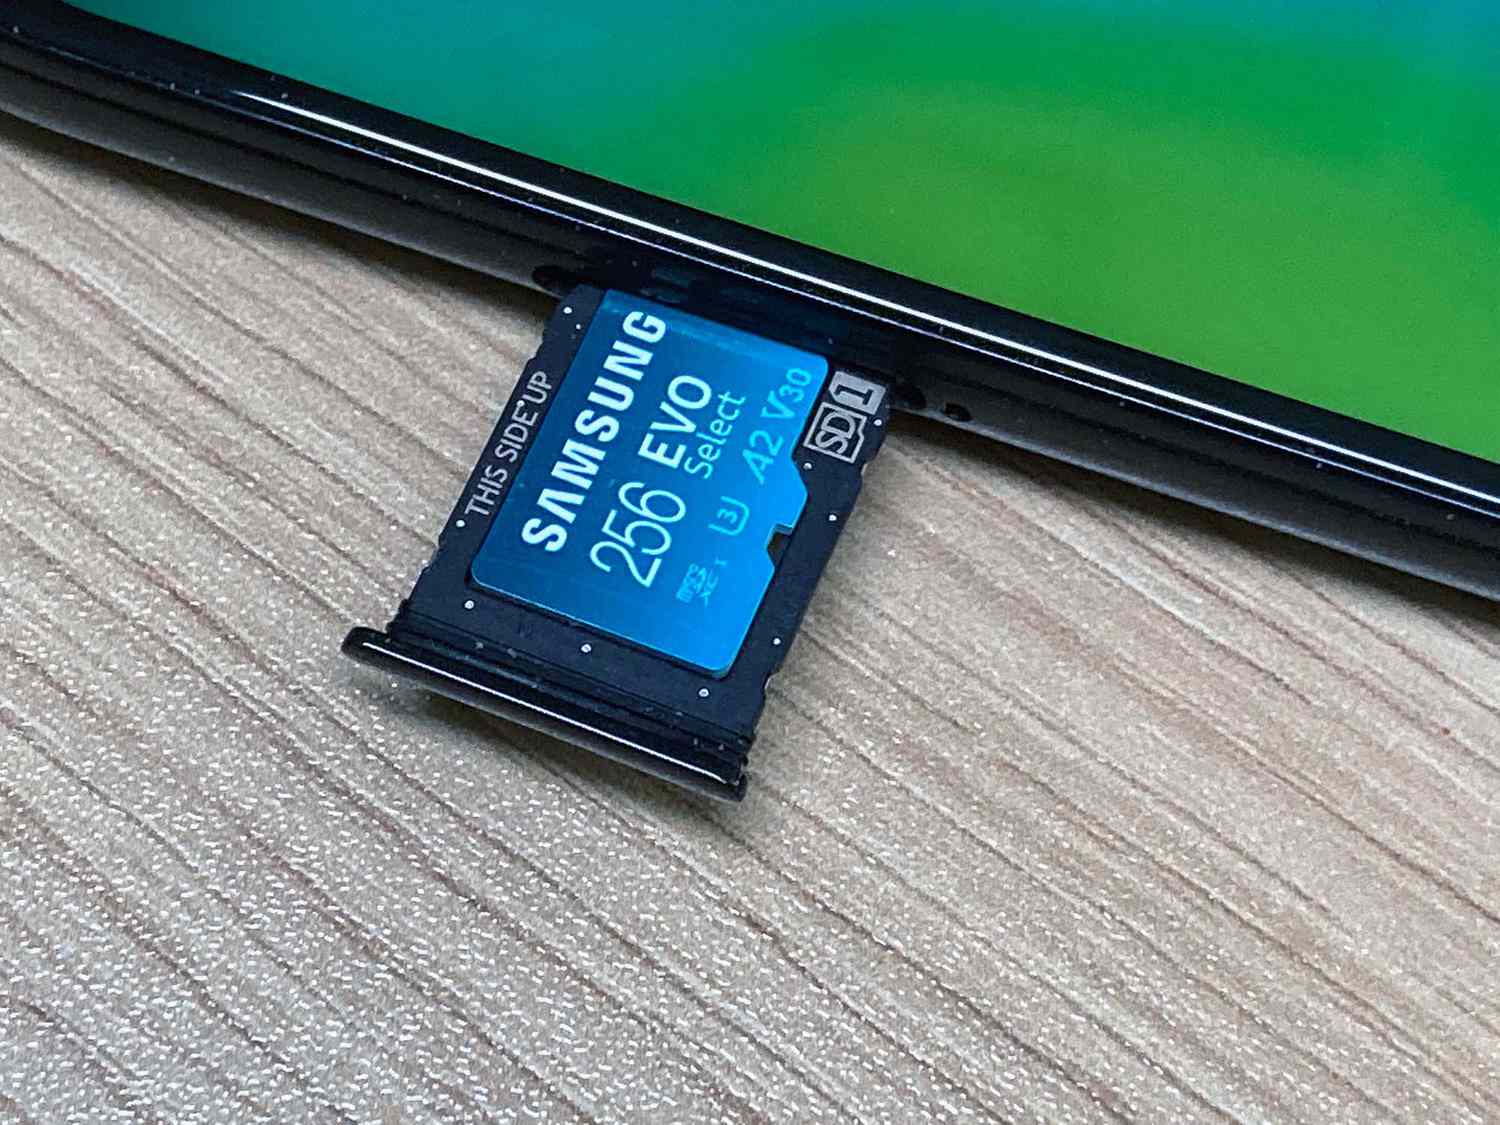
- Hold the SD card: Before inserting the SD card, gently hold it between your fingers. Take care not to touch the gold contacts or any exposed components.
- Align the SD card: Look for the notch or groove on the SD card. Align this notch or groove with the corresponding tab or groove in the SD card slot. This ensures proper alignment and prevents the SD card from being inserted incorrectly.
- Insert the SD card: With the SD card properly aligned, carefully insert it into the SD card slot. Apply gentle pressure until you feel the card slide smoothly into place. Do not force the card, as this could damage both the card and the slot.
- Verify the insertion: After inserting the SD card, check to ensure that it is fully seated in the slot. It should be flush with the tablet’s surface, with no part of the card protruding or hanging out.
- Replace the SD card slot cover (if applicable): If you removed a cover or flap in the previous step, now is the time to carefully replace it. Align the cover with its original position and gently press it until you hear or feel a click, indicating that it is securely closed.
It is important to handle the SD card with care during the insertion process. Avoid touching the gold contacts or applying excessive pressure. This will help prevent any damage to the card or the tablet.
Now that the SD card is properly inserted, you’re almost ready to power on the tablet and start utilizing the additional storage capacity. But first, let’s move on to the next step.
Step 5: Replace the SD Card Slot Cover
After successfully inserting the SD card into the slot, it’s time to replace the SD card slot cover. This cover is designed to protect the SD card and keep it secure within the slot.
If you removed a cover or flap in the previous step, follow these instructions to securely replace it:
- Align the cover: Take a moment to align the cover with its original position. Make sure the cover is correctly oriented and positioned to fit back over the SD card slot.
- Apply gentle pressure: With the cover aligned, press it gently but firmly against the tablet’s surface. Ensure that the cover is snug, and there are no gaps or loose edges.
- Listen or feel for a click: As you apply pressure, listen for a clicking sound or feel for a slight resistance. This indicates that the cover is securely closed and properly in place.
- Double-check the fit: After replacing the cover, do a quick visual inspection to confirm that it is fitting flush with the tablet’s surface. There should be no visible gaps or misalignment.
It’s important to handle the SD card slot cover with care to avoid damaging it or the tablet. If you encounter any difficulties or the cover does not stay in place securely, refer to your tablet’s user manual for specific instructions or contact the manufacturer for assistance.
Now that the SD card slot cover is securely replaced, it’s time to move on to the final step: powering on the tablet.
Step 6: Power on the Tablet
With the SD card properly inserted and the SD card slot cover replaced, it’s time to power on your tablet and ensure that the SD card is recognized and accessible. Follow these steps to power on your tablet:
- Locate the power button: Find the power button on your tablet. It is typically located on the side or top of the device. Press and hold the power button for a few seconds until the screen lights up and the tablet powers on.
- Wait for the tablet to boot up: After pressing the power button, give your tablet a few moments to complete the boot-up process. The tablet’s manufacturer logo or a loading screen may appear during this time.
- Unlock the tablet: Once the tablet has fully powered on, you may need to unlock it using your PIN, password, or fingerprint, depending on the security settings you have configured. Follow the on-screen instructions to unlock your tablet and access the home screen.
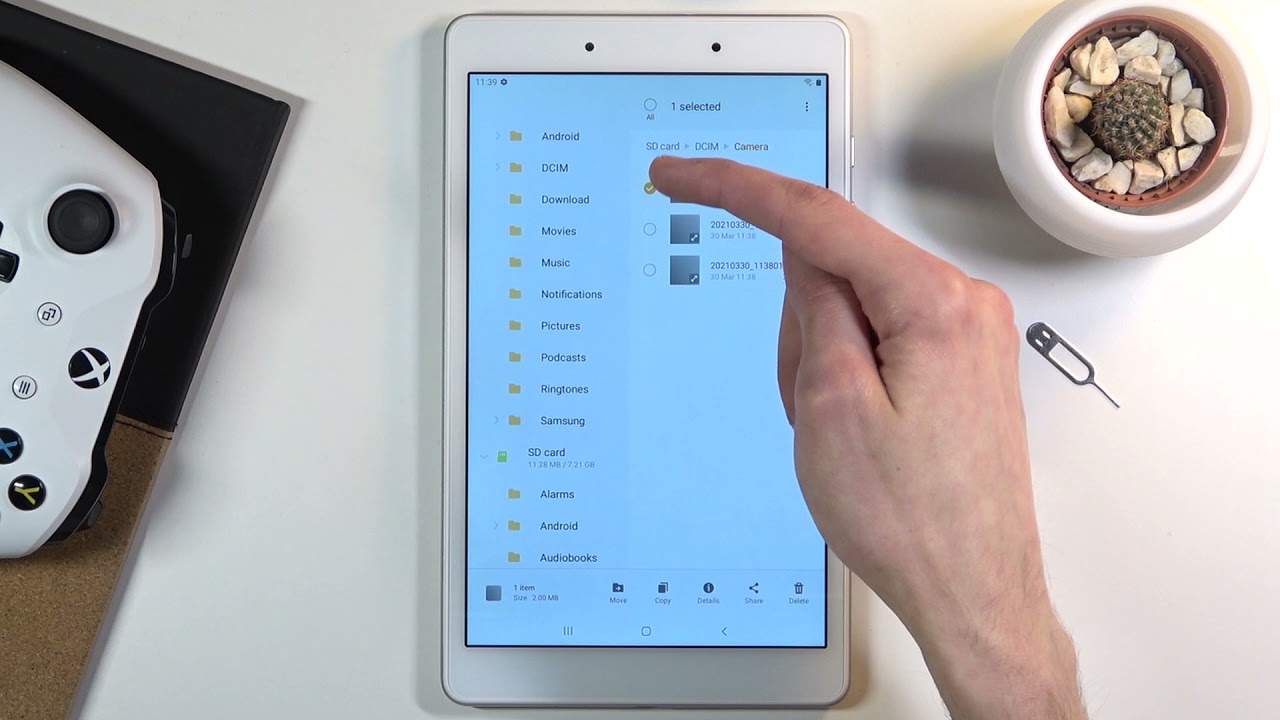
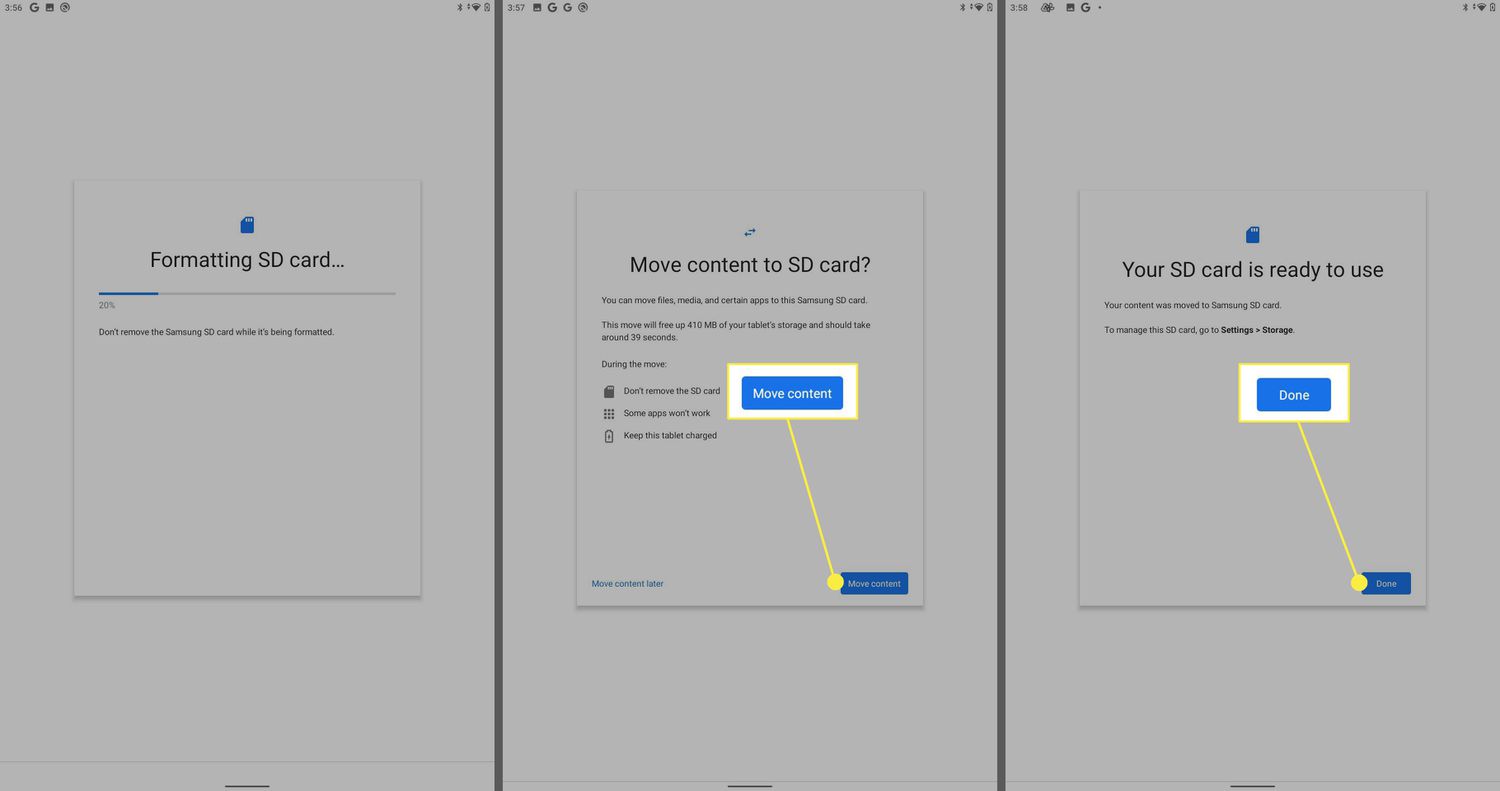
- Check for SD card recognition: Once you have unlocked your tablet and accessed the home screen, navigate to the settings or storage menu to confirm that the SD card has been recognized. You should see the additional storage capacity provided by the SD card.
- Test the SD card: To ensure that the SD card is functioning correctly, try accessing and transferring files to and from the card. You can also verify that your tablet can save new files and applications directly to the SD card.
If you encounter any issues with the SD card not being recognized or functioning properly, double-check the insertion and alignment of the SD card, restart the tablet, or refer to the tablet’s user manual for troubleshooting guidance.
Congratulations! You have successfully inserted an SD card into your tablet and powered it on. Enjoy the expanded storage capacity and the ability to carry more digital content with you wherever you go.
Conclusion
Adding an SD card to your tablet is a simple and effective way to expand its storage capacity and accommodate more photos, videos, documents, and apps. In this guide, we have provided a step-by-step process to help you insert an SD card into your tablet.
Remember to locate the SD card slot on your tablet and power off the device before proceeding. Take care when removing the SD card slot cover, align and insert the SD card properly, and securely replace the cover. Lastly, power on your tablet to ensure the SD card is recognized and functioning correctly.
Keep in mind that while the steps outlined in this guide are generally applicable, there may be slight variations in the process depending on your tablet’s make and model. It is always advisable to consult your tablet’s user manual or contact the manufacturer for specific instructions and troubleshooting.
With the additional storage space provided by the SD card, you can now enjoy the flexibility to store more files, capture more memories, and download more apps on your tablet. Whether you’re a student, professional, or casual user, the expanded storage will enhance your tablet experience.
Now that you have successfully inserted an SD card into your tablet, it’s time to make the most of your extended storage capacity and enjoy the convenience it offers. Happy exploring and may your tablet journey be filled with endless possibilities!