Introduction
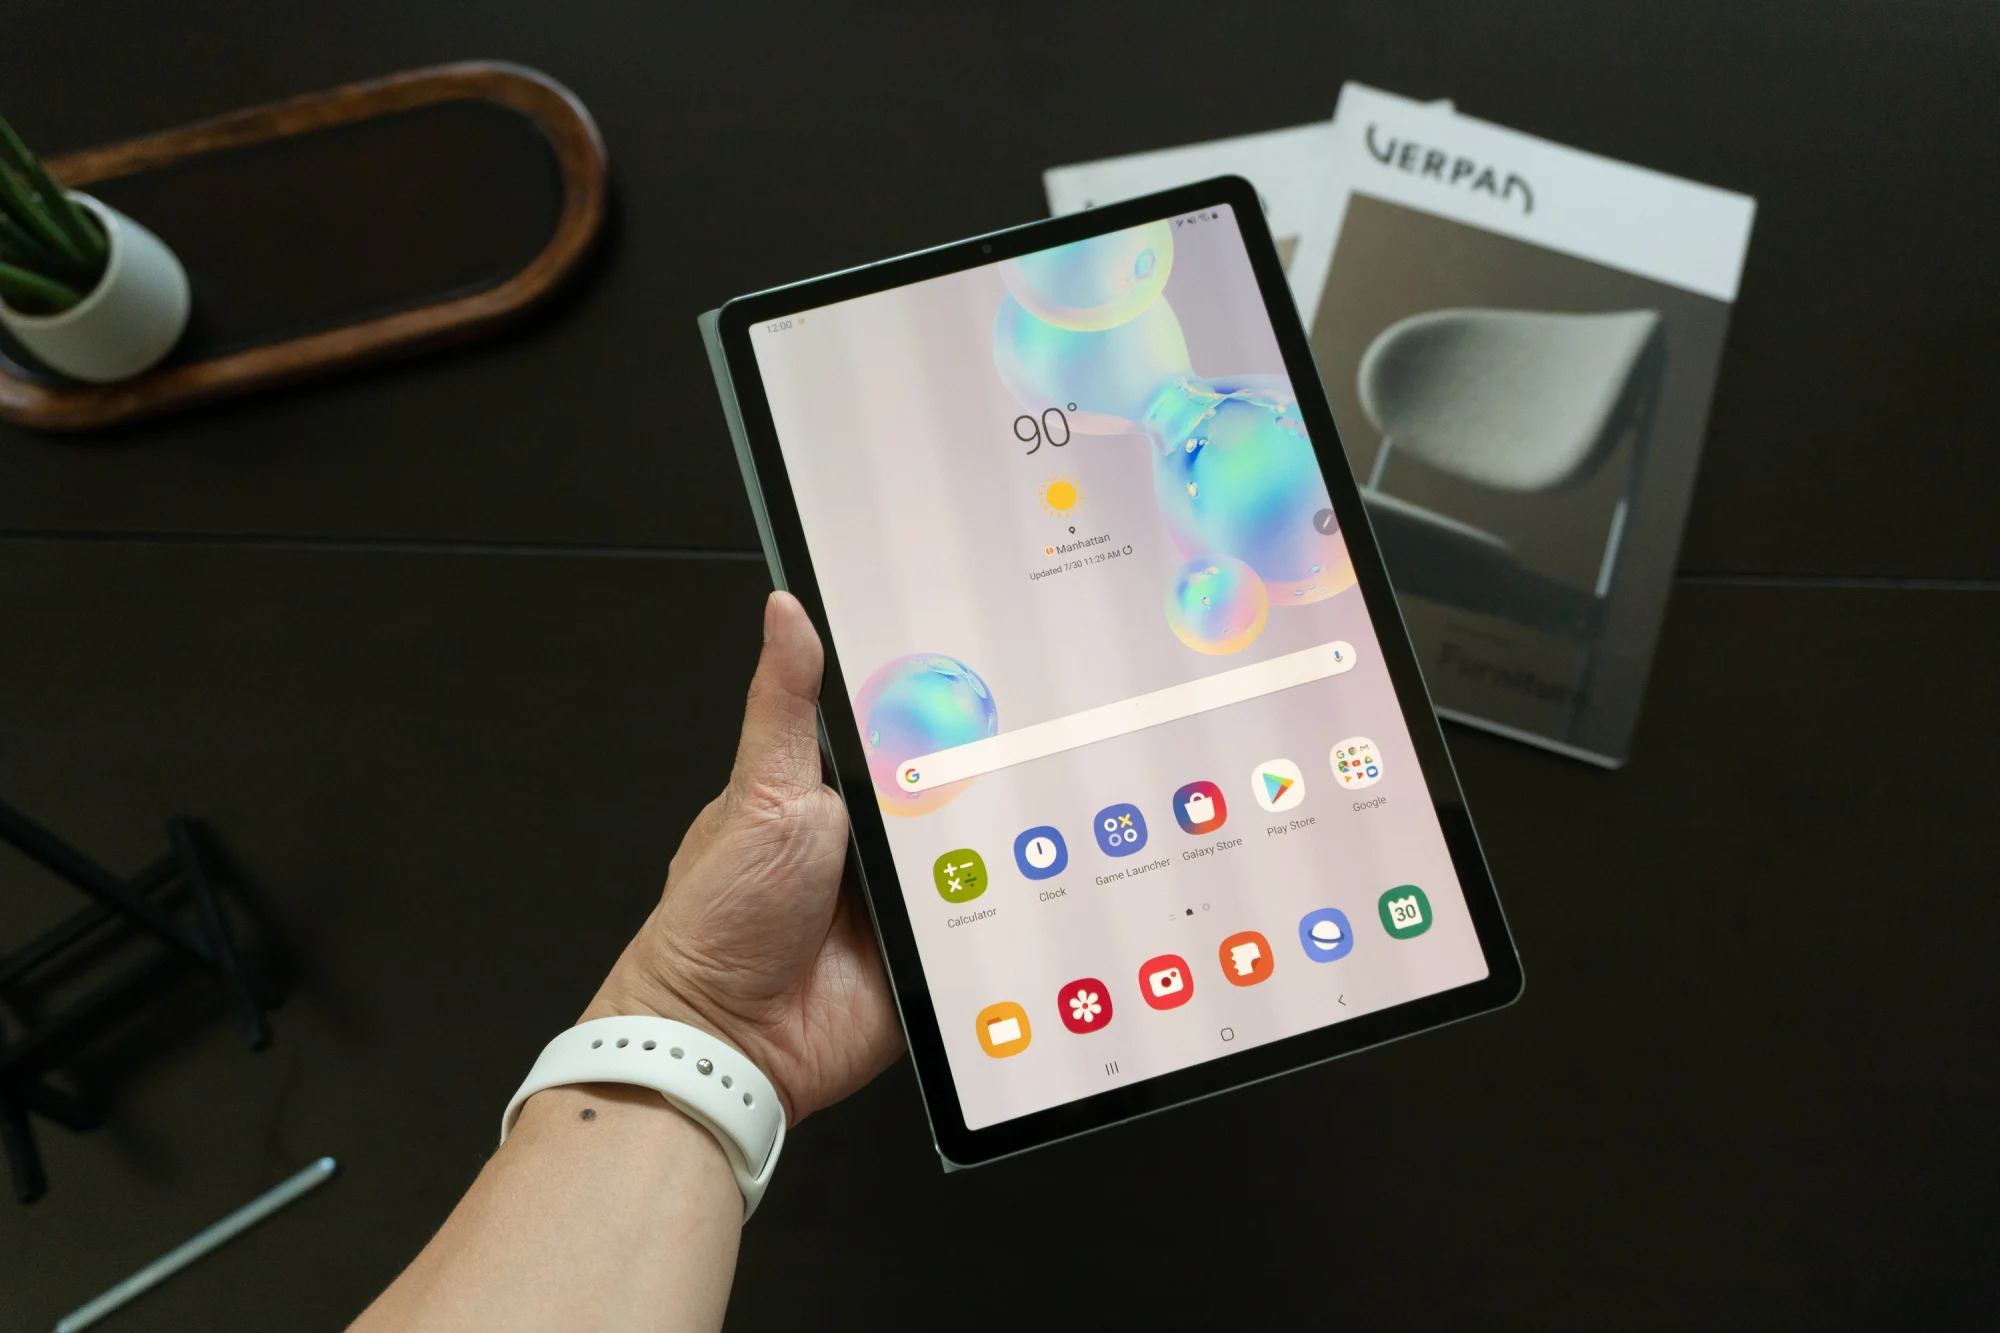
Are you running out of storage space on your Samsung tablet? Does your device come with an SD card slot? If so, you’re in luck! Moving items to an SD card can free up valuable storage on your tablet and ensure that you have space for all your important files, photos, videos, and apps.
In this article, we will guide you through the process of moving items to the SD card on your Samsung tablet. Whether it’s transferring photos, videos, music, or apps, we’ll cover all the steps you need to know to make the most of your tablet’s storage options.
By moving items to the SD card, you can not only free up storage but also keep your tablet running smoothly. The internal storage of your device may become cluttered over time, leading to performance issues. Transferring files to the SD card can help in decluttering and optimizing your tablet’s internal storage for better performance.
Before we dive into the details, it’s essential to ensure that your tablet has an SD card slot. Not all Samsung tablets come with this feature, so it’s worth checking whether your device supports expandable storage.
In the following sections, we will walk you through the steps to check if your tablet has an SD card slot, how to insert an SD card if it does, and the various methods to transfer different types of files to the SD card.
Let’s begin the journey of maximizing the storage capacity of your Samsung tablet by moving items to the SD card.
Why should you move items to SD card?
If you’re wondering why you should bother moving items to the SD card on your Samsung tablet, here are a few compelling reasons:
1. Free up storage space: One of the primary benefits of moving items to the SD card is to free up valuable storage space on your tablet. By transferring photos, videos, music, and apps to the SD card, you can ensure that your tablet’s internal storage is not overwhelmed with large files.
2. Keep your tablet running smoothly: Over time, as you accumulate more files on your tablet’s internal storage, it can start to affect the device’s performance. By offloading some of the files to the SD card, you can help declutter the internal storage and keep your tablet running smoothly.
3. Store more media: The available storage on a tablet can vary depending on the device model and storage capacity. If you enjoy capturing photos and videos or have a large music library, you may quickly fill up your tablet’s internal storage. Moving these media files to the SD card allows you to store more without worrying about running out of space.
4. Flexibility to switch devices: If you plan on upgrading to a new tablet or need to switch devices, having important files stored on the SD card makes the transition easier. Simply insert the SD card into the new device, and you’ll have access to all your files without the need for time-consuming transfers or backups.
5. Backup and data security: In the unfortunate event that your tablet malfunctions or is damaged, having files stored on the SD card provides an additional layer of backup and data security. You can easily remove the SD card from the damaged device and access your files on another device.
While there are several benefits to moving items to the SD card, it’s important to note that not all files can be transferred. Some apps or system files may still need to remain on the internal storage for proper functioning. Additionally, it’s recommended to regularly backup your files, including those on the SD card, to avoid any potential data loss.
Next, let’s explore how to check if your Samsung tablet has an SD card slot and how to insert an SD card into your device for expanded storage.
How to check if your tablet has an SD card slot
Before you start moving items to an SD card, it’s important to determine whether your Samsung tablet has an SD card slot. Here are the steps to check if your tablet supports expandable storage:
1. Consult the user manual: The user manual that came with your tablet is a valuable resource for understanding its features and specifications. Look for information about the presence of an SD card slot in the manual.
2. Physical inspection: Examine the sides or edges of your tablet for a small slot or cover. This is where the SD card slot is usually located. It’s often labeled with an “SD” or “microSD” icon.
3. Google your tablet model: If you’re unable to find information in the user manual or through a physical inspection, try searching for your tablet model online. Manufacturer websites or online forums may have specifications and details about the presence of an SD card slot.
4. Contact customer support: If you’re still unsure, reach out to the manufacturer’s customer support for assistance. They can provide accurate information about your tablet’s features and help you determine if it has an SD card slot.
Once you have confirmed that your tablet supports expandable storage, you can proceed to the next step of inserting an SD card into your Samsung tablet. This will allow you to take advantage of the additional storage space and efficiently manage your files, photos, videos, and apps.
Remember that SD cards come in different sizes and formats, so ensure that you choose a compatible SD card for your tablet. Check the user manual or manufacturer’s website for the recommended type and maximum storage capacity supported by your device.
Now that you know whether your tablet has an SD card slot, let’s move on to the steps for inserting an SD card into your Samsung tablet.
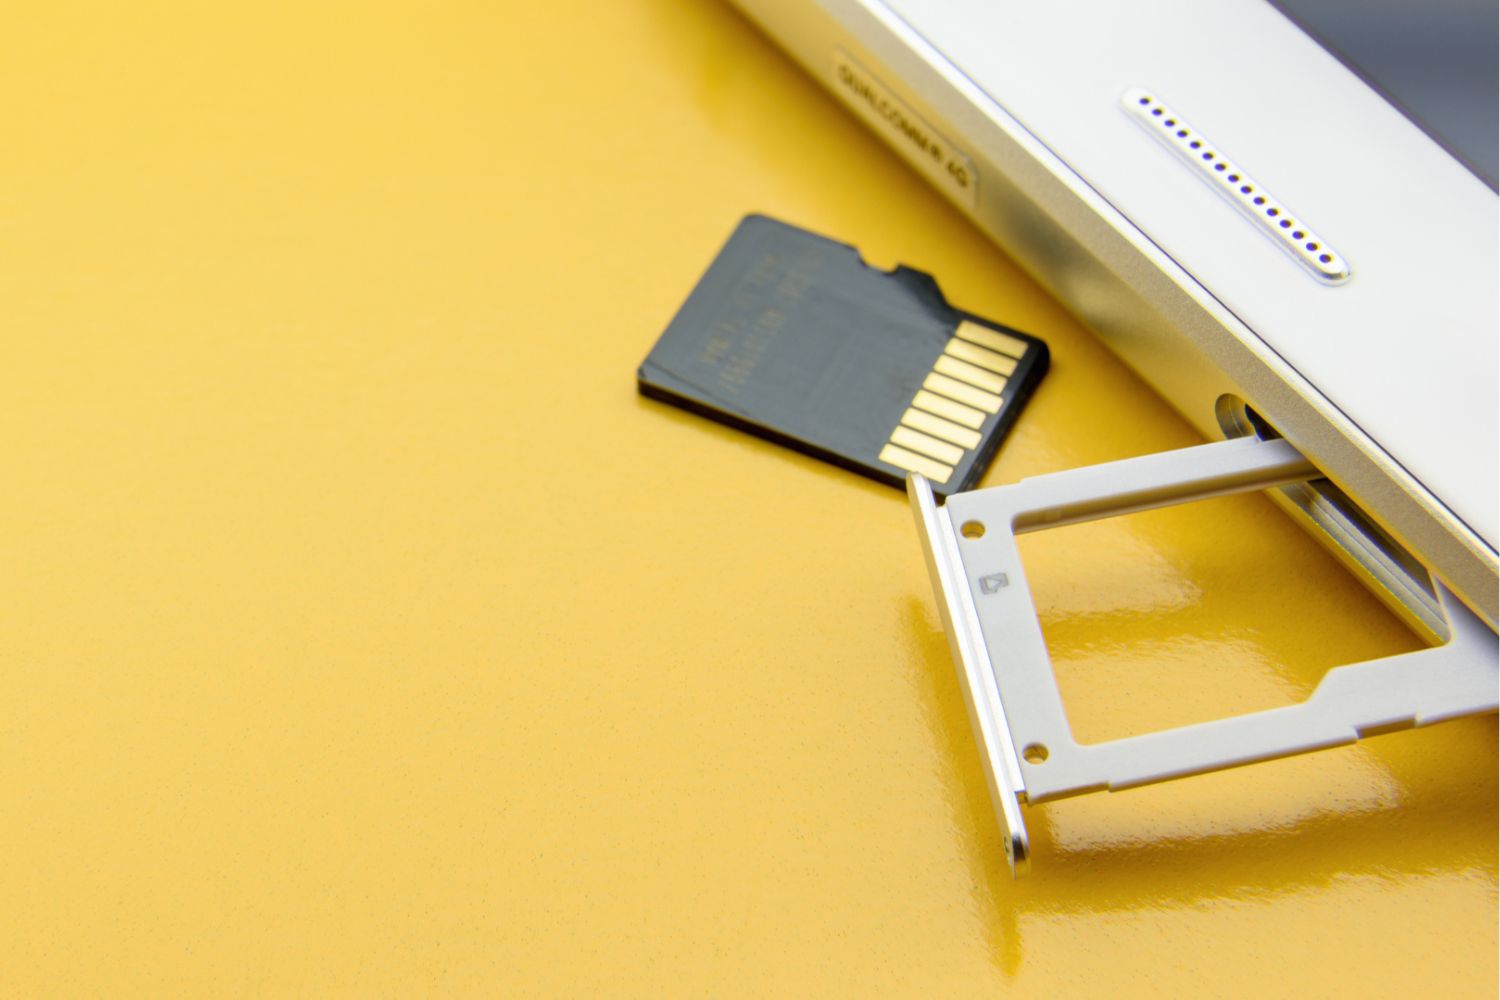
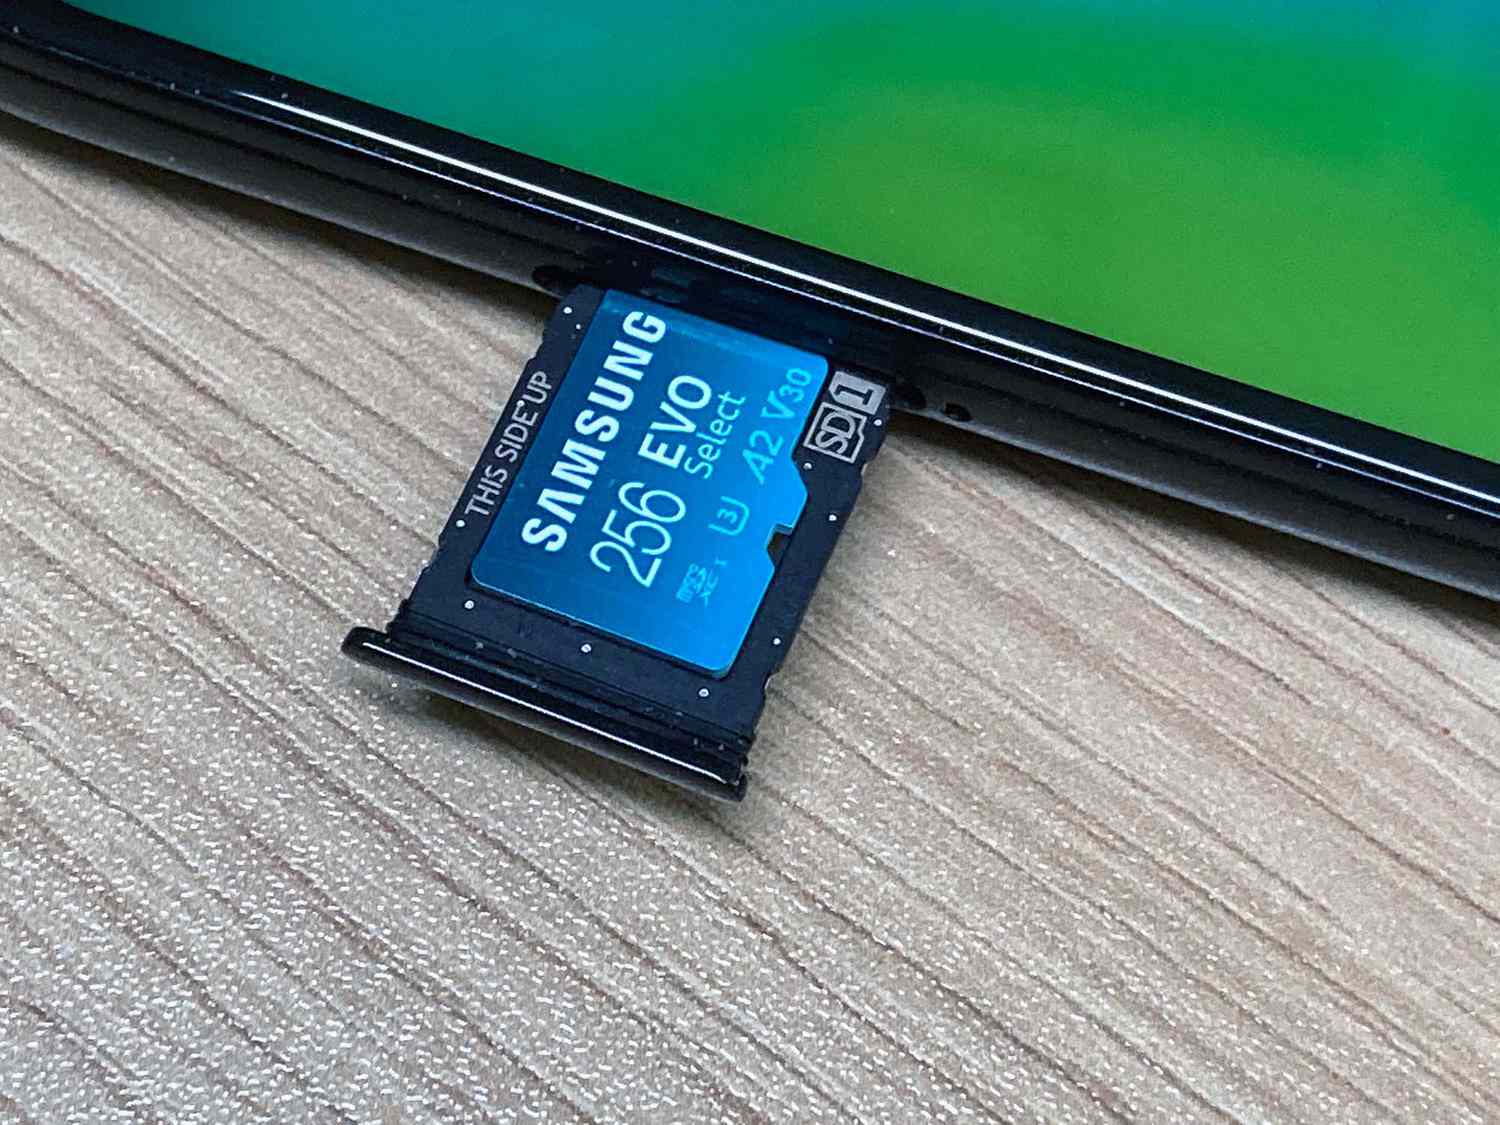
Inserting an SD card into your Samsung tablet
Once you’ve determined that your Samsung tablet has an SD card slot, you can proceed with inserting an SD card to expand your device’s storage capacity. Follow these steps to insert an SD card into your Samsung tablet:
1. Power off your tablet: Before inserting or removing an SD card, it’s essential to power off your tablet. This will prevent any damage to the device or the SD card.
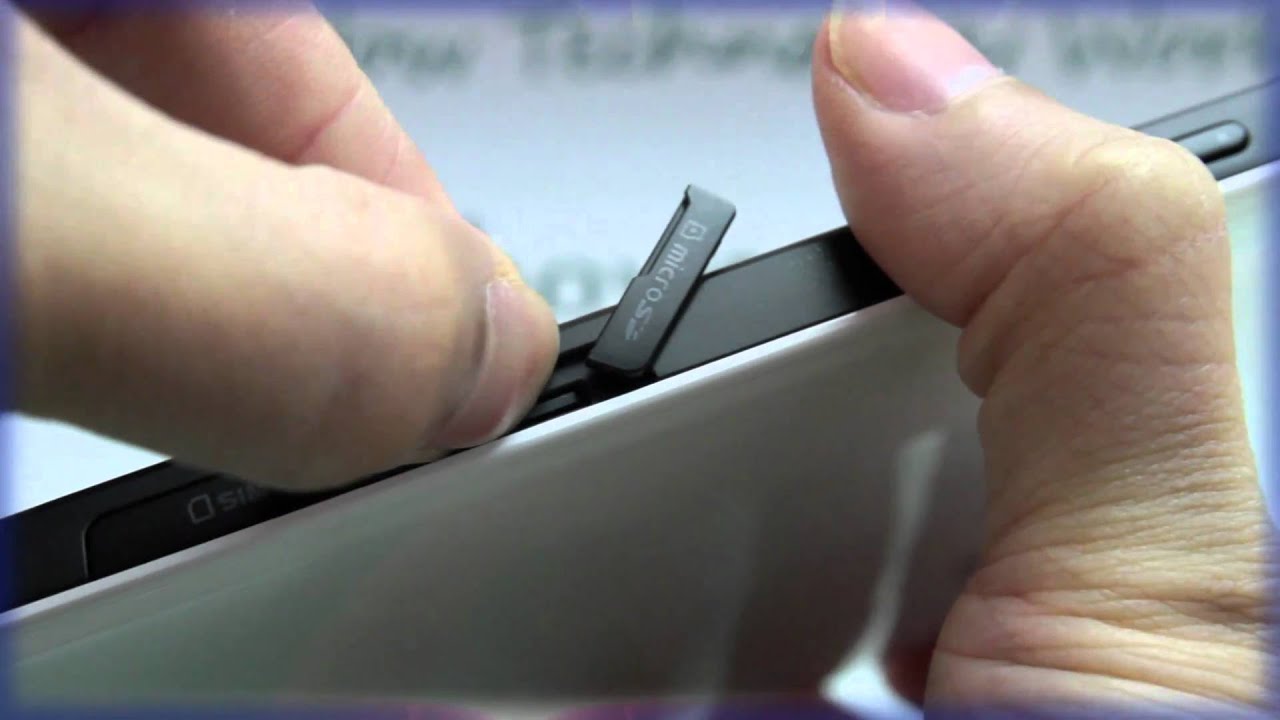
2. Locate the SD card slot: Look for the SD card slot on the sides or edges of your tablet. It’s typically a small rectangular slot labeled with an “SD” or “microSD” icon. If you’re unsure, consult the user manual or manufacturer’s website for the exact location of the SD card slot.
3. Prepare the SD card: Remove the SD card from its packaging, taking care not to touch the metal contacts on the card. If your tablet supports a microSD card, you may need to insert the card into a microSD adapter before proceeding.
4. Insert the SD card: Gently insert the SD card into the SD card slot, making sure the metal contacts on the card face down and align with the contacts in the slot. Apply light pressure until the card is securely inserted, but avoid using excessive force.
5. Secure the SD card: Once the SD card is inserted, you may hear a clicking sound or feel a slight resistance. This indicates that the card is securely in place.
6. Power on your tablet: After inserting the SD card, power on your tablet to ensure that it recognizes the newly inserted SD card. Your tablet should automatically detect and configure the SD card, making it ready for use.
It’s important to note that once the SD card is inserted, it becomes a part of your tablet’s storage system. Therefore, avoid removing the SD card while your tablet is in use to prevent data loss or software errors. If you need to remove the SD card, make sure to power off the tablet first.
Congratulations! You have successfully inserted an SD card into your Samsung tablet. In the upcoming sections, we will explore how to move different types of items, such as photos, videos, music, and apps, to the SD card for efficient storage management.
How to move photos and videos to SD card on Samsung tablet
If you’re running out of storage space on your Samsung tablet due to a large collection of photos and videos, moving them to the SD card can free up precious internal storage. Follow these steps to transfer your photos and videos to the SD card:
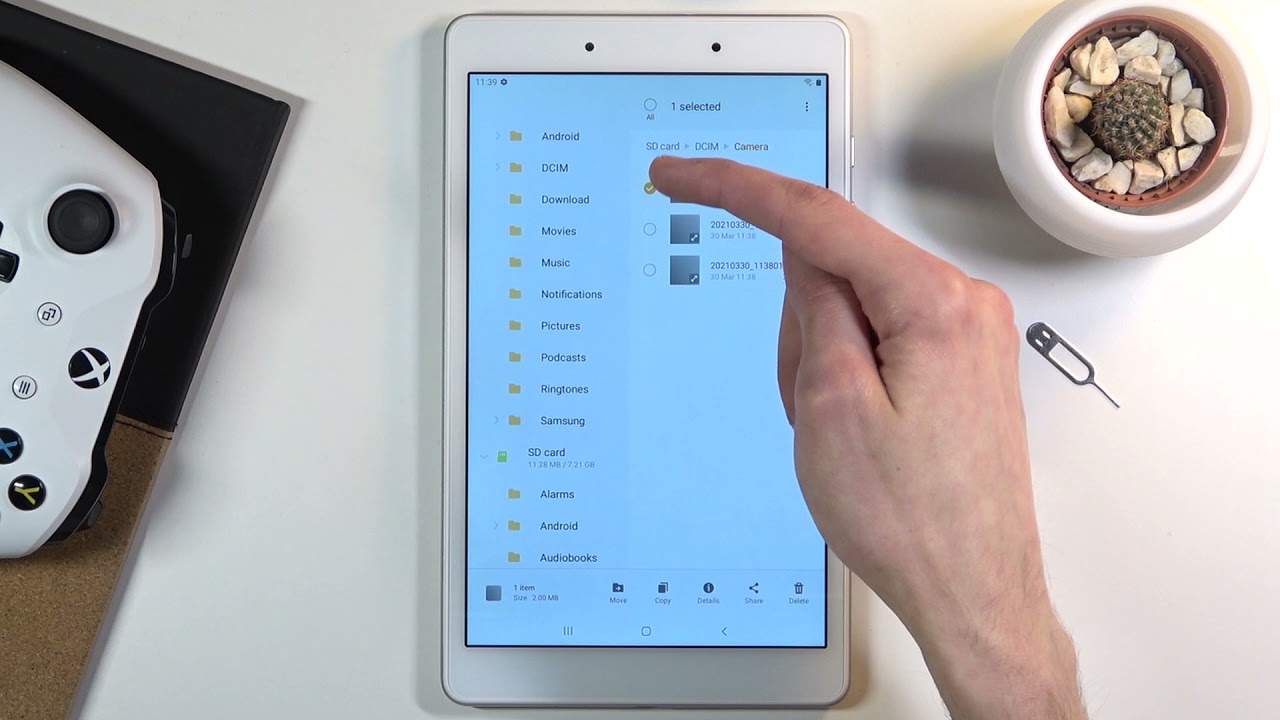
1. Open the Gallery app: Locate and open the Gallery app on your Samsung tablet. This app is usually preinstalled and displays all the photos and videos stored on your device.
2. Select the desired photos and videos: Browse through your photo and video collection and select the files you want to move to the SD card. You can tap and hold on a file to select it, or use the options menu to select multiple items.
3. Tap the “Share” or “Move” option: Once you have selected the desired files, tap the “Share” or “Move” option. This action may vary depending on the version of the Gallery app or the specific Samsung tablet model you have.
4. Choose the SD card as the destination: In the sharing or moving options, you should see the SD card listed as an available destination. Tap on the SD card option to select it as the transfer location for your photos and videos.
5. Confirm the transfer: Review the selected files and the destination (the SD card), and then tap “Move” or “OK” to initiate the transfer process. The photos and videos will be moved from the internal storage to the SD card.
6. Verify the transfer: After the transfer is complete, you can open the Gallery app and check if the photos and videos have been successfully moved to the SD card. Make sure to navigate to the SD card section within the app to view the files.
It’s important to note that moving photos and videos to the SD card does not delete them from the tablet’s internal storage. Instead, it creates copies on the SD card, allowing you to access them from either location. If you wish to reclaim the internal storage space, you can manually delete the files from the internal storage after confirming their successful transfer to the SD card.
By moving your photos and videos to the SD card, you can enjoy a larger storage capacity for capturing more memories without worrying about limited internal storage. In the next section, we will explore how to move music and audio files to the SD card on your Samsung tablet.
How to move music and audio files to SD card on Samsung tablet
If you have a vast collection of music and audio files on your Samsung tablet, moving them to the SD card can help you free up internal storage space and organize your media library. Follow these steps to transfer music and audio files to the SD card:
1. Open the Music app: Locate and open the Music app on your Samsung tablet. This app is typically preinstalled and allows you to access and listen to your music and audio files.
2. Select the files you want to move: Browse through your music library and select the files you wish to transfer to the SD card. You can tap and hold on a file to select it, or use the options menu to select multiple items.
3. Tap the “Share” or “Move” option: Once you have selected the desired music and audio files, tap the “Share” or “Move” option. The exact location of this option may vary depending on the version of the Music app or your specific Samsung tablet model.
4. Choose the SD card as the destination: Within the sharing or moving options, you should see the SD card listed as an available destination. Tap on the SD card option to select it as the transfer location for your music and audio files.
5. Confirm the transfer: Review the selected files and the destination (the SD card), and then tap “Move” or “OK” to initiate the transfer process. The music and audio files will be moved from the internal storage to the SD card.
6. Verify the transfer: After the transfer is complete, you can open the Music app and check if the music and audio files have been successfully moved to the SD card. Ensure that you navigate to the SD card section within the app to access the files.
Please note that moving music and audio files to the SD card does not delete them from the tablet’s internal storage. Instead, it creates copies on the SD card, allowing you to access them from either location. If you wish to reclaim the internal storage space, you can manually delete the files from the internal storage after confirming their successful transfer to the SD card.
By moving your music and audio files to the SD card, you can enjoy a larger storage capacity for your media collection and have easy access to your favorite tracks. In the next section, we will explore how to move apps to the SD card on your Samsung tablet.
How to move apps to SD card on Samsung tablet
If you’re running low on internal storage space on your Samsung tablet, moving apps to the SD card can help free up valuable space and optimize the performance of your device. Here’s how to move apps to the SD card:
1. Open the Settings app: Go to the main settings menu on your Samsung tablet. You can usually access it by swiping down from the top of the screen and tapping the gear icon or by locating the Settings app in your app drawer.
2. Select “Apps” or “Applications”: Depending on your tablet model and Android version, you may find the option labeled as either “Apps” or “Applications” in the settings menu. Tap on it to proceed.
3. Choose the app you want to move: In the list of installed apps, locate the app that you want to move to the SD card. Tap on the app to access its information and settings.
4. Check the app’s storage details: Within the app information page, you should see an option called “Storage” or “Storage details.” Tap on it to view the app’s storage usage and available options.
5. Select “Change” or “Move to SD card”: Look for an option labeled “Change” or “Move to SD card” within the storage details of the app. Tap on it to initiate the process of moving the app to the SD card.
6. Confirm the app move: A confirmation prompt will appear, informing you about the implications and limitations of moving the app to the SD card. Read the information carefully and tap “OK” or “Move” to proceed. Note that not all apps can be moved to the SD card, as some may require specific storage configurations to function properly.
7. Wait for the app to be moved: The system will initiate the process of moving the app to the SD card. This may take some time, depending on the app’s size and your tablet’s performance. Be patient and avoid interrupting the process.
8. Verify the app’s location: Once the app is successfully moved to the SD card, you can check its storage location in the app’s settings or in the “Apps” section of your device settings. The app will now occupy space on the SD card, freeing up internal storage on your tablet.
It’s important to note that not all apps can be moved to the SD card. System apps, certain pre-installed apps, and apps that require specific storage configurations may not have the option to be moved. Additionally, after updating the app or removing the SD card, some apps may be automatically moved back to the internal storage.
By moving compatible apps to the SD card, you can make more room for other essential files and improve the overall performance of your Samsung tablet. In the next section, we will explore how to manage files on the SD card for efficient storage organization.
Managing files on the SD card
Once you have moved files to the SD card on your Samsung tablet, it’s important to effectively manage and organize them for easy access and efficient storage usage. Here are some tips for managing files on the SD card:
1. Use file manager apps: Install a file manager app from Google Play Store that allows you to navigate, view, and manage files on both the internal storage and the SD card. These apps provide a user-friendly interface where you can easily move, copy, rename, or delete files on the SD card.
2. Create folders: Organize your files into different folders based on categories or themes. For example, you can create separate folders for photos, videos, music, documents, or specific projects. This will help you locate files quickly and maintain a clutter-free storage system.
3. Regularly backup your files: Even though the SD card provides additional storage and security, it’s always a good practice to create backups of your important files. You can periodically transfer files from the SD card to your computer, cloud storage, or external drives to ensure you have multiple copies in case of any accidental deletion or SD card issues.
4. Clean up unnecessary files: Regularly review your files on the SD card and remove any duplicates, outdated files, or files you no longer need. This will free up space and keep your storage organized.
5. Scan for malware: Use reliable antivirus software to scan your SD card regularly for any potential malware or virus infections. This will help protect your files and maintain the security of your tablet.
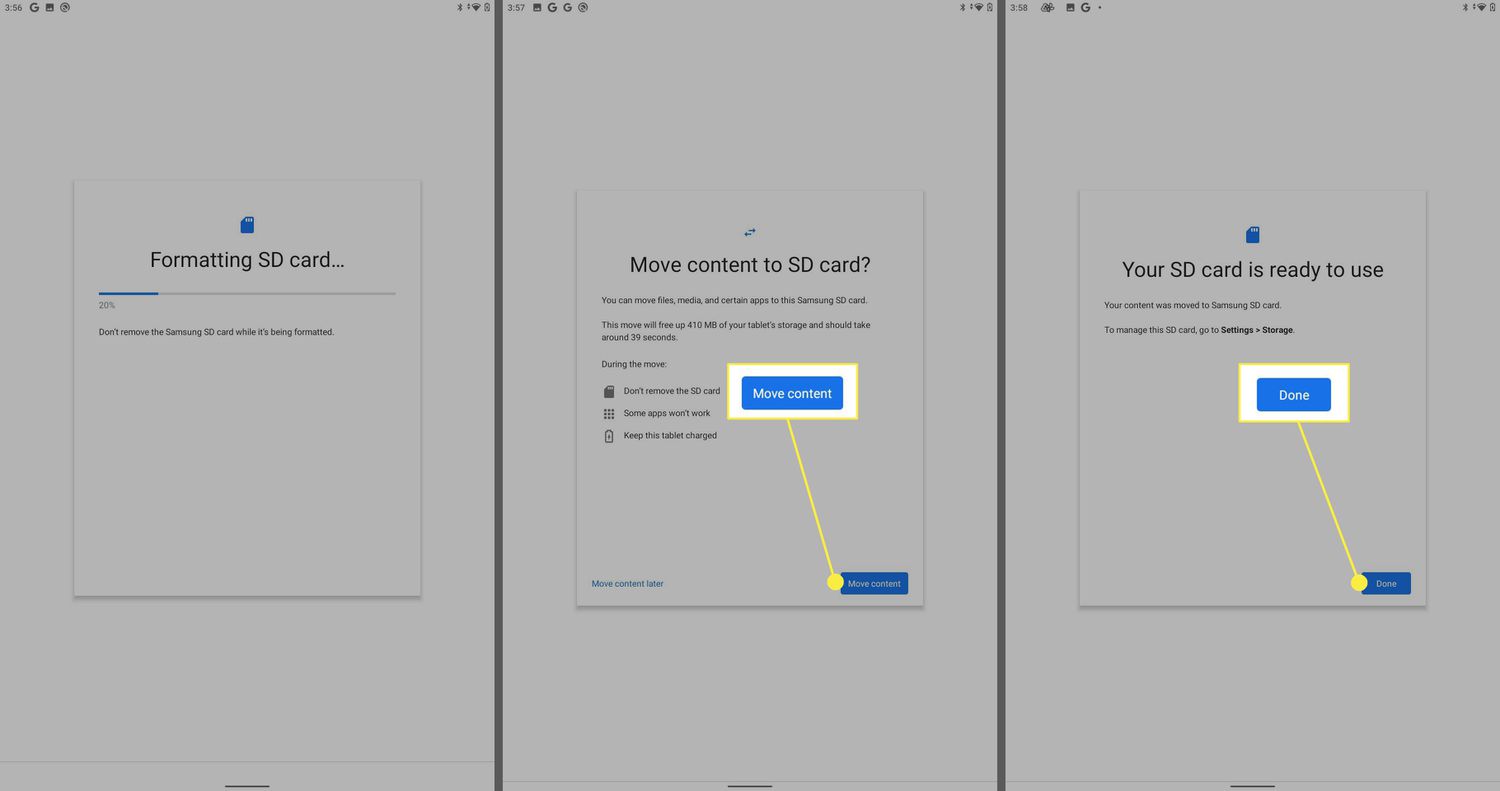
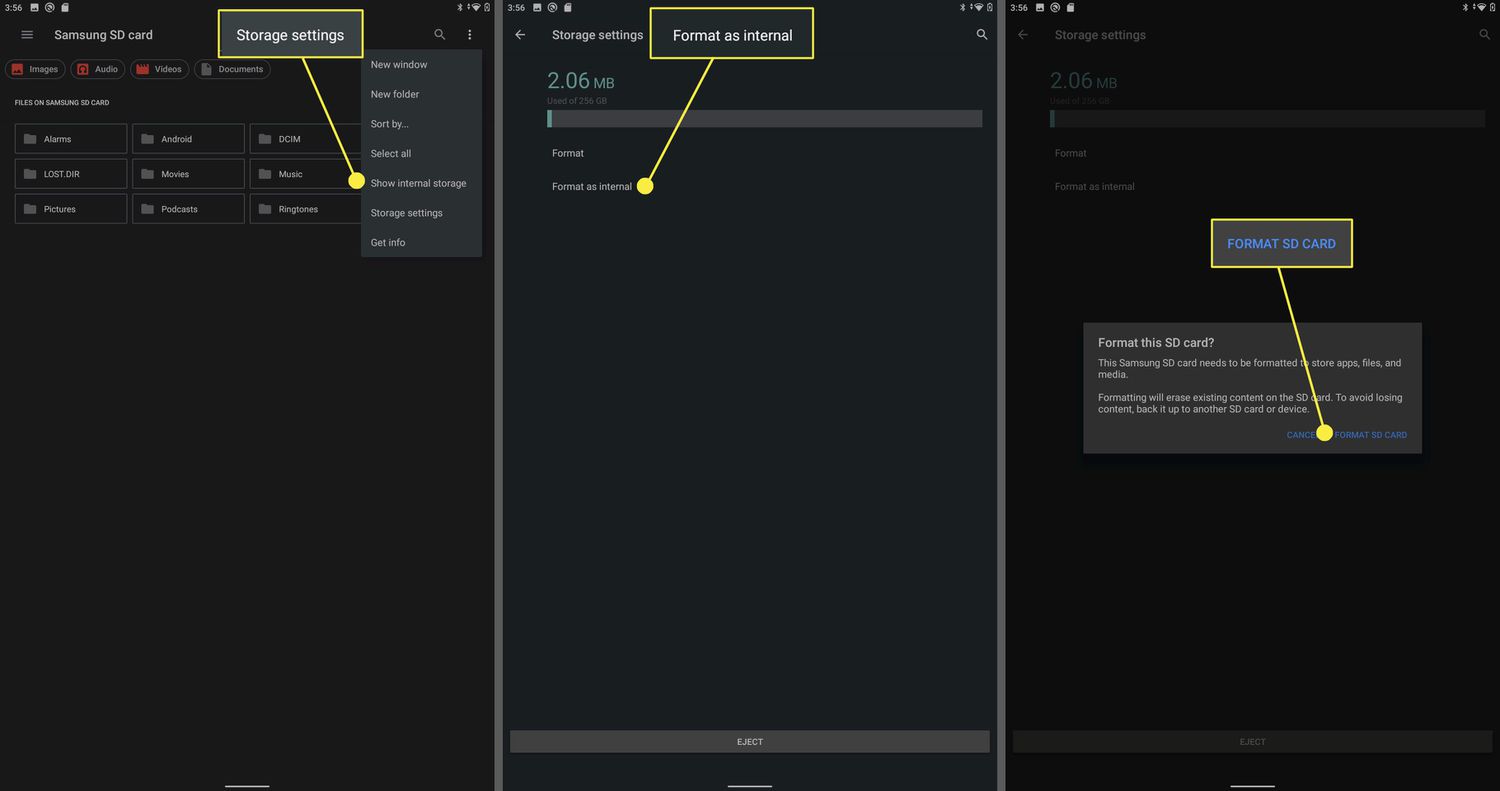
6. Format the SD card: If you encounter any issues with the SD card or if you want to start fresh, you can format the SD card. However, keep in mind that formatting will erase all the data on the card, so make sure to backup your files before proceeding.
7. Handle the SD card with care: Proper handling of the SD card is crucial to prevent any damage or data loss. Avoid removing the SD card while the tablet is in use, as it can lead to file corruption. When removing the SD card, make sure to power off the tablet first to prevent any potential data loss or system errors.
Remember to follow the manufacturer’s guidelines and recommendations for using the SD card with your specific Samsung tablet model. By effectively managing files on the SD card, you can optimize storage usage, keep your files organized, and ensure the longevity of your tablet’s storage system.
In the next section, we will provide some troubleshooting tips to help you overcome any potential challenges you may encounter when moving items to the SD card on your Samsung tablet.
Troubleshooting tips for moving items to SD card
While moving items to the SD card on your Samsung tablet is generally a straightforward process, you may encounter some challenges along the way. Here are some troubleshooting tips to help you overcome common issues:
1. SD card not detected: If your tablet doesn’t recognize the SD card, ensure that the card is inserted correctly and securely. Try removing and reinserting the SD card, making sure it clicks into place. If the issue persists, try using a different SD card to check if the problem lies with the card itself.
2. Apps cannot be moved: Not all apps can be moved to the SD card, as some require specific storage configurations to function properly. If you’re unable to move an app, it’s likely because the app doesn’t support it. In such cases, focus on moving other types of files to the SD card to free up internal storage.
3. Slow transfer speeds: If you experience slow transfer speeds when moving items to the SD card, it may be due to the SD card’s speed class. Consider using a higher-speed class SD card for faster data transfer rates. Additionally, ensure that your tablet’s firmware and software are up to date, as updates often include performance improvements.
4. File compatibility: In some cases, certain files may not be compatible with the SD card. Ensure that the file formats are supported by the tablet and the specific apps you use. If you encounter any compatibility issues, try converting the file to a compatible format or using alternative apps that support the file type.
5. Insufficient space on the SD card: If you’re unable to move items due to insufficient space on the SD card, consider deleting unnecessary files or transferring them to another storage location. Regularly review and manage the files on the SD card to optimize storage usage.
6. Incorrectly formatted SD card: Ensure that the SD card is properly formatted and compatible with your tablet. If needed, format the SD card using your tablet’s settings or a computer, following the recommended format (e.g., FAT32 or exFAT).
7. Issues after system update: If you encounter problems moving items after a system update, try rebooting your tablet or clearing the cache of the affected apps. This can help resolve any temporary conflicts or glitches caused by the update.
If you’re still facing issues with moving items to the SD card, it is recommended to reach out to Samsung support or consult the user manual of your tablet for further assistance. They can provide specific troubleshooting steps based on your tablet model and software version.
With these troubleshooting tips in mind, you’ll be better equipped to resolve any issues that may arise when moving items to the SD card on your Samsung tablet. Now you can make the most of the expanded storage and enjoy a seamless experience on your device.
Conclusion
Moving items to the SD card on your Samsung tablet can be a game-changer when it comes to optimizing storage space and managing your files efficiently. Whether it’s photos, videos, music, or apps, transferring them to the SD card allows you to free up internal storage and keep your tablet running smoothly.
In this article, we covered the importance of moving items to the SD card, how to check if your tablet has an SD card slot, and the steps to insert an SD card. We also explored how to move photos, videos, music, and apps to the SD card, and provided tips for managing and troubleshooting issues that may arise.
Remember to regularly review your files on the SD card, keep backups, and organize them into folders for easy access. Take note of the compatibility of files and app limitations when moving items, and handle the SD card with care to avoid data loss or damage.
By making the most of the expandable storage options on your Samsung tablet, you can enjoy a larger capacity for your files, enhance the overall performance of your device, and have a more organized digital experience.
Should you encounter any difficulties or have specific questions about your Samsung tablet, refer to the user manual or reach out to Samsung support for further assistance. They can provide tailored advice and guidance based on your tablet model and software version.
Now that you’re equipped with the knowledge and steps to move items to the SD card, go ahead and optimize your tablet’s storage space to enjoy a seamlessly organized digital journey.