Introduction
Welcome to the digital age, where our devices are constantly filled with a plethora of apps, media files, and documents. As technology advances, so does our need for more storage on our devices. If you’re a proud owner of a Samsung tablet, you may be wondering how to get more storage to accommodate your growing needs. Look no further, as we have some practical tips and tricks to help you optimize your storage space and make the most out of your Samsung tablet.
Your Samsung tablet may come with a specific amount of built-in storage, which can range from 16GB to 256GB or more, depending on the model. However, this storage can quickly fill up with downloaded apps, photos, videos, and other files. When your tablet’s storage is nearing its limit, you may experience lag, slower performance, and the inability to download additional files or apps.
But fret not! There are several ways you can free up or expand the storage capacity of your Samsung tablet, allowing you to continue enjoying a seamless and efficient digital experience. From clearing cache and app data to transferring files to external storage solutions, we’ll explore various methods to help you maximize the storage space on your Samsung tablet.
It’s time to take control of your Samsung tablet’s storage and create more room for your favorite apps, media, and documents. Let’s dive into the following sections and discover how you can optimize your tablet’s storage to meet your needs.
Check Available Storage
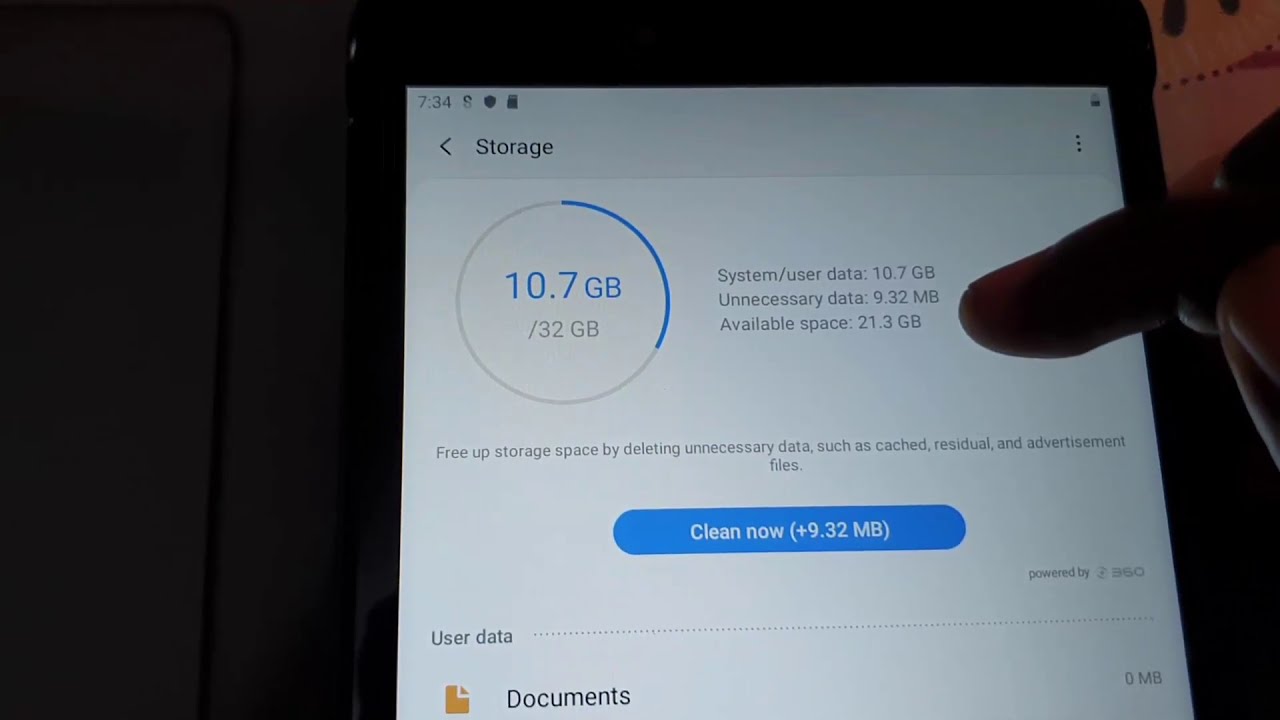
Before diving into the various methods of acquiring more storage for your Samsung tablet, it’s essential to understand your current storage situation. By checking the available storage, you can determine how much space you have left and identify which areas are taking up the most room.
To check your tablet’s available storage, follow these simple steps:
- Open the Settings app on your Samsung tablet.
- Scroll down and tap on ‘Device care’ or ‘Storage’ (depending on your tablet model).
- You’ll see a visual representation of your tablet’s storage, with different categories such as Apps, Images, Videos, Audio, and Other.
- Tap on any of these categories to get detailed information about the storage consumption.
Once you’ve identified which categories are taking up the most space, you can proceed to declutter and optimize your tablet’s storage accordingly.
Checking your available storage is not only essential for managing your current space but also for planning your future storage needs. It allows you to make informed decisions about which files or apps to keep and which ones can be safely removed to free up space.
In the following sections, we will explore various methods to help you optimize and expand your tablet’s storage, giving you more space and flexibility to store your favorite files and apps.
Clear Cache and App Data
One of the first and easiest ways to free up storage space on your Samsung tablet is by clearing the cache and app data. Over time, apps accumulate temporary files and data that can take up a significant amount of storage. Clearing this data not only frees up space but can also improve the performance of your tablet.
To clear cache and app data on your Samsung tablet, follow these steps:
- Open the Settings app on your tablet.
- Scroll down and tap on ‘Apps’ or ‘Applications’.
- You’ll see a list of all installed apps on your tablet.
- Select the app you want to clear the cache or data for.
- Tap on ‘Storage’.
- Here, you’ll see options to clear cache or clear data.
- Tap on ‘Clear cache’ to remove temporary files or ‘Clear data’ to delete all app-related data, including login credentials and settings.
It’s important to note that clearing the app data will remove any saved preferences or settings within the app. By clearing the cache and app data for frequently used apps or apps that are taking up significant storage space, you can quickly free up valuable storage on your tablet.
Repeat this process for multiple apps to maximize the storage reclaimed. Keep in mind that clearing app data may require you to sign in again or reset app-specific settings, so proceed with caution.
Now that you’ve cleared the cache and app data, you should see a noticeable improvement in your tablet’s storage space. However, if you still need more space, let’s move on to the next section where we’ll discuss uninstalling unnecessary apps.
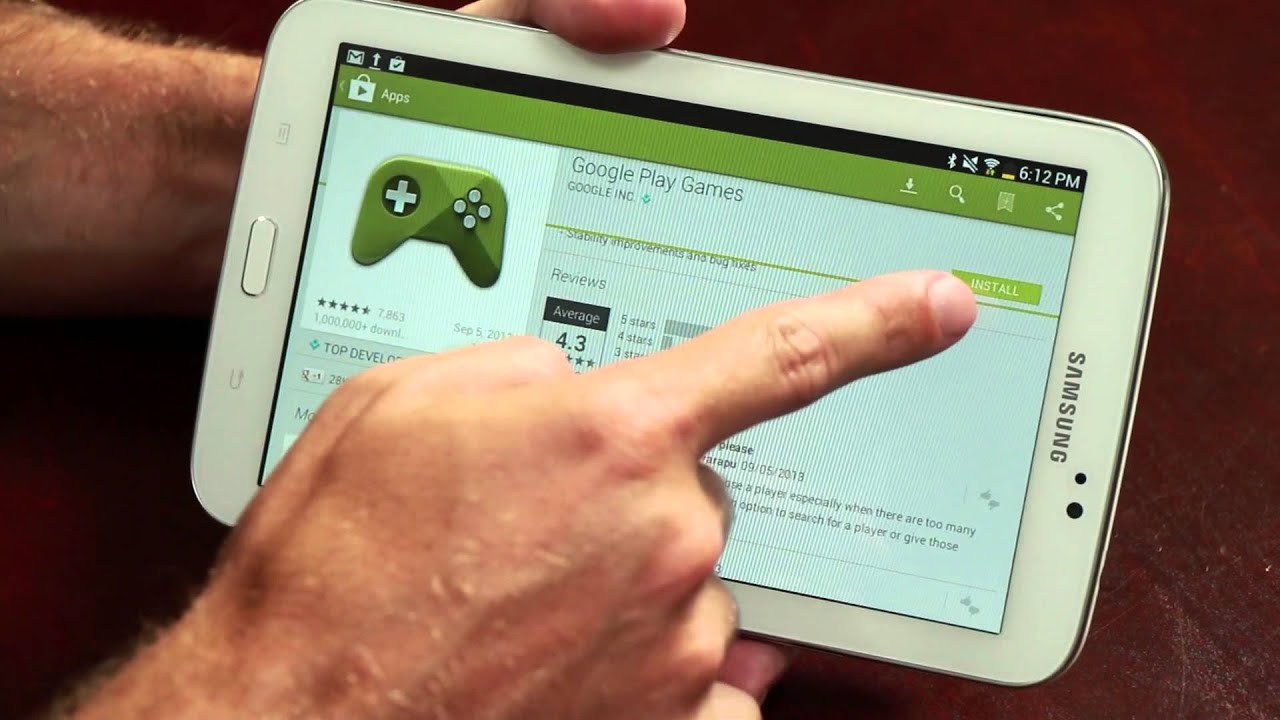
Uninstall Unnecessary Apps
If you’re looking to free up even more storage on your Samsung tablet, it’s time to take a closer look at the apps you have installed. Over time, you may have accumulated a collection of apps that you no longer use or need. Uninstalling these unnecessary apps can not only help you regain storage space but also declutter your device and improve overall performance.
To uninstall unnecessary apps on your Samsung tablet, follow these steps:
- Open the Settings app on your tablet.
- Scroll down and tap on ‘Apps’ or ‘Applications’.
- You’ll see a list of all installed apps on your tablet.
- Select the app you want to uninstall.
- Tap on ‘Uninstall’ or ‘Delete’.
- Confirm the action when prompted.
Repeat this process for all the apps you no longer need. You’ll be surprised at how much storage space you can reclaim just by removing apps you rarely use.
When deciding which apps to uninstall, consider the ones that take up a significant amount of space, ones that you haven’t used in a long time, or ones that have similar functionality to another app you prefer.
Additionally, some pre-installed apps on your tablet may not be essential for your needs. While you might not be able to uninstall these apps, you can disable them to prevent them from taking up valuable storage space.
By carefully curating the apps installed on your Samsung tablet and removing those that are unnecessary, you’ll create more room for the apps you actually use and enjoy. If you still need more storage or want to optimize further, let’s move on to the next section where we’ll discuss moving apps to the SD card.
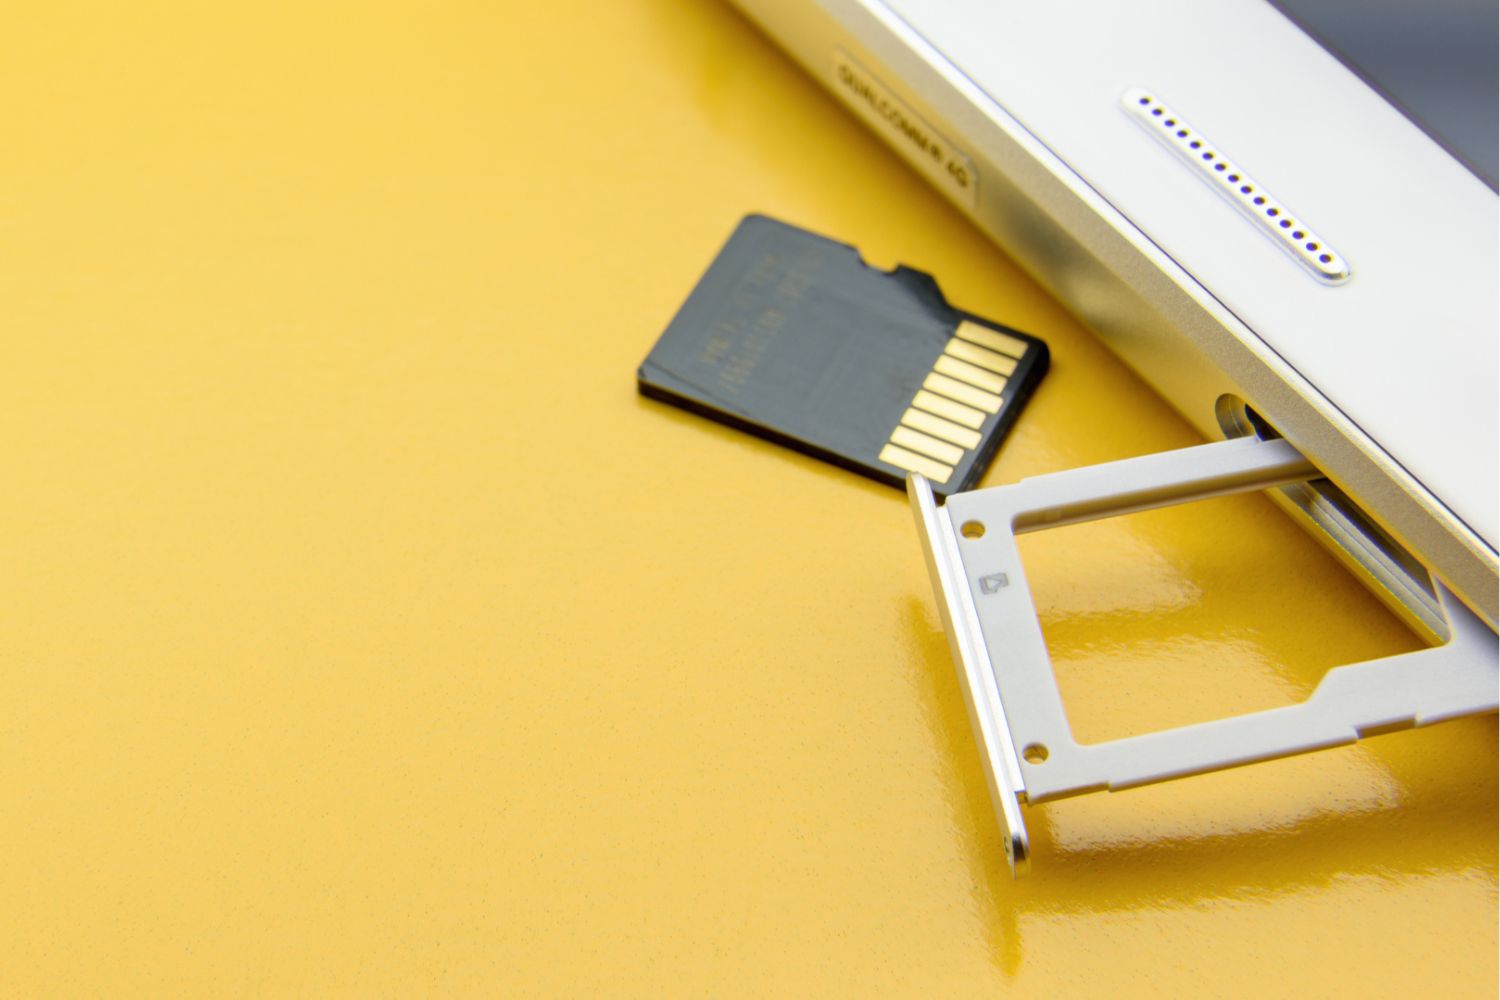
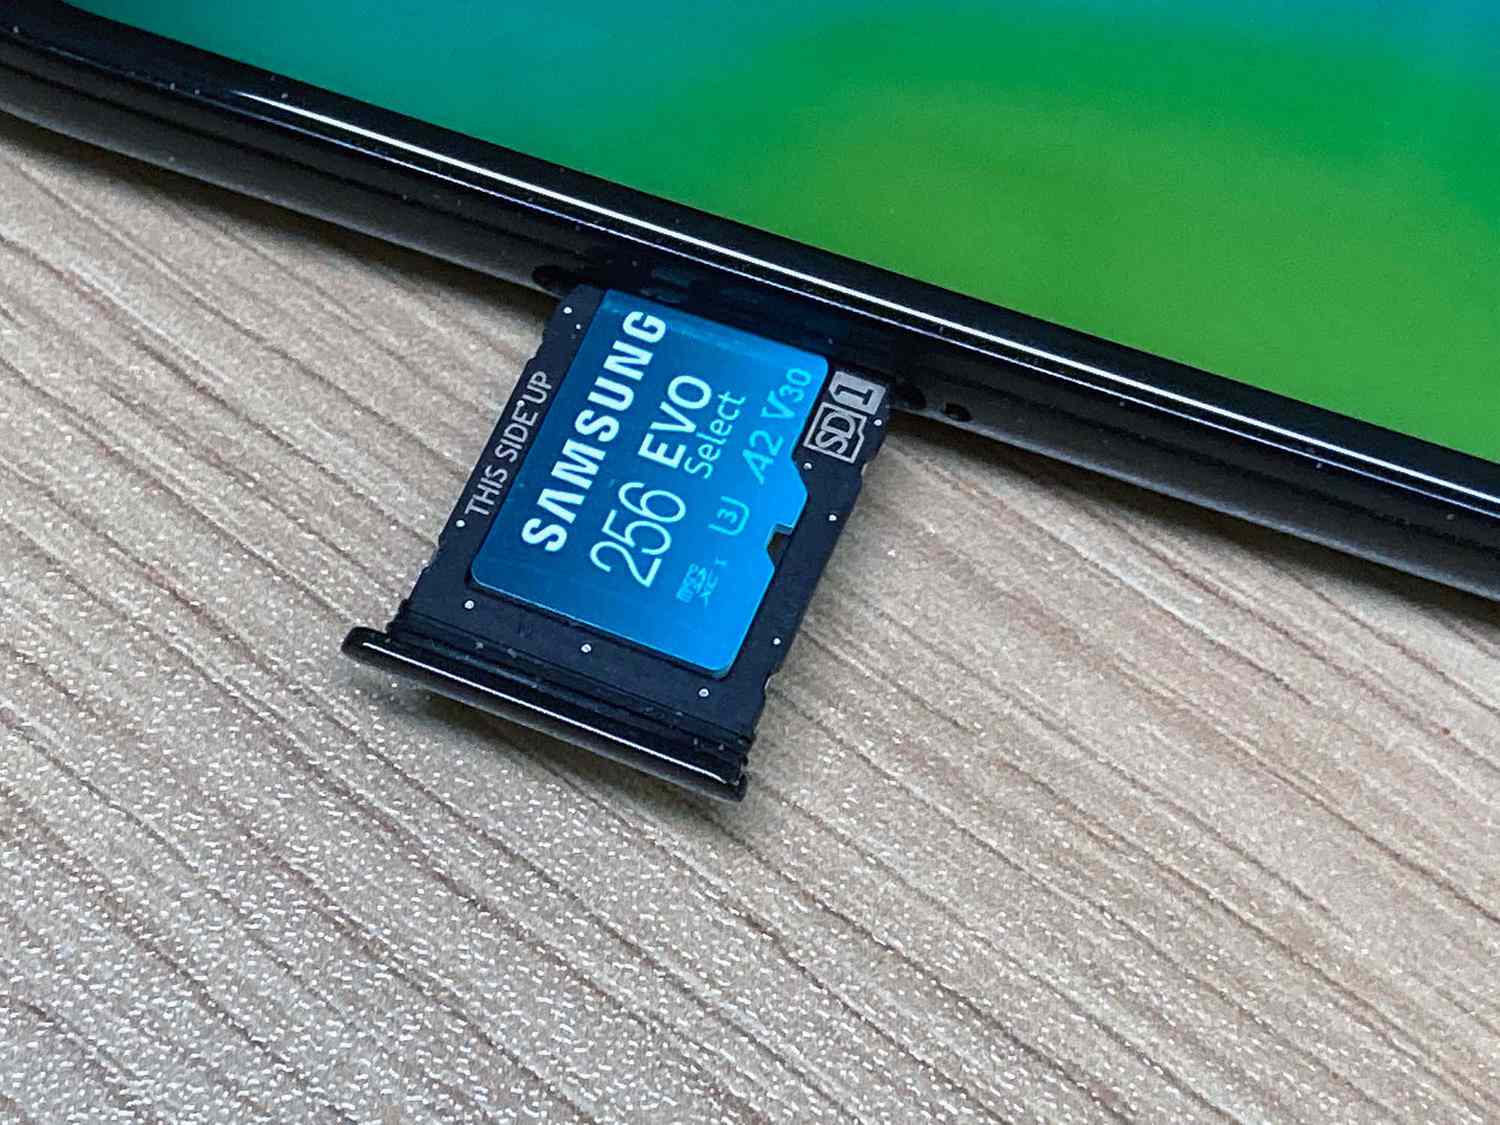
Move Apps to SD Card
If your Samsung tablet has an SD card slot, you can make use of it to expand your storage capacity by moving apps to the SD card. This option is especially useful for devices with limited internal storage.
To move apps to the SD card on your Samsung tablet, follow these steps:
- Open the Settings app on your tablet.
- Scroll down and tap on ‘Apps’ or ‘Applications’.
- You’ll see a list of all installed apps on your tablet.
- Select the app you want to move to the SD card.
- Tap on ‘Storage’.
- If the option to ‘Change’ or ‘Move to SD card’ is available, tap on it.
- Wait for the app to be moved to the SD card. This may take a few moments.
Not all apps can be moved to the SD card. Some system apps or apps that require constant access to the internal storage cannot be relocated. However, many apps, particularly games or apps with large file sizes, can be moved to the SD card to free up internal storage space.
Once you move an app to the SD card, it will still appear on your device’s app list, but a portion of the app will now reside on the external storage. Keep in mind that if you remove the SD card, you may encounter some issues with these apps, so it’s recommended to keep the SD card inserted.
Moving apps to the SD card can significantly alleviate the strain on your tablet’s internal storage. It allows you to reclaim space for other essential apps or media files. If you don’t have an SD card slot or want alternative storage options, don’t worry. In the next section, we will discuss using cloud storage solutions to expand your storage capacity.
Delete Unused Files and Media
Over time, our Samsung tablets accumulate a plethora of files and media that we no longer need. These files take up valuable storage space and can hinder the overall performance of our devices. Deleting unused files and media is an effective way to free up storage on your Samsung tablet.
To delete unused files and media on your Samsung tablet, follow these steps:
- Open the file manager app on your tablet. This app may be pre-installed, or you can download a third-party file manager app from the Google Play Store.
- Navigate to the folders where your files and media are stored, such as “Documents,” “Downloads,” or “Pictures.”
- Review the files in each folder and identify the ones you no longer need or want.
- Long-press on a file to select it, then select any other files you want to delete.
- Tap on the delete option, typically represented by a trash bin icon or the word “Delete.”
- Confirm the deletion when prompted.
Repeat this process for each folder or category where you store files and media. Pay special attention to large files, such as videos or high-resolution images, as they tend to occupy more storage space.
Before deleting any files, it’s always a good idea to back them up to an external storage solution or a cloud service if they hold any important or irreplaceable data.
By regularly deleting unused files and media, you can keep your tablet’s storage space optimized and make room for new files or apps. If you want an alternative solution for storing files, let’s explore the option of cloud storage in the following section.
Use Cloud Storage
When it comes to expanding your storage capacity without relying solely on your Samsung tablet’s internal storage or SD card, utilizing cloud storage is an excellent option. Cloud storage allows you to store files, media, and documents securely on remote servers accessible through the internet. By utilizing cloud storage services, you can free up space on your tablet and access your files from anywhere with an internet connection.
There are several popular cloud storage services available, such as Dropbox, Google Drive, Microsoft OneDrive, and iCloud. These services typically offer a certain amount of free storage and provide options to upgrade for additional space if needed.
To use cloud storage on your Samsung tablet, follow these steps:
- Download and install the cloud storage app of your choice from the Google Play Store.
- Create an account or sign in using your existing account details.
- Once logged in, you can upload files, media, and documents to your cloud storage account.
- You can usually browse and manage your files through the cloud storage app or a web browser on your tablet.
- Access your files anytime, anywhere, by logging in to your cloud storage account.
Cloud storage offers many advantages, including the ability to free up space on your tablet, automatic backup and syncing of files, and the flexibility to access your files from multiple devices. It’s an ideal solution for storing large files, photos, videos, or documents that you don’t require immediate access to on your tablet’s local storage.
Before relying solely on cloud storage, ensure that you have a stable internet connection to access your files. Additionally, consider the privacy and security policies of the cloud storage service you choose to ensure that your files are protected.
If you’re looking for an alternative solution to maximize your tablet’s storage space, let’s explore the option of using a file manager app in the next section.
Use a File Manager App
Managing and organizing your files on a Samsung tablet can be made much easier and more efficient by using a dedicated file manager app. A file manager app provides you with advanced features and tools to navigate and manage your tablet’s storage, making it easier to locate, organize, and delete files.
There are several file manager apps available for Samsung tablets on the Google Play Store. Some popular options include Solid Explorer, ES File Explorer, and ASTRO File Manager. These apps offer intuitive interfaces and a wide range of features to help you effectively manage your files.
To use a file manager app on your Samsung tablet, follow these steps:
- Download and install a file manager app of your choice from the Google Play Store.
- Open the file manager app on your tablet.
- Navigate through various folders and directories to locate your files.
- You can perform various actions on your files, such as copying, moving, renaming, and deleting.
- Use the search function in the app to quickly find specific files.
- Utilize the app’s built-in storage analyzer to identify large files or folders taking up significant storage space.
- Take advantage of additional features offered by the file manager app, such as FTP or cloud storage integration.
A file manager app can help you declutter your tablet’s storage by easily identifying and removing unused files, sorting files into different categories, and transferring files between different folders or storage locations.
With the ability to manage your files efficiently, a file manager app allows you to take full control of your Samsung tablet’s storage space, ensuring that it is optimized and used to its fullest potential.
If you have files that you no longer need on your tablet but still want to keep, the next section will discuss a method for transferring files to a computer.
Transfer Files to a Computer
If your Samsung tablet is running low on storage space and you have files that you want to keep but don’t necessarily need on your device at all times, transferring them to a computer is a great solution. Transferring files to a computer not only frees up space on your tablet but also provides an additional backup for your important files.
To transfer files from your Samsung tablet to a computer, follow these steps:
- Connect your tablet to a computer using a USB cable.
- On your tablet, swipe down from the top of the screen to access the notification panel.
- Tap on ‘USB for file transfer’ or ‘File Transfer’ (depending on your tablet model).
- Your tablet will be recognized as a storage device on your computer.
- On your computer, open the file explorer or finder to access your tablet’s storage.
- Navigate to the files or folders you want to transfer.
- Select the files or folders and copy or cut them.
- Paste the files or folders into a desired location on your computer.
By transferring files to your computer, you can keep them safely stored and easily accessible whenever you need them while keeping your tablet’s storage space free for apps and more immediate files.
If you have a large number of files or folders, you can create a dedicated folder on your computer to organize them and make them easier to find in the future.
Remember to regularly back up your files on your computer and consider setting up an automated backup system to ensure no important data is lost.
With your files now safely transferred to your computer, you have freed up storage space on your Samsung tablet while maintaining easy access to your files whenever needed. If you’re looking to start fresh or resolve more severe storage issues, let’s explore the option of performing a factory reset in the next section.
Factory Reset
If you’re facing persistent storage issues on your Samsung tablet or simply want to start fresh, performing a factory reset can help resolve these concerns. A factory reset restores your tablet to its original state, removing all apps, settings, and personal data. It can serve as a last resort when other storage optimization methods have not yielded satisfactory results.
Before proceeding with a factory reset, it’s crucial to backup all your important files, photos, videos, and documents. This ensures that you don’t lose any valuable data in the process.
To perform a factory reset on your Samsung tablet, follow these steps:
- Back up all your important files and data to an external storage device or cloud storage service.
- Open the Settings app on your tablet.
- Scroll down and tap on ‘General management’ or ‘System.’
- Select ‘Reset’ or ‘Reset options.’
- Choose ‘Factory data reset’ or ‘Factory reset.’
- Read the information provided and confirm your choice by selecting ‘Reset’ or ‘Erase all data.’
- Your tablet will undergo the factory reset process, which may take several minutes.
- Once the reset is complete, your tablet will restart, and you can set it up as if you’re using it for the first time.
Performing a factory reset erases all data on your tablet, including installed apps, accounts, and personalized settings. Therefore, it’s crucial to back up your data beforehand.
After the factory reset, you’ll have a clean slate to reorganize and optimize your tablet’s storage space. Remember to only reinstall the necessary apps and files to avoid cluttering your storage again.
If you’re still experiencing storage issues after performing a factory reset or if you want to explore additional options, it may be worthwhile to seek further assistance from Samsung support or a professional technician.
With the factory reset complete, you’re now ready to make the most of your Samsung tablet’s storage and enjoy a clutter-free digital experience.
Conclusion
Hooray! You’ve reached the end of our journey to optimize the storage on your Samsung tablet. We’ve explored various methods to help you free up space, expand storage capacity, and declutter your device. By implementing these strategies, you can make the most out of your tablet and ensure a seamless digital experience.
First, we recommended checking the available storage on your tablet to understand the current situation and identify areas where space is being consumed. Then, we discussed the importance of clearing cache and app data to remove temporary files and improve performance.
Next, we covered the significance of uninstalling unnecessary apps that are taking up valuable storage space. Removing these apps allows you to reclaim space and streamline your app collection.
We also explored the option of moving apps to an SD card if your tablet has the capability. This feature is particularly useful for devices with limited internal storage.
To further optimize storage, we discussed the benefits of deleting unused files and media. This step helps to free up considerable space and keeps your tablet clutter-free.
For those seeking additional storage options, we emphasized the use of cloud storage services. Storing files in the cloud not only expands your storage capacity but also allows you to access your files from any device with internet connectivity.
We then highlighted the importance of using a file manager app to efficiently manage and organize your files on the tablet, ensuring easy navigation and accessibility.
If you have files that you want to keep but don’t need on your tablet, we provided guidance on transferring them to a computer. This approach helps free up space on your tablet while providing an additional backup for important files.
Lastly, we discussed the option of performing a factory reset as a last resort to resolve persistent storage issues. This drastic step returns your tablet to its original state but should be approached with caution, as it erases all data.
With these tips and strategies in mind, you can now take control of your Samsung tablet’s storage and create a more streamlined and efficient digital experience. Whether you’re freeing up space for new apps, capturing memorable moments with your camera, or organizing your files, optimizing your tablet’s storage will enhance its performance and usability.
Remember to periodically review and manage your storage to ensure your tablet remains clutter-free and continues to meet your needs. Happy optimizing!