Introduction
Indulging in a rich and creamy scoop of homemade vanilla bean ice cream is a pure delight. Whether enjoyed on its own or paired with a decadent dessert, this classic frozen treat never fails to satisfy. While store-bought ice cream is readily available, there’s something special about crafting your own batch from scratch. Making homemade vanilla bean ice cream allows you to control the ingredients and customize the flavors to suit your preferences.
Creating this luscious dessert in the comfort of your own kitchen may seem intimidating, but with the help of an ice cream maker, the process becomes significantly easier. With just a few simple steps, you can enjoy the smooth and velvety texture of your very own homemade vanilla bean ice cream.
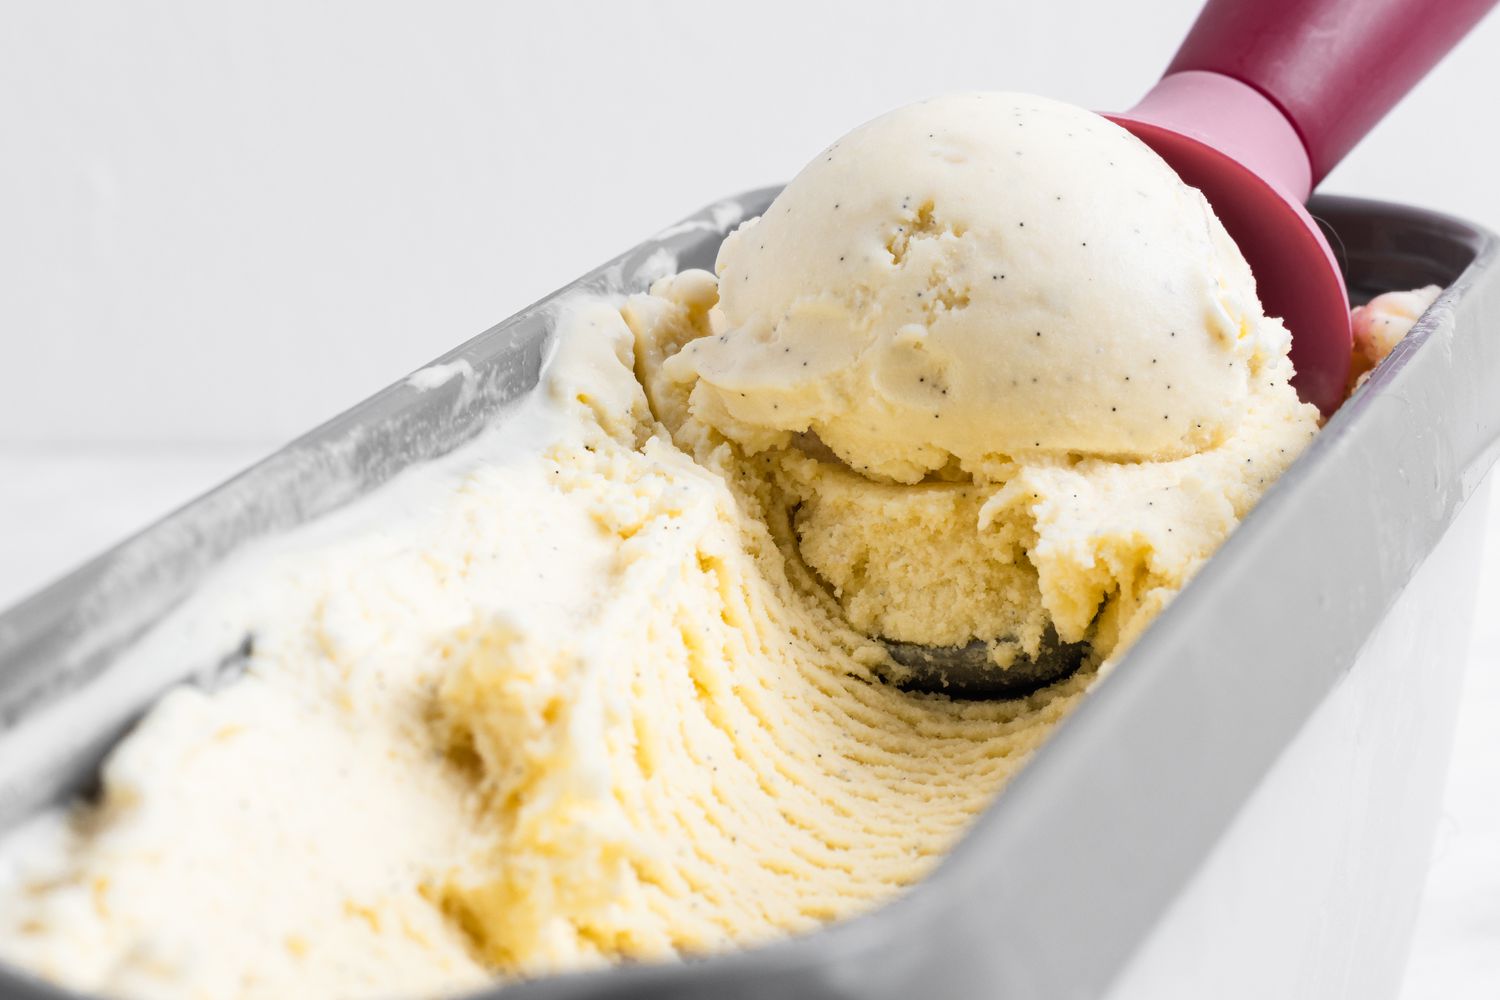
One of the key ingredients that sets this ice cream apart is the use of real vanilla beans. The tiny black specks scattered throughout the ice cream not only add visual appeal but also enhance the flavor. Choosing high-quality vanilla beans is essential to extract the maximum flavor and aroma.
In this guide, we will walk you through the process of making homemade vanilla bean ice cream using an ice cream maker. From selecting the perfect vanilla beans to adding customizable add-ins, we will provide you with all the necessary information to create a delectable frozen treat that will impress your family and friends.
So, let’s dive into the world of homemade ice cream and discover the joy of making your own vanilla bean ice cream. Get ready for a delightful culinary adventure that will leave your taste buds longing for more!
Choosing the Perfect Vanilla Beans for Your Homemade Ice Cream
When it comes to making homemade vanilla bean ice cream, selecting high-quality vanilla beans is crucial. The quality of the beans directly impacts the flavor and aroma of the final product. Here are some tips to help you choose the perfect vanilla beans:
1. Grade A or Grade B: Vanilla beans are typically classified into two grades – Grade A and Grade B. Grade A beans are plump, moist, and have a higher moisture content. They are often preferred for their superior flavor and are suitable for infusing the ice cream mixture. Grade B beans are drier and have a lower moisture content. While they might not be as visually appealing, they are excellent for extracting seeds and adding texture to the ice cream.
2. Appearance: Look for vanilla beans that are moist, shiny, and pliable. They should be free from any mold or dark spots. The exterior of the bean should be dark brown or black, indicating ripeness.
3. Flexibility: Gently bend the vanilla bean to test its flexibility. A fresh and high-quality bean should be soft and supple, allowing you to bend it easily without breaking.
4. Aroma: Give the vanilla bean a sniff. It should emit a strong, sweet, and intoxicating aroma. If the smell is weak or lacking, it may indicate lesser quality beans.
5. Source: Purchase vanilla beans from reputable suppliers to ensure their authenticity and quality. Look for beans that are sourced from regions known for producing superior vanilla, such as Madagascar, Tahiti, or Mexico.
6. Quantity: Depending on the intensity of vanilla flavor you desire, consider the number of beans needed for your ice cream recipe. On average, 2-3 vanilla beans should suffice for a standard batch of homemade ice cream.
Remember, the quality of your vanilla beans will significantly influence the taste of your homemade ice cream. Invest in premium beans to elevate the flavor profile of your dessert and unlock the true essence of vanilla.
Preparing the Ice Cream Mixture
Before delving into the process of churning your homemade vanilla bean ice cream, you’ll need to prepare the ice cream mixture. Here’s a step-by-step guide to help you get started:
1. Gather your ingredients: The key ingredients for a basic vanilla ice cream recipe include heavy cream, whole milk, granulated sugar, vanilla beans, and egg yolks. Ensure that all the necessary ingredients are on hand before you begin.
2. Split and scrape the vanilla beans: Take your vanilla beans and use a sharp knife to split them lengthwise. Gently open the beans and scrape out the tiny black seeds using the back of the knife or a spoon. These seeds hold the concentrated vanilla flavor that will infuse your ice cream mixture.
3. Heat the cream and milk: In a saucepan, combine the heavy cream and whole milk over medium heat. Heat the mixture until it becomes hot but not boiling. Stir occasionally to prevent scorching.
4. Infuse vanilla flavor: Once the cream and milk mixture is warm, add the split vanilla beans and the scraped seeds into the saucepan. Allow the mixture to simmer on low heat for about 10 minutes, allowing the vanilla flavor to infuse into the liquid.
5. Prepare the egg yolks: In a separate bowl, whisk the granulated sugar and egg yolks together until well combined. The sugar helps to sweeten the ice cream while the egg yolks provide a smooth and creamy texture.
6. Temper the egg yolks: Pour a small amount of the hot cream mixture into the bowl with the whisked egg yolks and sugar. Gently whisk the mixture together to temper the eggs, gradually raising their temperature without causing them to scramble.
7. Combine the mixtures: Slowly pour the tempered egg yolk mixture back into the saucepan with the remaining cream and milk mixture. Whisk constantly to combine all the ingredients thoroughly.
8. Cook the mixture: Continue cooking the ice cream mixture over low heat, stirring constantly until it thickens slightly and coats the back of a spoon. This process, known as “custard base” or “crème anglaise,” ensures a velvety texture and helps to eliminate any raw egg taste.
Once the mixture has thickened, remove it from the heat. At this stage, you have prepared the ice cream base that will be transformed into the delectable frozen treat. Let the mixture cool completely before moving on to the next step of using your ice cream maker.
Using Your Ice Cream Maker
Now that you have prepared the ice cream mixture, it’s time to put your ice cream maker to work. Follow these steps to achieve the perfect consistency and texture for your homemade vanilla bean ice cream:
1. Freeze the bowl: Most ice cream makers require the bowl to be frozen prior to use. Ensure that the bowl has been properly frozen according to the manufacturer’s instructions. This step is essential for the churning process.
2. Assemble the ice cream maker: Set up your ice cream maker according to the manufacturer’s instructions. This typically involves attaching the paddle or dasher to the motor and securing the frozen bowl onto the machine.
3. Place the mixture into the ice cream maker: Give the ice cream mixture a quick stir to ensure that it is well-mixed. Carefully pour the mixture into the ice cream maker while it is still running. Be cautious not to overfill the machine, as the mixture will expand as it churns.
4. Churn the ice cream: Turn on the ice cream maker and let it churn for the recommended amount of time specified in the manufacturer’s instructions. Typically, it takes around 20-30 minutes to reach the desired consistency.
5. Monitor the progress: Keep an eye on the ice cream as it churns. The mixture will gradually thicken and increase in volume. You’ll notice a transformation from a liquid state to a soft, creamy texture. Avoid over-churning, as it can lead to a grainy texture.
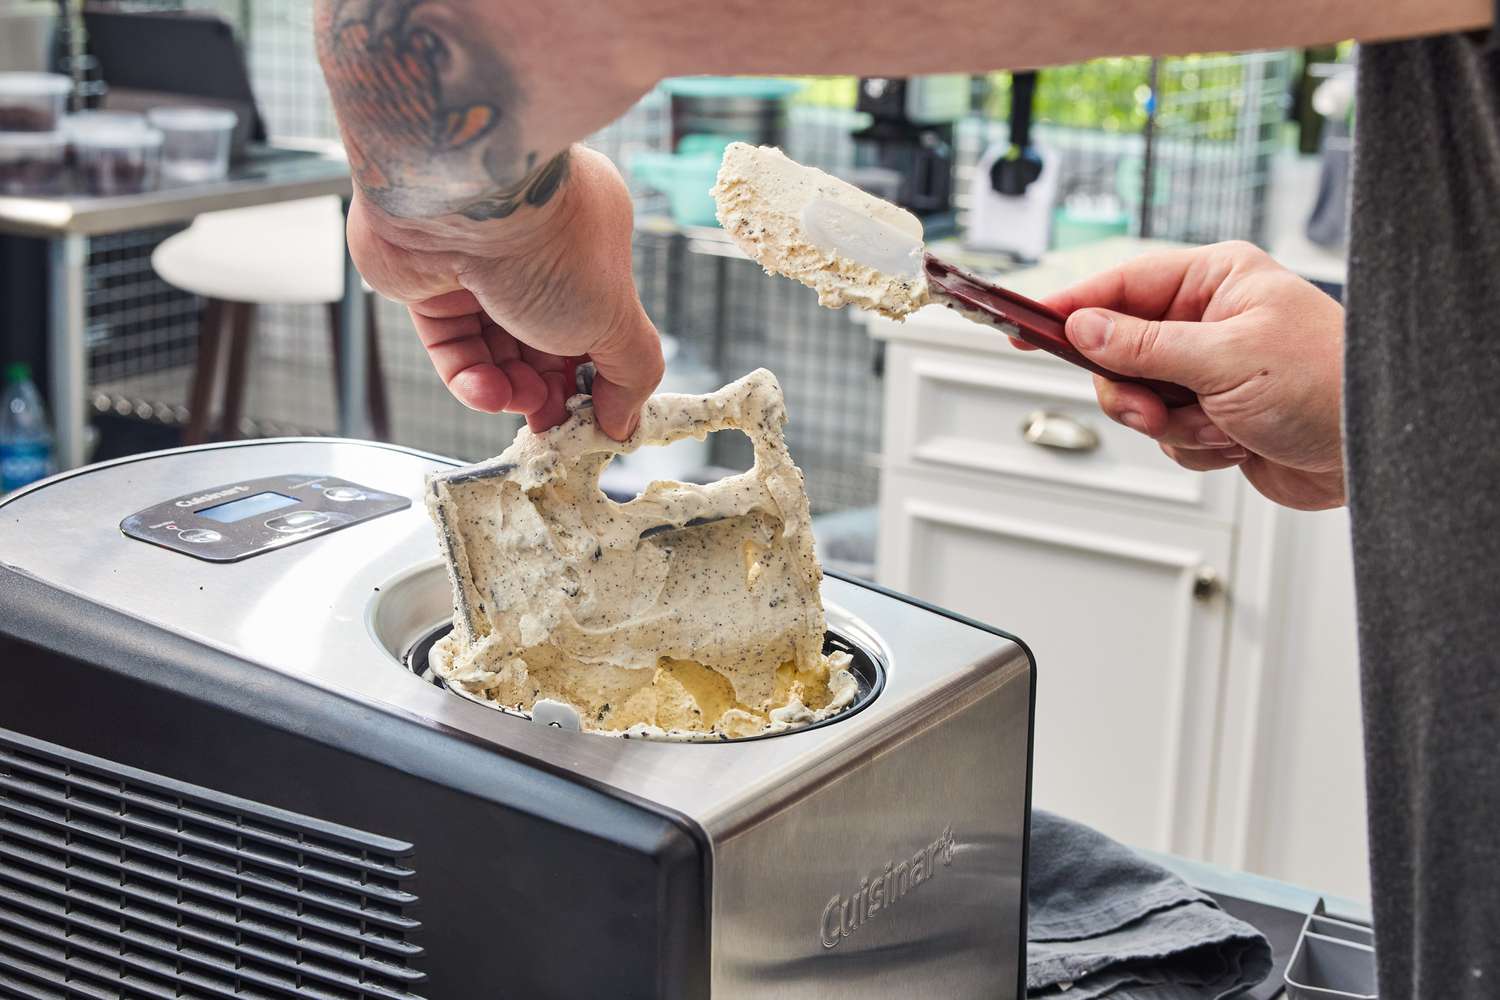
6. Add any desired mix-ins: If you wish to incorporate additional ingredients such as chocolate chips, crushed cookies, or chopped nuts, add them during the last few minutes of churning. This will ensure even distribution throughout the ice cream.
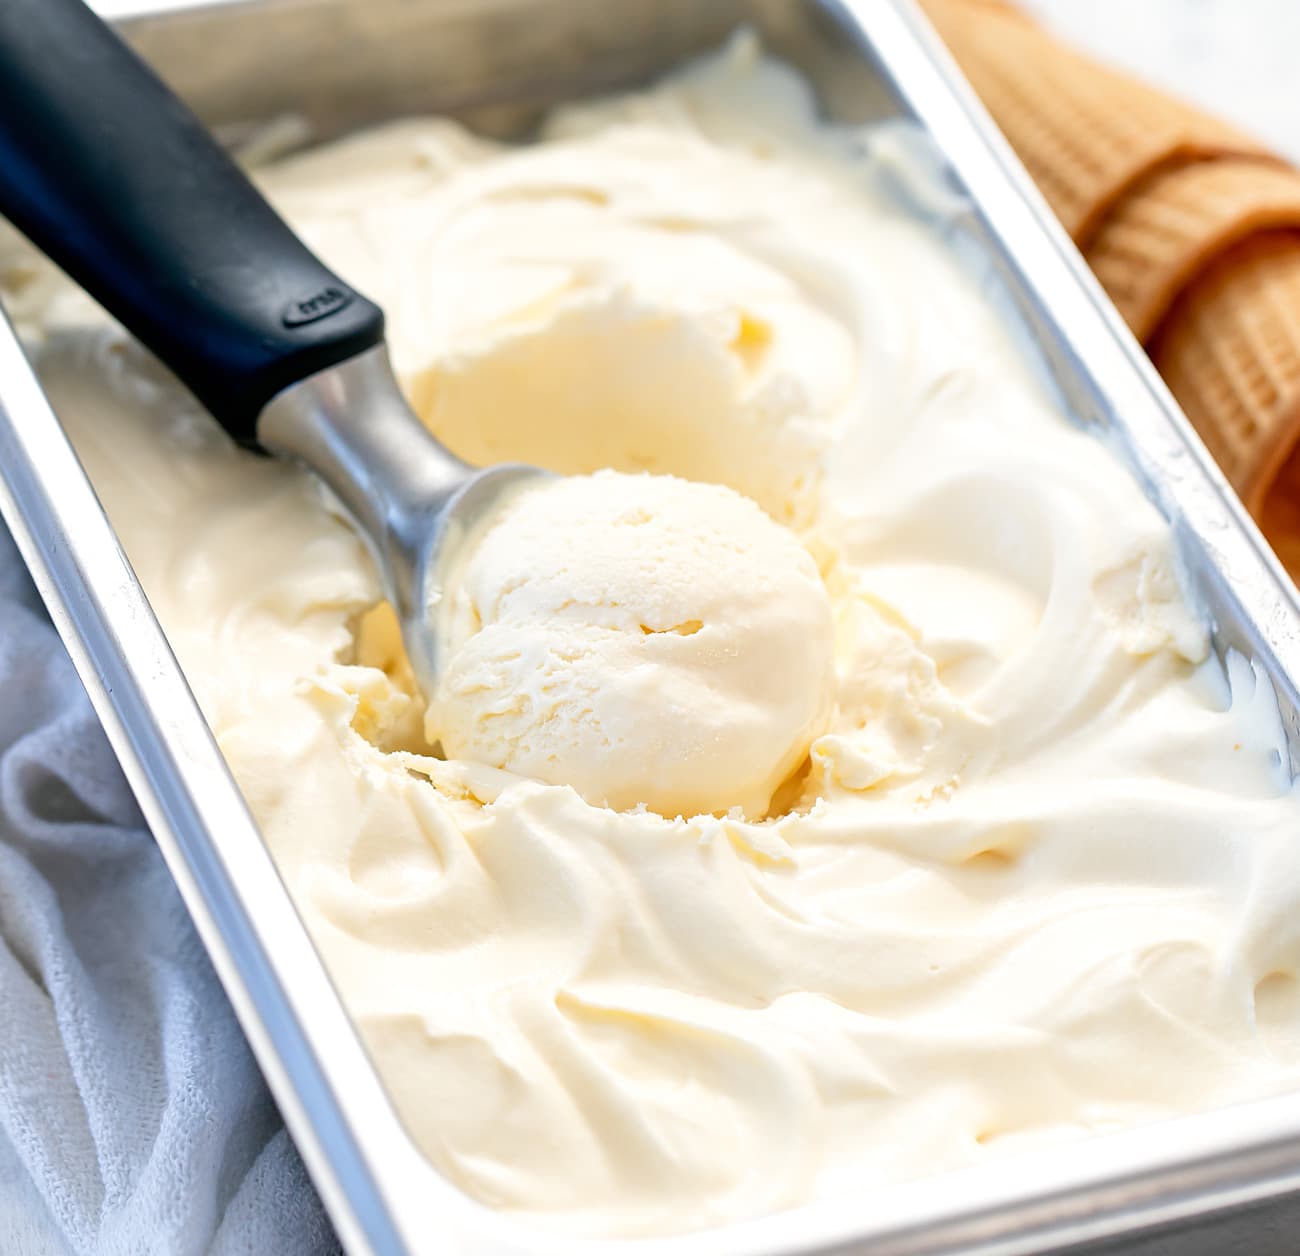
7. Transfer the ice cream to a container: Once the ice cream has reached the desired consistency, turn off the machine and carefully remove the paddle or dasher. Scoop the freshly churned ice cream into an airtight container. Smooth the surface with a spatula and cover the container tightly.
8. Freeze the ice cream: Place the container in the freezer and let the ice cream harden for at least 3-4 hours, or overnight for optimal results. This rest period will allow the flavors to meld and the texture to set.
Now that you have successfully used your ice cream maker, it’s time to savor the fruits of your labor. Your homemade vanilla bean ice cream is now ready to be enjoyed as a standalone treat or alongside your favorite desserts. So grab a spoon, dig in, and relish in the delightful taste of your very own handcrafted frozen masterpiece!
Adding the Vanilla Beans to the Ice Cream Mixture
Now comes the crucial step of infusing your homemade ice cream mixture with the delightful flavor of vanilla beans. Here’s how to do it:
1. Retrieve the vanilla beans: Take the split vanilla beans that you prepared earlier. Hold them over the ice cream mixture and carefully scrape any remaining seeds directly into the mixture.
2. Add the beans: Drop the scraped vanilla bean pods into the ice cream mixture as well. These pods will continue to infuse flavor as the mixture chills and develops.
3. Stir well: Using a wooden spoon or spatula, gently stir the ice cream mixture to ensure the vanilla seeds are evenly distributed throughout. The beans should be submerged in the mixture, allowing their essence to be released during the churning process.
4. Let it steep: Cover the mixture with a lid or plastic wrap and let it steep in the refrigerator for at least 2-3 hours, or preferably overnight. This resting period allows the flavors to meld together and intensify, resulting in a more pronounced vanilla taste.
5. Strain, if desired: If you prefer a smoother texture without the presence of vanilla bean pods, you can strain the mixture before churning. Simply pour the mixture through a fine-mesh sieve into a separate container, discarding the spent vanilla bean pods. This step is optional and primarily a matter of personal preference.
By adding the vanilla beans into the ice cream mixture, you infuse it with the unmistakable aroma and taste of real vanilla. The tiny black vanilla bean specks will be beautifully dispersed throughout the finished ice cream, enhancing both its appearance and flavor.
Now that your ice cream mixture is ready, it’s time to start churning and transforming it into creamy, dreamy vanilla bean ice cream!
Churning the Ice Cream Mixture
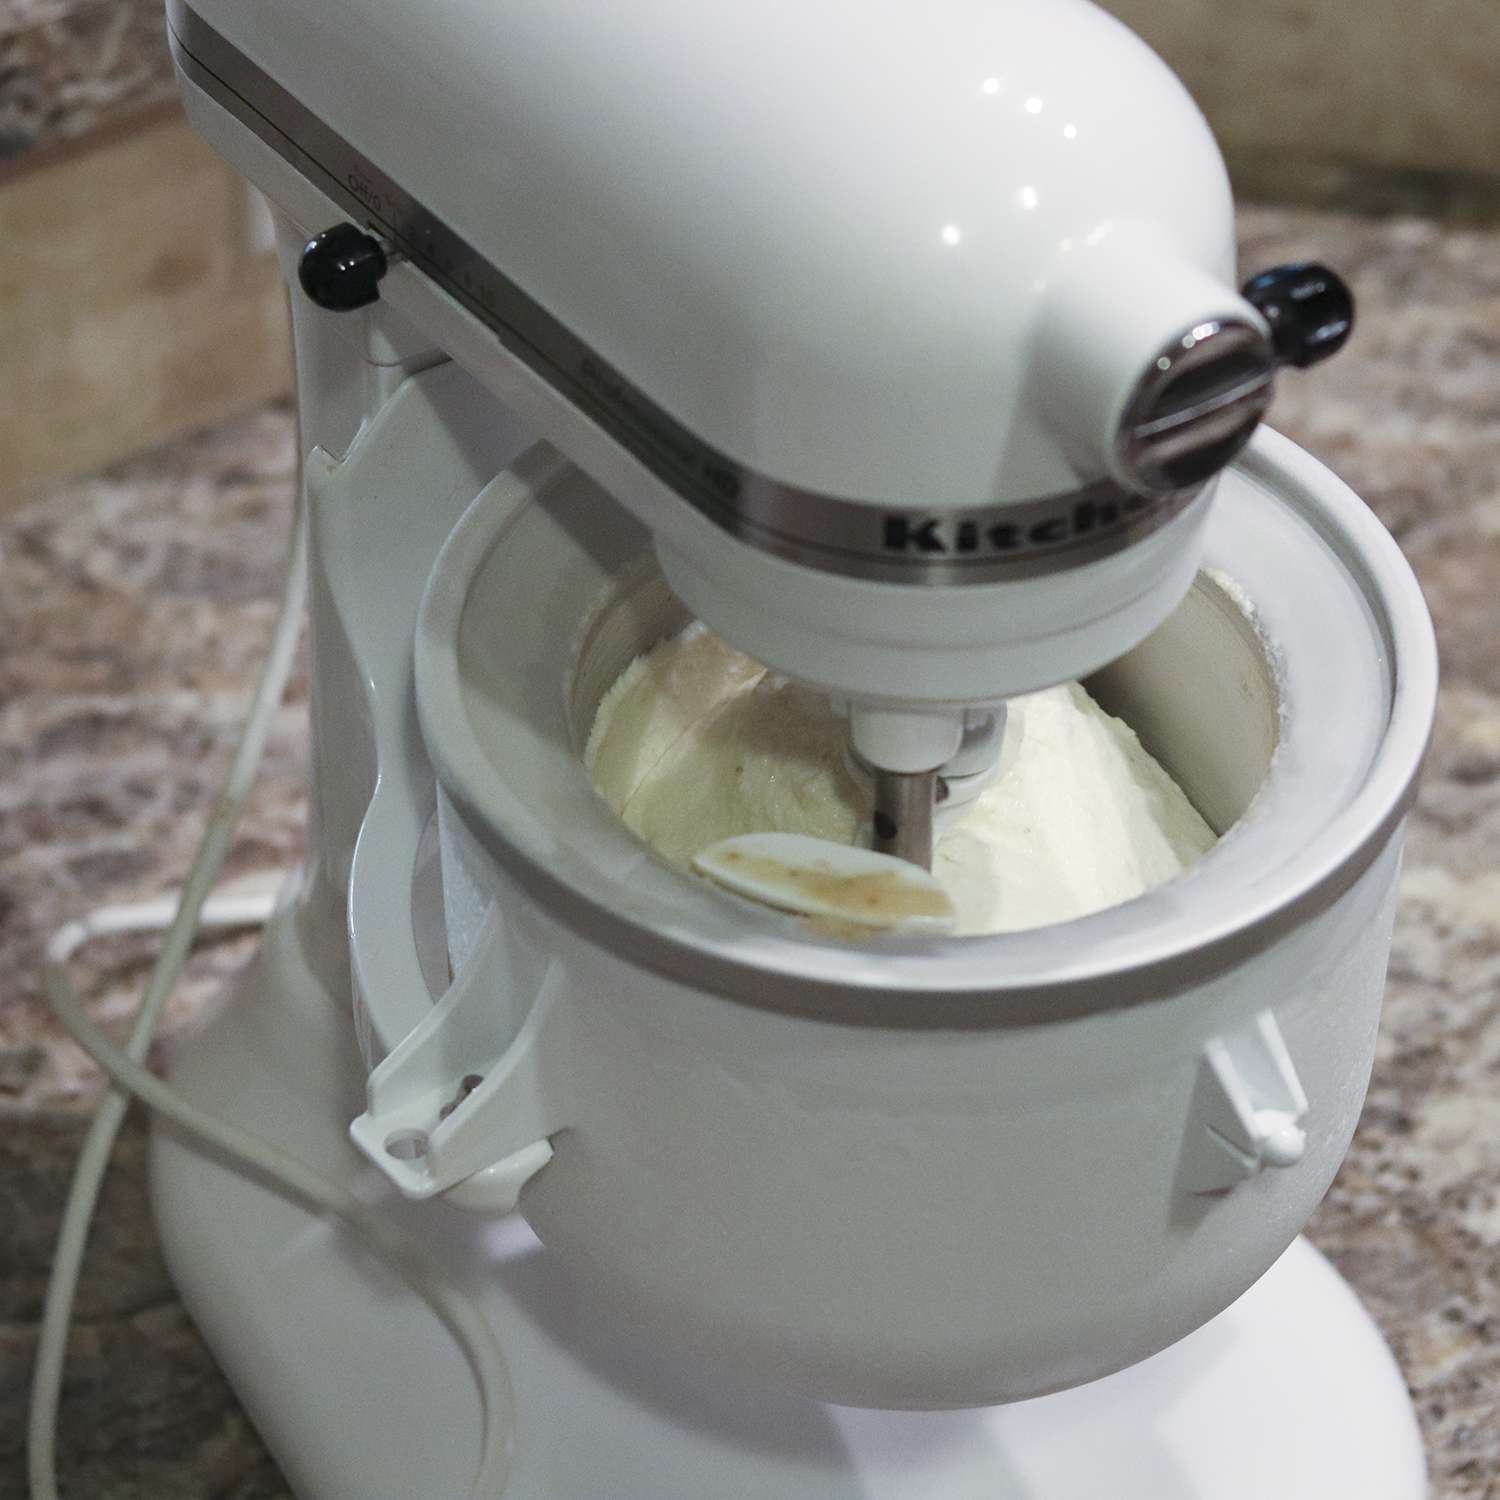
Now that your ice cream mixture is prepared and infused with the delightful flavors of vanilla beans, it’s time to churn it into a velvety smooth texture. Churning is a crucial step in the ice cream-making process, as it incorporates air and prevents ice crystals from forming. Here’s how to churn your ice cream mixture to perfection:
1. Set up your ice cream maker: Ensure that your ice cream maker has been properly assembled according to the manufacturer’s instructions. This usually involves placing the frozen bowl onto the machine’s motor and securing it in place.
2. Pour the ice cream mixture into the machine: Carefully pour the prepared ice cream mixture into the frozen bowl of the ice cream maker. Be cautious not to overfill, as the mixture will expand as it churns.
3. Start churning: Turn on the ice cream maker and let it do its magic. The machine will slowly begin to churn the ice cream mixture, incorporating air and creating a creamy texture. The length of time needed for churning can vary depending on your specific ice cream maker, so refer to the manufacturer’s instructions for guidance.
4. Monitor the churning process: Keep an eye on the progress of your ice cream as it churns. It will gradually thicken and increase in volume. You’ll notice a transformation from a liquid consistency to a soft, smooth, and creamy texture. This typically takes around 20-30 minutes, but it’s important to follow the recommended churning time for your specific machine.
5. Incorporate any mix-ins: If you wish to include additional add-ins, such as chocolate chips, crushed cookies, or nuts, add them to the ice cream during the last few minutes of churning. This ensures that the mix-ins are evenly distributed throughout the ice cream and don’t settle at the bottom of the container.
6. Check for the desired consistency: Once the churning process is complete, check the consistency of the ice cream. It should be soft, smooth, and have a texture similar to soft-serve ice cream. If you prefer a firmer consistency, transfer the ice cream to a lidded container and place it in the freezer for additional hardening.
Churning is a pivotal step in the ice cream-making process, transforming the ice cream mixture into a delightful treat. The slow and steady churn helps incorporate air, resulting in a light and creamy texture that is a hallmark of homemade ice cream.
Now that your ice cream is perfectly churned, it’s time to explore the world of add-ins and customize your vanilla bean ice cream to suit your taste.
Incorporating Different Add-ins to Your Vanilla Bean Ice Cream
While homemade vanilla bean ice cream is delightful on its own, adding in additional ingredients can take it to a whole new level of flavor and texture. Here are some exciting add-in options to customize your homemade vanilla bean ice cream:
1. Chocolate: Add a touch of decadence to your vanilla bean ice cream by incorporating chocolate. You can swirl in melted chocolate or add chocolate chips, chunks, or shavings for a delightful contrast of textures.
2. Fruits: Enhance the natural sweetness of your vanilla bean ice cream by folding in fresh, ripe fruits. Strawberries, raspberries, blueberries, or sliced bananas are popular choices. Roasted peaches or caramelized apples also add a delightful twist.
3. Nuts: For a satisfying crunch and added richness, consider adding chopped nuts. Walnuts, almonds, peanuts, or pecans not only provide texture but also complement the creamy vanilla flavor.
4. Cookies: Crushed cookies can transform vanilla bean ice cream into cookie dough, cookies and cream, or even cookies and cookie butter swirls. Use your favorite cookies, such as chocolate chip, Oreos, or graham crackers, and fold them into the mixture for a delightful surprise in every bite.
5. Caramel or Fudge: Drizzle caramel sauce or fudge swirls into the churned ice cream to create ribbons of indulgence. These sweet and gooey additions add depth and complexity to the vanilla base.
6. Spices: Experiment with adding warm and aromatic spices to your vanilla bean ice cream. Cinnamon, nutmeg, or even a pinch of cardamom can add depth and elevate the flavor profile of your homemade treat.
7. Liquors or Extracts: For a grown-up twist, incorporate a splash of your favorite liquor, such as bourbon, rum, or coffee liqueur. You can also experiment with extracts like almond or coconut to add unique flavors while maintaining the creamy vanilla base.
When adding these ingredients, gently fold them into the churned ice cream during the last few minutes of the churning process, allowing them to be evenly distributed throughout the mixture. However, be careful not to overmix, as it can result in a loss of air and a denser ice cream texture.
Don’t be afraid to get creative and mix and match different add-ins to create your own signature flavor combinations. The possibilities are endless, and you can customize your vanilla bean ice cream to suit your personal preferences and satisfy your cravings.
After incorporating your desired add-ins, it’s time to focus on achieving the perfect creamy texture for your homemade vanilla bean ice cream.
Tips for Achieving the Perfect Creamy Texture
When it comes to homemade vanilla bean ice cream, achieving a smooth and creamy texture is key to a delightful eating experience. Here are some tips to help you achieve that perfect texture:
1. Use the right fat content: The fat content in your ice cream mixture plays a crucial role in its creaminess. Opt for a combination of heavy cream and whole milk in your recipe. The higher the fat content, the smoother and creamier the ice cream will be.
2. Chill the mixture thoroughly: Before churning the ice cream, ensure that the mixture is thoroughly chilled. This allows the fats to solidify and helps in creating a smoother texture. Refrigerate the mixture for at least 2-3 hours, or preferably overnight, before churning.
3. Maintain the right temperature: It’s important to churn the ice cream mixture at the correct temperature. Follow the manufacturer’s instructions for your ice cream maker, as different machines may have different temperature requirements. Churning at too high or too low temperatures can affect the final texture.
4. Add a stabilizer: Including a stabilizer, such as a small amount of cornstarch or guar gum, can enhance the texture and prevent the formation of ice crystals. These ingredients help bind the water molecules and create a smoother mouthfeel. However, be cautious not to add too much, as it can result in a gummy or chewy texture.
5. Avoid over-churning: Once the ice cream starts to thicken and take on a consistent texture, it’s important to stop churning. Over-churning can cause the ice cream to become stiff and lose its creaminess. Pay close attention to the texture of the ice cream and follow the recommended churning time for your specific machine.
6. Freeze properly: After churning, transfer the ice cream to an airtight container and place it in the freezer. Ensure that the container is tightly sealed to prevent the formation of ice crystals. To maintain the creamy texture, store the ice cream in the coldest part of your freezer, ideally at a temperature below 0°F (-18°C).
7. Avoid frequent thawing and refreezing: Continuous thawing and refreezing can cause ice crystals to form, resulting in a grainy texture. To maintain the creaminess, avoid frequent removal of the ice cream from the freezer and serve it in one continuous scoop if possible.
By following these tips, you’ll be well on your way to achieving an irresistibly smooth and creamy texture for your homemade vanilla bean ice cream. Now, let’s move on to storing and serving your delicious creation!
Storing and Serving Your Homemade Vanilla Bean Ice Cream
Once you’ve made your delectably smooth and creamy homemade vanilla bean ice cream, it’s important to store it properly to maintain its texture and flavor. Here are some tips for storing and serving your creation:
1. Use an airtight container: Transfer the freshly churned ice cream into an airtight container. Ensure that the container is large enough to hold the entire batch and has a tight-fitting lid. This will help prevent ice crystals from forming and maintain the creaminess of the ice cream.
2. Press plastic wrap on the surface: Before sealing the container, press a piece of plastic wrap directly onto the surface of the ice cream. This helps create a barrier and prevents the formation of ice crystals on the top layer.
3. Store in the coldest part of the freezer: Place the container of ice cream in the coldest part of your freezer, ideally at a temperature below 0°F (-18°C). This helps maintain the creamy texture and prevents the ice cream from becoming too hard.
4. Avoid storing near strong-smelling foods: Ice cream has a tendency to absorb odors from strong-smelling foods. To preserve the pure, delightful flavors of your vanilla bean ice cream, store it away from pungent items such as onions or garlic.
5. Allow for proper softening: When you’re ready to serve the ice cream, it’s important to allow it to soften slightly for a few minutes at room temperature. This makes it easier to scoop and enhances the creamy texture.
6. Serve with care: Use a sturdy ice cream scoop to serve your homemade vanilla bean ice cream. Dip the scoop in hot water and wipe it dry between each scoop. This helps the ice cream glide smoothly onto the dessert dishes without sticking.
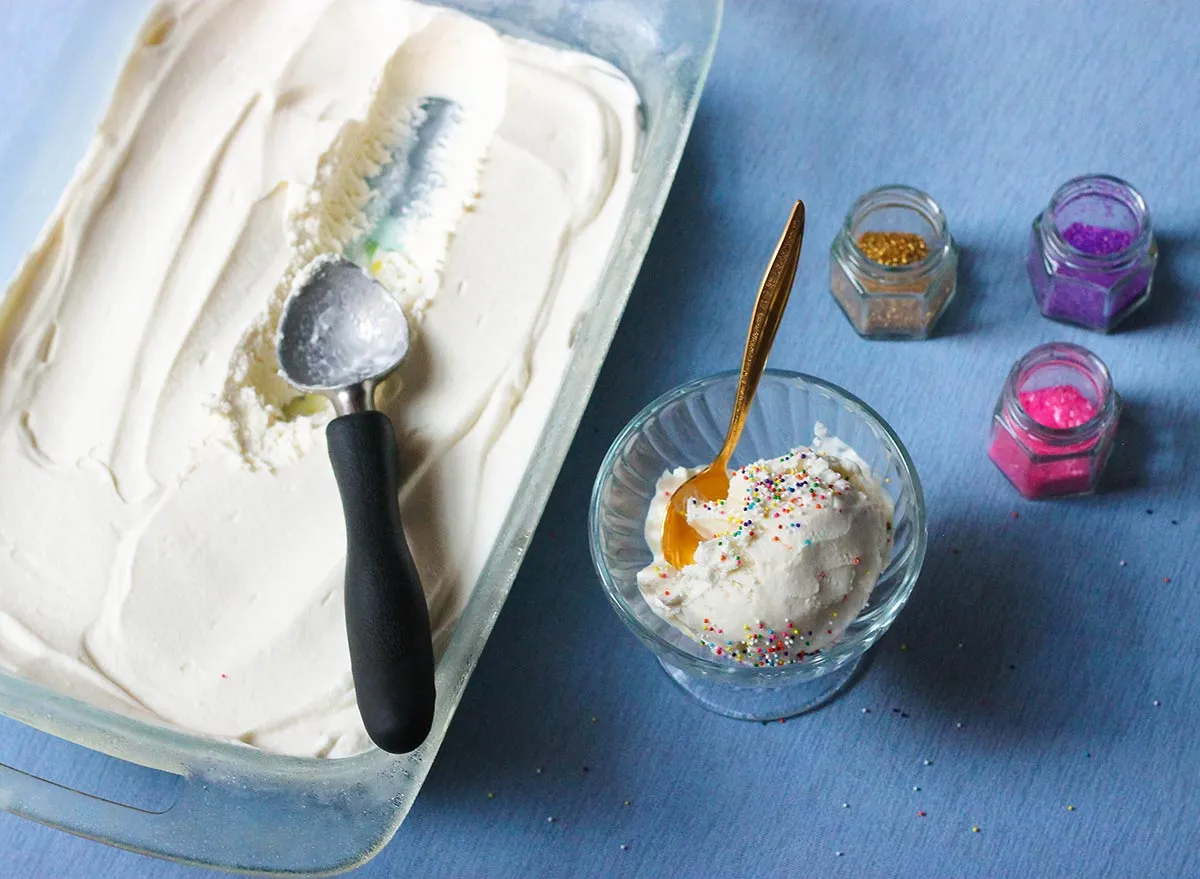
7. Add garnishes and toppings: Enhance the presentation and flavor of your vanilla bean ice cream by adding delicious garnishes and toppings. Sprinkle it with grated chocolate, crushed nuts, fresh fruit, or a drizzle of caramel or chocolate sauce. Get creative and experiment with various combinations!
8. Enjoy immediately: Homemade ice cream is best enjoyed fresh, as it retains its optimal texture and flavor. Serve and savor your creation immediately after scooping, ideally on chilled dessert bowls or cones.
By following these storage and serving tips, you can ensure that each scoop of your homemade vanilla bean ice cream is a creamy, delightful treat. Now, it’s time to indulge in the heavenly flavors you’ve created!
Conclusion
Making homemade vanilla bean ice cream with an ice cream maker is a truly rewarding and delicious experience. By carefully selecting high-quality vanilla beans, infusing the mixture with their delightful flavor, and churning it to a smooth and creamy texture, you can create a frozen treat that will impress your family and friends.
Throughout this guide, we have explored the step-by-step process of creating homemade vanilla bean ice cream. From choosing the perfect vanilla beans to incorporating various add-ins and achieving the ideal creamy texture, each stage requires attention to detail and a passion for creating something truly exceptional.
Using an ice cream maker simplifies the process and ensures consistently delightful results. The churning action helps incorporate air and prevent ice crystals from forming, resulting in a velvety-smooth texture that is irresistible.
Don’t be afraid to experiment with different variations and add-ins to customize your vanilla bean ice cream. Whether you choose to include fruits, nuts, chocolate, or even spices, the possibilities are endless, allowing you to create unique and tantalizing flavors.
Remember to store your homemade ice cream properly in an airtight container, keeping it in the coldest part of your freezer to maintain its texture and flavor. When it’s time to serve, allow the ice cream to soften slightly for easy scooping, and consider adding delectable garnishes and toppings to enhance the experience.
Creating homemade vanilla bean ice cream is not only a culinary delight, but also a way to bring joy to those around you. Whether it’s a simple pleasure on a warm summer day or a centerpiece for a special occasion, your homemade creation will undoubtedly be met with smiles and satisfaction.
So, gather your ingredients, fire up the ice cream maker, and embark on a delightful journey of making your very own delectable homemade vanilla bean ice cream. The smooth and creamy results will have you coming back for more, and the admiration of your loved ones will be the cherry on top of your sweet success.