Introduction
The joy of indulging in a creamy, homemade ice cream is unmatched. If you’ve ever wished to create your own frozen treats with ease, the Hamilton Beach Ice Cream Maker is the perfect solution for you. This user-friendly appliance allows you to satisfy your cravings for rich, smooth ice cream right in the comfort of your own home.
Whether you’re a novice to ice cream making or a seasoned pro, this comprehensive guide will walk you through using the Hamilton Beach Ice Cream Maker, from assembling the machine to troubleshooting common issues. Get ready to unleash your creativity and delight friends and family with delicious, homemade ice cream flavors!
In this article, we will start by familiarizing you with the Hamilton Beach Ice Cream Maker, exploring its features and capabilities. Then, we will guide you through the process of preparing the necessary ingredients for your frozen creations. Next, we will delve into the step-by-step assembly of the ice cream maker, ensuring you have everything set up correctly for a successful ice cream-making experience.
Once the ice cream maker is assembled, we will dive into the exciting part – using the Hamilton Beach Ice Cream Maker to whip up delectable ice cream treats. We will provide you with expert tips and techniques to achieve the perfect consistency and flavor every time, allowing you to unleash your creativity and experiment with various recipes and flavors.
While making ice cream is usually a smooth process, sometimes unexpected issues may arise. Not to worry, as we will troubleshoot common problems you may encounter along the way, ensuring you can overcome any obstacles and continue enjoying your homemade ice cream. We will also provide advice on cleaning and caring for your ice cream maker, ensuring it stays in top condition for years to come.
Intrigued? Let’s dive in and learn how to make the most out of your Hamilton Beach Ice Cream Maker!
Getting to Know the Hamilton Beach Ice Cream Maker
Before you start churning out delicious ice cream, it’s important to familiarize yourself with the features and components of the Hamilton Beach Ice Cream Maker. This will ensure you have a seamless experience and make the most out of this fantastic appliance.
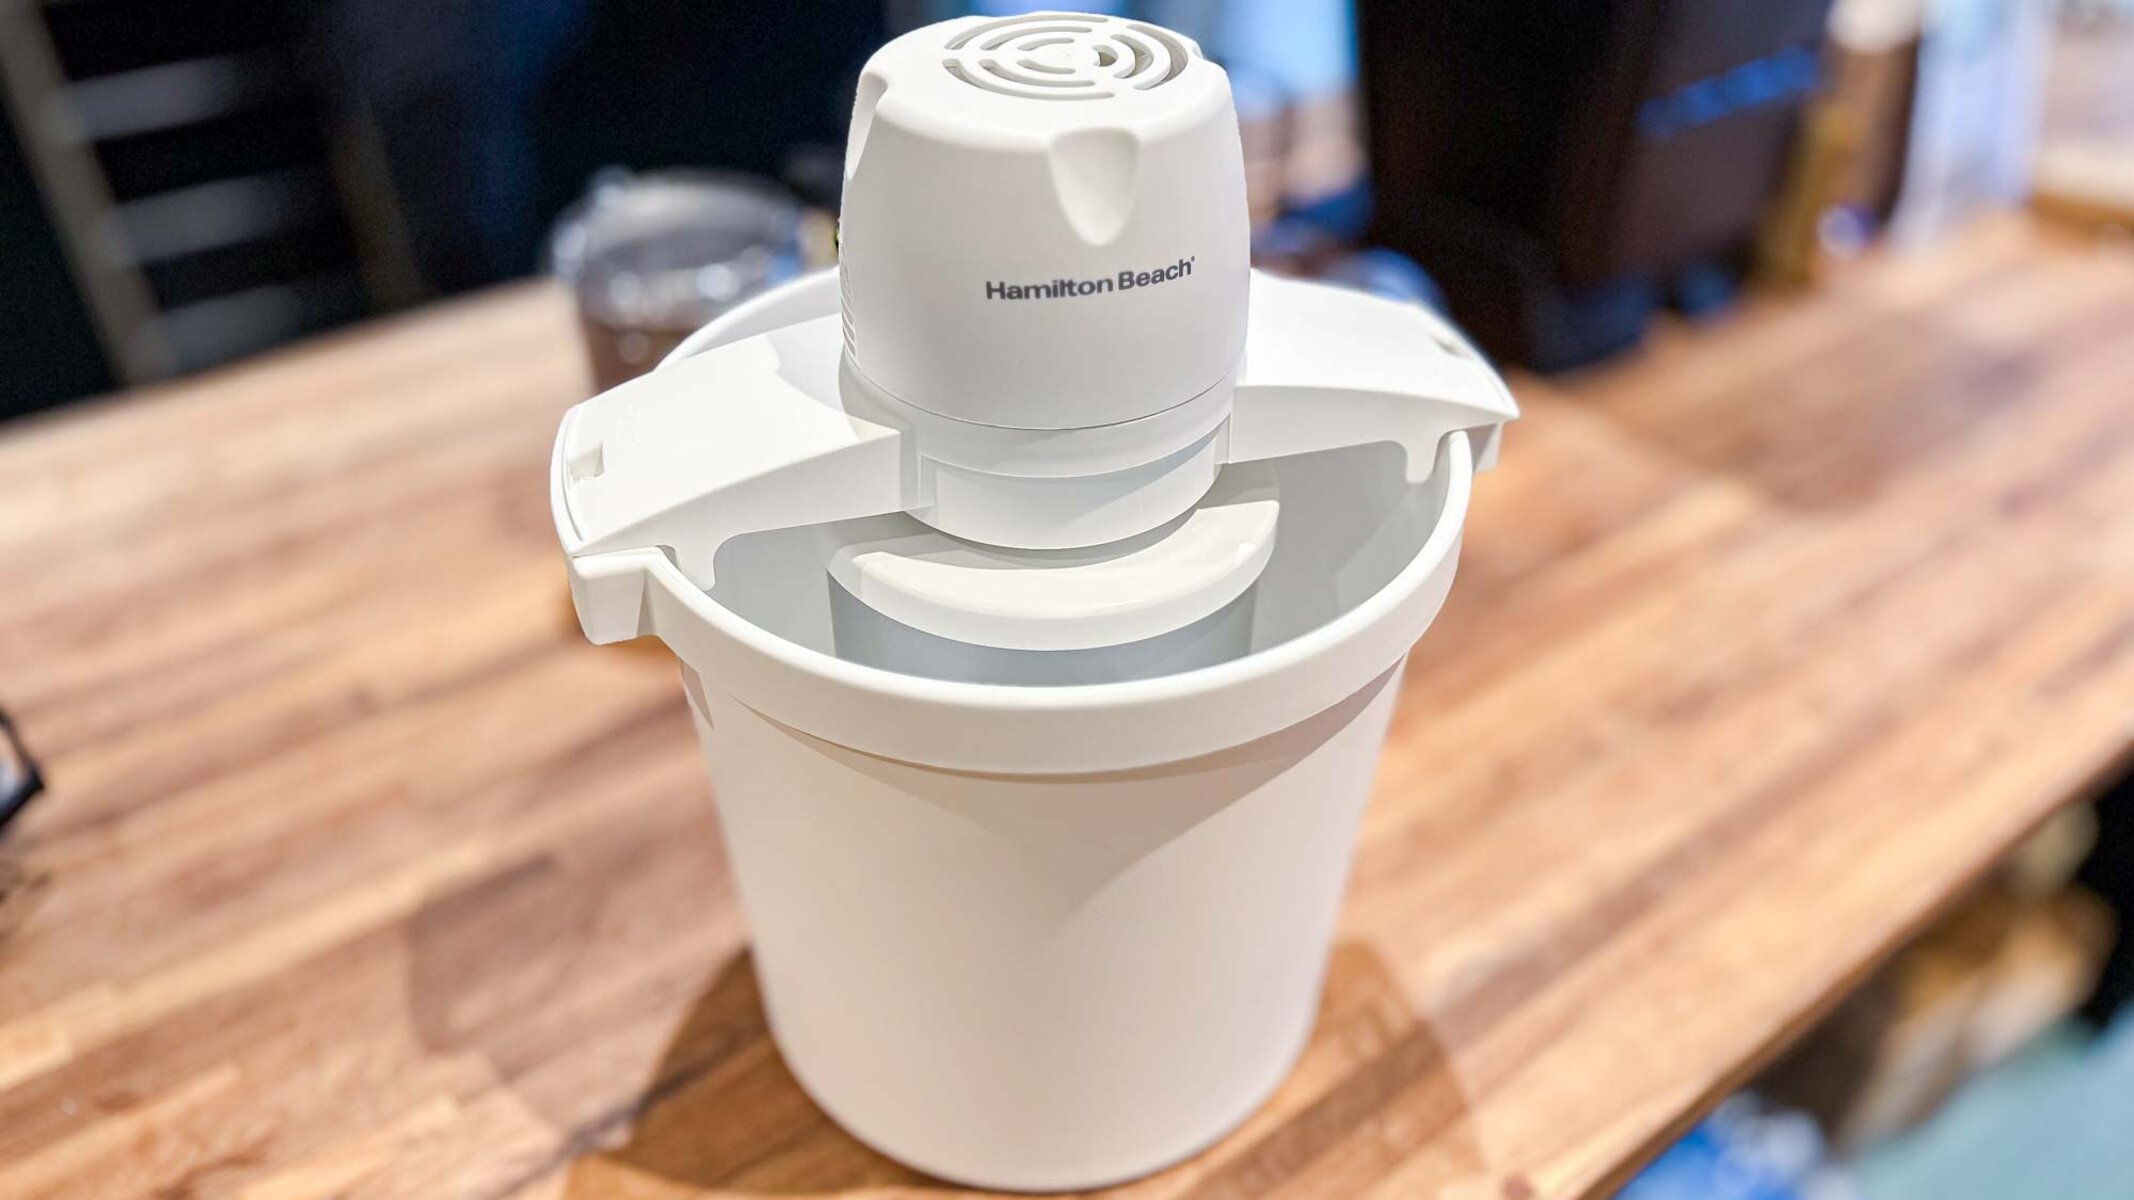
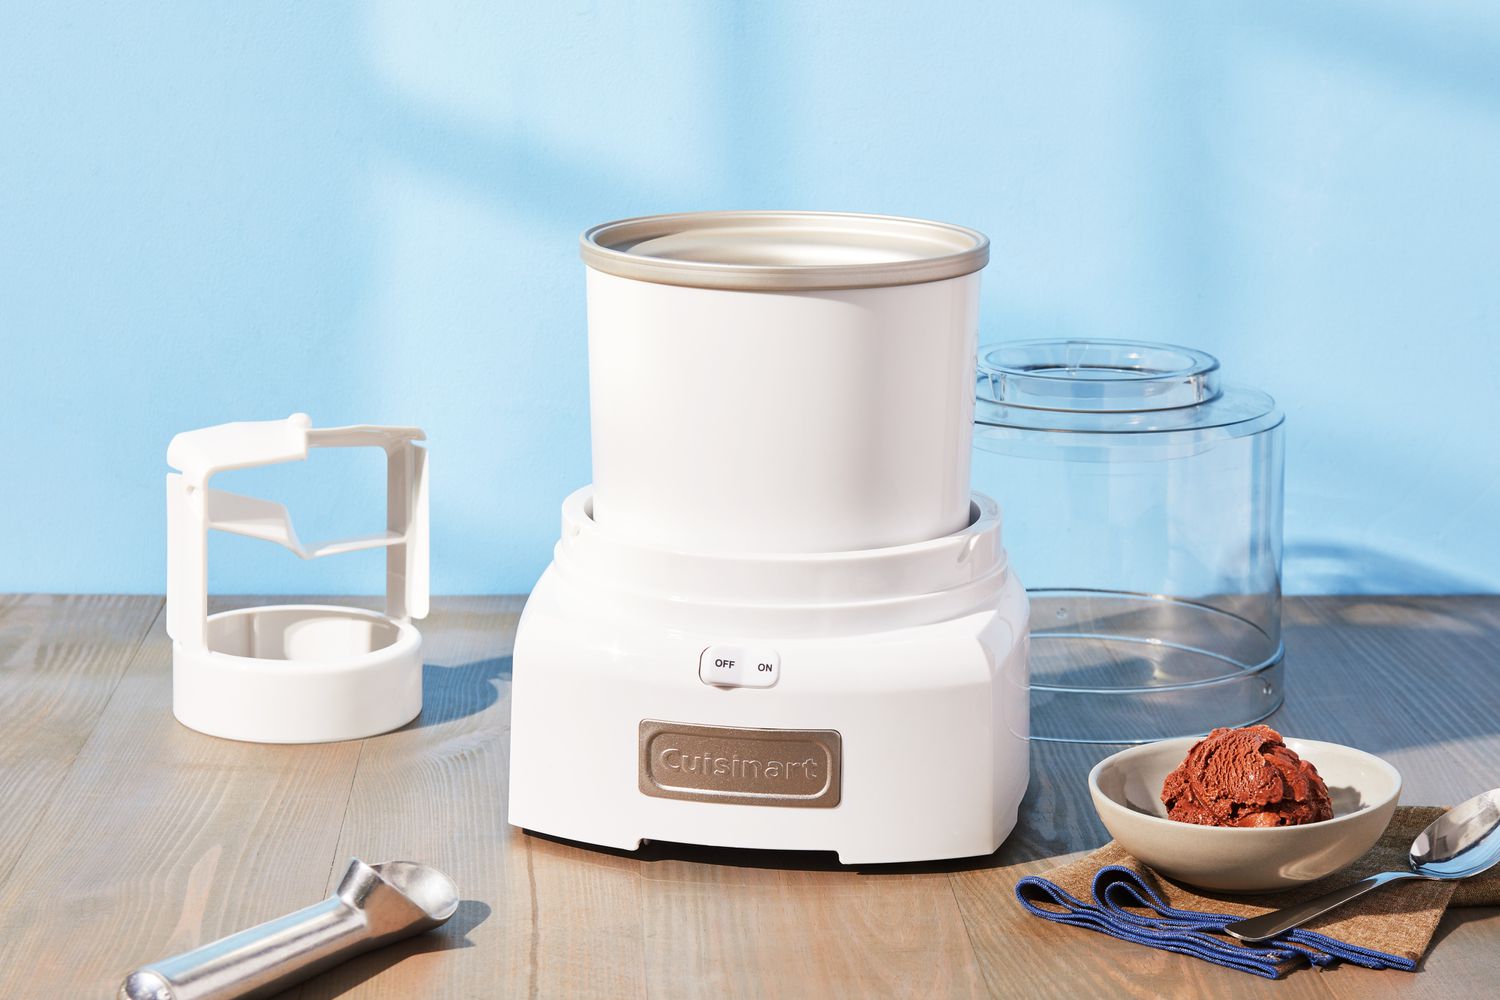
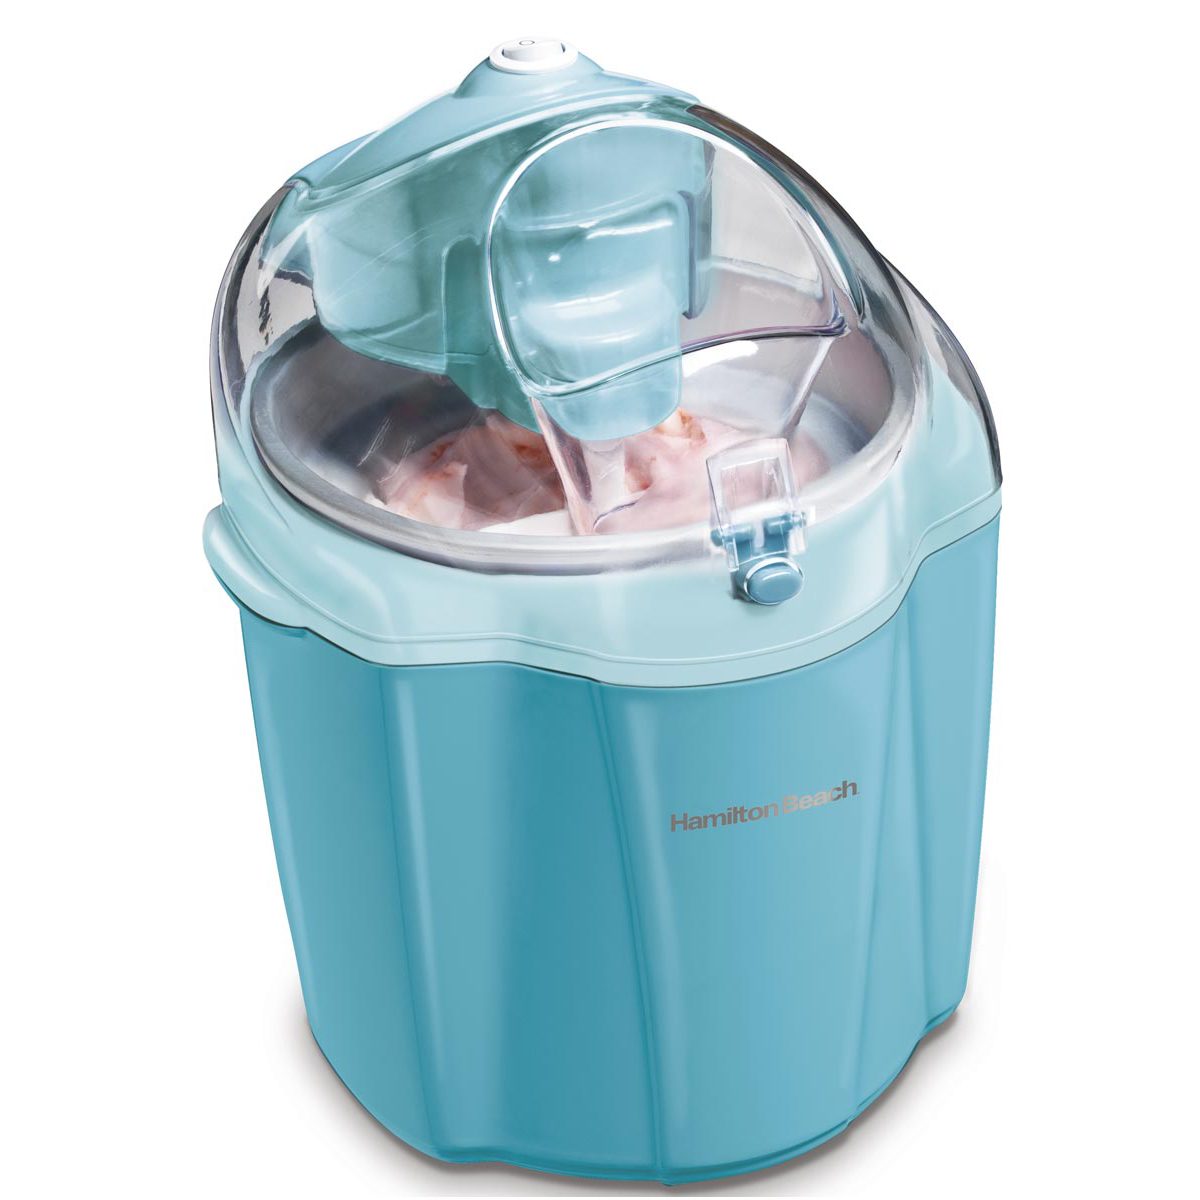
The Hamilton Beach Ice Cream Maker is designed for simplicity and ease of use. It comes with a freezer bowl, a motor-driven paddle, and a transparent lid. The freezer bowl is the heart of the machine, where the magic happens. It needs to be pre-frozen before using the ice cream maker, so be sure to plan ahead and allow enough time for freezing.
The motor-driven paddle is responsible for churning the ice cream mixture while it freezes, ensuring a smooth and creamy consistency. The transparent lid allows you to monitor the freezing process without lifting the lid and disturbing the mixture.
One of the greatest advantages of the Hamilton Beach Ice Cream Maker is its large capacity. With the ability to make up to 4 quarts (approximately 3.8 liters) of ice cream, it’s perfect for serving a crowd or indulging in multiple batches of your favorite flavors.
Another feature worth mentioning is the easy-lock lid system. This ensures a secure fit during operation, preventing any leaks or spills. This feature also contributes to the overall simplicity of using the ice cream maker.
It’s important to note that the Hamilton Beach Ice Cream Maker requires minimal preparation. Unlike more complex machines that require ice and rock salt, this model eliminates the need for these extra steps. Simply freeze the bowl, assemble the machine, and you’re ready to start making delicious ice cream in no time.
Now that you’re acquainted with the features and components of the Hamilton Beach Ice Cream Maker, let’s move on to preparing the ingredients for your frozen masterpiece.
Preparing Your Ingredients
Before you can churn out a delectable batch of homemade ice cream, it’s essential to gather and prepare the necessary ingredients. The quality and freshness of your ingredients will greatly impact the flavor and texture of your frozen treat. Let’s explore the key ingredients and how to prepare them.
Base Ingredients:
- Cream: Use heavy cream or a combination of heavy cream and whole milk to achieve a rich and creamy texture. The higher the fat content, the creamier the ice cream will be.
- Sugar: Choose granulated sugar or alternative sweeteners like honey or maple syrup for a more natural sweetness. Adjust the amount of sugar based on your preference.
- Eggs (optional): Adding eggs to the base mixture creates a custard-like texture and adds richness to the ice cream. This step is optional but highly recommended for a more luxurious experience.
- Vanilla Extract: A splash of pure vanilla extract enhances the flavor profile of the ice cream. Opt for high-quality vanilla extract for the best results.
Flavorings and Mix-ins:
The options for flavorings and mix-ins are endless. From classic flavors like chocolate and strawberry to unique combinations like cookies and cream or mint chocolate chip, let your imagination run wild. Here are some popular choices:
- Fruits: Fresh or frozen fruits can be blended into a puree or diced to add bursts of flavor and texture to your ice cream.
- Chocolate: Use cocoa powder, melted chocolate, or chocolate chips to satisfy your chocolate cravings.
- Nuts and Candy: Chopped nuts, crushed cookies, or candy pieces can be stirred into the ice cream during the final minutes of churning for added crunch and excitement.
- Extracts and Spices: Experiment with different extracts like almond or peppermint, and don’t hesitate to add a pinch of spices like cinnamon or nutmeg to elevate the flavor.
Prior to starting the ice cream-making process, ensure that all ingredients are properly prepared. Measure out the quantities needed and have them readily accessible. If using fruits, make sure they are washed, peeled, and cut into the desired size. For mix-ins, have them chopped, crushed, or ready to be incorporated into the ice cream.
Now that you have all the ingredients prepped and your taste buds tantalized, it’s time to move on to the next step – assembling the Hamilton Beach Ice Cream Maker.
Assembling the Ice Cream Maker
Now that you have your ingredients ready to go, it’s time to assemble the Hamilton Beach Ice Cream Maker and get closer to enjoying your homemade frozen treat. Follow these simple steps to ensure a smooth setup:
- Ensure that the freezer bowl is thoroughly frozen. Ideally, it should be frozen for at least 24 hours before use. The bowl should feel completely solid to the touch.
- Set the base of the ice cream maker on a stable and level surface. Make sure you have enough space for the machine to operate without any obstructions.
- Place the frozen bowl onto the base of the ice cream maker. The bowl should fit snugly and lock into place. Give it a gentle twist to ensure it is secure.
- Insert the motor-driven paddle into the bowl. The paddle should press firmly against the bottom of the bowl and be able to spin freely.
- Place the transparent lid over the bowl and secure it by aligning the tabs with the slots on the base. Press down gently until it clicks into place.
Once your ice cream maker is fully assembled, resist the temptation to lift the lid and check on the mixture while it’s churning. Opening the lid during the process can interrupt the freezing process and compromise the texture of the ice cream.
It’s important to note that while the Hamilton Beach Ice Cream Maker is designed for straightforward assembly, it may be beneficial to refer to the instruction manual that came with your specific model. This will ensure that you are following any specific guidelines or precautions provided by the manufacturer.
With the ice cream maker properly assembled, it’s time to move on to the exciting part – using the Hamilton Beach Ice Cream Maker to create creamy and delightful batches of homemade ice cream. Let’s dive into the next section and uncover the step-by-step process.
Using the Hamilton Beach Ice Cream Maker
Now that you have assembled your Hamilton Beach Ice Cream Maker, it’s time to put it to work and create your very own homemade ice cream masterpiece. Follow these simple steps to achieve creamy and delicious results:
- Ensure that the freezer bowl is fully frozen. This is crucial for the ice cream to properly freeze and set during the churning process.
- Prepare your ice cream mixture according to your chosen recipe. Combine the cream, sugar, eggs (if using), and any desired flavorings in a mixing bowl. Whisk or mix until well blended.
- Remove the lid of the ice cream maker and pour the ice cream mixture into the frozen bowl. Be careful not to overfill as the mixture will expand during churning.
- Place the lid back onto the ice cream maker and secure it in place. The machine is now ready to begin churning.
- Plug in the ice cream maker and turn it on. The motor will start rotating the paddle, which will churn the mixture and freeze it simultaneously.
- Let the ice cream maker operate for the recommended time stated in your recipe or until the ice cream reaches your desired consistency. This will typically take approximately 20-30 minutes, but it can vary depending on the recipe and the consistency you prefer.
- As the mixture churns, you may hear a slight humming sound coming from the machine. This is normal and indicates that the paddle is working to incorporate air into the mixture, resulting in a light and creamy texture.
- Once the desired consistency is reached, turn off the ice cream maker and unplug it from the power source.
- Remove the lid and use a spatula or spoon to transfer the freshly churned ice cream into a lidded container for further freezing. Ensure the container is freezer-safe and has a tight seal to prevent freezer burn.
- Place the container in the freezer for a few hours or until the ice cream is firm enough to scoop and serve.
Remember, the beauty of using the Hamilton Beach Ice Cream Maker is that you have full control over the flavors and mix-ins. Feel free to experiment with different ingredients, ratios, and combinations to create your own signature ice cream flavors.
Once your homemade ice cream is ready, it’s time to indulge in a delightful frozen treat made with love and creativity. Grab a scoop or two, savor the incredible flavors, and share the joy with family and friends!
In the next section, we will explore some common issues that may arise during the ice cream-making process and provide troubleshooting tips to ensure your ice cream-making journey is smooth and successful.
Troubleshooting Common Issues
While using the Hamilton Beach Ice Cream Maker is generally a straightforward process, occasionally, you may encounter some common issues along the way. Don’t worry, as we have solutions to help troubleshoot these problems and get you back on track to creating delicious ice cream. Let’s explore some common issues and their remedies:
Ice Cream Mixture Not Freezing:
If you find that your ice cream mixture is not freezing properly, there are a few potential causes:
- Ensure that the freezer bowl is fully frozen before starting. It should be solid to the touch, with no liquid sloshing inside.
- Check that the mixture is well-chilled before pouring it into the ice cream maker. If the mixture is too warm, it may struggle to freeze properly.
- Make sure the ice cream maker is properly assembled and securely plugged in. Double-check the lid and paddle are properly in place.
Ice Cream Mixture Freezing Too Quickly:
If your ice cream mixture is freezing too quickly, resulting in a grainy texture, consider these solutions:
- Adjust the temperature of your freezer. If the freezer is set to an extremely low temperature, the mixture may freeze too quickly. Increase the temperature slightly and monitor the results.
- Ensure that the mixture is well-chilled before pouring it into the ice cream maker. Overly warm mixtures can freeze too quickly and affect the texture of the ice cream.
- Check the consistency of your ice cream mixture. If it is too thick or contains a high fat content, it may freeze faster than anticipated. Consider adjusting your recipe to achieve a smoother texture.
Ice Cream Too Soft or Runny:
If your ice cream turns out too soft or runny, try these troubleshooting tips:
- Ensure that the freezer bowl is thoroughly frozen before starting. Insufficient freezing of the bowl can result in a softer consistency.
- Check the chilling time. If your recipe suggests a longer chilling time, allow the mixture to chill in the refrigerator for the recommended duration before pouring it into the ice cream maker.
- Consider reducing the liquid content in your recipe. Excessive liquids can contribute to a looser texture. Adjust the ratio of liquids to achieve a thicker consistency.
If you encounter any other issues while using the Hamilton Beach Ice Cream Maker, refer to the instruction manual specific to your model for additional troubleshooting advice. Remember, practice makes perfect, and with a bit of experimentation, you’ll soon become a master of making homemade ice cream.
In the next section, we’ll discuss the importance of cleaning and caring for your ice cream maker to ensure its longevity and optimal performance.
Cleaning and Care
Proper cleaning and care of your Hamilton Beach Ice Cream Maker are essential to maintain its performance and extend its lifespan. Follow these guidelines to keep your ice cream maker in top condition:
Cleaning After Each Use:
- Unplug the ice cream maker and allow it to cool down before starting the cleaning process.
- Remove the freezer bowl, paddle, and lid from the machine.
- Rinse the freezer bowl with warm water to remove any remaining ice cream mixture.
- Wash the freezer bowl, paddle, and lid with mild soap and warm water. Use a non-abrasive sponge or cloth to gently scrub away any residue.
- Rinse all parts thoroughly with clean water to remove any soap residue.
- Allow the parts to air dry completely before reassembling or storing them.
Deep Cleaning:
Periodically, it’s important to give your ice cream maker a more thorough cleaning:
- Disassemble the ice cream maker by removing the freezer bowl, paddle, and lid.
- Wash all parts with mild soap and warm water, using a sponge or cloth to remove any stubborn residue.
- If necessary, you can soak the freezer bowl in warm, soapy water to help loosen any buildup.
- Rinse all parts thoroughly with clean water to remove any soap residue.
- Using a clean, damp cloth, wipe down the base of the ice cream maker to remove any spills or splatters.
- Allow all parts to air dry completely before reassembling or storing them.
Storage and Care:
- Make sure all parts of the ice cream maker are completely dry before storing them. Moisture can lead to mold or unpleasant odors.
- Store the freezer bowl in the freezer when not in use. This will ensure it is ready for your next ice cream-making adventure.
- Store the remaining components of the ice cream maker together in a clean and dry area, such as a cupboard or pantry.
- Avoid using harsh abrasives or chemical cleaners on any part of the ice cream maker. These can damage the surfaces and affect the performance of the machine.
- Regularly check for any signs of wear or damage, such as cracks or loose connections. If you notice any issues, contact the manufacturer or authorized service center for assistance.
By following these cleaning and care guidelines, you can ensure that your Hamilton Beach Ice Cream Maker remains in optimal condition and continues to provide delicious homemade ice cream for years to come.
Now that you know how to properly clean and care for your ice cream maker, you’re ready to embark on a continuous journey of creating delightful frozen treats. In the final section, we’ll wrap up our guide and remind you of the joys of using the Hamilton Beach Ice Cream Maker.
Conclusion
Using the Hamilton Beach Ice Cream Maker opens up a world of possibilities for creating delicious homemade ice cream. With its user-friendly design and large capacity, you can indulge in creamy and customized frozen treats right in the comfort of your own home.
In this guide, we have explored everything you need to know to make the most out of your ice cream maker. From getting acquainted with its features to assembling the machine, preparing ingredients, and troubleshooting common issues, you now have the knowledge and tools to create incredible batches of homemade ice cream.
Remember to gather high-quality ingredients, experiment with different flavors and mix-ins, and follow the step-by-step instructions for assembly and usage. Don’t forget the importance of proper cleaning and care to ensure the longevity of your ice cream maker.
So, what are you waiting for? Unleash your creativity, delight your taste buds, and share the joy of homemade ice cream with family and friends. The Hamilton Beach Ice Cream Maker is your gateway to a world of frozen delights!
Now, go forth and start churning out amazing batches of homemade ice cream with your Hamilton Beach Ice Cream Maker. Bon appétit!