Introduction
Welcome to the wonderful world of homemade ice cream! There’s something truly special about making your own creamy and delicious frozen treat right in the comfort of your own kitchen. And with the help of a Kitchenaid ice cream maker, it’s easier than ever to create a wide variety of flavors that will tantalize your taste buds.
Whether you’re a seasoned ice cream enthusiast or a newbie looking to try your hand at this delightful dessert, this article will guide you through the process of making ice cream with a Kitchenaid ice cream maker.
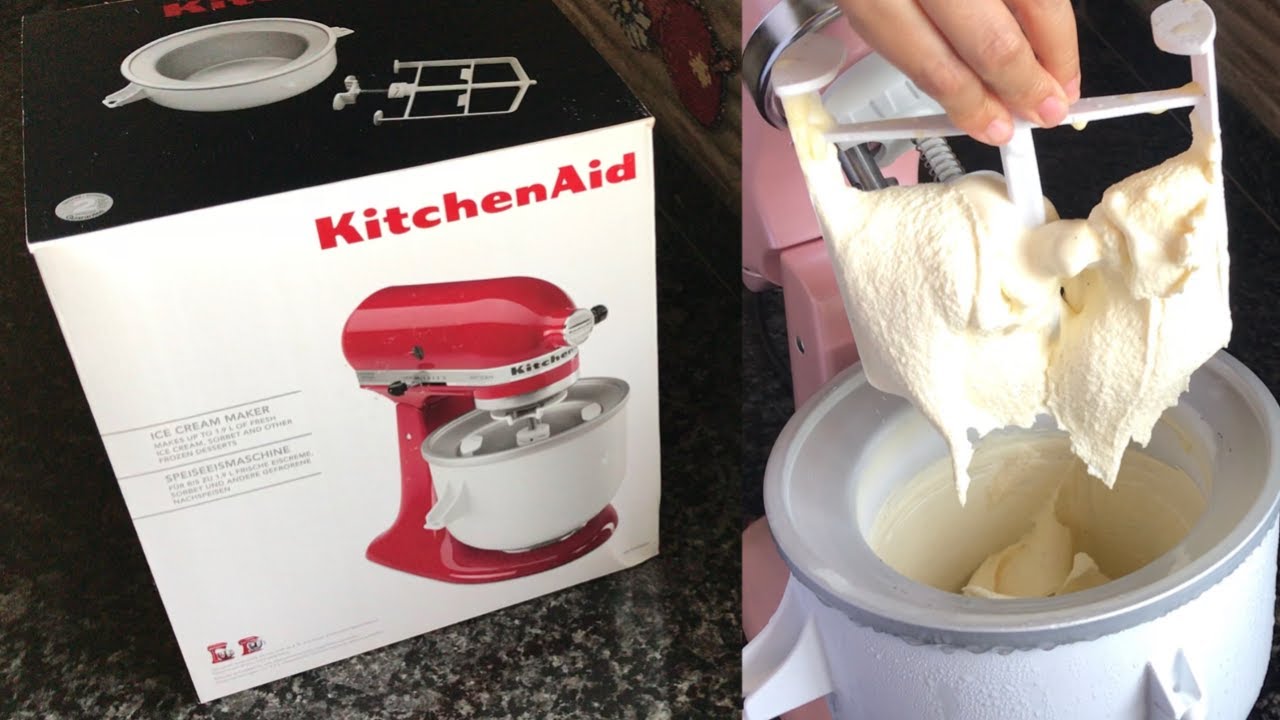
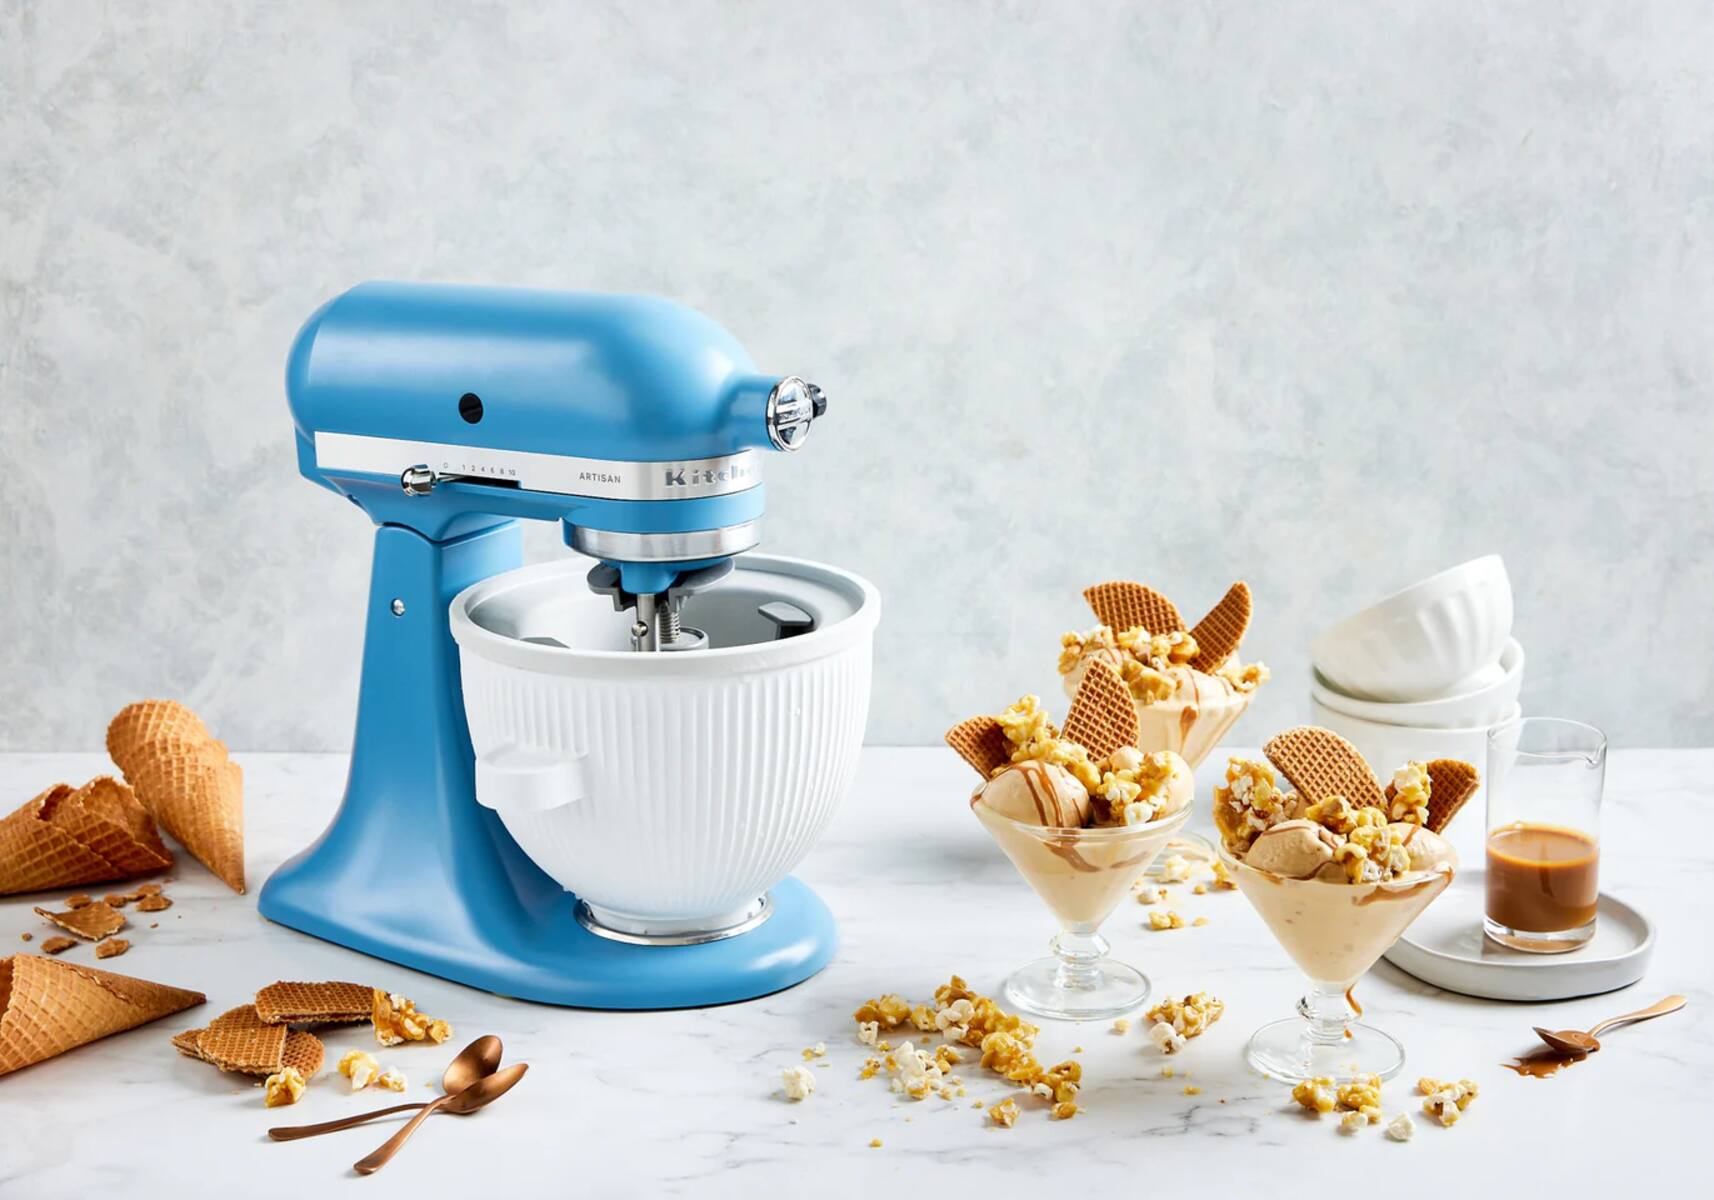
With its durable construction and user-friendly design, the Kitchenaid ice cream maker attachment is a perfect addition to your Kitchenaid stand mixer. It allows you to transform simple ingredients into a velvety-smooth ice cream that will rival the best ice cream parlors in town.
In the following sections, we’ll dive into the step-by-step process of creating your homemade ice cream masterpiece. From preparing the ice cream maker to serving up your heavenly creation, we’ll cover it all.
So, get ready to embark on a delicious journey as we explore the art of making homemade ice cream with the Kitchenaid ice cream maker.
Getting Started
Before you start making your ice cream, it’s important to gather all the necessary tools and ingredients. Here’s what you’ll need:
- Kitchenaid stand mixer
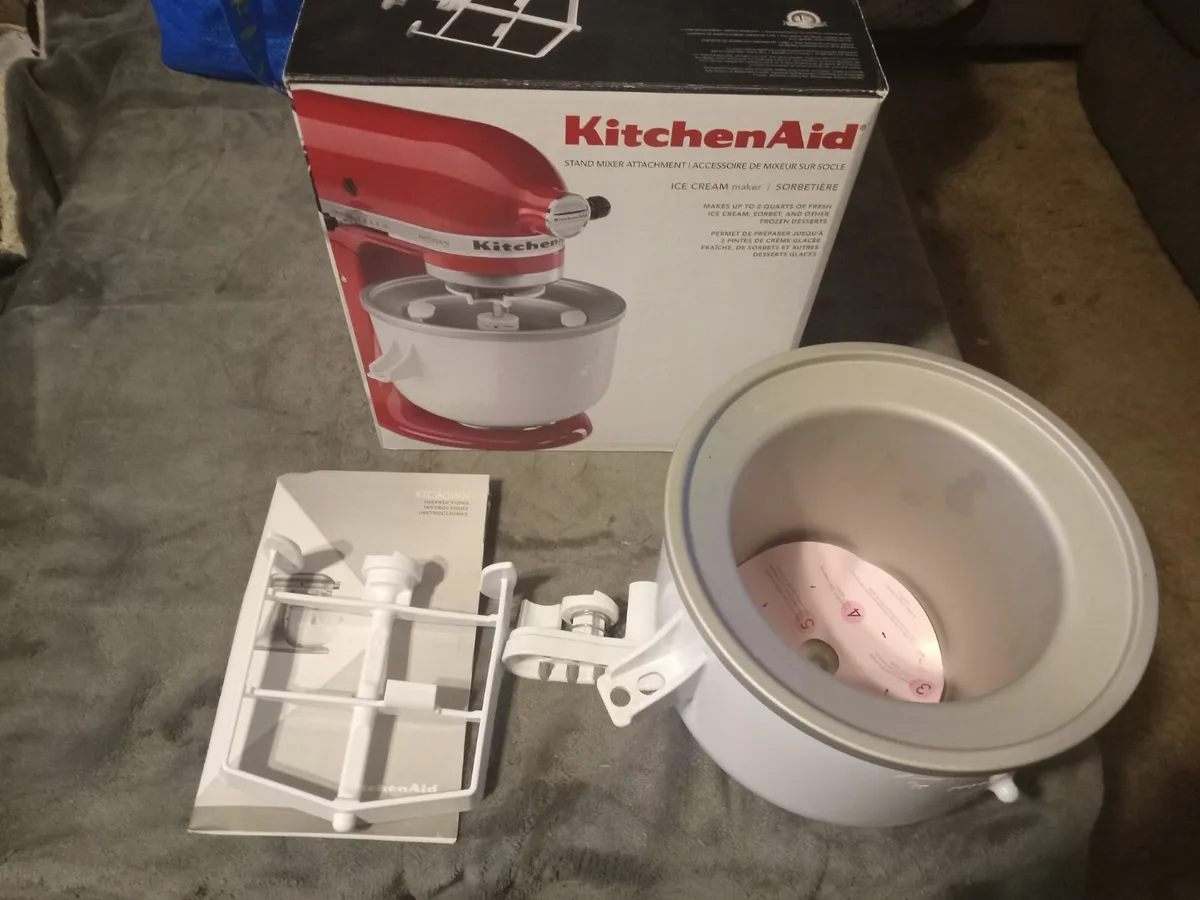
- Kitchenaid ice cream maker attachment
- Freezer-safe container for storing the ice cream
- Measuring cups and spoons
- Whisk or spatula
- Ingredients for the ice cream flavor of your choice (more on that later!)
Make sure your Kitchenaid stand mixer is in good working order, and that the ice cream maker attachment is clean and dry. It’s also a good idea to double-check that you have enough freezer space to chill the mixing bowl of the ice cream maker.
Once you have everything ready, it’s time to move on to the next step: gathering the ingredients. The great thing about making ice cream at home is that you have complete control over the flavors and ingredients you use. You can let your imagination run wild and create unique combinations or stick to classic favorites.
Next, we’ll discuss the essential ingredients needed to make a basic ice cream base. These ingredients serve as a blank canvas for adding various flavors, mix-ins, and toppings. So, let’s dive into the world of ice cream flavors and get ready to satisfy your sweet tooth!
Ingredients
Making homemade ice cream allows you to experiment with a wide range of flavors, from traditional classics to adventurous creations. Here are the basic ingredients you’ll need for a classic ice cream base:
- 2 cups of heavy cream: This will give your ice cream its rich, creamy texture.
- 1 cup of whole milk: The milk adds a smoothness to the ice cream and helps create a balanced consistency.
- 3/4 cup of granulated sugar: The sugar adds sweetness and helps prevent the ice cream from freezing too hard.
- Pinch of salt: Salt enhances the overall flavor of the ice cream and helps balance the sweetness.
- 2 teaspoons of vanilla extract: Vanilla extract adds a delightful aroma and flavor to the ice cream.
These ingredients form the base of your ice cream, and from here, you can let your creativity shine by adding various flavors and mix-ins. Whether you prefer chocolate, fruit, nuts, or even cookies, the possibilities are endless.
For example, to make a classic vanilla ice cream, you can simply add vanilla bean paste or scrape the seeds from a vanilla bean and mix them into the base ingredients. For chocolate lovers, cocoa powder or melted chocolate can be added to create a luscious chocolate ice cream.
If you’re feeling adventurous, you can infuse your ice cream with flavors like mint, coffee, or even lavender. Simply steep the desired ingredient in the warm milk and cream mixture before adding it to the other ingredients.
Once you have selected your flavors and mix-ins, it’s time to move on to the next steps of the ice cream making process. In the following sections, we’ll guide you through the steps of preparing the ice cream maker, assembling the ingredients, and chilling the mixture to perfection.
Step 1: Preparing the Ice Cream Maker
Before you can start churning your ice cream, it’s crucial to prepare your Kitchenaid ice cream maker attachment for the best results. Follow these steps for proper preparation:
- Place the ice cream maker bowl in the freezer: It’s important to freeze the mixing bowl for at least 15 hours before making the ice cream. Ensure the bowl is completely dry before placing it in the freezer.
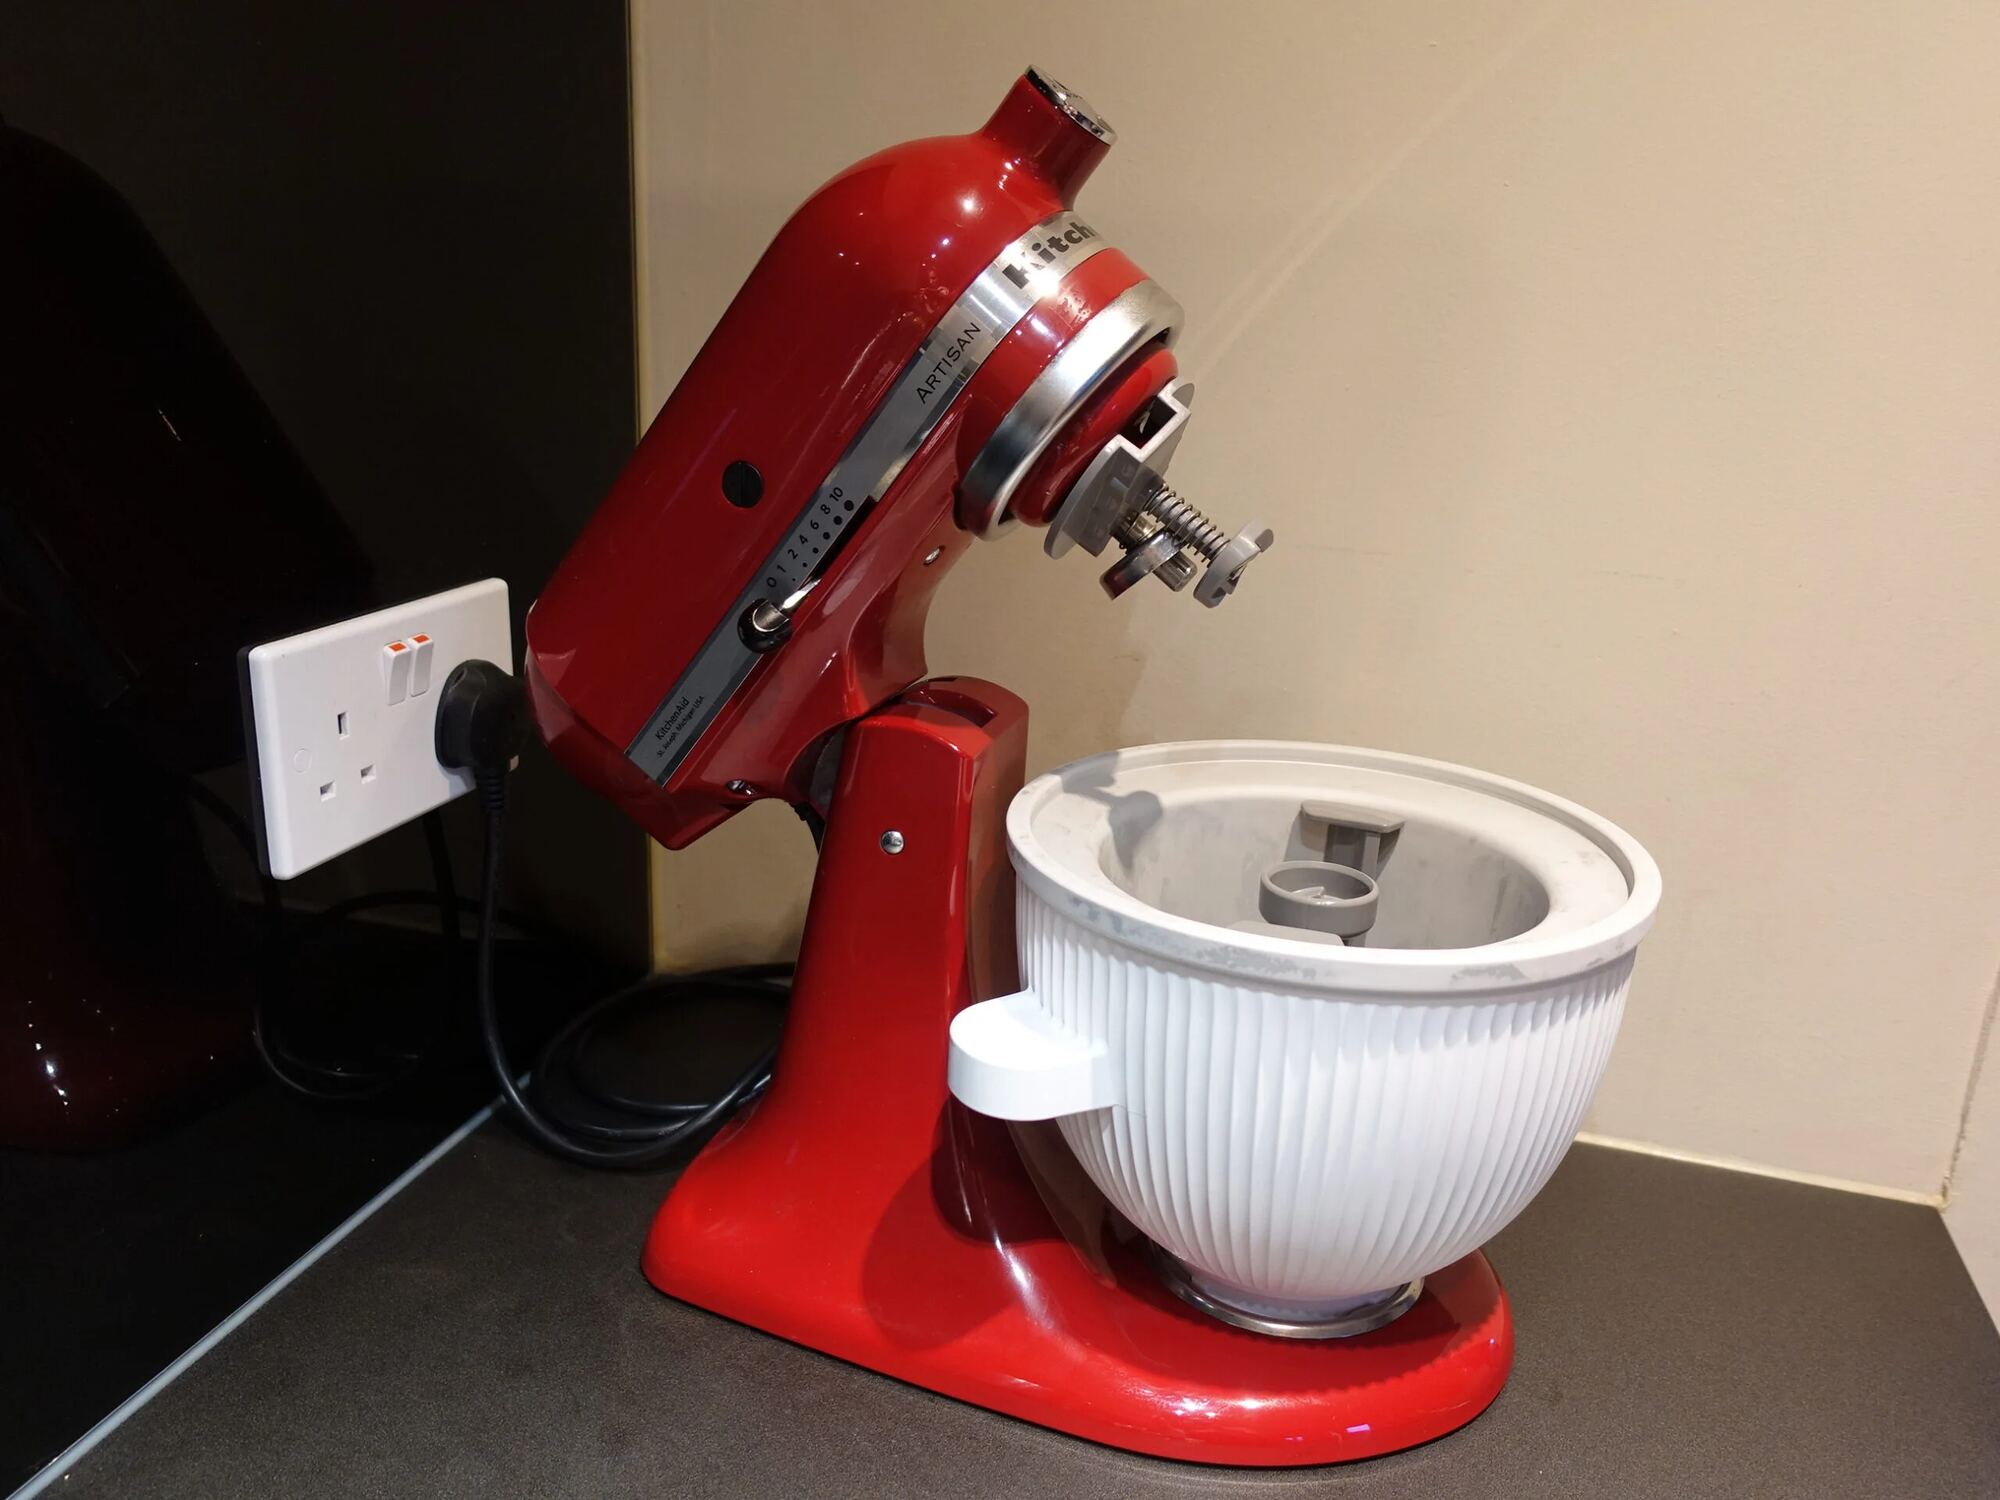
- Attach the ice cream maker to the Kitchenaid stand mixer: Remove the freeze bowl from the freezer and securely attach it to the stand mixer. Ensure that it locks into place and is stable.
- Set up the speed control: Fit the dasher onto the stand mixer’s beater shaft and adjust the speed control lever to the “stir” setting, which is the lowest speed. This will ensure a gentle and consistent churn.
By properly preparing your ice cream maker, you’ll create an optimal environment for the ice cream mixture to freeze and churn evenly. This will result in a creamy and indulgent texture that will make your homemade ice cream truly irresistible.
Now that your ice cream maker is ready, it’s time to move on to the next step: assembling the ingredients for your delicious ice cream creation.
Step 2: Assembling the Ingredients
Now that your Kitchenaid ice cream maker attachment is prepared, it’s time to gather your ingredients and start assembling the base for your homemade ice cream. Follow these simple steps:
- In a mixing bowl, combine the heavy cream, whole milk, granulated sugar, and a pinch of salt. Whisk the mixture until the sugar is completely dissolved. You can also use a spatula to ensure all the ingredients are well incorporated.
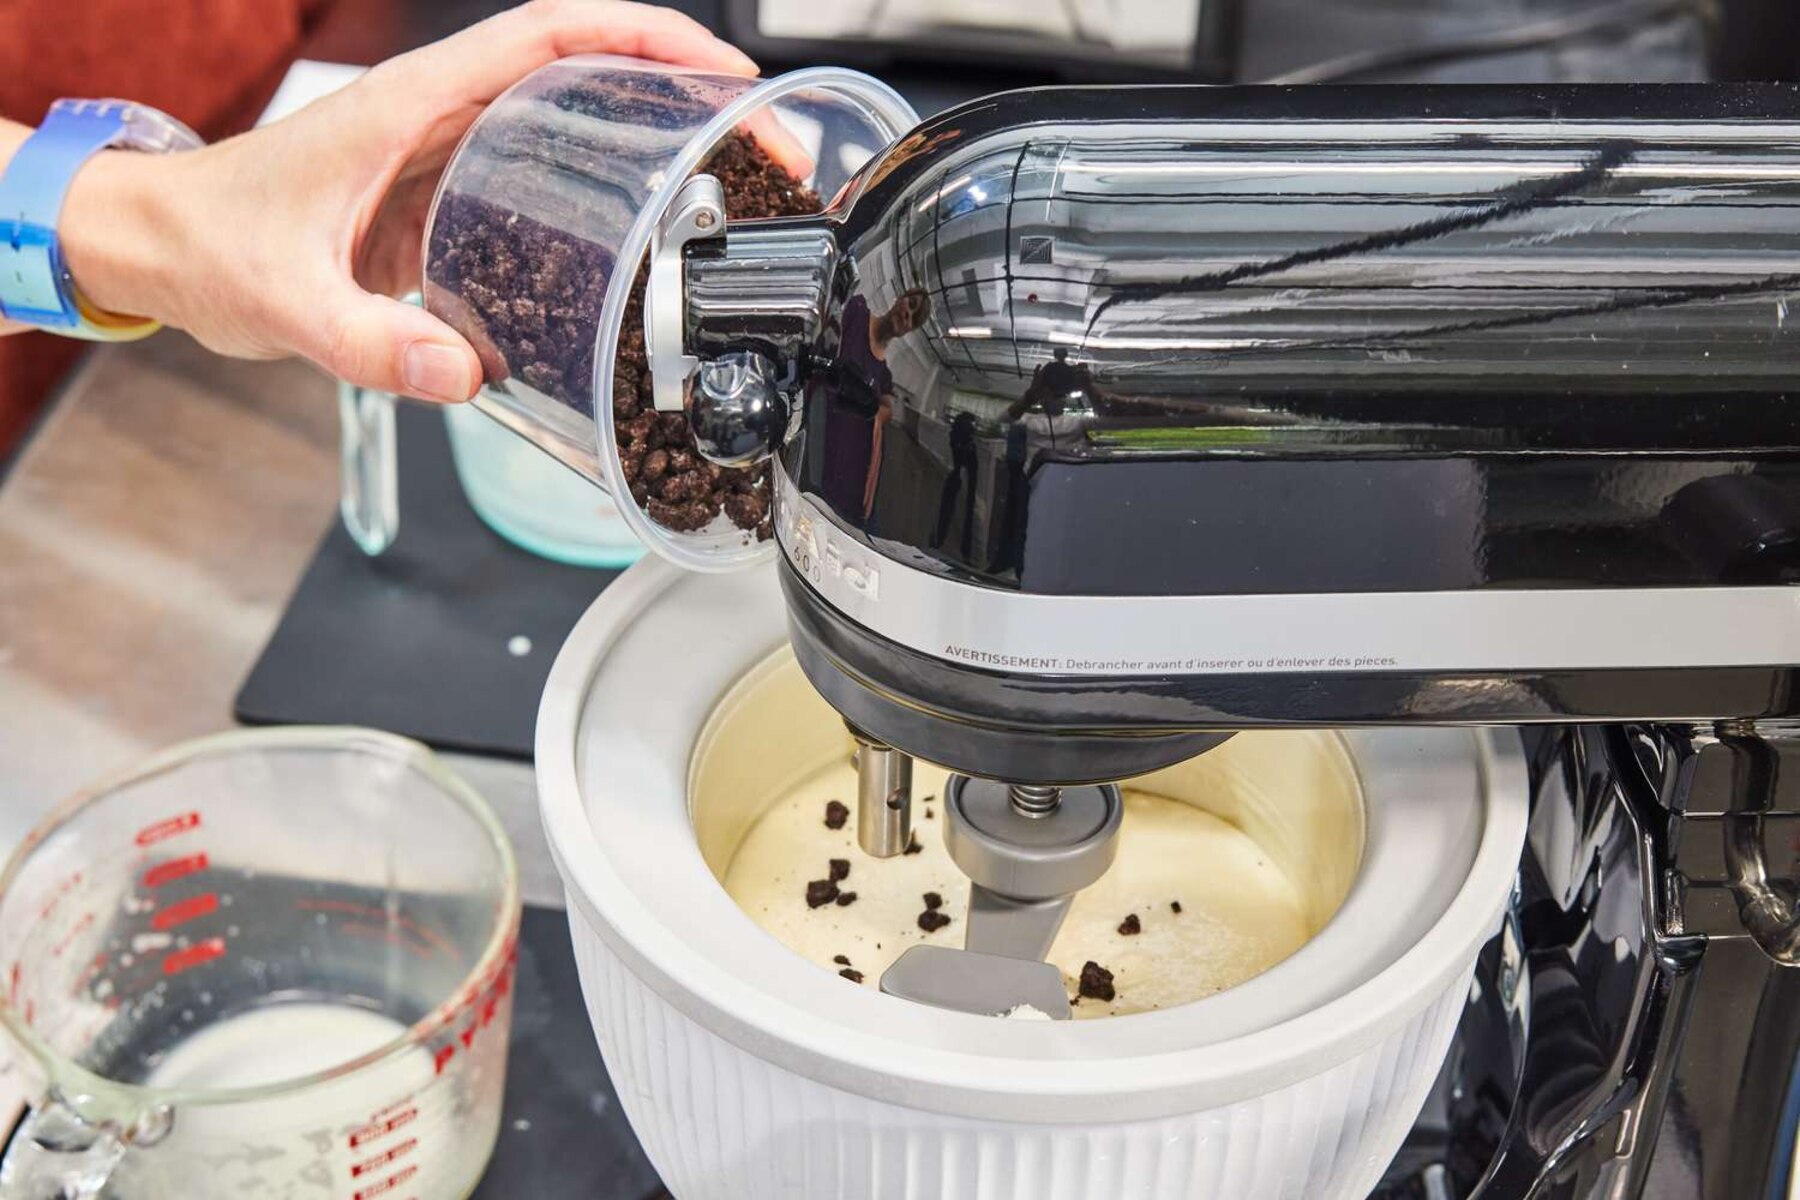
- Add in your desired flavorings and mix-ins. Whether you’re adding vanilla extract, cocoa powder, or other flavors, ensure to follow the recommended measurements to maintain a balanced flavor profile. For additional mix-ins like chocolate chips or nuts, fold them into the mixture gently.
- Give the mixture a taste test and adjust the flavors if necessary. Remember, the flavors may be slightly muted when cold, so it’s okay if the mixture tastes slightly stronger than desired.
- Once the mixture is well-combined and the flavors are to your liking, transfer it to a container with a spout to make pouring into the ice cream maker easier.
At this stage, your ice cream base is ready to be churned to perfection. The combination of creamy ingredients and delicious flavors will result in a delectable frozen treat that you’ll be proud to call your own.
Now that you’ve assembled your ingredients, it’s time to move on to the next step: chilling the ice cream mixture before it goes into the ice cream maker.
Step 3: Chilling the Mixture
After assembling the ingredients for your homemade ice cream, it’s important to chill the mixture before it goes into the Kitchenaid ice cream maker. This step helps the flavors meld together and ensures a smoother freezing process. Follow these steps:
- Cover the container holding the ice cream mixture with a lid or plastic wrap to prevent any unwanted flavors or odors from seeping in.
- Refrigerate the mixture for at least 2 hours, or until it is thoroughly chilled. Chilling the mixture allows the flavors to develop and results in a creamier texture.
- While the mixture is chilling, it is a good time to clean up your workspace and prepare any additional toppings or mix-ins you plan to add to your ice cream.
- Once the mixture has chilled, remove it from the refrigerator and give it a quick stir to ensure it is well mixed and smooth.
Chilling the mixture not only enhances the flavors but also ensures better consistency when churning. It’s essential to use a chilled ice cream base to achieve the desired velvety texture and prevent the ice cream from melting too quickly.
Now that your ice cream mixture is chilled and ready, it’s time to move on to the next step: churning the mixture in the Kitchenaid ice cream maker. Get ready to watch as the magic unfolds and your ice cream takes shape!
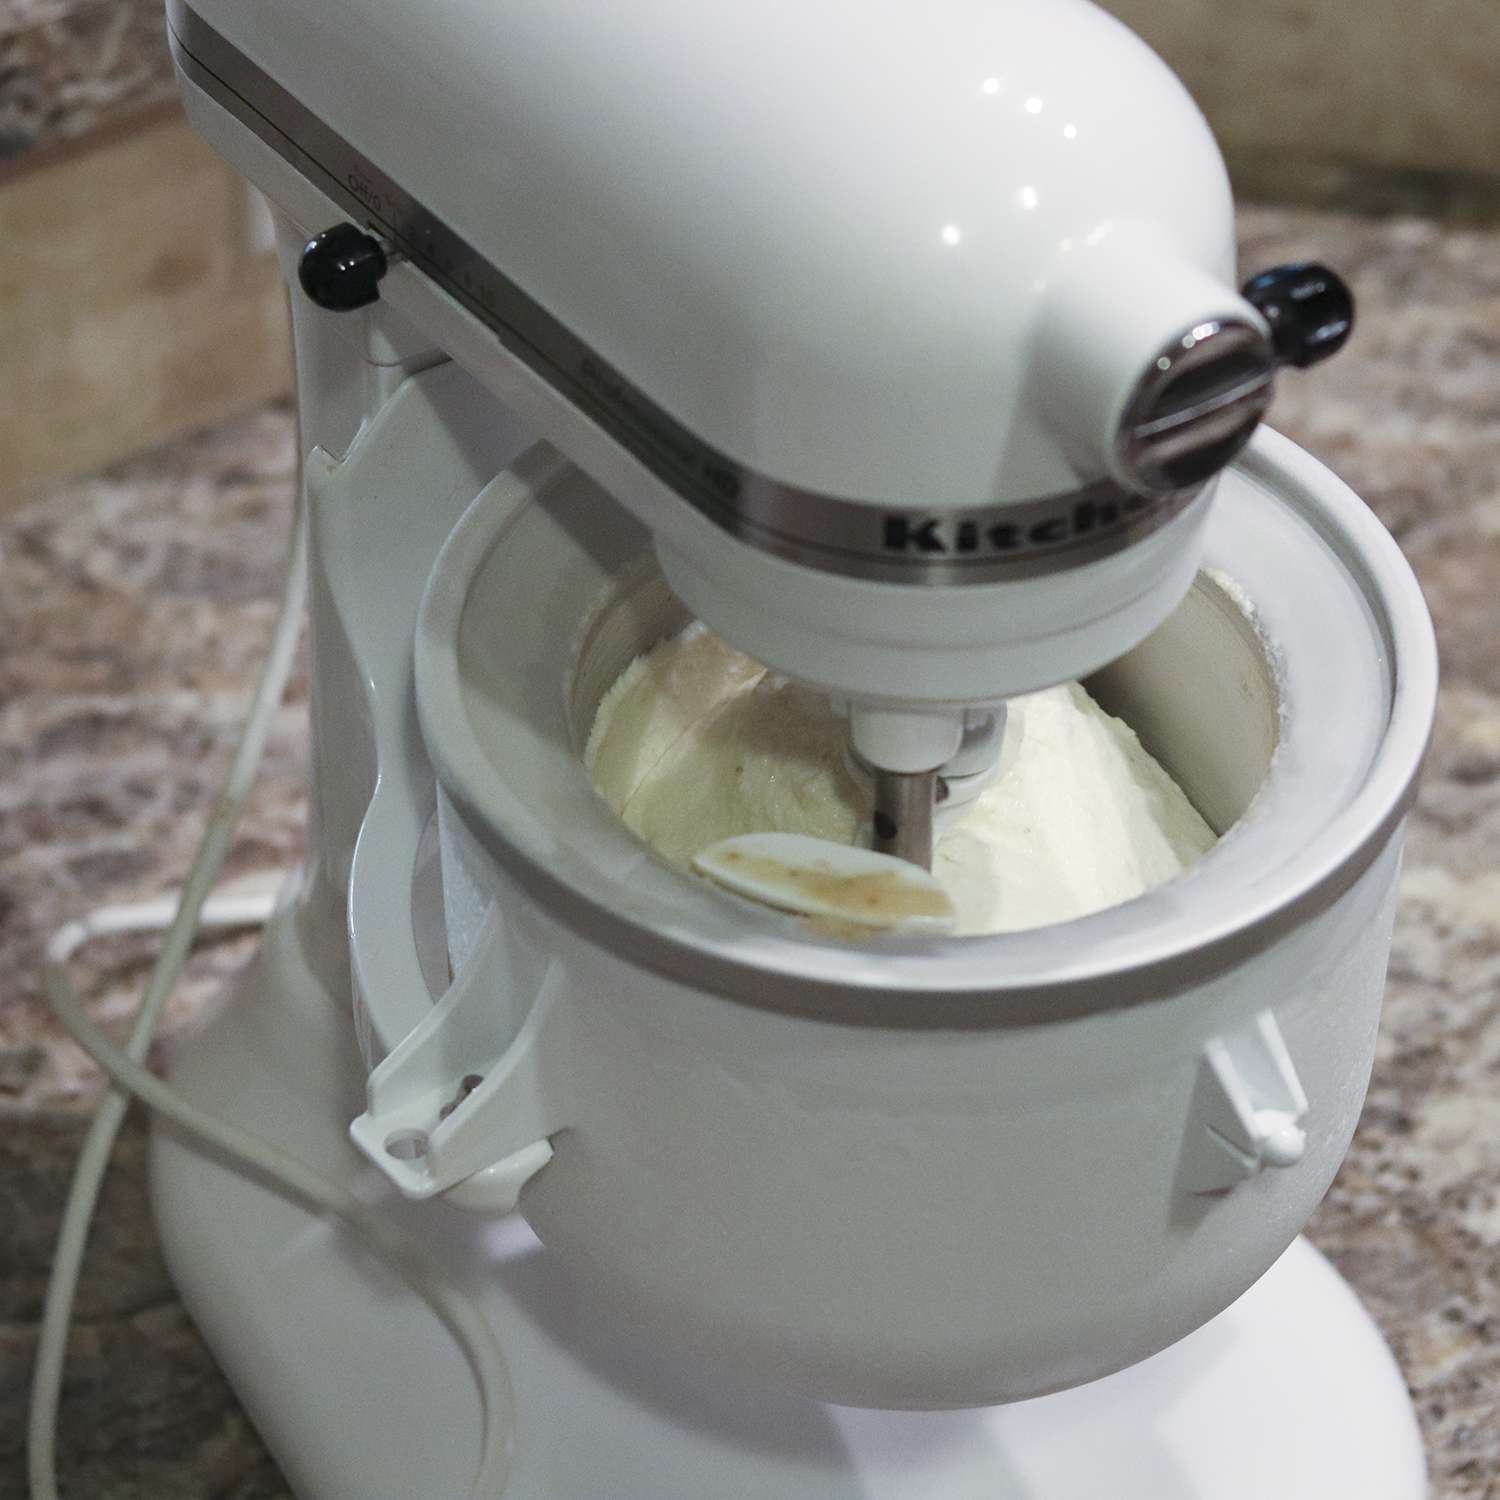
Step 4: Churning the Ice Cream
Now that your ice cream mixture is chilled and perfectly prepared, it’s time to start the churning process. Follow these steps to transform your mixture into a creamy and dreamy ice cream:
- Retrieve the frozen mixing bowl from the freezer and securely attach it to your Kitchenaid stand mixer.
- Set the stand mixer to the lowest speed using the speed control lever, ensuring the dasher is properly positioned inside the freezing bowl.
- Pour the chilled ice cream mixture into the freezing bowl through the pour spout or directly onto the dasher.
- Allow the Kitchenaid ice cream maker to churn the mixture for about 20 to 30 minutes, or until the ice cream reaches your desired consistency.
- Throughout the churning process, keep an eye on the mixture. It will gradually thicken and increase in volume.
- Optional: If you plan to incorporate any mix-ins, such as chocolate chips or cookie dough, add them during the last few minutes of churning to evenly distribute them throughout the ice cream.
As the ice cream churns, the freezing bowl freezes the mixture gradually, resulting in a smooth and creamy texture. It’s important not to overfill the bowl to allow for expansion during churning.
While the ice cream is churning, take in the delightful aromas and prepare yourself for the mouthwatering experience that awaits. Once the desired consistency is achieved, it’s time to move on to the final step: freezing your freshly churned ice cream.
Step 5: Freezing the Ice Cream
After the ice cream has been churned to perfection, it’s time to transfer it to a container and freeze it for a final setting. Follow these steps to properly freeze your homemade ice cream:
- Prepare a freezer-safe container with a tight-fitting lid. It should be large enough to hold the entire batch of ice cream.
- Using a spatula or spoon, transfer the freshly churned ice cream from the freezing bowl into the container.
- Smooth out the surface of the ice cream with the back of a spoon or spatula to remove any air pockets and create an even texture.
- Place the lid securely on the container to prevent freezer burn and the absorption of any unwanted flavors or odors.
- Label the container with the flavor and the date to keep track of your ice cream creations in the freezer.
- Put the container in the freezer and allow the ice cream to freeze for at least 4 hours or until it reaches a firm consistency.
Freezing the ice cream allows it to solidify and develop its desired texture. While it’s tempting to enjoy a scoop right away, the freezing process ensures the flavors meld together and creates a creamy, scoopable treat.
Now that your freshly churned ice cream is in the freezer, you’ll need to exercise some patience. Allow it to freeze undisturbed, resisting the temptation to constantly check on it. The longer the ice cream has a chance to freeze, the better the texture will be upon serving.
Once the ice cream is fully frozen, it’s time to move on to the final step: serving and enjoying your homemade creation!
Step 6: Serving and Enjoying
Congratulations! You’ve successfully made homemade ice cream with the help of your Kitchenaid ice cream maker. Now it’s time to indulge in the delicious fruits of your labor. Follow these steps to serve and enjoy your homemade creation:
- Retrieve the container of frozen ice cream from the freezer and allow it to sit at room temperature for a few minutes to soften slightly. This will make scooping easier.
- Using an ice cream scoop, spoon, or melon baller, scoop your desired amount of ice cream into a serving bowl or cone.
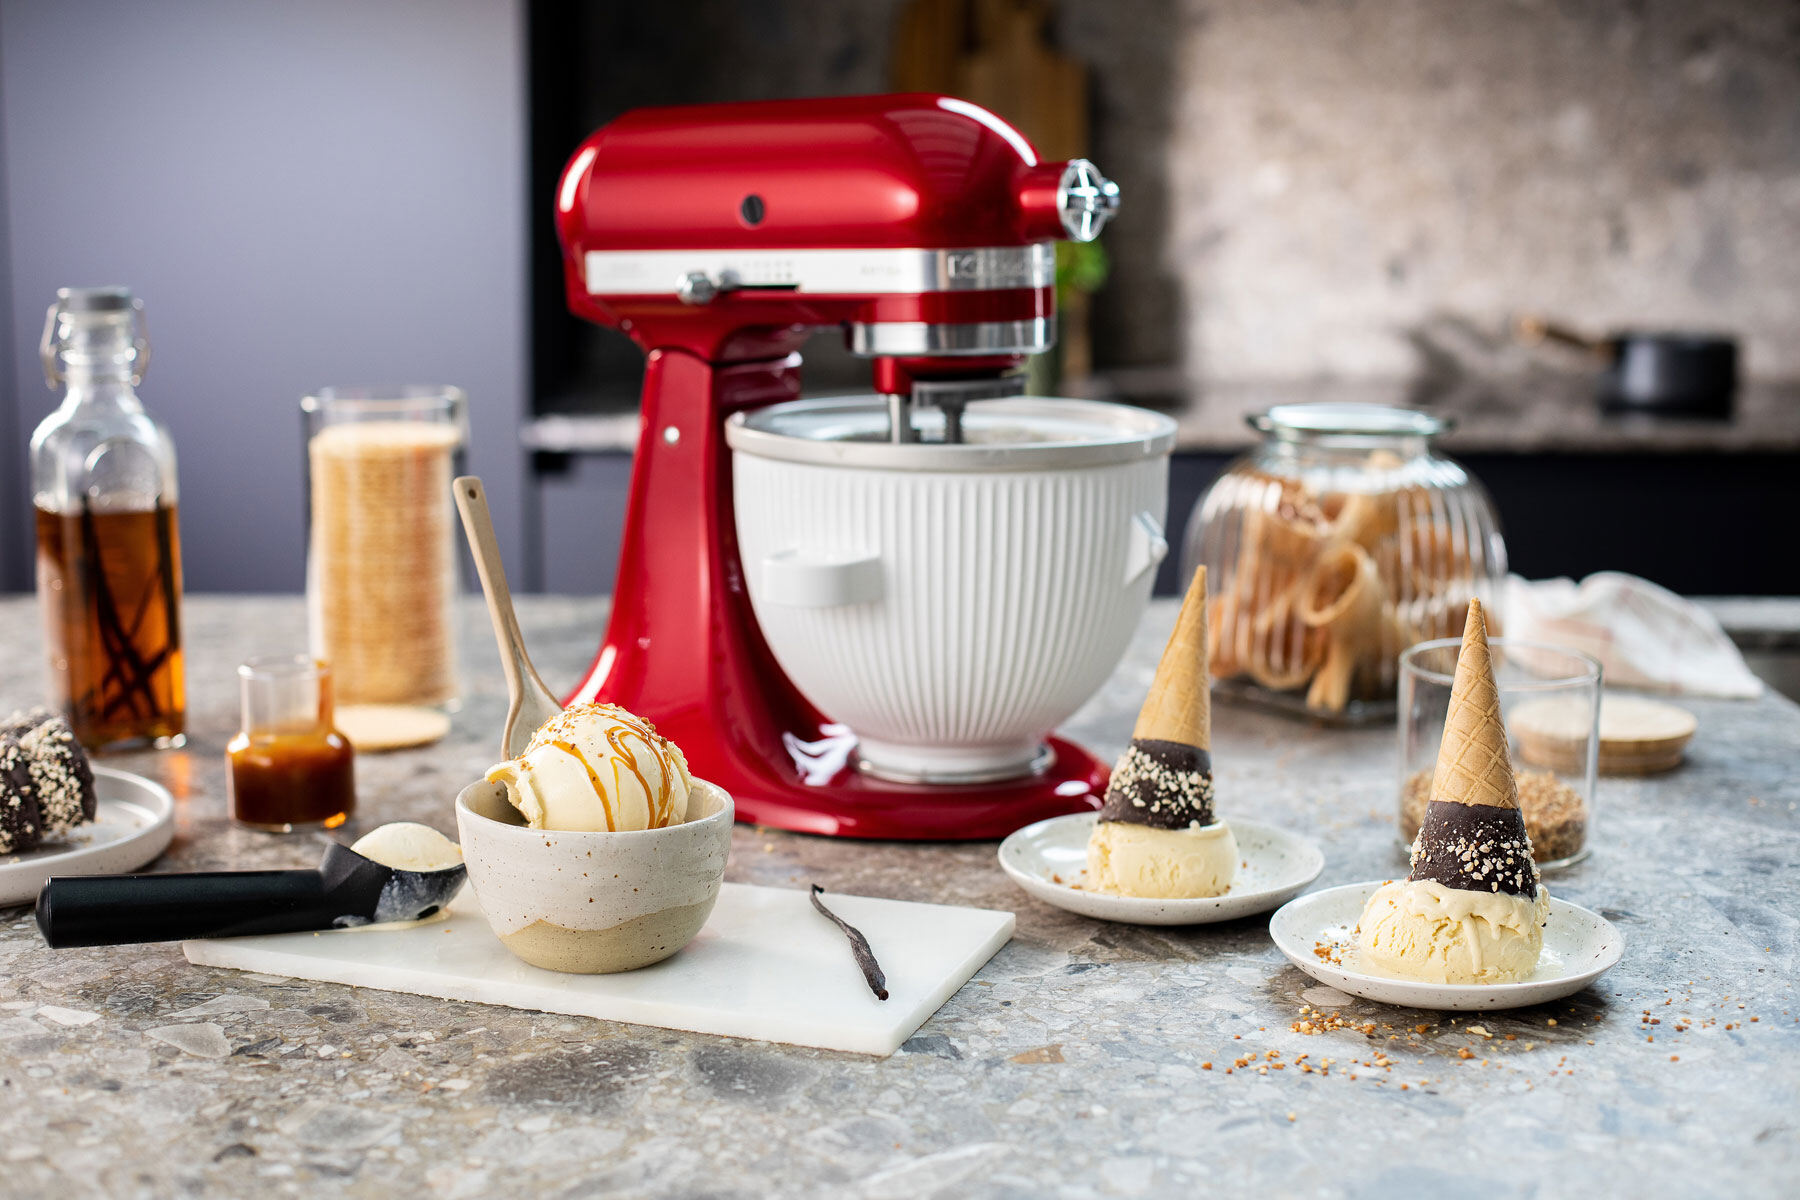
- Garnish your ice cream with toppings such as sprinkles, crushed nuts, chocolate sauce, or fresh fruit, depending on your preference.
- Take a moment to admire your creation, appreciating the effort and love that went into making your own ice cream.
- Grab a spoon and dig in! Savor the creamy and luscious texture, allowing the flavors to explode on your taste buds.
As you enjoy your homemade ice cream, take note of its unique qualities and revel in the fact that you crafted this delightful dessert from scratch. Share the joy with friends and family, or simply savor it as a personal treat.
Remember, homemade ice cream is best enjoyed fresh, so be sure to store any leftovers in a tightly sealed container in the freezer for future indulgence. Keep in mind that ice cream may become harder when stored for a longer period, so allow it to sit at room temperature for a few minutes before scooping and serving.
Now that you’ve mastered the art of making ice cream with your Kitchenaid ice cream maker, the possibilities are endless. Let your creativity run wild with different flavor combinations, mix-ins, and toppings to create personalized ice cream creations that will leave everyone impressed.
So go ahead, gather some ingredients, fire up your Kitchenaid ice cream maker, and embark on your next frozen dessert adventure. Enjoy the sweet rewards of your homemade ice cream as you relish in the satisfaction of creating something truly remarkable.