Introduction
Factory resetting your Windows 10 laptop can be a practical solution when you’re facing persistent issues or want to start fresh with a clean slate. Whether your laptop is running too slow, experiencing frequent crashes, infected with malware, or you simply want to sell it, a factory reset can help restore it to its original state.
By performing a factory reset, you can erase all the data, settings, and applications on your laptop, eliminating any software conflicts or system errors that may be causing problems. This process essentially reverts your laptop back to the state it was in when you first bought it, giving you a clean and stable operating system to work with.
However, it’s important to note that a factory reset will wipe out all your personal files and installed programs, so it’s crucial to back up any important data before proceeding. Additionally, certain precautions should be taken to ensure a successful reset and minimize the risk of data loss.
In this guide, we will walk you through the various methods to factory reset your Windows 10 laptop. We will cover both the built-in options available within the Windows 10 operating system, as well as external methods using recovery media. So, whether you’re a tech-savvy individual or a novice user, we’ve got you covered.
Before we dive into the step-by-step instructions for each method, let’s explore the scenarios in which a factory reset can be beneficial and the importance of backing up your files.
When Should You Factory Reset Your Windows 10 Laptop?
Factory resetting your Windows 10 laptop can be a useful troubleshooting technique when you encounter certain issues with your device. Here are some scenarios where a factory reset might be warranted:
- Performance issues: Is your laptop running frustratingly slow, taking forever to load programs or respond to commands? A factory reset can help eliminate any software conflicts or cluttered files that may be causing the sluggish performance.
- Frequent crashes and errors: If your laptop frequently crashes or displays error messages, it can indicate underlying software issues. By performing a factory reset, you can start fresh and resolve any system errors that might be responsible for the instability.
- Malware or virus infections: Has your laptop been infected with malicious software or viruses despite your best efforts to protect it? A factory reset can help remove the malware and restore your laptop to a clean state.
- Stuck in a boot loop: Sometimes, a corrupted system file or incompatible driver can cause your laptop to get stuck in a continuous boot loop. In such cases, a factory reset can help resolve the issue and get your laptop back to normal.
- Preparing to sell or donate: If you’re planning to sell or donate your laptop, you should perform a factory reset to ensure that none of your personal files or sensitive data remain on the device. This helps protect your privacy and ensures a fresh start for the new owner.
It’s important to note that a factory reset should be seen as a last resort when other troubleshooting methods have failed to resolve the issue. Before proceeding with a factory reset, it’s recommended to try other remedies such as updating drivers, performing a malware scan, or using system recovery options.
Remember, a factory reset will delete all your personal files, applications, and settings, so it’s crucial to back up any important data before initiating the process.
Now that we’ve explored the scenarios where a factory reset can be beneficial, let’s move on to the next section, where we will discuss the importance of backing up your files before performing a reset.
Backup Your Important Files and Data
Before proceeding with a factory reset, it’s absolutely crucial to back up all your important files and data. The process of factory resetting your Windows 10 laptop involves erasing all the existing data, including personal files, installed applications, and customized settings. Without a backup, you risk losing valuable documents, photos, videos, and other irreplaceable files.
Thankfully, backing up your important files and data is a relatively simple and straightforward process. Here are a few methods you can use:
- External hard drive or USB: One of the most common and convenient methods is to transfer your files to an external hard drive or USB storage device. Connect the external device to your laptop, then copy and paste or drag and drop your files onto the external storage.
- Cloud storage services: There are several cloud storage services available, such as Google Drive, Dropbox, and OneDrive. These services allow you to upload your files to the cloud, providing secure storage and the ability to access your files from anywhere with an internet connection.
- Network storage: If you have a network-attached storage (NAS) device or a home server, you can transfer your files to these devices for safekeeping. This method is especially useful if you have a large amount of data that may not fit on an external hard drive or in cloud storage.
Whichever method you choose, make sure to organize your files and create a backup folder structure that makes it easy to locate and retrieve your files later on. Take the time to review all your folders, including desktop, documents, pictures, music, videos, and any other directories where you may have stored important files.
Additionally, don’t forget to back up any emails, contacts, bookmarks, and other data that may be stored within applications or web browsers. Many email platforms provide export options to save your emails locally, and browsers offer options to export bookmarks and settings.
Once you have successfully backed up all your important files and data, you can proceed with confidence knowing that your data is secure and won’t be lost during the factory reset process.
Now that we’ve covered the importance of backing up your files, let’s move on to the different methods you can use to factory reset your Windows 10 laptop.
Factory Reset via Windows 10 Settings
One of the easiest ways to factory reset your Windows 10 laptop is through the built-in settings option. This method allows you to reset your laptop while preserving the operating system. Here’s how you can do it:
- Open the Start menu and click on the Settings icon (it looks like a gear).
- In the Settings menu, select Update & Security.
- In the left sidebar, click on Recovery.
- Under the Reset this PC section, click on the Get started button.
- You will be presented with two options:
- Keep my files: This option will remove all installed apps and settings, but will keep your personal files intact.
- Remove everything: This option will remove all installed apps, settings, and personal files. Make sure you have backed up your important files before choosing this option.
Select the appropriate option for your needs.
- Windows will display a final warning message explaining what will happen during the reset process. Review the information and click on the Next button.
- Click on the Reset button to initiate the factory reset process.
Windows will now begin the process of resetting your laptop. This can take some time, so make sure you have your laptop connected to a power source. The reset process may involve multiple restarts and system configurations, so be patient and do not interrupt the process.
Once the reset is complete, your laptop will restart and you will be guided through the initial setup process, just like when you first purchased the laptop. At this point, you can reinstall your necessary applications and restore your backed-up files.
It’s important to note that not all laptops have the exact same configuration options in the Windows 10 settings menu, as the interface may vary slightly between manufacturers. However, the general steps outlined above should apply to most Windows 10 laptops.
Next, we will explore another method to factory reset your Windows 10 laptop using the Advanced Startup Options.
Factory Reset using Advanced Startup Options
If you’re unable to access the Windows 10 settings or your laptop is experiencing serious issues, you can still perform a factory reset using the Advanced Startup Options. This method allows you to reset your laptop without needing to boot into the operating system. Follow the steps below to perform a factory reset using this method:
- Ensure that your laptop is powered off completely.
- Press the Power button to turn on your laptop.
- As soon as the laptop starts booting, press and hold the Shift key.
- Continue holding the Shift key until the blue Windows logo appears on the screen.
- Once you see the blue Windows logo, release the Shift key and select Troubleshoot from the options available.
- In the Troubleshoot menu, select Reset this PC.
- Similar to the previous method, you will be presented with two options: Keep my files or Remove everything. Choose the appropriate option based on your needs.
- Windows will display a warning message explaining the consequences of the reset process. Review the information and click on Next.
- Click on the Reset button to initiate the factory reset process.
Windows will now start the factory reset process, which may take some time. The laptop will restart, and the reset process will begin. Be patient and do not interrupt the process.
After the reset is complete, your laptop will restart, and you will need to complete the initial setup, just like when you first purchased the laptop. You can then reinstall any necessary applications and restore your backed-up files.
Keep in mind that accessing the Advanced Startup Options may vary slightly depending on your laptop’s manufacturer or specific model. Also, note that this method is more suitable for advanced users who are comfortable with accessing system-level options.
In the next section, we will explore how to perform a factory reset using a Recovery Drive.
Factory Reset using Recovery Drive
If your Windows 10 laptop is experiencing severe issues or you’re unable to access the operating system, using a Recovery Drive can be a viable option to perform a factory reset. A Recovery Drive is a USB drive that contains the necessary files to troubleshoot and repair your laptop. Here’s how you can use a Recovery Drive to factory reset your Windows 10 laptop:
- Connect the USB Recovery Drive to an available USB port on your laptop.
- Power on your laptop and press the appropriate key (such as F12 or Esc) to access the boot menu. The specific key may vary depending on your laptop’s manufacturer.
- In the boot menu, select the USB Recovery Drive as the boot device.
- Follow the on-screen instructions to access the recovery environment.
- Once you’re in the recovery environment, select the desired language and keyboard layout.
- Click on Troubleshoot and then select Reset this PC.
- Choose the option that suits your needs: Keep my files to remove apps and settings but preserve personal data, or Remove everything to wipe all data from the laptop.
- Windows will display a warning message about the consequences of the reset process. Carefully review the information and click on Next.
- Click on the Reset button to start the factory reset process.
Windows will now begin the reset process, which may take a while. The laptop will reboot and the factory reset will proceed. It’s important to note that during this process, your laptop may restart multiple times and perform various configurations. Do not interrupt the process and keep the laptop connected to a power source.
Once the factory reset is complete, your laptop will restart and you’ll need to go through the initial setup, just like when you first bought the laptop. You can then reinstall applications and restore your backed-up files.
Note: It’s essential to create a Recovery Drive before you encounter any issues with your laptop. Instructions on creating a Recovery Drive can be found in the Windows 10 documentation or on Microsoft’s support website.
In the next section, we will explore an alternative way to perform a factory reset using the System Restore feature.
Factory Reset using System Restore
If you’re facing minor software issues or unstable system behavior, using the System Restore feature in Windows 10 can help you revert your laptop to a previous state without affecting your personal files. Here’s how you can perform a factory reset using System Restore:
- Open the Start menu and type “system restore” in the search bar. Select Create a restore point from the search results.
- In the System Properties window, click on the System Restore button.
- In the System Restore wizard, click on Next to proceed.
- You will be presented with a list of available restore points. Choose a restore point that predates the issues you’re experiencing and click on Next.
- Review the details of the restore point and click on Finish to confirm.
- Windows will now restore your laptop to the selected restore point. This process may take some time, and your laptop may restart multiple times during the process. Do not interrupt the process.
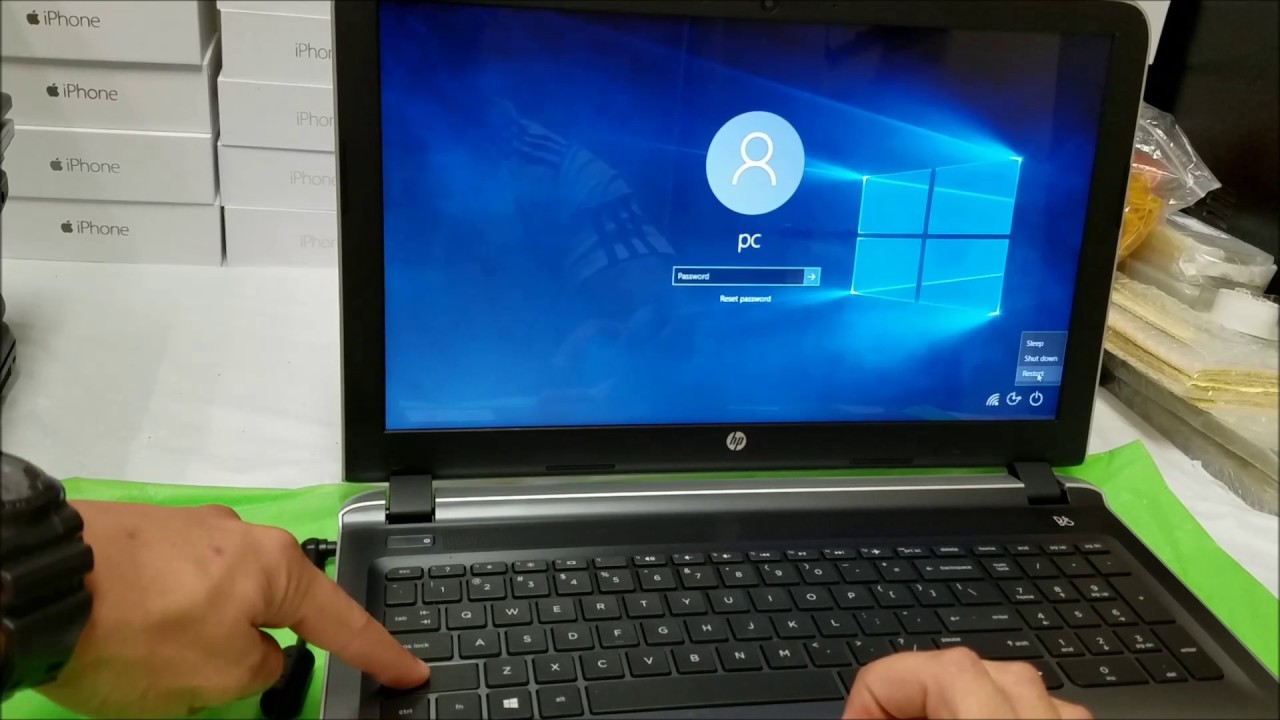
- Once the restoration is complete, your laptop will restart, and you will be taken to the Windows login screen. Enter your credentials to access your restored desktop.
It’s important to note that System Restore does not remove personal files, but it will uninstall any applications and revert system settings to a previous state. This can help resolve software conflicts and fix stability issues without the need for a full factory reset.
If you’re unable to access the Windows 10 operating system or the System Restore feature is not available, you can still perform a factory reset using the other methods mentioned in this guide.
Now that you know how to perform a factory reset using System Restore, let’s move on to the next section, where we will discuss reinstalling Windows 10 from USB media.
Reinstalling Windows 10 from USB Media
If your Windows 10 laptop is experiencing major issues, such as a corrupted operating system or persistent errors, reinstalling Windows 10 from USB media can provide a fresh start. Here’s how you can reinstall Windows 10 using a USB drive:
- Ensure that you have a USB drive with at least 8GB of storage capacity available.
- Visit the official Microsoft website and download the Windows 10 Media Creation Tool.
- Insert the USB drive into a functional computer and run the Media Creation Tool.
- Follow the instructions in the tool to create a bootable USB drive with the Windows 10 installation files.
- Once the USB drive is ready, insert it into the Windows 10 laptop that you want to reinstall.
- Power on the laptop and press the appropriate key (usually F12 or Esc) to access the boot menu.
- In the boot menu, choose the USB drive as the boot device.
- The Windows 10 setup will begin. Select your preferred language, time, and keyboard layout.
- Click on Install Now to start the installation process.
- Follow the on-screen prompts and enter your Windows 10 product key if prompted.
- Choose your installation type. If you want to perform a full factory reset, select Custom. If you want to keep some files or settings, choose Upgrade.
- Select the drive where you want to install Windows 10 and click on Next.
- Windows 10 will start installing on your laptop. The installation process may take some time, and your laptop may restart several times.
- Once the installation is complete, follow the on-screen instructions to set up your newly installed Windows 10.
After the reinstallation, you will have a clean and fresh copy of Windows 10 on your laptop. You can then reinstall your applications, restore your backed-up files, and customize your settings to your preference.
Note: It’s important to ensure that you have a valid Windows 10 product key before reinstalling the operating system. If you don’t have one, reach out to Microsoft for assistance.
In the next section, we will summarize the methods discussed and conclude this guide.
Conclusion
Factory resetting your Windows 10 laptop can be a powerful solution to address various issues and start fresh with a clean system. Whether you’re facing performance issues, frequent crashes, malware infections, or simply preparing to sell or donate your laptop, performing a factory reset can help restore your laptop to its original state.
In this guide, we explored several methods to factory reset your Windows 10 laptop. You learned how to reset your laptop through Windows 10 settings, access the Advanced Startup Options, use a Recovery Drive, perform a factory reset with System Restore, and reinstall Windows 10 from USB media.
Regardless of the method you choose, it’s crucial to remember the importance of backing up your important files and data before initiating a factory reset. This ensures that your precious files are safe, and you can easily restore them after the reset process.
Remember to carefully follow the step-by-step instructions for the specific method you choose, as the process may vary depending on your laptop’s manufacturer and model. Be patient during the reset process, as it may take some time and involve multiple restarts.
After completing the factory reset, you can set up your laptop anew, reinstall necessary applications, and restore your backed-up files. Take advantage of this fresh start to organize your files and customize your settings to suit your needs.
By utilizing the methods discussed in this guide, you can confidently perform a factory reset on your Windows 10 laptop and address any persistent issues you may be experiencing. Whether you’re a tech enthusiast or a novice user, these methods offer a range of options to suit your comfort level and specific requirements.
We hope this guide has been helpful to you in understanding the various methods available to factory reset your Windows 10 laptop. Should you encounter any difficulties or have further questions, always refer to the official documentation or seek assistance from Microsoft support.


![[Full Guide] How to Bypass Google Account Verification After Reset](https://robots.net/wp-content/uploads/2023/11/How-to-Bypass-Google-Account-Verification-After-Reset-300x180.png)