Introduction
In today’s digital age, storage space is at a premium. With the increasing amount of data we store on our devices, it’s common to quickly run out of storage capacity, especially on SSDs (Solid State Drives) which are known for their faster performance and reliability. If you find yourself facing this issue, don’t worry! There are several ways to extend your SSD partition to accommodate your growing storage needs.
Understanding how SSD partitions work is essential before attempting to extend them. A partition is a logical division of a physical drive that allows you to organize and manage your data efficiently. The size of these partitions determines how much storage space is allocated to each section.
Before extending your SSD partition, it’s crucial to check your current disk space utilization. By understanding how much storage space you have available and how much you need, you can plan accordingly.
It is always recommended to back up your data before making any modifications to your SSD partition. While the chances of data loss are minimal, it’s better to be safe than sorry. Creating a backup not only protects your valuable files but also provides a restore point in case anything goes wrong during the partition extension process.
Removing unnecessary files from your SSD is another step to consider before extending your partition. By deleting files you no longer need, you can free up valuable space and potentially avoid the need for partition extension altogether.
Now, let’s explore the different methods available to extend your SSD partition. Depending on your requirements and technical expertise, you can choose to use the built-in Disk Management tool provided by your operating system or opt for third-party partitioning software for advanced functionality and features.
Understanding SSD Partitions
SSDs (Solid State Drives) have become increasingly popular due to their faster read and write speeds compared to traditional hard drives. To effectively manage data on an SSD, it is important to understand how SSD partitions work.
A partition is a logical division of a physical drive that allows you to organize and manage your data. It acts as a separate unit, making it easier to store and retrieve files. Each partition can have its own file system, such as NTFS or FAT32, which determines how data is stored and accessed.
When you first set up your SSD, it is usually divided into one or more partitions by default. These partitions can be of varying sizes, depending on factors like the manufacturer’s configuration or the operating system’s requirements.
The primary partition, often referred to as the system partition, contains the necessary files for booting up your computer. It typically has the operating system installed on it, making it an essential part of the SSD. Other partitions, called logical or extended partitions, can be created to store user data, applications, and media files.
It is important to note that resizing or extending an SSD partition can have potential risks, such as data loss or system instability. Therefore, it is crucial to always back up your data before making any changes to the partition structure.
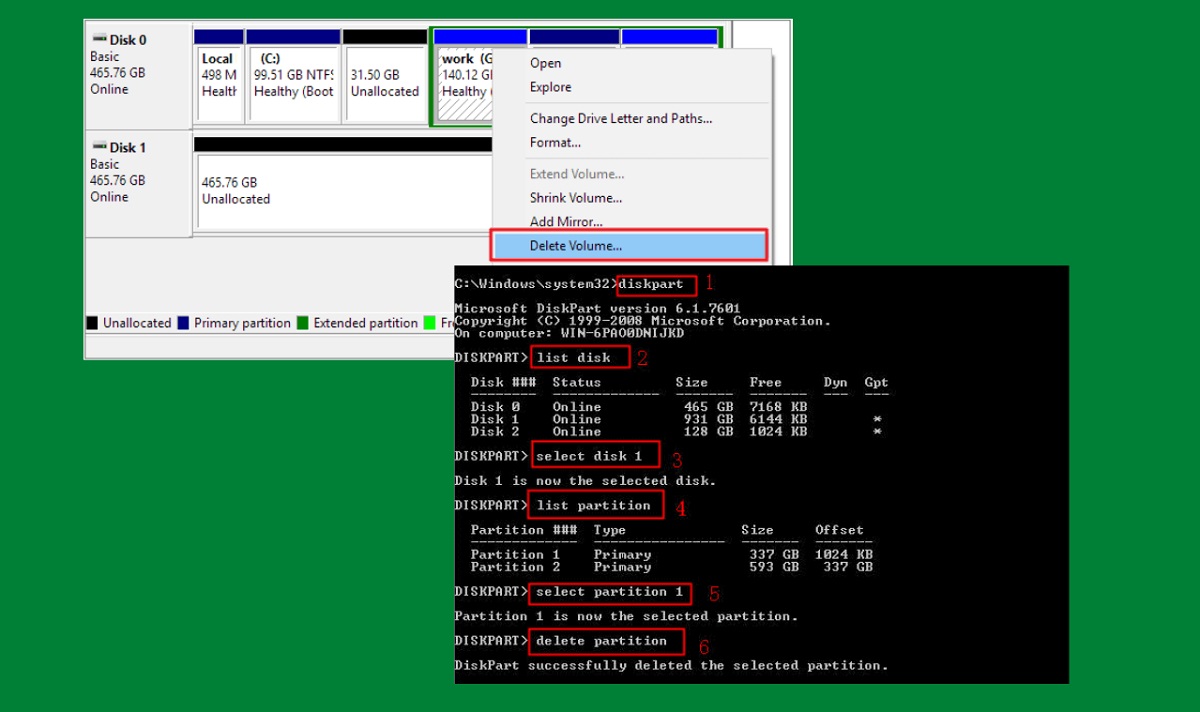
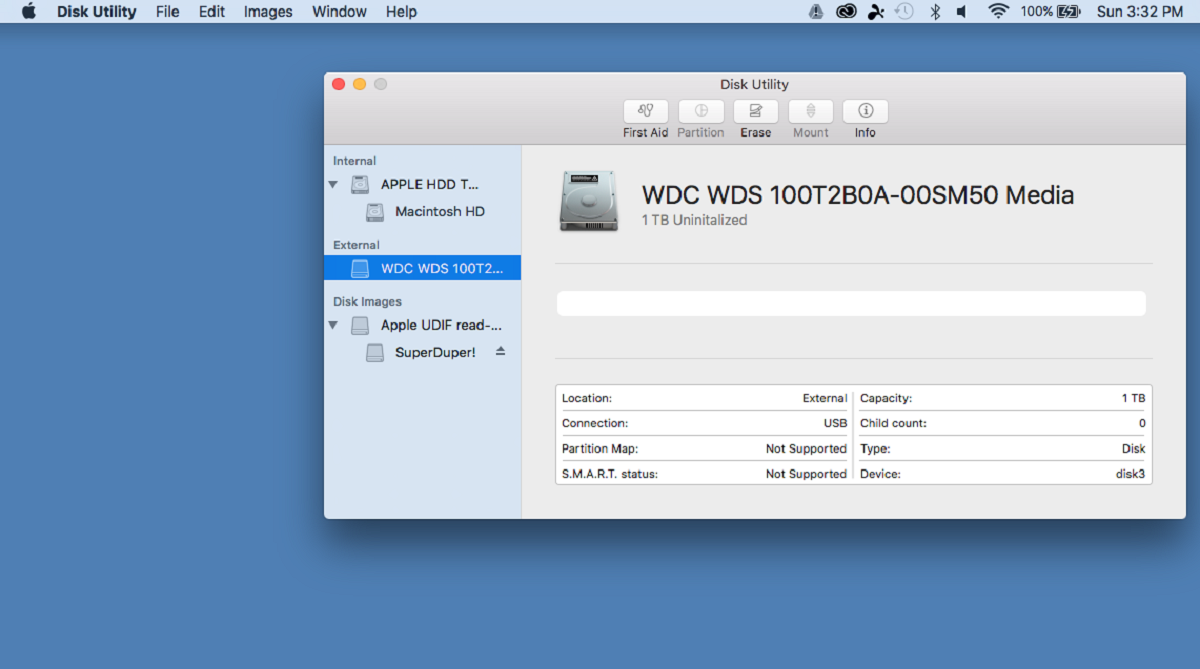
SSD partitions can be managed through various tools provided by the operating system, such as Disk Management in Windows or Disk Utility in macOS. These tools allow you to view the existing partitions, create new partitions, delete unwanted partitions, and resize existing ones.
Properly managing your SSD partitions is essential for efficient data organization and maximizing storage capacity. By understanding the basics of SSD partitions and utilizing the appropriate tools, you can ensure a smooth and optimized storage experience on your SSD.
Checking Disk Space
Before extending your SSD partition, it is essential to check your current disk space utilization. This step will help you understand how much storage space you have available and determine if extending the partition is necessary.
On Windows, you can easily check your disk space by following these steps:
- Open File Explorer by pressing the Windows key and E simultaneously.
- Select the SSD drive you want to check, usually labeled as “C:/”
- Right-click on the drive and choose “Properties” from the drop-down menu.
- A window will appear displaying the used and free space on the drive.
On macOS, the process is equally straightforward:
- Click on the Apple menu and select “About This Mac”.
- In the new window, click on “Storage”.
- You will see an overview of your storage space, including how much is used and available.
By checking your disk space, you can determine if you have enough space to accommodate your growing storage needs without extending the SSD partition. If you find that you are running low on storage space, it’s time to consider extending the partition to prevent any potential data loss or performance issues.
Remember, it’s crucial to have a sufficient amount of free space on your SSD for smooth operation. Running out of disk space can lead to decreased performance, slower system responsiveness, and even software malfunctions.
Regularly monitoring your disk space and taking action to address any shortage will ensure that your SSD continues to perform optimally and that you have the storage space you require for your files and applications. Checking your disk space is a simple yet crucial step in managing your SSD effectively.
Backup Your Data
Before proceeding with any modifications to your SSD partition, it’s crucial to prioritize the safety of your data. Backing up your data ensures that you have a copy of your important files in case anything goes wrong during the partition extension process.
There are several methods you can use to back up your data:
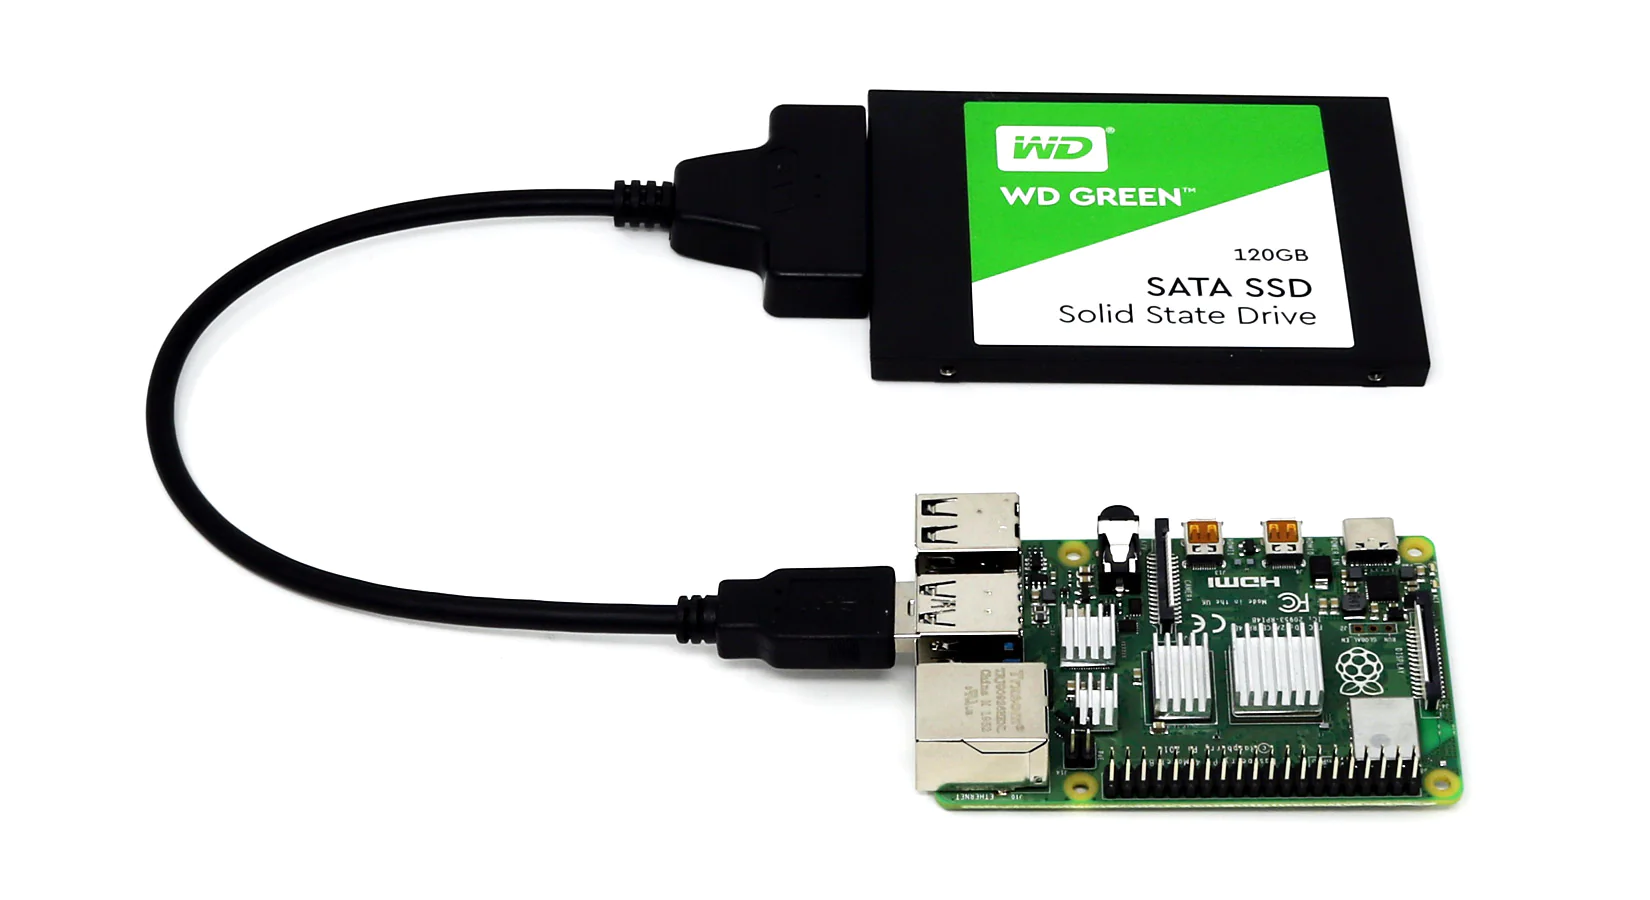
- External Hard Drive: Connect an external hard drive to your computer and manually copy and paste the files and folders that you want to back up. This method is straightforward and allows for easy access to your data.
- Cloud Storage: Sign up for a cloud storage service like Google Drive, Dropbox, or OneDrive. These services provide secure online storage where you can upload and sync your files. This option ensures that your data is accessible from any device with an internet connection.
- Disk Imaging Software: Use disk imaging software like Acronis True Image or Macrium Reflect to create a complete backup of your SSD. This method is ideal if you want to create a snapshot of your entire system, including the operating system and installed applications.
It is important to choose a backup method that suits your needs and preferences. Consider factors such as the amount of data you need to back up, the frequency of backups, and the level of convenience you require.
Regularly backing up your data provides peace of mind and ensures that you have a fallback option in case any unforeseen issues arise during the partition extension process. It’s better to be safe than sorry, so take the time to properly back up your important files before proceeding.
Remember, accidents can happen, and data loss can occur unexpectedly. Having a reliable backup of your data safeguards against any potential loss and allows for a smooth restoration process if needed.
Once you have successfully backed up your data, you can proceed with confidence to extend your SSD partition and make the necessary changes to accommodate your expanding storage needs.
Removing Unnecessary Files
Before extending your SSD partition, it’s a good idea to clean up your drive by removing unnecessary files. Over time, your SSD can accumulate various types of data that take up valuable storage space. By identifying and eliminating these unwanted files, you can free up storage capacity and potentially avoid the need for a partition extension.
Here are some ways to remove unnecessary files from your SSD:
- Deleting Temporary Files: Temporary files are created by applications and the operating system as a temporary storage solution. However, these files can accumulate over time and take up significant space. Use the built-in disk cleanup utility on Windows, or the “Optimize Storage” feature on macOS, to remove temporary files and reclaim storage space.
- Removing Duplicate Files: Duplicate files can be unintentionally created and can waste significant storage space. Use a duplicate file finder application to scan your SSD and identify and delete any duplicate files. This process will help optimize storage utilization and eliminate redundancy.
- Uninstalling Unused Applications: If you have applications installed on your SSD that you no longer use or need, uninstalling them can free up a considerable amount of storage space. Use the “Add or Remove Programs” feature on Windows or the “Applications” section of the “Settings” app on macOS to uninstall unused applications.
- Cleaning Up Downloads Folder: The downloads folder is often overlooked when it comes to freeing up space. Go through your downloads folder and remove any files that you no longer need or have already saved in another location.
By regularly performing these cleaning tasks, you can keep your SSD clutter-free and ensure that you have enough storage space for your essential files and applications. It’s a simple yet effective way to optimize your SSD’s performance and delay the need for a partition extension.
Remember, removing unnecessary files should be done with caution. Always double-check before deleting any files to ensure that you won’t accidentally delete something important. It’s also a good idea to periodically perform these cleaning tasks to maintain a clean and organized SSD.
By following these steps and removing unnecessary files, you can make the most of your SSD’s storage capacity and potentially avoid the need for a partition extension.
Expanding SSD Partition
When you’ve determined that extending your SSD partition is necessary to accommodate your growing storage needs, there are several methods you can use to accomplish this task. The method you choose will depend on your technical expertise and the features available to you.
Here are two common methods for expanding your SSD partition:
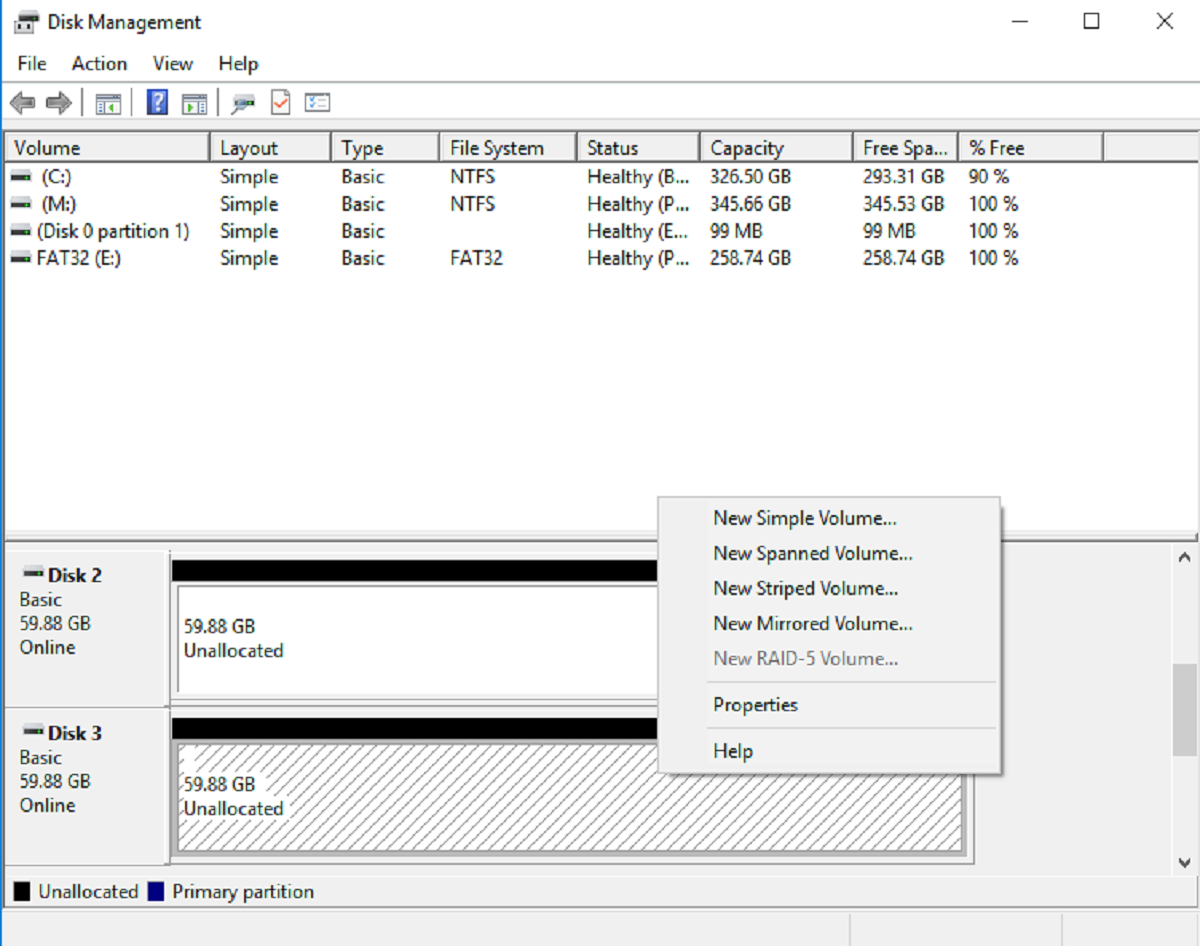
- Using Disk Management Tool: Both Windows and macOS provide built-in partition management tools that allow you to resize and extend partitions. On Windows, you can use the Disk Management tool by following these steps:
- Open the Disk Management tool by typing “diskmgmt.msc” into the Run dialog box (Windows Key + R) and pressing Enter.
- Identify the SSD partition you want to extend.
- Right-click on the partition and choose “Extend Volume.”
- Follow the on-screen instructions to extend the partition to the desired size.
- Using Third-Party Partitioning Software: If you require more advanced features or if the built-in tools are not sufficient, you can consider using third-party partitioning software. These tools often provide more flexibility and functionality for managing your SSD partitions. Popular third-party partitioning software options include MiniTool Partition Wizard, EaseUS Partition Master, and Paragon Partition Manager.
Regardless of the method you choose, it’s important to proceed with caution and follow the instructions provided by the respective tool or software. Keep in mind that partition resizing and extension operations can have potential risks, including data loss or system instability, if not executed properly.
Before making any changes to your SSD partition, it’s crucial to have a recent backup of your data. This backup acts as a safety net in case anything goes wrong during the partition extension process. It allows you to restore your files and ensure minimal data loss.
Additionally, ensure that you have enough available space on your SSD to accommodate the extension. If you have insufficient space, consider removing unnecessary files or performing other disk cleanup tasks to create enough room for the extended partition.
By carefully following the appropriate method and taking necessary precautions, you can successfully expand your SSD partition and increase your storage capacity for your growing data needs.
Using Disk Management Tool
Both Windows and macOS provide built-in partition management tools that can be used to resize and extend SSD partitions. The Disk Management tool in Windows allows you to make changes to your partitions without the need for third-party software. Here’s how you can use the Disk Management tool to extend your SSD partition:
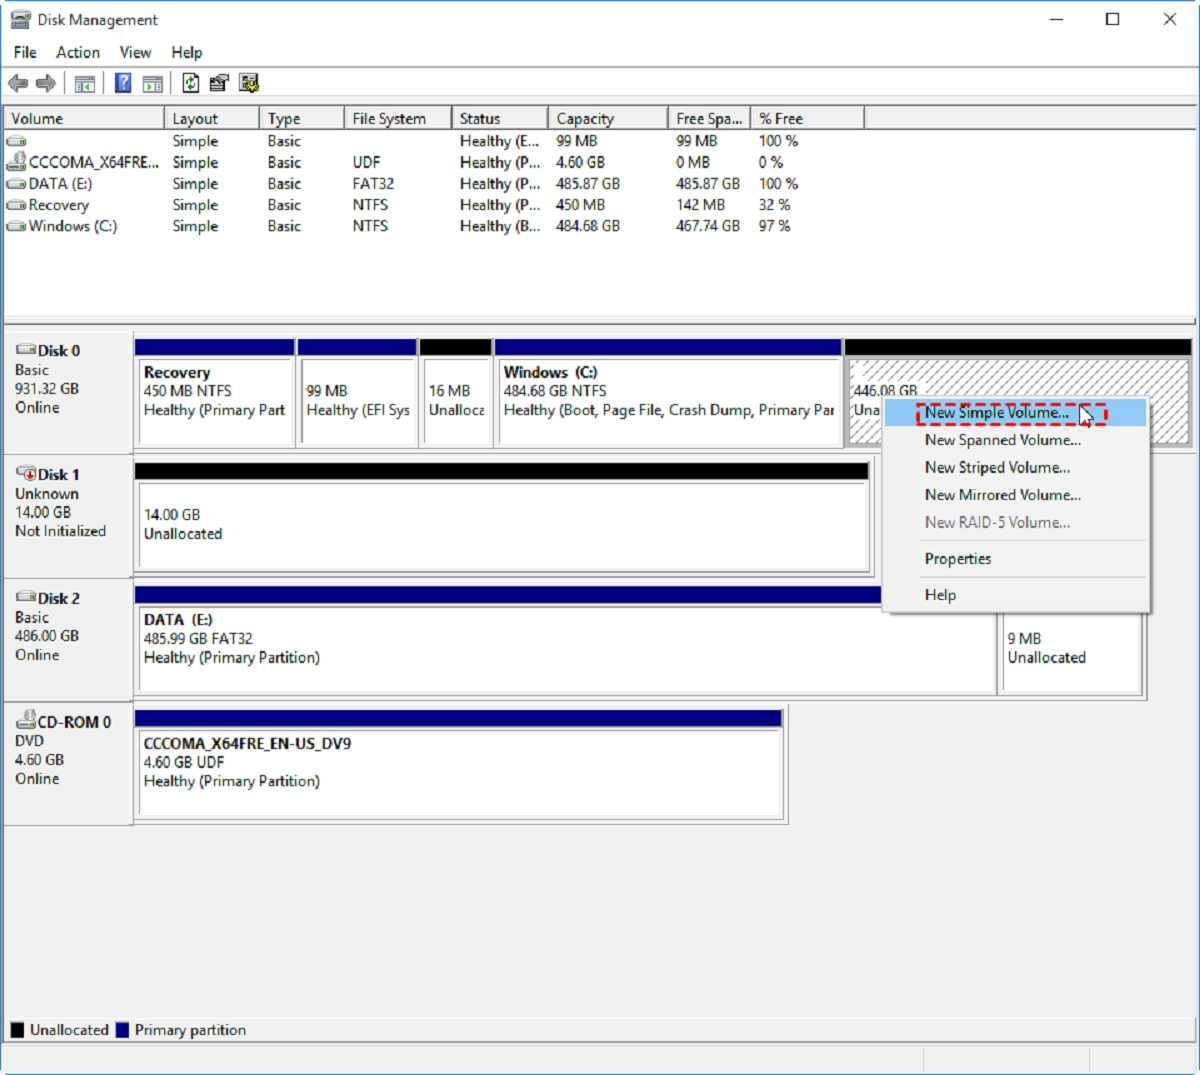
- Open the Disk Management tool by typing “diskmgmt.msc” into the Run dialog box (Windows Key + R) and pressing Enter.
- Once the Disk Management window opens, locate and identify the SSD partition you want to extend.
- Right-click on the partition and choose “Extend Volume” from the context menu.
- A wizard will guide you through the process of extending the partition. Make sure to select the unallocated space on your SSD to add it to the partition. You can also choose the amount of space you want to add to the partition.
- Follow the on-screen instructions to complete the extension process.
It’s important to note that the Disk Management tool has certain limitations. For example, it can only resize partitions if there is unallocated space available immediately after the partition. If there is no such space, you may need to shrink other partitions to create unallocated space before extending the desired partition.
When using the Disk Management tool, make sure to double-check the selected partition before performing any operations. Accidentally selecting the wrong partition can result in the loss of data, so it is crucial to proceed with caution.
Keep in mind that the precise steps and options may vary slightly depending on the version of Windows you are using.
Before making any changes to your SSD partition, it is highly recommended to create a backup of your data. This ensures that you have a copy of your important files in case anything goes wrong during the partition extension process. Having a backup provides peace of mind and allows you to restore your data if needed.
By utilizing the Disk Management tool provided by Windows, you can conveniently extend your SSD partition and increase your storage capacity without the need for third-party software.
Using Third-Party Partitioning Software
If you require more advanced features or if the built-in partition management tools provided by your operating system are not sufficient, you can turn to third-party partitioning software to extend your SSD partition.
Third-party partitioning software offers additional flexibility and functionality for managing your SSD partitions. These tools often have more advanced features that allow you to resize, move, merge, or split partitions with ease. Here are the general steps for using third-party partitioning software:
- Research and choose a reputable third-party partitioning software that suits your needs. Popular options include MiniTool Partition Wizard, EaseUS Partition Master, and Paragon Partition Manager.
- Download and install the chosen software on your computer.
- Launch the software and locate the SSD partition you want to extend within the partition management interface.
- Choose the option to extend the partition and specify the desired amount of space or adjust the partition size using the provided tools.
- Review the proposed changes and confirm your selection.
- Follow the on-screen instructions provided by the software to complete the partition extension process.
It’s important to carefully follow the instructions provided by the specific third-party software you are using. Different software may have slightly different interfaces and options, so it’s crucial to read the documentation or follow the software’s tutorial to ensure the correct steps are taken.
Before using third-party partitioning software, it’s highly recommended to have a recent backup of your data. This backup acts as a safety net in case anything goes wrong during the partition extension process, protecting your valuable files and ensuring minimal data loss.
While third-party partitioning software can provide more advanced functionality, it’s important to exercise caution and make informed decisions during the partitioning process. Always double-check your selections before applying any changes to avoid accidentally modifying the wrong partition or potentially losing data.
By utilizing third-party partitioning software, you can have more control over the management of your SSD partitions and easily extend their size to accommodate your growing storage needs.
Tips for Extending SSD Partition
Extending an SSD partition is a task that requires careful consideration and proper execution to ensure a successful outcome. Here are some tips to help you navigate the process and make the most out of your space extension:
- Backup Your Data: Before making any changes to your SSD partition, it is crucial to back up your data. This step ensures that you have a copy of your important files in case anything goes wrong during the partition extension process. A backup provides peace of mind and allows for a smooth restoration process if needed.
- Check Disk Health: Before extending the partition, it is recommended to perform disk health checks using tools like CrystalDiskInfo or SMART monitoring. These tools can help identify any potential issues with your SSD and ensure its optimal performance before proceeding with the extension.
- Confirm Available Space: Double-check the amount of available space on your SSD before extending the partition. It is essential to have enough unallocated space to accommodate the extension without compromising the performance or stability of your system.
- Consider Resizing Other Partitions: If there is limited unallocated space available, you may need to resize or shrink other partitions on your SSD to create more space for the partition extension. Be cautious while resizing partitions and ensure that you have backups of any data that may be affected.
- Research and Select the Right Method: Depending on your operating system, technical expertise, and requirements, choose the most suitable method for extending your SSD partition. Research the available options, read user reviews, and consider seeking expert advice if necessary.
- Follow Instructions Carefully: Whether using the built-in partition management tool or third-party software, carefully follow the provided instructions. Pay close attention to the selected partition and the options chosen to avoid accidental data loss or changes to the wrong partition.
- Regularly Clean Up and Optimize: After extending your SSD partition, maintaining its efficiency and longevity is essential. Regularly clean up unnecessary files, perform disk cleanup operations, and optimize your SSD using tools like TRIM or optimization software.
Implementing these tips will help you navigate the process of extending your SSD partition smoothly and efficiently. Remember to proceed with caution, back up your data, and make informed decisions to ensure the best possible outcome.
Conclusion
Extending your SSD partition is a practical solution to accommodate your growing storage needs. By understanding the basics of SSD partitions and utilizing the appropriate tools, you can successfully expand your storage capacity and optimize the performance of your SSD.
Before embarking on the partition extension process, it is crucial to check your disk space utilization and back up your data. These steps are essential to ensure that you have enough storage capacity for the extension and safeguard against potential data loss.
Removing unnecessary files and optimizing your SSD’s storage can also help free up space and delay the need for a partition extension. Regularly cleaning up your drive and assessing your data storage can contribute to a clutter-free and efficient SSD.
When it comes to extending your SSD partition, you have two primary options: using the built-in Disk Management tool provided by your operating system or opting for third-party partitioning software for more advanced features. Whichever method you choose, it is crucial to carefully follow the instructions and make informed decisions throughout the process.
Additionally, implementing the tips provided, such as backing up data, checking disk health, and considering available space, can greatly contribute to a smooth and successful partition extension. Regularly maintaining and optimizing your SSD even after extending the partition is equally important to ensure its longevity and optimal performance.
Remember, extending your SSD partition should be approached with caution and proper planning. Take the time to assess your storage needs, research the methods available, and always prioritize the safety of your data. With the right approach, you can effectively expand your SSD partition and enjoy the benefits of increased storage space for your files and applications.