Introduction
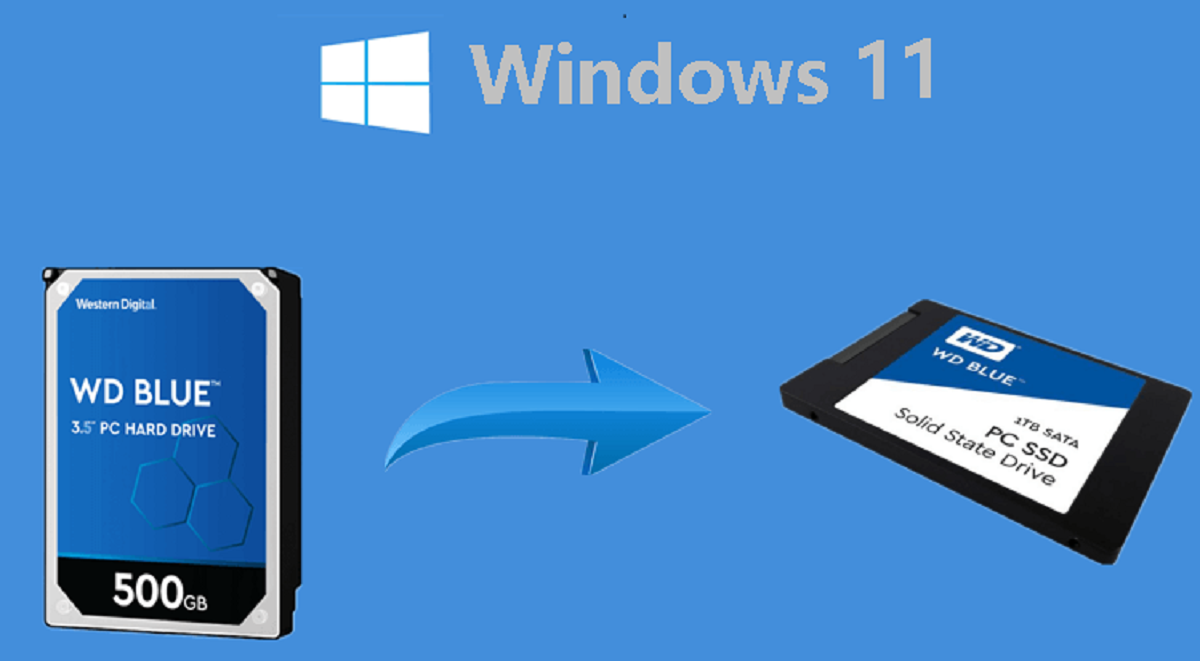
Upgrading your laptop with a solid-state drive (SSD) can give it a significant boost in performance and speed. Unlike traditional hard drives, SSDs have no moving parts, making them faster, quieter, and more reliable. The best part is, you don’t have to go through the hassle of reinstalling Windows and all your applications.
In this guide, we will walk you through the steps on how to install an SSD in your laptop without reinstalling Windows. Before we dive into the process, let’s take a look at the benefits of upgrading to an SSD.
Firstly, an SSD significantly improves the boot-up time of your laptop. With faster read and write speeds, you’ll be able to start up your laptop in seconds, compared to the minutes it may have taken with a traditional hard drive.
Secondly, an SSD enhances the overall performance of your laptop. Applications and files will load quicker, and you’ll experience smoother multitasking. Whether you’re editing photos, playing games, or running resource-intensive software, an SSD can handle it all with ease.
Thirdly, an SSD consumes less power, which means you’ll enjoy a longer battery life. This is especially beneficial for those who use their laptops on the go and rely on their battery to last throughout the day.
Now that you’re convinced of the benefits, let’s get started with the step-by-step process of installing an SSD in your laptop without the need to reinstall Windows. But before we begin, there are a few things you will need to gather.
Things You Will Need
Before you begin the process of installing an SSD in your laptop, make sure you have the following items ready:
- SSD: Choose an SSD that is compatible with your laptop’s specifications. Consider factors such as capacity, speed, and brand reputation when making your selection.
- SATA to USB cable: This cable will be used to clone your existing hard drive to the new SSD. It allows you to connect the SSD externally to your laptop.
- Screwdriver set: You may need various screwdriver sizes to open your laptop’s casing and remove the hard drive.
- External hard drive: This will be used to create a backup of your data before proceeding with the SSD installation.
- Software for SSD migration: Look for reliable software that can clone your existing hard drive to the new SSD. There are both free and paid options available, such as Macrium Reflect or EaseUS Todo Backup.
- Anti-static wrist strap: While not mandatory, an anti-static wrist strap can prevent any static discharge that could damage your laptop’s internal components during the installation process.
Ensure that you have all these items within your reach before you start the SSD installation. Having everything prepared will make the process smoother and more efficient.
In the next section, we will discuss the first step of the installation process – creating a backup of your data – in order to ensure that none of your important files are lost during the procedure.
Step 1: Backup Your Data
Before you embark on the process of installing an SSD in your laptop, it is crucial to create a backup of your data. This step ensures that none of your important files or documents get lost during the transition. Here’s how you can backup your data:
1.1 External Hard Drive: Connect an external hard drive to your laptop. This will serve as the destination for your backup files. Make sure the drive has enough capacity to accommodate all your important data.
1.2 Selective Backup: Determine which files and folders you want to backup. You can manually select individual files or entire directories. It’s a good idea to focus on critical documents, photos, videos, and any files you cannot afford to lose.
1.3 Transfer Files: Copy and paste the selected files and folders from your laptop’s internal storage to the external hard drive. You can simply drag and drop them or use the ‘Copy’ and ‘Paste’ commands.
1.4 Verify Backup: After transferring the files, double-check the backup to ensure that all your important data is safely stored on the external hard drive. Open a few files to make sure they’re intact and accessible.
By following these steps, you can safeguard your data and have peace of mind while you proceed with the installation. Remember to keep your external hard drive in a safe place until the SSD installation is complete.
In the next section, we will discuss how to check the compatibility of your laptop with the new SSD to ensure a seamless installation process.
Step 2: Check Compatibility
Before proceeding with the installation of an SSD in your laptop, it is essential to check whether the new SSD is compatible with your device. Here are a few factors you should consider when checking for compatibility:
2.1 Form Factor: Firstly, determine the form factor of your laptop’s hard drive. The most common form factors are 2.5-inch and M.2. Ensure that the SSD you wish to install matches the form factor of your existing hard drive.
2.2 Interface: Check the interface of your laptop’s hard drive. It is commonly SATA (Serial ATA) or PCIe (Peripheral Component Interconnect Express). Ensure that the SSD you choose has the same interface as your existing hard drive. If your laptop supports both interfaces, PCIe is generally faster and more efficient.
2.3 Capacity: Consider the capacity of the SSD. Choose a size that suits your storage needs. Remember that the SSD’s capacity should be equal to or higher than your existing hard drive to ensure a smooth transition of data.
2.4 BIOS Compatibility: Verify if your laptop’s BIOS supports booting from an SSD. Some older laptops may have limitations or require a BIOS update. Check the manufacturer’s website or user manual for guidance.
By ensuring that your new SSD is compatible with your laptop, you can avoid any unnecessary issues during the installation process. In the next section, we will guide you on how to prepare your laptop for the installation of the SSD.
Step 3: Prepare Your Laptop
Before you dive into the actual installation of the SSD, it is important to prepare your laptop for the process. This step involves a few preliminary actions to ensure a smooth and hassle-free installation. Follow these steps to prepare your laptop:
3.1 Power Off Your Laptop: Shut down your laptop and disconnect it from any power source. This is a crucial safety measure to prevent any electrical damage during the installation process.
3.2 Gather Necessary Tools: Make sure you have all the necessary tools within reach. You may need a small Phillips-head screwdriver, an anti-static wrist strap (optional but recommended), and any other tools specified by your laptop’s manufacturer.
3.3 Ground Yourself: To prevent static electricity discharge that could harm your laptop’s components, touch a grounded object or use an anti-static wrist strap before handling any internal parts.
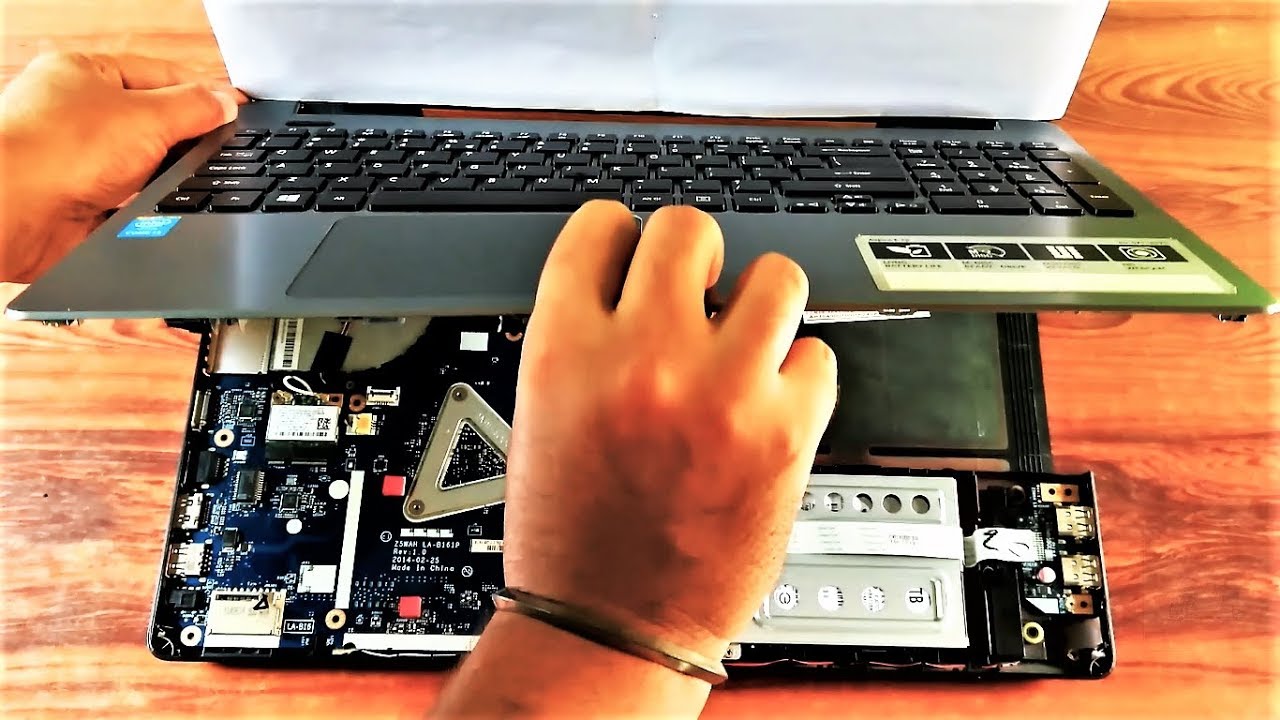
3.4 Locate and Access the Hard Drive Bay: Consult your laptop’s user manual or manufacturer’s website to find the location of the hard drive bay. Depending on your laptop model, it may be accessed from the bottom or through the side panel.
3.5 Remove the Casing or Side Panel: Unscrew and remove the laptop’s casing or side panel to gain access to the hard drive bay. Take your time and keep track of the screws to avoid losing them during the process.
3.6 Ground Yourself Again: Before touching any internal components, ground yourself once more to discharge any residual static electricity.
By following these steps, you will ensure that your laptop is properly prepared for the SSD installation. In the next section, we will guide you through the process of actually installing the SSD in your laptop.
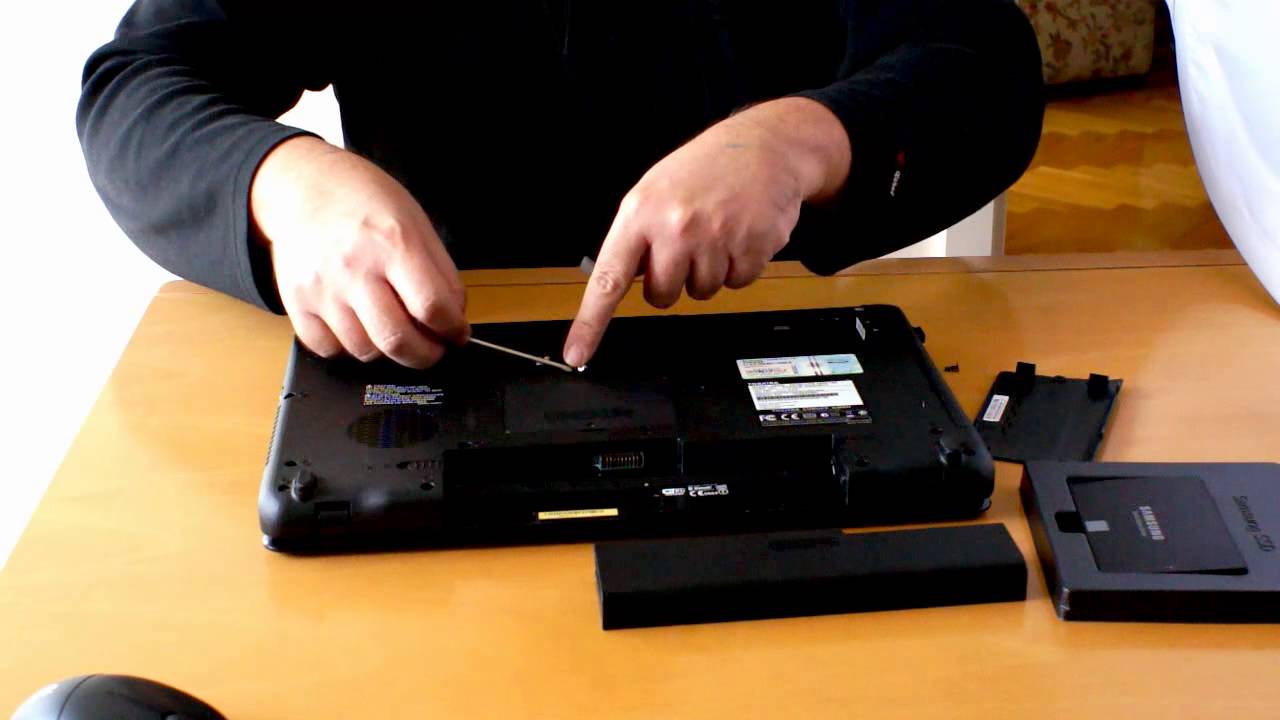
Step 4: Install the SSD
Now that you have prepared your laptop, it’s time to install the SSD. Follow these steps to ensure a successful installation:
4.1 Locate the Hard Drive: Identify the existing hard drive inside your laptop and carefully disconnect the cables connected to it. Take note of how the cables are connected for reassembly.
4.2 Remove the Existing Hard Drive: If your laptop has a caddy or bracket holding the hard drive in place, unscrew it and slide out the hard drive. Be cautious and gentle to avoid any damage.
4.3 Connect the SSD: Connect the new SSD in the same position and manner as the previous hard drive. Ensure that all cables are securely attached to the SSD.
4.4 Fix the SSD in Place: If your laptop has a caddy or bracket, place the SSD in it and secure it with screws. If not, make sure the SSD is securely positioned in the designated area and fasten it using any available screws.
4.5 Reconnect Cables: Reconnect the cables, ensuring proper alignment and secure connections. Double-check that all cables are securely and correctly connected.
4.6 Reinstall Casing or Side Panel: Once the SSD is properly installed, reattach the laptop’s casing or side panel using the screws you removed earlier. Tighten the screws but avoid overtightening to prevent damage to the casing.
With these steps, you have successfully installed the new SSD in your laptop. In the next section, we will guide you on how to replace the hard drive with the SSD.
Step 5: Replace the Hard Drive with SSD
Now that you have installed the SSD in your laptop, it’s time to replace the hard drive with the SSD. Follow these steps to complete the process:
5.1 Power Off Your Laptop: Make sure your laptop is turned off and disconnected from any power source before proceeding.
5.2 Remove the Casing or Side Panel: Refer to the laptop’s user manual or manufacturer’s website for instructions on how to remove the casing or side panel.
5.3 Locate the Hard Drive Bay: Identify the hard drive bay where the existing hard drive is situated. It is usually a removable tray or bracket.
5.4 Remove the Existing Hard Drive: Carefully disconnect any cables connected to the hard drive and remove it from the bay by unscrewing any brackets or sliding it out from the tray.
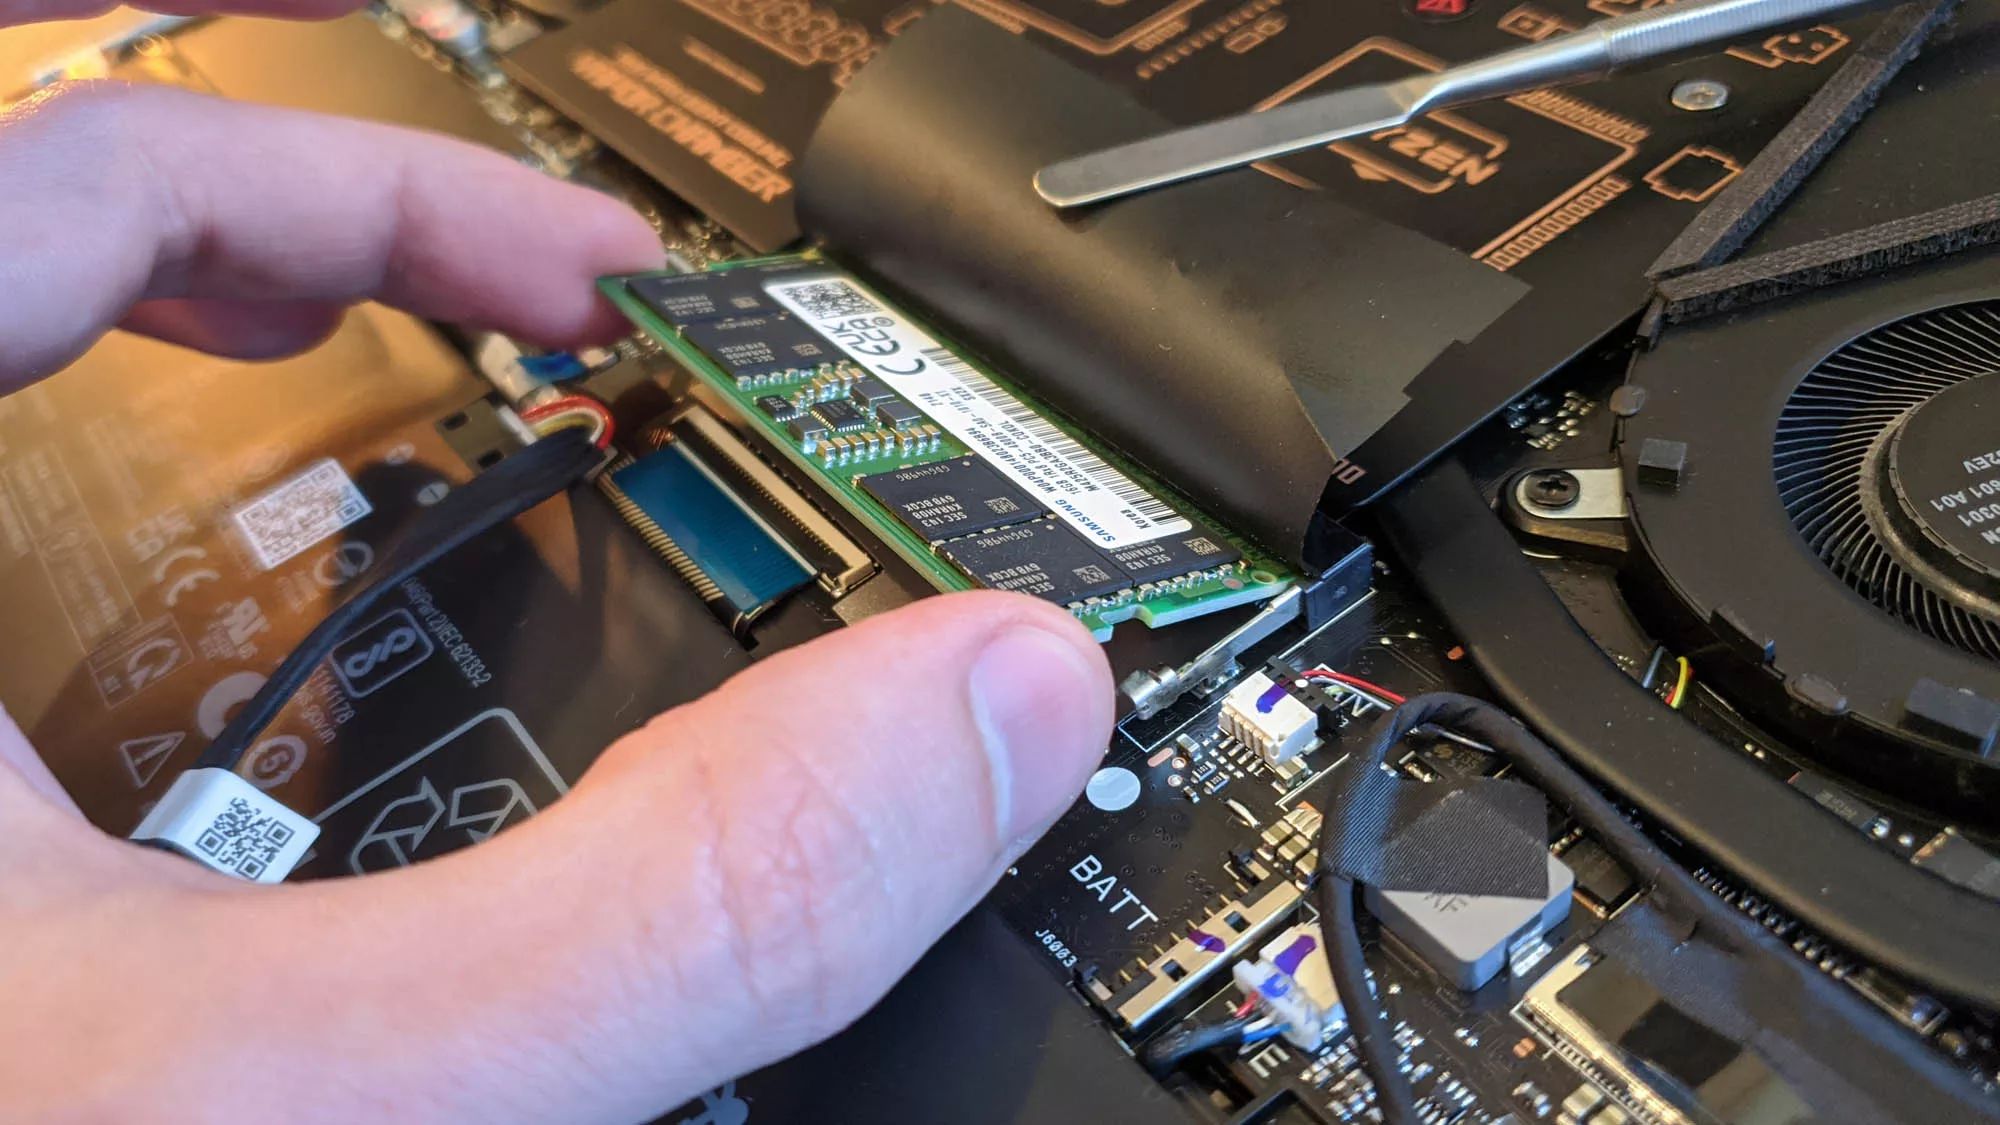
5.5 Insert the SSD: Place the SSD in the empty space left by the removed hard drive. Ensure that it is properly aligned with the SATA or PCIe connector.
5.6 Screw the SSD into Place: Secure the SSD in the bay or tray using the screws that were previously attached to the hard drive. Make sure it is securely fastened but avoid overtightening.
5.7 Reconnect Cables: Attach the necessary cables to the SSD, ensuring proper alignment and connections. Double-check that all cables are securely and correctly connected.
5.8 Reinstall Casing or Side Panel: Put the laptop’s casing or side panel back in place and secure it with the screws you removed earlier. Tighten the screws, but be careful not to overtighten and risk damaging the casing.
By following these steps, you have successfully replaced the hard drive with the SSD in your laptop. In the next section, we will guide you through the process of reassembling your laptop.
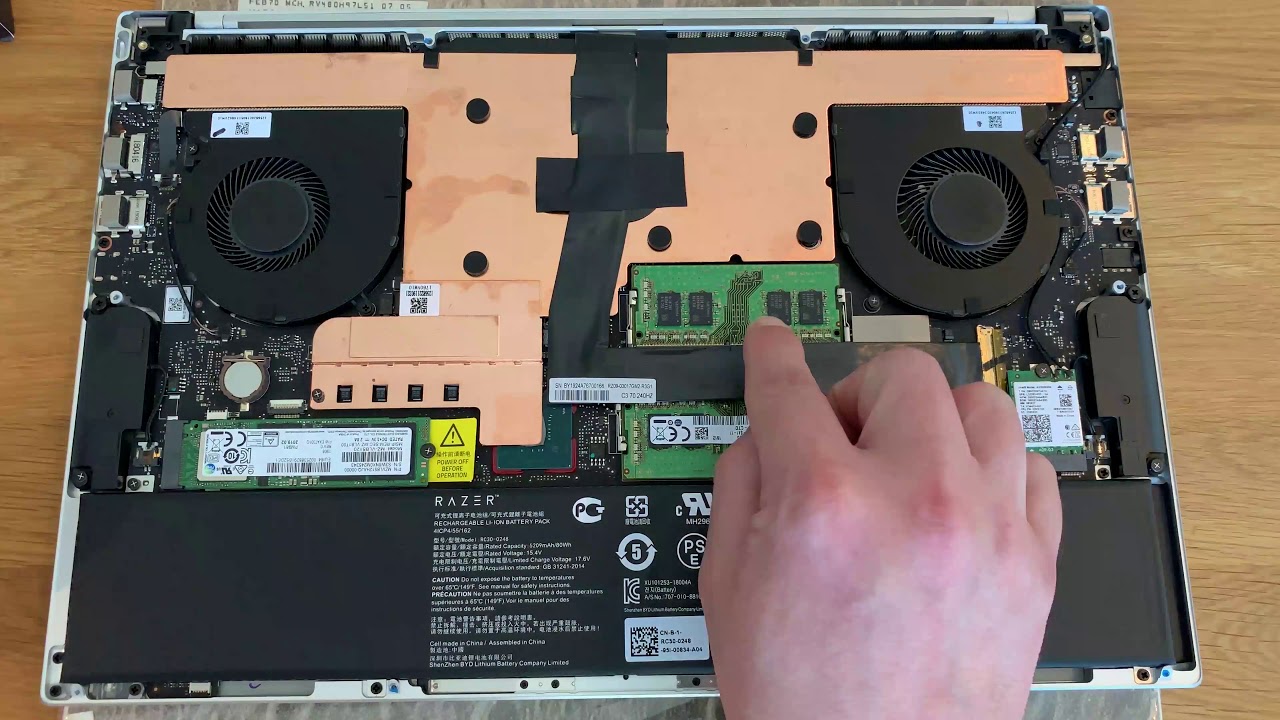
Step 6: Reassemble Your Laptop
After replacing the hard drive with the SSD, it’s time to reassemble your laptop. Follow these steps to complete the reassembly process:
6.1 Organize the Screws: Ensure that you have kept track of all the screws you removed during the disassembly process. Organize them according to their placement for easier reassembly.
6.2 Place the Casing or Side Panel: Carefully align the laptop’s casing or side panel with the appropriate slots or connectors. Gently press it into place until it is securely seated.
6.3 Secure the Casing or Side Panel: Begin securing the casing or side panel by reinserting and tightening the screws you removed earlier. Make sure to follow the correct sequence if multiple screws are involved.
6.4 Tighten the Screws: Use a screwdriver to tighten the screws, but be cautious not to overtighten, as it may damage the laptop’s casing or strip the screws.
6.5 Verify the Casing Alignment: Double-check to ensure that the reassembled casing or side panel is aligned correctly and snugly in place. Make any necessary adjustments if needed.
6.6 Power On and Test: Once your laptop is fully reassembled, connect it to a power source, press the power button, and let it boot up. Ensure that the SSD is detected and the laptop is functioning properly.
By following these steps, you have successfully reassembled your laptop after installing the SSD. In the next section, we will guide you through the process of booting up your laptop with the new SSD.
Step 7: Boot Up Your Laptop
Now that you have reassembled your laptop, it’s time to boot it up with the newly installed SSD. Follow these steps to ensure a successful startup:
7.1 Power On Your Laptop: Connect your laptop to a power source and press the power button to turn it on. Allow the laptop to boot up and initialize the SSD.
7.2 Access the BIOS: During the startup process, you may need to access the BIOS settings. The specific key to press varies depending on the laptop model but is typically F2, F10, or Del. Consult your laptop’s user manual or manufacturer’s website for the correct key.
7.3 Set the SSD as the Boot Drive: In the BIOS settings, navigate to the boot order or boot priority section. Ensure that the SSD is listed as the first boot option. Save the changes and exit the BIOS.
7.4 Restart Your Laptop: Restart your laptop to apply the changes made in the BIOS settings. Upon restarting, the laptop should now boot up from the SSD instead of the previously installed hard drive.
7.5 Operating System Initialization: The first boot after installing the SSD may take slightly longer as the operating system initializes and recognizes the new hardware. Be patient and allow the system to complete the startup process.
7.6 Verify SSD Detection: Once your laptop has successfully booted up, verify that the SSD is being detected in the system. You can do this by checking the storage settings in your operating system or using a system information tool.
Congratulations! You have successfully booted up your laptop with the new SSD. In the next section, we will guide you through the process of updating drivers and settings to optimize your laptop’s performance with the SSD.
Step 8: Update Drivers and Settings
After booting up your laptop with the new SSD, it’s important to update drivers and settings to optimize performance. Follow these steps to ensure your laptop is running smoothly with the SSD:
8.1 Update SSD Firmware: Visit the manufacturer’s website and check if there are any firmware updates available for your SSD. Download and install the latest firmware to ensure optimal performance and compatibility.
8.2 Update Operating System: Check for any available updates for your operating system. Install the latest updates to ensure compatibility with the new SSD and take advantage of any performance improvements.
8.3 Update Device Drivers: Update device drivers for components such as graphics card, network adapter, and chipset. Visit the manufacturer’s website to download and install the latest drivers specific to your laptop model.
8.4 Enable TRIM: Enable TRIM on your SSD. TRIM is a command that helps optimize the performance and lifespan of SSDs. To enable TRIM, open the Command Prompt or Terminal, type the command “fsutil behavior set DisableDeleteNotify 0” (without quotes), and press Enter.
8.5 Adjust Power Settings: Adjust the power settings of your laptop to optimize performance for the SSD. Set your laptop to the “High performance” power plan to ensure that the SSD operates at its full potential.
8.6 Check Storage Alignment: Verify that the partitions on your SSD are aligned correctly. You can use a partition management tool or check with your operating system’s disk management utility.
8.7 Disable Defragmentation: Disable automatic defragmentation for your SSD. Unlike traditional hard drives, SSDs do not benefit from defragmentation and it may cause unnecessary wear on the drive.
8.8 Enable AHCI Mode: If your laptop’s BIOS settings allow it, enable AHCI (Advanced Host Controller Interface) mode. AHCI mode enables advanced features and performance for SSDs.
By following these steps, you can ensure that your laptop’s drivers and settings are optimized for the new SSD. Enjoy the improved performance, speed, and reliability that your laptop now offers with the upgraded storage solution.
Conclusion
Congratulations! You have successfully installed an SSD in your laptop without the need to reinstall Windows. By following the steps outlined in this guide, you have unlocked an array of benefits, including improved performance, faster boot-up times, and increased reliability.
Throughout the installation process, you learned how to backup your data, check for compatibility, prepare your laptop, and install the SSD with precision. By reassembling your laptop and booting it up with the newly installed SSD, you have taken a significant step towards optimizing your laptop’s performance.
After the installation, remember to update the SSD’s firmware, operating system, and device drivers to ensure maximum compatibility and performance. Adjusting power settings, enabling TRIM, and verifying storage alignment are important steps to further optimize your SSD’s functionality.
Installing an SSD in your laptop is a cost-effective way to breathe new life into your machine and enhance your overall computing experience. With faster load times, improved multitasking capabilities, and extended battery life, you’ll notice a significant difference in your day-to-day tasks, whether it’s gaming, photo editing, or work-related activities.
Remember to keep your old hard drive as a backup or repurpose it for additional storage. Regularly backing up your data is essential to protect against any unforeseen issues and ensure the safety of your valuable files.
We hope that this guide has provided you with the necessary information and guidance to successfully install an SSD in your laptop without reinstalling Windows. Enjoy the enhanced performance and productivity that your upgraded system now offers!