Introduction
Welcome to the detailed guide on how to replace a hard drive with a solid-state drive (SSD). As technology advances, SSDs have become a popular choice for computer storage due to their faster performance, improved durability, and enhanced reliability. By replacing your existing hard drive with an SSD, you can breathe new life into your computer and enjoy faster boot times, quicker application launches, and more responsive overall performance.
Whether you’re a tech-savvy enthusiast or a first-time DIYer, this step-by-step guide will walk you through the entire process of replacing your hard drive with an SSD. We’ll cover everything from backing up your data to installing the SSD and restoring your files. By following these instructions, you can ensure a smooth transition without losing any important data.
Before we delve into the nitty-gritty details, it’s important to note that replacing the hard drive with an SSD may require some technical skills and familiarity with computer hardware. If you’re not comfortable working with computer components or are unsure about any step, it’s always a good idea to seek professional help.
Now, let’s get started on this exciting journey of upgrading your computer’s storage technology. Follow along with each step, and soon enough, you’ll have a faster and more efficient computer at your fingertips.
Choosing the Right SSD
When it comes to choosing an SSD for your computer, there are a few key factors to consider to ensure compatibility and optimal performance. Here are some important points to keep in mind:
Storage Capacity: Determine the amount of storage you need based on your usage requirements. SSDs are available in various capacities, ranging from 128GB to 4TB or more. Consider the type of files you’ll be storing, such as documents, photos, videos, or games, to determine the appropriate capacity.
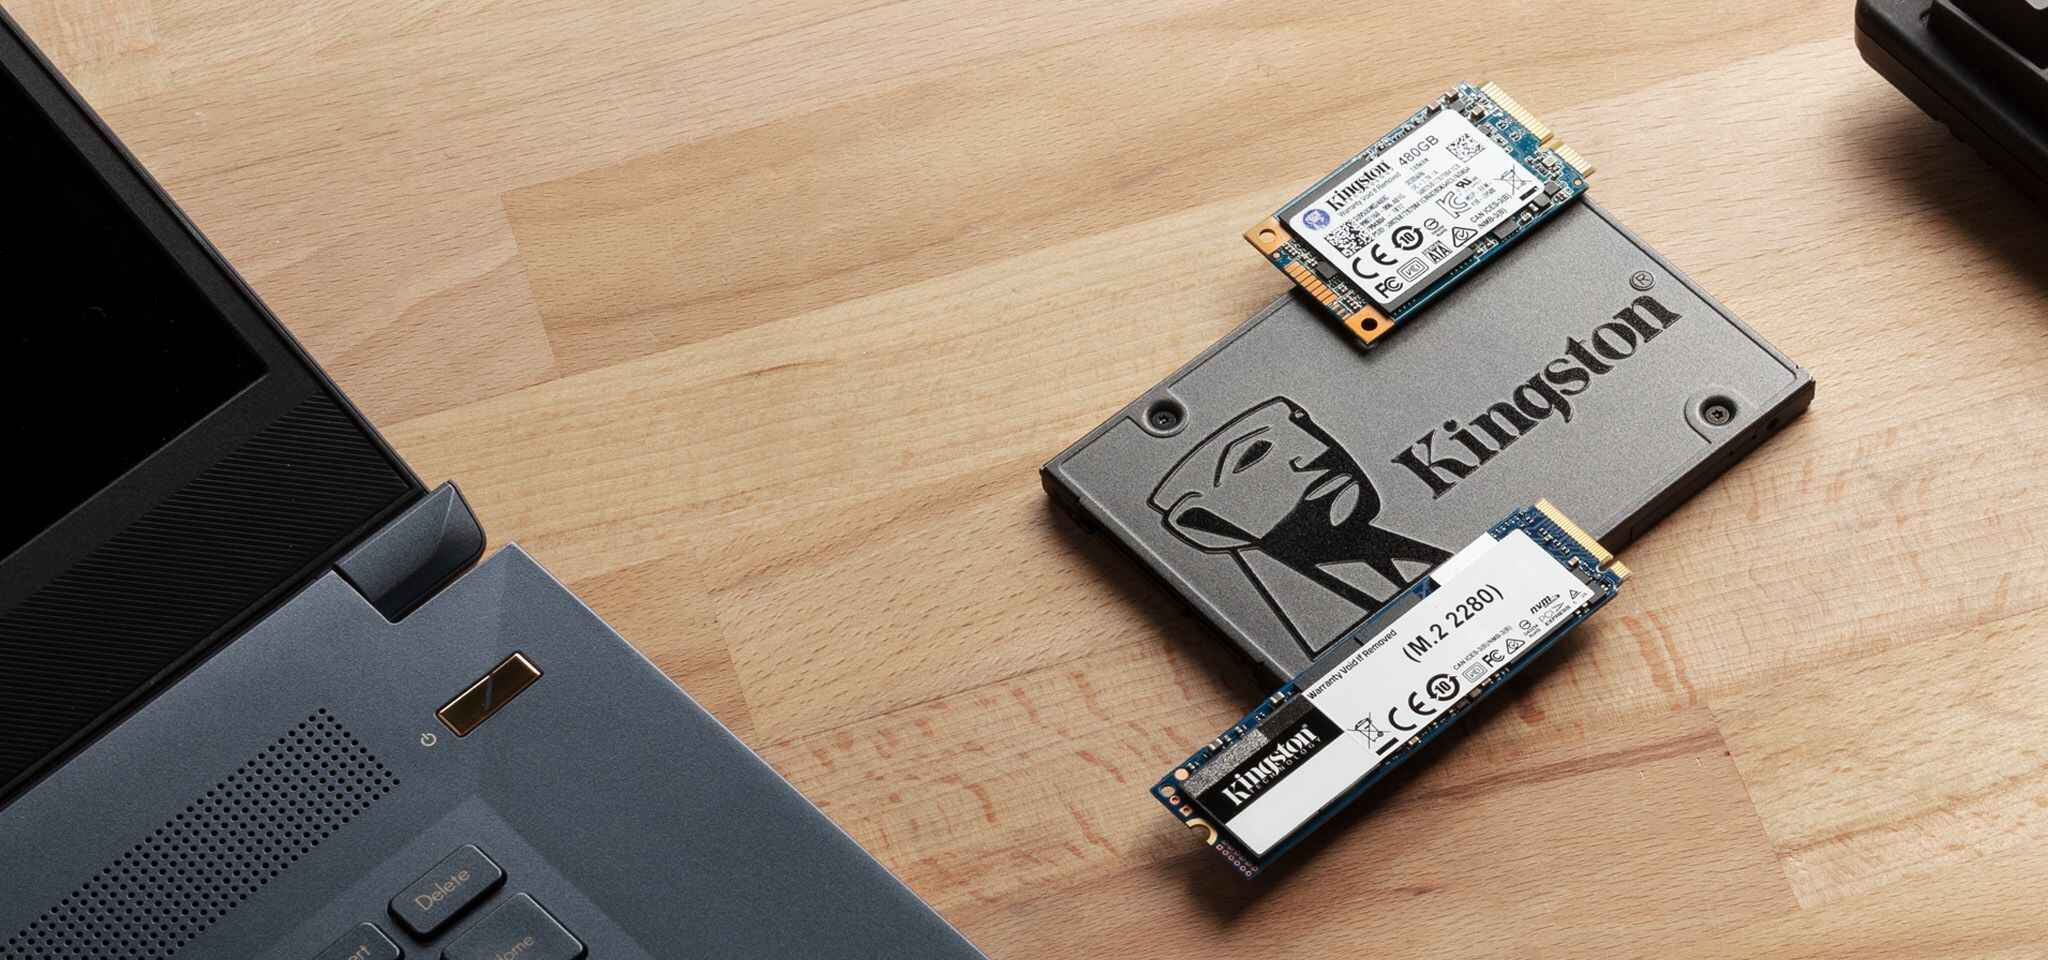
Interface: Check the interface compatibility of your computer’s motherboard. The most common interface for SSDs is SATA (Serial ATA), with SATA III being the latest and fastest version. However, newer computers may support more advanced interfaces like PCIe (Peripheral Component Interconnect Express) or NVMe (Non-Volatile Memory Express) for even faster data transfer speeds.
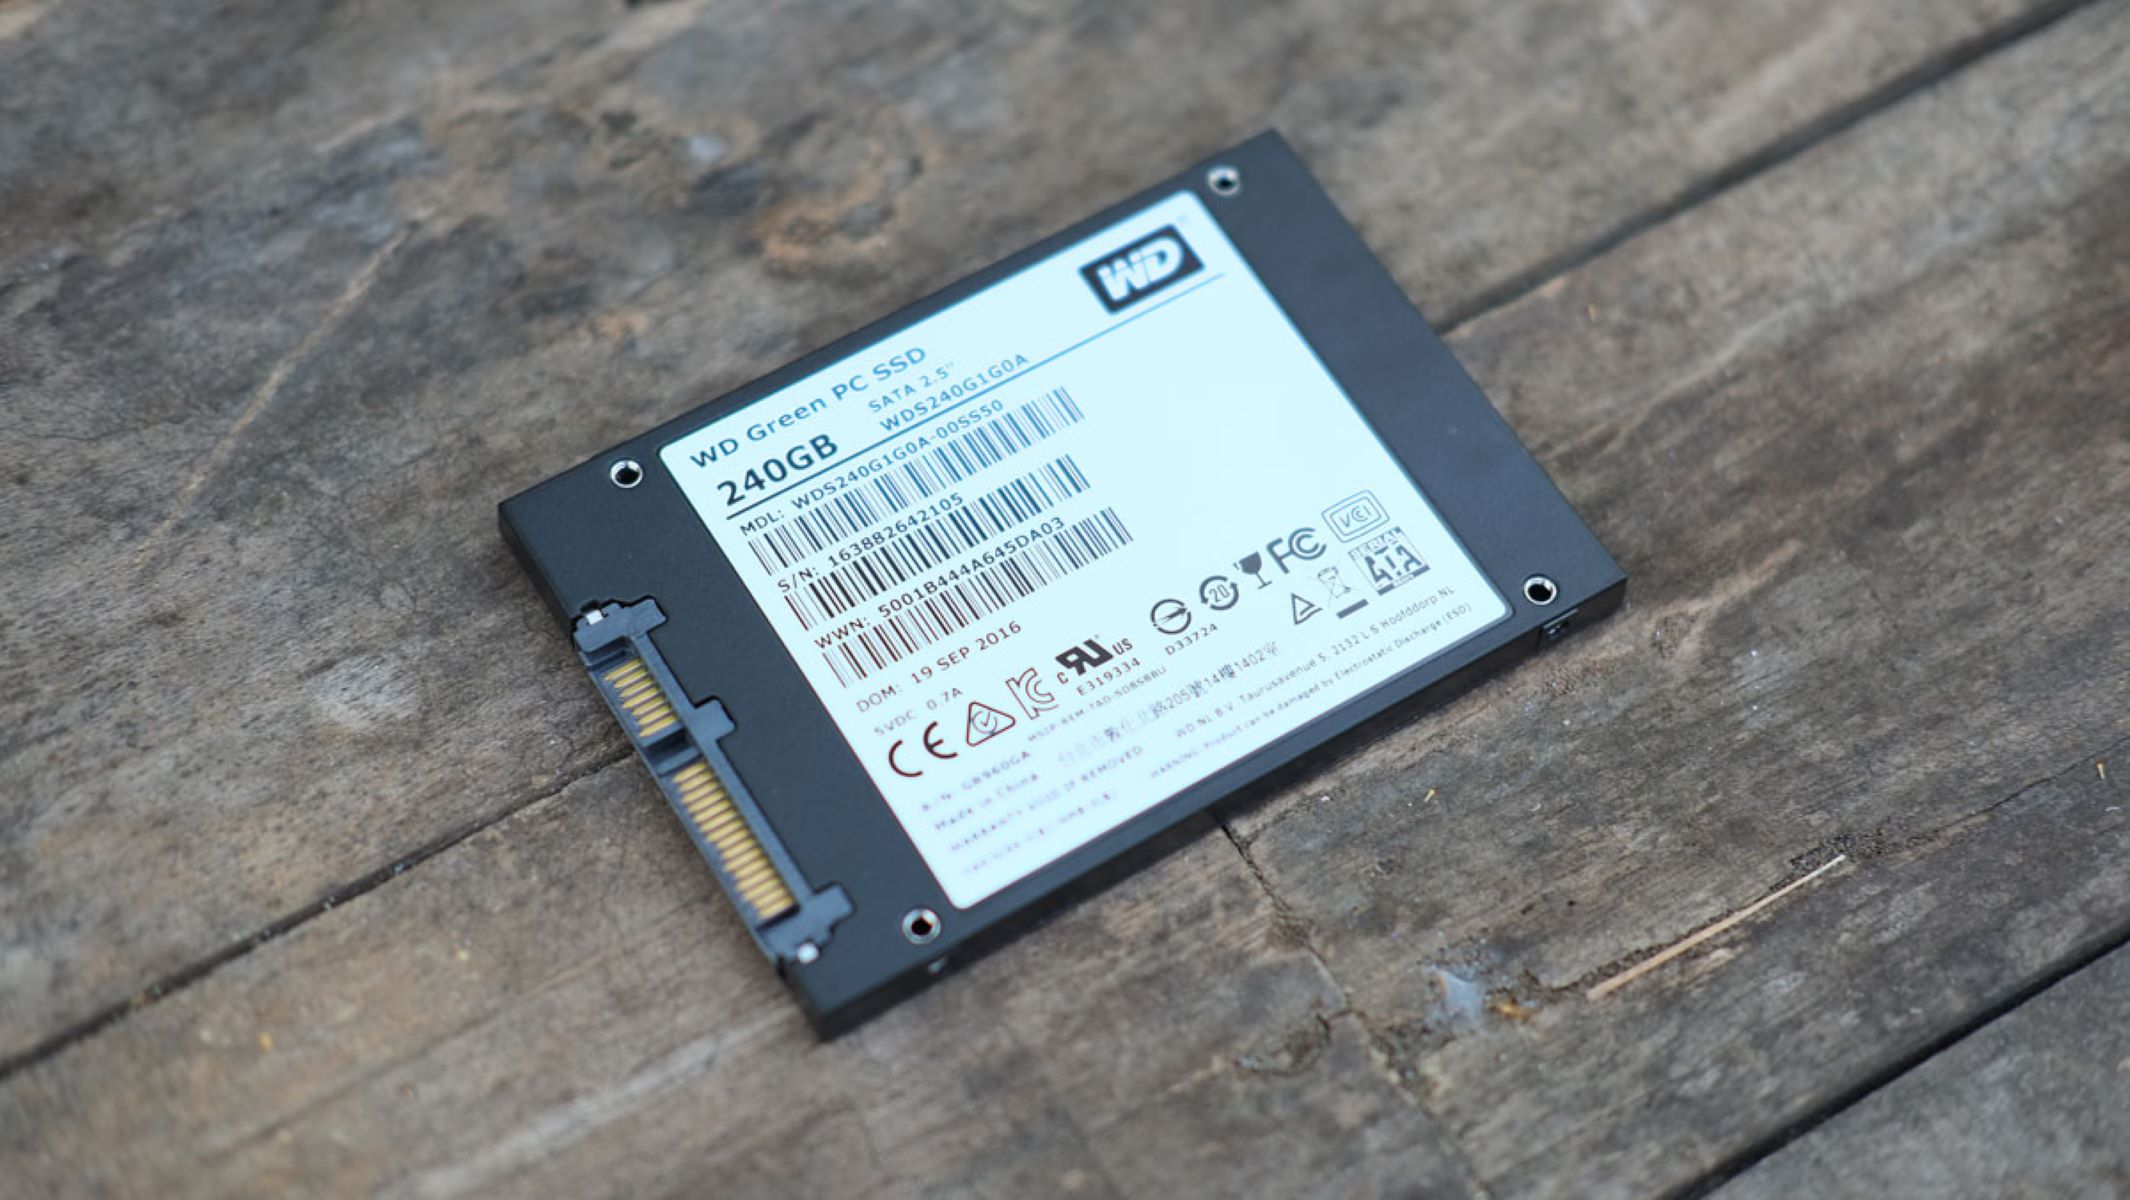
Form Factor: SSDs come in different form factors, including 2.5-inch, M.2, and mSATA. Ensure that the SSD you choose matches the available slots or connections in your computer. Note that some laptops may require specific form factors for compatibility, so it’s important to research your device’s specifications.
Performance: Consider the performance specifications of the SSD, such as read and write speeds. Higher speeds will result in faster data transfers, boot times, and application loading. Keep in mind that while SATA SSDs offer a significant performance improvement over traditional hard drives, NVMe SSDs provide even greater speed and responsiveness.
Brand and Reliability: Opt for reputable brands known for their reliability and quality. Research customer reviews and ratings to gain insights into the longevity and overall performance of the SSD. A reliable SSD will offer a longer lifespan and better data protection.
Budget: Set a budget for your SSD purchase. While SSDs tend to be more expensive per gigabyte than traditional hard drives, the prices have significantly dropped in recent years. Evaluate your storage needs and budget constraints to find the right balance.
By considering these factors, you can choose an SSD that not only meets your storage requirements but also enhances your computer’s performance. Take your time to research and compare different SSD options before making a decision.
Backing up Your Data
Before you proceed with replacing your hard drive with an SSD, it’s crucial to back up your data to prevent any potential loss. While the installation process itself is relatively safe, unexpected issues can arise, and it’s better to be safe than sorry. Here’s how you can back up your data:
- Identify Important Files: Take some time to identify the files and folders that are crucial to you. These may include documents, photos, videos, music, and any other personal or work-related files.
- Choose a Backup Method: There are several backup methods you can choose from, depending on your preferences and available resources.
- External Hard Drive: Use an external hard drive to manually copy and transfer your important files. Connect the external hard drive to your computer and create a folder where you can store the backup files. Then, simply drag and drop the files you want to back up into the folder.
- Cloud Storage Services: Utilize cloud storage services like Dropbox, Google Drive, or Microsoft OneDrive to back up your files. Install the corresponding desktop application or access the service through a web browser, and then upload your files to the cloud storage.
- Backup Software: Consider using backup software like Acronis True Image, Macrium Reflect, or EaseUS Todo Backup. These types of software provide more advanced features and can automate the backup process for you.
- Perform the Backup: Follow the instructions specific to your chosen backup method to transfer your files. Ensure that all the important files are successfully backed up without any errors.
- Verify the Backup: Once the backup process is complete, verify that all the files have been successfully copied and are accessible. Double-check to make sure that no files are missing or corrupted.
Remember to keep your backup files in a safe and secure location. Consider storing backups in multiple locations, such as an external hard drive and cloud storage, for added redundancy and protection.
Backing up your data is a crucial step to safeguard your important files and prevent any data loss during the hard drive to SSD replacement process. Take the time to complete this step thoroughly to ensure peace of mind and a smooth transition to your new SSD.
Gathering the Necessary Tools
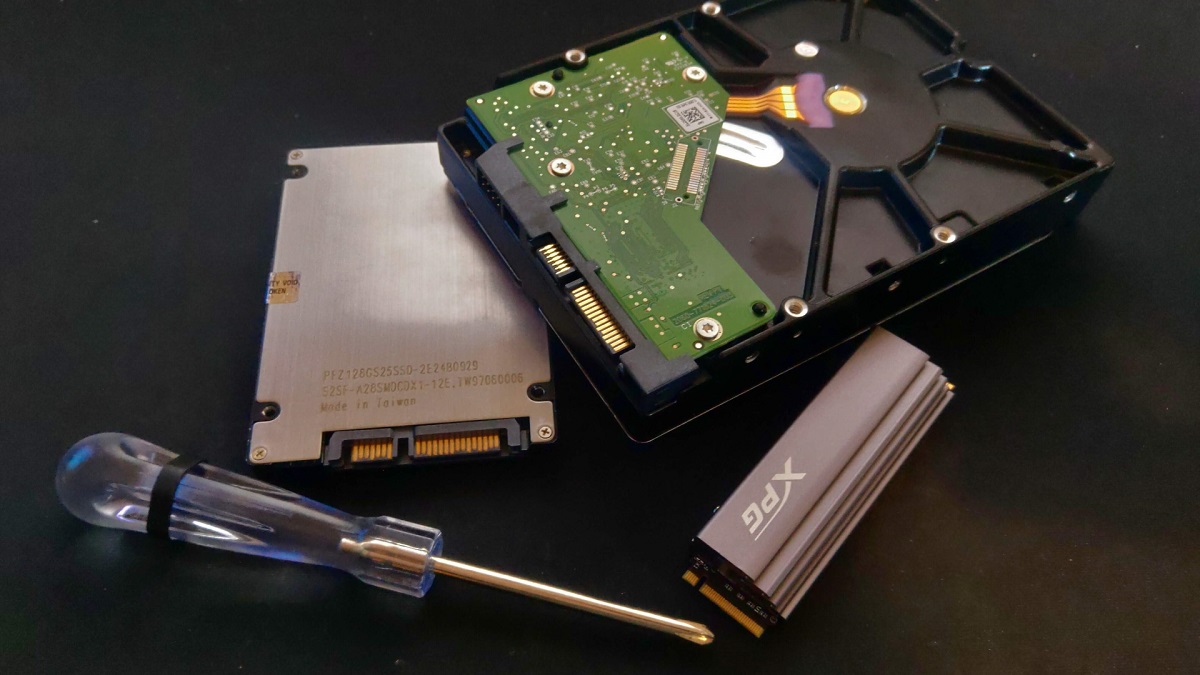
Before you begin replacing your hard drive with an SSD, it’s essential to gather all the necessary tools and equipment. Having the right tools on hand will make the process smoother and more efficient. Here are the tools you’ll need:
- Screwdriver: The specific type of screwdriver you’ll need depends on your computer’s design. Most commonly, a Phillips screwdriver or a Torx screwdriver will be required to remove the screws holding your computer’s casing or hard drive in place. Check your computer’s manual or do some research to determine the appropriate screwdriver type.
- Anti-static Wrist Strap: An anti-static wrist strap is used to protect sensitive computer components from static electricity. By wearing the strap and connecting it to a grounded object, you can prevent static discharge that could potentially damage your computer’s internal components.
- SSD Mounting Bracket: If your computer’s internal slot or bay is not compatible with the size or form factor of the SSD, you may need a mounting bracket or adapter. This will allow you to securely install the SSD in your computer. Check the dimensions and form factor of your SSD to ensure compatibility when purchasing a mounting bracket.
- Data and Power Cables: Depending on your computer’s configuration, you may need data and power cables to connect the SSD to your motherboard and power supply. Some SSDs come with these cables included, so check the packaging or consult the manufacturer’s instructions.
- External Hard Drive or USB Drive: You will need an external hard drive or a USB drive to store your backup files. Ensure that it has enough storage capacity to hold all the necessary data.
- Cleaning Cloth: A soft, lint-free cloth can come in handy to clean any dust or debris from the computer and components before and after the installation process.
- Flashlight: A flashlight can be useful for illuminating dark corners or tight spaces inside your computer case, making it easier to see and work on the components.
- Labels and Pen: Consider using labels and a pen to mark and identify cables or components during the disassembly process. This will help you keep track of which cables and screws belong to which parts when it’s time to reassemble your computer.
By gathering all these necessary tools before you begin, you can save time and frustration during the hard drive to SSD replacement process. Additionally, having everything readily available will help ensure a successful and hassle-free upgrade. Now that you have your tools in hand, it’s time to move on to the next step of opening your computer.
Opening Your Computer
Now that you have gathered all the necessary tools, it’s time to open your computer case and access the internal components. Follow these steps to safely open your computer:
- Power Down: Before working on your computer, make sure it is powered off completely. Unplug the power cord from the wall outlet and disconnect any other cables connected to the computer.
- Ground Yourself: Protect your computer’s internal components from static electricity by wearing an anti-static wrist strap. This will help prevent electrostatic discharge that can damage sensitive components.
- Locate the Screws: Most computer cases have screws holding the side panels in place. Use the appropriate screwdriver to remove these screws. Place the screws in a safe place for reassembly later.
- Remove the Side Panel: Gently slide or lift off the side panel of the computer case. Some cases may require you to push a release button or slide a latch to unlock the panel.
- Identify the Hard Drive: Locate the hard drive inside the computer. It is usually a rectangular metal or plastic box with cables connected to it. If you’re unsure about which drive is the hard drive, consult your computer’s manual or do some research online.
- Disconnect Cables: Carefully detach the data and power cables connected to the hard drive. Hold the connectors, not the cables, and gently pull them out. Take note of how the cables are connected for reference during reassembly.
- Remove Mounting Brackets or Screws: Some hard drives may be held in place by mounting brackets or screws. Use the appropriate tools to remove these brackets or screws, ensuring that you keep them safely aside for later use.
- Take Out the Hard Drive: Once all the cables and brackets/screws are removed, slide the hard drive out of its bay or slot. Be careful not to apply excessive force or drop the drive.
With the hard drive now removed, you have successfully opened your computer and gained access to the internal components. Keep the side panel and screws in a safe place to ensure they aren’t misplaced during the upgrade process. Next, we will prepare the SSD for installation.
Removing the Old Hard Drive
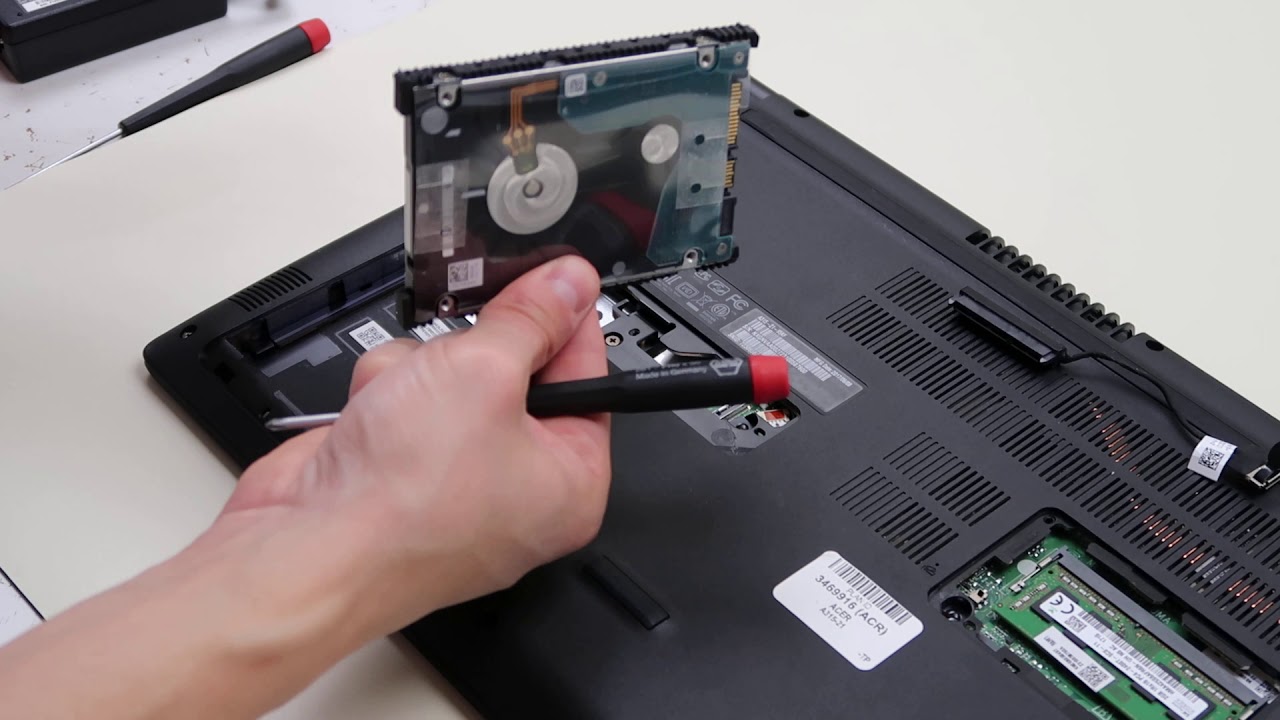
Now that you have opened your computer and accessed the internal components, it’s time to remove the old hard drive. Follow these steps to safely remove the old hard drive:
- Handle the Hard Drive with Care: Hard drives are delicate components, so it’s important to handle them with care. Avoid touching the circuit board or any exposed connectors. Instead, hold the drive by its edges.
- Disconnect Remaining Cables: If there are any additional cables connected to the hard drive, such as fan connectors or other data cables, make sure to disconnect them. Take note of how these cables are connected for reference during reassembly.
- Remove Mounting Brackets or Screws: If there are any mounting brackets or screws securing the hard drive in place, use the appropriate tools to remove them. Set aside the brackets or screws for later use.
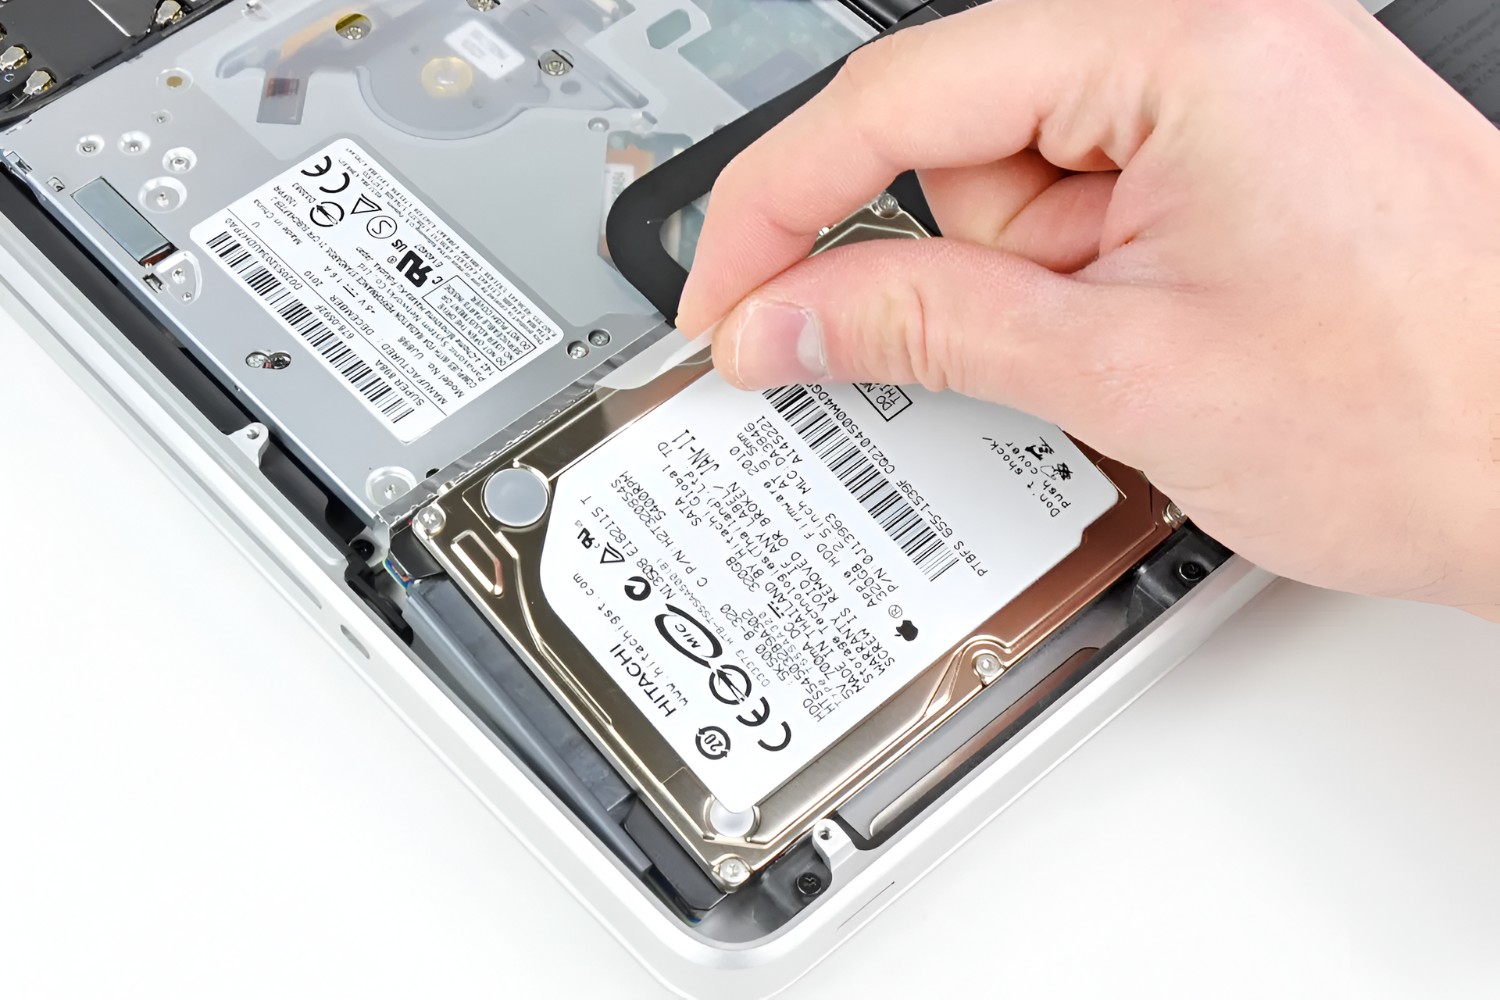
- Slide or Lift the Hard Drive: Once all the cables and brackets/screws are disconnected, carefully slide or lift the old hard drive out of its bay or slot. Be cautious not to apply excessive force or drop the drive.
- Store the Old Hard Drive: If the old hard drive is still in good working condition and you have no further use for it, consider storing it in an anti-static bag for future use or donate it to a recycling center.
With the old hard drive safely removed from your computer, you have completed an important step in the process of replacing it with an SSD. Your computer is now ready for the installation of the new SSD. In the next section, we will prepare the SSD for installation.
Preparing the SSD for Installation
With the old hard drive removed from your computer, it’s time to prepare the solid-state drive (SSD) for installation. Proper preparation ensures a smooth and successful installation process. Follow these steps to prepare the SSD:
- Inspect the SSD: Before proceeding, carefully inspect the SSD for any physical damage or defects. Ensure that all connectors and components are intact.
- Check Compatibility: Verify that the SSD is compatible with your computer’s interface and form factor. Refer to the documentation provided with the SSD or consult the manufacturer’s website for detailed specifications.
- Backup the SSD: If the SSD comes with pre-installed software or firmware, make a backup of it if necessary. This can be useful in case you need to restore or reinstall the software later.
- Verify Firmware Updates: Check if there are any firmware updates available for the SSD. Updating the firmware can improve performance and address any known issues or bugs. Download and install the latest firmware from the manufacturer’s website if required.
- Handle the SSD Properly: Just like with the old hard drive, handle the SSD with care. Avoid touching the circuit board or any exposed connectors. Hold the drive by its edges to prevent static electricity and physical damage.
- Attach Mounting Brackets or Screws: If necessary, attach the mounting brackets or screws to the SSD. This step may vary depending on your computer’s form factor and the mounting options available.
- Label the SSD: Consider labeling the SSD or its connectors with small adhesive labels or a marker. This will help you identify the SSD during the installation process and ensure proper cable connections.
By properly preparing the SSD, you can minimize any potential issues or complications during the installation process. Double-checking compatibility and firmware updates, handling the SSD with care, and labeling it will help ensure a smooth transition to the new drive. In the next section, we will guide you through the process of installing the SSD in your computer.
Installing the SSD
Now that you have prepared the solid-state drive (SSD), it’s time to install it into your computer. Follow these steps to properly install the SSD:
- Locate the Installation Spot: Identify the appropriate slot or bay in your computer where the SSD will be installed. Refer to your computer’s documentation or research online to find the exact location.
- Align the SSD: Carefully align the connectors on the SSD with the corresponding connectors in the slot or bay. Make sure the SSD is oriented correctly, matching the connector shapes and positions.
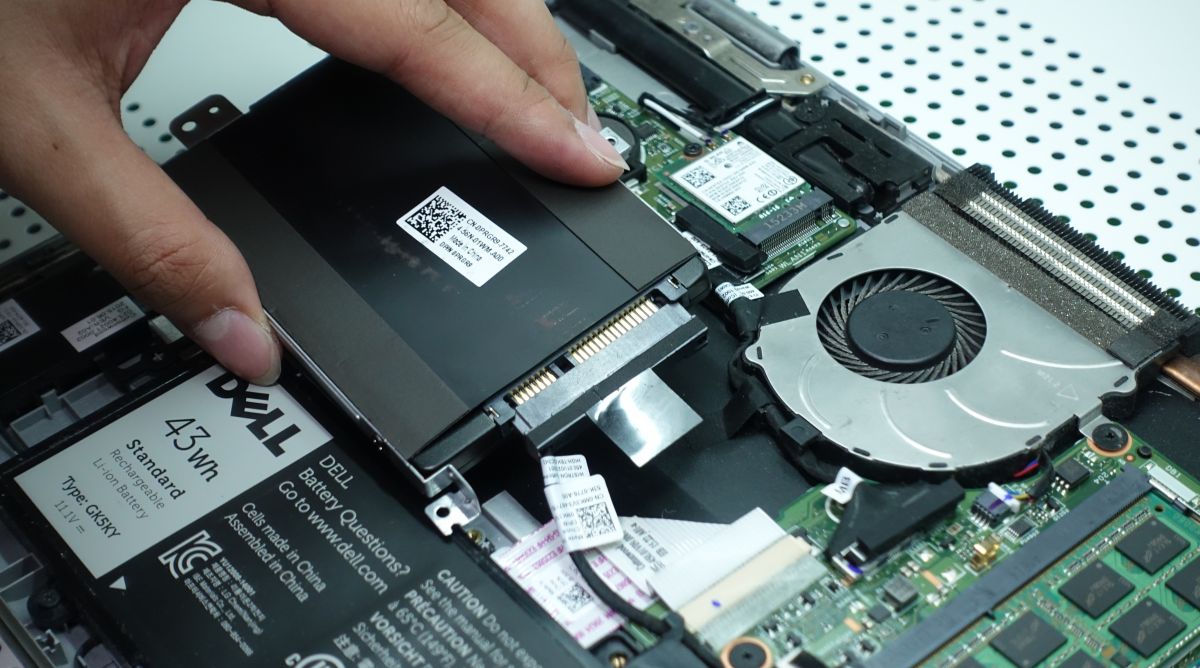
- Slide or Insert the SSD: Gently slide or insert the SSD into the slot or bay. Apply slight pressure, if necessary, to ensure a snug fit. Avoid using excessive force, as it may cause damage to the connectors or the SSD itself.
- Secure the SSD: Depending on your computer’s design, you may need to secure the SSD with mounting brackets or screws. Follow the manufacturer’s instructions or consult your computer’s manual to determine the appropriate securing method.
- Connect Data and Power Cables: Attach the data and power cables to the SSD. Ensure that the cables are firmly connected and properly seated in their respective connectors. Refer to the labels or markings made during the preparation stage to ensure correct cable placement.
- Organize Cables: Arrange the cables neatly to optimize airflow and prevent any interference with other components. Use cable ties or cable management solutions to secure and organize the cables, if necessary.
By following these steps, you have successfully installed the SSD into your computer. Double-check all connections and ensure that the SSD is securely in place. With the installation complete, it’s time to move on to the next section, where we will guide you through the process of closing up your computer.
Closing Up Your Computer
With the solid-state drive (SSD) successfully installed in your computer, it’s time to close up the case and secure the components. Follow these steps to properly close your computer:
- Double-Check Connections: Before closing the case, double-check all the connections, including the data and power cables connected to the SSD. Ensure that they are firmly seated and properly secured.
- Secure the Side Panel: Align the side panel of the computer case with the opening and gently slide it into place. Make sure it is correctly aligned and fully secured. Use the appropriate screws to secure the side panel tightly.
- Organize Cables: Take a moment to organize the cables inside your computer case. Bundle and route them in a way that promotes good airflow and reduces clutter. Use cable ties or cable management solutions if necessary to keep everything neat and tidy.
- Power Supply Reconnection: Reconnect the power cord and any other cables that were disconnected from the power supply. Ensure that all connections are secure.
- Power On: Once everything is securely closed up, plug the power cord back into the wall outlet. Press the power button to turn on your computer and check if it boots up properly.
- Ensure SSD Recognition: Enter your computer’s BIOS or UEFI settings and verify that the SSD is being recognized correctly. If required, configure the boot order to prioritize the SSD as the primary boot device.
- Operating System Installation: If you have installed a new, empty SSD, you will need to install an operating system on it. Insert the installation media (CD/DVD or USB) and follow the prompts to install the operating system on the SSD.
By following these steps, you have successfully closed up your computer after installing the SSD. Take a moment to ensure all connections are correct and the SSD is recognized by your computer. If everything is working properly, congratulations! You have completed the installation process. In the next section, we will guide you through the process of powering on and formatting the SSD.
Powering On and Formatting the SSD
With the solid-state drive (SSD) installed and your computer closed up, it’s time to power on your system and format the SSD to prepare it for use. Follow these steps to ensure a successful power-on and formatting process:
- Power On the Computer: Press the power button to turn on your computer. Allow it to boot up and reach the operating system.
- BIOS or UEFI Access: During the initial boot sequence, press the appropriate key (usually Del, F1, F2, or ESC) to access your computer’s BIOS or UEFI settings. Refer to your computer’s documentation or do some research to determine the specific key for your system.
- Verify SSD Recognition: Within the BIOS or UEFI settings, navigate to the storage or drive configuration section. Verify that the SSD is being correctly recognized and listed as a connected storage device.
- Set SSD as Boot Device (if needed): If you have installed a new operating system on the SSD and want it to be the primary boot device, navigate to the boot order section in the BIOS or UEFI settings. Set the SSD as the first boot device in the list.
- Save and Exit: Save any changes made in the BIOS or UEFI settings and exit the settings menu. This will prompt the system to restart.
- Operating System Setup: If you have installed a new, empty SSD, you will need to set up and format the drive to prepare it for use. Insert the installation media for your operating system (CD/DVD or USB) and follow the prompts to install the operating system on the SSD.
- Format the SSD: Once the operating system is installed, access the Disk Management utility in your operating system. Locate the SSD in the list of drives and format it using the desired file system (such as NTFS for Windows). Follow the prompts to complete the formatting process.
- Assign a Drive Letter: After formatting, assign a drive letter to the SSD to make it accessible in your file explorer. This can be done within the Disk Management utility.
- Verify SSD Functionality: Open your file explorer and ensure that the SSD appears as an available drive with the assigned drive letter. Attempt to browse and access the SSD to confirm its functionality.
By following these steps, you have successfully powered on your computer and formatted the SSD. Now, your SSD is ready for use and can be utilized to store and access your data. In the next section, we will guide you through the process of restoring your data from the backup you created earlier.
Restoring Your Data
Now that your solid-state drive (SSD) is formatted and ready for use, it’s time to restore your data from the backup you created earlier. Follow these steps to successfully restore your data:
- Connect the Backup Device: If you stored your backup files on an external hard drive or USB drive, connect it to your computer. Ensure that it is recognized and accessible.
- Locate the Backup Files: Navigate to the location where you stored your backup files. This may be on the external device or a cloud storage service. If necessary, install any required software or log in to the cloud storage service to access your backup files.
- Restore Files: Select the files and folders you want to restore and copy them to your SSD. You can typically do this by dragging and dropping the files from the backup location to the desired location on your SSD.
- Organize Restored Files: Once the files are restored, organize them into appropriate folders and directories on your SSD. This will help you easily locate and access your files in the future.
- Verify Data Integrity: After the restoration is complete, take some time to ensure that the restored files are intact and accessible. Open a few randomly selected files to make sure they open without any issues.
- Delete Backup Files: If you no longer need the backup files and have successfully restored all necessary data to your SSD, consider deleting the backup files from the external device or the cloud storage service. This will free up storage space and ensure that there are no duplicate copies of your files.
By following these steps, you have successfully restored your data from the backup onto your SSD. Take the time to verify the integrity of your restored files and ensure they are all in the correct locations. With your data restored, you can now enjoy the improved speed, performance, and reliability of your computer with the new SSD. In the final section, we will provide some additional tips and insights to wrap up the process.
Final Thoughts and Tips
Congratulations! You have successfully replaced your old hard drive with a solid-state drive (SSD), unlocking faster performance and improved reliability for your computer. As you wrap up the process, here are some final thoughts and tips to keep in mind:
1. Test Your SSD: After the installation and data restoration, run some performance tests on your SSD to make sure it is functioning optimally. This can help identify any potential issues or ensure that you’re getting the expected performance benefits.
2. Keep Your Old Hard Drive: If your old hard drive is still in working condition, consider repurposing it as an external drive using an enclosure. This will allow you to continue using it for additional storage or as a backup device.
3. Regularly Back Up Your SSD: Just like any other storage device, it’s important to regularly back up your SSD to prevent data loss. Create a backup routine and store your important files in multiple locations, including external drives or cloud storage services.
4. Enable TRIM (if Supported): Check if your operating system supports TRIM, a feature that helps optimize SSD performance and lifespan. If supported, enable TRIM to ensure your SSD stays in peak condition.
5. Perform Regular Maintenance: Keep your SSD running smoothly by performing regular maintenance tasks, such as updating the firmware, cleaning the connectors, and optimizing your operating system for SSD usage.
6. Monitor SSD Health: Use SSD health monitoring tools to keep an eye on the health and performance of your SSD. Regularly check for any warning signs or anomalies to detect potential issues at an early stage.
7. Seek Professional Help (if Needed): If you encountered any difficulties during the installation process or feel unsure about the technical aspects, don’t hesitate to seek professional help. It’s better to have an expert address any concerns than risk causing damage to your computer.
By following these final thoughts and tips, you can ensure the long-term success and optimal performance of your newly installed SSD. Enjoy the benefits of faster boot times, improved responsiveness, and enhanced overall computing experience. Happy computing!