Introduction
Welcome to the world of solid-state drives (SSDs), the next generation of storage technology. If you’re tired of sluggish performance and slow data access on your computer, an SSD might just be the solution you’ve been looking for. In this article, we will explore what an SSD is, the advantages of using one, how to install an SSD, transferring data to an SSD, optimizing its performance, maintenance and care, as well as troubleshooting common issues.
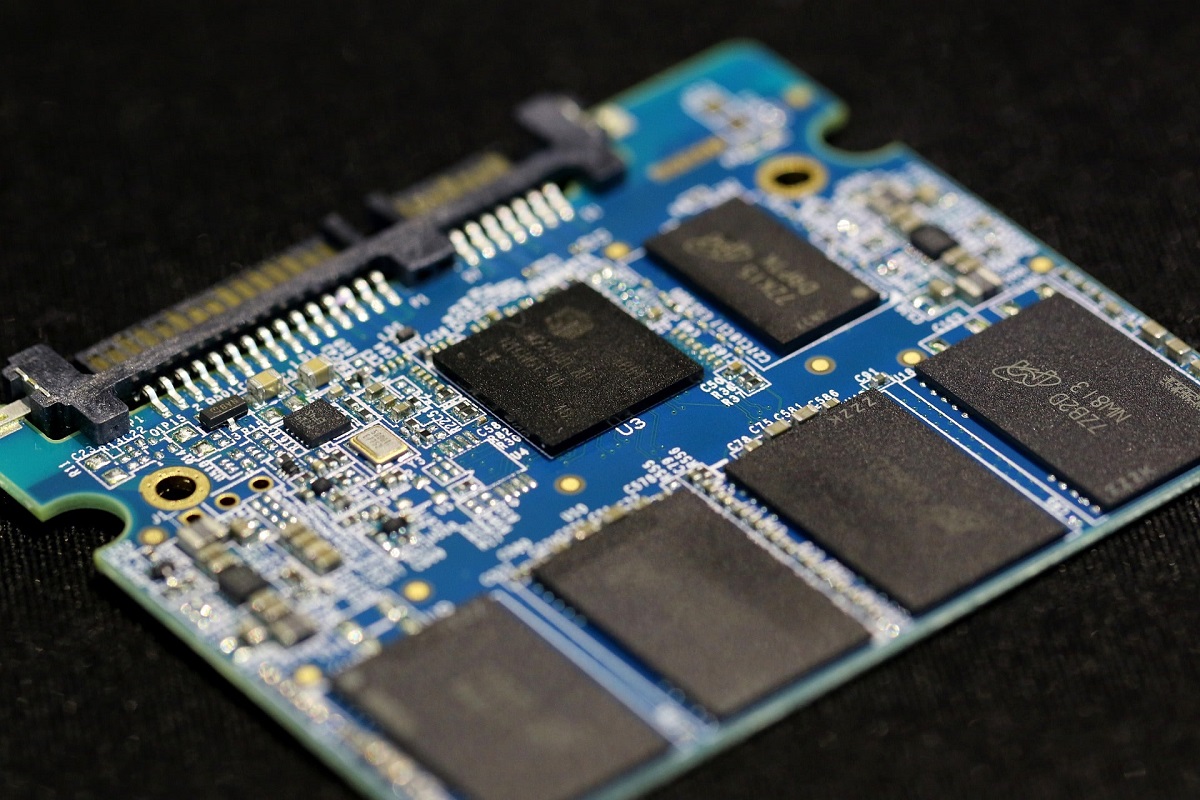
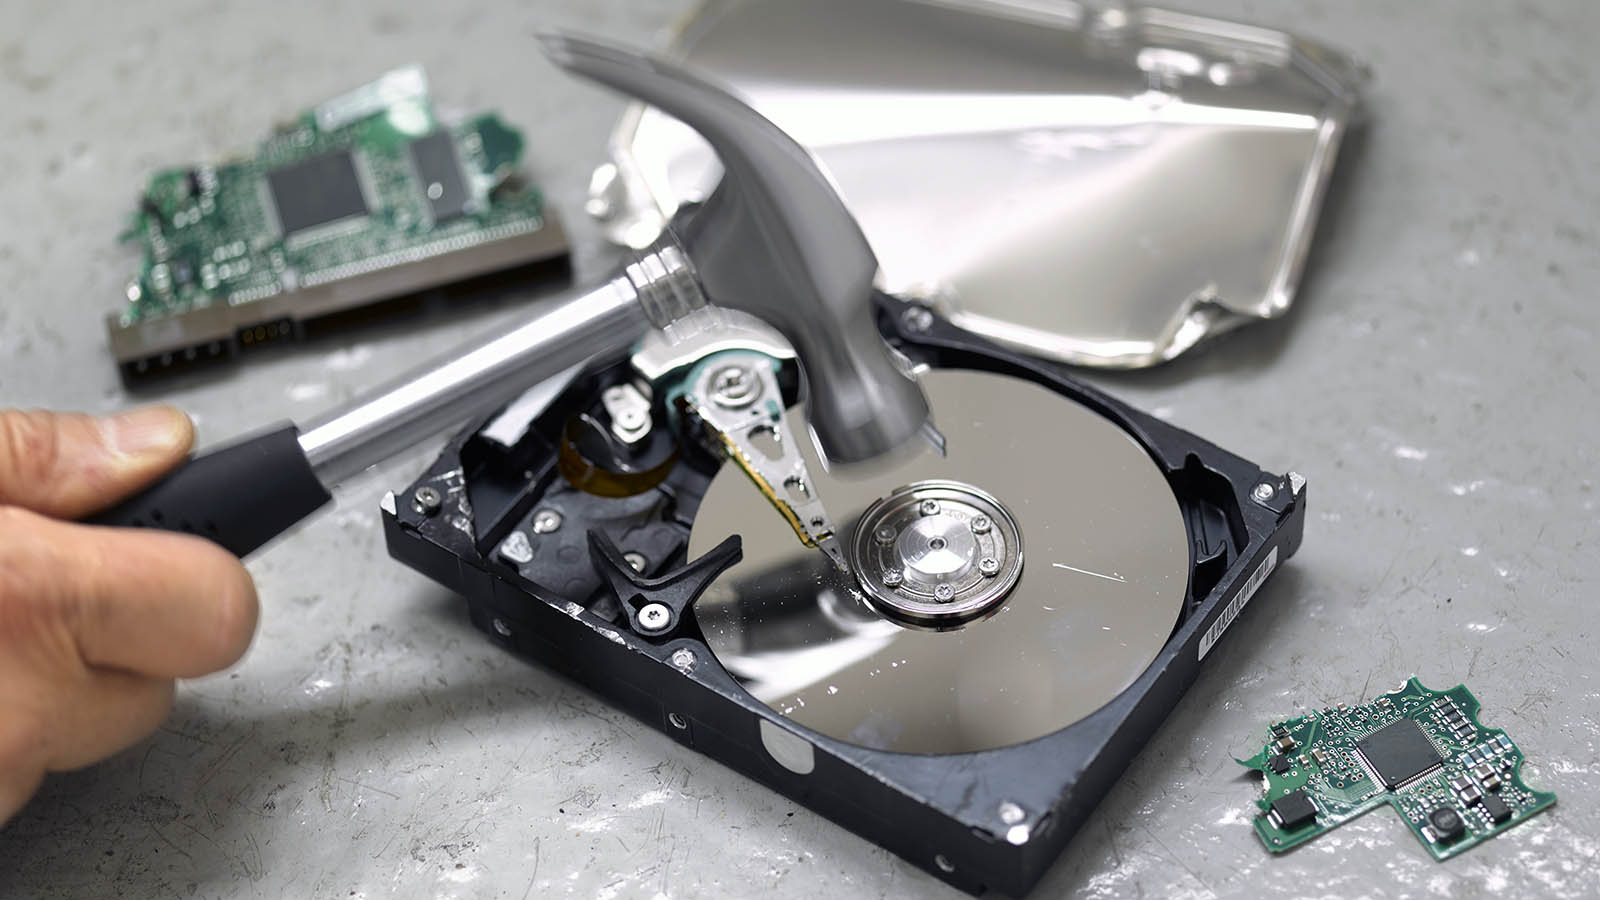
So, what exactly is an SSD? In basic terms, an SSD is a storage device that uses flash memory to store and retrieve data. Unlike traditional hard disk drives (HDDs) which use spinning disks and mechanical read/write heads, SSDs have no moving parts. This makes them faster, more durable, and less susceptible to mechanical failures. With an SSD, your computer can boot up faster, applications can launch almost instantly, and file transfers are significantly quicker.
Now let’s delve into the advantages of using an SSD. Aside from the noticeable speed improvements mentioned earlier, SSDs consume less power, generate less heat, and produce less noise compared to HDDs. This means that not only will your system run more efficiently and quietly, but you’ll also enjoy longer battery life on laptops. Additionally, SSDs are more resistant to shock and vibration, making them ideal for portable devices.
Installing an SSD is a relatively straightforward process, and we will guide you through it step by step. We’ll cover how to connect the drive to your computer, whether it’s a desktop or laptop, and explain the necessary precautions to take. Once you’ve installed the SSD, we’ll show you how to transfer your existing data to the new drive, ensuring a seamless transition without losing any important files.
After the installation, it’s important to optimize the SSD’s performance to get the most out of it. We’ll discuss various optimization techniques, such as enabling TRIM, adjusting power settings, and updating firmware. These optimizations will help maintain the SSD’s fast and efficient operation over time.
Just like any other electronic device, an SSD requires regular maintenance and care to ensure its longevity. We’ll provide some essential tips on how to keep your SSD in optimal condition, including regular backups, avoiding extreme temperatures, and keeping the firmware up to date.
Despite their many advantages, SSDs may encounter the occasional issue. In this article, we will cover common troubleshooting steps that can help you diagnose and resolve any problems you may encounter with your SSD. From drive not being detected to firmware issues, we’ve got you covered.
Now that you have a comprehensive overview of what to expect in this article, let’s get started with exploring the world of SSDs and how they can revolutionize your computing experience.
What is an SSD?
A solid-state drive (SSD) is a type of storage device that uses flash memory to store and retrieve data. Unlike traditional hard disk drives (HDDs), which rely on spinning platters and mechanical read/write heads, SSDs have no moving parts. Instead, they use NAND flash memory chips to store data electronically. This fundamental design difference gives SSDs a significant advantage in terms of speed, reliability, and efficiency.
The absence of moving parts in SSDs allows them to access data much faster than HDDs. When you launch an application or open a file on an SSD, the data retrieval process is almost instantaneous. This is because SSDs can access any data stored on the memory chips directly, without the need for physical read/write operations. As a result, tasks like booting up your computer, loading software, and transferring files become much quicker and more efficient.
Another key advantage of SSDs is their durability and reliability. Since there are no mechanical parts involved, SSDs are less prone to physical damage from accidental drops or vibrations. They are also more resistant to temperature extremes and can operate reliably in a wider range of environments. Additionally, SSDs are not susceptible to disk fragmentation, a common issue that can slow down HDDs over time.
In terms of energy efficiency, SSDs are far superior to HDDs. Because they don’t require any power to spin platters or move mechanical components, SSDs consume significantly less energy during operation. This leads to lower power consumption, reduced heat generation, and longer battery life on laptops and other portable devices.
SSDs also offer benefits in terms of noise reduction. Since there are no spinning disks or whirring read/write heads, SSDs operate silently. This can be especially appreciated in quiet environments or when using devices close to you, like laptops in a library or desktop computers in a home office.
Overall, the use of SSDs can greatly improve the performance and user experience of your computer. With faster data access, enhanced durability, lower power consumption, and silent operation, SSDs are becoming the preferred choice for both personal and professional use.
Advantages of Using an SSD
Using a solid-state drive (SSD) as your primary storage device offers several significant advantages over traditional hard disk drives (HDDs). Let’s explore some of the key benefits that make SSDs a preferred choice for modern computing.
First and foremost, SSDs offer blazing-fast performance. Compared to HDDs, SSDs can deliver significantly faster read and write speeds, resulting in quicker boot times, faster application launches, and smoother multitasking. Whether you’re editing large files, running resource-intensive software, or playing graphically demanding games, an SSD can handle these tasks with remarkable speed and efficiency.
Another advantage of SSDs is their durability and reliability. Unlike HDDs, which rely on physical read/write heads that can get damaged or wear out over time, SSDs have no moving parts. This means they are less susceptible to physical shock, vibration, or mechanical failure. As a result, your data is better protected and the risk of losing important information due to physical damage is greatly reduced.
SSDs also effectively eliminate the problem of fragmentation that affects HDD performance. As data is stored on different physical sectors of an HDD, retrieval requires the read/write head to move across the spinning platters. Over time, this can cause fragmentation, resulting in slower access speeds. In contrast, SSDs access data electronically without the need for physical movement, eliminating the issue of fragmentation. This ensures consistent and reliable performance, even as the drive becomes more filled with data.
Energy efficiency is another key advantage of SSDs. Traditional HDDs consume more power due to the mechanical components and the need to spin the platters. In contrast, SSDs require less power to operate, resulting in lower energy consumption and longer battery life for laptops and other portable devices. The reduced power usage also leads to less heat generation, which contributes to a cooler and quieter computing experience.
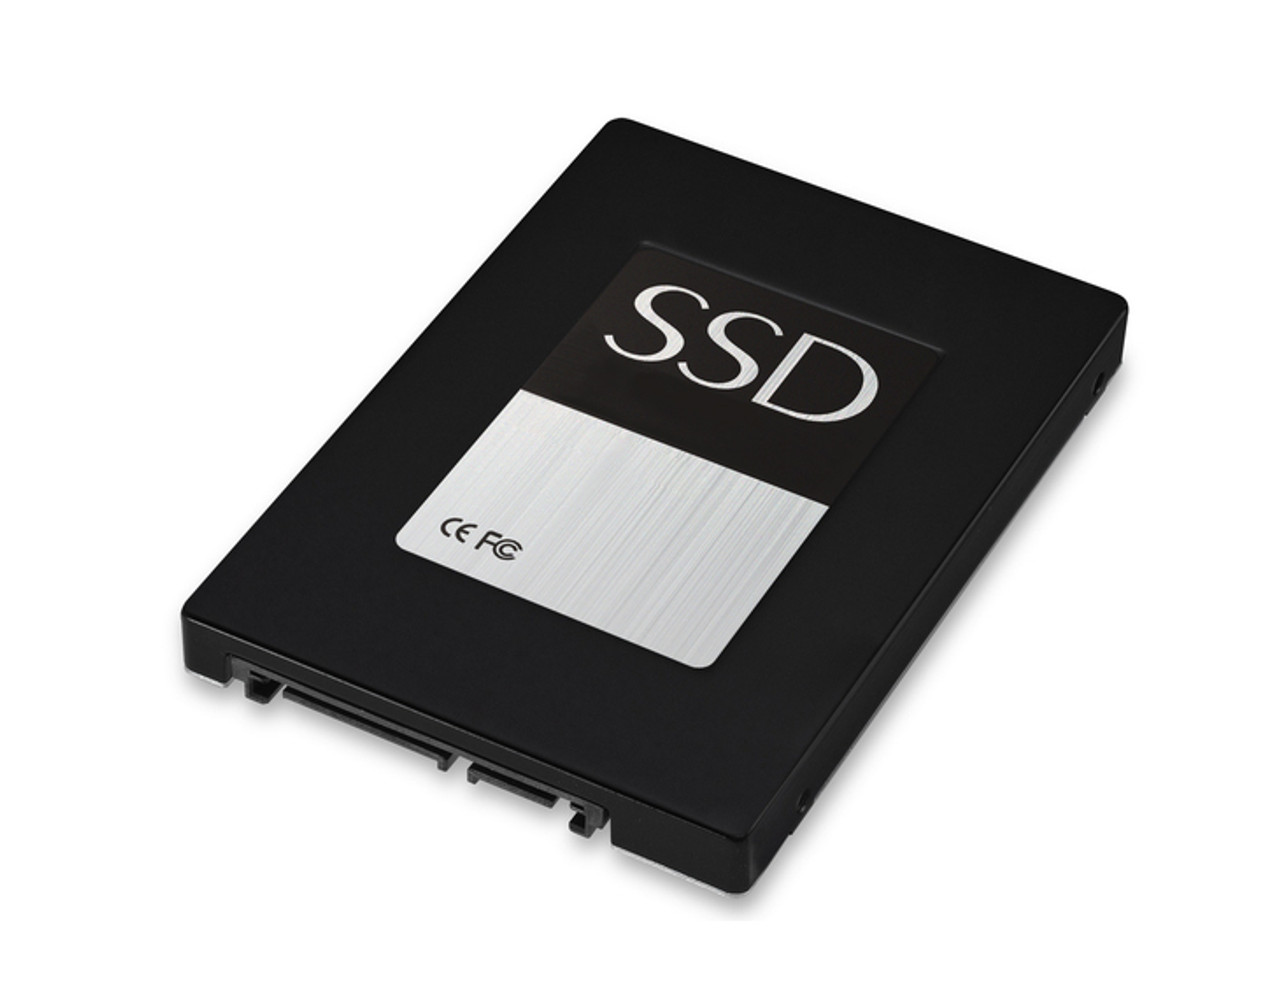
SSDs are also known for their compact form factor and lightweight design. This makes them an ideal choice for portable devices like ultrabooks and tablets, where space and weight are crucial factors. With an SSD, you can enjoy high-performance storage without sacrificing portability or adding unnecessary bulk to your devices.
Additionally, SSDs offer improved data security. Encryption features are often built into SSDs, providing a higher level of protection for sensitive data. Whether you’re using an SSD for personal use or in a professional setting, the added security features can help safeguard your confidential information.
With all these advantages, it’s clear why SSDs have become the go-to choice for both casual users and professionals alike. The combination of speed, durability, energy efficiency, and compact design make SSDs a reliable and efficient storage solution for modern computing needs.
How to Install an SSD
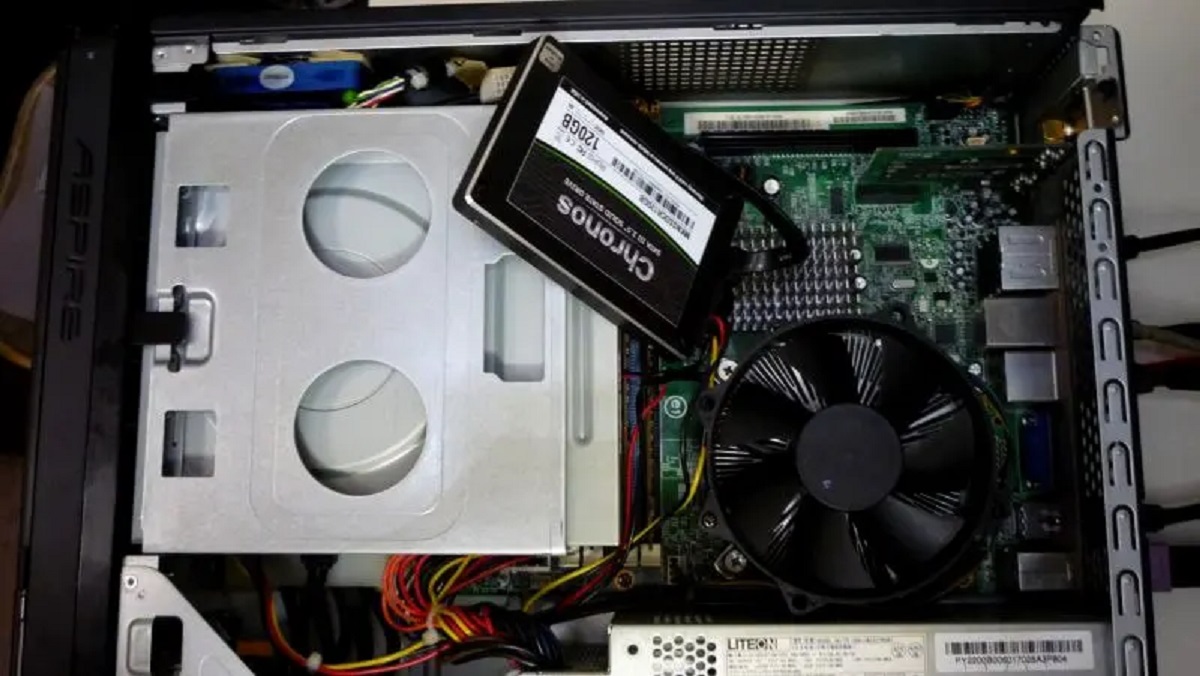
Installing a solid-state drive (SSD) is a straightforward process that can significantly enhance the performance of your computer. Whether you have a desktop or a laptop, we will guide you through the step-by-step installation process to ensure a smooth transition to your new SSD.
1. Check compatibility: Before purchasing an SSD, ensure that it is compatible with your computer. Determine if your system supports SATA or PCIe connections, as these are the most common types for SSDs. Also, check the physical dimensions to make sure the drive will fit into your computer’s storage bay.
2. Backup your data: Before proceeding with the installation, it’s crucial to back up your important data. This ensures that if anything goes wrong during the installation process, you won’t lose any important files. You can use an external hard drive, cloud storage, or any other backup method of your choice.
3. Prepare your system: Shut down your computer and disconnect the power cable. For a desktop, open the case by removing the screws or latches and locate an empty storage bay. For a laptop, refer to the manufacturer’s manual to find the appropriate access point for the storage drive.
4. Install the SSD: Carefully insert the SSD into the appropriate slot or bay. For a desktop, you might need to attach the SSD to a mounting bracket first. Secure it in place using screws or latches. In a laptop, connect the SSD to the designated slot and secure it according to the manufacturer’s instructions.
5. Connect power and data cables: For SATA SSDs, connect one end of the SATA power cable to the power connector on the SSD and the other end to an available power cable from your power supply. Next, connect one end of the SATA data cable to the SSD and the other end to an available SATA port on your motherboard.
6. Secure the SSD: In a desktop, ensure that the SSD is securely fastened in its bay using screws or latches. For a laptop, reattach any clips or screws that secure the access panel or casing.
7. Reassemble and power on: Make sure all connections are secure, then reassemble your desktop by replacing the case or cover. If you’re using a laptop, put the access panel back in place. Reconnect the power cable and boot up your computer.
8. BIOS/UEFI settings: Enter the BIOS or UEFI settings of your computer and confirm that the SSD is detected. If it’s not recognized, you may need to check the connections or consult the user manual for further troubleshooting.
9. Format and initialize the SSD: Once your computer recognizes the SSD, you will need to format and initialize it. Go to Disk Management (Windows) or Disk Utility (Mac) to perform these tasks. Follow the on-screen prompts to create a new partition and format the SSD with the desired file system.
10. Restore your data: Finally, restore your backed-up data onto the new SSD. Copy your files from the backup source to the newly formatted SSD. Ensure that everything is in its proper place and functioning as expected.
By following these steps, you can successfully install an SSD and enjoy the remarkable speed and performance improvements it brings to your computer.
Transferring Data to an SSD
Once you have successfully installed a solid-state drive (SSD) in your computer, the next step is to transfer your data from your old storage device to the new SSD. This process ensures that you have all your files, programs, and settings available on the faster and more efficient SSD. Let’s explore different methods to transfer your data to an SSD.
1. Manual file transfer: One of the simplest ways to transfer data is by manually copying files from your old storage device to the SSD. Connect both the old and new drives to your computer, and using the file explorer, copy and paste the desired files and folders from the old drive to the SSD. This method works best for personal files, such as documents, pictures, and videos.
2. Disk cloning: Disk cloning is a method that creates an exact copy of your old drive, including the operating system, programs, and data, onto the SSD. To perform disk cloning, you’ll need specialized software, such as Acronis True Image, Macrium Reflect, or Clonezilla. Follow the software’s instructions to clone your old drive onto the new SSD. Keep in mind that the SSD should have enough capacity to accommodate the entire contents of the old drive.
3. Operating system migration: If you only want to transfer the operating system and installed programs to the SSD, you can use migration software provided by SSD manufacturers or third-party tools, such as EaseUS Todo Backup or Samsung Data Migration. These tools help you migrate the operating system and selected applications to the SSD while excluding unnecessary files and data. This method can save time and storage space on the SSD.
4. Cloud storage and synchronization: If you utilize cloud storage services such as Dropbox, Google Drive, or Microsoft OneDrive, you can upload your files and folders to the cloud and then sync them to the SSD after the installation. This method allows you to access your files from any device and provides an efficient way to transfer large amounts of data without the need for physical connections.
5. Time Machine or Windows File History: For Mac users, Apple’s Time Machine backup utility is a convenient option to restore files from a backup onto the SSD. Windows users can use the built-in File History feature to back up their files and restore them to the SSD. Make sure to set up these backup utilities on your old drive prior to the SSD installation.
Regardless of the method you choose, it’s essential to keep a backup of your data before transferring it to the SSD. This ensures that your data remains safe in case of any unforeseen issues during the transfer process.
After transferring your data, verify that everything is functioning correctly on the SSD. Test your applications, open files, and ensure that settings and configurations are as expected. In some cases, you may need to update certain drivers or reactivate licensed software after the transfer.
By utilizing one of these methods, you can easily and effectively transfer your data to the new SSD, maximizing its speed and performance benefits while preserving your important files and settings.
Optimizing SSD Performance
Once you have installed a solid-state drive (SSD), there are several optimization techniques you can apply to maximize its performance and prolong its lifespan. Let’s explore some essential tips and tricks to optimize the performance of your SSD.
1. Enable TRIM: TRIM is a command that allows the operating system to inform the SSD which blocks of data are no longer in use. Enabling TRIM ensures that the SSD can efficiently manage its storage space, leading to improved performance and longevity. Most modern operating systems, such as Windows 10, macOS, and Linux, automatically enable TRIM for compatible SSDs. However, it’s always a good idea to double-check and update your operating system if necessary.
2. Adjust power settings: SSDs are already energy-efficient, but adjusting power settings can further optimize their performance. In Windows, navigate to the power options and select the “High Performance” power plan. This ensures that the SSD operates at its maximum potential. However, bear in mind that this may slightly reduce battery life on laptops.
3. Update firmware: Manufacturers regularly release firmware updates for their SSDs. These updates often include bug fixes, performance enhancements, and improved compatibility. Check the manufacturer’s website or use their dedicated software to download and install the latest firmware updates for your SSD. Updating firmware can address any potential performance issues and ensure the optimal functionality of your SSD.
4. Disable disk defragmentation: Unlike traditional hard disk drives (HDDs), SSDs do not benefit from regular disk defragmentation. In fact, frequent defragmentation can decrease the lifespan of an SSD by increasing unnecessary write operations. Most operating systems automatically disable defragmentation for SSDs. However, it’s always good practice to verify that defragmentation is turned off to avoid any potential performance degradation.
5. Allocate more memory for the page file: The page file, also known as the swap file or virtual memory, is a portion of the hard drive that the operating system uses as additional RAM. SSDs can handle random access operations more efficiently than traditional HDDs. To take advantage of this, you can allocate more memory for the page file on the SSD, which can improve system responsiveness, especially when multitasking or running memory-intensive applications.
6. Disable hibernation: Hibernation is a feature that saves the current state of your system to the hard drive, allowing you to resume exactly where you left off after powering down. However, hibernation can generate large files on your SSD, which may lead to excessive write operations. Disabling hibernation can save SSD space and decrease unnecessary write cycles. In Windows, open the command prompt as an administrator and type “powercfg -h off” to disable hibernation.
7. Avoid filling the drive to capacity: Keeping some free space on your SSD is important for performance optimization. When an SSD nears its storage capacity, its read and write speeds can decrease. Aim to leave at least 10-20% of the total capacity free. This ensures the SSD has enough free space to perform wear leveling, garbage collection, and other maintenance tasks that enhance overall performance and extend its lifespan.
By implementing these optimization techniques, you can ensure that your SSD performs at its best, improving overall system responsiveness and prolonging its lifespan. Regularly check for firmware updates and monitor your SSD’s health to maintain optimal performance over time.
SSD Maintenance and Care
While solid-state drives (SSDs) are known for their durability, it’s important to implement regular maintenance and care to ensure their longevity and optimal performance. By following these maintenance tips, you can keep your SSD in top condition for years to come.
1. Regular backups: Just like any other storage device, backing up your data is crucial. Even though SSDs are reliable, there is always a risk of data loss due to hardware failure, accidental deletion, or software issues. Create regular backups of your important files and store them on an external hard drive, cloud storage, or using an online backup service. This ensures that your data remains safe and accessible, even in the event of an SSD failure.
2. Avoid extreme temperatures: SSDs are sensitive to high temperatures, which can impact their performance and lifespan. To ensure longevity, avoid exposing your SSD to extreme heat or cold. Keep your computer in a well-ventilated area and ensure proper airflow to prevent overheating. Additionally, refrain from placing your laptop in direct sunlight or near heat sources, as this can lead to excessive heat buildup and potential damage to the SSD.
3. Keep firmware up to date: Manufacturers periodically release firmware updates for SSDs, which can bring performance improvements, bug fixes, and enhanced compatibility. Check the manufacturer’s website or use their provided software to ensure your SSD’s firmware is up to date. Keeping the firmware current helps to maintain optimal performance and stability, addressing any potential issues that may arise.
4. Avoid frequent full capacity usage: While SSDs are not subject to the same mechanical limitations as traditional hard disk drives (HDDs), keeping them consistently full can impact performance. Aim to leave around 10-20% of the SSD’s total capacity free. This allows the drive to perform important background processes, such as wear leveling and garbage collection, which help optimize performance and extend its lifespan.
5. Prevent sudden power loss: Abrupt power loss during read/write operations can lead to data corruption or other issues. To minimize the risk, consider using an uninterruptible power supply (UPS) or a quality surge protector. These devices provide a stable power supply and protect your SSD from the potential damage caused by power fluctuations or outages.
6. Securely erase data: When disposing of or selling your SSD, it’s important to securely erase all data to protect your privacy. SSDs utilize wear leveling and trim commands, which can make data recovery more challenging. Use a reliable disk wipe utility, provided by the SSD manufacturer or a third-party tool, to securely erase the SSD and ensure that no traces of sensitive information remain.
By following these maintenance and care tips, you can ensure that your SSD remains in optimal condition, maintaining its performance and reliability for years to come. Regularly updating firmware, creating backups, avoiding extreme temperatures, and implementing secure data erasure practices will help you get the most out of your SSD investment.
Troubleshooting SSD Issues
While solid-state drives (SSDs) are generally reliable, they can encounter occasional issues that may impact their performance or operation. It’s important to be aware of common SSD problems and how to troubleshoot them effectively. Let’s explore some troubleshooting steps you can take to address SSD issues.
1. Check connections: Start by ensuring that all connections to the SSD are secure. Disconnect and reconnect the SATA or PCIe cables, both at the SSD and the motherboard. This helps to rule out any loose connections that may be causing the problem.
2. Update drivers and firmware: Outdated drivers and firmware can cause compatibility issues and hinder SSD performance. Check the manufacturer’s website for the latest driver and firmware updates specific to your SSD model. Install any available updates to ensure optimal functionality.
3. Check for overheating: Overheating can impact SSD performance and potentially lead to system instability. Monitor the temperature of your SSD using specialized software or the manufacturer’s provided utility. If the temperature exceeds recommended values, ensure proper ventilation and cooling inside your computer case or consider installing additional cooling solutions.
4. Scan for malware: Malware or viruses on your computer can affect the performance of your SSD. Run a reputable antivirus or anti-malware scan to detect and remove any malicious programs. Regular scanning and keeping your computer protected can help prevent potential disruptions to SSD performance.
5. Run diagnostic tools: SSD manufacturers often provide diagnostic tools that can help identify and resolve potential issues. These tools can detect errors, check drive health, and provide options for repairs. Visit the manufacturer’s website and download the appropriate diagnostic tool for your SSD model.
6. Check TRIM and garbage collection: Verify that TRIM is enabled on your SSD. TRIM helps maintain the performance of the drive by informing the SSD which data blocks are no longer in use. Additionally, ensure that the SSD’s built-in garbage collection mechanism is functioning correctly. These technologies work together to optimize performance and extend the SSD’s lifespan.
7. Utilize disk repair utilities: Just like traditional hard drives, SSDs may develop file system issues over time. Run disk repair utilities such as CHKDSK (Windows) or Disk Utility (Mac) to scan and repair any file system errors that may be impacting SSD performance.
8. Test on another system: If possible, connect your SSD to a different computer to identify whether the issue is specific to your current system. This helps determine if the problem lies with the SSD or with other components in your computer.
9. Contact technical support: If none of the above troubleshooting steps resolve the SSD issue, consider reaching out to the manufacturer’s technical support. They can provide additional guidance and assistance based on the specific problem you’re facing.
By following these troubleshooting steps, you can effectively identify and address SSD issues. Remember to stay informed about the latest firmware updates, monitor SSD health, and take preventive measures to maintain the performance and reliability of your SSD.
Conclusion
In conclusion,
SSDs have revolutionized the world of storage technology, offering significant advantages over traditional hard disk drives (HDDs). With their faster speeds, enhanced durability, lower power consumption, and silent operation, SSDs have become the preferred choice for many users, both casual and professional.
We explored the process of installing an SSD, emphasizing the importance of checking compatibility, backing up data, and connecting the drive properly. We also discussed various methods for transferring data to the new SSD, such as manual file transfer, disk cloning, and operating system migration, as well as utilizing cloud storage and synchronization tools.
To optimize SSD performance, we highlighted the significance of enabling TRIM, adjusting power settings, updating firmware, avoiding disk defragmentation, allocating memory for the page file, and disabling unnecessary features like hibernation. Additionally, we emphasized the importance of leaving some free space on the SSD to allow for wear leveling and garbage collection.
Maintaining and caring for an SSD is crucial for longevity and performance. We highlighted the importance of regular backups, avoiding extreme temperatures, keeping firmware up to date, preventing sudden power loss, and securely erasing data before disposal. These practices help ensure the integrity and reliability of the SSD over time.
Lastly, we provided troubleshooting steps for common SSD issues, such as checking connections, updating drivers and firmware, addressing overheating problems, scanning for malware, and utilizing diagnostic tools. We also emphasized the importance of enabling TRIM and garbage collection, running disk repair utilities, and contacting technical support if needed.
Incorporating an SSD into your computing setup can significantly enhance your overall experience, providing faster performance, improved durability, and more efficient power usage. By following the guidelines and best practices outlined in this article, you can make the most out of your SSD, ensuring a seamless and reliable storage solution for years to come.