Overview
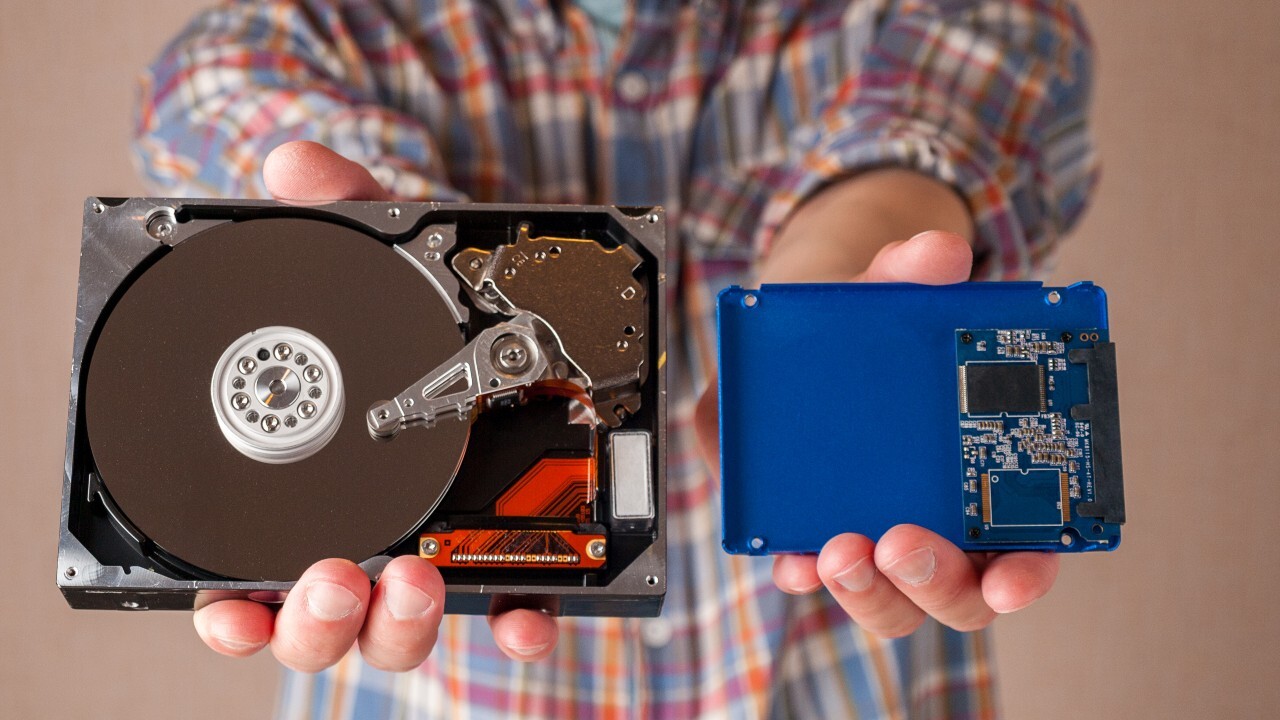
A solid-state drive (SSD) is a storage device that uses integrated circuit assemblies to store data persistently. It offers faster read and write speeds, improved reliability, and lower power consumption compared to traditional hard disk drives (HDDs). However, like any other electronic device, SSDs can experience wear and tear over time, leading to degraded performance or complete failure.
Checking the health of your SSD on a regular basis is crucial to ensure its optimal performance and longevity. By monitoring your SSD’s health, you can identify potential issues early on and take necessary action to prevent data loss and system crashes.
In this article, we will discuss why checking the health of your solid-state drive is important, the signs of a failing SSD, tools and software to check SSD health, and how to interpret the results of an SSD health check. We will also provide some best practices to help you maintain the health of your solid-state drive.
Whether you are a casual user or a power user, understanding how to check the health of your SSD and taking proactive measures can save you from potential headaches and costly repairs. So, let’s dive in and explore the world of SSD health monitoring!
Why Checking the Health of Your Solid State Drive is Important
Checking the health of your solid-state drive (SSD) is essential for several reasons. Here are a few key reasons why SSD health monitoring should be a priority:
- Prevent Data Loss: Regularly checking your SSD’s health allows you to identify potential issues that could lead to data loss. By being proactive, you can take necessary measures to back up your data and ensure its safety.
- Maximize Performance: Monitoring the health of your SSD helps you identify any performance degradation early on. This allows you to take appropriate actions, such as optimizing the drive or replacing it if necessary, to maintain peak performance.
- Prolong Drive Lifespan: SSDs have a limited lifespan, determined by the number of read and write cycles they can handle. By monitoring the health of your SSD, you can keep tabs on its usage and take preventive measures to extend its lifespan. This can save you money on premature drive replacements.
- Prevent System Crashes: A failing SSD can cause your entire system to crash, resulting in loss of productivity and potentially costly repairs. Regularly checking your SSD’s health allows you to catch any issues before they escalate, preventing system crashes and ensuring a stable computing experience.
- Warranty Coverage: Many SSD manufacturers provide warranties that cover drive failures. However, these warranties often have stipulations, such as requiring proof that the drive failed while still under warranty. By regularly monitoring your SSD’s health, you can identify any potential issues and take advantage of the warranty coverage, if applicable.
Overall, checking the health of your solid-state drive is crucial for maintaining data integrity, maximizing performance, prolonging drive lifespan, preventing system crashes, and taking advantage of warranty coverage. It’s a simple yet crucial step in ensuring the longevity and reliability of your SSD.
Signs of a Failing Solid State Drive
A failing solid-state drive (SSD) can have several indicators that can help you identify potential issues. Here are some common signs that your SSD may be failing:
- Slow Performance: One of the early signs of SSD failure is a noticeable decrease in performance. If your SSD takes longer to boot up, load applications, or transfer files, it could indicate that there are underlying problems with the drive.
- Frequent System Crashes: If your computer frequently freezes or crashes, especially during disk-intensive tasks, it could be a sign of an SSD failure. It’s important to rule out other potential causes such as software issues, but if crashes persist, it’s worth investigating the health of your SSD.
- Files and Folders Suddenly Disappearing: If you find that files and folders on your SSD are randomly disappearing or becoming corrupt, it could be an indication of a failing SSD. This can result in data loss, and it’s important to take immediate action to safeguard your important files.
- Error Messages: When a solid-state drive starts to fail, it may generate error messages indicating disk read or write failures. These error messages can appear during system startup or while using applications that rely heavily on disk access.
- Drive Not Recognized: If your computer fails to detect the SSD altogether or if it intermittently disappears from the system, it could indicate a failing drive. This could be due to a faulty connection or more severe issues within the SSD itself.
If you encounter any of these signs, it is crucial to back up your important data immediately to prevent irreversible data loss. Once you have a backup, it’s recommended to run diagnostic tests or use specialized software to check the health of your SSD.
Keep in mind that these signs may also be indicative of other system or software issues, so it’s important to rule out other potential causes. If you are unsure, consulting with a professional or contacting your SSD manufacturer’s support team can help you diagnose the problem accurately.
By being vigilant and aware of the signs of a failing SSD, you can take proactive steps to address issues early on and prevent significant data loss or system failures.
Tools and Software to Check SSD Health
There are several tools and software available that can help you check the health of your solid-state drive (SSD) and monitor its performance. Here are some popular options:
- SSD Utility: SSD Utility is a comprehensive tool provided by many SSD manufacturers, such as Samsung, Crucial, and Kingston. It allows you to access various features and information about your SSD, including temperature monitoring, firmware updates, and overall health status.
- CrystalDiskInfo: CrystalDiskInfo is a free and lightweight software that provides detailed information about your SSD’s health and performance. It displays crucial data, including the current temperature, overall health status, and any warnings or errors detected by the drive.
- SSD Life: SSD Life is a tool specifically designed to monitor the health of solid-state drives. It provides detailed reports on the drive’s lifespan, estimated remaining life, and other crucial attributes to help you determine the SSD’s health and potential lifespan.
- HD Tune: HD Tune is a popular utility that allows you to analyze and optimize the performance of your SSD. It also provides various health monitoring features, including real-time temperature readings, error scan, and S.M.A.R.T (Self-Monitoring, Analysis, and Reporting Technology) attributes.
- HWiNFO: HWiNFO is a comprehensive system information and monitoring tool that covers various hardware components, including your SSD. It provides detailed information about your SSD’s health, temperature, performance, and other critical parameters.
It’s important to note that the availability of these tools and software may vary depending on your SSD brand and model. It’s recommended to visit the manufacturer’s website or support page to find the appropriate tool for your specific SSD.
Once you have chosen a tool, download and install it, and then run the program to access the SSD health monitoring features. Pay attention to any warnings, error messages, or abnormal readings and take appropriate action based on the tool’s recommendations.
Regularly using these tools to check the health of your SSD can provide valuable insights into its condition, allowing you to identify potential issues early on and take necessary steps to ensure optimal performance and longevity.
Checking SSD Health on Windows
Checking the health of your solid-state drive (SSD) on a Windows computer can be done using various methods. Here are a few common ways to check SSD health on Windows:
- Using SSD Manufacturer’s Software: Many SSD manufacturers provide dedicated software that allows you to check the health of your SSD. Visit the manufacturer’s website and download the appropriate software for your SSD model. Once installed, launch the software and look for options related to drive health, monitoring, or diagnostics. These tools often provide detailed information about the SSD’s health status, temperature, and other crucial attributes.
- Using Windows Built-in Tools: Windows operating systems come with built-in tools that can help you check SSD health. One such tool is the Command Prompt, which allows you to run commands to gather information about your SSD’s health. Open the Command Prompt by searching for it in the Start menu and type in the command “wmic diskdrive get status”. This will display the status of all connected drives, including your SSD. If the status is “OK”, it indicates that the drive is working correctly.
- Using Third-Party Software: There are several third-party software options available for checking SSD health on Windows. Programs like CrystalDiskInfo, HD Tune, and HWiNFO, mentioned earlier, also support Windows operating systems. Download and install the software of your choice, then launch it to access SSD health monitoring features. These tools provide detailed reports on your SSD’s health status, temperature, and other key parameters.
Remember to regularly check your SSD’s health using one of these methods to stay informed about its condition. If you notice any warning signs, such as high temperatures, errors, or failures, take immediate action to prevent further damage or data loss.
It’s important to note that the specific steps and available options may vary depending on your SSD model and software used. Refer to the manufacturer’s documentation or online resources for detailed instructions specific to your SSD.
By regularly monitoring the health of your SSD on Windows, you can ensure its optimal performance, longevity, and protect your valuable data from potential failures.
Checking SSD Health on Mac
If you are using a Mac computer, checking the health of your solid-state drive (SSD) can be done using various methods. Here are a few common ways to check SSD health on Mac:
- Using Disk Utility: Disk Utility is a built-in application on Mac that allows you to manage and troubleshoot storage devices, including SSDs. To check the health of your SSD with Disk Utility, follow these steps:
- Go to Finder > Applications > Utilities > Disk Utility.
- Select your SSD from the left-hand sidebar.
- Click on the “First Aid” tab.
- Click on “Run” to initiate the disk verification process.
- Observe the results. If any issues are detected, Disk Utility will attempt to repair them. Take note of any warnings or error messages.
- Using Third-Party Software: There are also third-party software options available for checking SSD health on Mac. Programs like DriveDx, SmartReporter, and TechTool Pro provide comprehensive SSD health monitoring and diagnostics. Simply download and install the software of your choice, launch it, and follow the instructions to perform a health check of your SSD.
- Using Terminal Commands: For advanced users, you can also check SSD health using Terminal commands. Open Terminal from Finder > Applications > Utilities > Terminal. Then, enter the command “diskutil info diskX” (replace X with the appropriate disk number for your SSD). Look for the “SMART Status” field in the output – if it says “Verified,” it indicates that your SSD is in good health.
Regularly checking the health of your SSD on Mac is crucial for maintaining its performance and longevity. By identifying potential issues early on, you can take necessary actions to prevent data loss or system failures.
Remember, the specific steps and available options may vary depending on your Mac model, macOS version, and SSD software compatibility. Refer to the software documentation or online resources for detailed instructions specific to your setup.
By staying proactive and monitoring your SSD’s health on Mac, you can ensure its optimal performance and reliability for years to come.
Checking SSD Health on Linux
Checking the health of your solid-state drive (SSD) on a Linux system can be done using various methods. Here are a few common ways to check SSD health on Linux:
- Using Smartmontools: Smartmontools is a collection of utilities that allows you to monitor and analyze the health of storage devices, including SSDs, on Linux. To check SSD health using Smartmontools, follow these steps:
- Open the terminal.
- Install Smartmontools if it is not already installed. Use the package manager specific to your Linux distribution.
- Type the command “smartctl -a /dev/sdX” (replace X with the appropriate letter that represents your SSD). This will display detailed information about your SSD’s health, including the overall health status, temperature, and other important parameters.
- Using GNOME Disks: GNOME Disks is a graphical utility that comes pre-installed with many Linux distributions. It allows you to manage and monitor storage devices, including SSDs. To check SSD health using GNOME Disks, follow these steps:
- Open the GNOME Disks application.
- Select your SSD from the list of devices on the left-hand side.
- Click on the menu icon in the top-right corner (three horizontal lines) and select “SMART Data & Self-Tests.”
- Here, you can view the overall health status, temperature, and various other attributes of your SSD.
- Using NVMe Command: If you have an NVMe SSD, you can also use the nvme command-line utility to check its health. Open the terminal and type “sudo nvme smart-log /dev/nvmeX” (replace X with the appropriate number that represents your NVMe SSD). This command will display the SMART (Self-Monitoring, Analysis, and Reporting Technology) data of your NVMe SSD, including the overall health status and various other attributes.
Regularly checking the health of your SSD on Linux is important to ensure its optimal performance and longevity. By being proactive and identifying any potential issues early on, you can take the necessary steps to prevent data loss and maintain the reliability of your SSD.
It’s important to note that the specific steps and commands may vary depending on your Linux distribution and SSD model. Refer to the documentation or online resources specific to your distribution and SSD to obtain accurate instructions.
By utilizing the available tools and utilities on Linux, you can monitor your SSD’s health and make informed decisions to ensure its longevity and performance.
Understanding the Results of SSD Health Check
When performing a health check on your solid-state drive (SSD), it is important to understand the results obtained from the monitoring software or tools used. Here are some key aspects to consider when interpreting the results of an SSD health check:
- Overall Health Status: Most SSD health monitoring software provides an overall health status that indicates the overall well-being of the drive. This status is usually represented by terms like “Excellent,” “Good,” “Caution,” or “Bad.” Pay close attention to this indicator as it provides a general evaluation of the SSD’s health.
- S.M.A.R.T Attributes: S.M.A.R.T (Self-Monitoring, Analysis, and Reporting Technology) is a feature built into most modern SSDs that records various attributes related to the drive’s health and performance. SSD health monitoring software often provides detailed reports on these attributes. Look for any abnormal values, warning signs, or high values that may indicate potential issues with the SSD.
- Temperature: SSD health monitoring tools also provide information about the temperature of the drive. Ensure that the temperature readings are within the acceptable range specified by the manufacturer. High temperatures can lead to reduced performance and may indicate potential issues with cooling or ventilation within your system.
- Error Rate: SSD health checks may also reveal error rates related to read or write operations. These error rates are usually measured in terms of error corrections per unit of data transferred (e.g., CRC errors). An excessive error rate may indicate potential problems with the SSD’s controller, memory chips, or firmware.
- Wear Leveling: Wear leveling is a feature that helps distribute write operations evenly across the memory cells of an SSD, extending its lifespan. SSD health monitoring software may provide information about the wear leveling count or percentage. Higher wear leveling counts may imply that the SSD has undergone more write operations and could be closer to its lifespan limit.
It is important to note that interpreting the results of an SSD health check may require some technical knowledge and understanding of the specific attributes and benchmarks used by the monitoring software. If you are unsure about any results or terms, consider consulting the manufacturer’s documentation or seeking assistance from technical experts.
If the results of the SSD health check indicate any potential issues, such as high error rates, abnormal temperatures, or critical warning signs, take appropriate action. This may include contacting the manufacturer’s support, backing up important data, or considering a replacement if the drive is approaching its end of life.
Remember, regular SSD health checks are essential for proactive maintenance and can help you identify and address issues before they escalate into more significant problems, ultimately ensuring the longevity and reliability of your SSD.
Taking Action based on SSD Health Check Results
When you perform a health check on your solid-state drive (SSD) and receive the results, it is important to take appropriate action based on the findings. Here are some actions you can consider based on the SSD health check results:
- Backup Your Data: If the SSD health check reveals any warning signs or potential issues, it is crucial to back up your important data immediately. This ensures that your data is safe in case of any further deterioration or failure of the SSD.
- Replace Failing SSD: If the SSD health check indicates critical issues, such as a failing health status or high error rates, it might be necessary to replace the SSD. Contact the manufacturer’s support or consult with a professional for further guidance on the best course of action.
- Update Firmware: Some SSD health monitoring software may recommend updating the SSD firmware if it is outdated. Firmware updates often include bug fixes and performance enhancements, so follow the manufacturer’s instructions to update the firmware to the latest version.
- Optimize SSD: If the SSD health check shows no critical issues but indicates some performance degradation, consider optimizing the SSD. This involves tasks like enabling TRIM support, aligning partitions correctly, and ensuring the drive is operating at peak efficiency. Refer to your SSD manufacturer’s documentation or online resources for specific optimization steps for your SSD.
- Improve Cooling: If the SSD health check highlights high temperatures, it may be necessary to improve the cooling of your system. Ensure proper airflow, clean any dust accumulated near the SSD, and consider additional cooling solutions like improved fans or heatsinks.
- Regular Maintenance: Even if the SSD health check results are satisfactory, it is important to perform regular maintenance to keep the drive in optimal condition. This includes regular backups, periodic checks for firmware updates, and monitoring the drive’s temperature and performance over time.
Keep in mind that the appropriate action to take may vary depending on the specific SSD health check results and the recommendations provided by the monitoring software. It is always a good idea to consult with the manufacturer’s support team or seek assistance from technical experts if you are unsure about the best course of action.
By taking proactive steps based on the SSD health check results, you can ensure the longevity, performance, and reliability of your SSD, and minimize the risk of data loss or system failures.
Best Practices to Maintain the Health of Your Solid State Drive
To ensure the optimal performance and longevity of your solid-state drive (SSD), it is important to follow certain best practices for its maintenance. Here are some key practices to consider:
- Regularly Update Firmware: Keep your SSD firmware up to date. SSD manufacturers often release firmware updates that include bug fixes, performance improvements, and compatibility enhancements. Check the manufacturer’s website periodically for firmware updates specific to your SSD model, and follow their instructions to update the firmware.
- Enable TRIM: TRIM is an essential feature that helps maintain the performance and lifespan of your SSD. Ensure that TRIM is enabled on your operating system. TRIM helps the operating system inform the SSD which blocks of data are no longer in use, allowing the drive to optimize performance and prolong its lifespan.
- Avoid Full Capacity Usage: It is generally recommended to keep some free space on your SSD. Avoid filling it up to its maximum capacity, as this can degrade performance and reduce the drive’s lifespan. Aim to leave at least 10-20% of the total capacity free for optimal performance and longevity.
- Minimize Unnecessary Write Operations: SSDs have a limited number of write cycles. To prolong the lifespan of your SSD, minimize unnecessary write operations. This includes avoiding excessive file copying, moving frequently written files to a separate storage device, and optimizing settings to reduce unnecessary write activities.
- Protect Against Power Loss: Power loss can lead to data corruption or loss. To protect your SSD from the consequences of sudden power outages or failures, consider using an uninterruptible power supply (UPS) or a reliable power backup solution. These devices can provide enough time for your system to shut down properly during a power loss event.
- Monitor Temperature: Keep an eye on the temperature of your SSD. High temperatures can affect performance and decrease the drive’s lifespan. Ensure that your system has adequate cooling, clean any dust that may accumulate near the SSD, and avoid exposing the SSD to extreme temperatures.
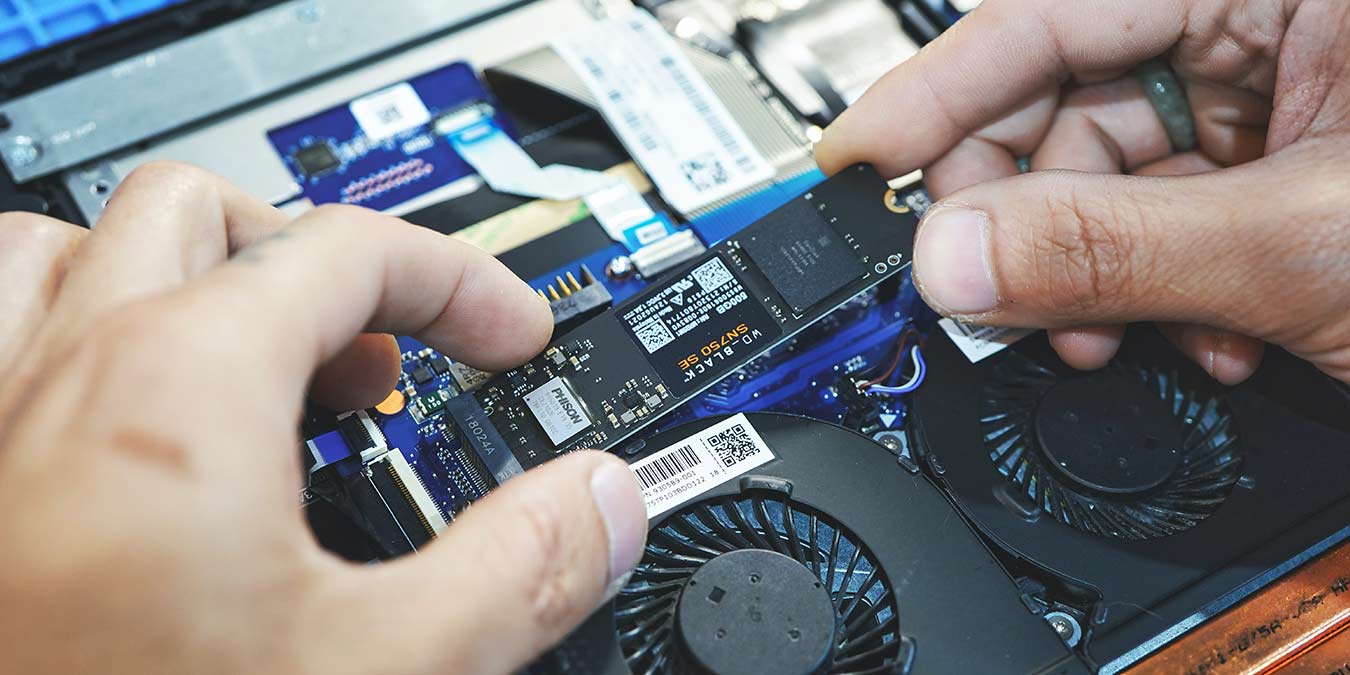
- Handle with Care: SSDs are sensitive to physical shock and static electricity, so handle them with care. When installing or removing an SSD, make sure the system is powered off and grounded properly. Avoid dropping or subjecting the drive to unnecessary impact, as it can damage the internal components.
By following these best practices, you can significantly enhance the health, performance, and longevity of your solid-state drive. Regular maintenance, firmware updates, enabling TRIM, and avoiding full capacity usage are key steps to ensure that your SSD continues to perform optimally for years to come.
Conclusion
Checking the health of your solid-state drive (SSD) is crucial for maintaining its optimal performance, preventing data loss, and ensuring its longevity. By regularly monitoring the health of your SSD, you can identify potential issues early on and take necessary actions to address them before they escalate into more significant problems.
In this article, we discussed the importance of checking SSD health and the potential signs of a failing SSD. We also explored various tools and software available for checking SSD health on different operating systems, including Windows, Mac, and Linux.
Understanding the results of an SSD health check is essential for making informed decisions. Interpreting parameters such as overall health status, S.M.A.R.T attributes, temperature, error rates, and wear leveling can help you diagnose potential issues and take appropriate actions.
Based on the results of an SSD health check, you can take various actions, including backing up your data, replacing a failing SSD, updating firmware, optimizing the drive, improving cooling, and following regular maintenance practices. These actions will contribute to the longevity, reliability, and performance of your SSD.
Remember, following best practices such as regularly updating firmware, enabling TRIM, avoiding full capacity usage, minimizing unnecessary write operations, protecting against power loss, monitoring temperature, and handling your SSD with care can significantly contribute to maintaining the health and longevity of your SSD.
By implementing these practices and staying vigilant about your SSD’s health, you can ensure optimal performance, prevent data loss, and maximize the lifespan of your solid-state drive.