Introduction
Upgrading your laptop with a solid-state drive (SSD) can dramatically improve its performance and speed. Unlike traditional hard drives, SSDs have no moving parts, which allows for faster read and write speeds, quicker boot times, and more responsive overall use. Additionally, SSDs are more durable and less prone to mechanical failure.
If you find that your laptop is becoming sluggish and taking longer to perform basic tasks, installing an SSD is a cost-effective solution that can breathe new life into your device. This step-by-step guide will walk you through the process of installing an SSD in your laptop, enabling you to take advantage of its numerous benefits.
Before we begin, it’s important to note that while the process of installing an SSD is generally straightforward, it does require some technical know-how. If you feel uncomfortable or unsure about performing the installation yourself, it may be best to consult a professional technician. However, if you’re ready to embark on this DIY adventure, gather your tools, back up your data, and let’s get started!
Step 1: Gather the necessary tools and materials
Before diving into the installation process, it’s essential to have all the required tools and materials on hand. Here’s a list of what you’ll need:
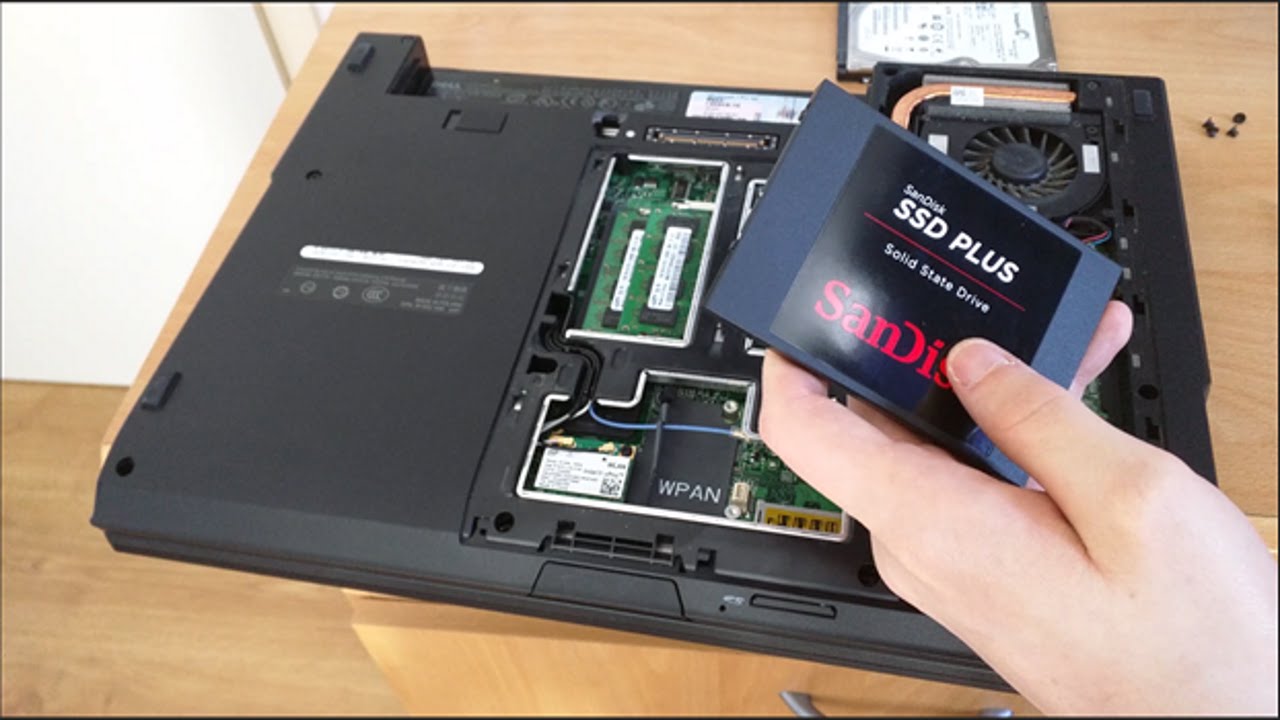
1. Solid-state drive (SSD): Look for an SSD that is compatible with your laptop’s specifications, such as the size and interface (SATA or M.2). Consider the storage capacity based on your requirements and budget.
2. Screwdriver set: Most laptops use standard Phillips screws. Check your laptop’s manual or online resources to determine the appropriate size.
3. External storage device: To back up your data, an external hard drive or USB flash drive is necessary. Make sure it has enough capacity to store all your important files.
4. Cloning software (optional): If you want to transfer the contents of your current hard drive to the new SSD, cloning software can simplify the process. Some SSD manufacturers provide free cloning software or you can explore third-party options.
5. Anti-static wrist strap (recommended): While not mandatory, an anti-static wrist strap can prevent static electricity from damaging sensitive components during the installation process. If you don’t have one, be sure to ground yourself by touching a metal object before handling any internal components.
By gathering these tools and materials beforehand, you’ll have everything you need to proceed with the installation smoothly. It’s always a good idea to read through the laptop’s manual or manufacturer’s website to ensure you have the correct specifications and any additional tools that may be required for your specific model.
In the next step, we’ll discuss how to back up your data to avoid any potential loss during the installation process.
Step 2: Back up your data
Before proceeding with the installation of the SSD, it is crucial to back up all your important data. This ensures that in case of any unforeseen events or errors during the installation process, your files remain safe and can be easily restored.
There are several methods you can use to back up your data:
1. External storage device: Connect an external hard drive or USB flash drive to your laptop and manually copy and paste your files onto the device. Organize your data into folders to make it easier to locate and restore later.
2. Cloud storage: Utilize cloud storage services like Google Drive, Dropbox, or OneDrive to upload and store your files securely. This method allows for easy access to your data from any device with an internet connection.
3. Disk imaging software: Create a disk image of your entire hard drive using specialized software. This captures an exact replica of your current drive, including the operating system, programs, and files. In the event of data loss, you can restore your system to its previous state using the disk image.
Choose the method that best suits your needs and preferences. It’s recommended to perform a complete backup, including documents, photos, videos, and any other important files. Double-check that all your data is successfully backed up and ensure it is easily accessible before proceeding to the next step.
Remember, the goal of backing up your data is to safeguard against data loss or corruption during the SSD installation process. Taking the time to back up your files provides peace of mind and allows for a smooth and worry-free transition to the new SSD.
Next, we’ll move on to shutting down and preparing your laptop for the installation process.
Step 3: Shut down and unplug the laptop
Now that you have successfully backed up your data, it’s time to shut down your laptop and prepare it for the installation of the SSD. Follow these steps to ensure a safe and effective installation process:
1. Save your work: Close any open applications or documents and save your work. It’s good practice to exit all programs before shutting down your laptop.
2. Shut down your laptop: Click on the Start menu and select the “Shut Down” option. Alternatively, press and hold the power button until the laptop powers off completely. Make sure to save any changes or data before shutting down.
3. Unplug the laptop: Once your laptop is shut down, unplug the power cord from the wall outlet and disconnect any other peripherals connected to your laptop, such as external monitors or USB devices. This will ensure the safety of both you and your laptop during the installation process.
Taking these precautions helps prevent any accidental data loss or damage to your laptop. By shutting down and unplugging your laptop, you eliminate the risk of electric shock or any potential interference while handling the internal components.
In the next step, we’ll proceed to remove the laptop’s bottom cover to access the internal components.
Step 4: Remove the laptop’s bottom cover
Now that your laptop is shut down and unplugged, it’s time to remove the bottom cover to gain access to the internal components. Here’s how you can do it:
1. Locate the screws: Flip your laptop over and inspect the bottom for screws. They are usually marked with small icons or labeled as “HDD” or “SSD.” Use a screwdriver that fits the screws to carefully unscrew and remove them. Keep the screws in a safe place, as you will need them later to secure the SSD.
2. Remove the bottom cover: Once the screws are removed, gently pry off the bottom cover of the laptop. You may need to use a plastic pry tool or your fingers to carefully separate the cover from the laptop’s chassis. Take your time and be patient, ensuring not to apply excessive force to avoid damaging the cover or any internal components.
3. Set the cover aside: Place the removed bottom cover in a clean and safe location. It’s a good practice to place it on a soft cloth or towel to prevent scratches.
By following these steps, you should be able to successfully remove the laptop’s bottom cover. However, note that the process may vary slightly depending on the laptop model. If you encounter any difficulties or require more specific guidance, consult your laptop’s manual or visit the manufacturer’s website for detailed instructions.
In the next step, we’ll locate the hard drive bay where the old hard drive is housed, which will be removed to make way for the new SSD.
Step 5: Locate the hard drive bay
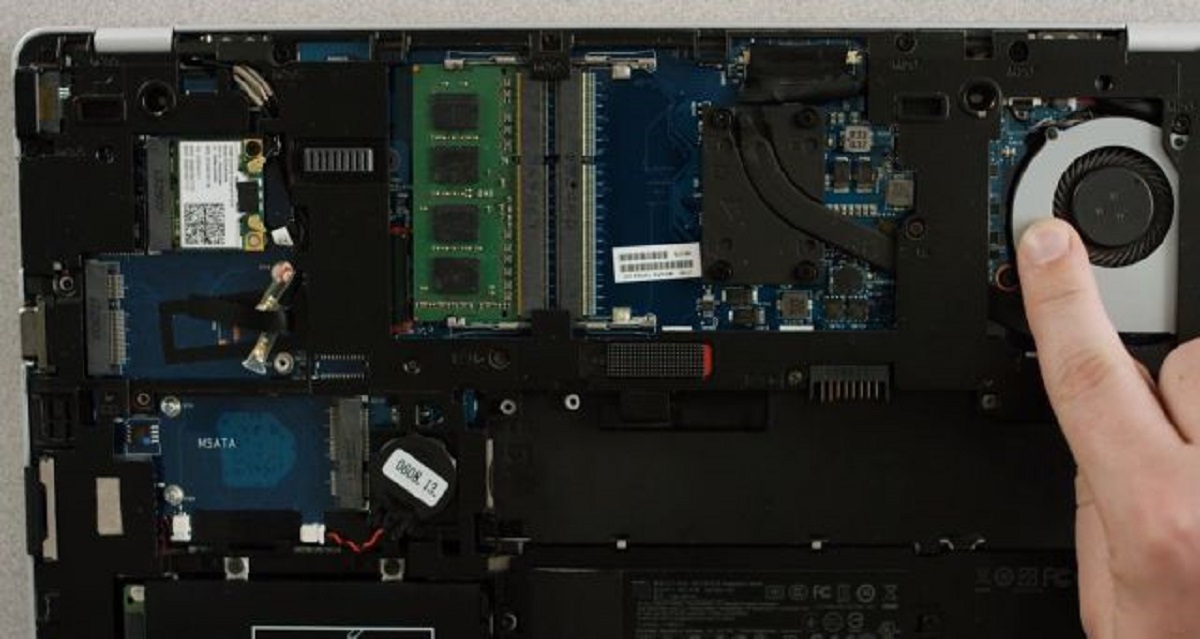
After successfully removing the bottom cover of your laptop, it’s time to locate the hard drive bay where the old hard drive is housed. Follow these steps to find the hard drive bay:
1. Look for a metal or plastic bracket: Once the bottom cover is removed, you will likely see a metal or plastic bracket secured by screws. This bracket holds the hard drive in place. Take note of its location and orientation.
2. Identify labels or markings: Some laptops may have labels or markings indicating the location of the hard drive bay. Look for words like “HDD” or “SSD” or symbols like a disk icon, which can help in identifying the bay.
3. Consult your laptop’s manual: If you’re having trouble locating the hard drive bay, consult your laptop’s manual or visit the manufacturer’s website for specific guidance. The manual should provide detailed diagrams and instructions to help you easily identify the bay.
Remember, the location of the hard drive bay may vary depending on the laptop model. It could be located towards the front or back of the laptop, on one side, or underneath other components. Take your time and ensure that you have located the correct bay before proceeding to the next step.
In the next step, we’ll cover how to safely remove the old hard drive from the bay in preparation for installing the new SSD.
Step 6: Remove the old hard drive
Now that you have located the hard drive bay, it’s time to remove the old hard drive. Follow these steps to safely remove it:
1. Disconnect the data and power cables: Most laptops use SATA cables to connect the hard drive to the motherboard. Carefully disconnect both the data cable and the power cable from the hard drive. Gently pull on the connectors, ensuring not to apply excessive force.
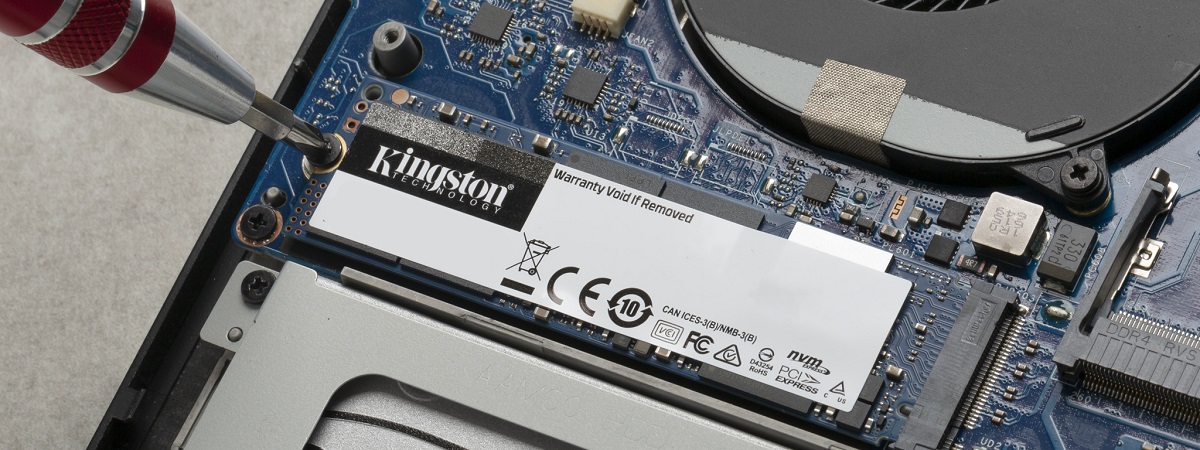
2. Remove any mounting screws or brackets: Depending on your laptop model, there may be screws or brackets holding the hard drive in place within the bay. Use the appropriate screwdriver to carefully remove these screws or brackets. Keep them in a safe place, as you may need them to secure the new SSD.
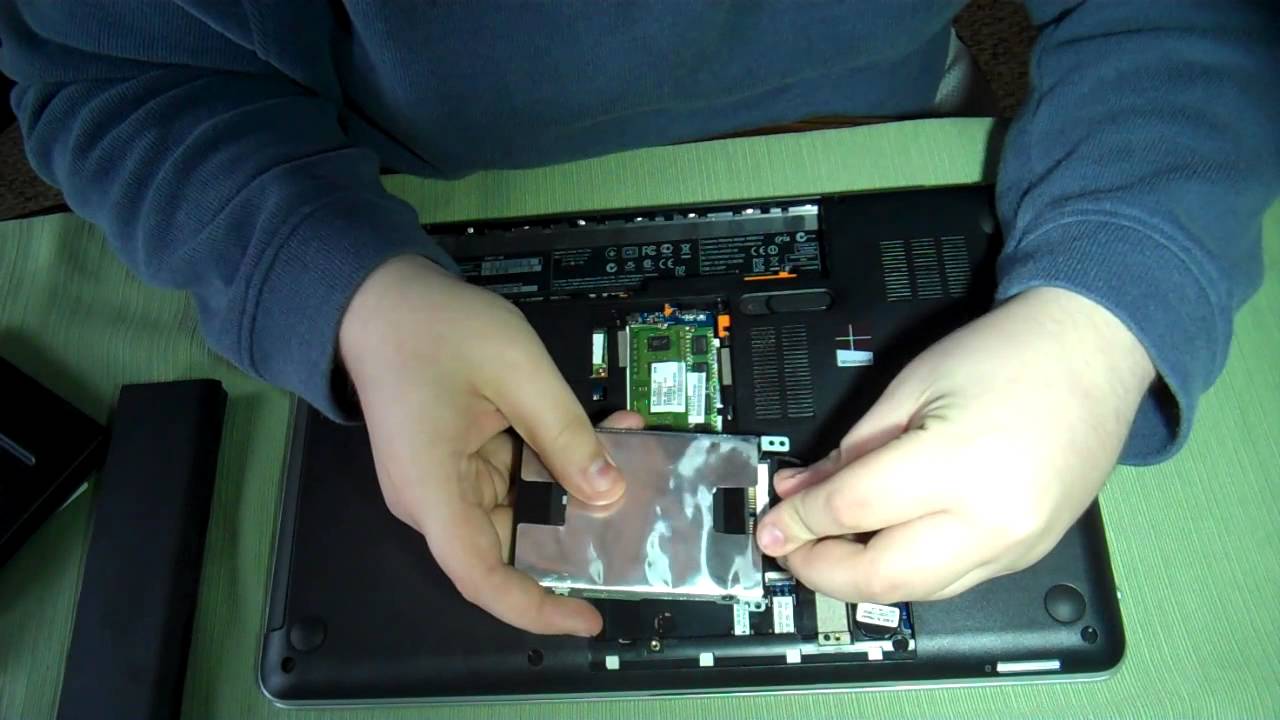
3. Slide the hard drive out of the bay: Once the screws or brackets are removed, slide the old hard drive out of the bay using gentle but firm pressure. Be cautious not to pull or yank on the hard drive forcefully, as this could cause damage to the connectors or other components.
4. Set aside the old hard drive: Place the removed hard drive in an anti-static bag or on a soft cloth to protect it from static electricity and physical damage. It’s a good idea to label the old hard drive or keep it in a safe place in case you need to access or restore data from it in the future.
By following these steps, you should be able to safely remove the old hard drive from your laptop. Remember to handle the old hard drive with care and avoid touching the electronic components. Now that you have removed the old hard drive, you are ready to install the new SSD in the next step.
In the next step, we’ll cover how to properly install the SSD into the hard drive bay.
Step 7: Install the SSD into the hard drive bay
With the old hard drive removed, it’s time to install the new SSD into the hard drive bay. Follow these steps to properly install the SSD:
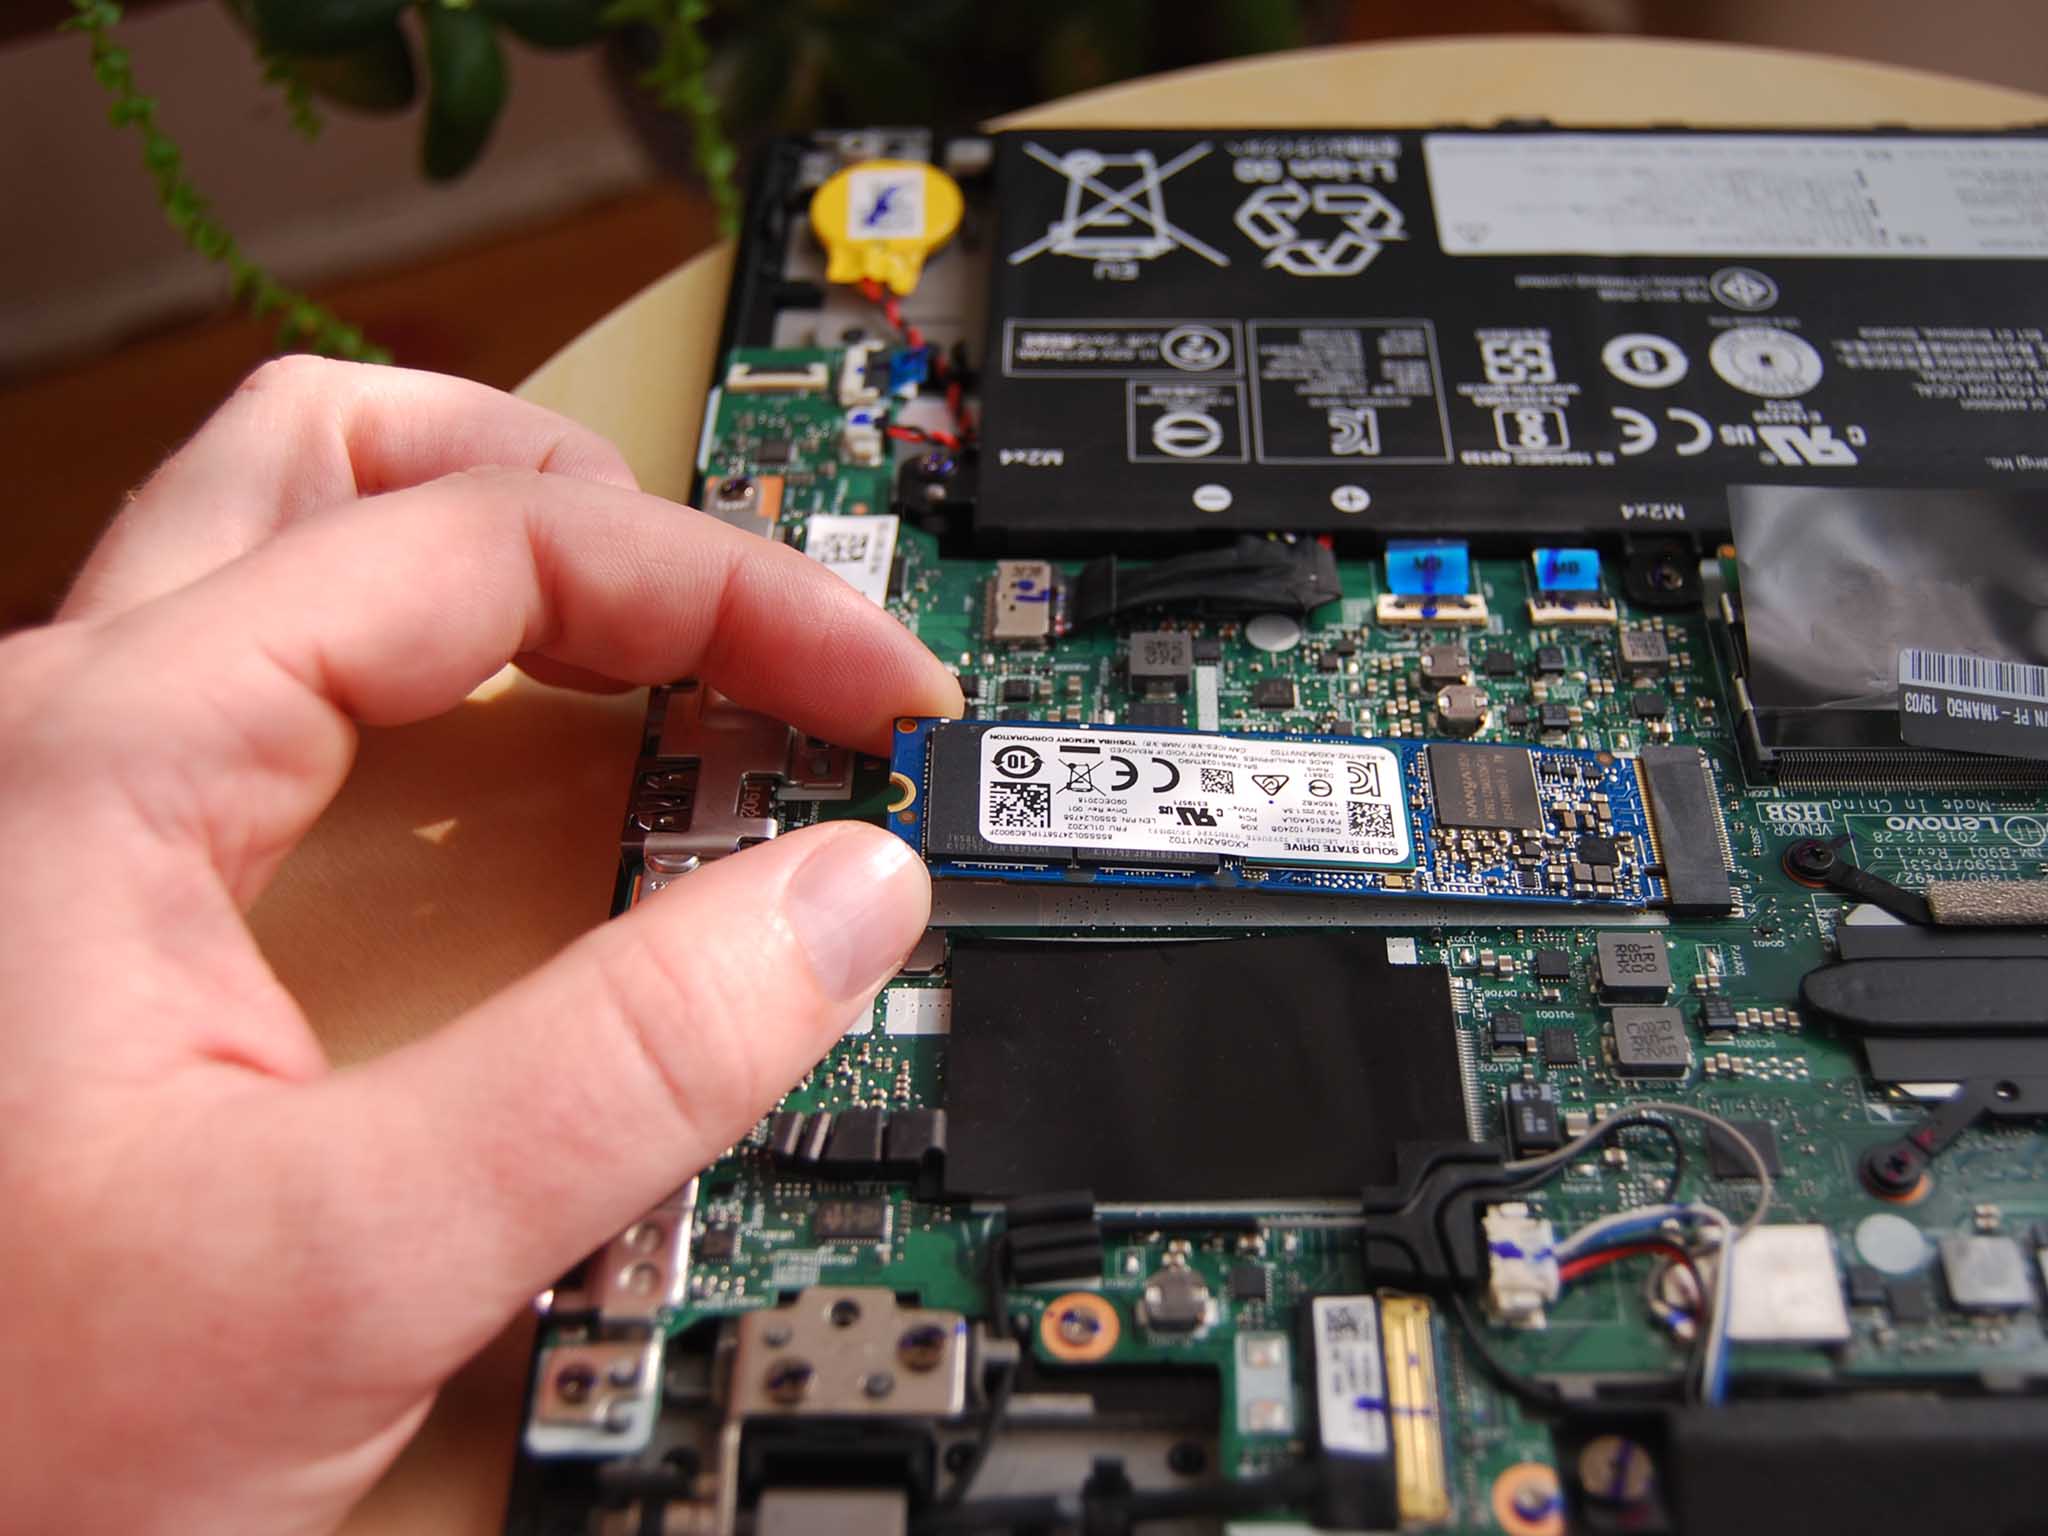
1. Orient the SSD correctly: Depending on your laptop model, the SSD may need to be inserted in a specific orientation. Make sure to align the connectors on the SSD with the corresponding slots in the hard drive bay.
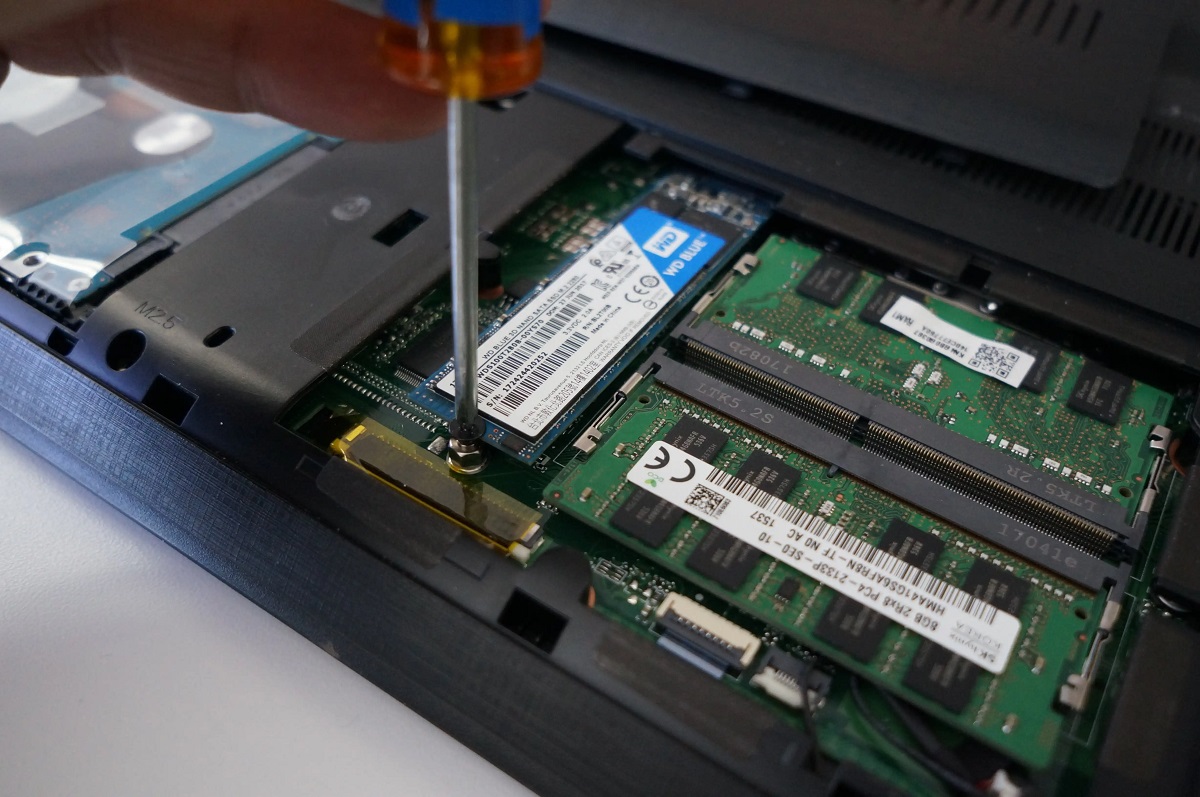
2. Slide the SSD into the bay: Gently slide the SSD into the bay, applying even pressure. Ensure that the connectors on the SSD are fully inserted into the slots in the bay. Be careful not to force the SSD or apply excessive pressure, as this can cause damage to the connectors or the SSD itself.
3. Secure the SSD: If there are screws or brackets that were used to secure the old hard drive, use them to secure the new SSD in place. Tighten the screws gently using the appropriate screwdriver. Be cautious not to overtighten, as this can damage the SSD or strip the screw threads.
4. Reconnect the cables: Once the SSD is securely in place, reconnect the data cable and power cable to the SSD. Ensure that the connections are snug and secure, but avoid applying excessive force.
By following these steps, you should have successfully installed the new SSD into the hard drive bay of your laptop. Take a moment to double-check all the connections to ensure they are secure.
In the next step, we’ll cover how to replace the laptop’s bottom cover to finalize the installation process.
Step 8: Replace the laptop’s bottom cover
Now that you have installed the new SSD, it’s time to reassemble your laptop by replacing the bottom cover. Follow these steps to properly replace the cover:
1. Line up the cover: Align the bottom cover with the screw holes on the laptop’s chassis. Ensure that all the edges and corners of the cover are properly aligned.
2. Press down gently: Once the cover is aligned, press down on the cover evenly and gently, using your hands or a soft cloth. Apply slight pressure to ensure that the cover is seated properly and securely. Be careful not to press too hard, as it can cause damage to the cover or internal components.
3. Reinsert the screws: Take the screws that were removed earlier and carefully reinsert them into their respective holes on the bottom cover. Use a screwdriver to tighten the screws, but do not overtighten them. Tighten them just enough to secure the cover in place.
4. Double-check the cover: Once all the screws are in place, run your fingers along the edges of the cover to ensure that it is flush with the laptop’s chassis. Confirm that there are no gaps or loose areas.
By following these steps, you should have successfully replaced the laptop’s bottom cover. Take a moment to admire your work and ensure everything is securely fastened.
In the next step, we’ll cover how to boot up the laptop and initialize the newly installed SSD.
Step 9: Boot up the laptop and initialize the SSD
With the new SSD installed and the bottom cover replaced, it’s time to boot up your laptop and initialize the SSD. Follow these steps to complete the process:
1. Plug in the power cord: Connect the power cord to your laptop and then plug it into a power outlet. Ensure that the power cord is securely connected.
2. Power on your laptop: Press the power button to turn on your laptop. As it boots up, you may see the manufacturer’s logo or a loading screen. Be patient, as the initial boot may take a bit longer than usual.
3. Access the BIOS/UEFI settings: During the boot-up process, you may need to access the BIOS/UEFI settings to ensure that your laptop recognizes the new SSD. The key to access these settings varies depending on the laptop model, but it is typically one of the function keys (F1, F2, etc.) or the Delete key. Consult your laptop’s manual or manufacturer’s website for specific instructions on how to access the BIOS/UEFI settings.
4. Verify SSD detection: Once in the BIOS/UEFI settings, navigate to the storage settings or device configuration section. Ensure that the new SSD is detected and listed correctly. If the SSD is not being recognized, double-check the connections and make sure it is properly seated in the bay.
5. Save and exit: If the SSD is detected correctly, save any changes made in the BIOS/UEFI settings and exit. Your laptop will now restart.
6. Install the operating system (OS): If you installed a blank SSD without cloning your old hard drive, you will need to install an operating system on the new SSD. Insert the OS installation media (typically a USB drive or DVD), and follow the prompts to install the OS onto the SSD.
By following these steps, you should be able to successfully boot up your laptop and initialize the newly installed SSD. Once the OS is installed, your laptop will be ready to use with the enhanced performance and speed offered by the SSD.
In the final step, we’ll cover how to restore your data from the backup you created earlier.
Step 10: Restore your data from the backup
Now that your laptop is up and running with the new SSD, it’s time to restore your data from the backup you created earlier. Follow these steps to restore your valuable files:
1. Connect the external storage device: If you backed up your data onto an external storage device, such as an external hard drive or USB flash drive, connect it to your laptop.
2. Access your backup files: Navigate to the location where you stored your backup files. If you used cloud storage, log in to your cloud storage account and access your files from there.
3. Copy and paste your files: Select the files and folders you want to restore and copy them from the backup location. Paste them into the appropriate locations on your newly installed SSD.
4. Organize your files: Take the time to organize your restored files and folders into a structure that is easy for you to navigate and access. Consider creating specific folders for documents, photos, videos, and other file types to keep everything organized.
5. Check file integrity: After restoring your files, it’s crucial to ensure that they are intact and accessible. Open a few files from different folders to verify that they are working correctly.
By following these steps, you should be able to restore your data from the backup and have it readily available on your new SSD. Take the opportunity to clean up any unnecessary files or folders during this process to optimize your storage space.
Congratulations! You have successfully installed an SSD in your laptop and restored your valuable data. Enjoy the improved performance and speed that the SSD provides.
Remember to keep your backup files in a safe place for future use, and consider setting up regular data backups to protect your files against potential data loss.
Conclusion
Congratulations on successfully installing a solid-state drive (SSD) in your laptop! By following the step-by-step guide outlined in this article, you have not only improved the performance and speed of your laptop, but also protected your valuable data.
The process of installing an SSD may seem daunting at first, but with the right tools, preparation, and careful execution, it can be a rewarding DIY project. Upgrading to an SSD offers numerous benefits, including faster boot times, enhanced multitasking capabilities, and improved overall responsiveness.
Remember to gather all the necessary tools and materials before starting the installation process. Properly back up your data to avoid any potential loss, shut down and unplug your laptop, and remove the bottom cover to access the internal components.
Locate the hard drive bay, remove the old hard drive, and install the new SSD in its place. Securely replace the laptop’s bottom cover and boot up your laptop to initialize the SSD. Restore your data from the backup you created, ensuring that all your files are intact and accessible.
Now that your laptop is equipped with an SSD, you can enjoy a faster and more efficient computing experience. Take advantage of the improved performance and speed to effortlessly handle demanding tasks, launch applications in an instant, and enjoy smoother multitasking.
Don’t forget to keep your backup files safely stored in case you need to access them in the future. Regularly backing up your data is essential to protect against any unforeseen circumstances.
By following these steps, you have successfully upgraded your laptop with an SSD, boosting its performance and extending its lifespan. Enjoy the renewed speed and responsiveness of your device, and make the most out of your computing experience!