Introduction
Installing a solid state drive (SSD) in your Dell laptop can significantly improve its performance and speed. Unlike traditional hard drives, SSDs use flash memory to store data, resulting in faster boot times, quicker application launches, and shorter file transfer durations. If you’re tired of waiting for your laptop to catch up with your tasks, upgrading to an SSD is a cost-effective solution.
In this article, we will guide you through the step-by-step process of installing a solid state drive in your Dell laptop. With the right tools and a little patience, you’ll be able to enjoy the benefits of a faster, more efficient system in no time. Whether you’re a tech-savvy individual or a first-time upgrader, this guide will provide you with all the information you need to successfully complete the installation.
Before getting started, it’s important to note that the precise steps may vary depending on your specific Dell laptop model. However, the overall process remains similar across most Dell laptops. It’s always a good idea to consult your laptop’s user manual or refer to the Dell support website for model-specific instructions.
Now, let’s gather the necessary tools and get ready to upgrade your Dell laptop with a blazing-fast solid state drive.
Step 1: Gather the Necessary Tools
Before you begin the installation process, it’s crucial to gather all the necessary tools and equipment. Here’s a list of items you’ll need:
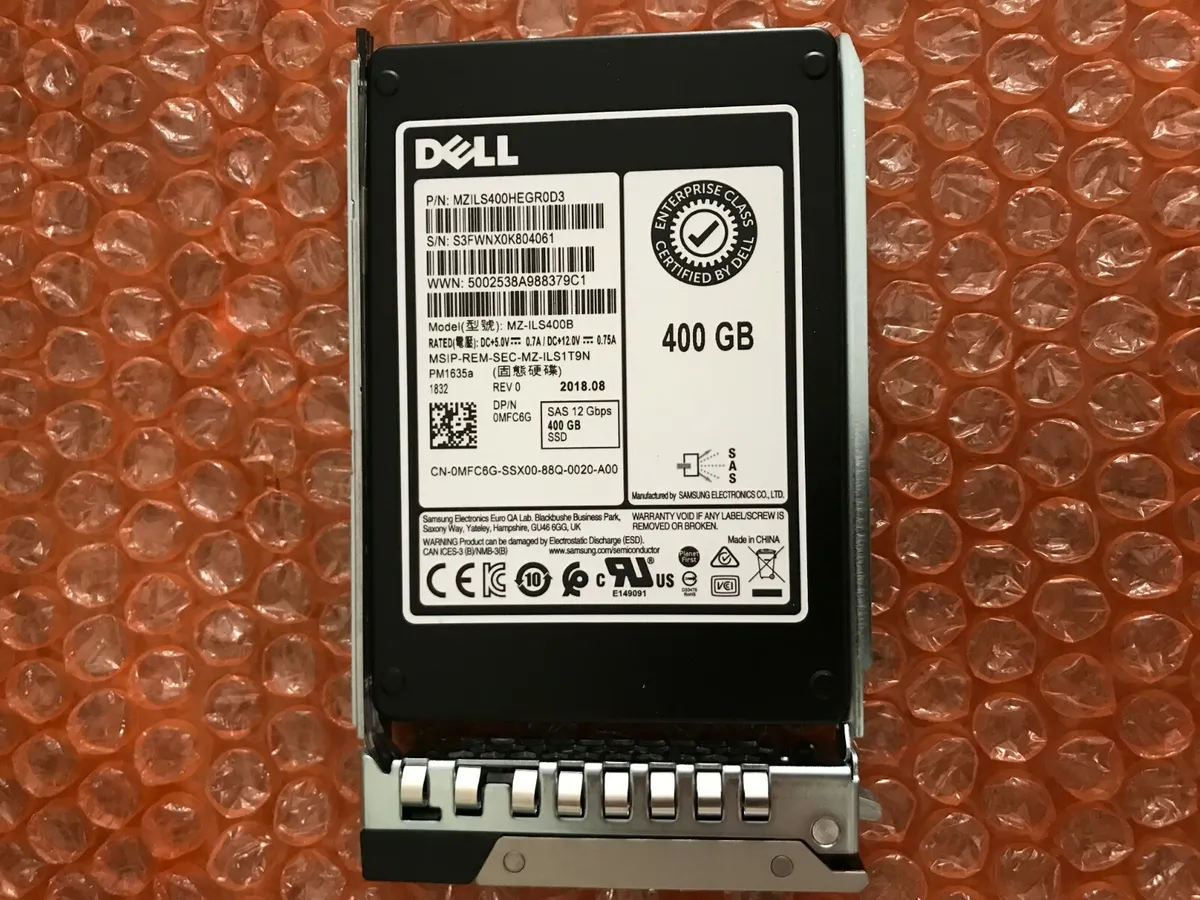
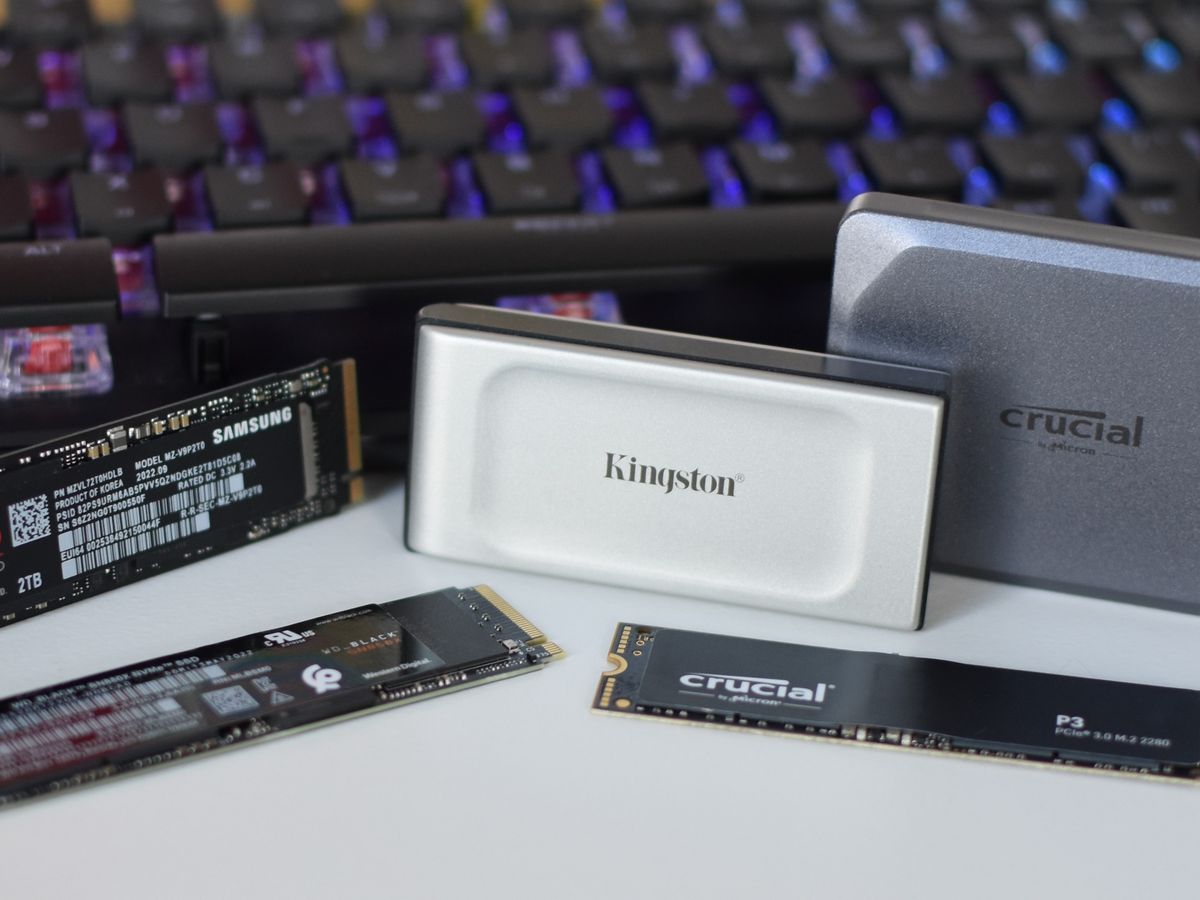
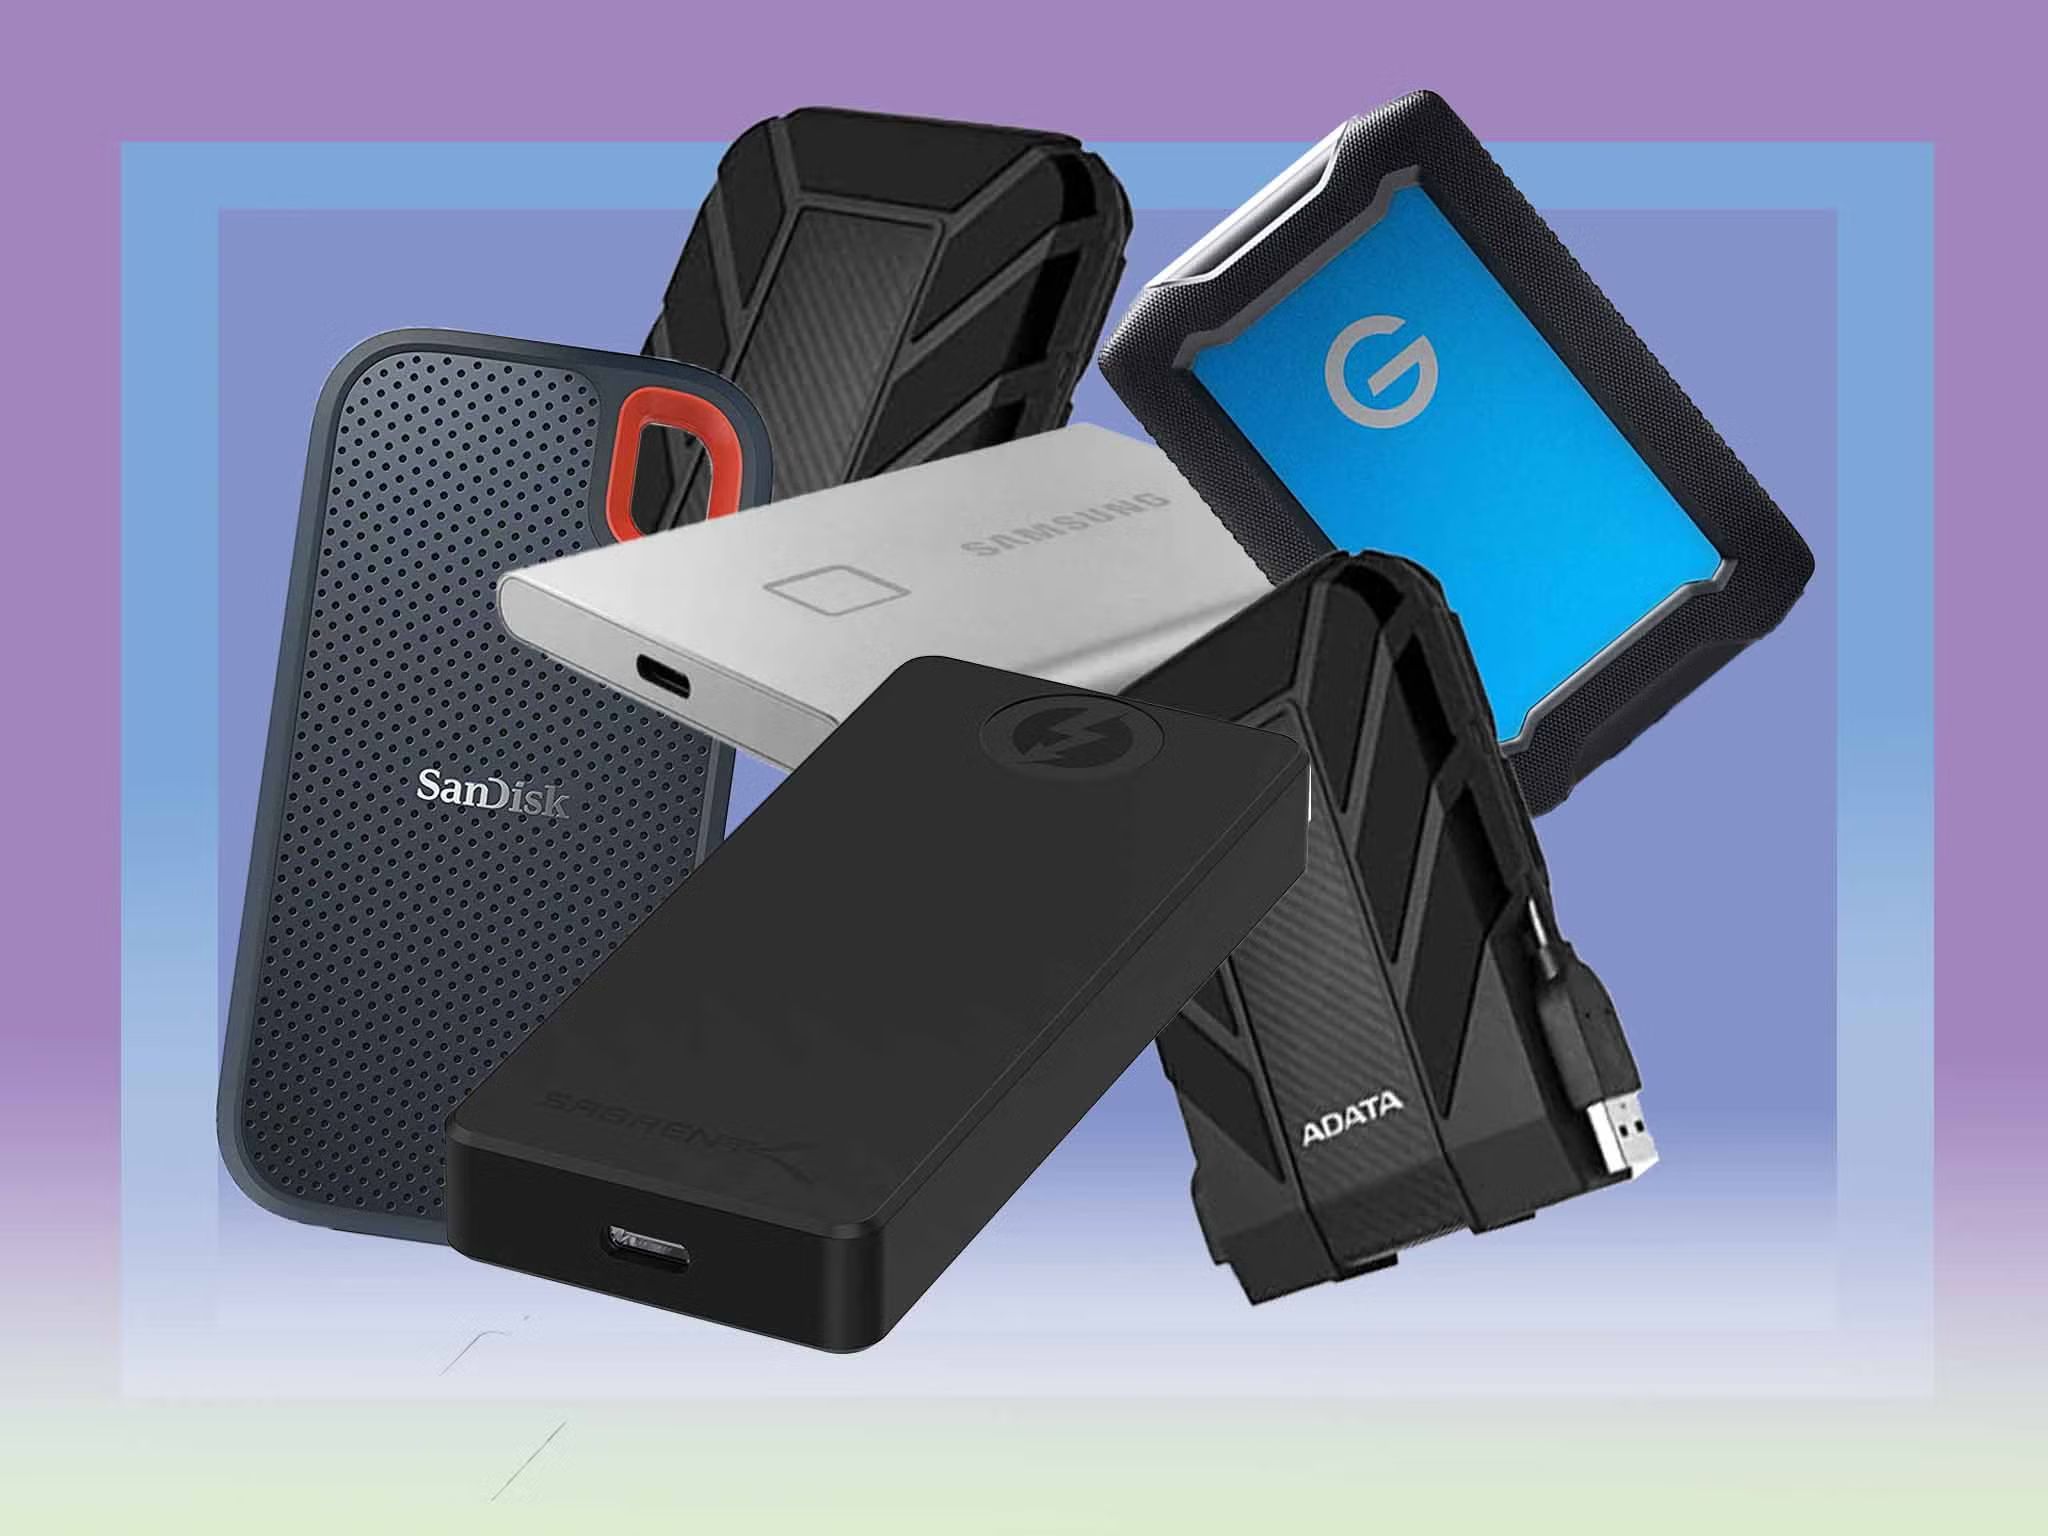
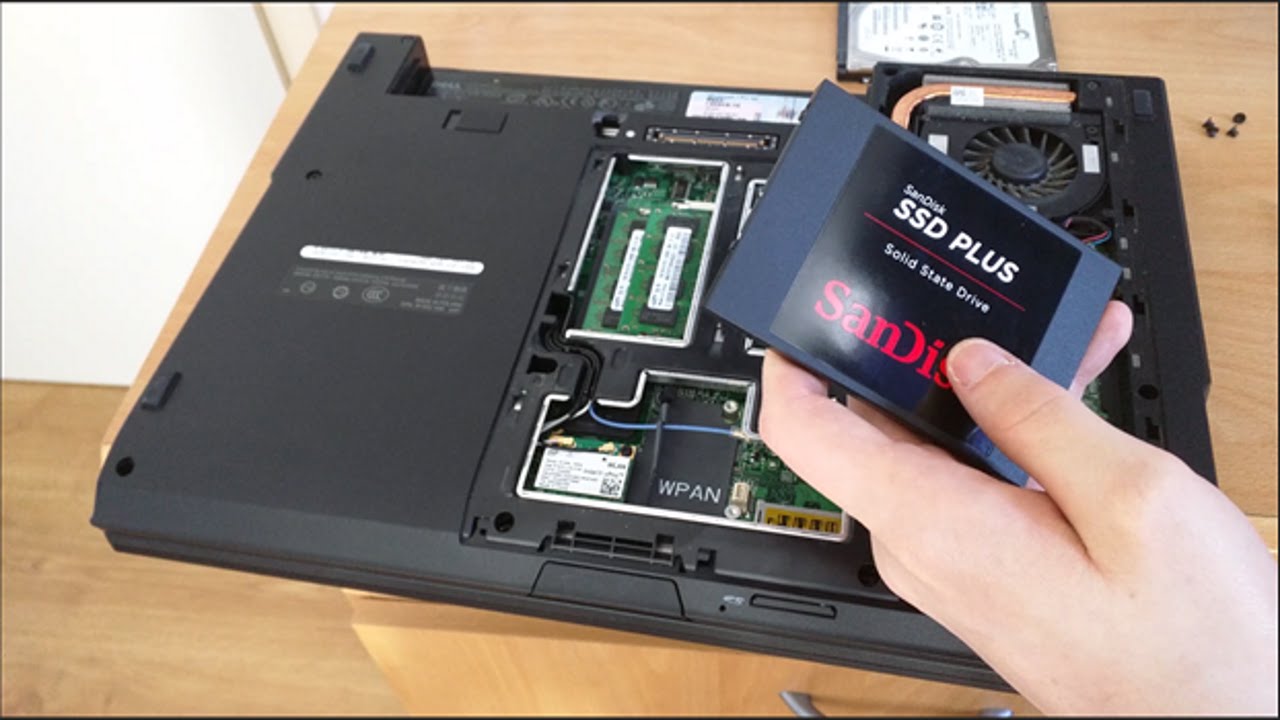
1. SSD: Purchase a suitable solid state drive that matches the specifications of your Dell laptop. Consider factors such as storage capacity, interface, and form factor when choosing an SSD. If you’re unsure which SSD is compatible with your laptop, refer to the user manual or consult Dell’s support documentation.
2. Screwdriver Set: A small Phillips-head screwdriver is typically required to remove the screws holding the laptop casing and hard drive in place. Ensure you have the appropriate screwdriver size and quality, as improper tools may damage the screws or strip them.
3. External Hard Drive or USB Flash Drive: Backing up your data is a crucial step before replacing your hard drive with an SSD. Use an external hard drive or USB flash drive with sufficient storage capacity to create a complete backup of your important files, documents, and media.
4. Hard Drive Enclosure or SATA-to-USB Adapter: If you wish to clone or transfer your existing data to the new SSD, you’ll need a hard drive enclosure or a SATA-to-USB adapter. This will allow you to connect your existing hard drive to your laptop via USB and perform the data transfer.
5. Anti-static Wrist Strap (Optional): To prevent damage from static electricity, an anti-static wrist strap is recommended. This strap helps discharge any static buildup in your body, keeping your laptop and its sensitive components safe during the installation process.
6. Clean, Static-Free Workspace: Find a clean and static-free workspace, such as a large table, to perform the installation. Avoid working on surfaces that generate static electricity, such as carpets or rugs. If necessary, use an anti-static mat to further protect your equipment.
Make sure to gather all these tools and ensure they are in good working condition before proceeding to the next step. With everything ready, you’re now prepared to back up your data before installing the SSD in your Dell laptop.
Step 2: Back Up Your Data
Before you embark on the SSD installation process, it’s crucial to back up all your important data. This step ensures that you won’t lose any files or documents during the transition. There are a few different methods you can use to back up your data:
- External Hard Drive: Connect an external hard drive to your laptop and transfer all your important files to it. Make sure the external hard drive has sufficient storage capacity to accommodate your data. Simply drag and drop files and folders onto the external hard drive, or use backup software to automate the process.
- Cloud Storage: Utilize cloud storage services such as Google Drive, Dropbox, or OneDrive to save your files securely in the cloud. Upload your important documents, photos, videos, and other files to the cloud storage platform of your choice. This method ensures that your data is accessible from anywhere, even if your laptop encounters any unexpected issues.
- Clone Your Hard Drive: If you want to preserve your operating system, applications, and settings exactly as they are, you can clone your existing hard drive to the new SSD. This method requires a hard drive enclosure or SATA-to-USB adapter, as mentioned in the previous step. Follow the instructions provided by the manufacturer to clone your hard drive using software such as Clonezilla or Macrium Reflect.
Whichever method you choose, ensure that all your important files are backed up successfully. Take the time to double-check and verify that all your documents, photos, videos, and other data have been securely stored before proceeding with the installation. This extra precaution will give you peace of mind and ensure that no valuable information is lost in the process.
Once you’ve backed up your data, you’re ready to shut down your laptop and begin the physical installation of the solid state drive.
Step 3: Shutdown and Disconnect Your Laptop
Now that you have successfully backed up your data, it’s time to prepare your Dell laptop for the SSD installation by shutting it down and disconnecting it from any power sources. Follow these steps to ensure a safe and proper shutdown:
- Save and Close Programs: Save any open documents or files and close all running programs. Ensure that you have saved any work in progress to avoid losing any data.
- Disconnect Power Adapter: Unplug the power adapter from your laptop and disconnect any other cables or peripherals connected to it, such as USB devices or external monitors.
- Shut Down Properly: On your laptop’s keyboard, locate the power button and hold it down for a few seconds until the screen turns off. This action ensures that the laptop is completely powered off.
- Remove the Battery (if applicable): If your Dell laptop has a removable battery, gently slide the battery release switch or lever, often located on the bottom of the laptop. Carefully lift the battery out of its compartment and set it aside.
- Release Static Electricity: To prevent any damage to sensitive components during the installation process, it’s important to discharge any static electricity from your body. You can do this by touching a metal surface, such as a doorknob or a metal part of your laptop’s casing.
By following these steps, you ensure that your laptop is safely prepared for the SSD installation. Taking the time to properly shut down and disconnect your laptop decreases the risk of damaging any internal components and allows for a smooth and hassle-free upgrade process. With your laptop powered off and ready, it’s time to move on to the next step: opening the laptop casing.
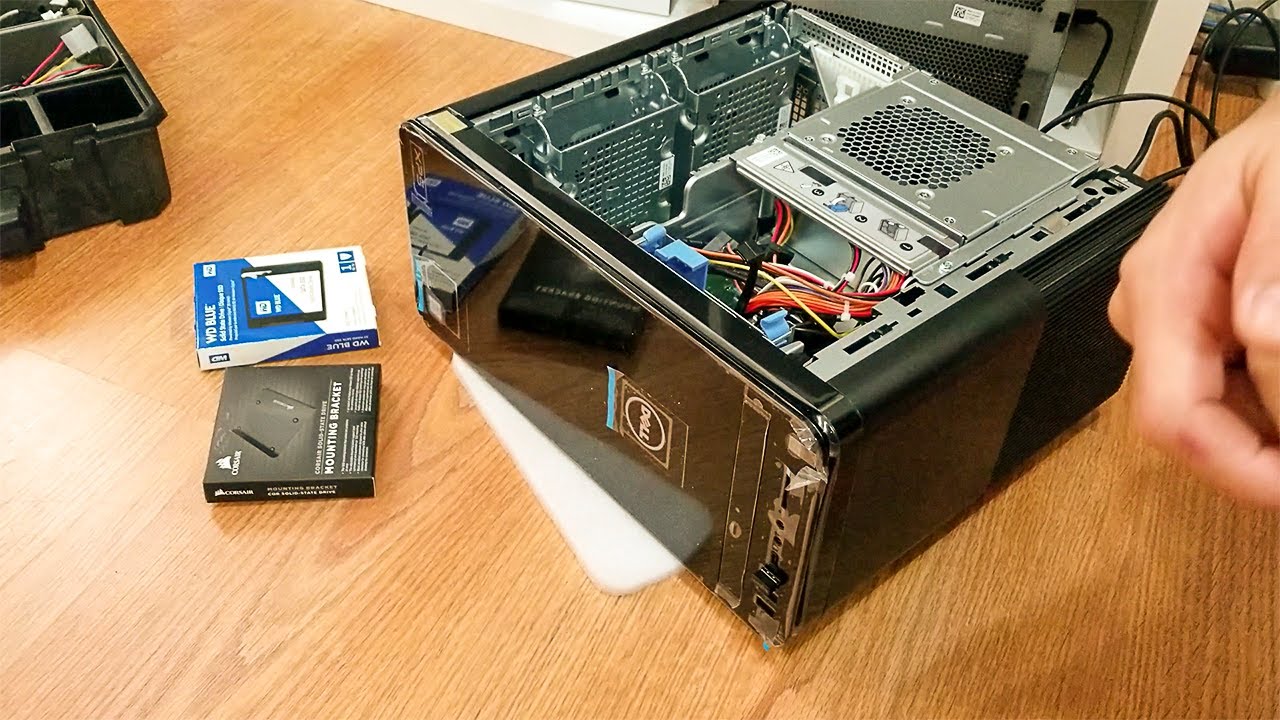
Step 4: Open the Laptop Casing
With your Dell laptop properly shut down and disconnected, it’s time to open the casing and gain access to the internal components. Follow these steps carefully to avoid any damage to your laptop:
- Flip Your Laptop: Turn your laptop upside down so that the bottom side is facing upwards. Place it on a soft and clean surface to prevent scratches.
- Identify Screws: Look for the screws that secure the laptop casing. These screws are typically located around the edges and corners of the laptop’s bottom panel. They may be marked with an icon that resembles a keyboard or a lock.
- Remove Screws: Using a small Phillips-head screwdriver, carefully unscrew and remove the screws. Keep the screws in a safe place to avoid misplacing them.
- Separate Bottom Panel: Gently pry the bottom panel away from the rest of the laptop using your fingers or a plastic opening tool. Start from one corner and gradually work your way around the edges. Be cautious and avoid using excessive force to prevent damaging the plastic clips that hold the panel in place.
- Set Aside Bottom Panel: Once the bottom panel is separated, set it aside in a safe location. Take note of any connectors or cables attached to the panel and make sure they are not strained or damaged.
With the laptop casing opened, you now have access to the internal components, including the hard drive bay. It’s crucial to handle the laptop components with care and avoid touching any sensitive parts such as the motherboard or the circuitry. Now that you have successfully opened the laptop casing, it’s time to locate the existing hard drive, which will be replaced with the new solid state drive.
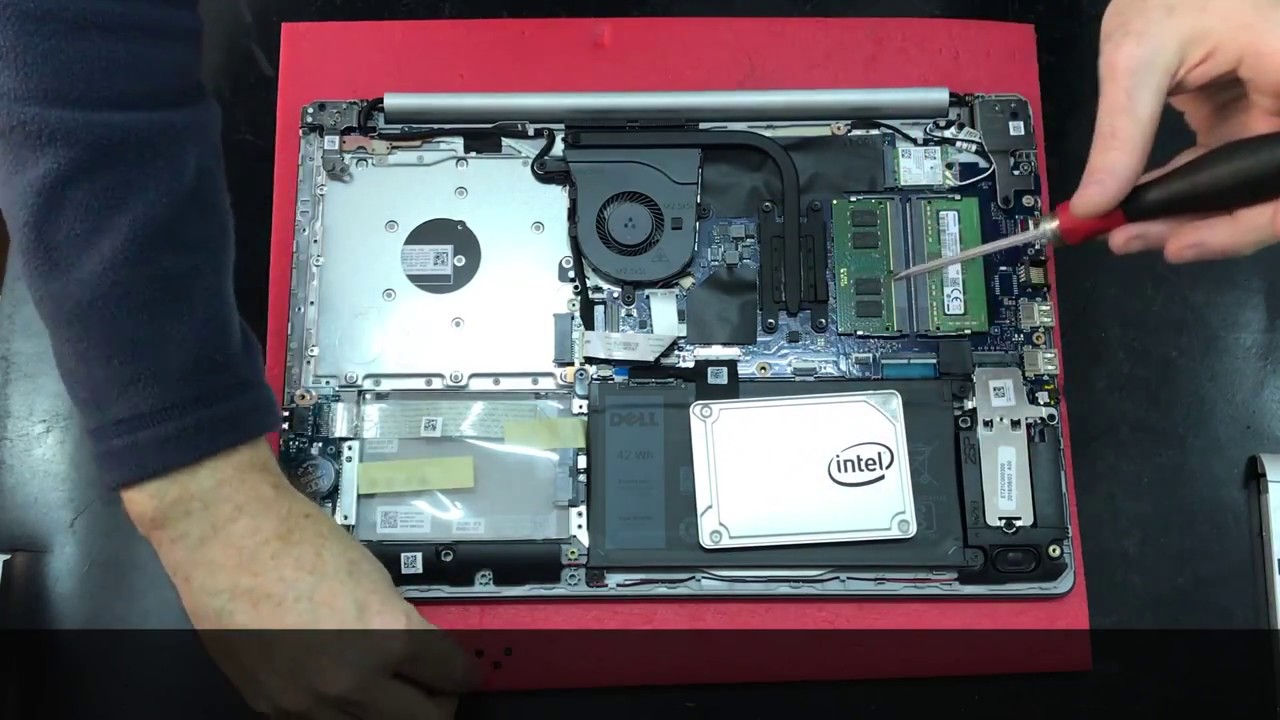
Step 5: Locate the Hard Drive
Now that you have safely opened the laptop casing, the next step is to locate the existing hard drive that you will be replacing with the new solid state drive. Here’s how you can find the hard drive in your Dell laptop:
- Examine the Casing: Take a look inside the laptop casing to identify the different components and circuitry. Pay attention to the general layout and position of the parts.
- Refer to the User Manual: If you are unsure about the exact location of the hard drive, consult the user manual specific to your Dell laptop model. The manual will usually have detailed diagrams and instructions on how to locate and replace the hard drive.
- Look for the Drive Bay: In most Dell laptops, the hard drive is typically located in a drive bay situated towards the side or bottom of the laptop. It is often secured with screws or brackets.
- Identify the Connector Cable: The existing hard drive will have a connector cable attached to it. This cable allows the hard drive to communicate with other components of the laptop, such as the motherboard. Take note of the cable’s position and how it is connected to the hard drive.
It’s important to handle the internal components of your laptop with care and avoid touching any sensitive parts. If you are unsure about any step or have difficulty locating the hard drive, it’s best to seek assistance from a professional or refer to reliable online resources.
Once you have located the hard drive, it’s time to proceed with removing it from your Dell laptop. The next step will guide you through the process of safely removing the existing hard drive to make way for the new solid state drive.
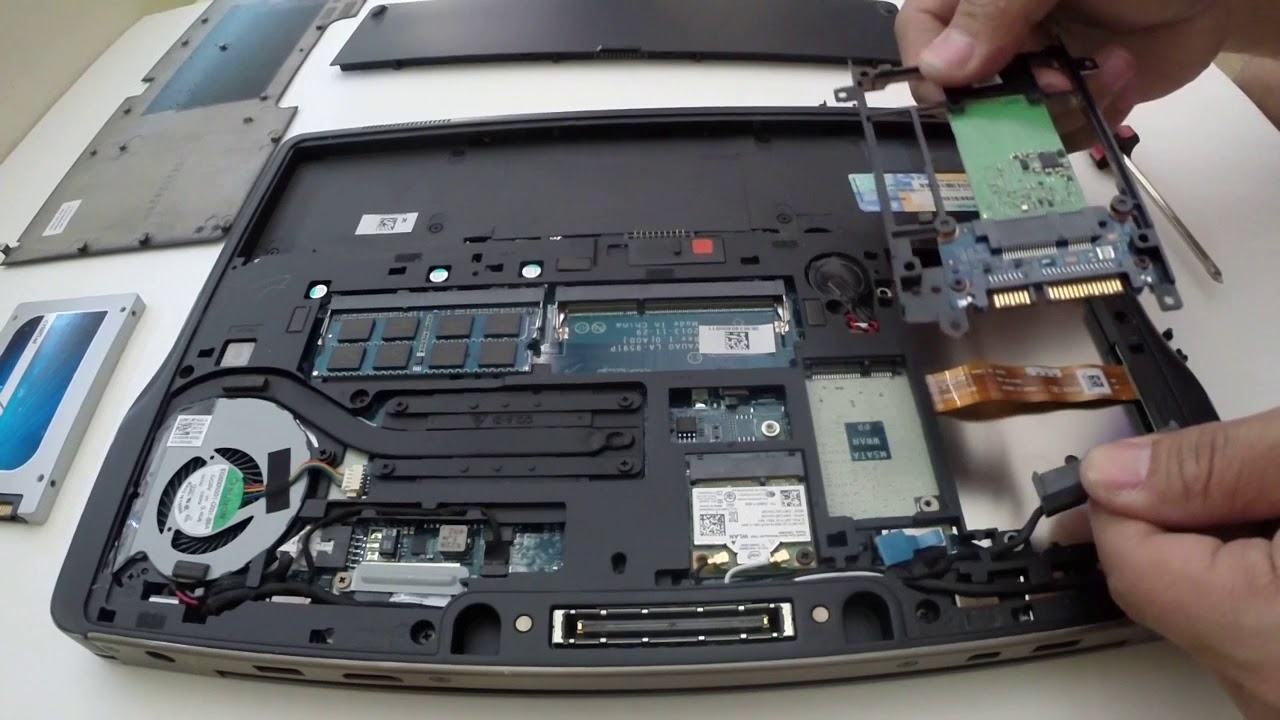
Step 6: Remove the Existing Hard Drive
Now that you have located the existing hard drive in your Dell laptop, it’s time to remove it. Follow these steps carefully to ensure a smooth removal process:
- Disconnect the Cable: Identify the cable connected to the existing hard drive. Gently detach the cable by pulling it straight outwards, taking care not to damage the connector or the cable itself.
- Secure the Cable: To prevent the cable from accidentally connecting to any other components, it’s recommended to secure it using tape or a cable tie. This step will help ensure a hassle-free installation of the new solid state drive.
- Remove the Mounting Screws: Locate the mounting screws holding the existing hard drive in place. Typically, there are two or more screws securing the hard drive to the drive bay or bracket. Take note of their positions and remove the screws using a Phillips-head screwdriver or an appropriate tool.
- Slide Out the Hard Drive: Gently slide the existing hard drive out of the drive bay or bracket. Be cautious and avoid applying excessive force to prevent any damage to the components or the surrounding area.
- Set Aside the Existing Hard Drive: Place the removed hard drive in a safe location. If you plan to reuse it or dispose of it later, take proper precautions to protect it from physical damage or electrostatic discharge.
With the existing hard drive safely removed from your Dell laptop, you’re now ready to install the new solid state drive. The next step will guide you through the process of properly installing the SSD and securing it in place.
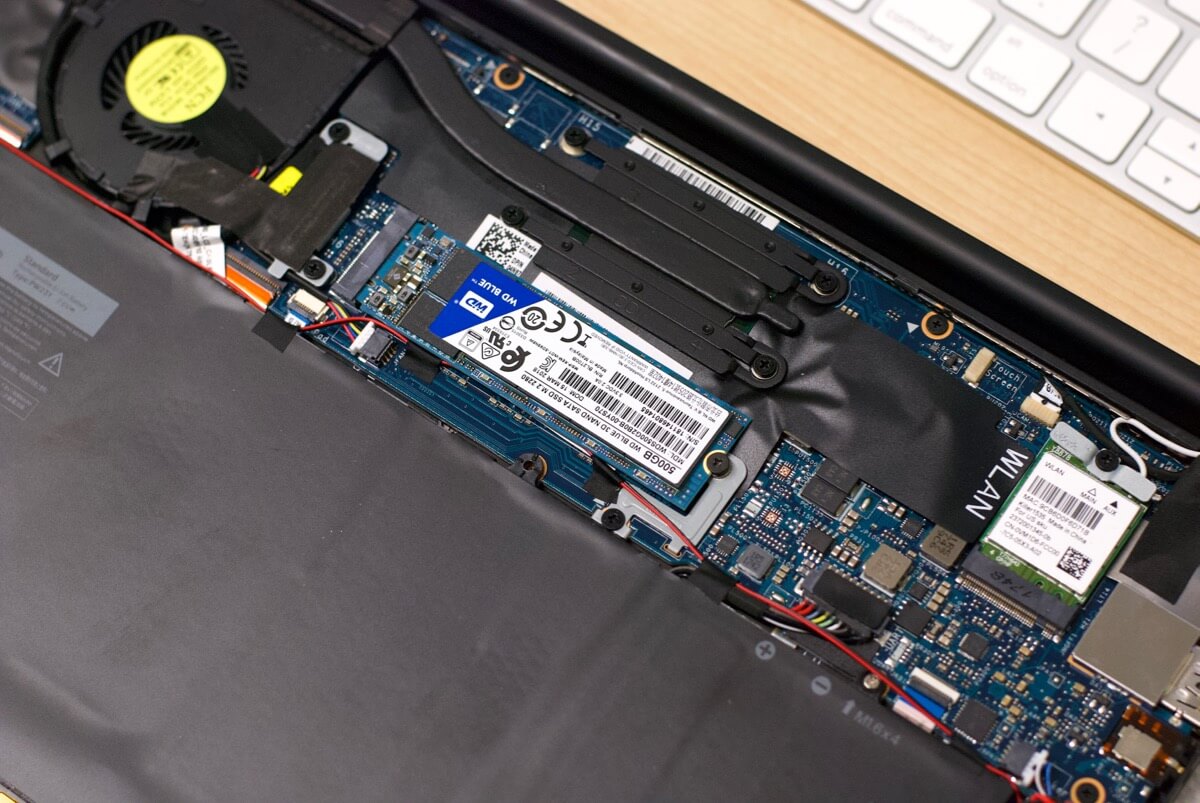
Step 7: Install the Solid State Drive
With the existing hard drive removed, it’s time to install the new solid state drive (SSD) in your Dell laptop. Follow these steps carefully to ensure proper installation:
- Prepare the SSD: Take the new SSD out of its packaging and remove any protective covers or tapes. Handle the SSD with care and avoid touching the connectors or circuitry.
- Align the SSD: Position the SSD in the drive bay, ensuring that the connectors on the SSD align with the corresponding ports in the laptop. Be gentle when inserting the SSD, making sure not to force it into place.
- Secure the SSD: Once the SSD is properly aligned, secure it in place by replacing the mounting screws that were removed earlier. Tighten the screws with the appropriate screwdriver to ensure a secure fit, but avoid over-tightening.
- Connect the Cable: Locate the connector cable that was previously disconnected from the existing hard drive. Attach it securely to the SSD, ensuring a snug fit. Be careful not to bend any pins or damage the connectors during this process.
It’s important to take note of the orientation and alignment of the SSD during the installation process. Double-check that the SSD is properly seated and securely connected to the laptop.
With the SSD installed and connected, you’re one step away from completing the upgrade. The next section will guide you through securing the solid state drive in place, ensuring it stays in position during use.
Step 8: Secure the Solid State Drive
After installing the new solid state drive (SSD) in your Dell laptop, it’s important to secure it in place to prevent any movement or dislodging during use. Follow these steps to ensure that the SSD remains firmly secure:
- Check for Brackets or Mounting Holes: Inspect the drive bay or bracket to determine if there are any additional brackets or mounting holes specifically designed to secure the SSD in place. These brackets or holes are often present in laptops that support different drive sizes.
- Attach Brackets (if applicable): If there are brackets available, align them with the mounting holes on the SSD. Use the appropriate screws to attach the brackets to the SSD and tighten them securely. This will help stabilize and secure the SSD within the drive bay.
- Verify a Snug Fit: Ensure that the SSD is snugly positioned within the drive bay. Avoid any loose movement or play. If necessary, adjust the SSD’s position or the brackets to achieve a secure fit.
- Reassemble the Casing: Carefully place the bottom panel of the laptop back onto the casing, aligning it with the screw holes. Gently press down to secure the panel, ensuring that all the plastic clips engage properly.
- Tighten Screws: Using your Phillips-head screwdriver, reinsert and tighten the screws that secure the bottom panel. Start by loosely inserting all the screws before gradually tightening them in a diagonal or cross pattern to ensure even pressure across the panel.
Once the SSD is securely fastened in place and the laptop casing is reassembled, you’re almost finished with the installation process. The next steps will guide you through reconnecting and powering up your laptop, as well as formatting and partitioning the new SSD.
Step 9: Reassemble the Laptop
With the solid state drive (SSD) securely installed, it’s time to reassemble your Dell laptop. Follow these steps to ensure a successful reassembly:
- Align the Bottom Panel: Position the bottom panel of the laptop over the casing, aligning it with the screw holes and ensuring that all the plastic clips align with their corresponding slots.
- Press Down Gently: Apply gentle pressure along the edges and corners of the bottom panel to secure it in place. Take care not to exert too much force, as this may cause damage to the panel or the laptop’s internal components.
- Tighten the Screws: Using a Phillips-head screwdriver, reinsert and tighten the screws that secure the bottom panel. Start by loosely inserting all the screws before gradually tightening them in a diagonal or cross pattern to ensure even pressure. Be careful not to overtighten the screws, as this may strip the threads.
As you reassemble the laptop, take note of any connectors or cables that may need to be reattached or routed through the appropriate channels. Ensure that all cables are properly connected and that no cables are pinched or strained during the reassembly process.
Once you have reassembled the laptop and tightened all the screws, you’re ready to move on to the next step: connecting and powering up your Dell laptop with the newly installed SSD.
Step 10: Connect and Power Up Your Laptop
With your Dell laptop reassembled, it’s time to prepare for the final stages of the solid state drive (SSD) installation. Follow these steps to connect and power up your laptop:
- Reconnect the Power Adapter: Plug the power adapter back into your laptop, ensuring that it is securely connected to both the laptop and a power source.
- Reconnect Peripherals: If you had any peripherals or accessories disconnected during the installation process, such as USB devices or external monitors, reconnect them to your laptop.
- Insert Battery (if applicable): If your Dell laptop has a removable battery, slide it back into its compartment and secure it by sliding the battery release switch or lever back into position.
- Power On Your Laptop: Press the power button on your laptop to turn it on. You should see the familiar Dell logo or the Windows logo appearing on the screen.
During the initial startup process, the laptop may take a bit longer to boot up as it recognizes and configures the new SSD. Be patient, as this is a normal part of the process.
Once your laptop has powered up successfully, you can proceed to the next steps, which involve formatting and partitioning the new SSD to prepare it for use in your Dell laptop.
Step 11: Format and Partition the New Drive
After connecting and powering up your Dell laptop with the new solid state drive (SSD), it’s time to format and partition the drive to make it ready for use. Follow these steps to complete the process:
- Open Disk Management: Right-click on the “Start” button and select “Disk Management” from the contextual menu. This will open the Disk Management window.
- Locate the New Drive: In the Disk Management window, locate the new SSD. It should be listed as a new disk with unallocated space.
- Create a New Partition: Right-click on the unallocated space of the new SSD and select “New Simple Volume” from the menu. This will open the New Simple Volume Wizard.
- Follow the Wizard: Follow the prompts in the New Simple Volume Wizard to set the size, assign a drive letter, and format the new partition. You can choose to format the partition using the NTFS file system, which is recommended for Windows operating systems.
- Complete the Wizard: Once you have made the necessary selections and configurations, click “Finish” to complete the wizard. The new partition will be formatted, and the SSD will be assigned a drive letter.
- Verify the New Drive: Open “File Explorer” or “My Computer” to verify that the new drive is visible and accessible. You can now use it to store files, install applications, and enjoy the improved performance of your Dell laptop.
It’s important to note that formatting and partitioning the drive will erase any existing data on it. Therefore, make sure you have backed up all important files before proceeding with this step.
With the new drive properly formatted and partitioned, your Dell laptop is now ready to fully utilize the benefits of the solid state drive. In the next step, we’ll discuss how to restore your backed-up data onto the newly installed SSD.
Step 12: Restore Your Data
With the new solid state drive (SSD) formatted and partitioned, it’s time to restore your backed-up data onto the newly installed drive. Follow these steps to complete the data restoration process:
- Connect Your Backup Device: If you used an external hard drive or USB flash drive to back up your data, connect it to your Dell laptop.
- Copy Data to the New Drive: Open your backup device in “File Explorer” or “Finder” and navigate to the files and folders you want to restore. Select them and copy them to the appropriate location on the new SSD.
- Organize Your Data: As you restore your data, take the opportunity to organize your files and folders in a way that suits your workflow. Create new folders, rearrange files, and ensure everything is in its proper place.
- Install Applications: If you had any applications installed on your previous hard drive, you will need to install them again on the new SSD. Locate the installation files or use official sources to reinstall the software.
- Configure Settings: Once your data and applications are restored, take some time to configure settings and preferences within your applications and the operating system. Ensure that everything is optimized for your needs and preferences.
It’s essential to verify that all restored files and applications are functioning correctly on the new SSD. Take the time to open files, test applications, and ensure everything is operating as expected.
Congratulations! You have successfully installed a solid state drive in your Dell laptop and restored your data onto the new drive. Enjoy the improved performance and faster load times that come with the upgrade. Regularly back up your SSD to prevent data loss and keep your laptop running smoothly for years to come.
Conclusion
Congratulations on successfully installing a solid state drive (SSD) in your Dell laptop! By following the step-by-step process outlined in this guide, you have significantly improved the performance and speed of your laptop. With faster boot times, quicker application launches, and shorter file transfer durations, you can now enjoy a more efficient and responsive computing experience.
Throughout the installation process, you gathered the necessary tools, backed up your data, and carefully navigated the hardware components of your Dell laptop. By locating and removing the existing hard drive, installing the new SSD, and securing it in place, you completed the physical installation with precision.
After reassembling your laptop, you formatted and partitioned the new drive, allowing it to be recognized and utilized by the operating system. With your data successfully restored and your applications installed, you can now take advantage of the improved storage capacity and lightning-fast performance of your new SSD.
Remember, regular backups are crucial to prevent data loss. Consider setting up automatic backup solutions or manually backing up your important files to an external device or a reliable cloud storage platform. This will ensure that your data remains protected, even if unexpected issues arise.
We hope this guide has been helpful in guiding you through the process of installing an SSD in your Dell laptop. If you have any questions or encounter any difficulties, consider consulting the user manual for your specific laptop model or seeking assistance from a professional.
Enjoy the enhanced speed and efficiency of your Dell laptop with the new solid state drive. Happy computing!