Introduction
Welcome to this step-by-step guide on how to install a solid state drive (SSD) on your Dell XPS M140 laptop. Upgrading to an SSD can greatly improve the performance and speed of your laptop, making it feel like new again. Whether you’re a professional looking for faster load times and seamless multitasking, or a casual user wanting to enhance your overall computing experience, installing an SSD is a worthwhile investment.
Gone are the days of slow boot times and sluggish application launches. With an SSD, you can expect faster start-up times, quicker file transfers, and improved responsiveness in everyday tasks. Not only that, but SSDs are more reliable than traditional hard drives, as they have no moving parts and are less susceptible to damage from drops or shocks.
In this guide, we will walk you through the process of installing an SSD on your Dell XPS M140 laptop. Don’t worry if you’re not an expert in technology – we will break down each step into simple and easy-to-follow instructions. By the end of this guide, you’ll have a faster and more efficient laptop that can keep up with your needs.
Before we get started, please note that this guide is specifically tailored for the Dell XPS M140 laptop model. While the general steps can be applied to other laptops, it’s important to consult your laptop’s user manual or the manufacturer’s website for any model-specific instructions or compatibility concerns.
Are you ready to give your Dell XPS M140 a speed boost? Let’s dive in and get started!
Step 1: Gather the necessary tools and materials
Before you begin the installation process, it’s important to gather all the necessary tools and materials. Here’s a list of what you’ll need:
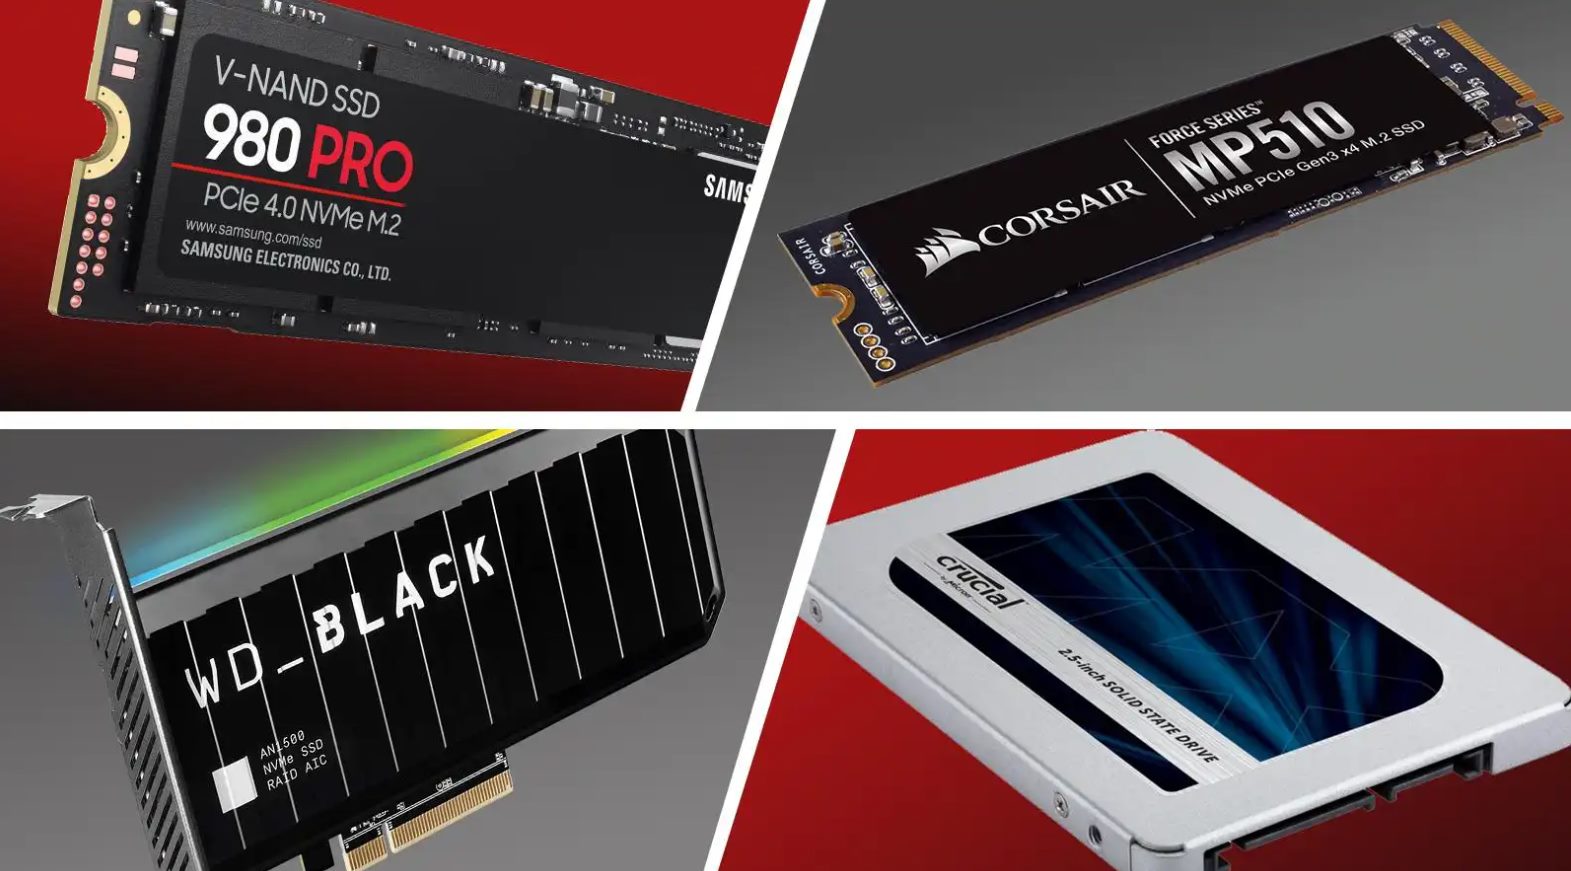
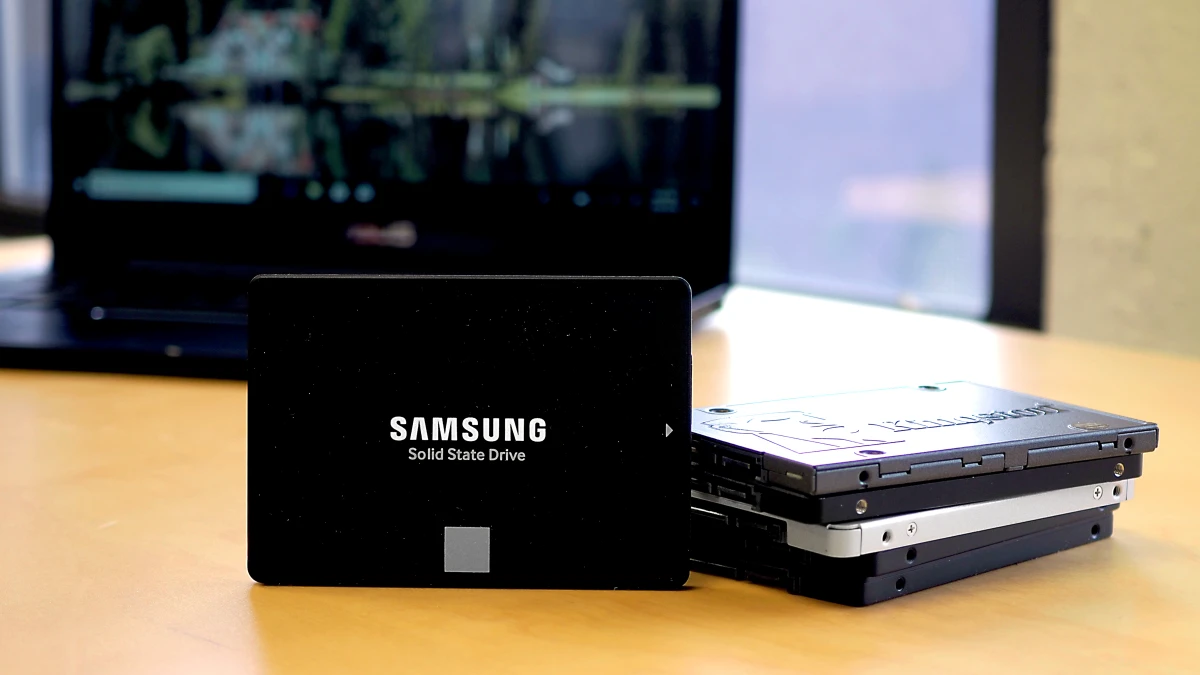
- Solid State Drive (SSD): Make sure you have a compatible SSD for your Dell XPS M140 laptop. Consider the storage capacity you need and choose a reputable brand for optimal performance and reliability.
- Screwdriver: You’ll need a small Phillips screwdriver to remove the screws securing the laptop’s casing and hard drive.
- Anti-static wrist strap: To protect the components of your laptop from static electricity, it’s recommended to wear an anti-static wrist strap during the installation process.
- External storage device: It’s advisable to have an external storage device, such as a USB flash drive or an external hard drive, to back up your important files before removing the existing hard drive.
- Compatible SATA cable: Depending on your specific SSD model, you may need a compatible SATA cable for the installation process.
Once you have gathered all the necessary tools and materials, you’re ready to proceed to the next step. It’s always a good idea to double-check that you have everything you need before starting the installation to avoid any unnecessary interruptions or delays.
Remember to work in a clean and well-lit environment, and take proper precautions to prevent electrostatic discharge that could potentially damage your laptop or the SSD. By having all the tools and materials prepared, you’ll be able to smoothly progress through the installation process and achieve a successful SSD upgrade for your Dell XPS M140 laptop.
Step 2: Prepare your laptop
Before you start the installation process, it’s important to properly prepare your Dell XPS M140 laptop. Here are the steps to follow:
- Back up your data: Before making any changes to your laptop’s hardware, it’s crucial to back up all your important files and documents. Connect your external storage device and transfer any valuable data to ensure it is safe and easily accessible.
- Power down your laptop: Shut down your laptop completely and disconnect it from any power source. This will prevent any potential damage to the hardware during the installation process.
- Remove the battery: Locate the battery release latch on the bottom of your laptop and slide it to the unlock position. Gently remove the battery from its compartment and set it aside in a safe place. This will ensure that power is completely cut off from the laptop.
- Ground yourself: To avoid damaging sensitive electronic components and to protect your laptop from static electricity, it’s important to ground yourself. Wear an anti-static wrist strap and connect it to a grounded object or touch a grounded metal surface before beginning the installation process.
By taking these preparatory steps, you are ensuring the safety of your data and protecting your laptop from potential electrical damage. It’s always better to be safe than sorry when working with delicate hardware components.
Once you have completed these preparations, you’re now ready to move on to the next step of removing the existing hard drive from your Dell XPS M140 laptop.
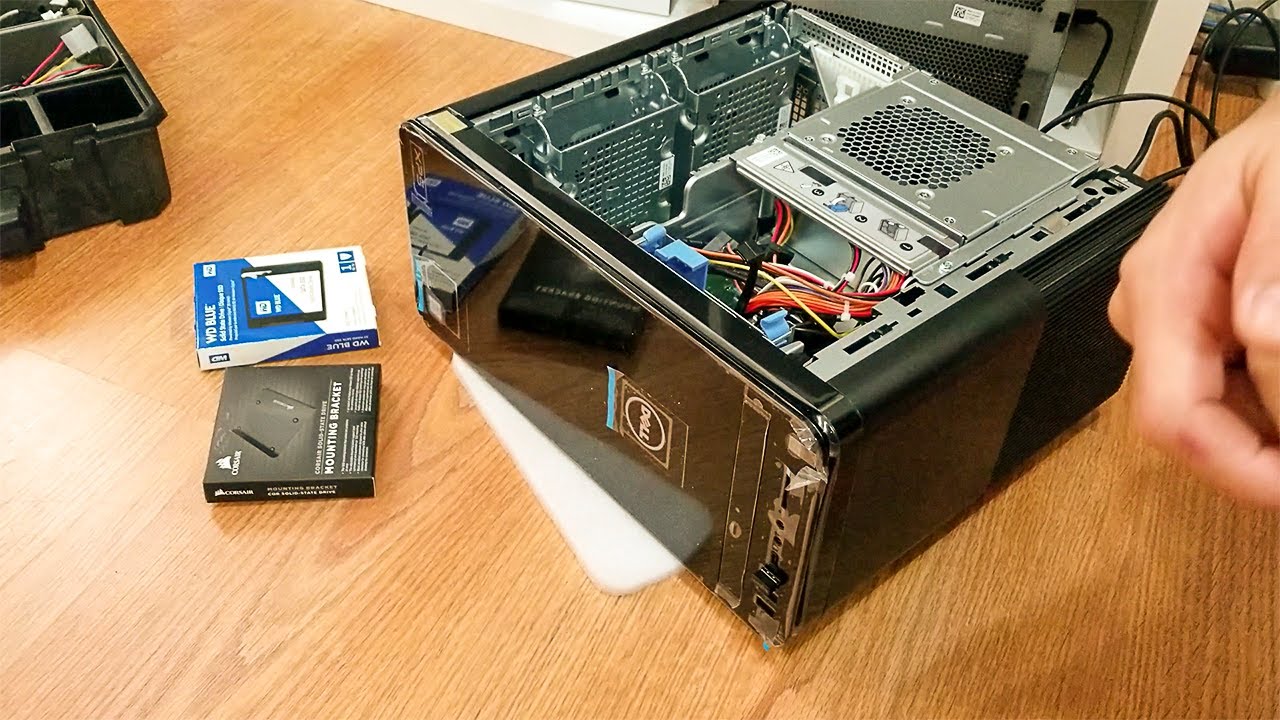
Step 3: Remove the existing hard drive
Now that you’ve prepared your Dell XPS M140 laptop, it’s time to remove the existing hard drive. Follow these steps carefully:
- Locate the hard drive bay: On the bottom of your laptop, you’ll find a small rectangular panel secured with screws. This is the hard drive bay, where the existing hard drive is housed.
- Remove the screws: Use a small Phillips screwdriver to carefully unscrew the screws securing the hard drive bay cover. Set the screws aside in a safe place to avoid misplacing them.
- Detach the hard drive: Once the screws have been removed, gently lift the hard drive bay cover to expose the existing hard drive. It may be held in place by additional screws or a bracket. Unscrew any screws or remove any brackets that are securing the hard drive.
- Disconnect the cables: Carefully disconnect the cables attached to the hard drive, including the SATA cable and power cable. Take note of the cable placements to ensure proper reinstallation later.
- Remove the hard drive: With the cables detached, you can now remove the existing hard drive from the laptop. Lift it out of the bay and set it aside.
Be cautious and gentle when handling the hard drive and its components to avoid causing any damage. If needed, consult the Dell XPS M140 laptop’s user manual for specific instructions on how to remove the existing hard drive.
By completing this step, you have successfully removed the old hard drive from your Dell XPS M140 laptop. In the next step, we’ll guide you through the process of installing the new solid state drive (SSD).
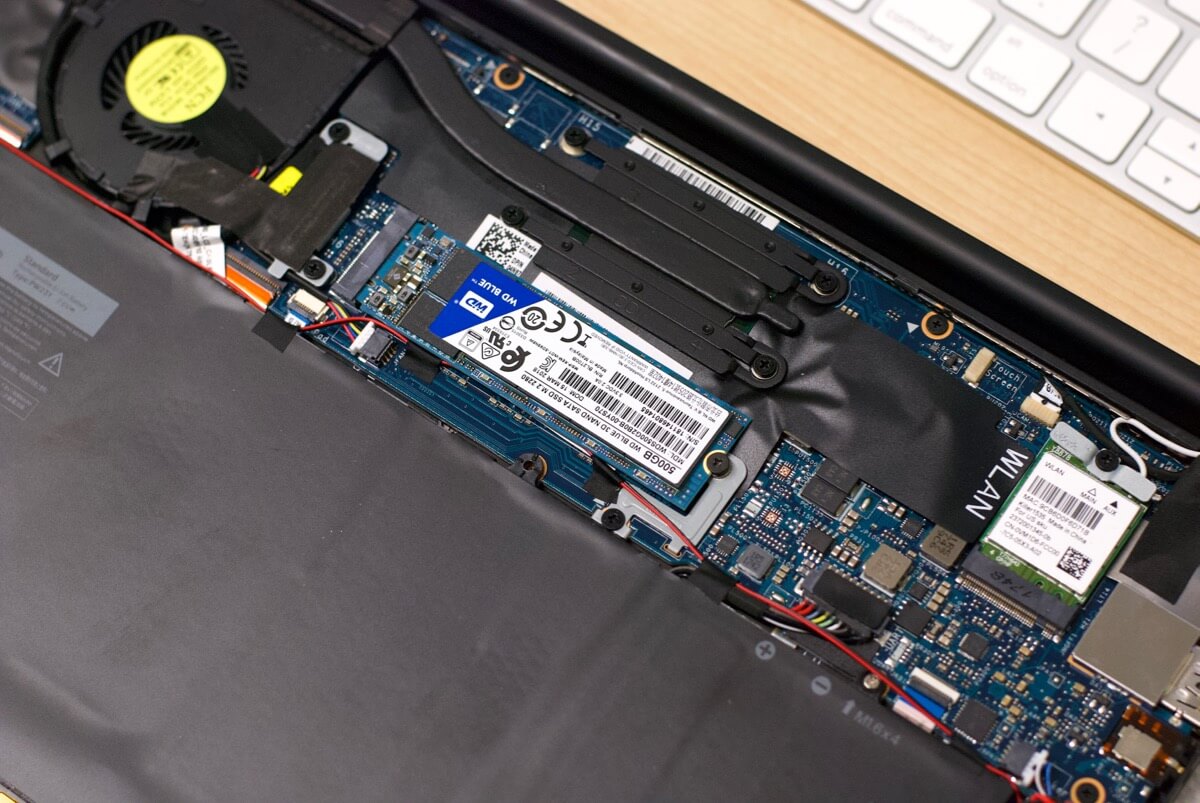
Step 4: Install the solid state drive
With the existing hard drive removed, it’s time to install the new solid state drive (SSD) into your Dell XPS M140 laptop. Follow these steps to ensure a successful installation:
- Prepare the SSD for installation: If your SSD comes with a protective cover or bracket, remove it to expose the SATA connectors. Take note of any alignment notches or guides to ensure proper installation.
- Align the SSD: Insert the SSD into the hard drive bay, aligning it with the connectors in the laptop. Make sure the SATA connectors on the SSD are facing the same direction as they were on the previous hard drive.
- Secure the SSD: If there are any screws or brackets that were used to secure the previous hard drive, use them to secure the SSD in place. Ensure that it is firmly and properly seated in the bay.
- Connect the cables: Reconnect the SATA cable and power cable to the appropriate connectors on the SSD. Take extra care to align the connectors correctly to avoid any damage.
- Double-check the connections: Once the cables are connected, ensure that the connections are secure. Gently tug on the cables to make sure they are firmly attached to the SSD.
Take your time during this step to ensure that the SSD is properly installed and securely attached. Proper alignment and connections are crucial for optimal performance and reliability.
It’s important to note that some SSD models may require additional steps or specific installation processes. Refer to the manufacturer’s instructions or consult the Dell XPS M140 laptop’s user manual if you encounter any difficulties or if there are any specific guidelines for your SSD model.
With the new SSD installed, we’re one step closer to having a faster and more efficient Dell XPS M140 laptop. In the next step, we’ll learn how to secure the solid state drive in place.
Step 5: Secure the solid state drive
Now that the solid state drive (SSD) is installed in your Dell XPS M140 laptop, it’s important to secure it properly in order to prevent any movement or damage. Follow these steps to ensure that the SSD stays in place:
- Replace the hard drive bay cover: Carefully align the hard drive bay cover with the screw holes on your laptop. Gently press it down until it sits flush with the laptop’s casing.
- Screw in the cover: Take your Phillips screwdriver and securely fasten the screws that hold the hard drive bay cover in place. Ensure that they are tightened evenly for a secure fit.
- Double-check the SSD: Give the laptop a gentle shake or tap to ensure that the SSD is not loose or moving inside the hard drive bay. If you notice any movement, open the laptop and make necessary adjustments to secure the SSD.
By properly securing the SSD, you are minimizing the risk of any potential damage that could occur from movement or jostling inside the laptop. It’s always better to be safe than sorry when it comes to delicate hardware components.
It’s important to note that some SSD models may come with additional secure mounting options, such as brackets or screws. If your SSD requires any specific securing mechanisms, refer to the manufacturer’s instructions for proper installation.
With the solid state drive securely in place, your Dell XPS M140 laptop is one step closer to experiencing improved speed and performance. In the next step, we’ll guide you through the process of reassembling your laptop.
Step 6: Reassemble your laptop
Now that the solid state drive (SSD) is securely installed in your Dell XPS M140 laptop, it’s time to reassemble the laptop and put all the components back together. Follow these steps to ensure a smooth reassembly process:
- Reattach the battery: Take the battery that you removed earlier and slide it back into its compartment. Make sure it is properly aligned and securely placed.
- Replace any other components: If you had to remove any other components, such as panels or covers, during the installation process, make sure to put them back in their proper places. Align them correctly and secure them with the appropriate screws.
- Replace the laptop’s casing: Carefully align the laptop’s casing with the body of the laptop. Gently press it down until it snaps into place. Ensure that all the edges are aligned and the casing fits snugly.
- Tighten the screws: Use your Phillips screwdriver to securely tighten all the screws that hold the laptop’s casing in place. Start with the corners and work your way around. Make sure they are all evenly tightened for a secure fit.
- Power on your laptop: Once the laptop is reassembled, connect it to a power source and press the power button to turn it on. Verify that the laptop boots up properly and recognizes the newly installed SSD.
Take your time during the reassembly process to ensure that everything is properly aligned and secured. Double-check each step to make sure you haven’t missed any components or screws. A thorough and careful reassembly will ensure the longevity and optimal performance of your laptop.
Now that your Dell XPS M140 laptop is fully reassembled, it’s time to move on to the next step: booting up and configuring the solid state drive.
Step 7: Boot up and configure the solid state drive
With the Dell XPS M140 laptop reassembled, it’s time to boot up the laptop and configure the newly installed solid state drive (SSD) for optimal performance. Follow these steps to complete the setup:
- Power on your laptop: Connect your laptop to a power source and press the power button to turn it on.
- Enter the BIOS: During startup, you may need to press a specific key (such as F2 or Del) to enter the BIOS setup. Consult your laptop’s user manual or look for on-screen prompts to determine the correct key.
- Check the SSD detection: Once in the BIOS setup, navigate to the “Drive Configuration” or similar section. Verify that the SSD is detected and properly recognized by the laptop’s system. If not, ensure the cables are securely connected and check for any compatibility issues.
- Set the SSD as the boot drive: In the BIOS setup, navigate to the “Boot” or “Boot Order” section. Set the SSD as the primary boot drive by selecting it and moving it to the top of the boot order. This will ensure that the laptop boots from the SSD.
- Save and exit the BIOS: Once you have made the necessary changes, save the BIOS settings and exit. The laptop will restart.
- Install or restore the operating system: If you are using a new SSD without an operating system installed, you will need to install the operating system using an installation disc or USB. Follow the on-screen prompts to complete the installation process. If you have an existing operating system on the SSD, you may need to restore it from a backup or clone it from the old hard drive.
- Update SSD firmware (optional): It’s recommended to check for any firmware updates for your SSD and install them. Consult the SSD manufacturer’s website for instructions on updating the firmware.
By properly configuring the SSD in the BIOS and installing or restoring the operating system, you are ensuring that the new drive functions smoothly and optimally in your Dell XPS M140 laptop.
Once you have completed these steps, your Dell XPS M140 laptop is ready to take advantage of the improved performance and speed provided by the solid state drive. Enjoy faster boot times, quicker file transfers, and a more responsive computing experience!
Conclusion
Congratulations! You have successfully installed a solid state drive (SSD) in your Dell XPS M140 laptop. By following the step-by-step guide provided, you have upgraded your laptop’s storage and significantly improved its performance.
With the new SSD, you can experience faster boot times, quicker file transfers, and improved responsiveness in everyday tasks. Say goodbye to slow load times and hello to a more efficient computing experience.
Remember to always prepare your laptop before starting the installation process. Back up your data, power down your laptop, and remove the battery to ensure a safe and smooth installation process.
Gathering all the necessary tools and materials, such as the SSD itself, a screwdriver, an anti-static wrist strap, and a compatible SATA cable, is crucial for a successful installation.
From there, you carefully remove the existing hard drive, install the new SSD, secure it in place, reassemble the laptop, and finally boot up and configure the SSD in the BIOS.
Don’t forget to install or restore the operating system using an installation disc or USB, and consider updating the SSD firmware for optimal performance. Consult the manufacturer’s instructions or their website for any specific guidelines.
By following these steps, you have unlocked the full potential of your Dell XPS M140 laptop, turning it into a faster and more efficient machine.
We hope this guide has been helpful in guiding you through the installation process and ensuring a successful SSD upgrade. Enjoy the benefits of your new solid state drive and take advantage of the improved performance it brings.
Thank you for choosing this guide, and happy computing!