Introduction
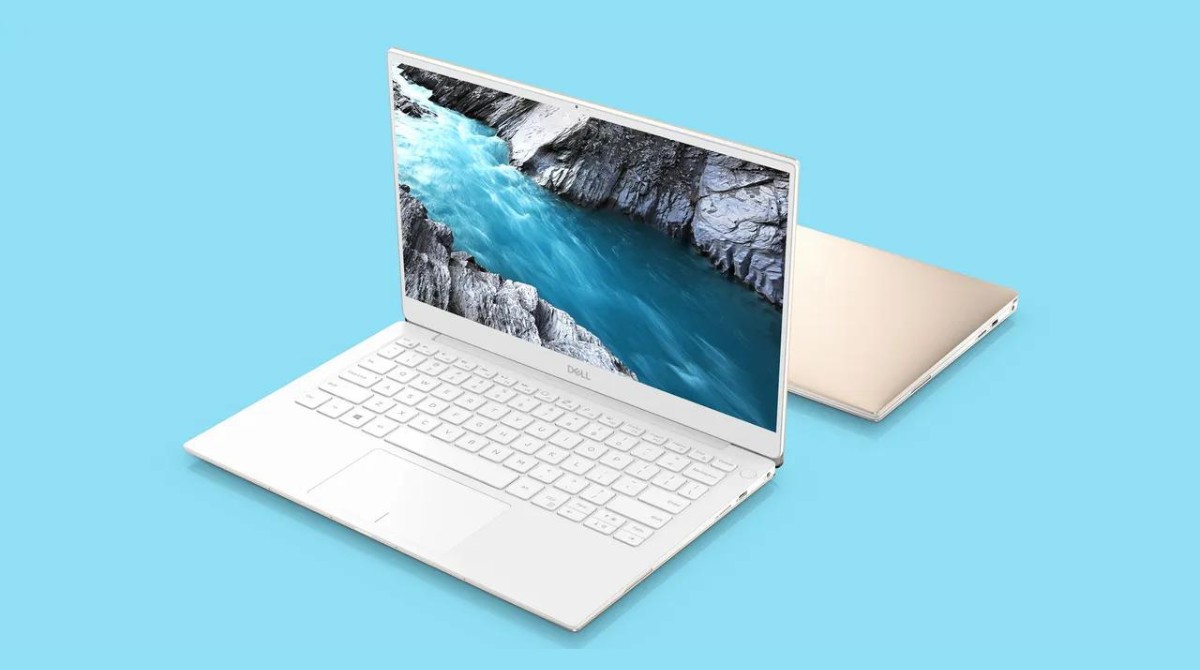
Welcome to this step-by-step guide on how to upgrade to a Solid State Drive (SSD) in your Dell XPS. As technology advances, traditional hard drives are being replaced by faster and more efficient SSDs. By upgrading to an SSD, you can significantly improve the performance and speed of your Dell XPS, enhancing your overall computing experience.
An SSD is a storage device that uses flash memory to store data, offering faster read and write speeds compared to traditional hard drives. This means faster boot times, quicker file transfers, and seamless multitasking. Whether you’re a gamer, a professional working with large files, or simply want to enhance your computer’s performance, upgrading to an SSD is a smart investment.
Before we dive into the upgrade process, it’s important to note that this guide is specifically tailored to Dell XPS models. However, many of the steps can be applied to other laptops as well. It’s always wise to refer to your Dell XPS manual or consult with a professional if you feel uncertain about any specific instructions.
In this guide, we will cover everything you need to know to successfully upgrade your Dell XPS to an SSD. We will discuss the benefits of upgrading, how to prepare for the upgrade, which SSD to choose, and the step-by-step process of opening up your Dell XPS, installing the new SSD, and formatting it. We will also provide troubleshooting tips and highlight common issues you may encounter during the process.
Before we start, it’s important to note that performing any hardware upgrades on your laptop may void the warranty. If your Dell XPS is still under warranty, consider checking with the manufacturer or a certified technician before proceeding with the upgrade. Now, let’s get started on enhancing the performance of your Dell XPS with a Solid State Drive!
Background information on Solid State Drives (SSD)
A Solid State Drive (SSD) is a type of storage device that has gained significant popularity in recent years due to its numerous advantages over traditional hard drives. Unlike hard drives, which use spinning platters and a mechanical read/write head, SSDs use flash memory to store data.
One of the key benefits of SSDs is their speed. SSDs have incredibly fast read and write speeds, resulting in faster boot times and improved overall system performance. This means you can start up your computer in seconds and launch applications quickly, allowing you to be more productive and efficient.
Another advantage of SSDs is their durability. Since SSDs have no moving parts like traditional hard drives, they are less susceptible to physical damage from drops and vibrations. This makes them a reliable choice for portable devices like laptops. Additionally, SSDs are more resistant to temperature extremes, which can be beneficial in harsh environments or if you frequently travel with your Dell XPS.
SSDs also offer better power efficiency compared to traditional hard drives. As SSDs do not require a mechanical read/write head to move around, they consume less power during operation. This leads to improved battery life and less heat generated, resulting in a cooler and quieter computing experience.
Furthermore, SSDs are silent during operation. Since they have no moving parts, there are no spinning noises or vibrations commonly associated with traditional hard drives. This can greatly enhance the overall user experience, especially for individuals who value a quiet working environment or engage in activities that require minimal background noise.
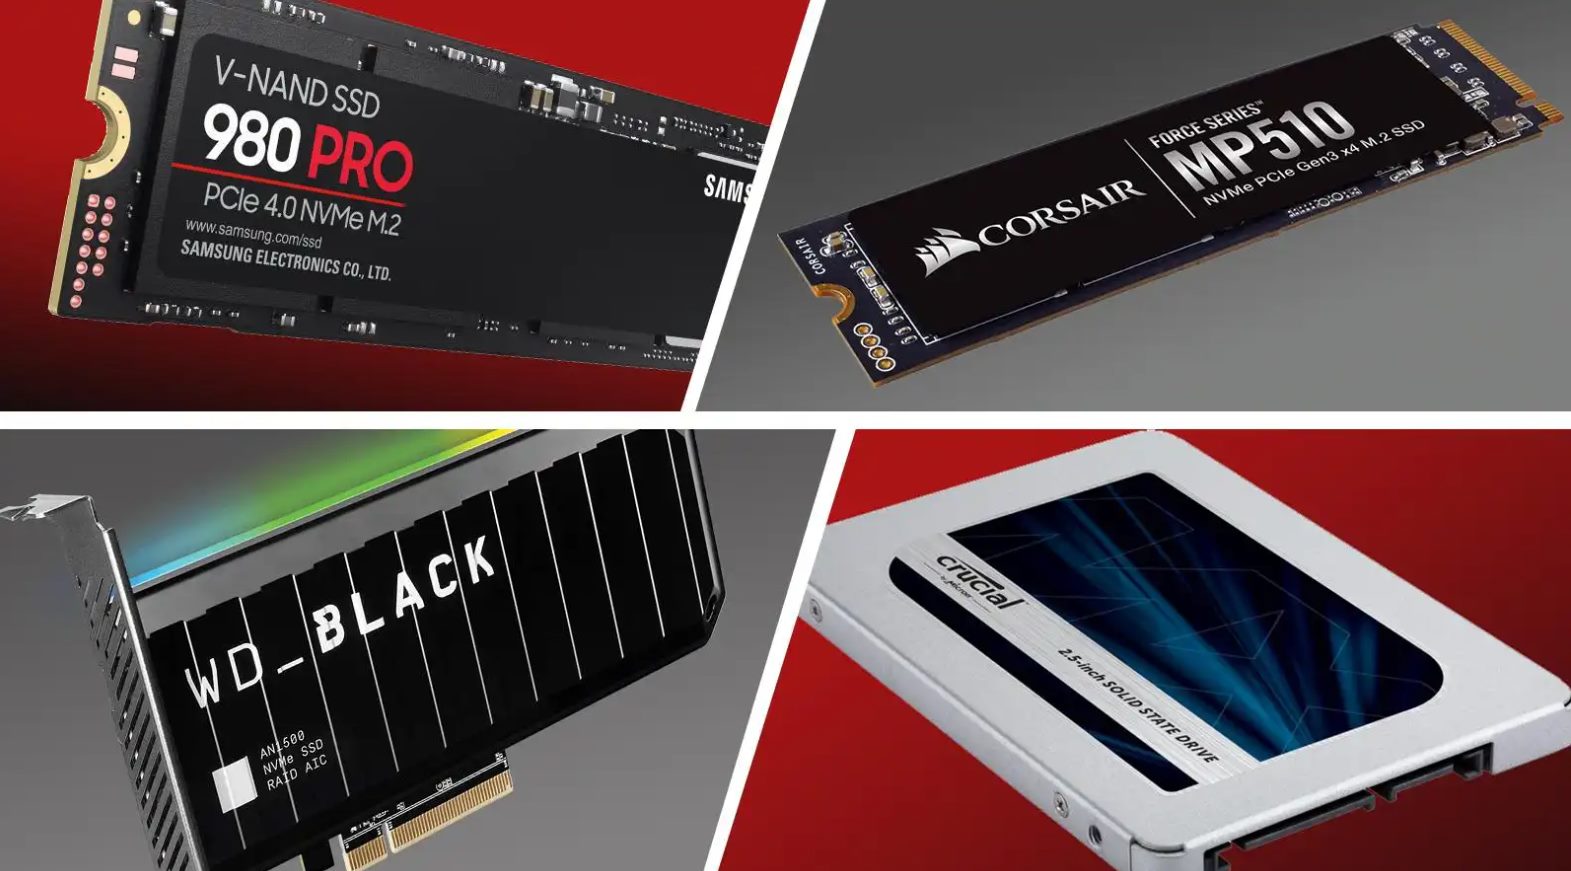
It’s worth mentioning that SSDs come in different form factors, including 2.5-inch drives and M.2 drives. The choice between these form factors depends on the compatibility of your Dell XPS and its available storage slots. So, before choosing an SSD for your upgrade, make sure to check the specifications of your Dell XPS and choose the appropriate form factor.
In summary, Solid State Drives (SSDs) offer significant advantages over traditional hard drives, including faster speeds, enhanced durability, improved power efficiency, and silent operation. Upgrading your Dell XPS to an SSD can provide a noticeable performance boost and improve your overall computing experience.
Benefits of Upgrading to an SSD
Upgrading to a Solid State Drive (SSD) in your Dell XPS comes with a plethora of benefits that can greatly enhance your computing experience. Let’s explore some of the key advantages of upgrading to an SSD:
- Improved Performance: One of the most significant benefits of upgrading to an SSD is the remarkable improvement in performance. SSDs have significantly faster read and write speeds compared to traditional hard drives. This means faster boot times, quicker file transfers, and snappier application launches. You’ll experience a noticeable difference in overall system responsiveness and smooth multitasking capabilities.
- Faster Load Times: Loading large files, such as games or graphics-intensive applications, can be a time-consuming process with a traditional hard drive. However, with an SSD, you’ll witness significantly faster load times. Games will load quickly, and you’ll spend less time waiting for applications to respond, allowing you to dive straight into your tasks or gaming sessions without any unnecessary delays.
- Enhanced Productivity: With an SSD, your Dell XPS will become more responsive and efficient, leading to increased productivity. You’ll be able to open multiple programs simultaneously without any lag, switch between tasks seamlessly, and experience minimal delays when accessing files or running resource-intensive applications. This boost in productivity can be particularly beneficial for professionals who rely on their laptops for demanding workloads.
- Better Durability: SSDs have no moving parts, making them more durable and less susceptible to physical damage caused by drops, bumps, or vibrations. This durability factor makes SSDs an ideal choice for individuals who frequently travel with their Dell XPS or use their laptops in environments that may expose them to more rugged conditions.
- Improved Battery Life: Since SSDs consume less power than traditional hard drives, upgrading to an SSD can result in improved battery life for your Dell XPS. You’ll be able to work or enjoy media for longer periods without having to worry about running out of power. This extended battery life can be especially beneficial for frequent travelers or individuals who work on the go.
- No Noise: Traditional hard drives can produce noise due to the spinning platters and mechanical read/write heads. In contrast, SSDs operate silently as they have no moving parts. This means a quieter working environment, free from distracting noises that can impact concentration or audio recording. Whether you’re enjoying a movie or working on important tasks, the absence of noise can significantly enhance your overall experience.
By upgrading to an SSD in your Dell XPS, you’ll unlock the full potential of your laptop, experiencing improved performance, faster load times, enhanced productivity, better durability, improved battery life, and a noise-free environment. These benefits make upgrading to an SSD a worthwhile investment that can transform your computing experience.
Preparing for the Upgrade
Before diving into the process of upgrading to a Solid State Drive (SSD) in your Dell XPS, it’s important to properly prepare to ensure a smooth and successful upgrade experience. Here are the key steps to follow:
- Back up Important Data: Before making any changes to your storage configuration, it’s crucial to back up all your important files and data. This includes documents, photos, videos, and any other files you don’t want to lose. You can use external storage devices like external hard drives or cloud storage solutions to create a secure backup of your data. This step is essential to prevent any data loss during the upgrade process.
- Gather Necessary Tools and Materials: To perform the upgrade, you will need a few tools and materials. These typically include a small screwdriver set, an anti-static wristband (optional but recommended), and, of course, the new SSD that you wish to install. Make sure you have all the necessary tools and materials ready before you begin the upgrade process to avoid any interruptions or delays.
- Choose the Right SSD: There are various types and models of SSDs available in the market. It’s essential to choose an SSD that is compatible with your Dell XPS model and meets your storage requirements. Consider factors such as storage capacity, read/write speeds, and brand reputation when selecting an SSD. Research customer reviews and consult reliable sources to make an informed decision.
- Review Dell XPS Manual: Familiarize yourself with your Dell XPS model and its internal components by reviewing the user manual provided by Dell. The manual will provide valuable information on the location of the existing hard drive, the necessary steps to access the internal hardware, and any specific precautions or recommendations for the upgrade process. Having a good understanding of your laptop’s internals will make the upgrade smoother and less confusing.
- Prepare a Clean Workspace: Make sure you have a clean and well-lit workspace with ample space to work comfortably. Clear away any clutter or obstructions that could impede your progress. A clutter-free workspace reduces the risk of losing or misplacing small components during the upgrade process. Additionally, consider using an anti-static mat or working on a non-static surface to minimize the risk of electrostatic discharge that could damage sensitive electronic components.
By following these preparation steps, you’ll be ready to tackle the upgrade process with confidence. Remember to back up your data, gather the necessary tools, choose the right SSD, review the Dell XPS manual, and create a suitable workspace. These preparations will help ensure a successful upgrade and minimize any potential issues or setbacks that may arise during the process.
Backing up Important Data
Before embarking on the process of upgrading your Dell XPS to a Solid State Drive (SSD), it is crucial to perform a thorough backup of all your important data. This step will ensure that you don’t lose any valuable files during the upgrade process. Follow these guidelines to back up your data effectively:
- Identify Important Files: Take the time to identify the files that hold significant value to you. These may include documents, photos, videos, music files, and any other data you wish to preserve. By determining which files are essential, you’ll know exactly what needs to be included in the backup.
- Choose a Backup Method: There are several backup methods available, and choosing the right one depends on your preferences and needs. You may opt for an external hard drive to physically store your files, or you can utilize cloud storage solutions such as Google Drive, Dropbox, or iCloud to securely backup your data online. Consider the storage capacity, ease of use, and security features of each method before making a decision.
- Copy Files to External Storage: Once you have decided on the backup method, begin copying your important files to the chosen storage solution. If you are using an external hard drive, connect it to your Dell XPS and copy the files manually. For cloud storage, you can use the provided software or online interface to upload your files. Ensure that the transfer process completes successfully and that all files have been correctly copied.
- Verify the Backup: After the files have been copied, it’s crucial to verify the backup integrity. Double-check that all the files you selected for backup are present and accessible. Open a few random files to ensure they haven’t been corrupted or damaged during the transfer process. By confirming the backup’s accuracy, you can have peace of mind knowing that your data is securely stored.
- Test the Restore Process: While backing up is essential, it’s equally important to verify the restore process. Select a few files from your backup and restore them to a separate location, such as a different folder or a different device. This test will help ensure that the restore process works smoothly and that your files can be easily retrieved if needed in the future.
Backing up your important data is a crucial step before upgrading your Dell XPS to an SSD. By identifying and selecting the essential files, choosing an appropriate backup method, securely copying the files to external storage or the cloud, verifying the backup, and testing the restore process, you can safeguard your important data from any potential loss during the upgrade process.
Gathering Necessary Tools and Materials
Before you begin the process of upgrading your Dell XPS to a Solid State Drive (SSD), it’s important to gather all the necessary tools and materials. Having these items at hand will ensure a smooth and efficient upgrade process. Here are the essential tools and materials you’ll need:
- Screwdriver Set: A small screwdriver set is essential for opening up your Dell XPS and accessing the internal components. Make sure to have a set of screwdrivers with various sizes and types, including Philips and flathead screwdrivers. This will allow you to handle different types of screws found in laptops.
- Anti-Static Wristband (Optional): While not mandatory, using an anti-static wristband can help protect your Dell XPS and yourself from static electricity. This can prevent any static discharge that may damage sensitive electronic components. If you don’t have an anti-static wristband, make sure to ground yourself periodically by touching a grounded metal object.
- New Solid State Drive (SSD): The most crucial item for the upgrade is the new SSD itself. Make sure to research and choose an SSD that is compatible with your Dell XPS model. Consider factors such as storage capacity, read/write speeds, and brand reputation when making your selection.
- External Hard Drive (Optional): While not required for the upgrade process, having an external hard drive can be helpful for creating a backup of your important data before the upgrade. This will ensure that you have a copy of your files in case anything goes wrong during the upgrade process.
- Microfiber Cloth: A soft microfiber cloth is useful for cleaning the exterior and interior of your Dell XPS. It will help remove dust, fingerprints, and any particles that may have accumulated on the surfaces.
- Cleaning Solution (Optional): If your Dell XPS requires a more thorough cleaning, you can use a mild cleaning solution specifically designed for electronics. Be sure to follow the manufacturer’s instructions and apply the solution to a cloth rather than directly to the laptop.
- Cable Ties or Velcro Straps: Cable ties or velcro straps can come in handy for managing cables inside your Dell XPS. They will help keep cables organized and prevent them from interfering with other components or obstructing airflow.
- Anti-Static Mat or Non-Static Surface: While not essential, using an anti-static mat or working on a non-static surface can further minimize the risk of static electricity damaging your Dell XPS or its components. These mats or surfaces are designed to dissipate any static charges that may build up during the upgrade process.
By gathering these necessary tools and materials ahead of time, you’ll be fully equipped for a successful upgrade of your Dell XPS to an SSD. Remember to have a screwdriver set, consider using an anti-static wristband, have a new SSD, secure an external hard drive for backup (if desired), acquire a microfiber cloth and cleaning solution for cleaning, use cable ties or velcro straps for cable management, and consider using an anti-static mat or non-static surface for added protection.
Choosing the Right SSD for your Dell XPS
When upgrading your Dell XPS to a Solid State Drive (SSD), it’s vital to choose the right SSD that meets your needs and is compatible with your laptop. Here are some key factors to consider when selecting the perfect SSD:
- Storage Capacity: Determine your storage requirements based on your usage habits and the types of files you typically work with. SSDs come in a range of storage capacities, from smaller options like 250GB to larger capacities like 1TB or even higher. Assess your needs and choose an SSD with adequate storage to accommodate your files.
- Form Factor: Dell XPS laptops may support different form factors for SSDs, such as 2.5-inch drives or M.2 drives. Carefully check the specifications of your Dell XPS model to ensure compatibility with the SSD you choose. Choosing the wrong form factor could result in an incompatible SSD that cannot be installed in your laptop.
- Read/Write Speeds: Consider the read and write speeds of the SSD you’re considering. Higher speeds will result in faster data transfers, quicker boot times, and snappier application launches. Opting for an SSD with faster speeds can provide a noticeable performance boost.
- Reliability and Brand Reputation: Look for SSD brands with a reputation for reliability and durability. Reading customer reviews and consulting reliable sources can give you insights into the performance and longevity of different SSD models. Choosing a reliable brand can ensure a long-lasting and dependable SSD for your Dell XPS.
- Price: Evaluate your budget and compare the prices of different SSD models. SSD prices have become more affordable over time, but prices can still vary depending on storage capacity, brand, and performance. Set a budget and look for an SSD that strikes the ideal balance between performance and cost.
- Warranty: Check the warranty details offered by the SSD manufacturer. A longer warranty period indicates the manufacturer’s confidence in their product’s reliability. In the event of any issues, having a solid warranty can provide peace of mind and assistance in getting a replacement or repair.
By considering these factors, you can select the right SSD for your Dell XPS. Determine the appropriate storage capacity, ensure compatibility with the form factor, consider the read/write speeds, prioritize reliability and brand reputation, assess the price within your budget, and check the warranty details. By making an informed decision based on these factors, you can choose an SSD that will enhance the performance and storage capabilities of your Dell XPS.
Opening up your Dell XPS
Before you can install a Solid State Drive (SSD) in your Dell XPS, you’ll need to open up your laptop and access the internal components. Follow these steps to safely open your Dell XPS:
- Power Off and Disconnect: Shut down your Dell XPS completely and disconnect any external power source. This will ensure your safety and prevent any electrical mishaps during the process.
- Ground Yourself: To prevent any static electricity from damaging sensitive components, ground yourself by touching a grounded metal object or by using an anti-static wristband. This step is crucial to protect the internal electronics from electrostatic discharge.
- Remove the Battery (if applicable): Some Dell XPS models may have a removable battery. If your laptop has a removable battery, carefully remove it by following the instructions provided in your Dell XPS manual. This step may not be necessary for certain models that have an internal, non-removable battery.
- Remove the Bottom Cover: Locate and remove the screws that secure the bottom cover of your Dell XPS. Keep the screws in a safe place as you’ll need them when reassembling the laptop later. Gently lift the bottom cover to access the internal components. Be cautious not to apply excessive force to avoid damaging the cover or the laptop’s internal parts.
- Locate the Hard Drive: Identify the location of the existing hard drive. In most Dell XPS models, the hard drive is located in the 2.5-inch drive bay or the M.2 slot. Refer to your Dell XPS manual for the exact location and any specific instructions related to your laptop’s configuration.
- Disconnect Cables: Carefully disconnect any cables or connectors attached to the hard drive. These may include the SATA data cable, SATA power cable, or any other connectors specific to your Dell XPS model. Take note of the cable routing or take reference photos to ensure proper reinstallation later.
- Remove the Hard Drive: Once the cables are disconnected, take out the old hard drive from its bay or slot. Depending on the securing mechanism, you may need to unscrew a bracket or slide the drive out of its slot. Handle the hard drive with care, holding it by the edges to avoid damaging any internal components.
By following these steps, you can safely open up your Dell XPS and gain access to the internal components, including the existing hard drive. Remember to power off and disconnect your laptop, ground yourself to prevent static discharge, remove the battery if applicable, carefully remove the bottom cover, locate the hard drive, disconnect the cables, and finally, remove the old hard drive. These steps will prepare you for the next stage of installing the new SSD into your Dell XPS.
Removing the old hard drive
Now that you have opened up your Dell XPS and gained access to the internal components, it’s time to remove the old hard drive. Follow these steps to safely remove the old hard drive from your Dell XPS:
- Identify the Old Hard Drive: Locate the old hard drive that you want to replace. It will typically be in the 2.5-inch drive bay or the M.2 slot, depending on your Dell XPS model. Take note of any screws or brackets securing the hard drive in place.
- Unscrew or Detach the Mounting Bracket: If there is a mounting bracket holding the old hard drive in place, you will need to unscrew it or detach it according to your Dell XPS manual’s instructions. Set aside the screws or brackets for later use if they are reusable with the new SSD.
- Disconnect Cables and Connectors: Carefully disconnect any cables and connectors attached to the old hard drive. These may include a SATA data cable, SATA power cable, or any other connectors specific to your Dell XPS model. Ensure that you handle the cables gently to avoid damaging them.
- Remove the Old Hard Drive: Once all cables and connectors are disconnected, gently slide or lift out the old hard drive from its bay or slot. Be cautious not to use excessive force or twist the hard drive as it could cause damage to the connectors or other internal components.
- Set Aside the Old Hard Drive: Place the removed old hard drive in a safe and static-free location. You may want to keep it as a backup or transfer any necessary data from it to your new SSD later. If you don’t need the old hard drive, consider proper disposal methods to ensure data security and environmental responsibility.
Following these steps will enable you to properly remove the old hard drive from your Dell XPS. Identify the old hard drive, unscrew or detach any mounting brackets, disconnect cables and connectors, remove the old hard drive from its bay or slot, and set it aside for further action. With the old hard drive removed, you are now ready to install your new Solid State Drive (SSD) and continue the upgrade process.
Installing the New SSD
With the old hard drive safely removed from your Dell XPS, it’s time to install the new Solid State Drive (SSD). Follow these steps to properly install the new SSD in your Dell XPS:
- Position the New SSD: Take the new SSD and orient it correctly according to the designated slot. Ensure that the connectors on the SSD align with the corresponding connectors in the drive bay or M.2 slot.
- Secure the New SSD: If there is a mounting bracket that came with the new SSD or was previously used to secure the old hard drive, attach it to the new SSD following the instructions provided by your Dell XPS manual. Use screws or other appropriate mechanisms to secure the SSD in place.
- Connect Cables and Connectors: Attach the necessary cables and connectors to the new SSD. This typically includes a SATA data cable and a SATA power cable. Ensure that the connectors are properly inserted, and the cables are securely attached to the SSD.
- Check Cable Routing: Take note of the cable routing and make sure that the cables are neatly arranged and not obstructing any other components or interfering with the laptop’s internal structure. Proper cable management helps with airflow and prevents any accidental disconnections.
- Double-Check Connections: Double-check that all connections to the new SSD are firmly in place. Gently tug on the cables to ensure they are secure, but avoid applying excessive force that might damage the connectors or the SSD itself.
- Reattach the Bottom Cover: Carefully place the bottom cover back onto your Dell XPS, aligning it with the corresponding screw holes. Use the screws you set aside earlier to secure the bottom cover. Ensure that all screws are tightened appropriately, but be cautious not to overtighten them.
By following these steps, you can successfully install your new SSD into your Dell XPS. Position the SSD correctly, secure it with a mounting bracket (if applicable), connect the necessary cables and connectors, check cable routing, double-check all connections, and reattach the bottom cover. Once the new SSD is securely installed, you can move on to the next steps of formatting and cloning your new drive.
Reassembling your Dell XPS
Now that you have installed the new Solid State Drive (SSD) in your Dell XPS, it’s time to reassemble your laptop. Follow these steps to ensure a proper and secure reassembly:
- Verify Cable Connections: Before reassembling, double-check that all cables and connectors are securely attached to the new SSD. Ensure that the SATA data cable, SATA power cable, and any other cables are properly inserted and secured.
- Position the Bottom Cover: Align the bottom cover with the screw holes on your Dell XPS. Be mindful of any cables that may need to pass through specific openings or spaces in the cover. Make sure the cover is resting flush against the laptop’s body.
- Secure the Bottom Cover: Begin screwing the bottom cover back into place using the screws you set aside earlier. Start by tightening all screws loosely and then go back to tighten each one fully. Be cautious not to overtighten the screws as it can cause damage to the threads or put unnecessary pressure on the laptop’s components.
- Confirm Proper Alignment: Once all screws are tightened, visually inspect the laptop to ensure there are no gaps or misalignments in the bottom cover. The cover should fit snugly and evenly on all sides, indicating a proper reassembly.
- Insert the Battery (if applicable): If you removed the battery during the disassembly phase, insert it back into its designated compartment. Follow the instructions provided in your Dell XPS manual to ensure proper alignment and connection.
- Power On and Test: With the Dell XPS reassembled, reconnect the external power source (if needed) and power on your laptop. Once the laptop boots up, verify that it recognizes the new SSD and that it functions properly. If all is well, proceed with the next steps of formatting and cloning your new drive.
By following these steps, you can effectively reassemble your Dell XPS after installing the new SSD. Verify cable connections, position the bottom cover correctly, secure the cover with the screws, ensure proper alignment, insert the battery (if applicable), power on the laptop, and perform a test to confirm the functionality of the new SSD. With your Dell XPS successfully reassembled, you are now ready to proceed with the formatting and cloning of your new drive.
Formatting and Cloning your new SSD
After successfully reassembling your Dell XPS with the newly installed Solid State Drive (SSD), the next step is to format and clone your new drive. This process allows you to transfer the data from your old hard drive to the new SSD, ensuring a seamless transition. Follow these steps to format and clone your new SSD:
- Formatting the New SSD: Start by formatting your new SSD to prepare it for data transfer. This process will erase any existing data on the SSD, so ensure that you have already backed up your important files. Use disk formatting tools like Disk Management on Windows or Disk Utility on macOS to format the SSD to the desired file system, such as NTFS or APFS.
- Cloning the Old Hard Drive: You can clone the data from your old hard drive to the new SSD using cloning software. Several reliable cloning tools are available, such as Acronis True Image, EaseUS Todo Backup, or Clonezilla. Follow the instructions provided by the cloning software to initiate the process. Typically, you will need to select the source (old hard drive) and the destination (new SSD) and then start the cloning process.
- Wait for the Cloning Process: The cloning process may take some time depending on the size of the data being transferred. It is essential to be patient and let the software complete the process without interruptions. Avoid using the Dell XPS or accessing the old hard drive during the cloning process to minimize any potential errors or data corruption.
- Verify the Cloned Data: Once the cloning process is complete, verify the data on the new SSD. Restart your Dell XPS and ensure that the system recognizes and boots from the new SSD. Double-check that all your files, applications, and settings have been successfully transferred to the new drive.
- Test the New SSD’s Performance: After verifying the cloned data, test the performance of your new SSD by launching applications, opening files, and performing various tasks. You should notice a significant improvement in speed and responsiveness compared to the old hard drive.
By following these steps, you can format your new SSD, clone the data from your old hard drive, verify the cloned data, and test the performance of your new SSD. Remember to use reputable cloning software, wait for the cloning process to complete, and thoroughly test the functionality of the new SSD to ensure a successful transfer of your data.
Final Steps and Troubleshooting Tips
As you near the completion of the SSD upgrade process in your Dell XPS, there are a few final steps to take and some troubleshooting tips to keep in mind:
- Configure BIOS Settings (if necessary): Access the BIOS settings of your Dell XPS by pressing the designated key during startup (often Del, F2, or F12). Verify that the system recognizes the new SSD as the primary boot device. If needed, adjust the boot order to ensure the SSD is set as the first boot option.
- Update Device Drivers and Firmware: Visit the Dell support website and check for any available updates for your Dell XPS model. Updating device drivers, firmware, and BIOS can help improve compatibility, performance, and stability with the new SSD.
- Securely Dispose of the Old Hard Drive: If you no longer need the old hard drive, it’s important to dispose of it securely. You can physically destroy it or use specialized software to wipe the data before disposal to prevent potential data breaches.
- Monitor SSD Health: Install SSD monitoring software, such as CrystalDiskInfo or Samsung Magician, to keep track of your new SSD’s health and performance. These tools can provide valuable insights into the drive’s temperature, lifespan, and any potential issues that may arise.
- Troubleshooting Tips: In case you encounter any issues during or after the SSD upgrade, here are some troubleshooting tips:
- Double-check all cable connections and ensure they are securely attached.
- Update your operating system to the latest version to ensure compatibility with the new SSD.
- Verify that the SSD firmware is up to date and consider updating it if necessary.
- Consult the Dell support website or contact customer support for further assistance if you encounter persistent issues.
By following these final steps and troubleshooting tips, you can complete the SSD upgrade process in your Dell XPS with confidence. Ensure the BIOS settings are correctly configured, update device drivers and firmware, securely dispose of the old hard drive, monitor your new SSD’s health, and utilize troubleshooting tips if any issues arise. With everything in place, you can enjoy the improved performance and efficiency of your upgraded Dell XPS with the new Solid State Drive.
Conclusion
Congratulations! You have successfully completed the process of upgrading your Dell XPS to a Solid State Drive (SSD). By replacing your old hard drive with an SSD, you have unlocked a range of benefits, including enhanced performance, faster load times, increased productivity, improved durability, better power efficiency, and a noise-free computing experience. Your Dell XPS will now operate faster, allowing you to work more efficiently and enjoy a seamless computing experience.
Throughout this upgrade process, you have learned important steps, including backing up important data, gathering necessary tools and materials, choosing the right SSD for your Dell XPS, opening up the laptop, removing the old hard drive, installing the new SSD, reassembling the Dell XPS, formatting and cloning the new SSD, and completing final steps with troubleshooting tips. Following these steps diligently has ensured a smooth and successful upgrade.
Remember to monitor the health and performance of your new SSD with the help of specialized software, update device drivers and firmware regularly, and securely dispose of the old hard drive to protect your data. Should you encounter any issues, don’t hesitate to refer to the troubleshooting tips or seek assistance from Dell’s support team.
With your upgraded Dell XPS, you can now experience the benefits of faster speeds, improved productivity, and a more reliable storage solution. Embrace the enhanced performance and efficiency that your new SSD brings, and enjoy a seamless computing experience for years to come.