Introduction
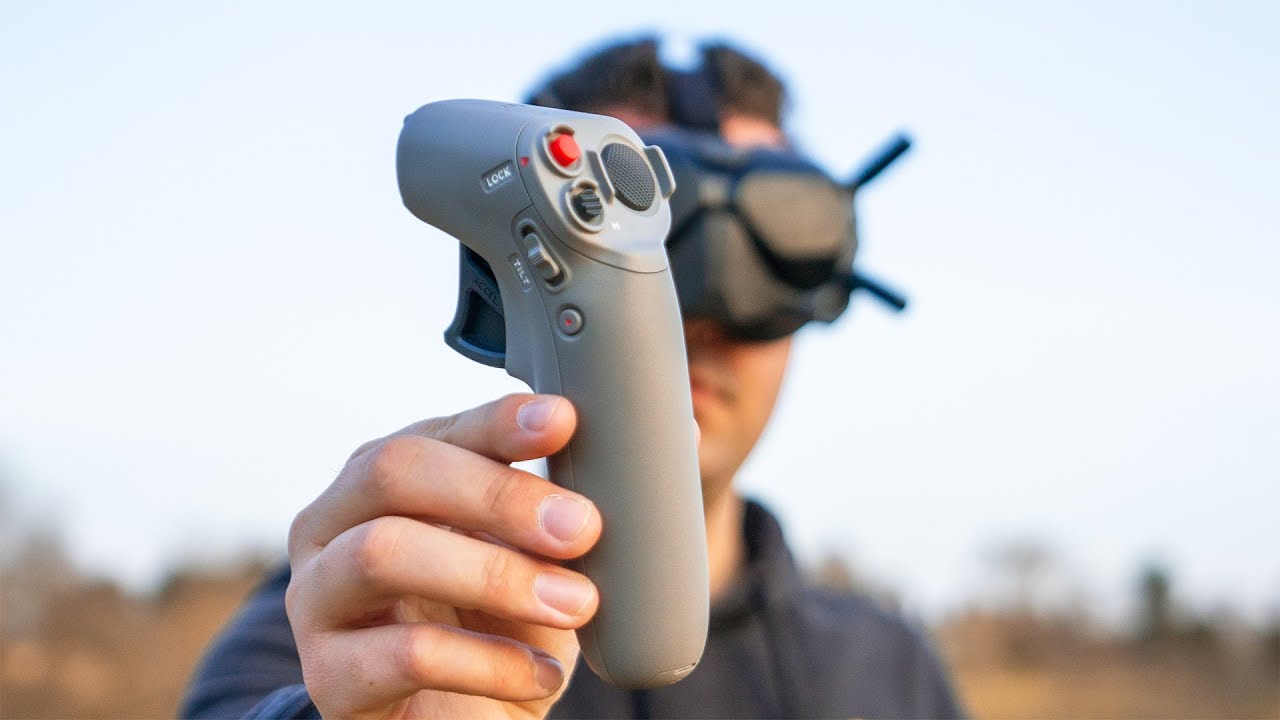
Welcome to this guide on how to charge the DJI Motion Controller. The DJI Motion Controller is an innovative and intuitive device that enhances the flight experience for DJI drone users. To ensure uninterrupted operation, it’s essential to keep the Motion Controller charged. In this article, we will walk you through the different methods of charging the Motion Controller, including using a USB-C cable and a charging hub. By following these steps, you can ensure that your Motion Controller is always ready for your next adventure in the sky.
As a drone pilot, you understand the importance of having all your equipment fully charged before heading out to capture stunning aerial footage. The Motion Controller is no exception. Whether you’re a seasoned drone flyer or a beginner, having a fully charged Motion Controller allows you to have precise control over your drone movements, leading to more accurate and cinematic shots.
Before we dive into the details of the charging process, it’s important to note that the Motion Controller comes with a built-in rechargeable battery. This means there’s no need to worry about purchasing and replacing batteries. Instead, you can conveniently recharge the Motion Controller using the methods we will discuss in this guide.
Now that we’ve covered the basics, let’s move on to the different methods of charging the DJI Motion Controller. Whether you’re out in the field or at home, there’s a charging option that suits your needs. By following the instructions provided in the upcoming sections, you’ll be able to keep your Motion Controller powered up and ready for your next aerial adventure.
Checking the Battery Level
Before you begin the charging process, it’s a good idea to check the battery level of your DJI Motion Controller. This will give you an estimate of how much charge is remaining and whether it needs to be recharged. To check the battery level, follow these steps:
- Power on your DJI Motion Controller by pressing and holding the power button located on the side of the device.
- Once the Motion Controller is powered on, a small battery icon will appear on the screen, indicating the battery level.
- If the battery icon is green and displays four bars, it means the battery level is high. If it displays three bars, the battery level is medium. Two bars indicate a low battery level, and one bar means the battery is critically low and needs to be charged immediately.
Keep in mind that the battery level may also be displayed on the DJI Fly app when the Motion Controller is connected to your drone. Simply check the app to see the current battery level of the Motion Controller.
It’s important to regularly check the battery level of your Motion Controller, especially before embarking on a drone flight. This will give you an idea of how much flight time you have left and allow you to plan accordingly. It’s always better to be safe than sorry and avoid any unexpected battery drain while in the air.
Now that you’ve checked the battery level of your Motion Controller, it’s time to move on to the next step – connecting the device to a power source for charging. We will explore the different charging methods in the following sections, so keep reading to learn more.
Connecting the Motion Controller to a Power Source
Once you’ve checked the battery level of your DJI Motion Controller and confirmed that it needs to be charged, it’s time to connect it to a power source. There are two primary methods for charging the Motion Controller – using a USB-C cable or a charging hub. Let’s explore each of these methods in detail:
Charging via USB-C Cable:
The USB-C cable is a convenient and straightforward way to charge your Motion Controller. Here’s how to do it:
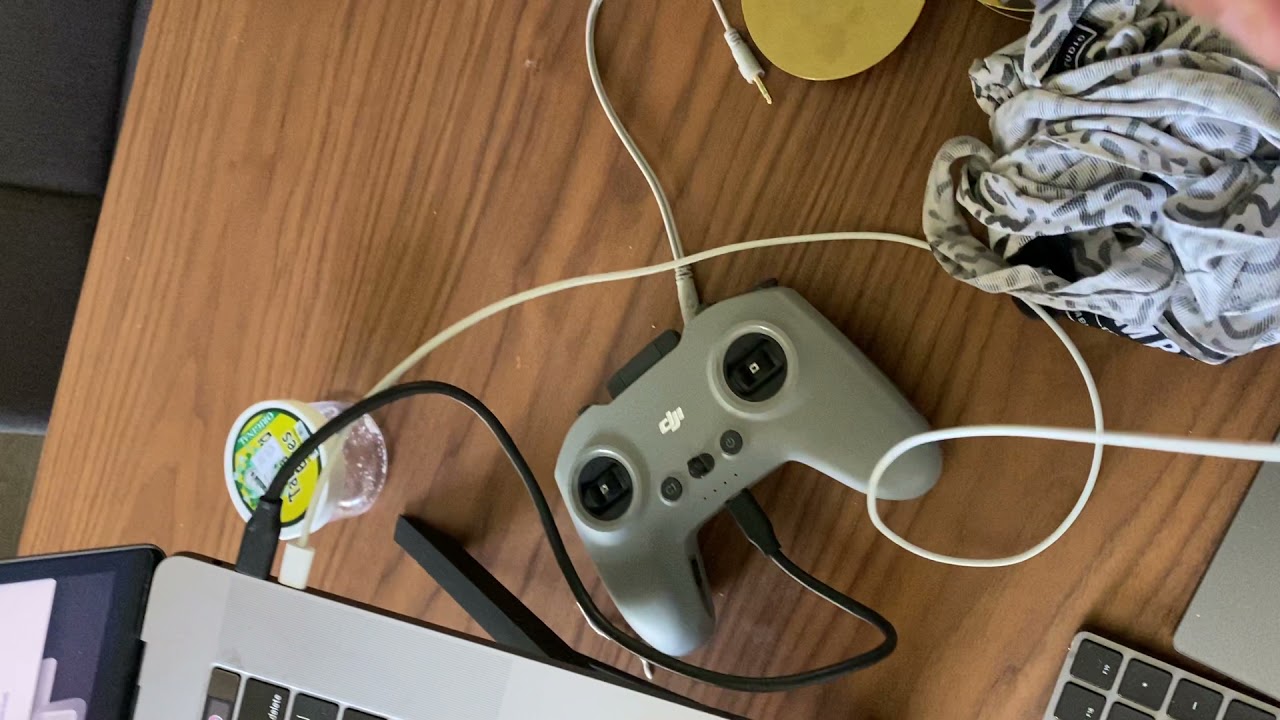
- Locate the USB-C port on your Motion Controller. It is located on the bottom of the device.
- Connect one end of the USB-C cable to the USB-C port of your Motion Controller.
- Connect the other end of the USB-C cable to a power source, such as a USB wall adapter or a computer.
- The Motion Controller will start charging once it’s connected to the power source. You may notice a small charging indicator on the screen, indicating that it’s receiving power.
- Leave the Motion Controller connected to the power source until it reaches a sufficient charge level.
It’s important to note that when using the USB-C cable, make sure to use a reliable and high-quality cable. Using a subpar cable might result in slower charging or even damage to the Motion Controller.
Charging via Charging Hub:
If you have a charging hub specifically designed for DJI devices, you can use it to charge your Motion Controller along with other accessories. Here’s how:
- Connect the charging hub to a power source using the provided power cable.
- Plug the Motion Controller into one of the available USB ports on the charging hub.
- The Motion Controller will start charging as soon as it’s connected to the charging hub.
- Monitor the charging progress through the LED indicators on the charging hub.
- Allow the Motion Controller to charge until it reaches a suitable battery level.
Charging hubs are especially useful when you have multiple DJI devices that need to be charged simultaneously. They provide a convenient and organized way to charge all your equipment in one place.
Now that you know how to connect your Motion Controller to a power source, it’s time to learn about the charging time and how to check the charging status. Keep reading to find out more.
Charging via USB-C Cable
Charging the DJI Motion Controller using a USB-C cable is a convenient and straightforward method. Here are the steps to charge your Motion Controller using this method:
- Locate the USB-C port on your Motion Controller. It is located on the bottom of the device.
- Take the USB-C cable and connect one end to the USB-C port of your Motion Controller.
- Connect the other end of the USB-C cable to a power source, such as a USB wall adapter or a computer’s USB port.
- Once the Motion Controller is connected to the power source, it will start charging. You may notice a small charging indicator on the screen, indicating that it’s receiving power.
- Keep the Motion Controller connected to the power source until it reaches a sufficient level of charge.
It’s important to use a reliable and high-quality USB-C cable when charging your Motion Controller. A subpar cable may result in slower charging or even damage to the device. DJI recommends using the original USB-C cable that came with the Motion Controller or a compatible one from a reputable manufacturer.
The charging time of the Motion Controller via USB-C cable may vary depending on several factors, such as the remaining battery level and the power output of the connected power source. However, in general, it takes approximately 2 to 3 hours for the Motion Controller to fully charge using this method.
To ensure that your Motion Controller charges efficiently, make sure to connect it to a stable power source. Avoid using low-power USB ports or chargers that are not capable of providing enough current to charge the device properly.
Once the Motion Controller is fully charged, you can disconnect it from the power source and start using it for your drone flights. However, it’s always a good idea to check the charging status before disconnecting to ensure that the battery is fully charged.
Now that you know how to charge the DJI Motion Controller using a USB-C cable, let’s move on to the next section, where we will explore the charging process using a charging hub.
Charging via Charging Hub
If you have a charging hub specifically designed for DJI devices, you can use it to charge your DJI Motion Controller along with other accessories. Here’s how you can charge your Motion Controller using a charging hub:
- Connect the charging hub to a power source using the provided power cable. Make sure the power source is compatible with the charging hub’s requirements.
- Plug the USB-C end of the charging cable into the corresponding port of the charging hub.
- Take the other end of the cable, which is also a USB-C connector, and plug it into the USB-C port on your Motion Controller.
- Once the Motion Controller is connected to the charging hub, it will start charging automatically.
- You can monitor the charging progress through the LED indicators on the charging hub. Different colors or patterns may indicate different charging statuses.
- Leave the Motion Controller connected to the charging hub until it reaches a suitable battery level.
Charging hubs are particularly useful when you have multiple DJI devices that need to be charged simultaneously. They provide a convenient and organized way to charge all your equipment in one place.
It’s important to note that when using a charging hub, make sure to follow the manufacturer’s instructions and use the provided power cable. Using an incompatible cable or power source may result in slower charging or even damage to the Motion Controller.
Charging times may vary depending on the remaining battery level and the power output of the charging hub. However, in general, it takes approximately 2 to 3 hours for the Motion Controller to be fully charged when using a charging hub.
Once the Motion Controller has reached a sufficient charge level, you can disconnect it from the charging hub and start using it for your drone flights. Before disconnecting, make sure to check the charging status to ensure that the battery is fully charged.
Now that you know how to charge your DJI Motion Controller using a charging hub, let’s move on to the next section, where we will discuss how to check the charging status of the Motion Controller.
Charging Time
The charging time of the DJI Motion Controller may vary depending on several factors, including the remaining battery level and the charging method used. It’s important to understand the approximate charging time to plan your activities accordingly. Here’s a general idea of how long it takes to charge the Motion Controller:
When charging the Motion Controller via USB-C cable, it typically takes around 2 to 3 hours for the battery to fully charge. However, this may vary depending on the power output of the connected power source and the current battery level. It’s recommended to use a high-quality USB-C cable and a stable power source to ensure efficient charging.
If you’re using a charging hub specifically designed for DJI devices, the charging time can also be around 2 to 3 hours, depending on the remaining battery level and the power output of the charging hub. Charging hubs are a great option when you have multiple DJI devices that need to be charged simultaneously.
Keep in mind that these are approximate charging times and can vary based on different factors. It’s always a good idea to monitor the charging progress and check the battery level periodically to ensure that the Motion Controller is fully charged before your next flight.
During the charging process, you may notice a small charging indicator on the Motion Controller. This indicator provides visual feedback that the device is receiving power. It’s important to pay attention to the charging indicator to ensure that the Motion Controller is charging properly.
Remember that charging times may also be affected by external factors, such as ambient temperature. It’s advisable to charge the Motion Controller in a cool and well-ventilated area, avoiding extreme temperatures, as this can affect the charging efficiency and battery life.
Now that you have an idea of the charging time for the DJI Motion Controller, let’s move on to the next section, where we will explore how to check the charging status to ensure that the battery is fully charged.
Checking the Charging Status
Checking the charging status of your DJI Motion Controller is crucial to ensure that the battery is fully charged before your next flight. There are a few methods you can use to check the charging status. Let’s explore them:
Charging Indicator
When the Motion Controller is connected to a power source and charging, you may notice a small charging indicator on the device’s screen. This indicator provides visual feedback that the Motion Controller is receiving power. It is usually in the form of an animated icon or a static symbol to indicate the charging status.
Keep an eye on this charging indicator while the Motion Controller is being charged. It will show the progress of the charging process, such as whether it is at an initial charging stage or nearing completion. This allows you to have a visual estimation of when the Motion Controller will be fully charged.
DJI Fly App
If your Motion Controller is connected to your drone and you’re using the DJI Fly app, you can also check the charging status through the app. Simply open the app and navigate to the Motion Controller settings or battery information section. Here, you should be able to see the current battery level and whether the Motion Controller is being charged or not.
The DJI Fly app provides a convenient and quick way to monitor the charging progress, especially when your Motion Controller is connected to your drone. It allows you to keep track of the battery level and plan your flights accordingly.
Cable Connection
Another way to check the charging status is to observe the connection between the USB-C cable and the Motion Controller. If the cable is securely connected and the charging process is ongoing, there may be a small LED indicator on the charging cable itself. This LED light can provide information about the charging status, such as blinking or staying lit to indicate different charging stages.
Ensure that the USB-C cable is securely connected to the Motion Controller throughout the charging process and keep an eye on any LED indicators that may be present. This can give you additional feedback on the charging status.
By utilizing these methods, you can easily check the charging status of your DJI Motion Controller. Remember to periodically check the progress to ensure that the battery is fully charged before your next drone flight.
Now that we have covered how to check the charging status, let’s move on to the next section for information on safely disconnecting the Motion Controller from the power source.
Disconnecting the Motion Controller from the Power Source
Once your DJI Motion Controller has reached a sufficient level of charge, it’s important to disconnect it from the power source correctly. Here are the steps to safely disconnect the Motion Controller:
- Ensure that the Motion Controller has finished charging and is at a suitable battery level. You can verify this by checking the charging indicator on the device’s screen or through the DJI Fly app.
- Unplug the USB-C cable from the power source, whether it’s a USB wall adapter or a computer’s USB port.
- Gently remove the USB-C cable from the USB-C port on the Motion Controller. Be careful not to apply excessive force or bend the cable.
It’s essential to handle the Motion Controller and its cable with care during the disconnection process. Mishandling the cable can lead to damage, decreased lifespan, or even accidents that may harm the device or yourself.
Once the Motion Controller is disconnected from the power source, it’s ready to be used for your drone flights. Ensure that the battery level is sufficient for your intended usage and double-check any other settings or configurations that you may need before taking off.
Keeping your Motion Controller properly charged and disconnected from the power source when not in use not only ensures its longevity but also allows you to be prepared for your drone adventures at any time.
Now that you know how to safely disconnect the Motion Controller from the power source, you can confidently charge and use your device without any worries. In the next section, we will summarize the key points covered in this guide for your reference.
Conclusion
Charging your DJI Motion Controller is a crucial aspect of ensuring uninterrupted and enjoyable drone flights. By following the steps outlined in this guide, you can easily charge your Motion Controller using either a USB-C cable or a charging hub. Remember to check the battery level before charging and use high-quality cables and power sources for efficient and safe charging.
Throughout the charging process, it’s important to monitor the charging status, whether through the charging indicator on the Motion Controller, the DJI Fly app, or any LED indicators on the cables or charging hub. This allows you to keep track of the progress and estimate when the Motion Controller will be fully charged.
Once the Motion Controller has reached a sufficient charge level, ensure that you disconnect it from the power source carefully. Handling the cable and the Motion Controller with care prevents any damage and ensures the longevity of your device.
With a fully charged Motion Controller, you can enjoy precise control over your drone movements, capturing breathtaking aerial footage and exploring the world from above. Remember to always check the battery level before your drone flights and plan accordingly to avoid any unexpected battery drain while in the air.
Now that you have a comprehensive understanding of how to charge your DJI Motion Controller, you’re ready to embark on your next drone adventure with confidence and peace of mind.