Introduction
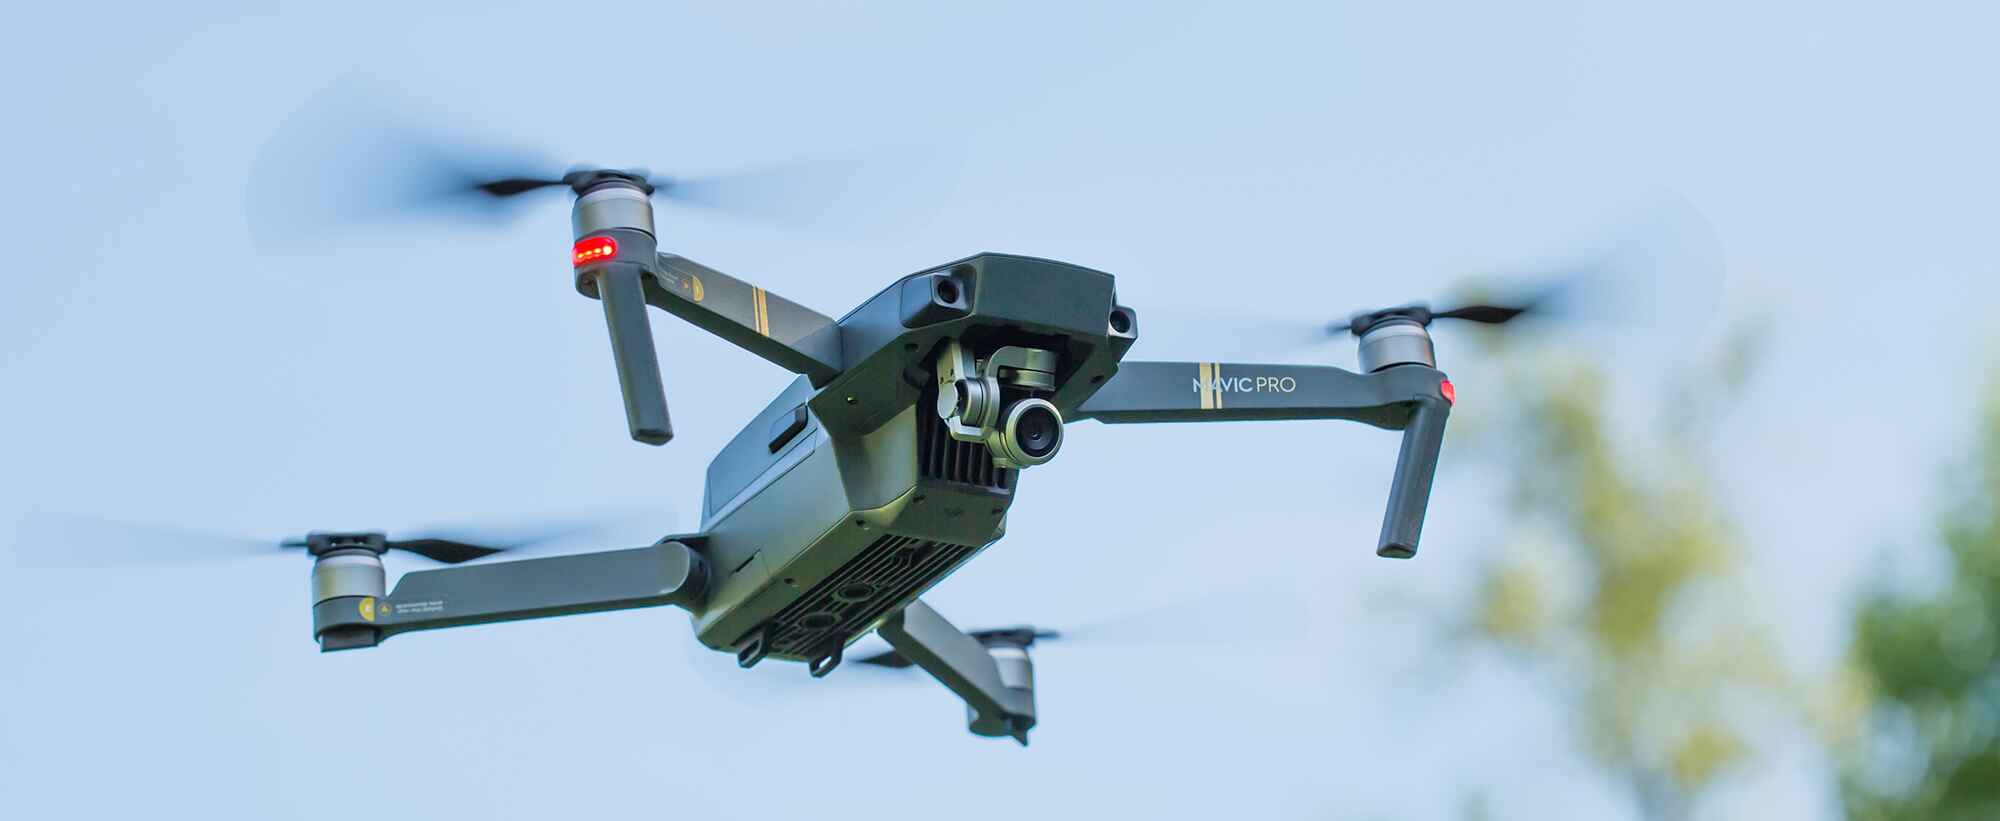
Welcome to the world of aerial photography and videography with the DJI Mavic Pro! Whether you are an enthusiast or a professional, this compact and powerful drone is a game-changer. With its advanced features and user-friendly interface, the Mavic Pro offers a truly immersive and high-quality flying experience.
Designed by DJI, a leading manufacturer in the drone industry, the Mavic Pro is known for its portability, stability, and exceptional image quality. It combines cutting-edge technology with ease of use, making it accessible to beginners and experts alike.
In this comprehensive guide, we will take you through everything you need to know to fly the DJI Mavic Pro. From the initial setup to mastering flight controls, we will cover all the essential information to help you get off the ground and capture stunning aerial footage.
So, whether you are planning to use the Mavic Pro for professional photography, cinematography, or simply capturing breathtaking moments from a unique perspective, this guide will provide you with the knowledge and skills to make the most of your aerial adventures.
Before we dive into the technical details, it’s important to note that safety should always be a top priority when flying drones. Make sure to familiarize yourself with local laws and regulations regarding drone usage and flying restrictions. Additionally, always fly responsibly and considerate of your surroundings to ensure a safe and enjoyable experience for yourself and others.
Now, let’s get started on this exciting journey to learn how to fly the DJI Mavic Pro!
Getting Started
Before taking to the skies with your DJI Mavic Pro, there are a few important steps you need to take to ensure a successful and safe flight. Let’s explore the essential tasks you need to complete when getting started with your drone.
1. Unboxing and Inspection: Start by unboxing your DJI Mavic Pro and carefully inspecting all the components. Ensure that everything is present and in good working condition. It’s essential to double-check that you have the drone itself, the remote controller, propellers, battery, charger, and any other accessories that may come with your specific package.
2. Firmware Update: It’s crucial to ensure that your Mavic Pro is running on the latest firmware. Connect your drone to a computer using its USB cable and follow the instructions from the DJI website or mobile app to update the firmware. Keeping your drone’s software up to date is essential for optimal performance and to access any new features or bug fixes.
3. Battery Charging: Charge the drone battery using the provided charger. Ensure that you use the official DJI charger and follow the recommended charging time to avoid damaging the battery. While waiting for the battery to charge, familiarize yourself with the Mavic Pro’s remote controller, its buttons, and the mobile device holder.
4. Installing the Battery: Once your Mavic Pro battery is fully charged, it’s time to install it into the drone. Locate the battery compartment on the back of the drone and gently push the battery in until it clicks into place. Make sure the battery is securely attached before proceeding.
5. Mobile Device Connection: To fully utilize the capabilities of the DJI Mavic Pro, you’ll need to connect a compatible mobile device to the remote controller. Install the DJI Go app or DJI Fly app (depending on your drone model) on your smartphone or tablet. Connect your mobile device to the remote controller using its USB cable and launch the app.
6. Remote Controller Calibration: Proper calibration ensures accurate flight control. Hold the controller level and rotate it in a circular motion to calibrate the compass. Follow the instructions provided by the DJI app to complete the calibration process successfully.
7. Read the User Manual: While it may seem tempting to skip the user manual, it’s highly recommended to read it carefully. The manual provides important safety information, operating instructions, and guidelines for troubleshooting common issues. Familiarize yourself with the Mavic Pro’s features, flight modes, and controls outlined in the manual to ensure a smooth flying experience.
By completing these essential tasks, you’ll be well-prepared to take flight with your DJI Mavic Pro. The next section will focus on important pre-flight checks that you should perform before each flight to ensure a safe and successful journey.
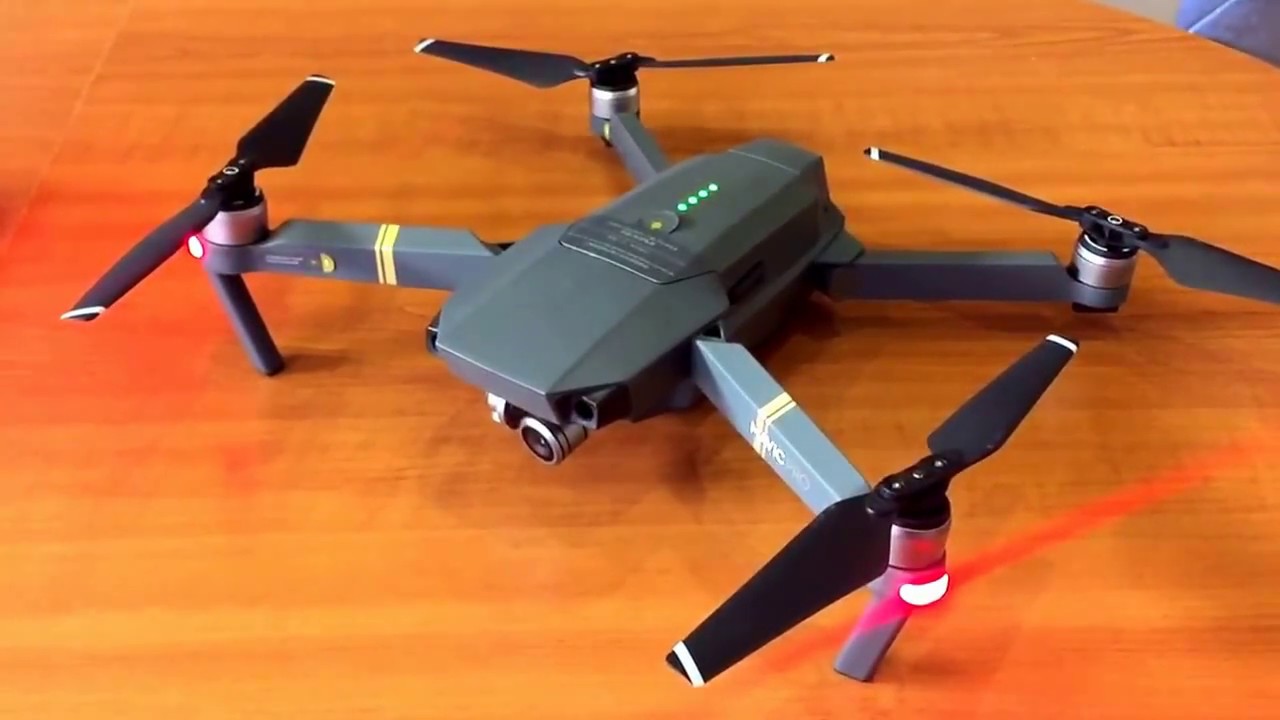
Charging and Installing the Battery
One of the most critical aspects of preparing your DJI Mavic Pro for flight is charging and installing the battery. The battery is the power source that keeps your drone airborne, and it’s essential to handle it properly. Here’s a step-by-step guide on charging and installing the battery for your Mavic Pro.
1. Use the Official Charger: To ensure optimal charging performance and safety, always use the official DJI charger that comes with your Mavic Pro. Third-party chargers may not deliver the correct voltage or amperage, which can damage the battery or even start a fire.
2. Connect the Charger: Plug the charger into a power outlet. Connect the other end of the charger to the battery charging port located on the side of the battery itself. The charging port looks like a small round socket.
3. Observe Charging Progress: Once connected, the battery indicator lights on the front of the battery will illuminate, indicating the battery’s current charge level. Typically, a solid green light means the battery is fully charged, while a blinking green light indicates that charging is in progress. It’s important to allow the battery to charge completely before using it for optimal performance.
4. Charging Time: The charging time for the Mavic Pro battery may vary depending on the battery’s current charge level and the power source’s output. It typically takes around 60-90 minutes to fully charge the battery. During the charging process, ensure the battery is placed in a cool and well-ventilated area to prevent overheating.
5. Installing the Battery: Before installing the battery, turn off both the Mavic Pro and the remote controller. Locate the battery compartment on the back of the drone, which is a rectangular area with a release button or lever. Hold the battery with the DJI logo facing up and gently slide it into the compartment until it clicks into place. Ensure the battery is securely attached before proceeding.
6. Powering On and Off: To power on the Mavic Pro, press and hold the battery power button for a few seconds. Release the button once the battery indicator lights up. To power off the drone, press and hold the battery power button again until the lights turn off, indicating that the drone is shutting down.
By following these steps, you will be able to safely charge and install the battery for your DJI Mavic Pro. Keep in mind that it’s essential to use genuine DJI batteries and chargers to maintain the drone’s performance and prevent any safety risks.
Pre-flight Checklist
Before taking off with your DJI Mavic Pro, it’s crucial to perform a pre-flight checklist to ensure that your drone is in optimal condition and that you’re prepared for a safe and successful flight. This checklist will help you avoid any potential issues during your flight and maximize your overall flying experience. Here are the key steps to include in your pre-flight checklist:
1. Location Check: Choose a suitable location for your flight that complies with local laws and regulations. Ensure that you have enough space to fly without any obstacles or restricted airspace. Check for any potential hazards such as power lines, trees, or buildings that could interfere with your flight path.
2. Weather Conditions: Check the weather forecast for your chosen flying location. Avoid flying in adverse weather conditions such as strong winds, rain, or thunderstorms. Always prioritize safety and fly in favorable weather conditions to maintain control of your Mavic Pro.
3. Drone Inspection: Inspect your Mavic Pro for any visible damage or loose parts. Check the propellers for any signs of wear or damage and confirm that they are securely attached. Ensure that the camera lens is clean and free from dirt or smudges. If you notice any issues, address them before flying to ensure optimal performance.
4. Battery Level: Check the battery level of both the drone and the remote controller. Ensure that they are sufficiently charged to complete your intended flight duration. It’s recommended to have spare fully charged batteries on hand for longer flights to avoid interruptions due to low battery levels.
5. GPS Signal: Ensure that the Mavic Pro has a strong GPS signal before takeoff. A stable GPS connection is essential for accurate positioning, stable flight, and access to certain flight modes. Wait for the drone to acquire a sufficient number of GPS satellites before launching.
6. Camera Settings: If you plan to capture photos or videos during your flight, check and adjust the camera settings accordingly. Set the desired resolution, frame rate, exposure, and other relevant settings based on your specific requirements. Double-check that the memory card is inserted properly and has sufficient storage capacity.
7. Flight Mode Selection: Depending on your skill level and the purpose of your flight, choose the appropriate flight mode. The DJI Mavic Pro offers various flight modes, including GPS mode for stable flight, ActiveTrack for tracking subjects, and Sport mode for high-speed maneuverability. Select the mode that best suits your needs and the conditions of your flight.
8. Calibrate Compass: Calibrate the compass of your Mavic Pro before takeoff, especially if you have changed your flying location significantly. Follow the in-app instructions or refer to the user manual to ensure accurate flight control and navigation.
9. Emergency Procedures: Familiarize yourself with emergency procedures in case of unexpected situations, such as loss of connection, low battery, or system malfunctions. Know how to initiate Return-to-Home (RTH) mode, manually land the drone, or take evasive actions if necessary. Being prepared for emergencies will help you handle any unforeseen circumstances smoothly.
By following this pre-flight checklist, you’ll be well-prepared and confident in your Mavic Pro’s condition and your ability to control it. Remember, safety should always be a priority, and thorough preparation will lead to a more enjoyable and successful flight experience.
Familiarizing Yourself with the DJI Mavic Pro
Before you take flight with your DJI Mavic Pro, it’s essential to familiarize yourself with the different components, buttons, and features of the drone. Getting to know your Mavic Pro will help you operate it confidently and make the most of its capabilities. Let’s explore some key aspects to focus on as you familiarize yourself with the DJI Mavic Pro.
1. Drone Structure: Take a close look at the physical structure of the Mavic Pro. Observe the placement of the propellers, the camera gimbal, and the landing gear. Understand how these components function and interact with each other.
2. Camera and Gimbal: The Mavic Pro is equipped with a high-quality camera and a three-axis gimbal for stabilized aerial shots. Familiarize yourself with the camera’s specifications, the adjustable gimbal angle, and the camera controls available through the mobile app or the remote controller.
3. Intelligent Flight Battery: The Mavic Pro uses an Intelligent Flight Battery that provides power to the drone during flight. Learn how to install and remove the battery, check the battery level, and understand the battery status indicators on both the drone and the remote controller.
4. Sensors and Obstacle Avoidance: The Mavic Pro is equipped with forward-facing and downward-facing sensors to detect obstacles and help avoid collisions. Learn how these sensors work and how they contribute to the safety and stability of the drone during flight.
5. Remote Controller: The Mavic Pro’s remote controller plays a crucial role in controlling the drone and accessing its features. Spend time familiarizing yourself with the various buttons, joysticks, and switches on the controller. Understand their functions and how to use them to navigate and control the drone effectively.
6. Mobile App Interface: The DJI Go or DJI Fly mobile app is the main interface for controlling and monitoring the Mavic Pro. Explore the app’s features, menus, and settings. Practice navigating through the app and accessing different flight modes, camera controls, and telemetry data.
7. Flight Modes and Intelligent Features: The Mavic Pro offers several flight modes and intelligent features to enhance your flying experience. Familiarize yourself with these modes, such as ActiveTrack for subject tracking, Gesture Control for hands-free operation, and Waypoint Mode for pre-programmed flight routes. Understand how to access and utilize these features effectively.
8. Remote Controller Calibration: Ensure that you understand the process of calibrating the remote controller and compass. Accurate calibration is crucial for accurate flight control and stable navigation. Practice calibrating the remote controller before each flight to ensure optimal performance.
9. User Manual and Online Resources: Refer to the user manual provided by DJI for detailed instructions on the Mavic Pro’s features, controls, and safety guidelines. Additionally, make use of online resources, forums, and tutorial videos to learn from experienced users and get insights into advanced techniques and settings.
By familiarizing yourself with these crucial aspects of the DJI Mavic Pro, you’ll gain confidence in operating and controlling the drone. This knowledge will enable you to make informed decisions during flight and make the most of the Mavic Pro’s capabilities to capture stunning aerial photography and videography.
Basic Flight Controls
Mastering the basic flight controls of the DJI Mavic Pro is essential for smooth and precise maneuvering. Understanding how to operate the drone efficiently will allow you to take full advantage of its capabilities. Let’s explore the basic flight controls that will help you navigate and control your Mavic Pro.
1. Takeoff and Landing: To take off, ensure that the Mavic Pro is in an open area free from obstacles. Hold the remote controller with both hands and simultaneously push the throttle stick (left stick) upwards. The drone will ascend into the air. To land, gradually throttle down until the drone touches the ground.
2. Ascend and Descend: The left stick on the remote controller controls the ascent and descent of the Mavic Pro. Push the throttle stick upwards to make the drone ascend and pull it downwards to make it descend. Maintain control over the altitude to avoid collisions and maintain a steady flight.
3. Pitch and Roll: The right stick on the remote controller controls the pitch and roll movements of the Mavic Pro. Pushing the stick forward or backward will pitch the drone forward or backward, respectively. Moving the stick left or right will roll the drone in the corresponding direction. Practice these movements to achieve smooth and controlled flight.
4. Yaw: Yaw refers to the rotation of the drone around its vertical axis. It allows you to change the direction the drone is facing without changing its position. To control the yaw, use the left stick on the remote controller. Push it to the left or right to rotate the Mavic Pro in the corresponding direction.
5. Hovering: Achieving a stable hover is important for capturing clear and steady footage. To hover in place, release the control sticks and allow the drone’s GPS and stability systems to maintain its position. This is particularly useful when framing a shot or observing a specific subject.
6. Speed Control: The Mavic Pro offers different flight modes that allow you to control the drone’s speed. Switch to Sport mode for faster flight and maneuvering, or switch to Tripod mode for precise and slow movements. Adjust the speed settings according to your needs and the environment you’re flying in.
7. Intelligent Flight Modes: The Mavic Pro offers various intelligent flight modes that can enhance your flying experience. Experiment with modes like ActiveTrack, where the drone will automatically track a subject, or TapFly, where you can simply tap on the screen to designate a destination for the drone to fly towards.
8. Emergency Procedures: It’s important to familiarize yourself with emergency procedures to handle unexpected situations. Learn how to initiate Return-to-Home (RTH) mode if the drone loses connection or battery is critically low. Additionally, practice emergency landings to ensure a safe landing in case of emergencies.
By mastering these basic flight controls, you’ll have a solid foundation in operating the DJI Mavic Pro. Practice flying in open areas and gradually increase your skill level to become a confident and skilled drone pilot. Always prioritize safety and follow local regulations while operating your drone.
Takeoff and Landing
Mastering the takeoff and landing techniques with your DJI Mavic Pro is essential for a safe and successful flight. These procedures mark the beginning and end of each drone operation and require careful attention to ensure smooth operations. Let’s explore the steps involved in taking off and landing your Mavic Pro.
1. Pre-flight Check: Before taking off, perform a pre-flight check to ensure that your drone and the surrounding area are ready for flight. Check the battery level, inspect the propellers for any damage, and ensure that the GPS signal is strong. Clear the area of any obstacles and ensure that it is suitable for takeoff.
2. Power On: Power on the Mavic Pro by pressing and holding the battery power button. The drone’s indicator lights will start flashing, indicating that it is initializing. The remote controller should be powered on as well, with the joysticks centered.
3. Takeoff Preparation: Before taking off, make sure you have a clear understanding of the flight environment. Check for any nearby obstacles, know your intended flight path, and assess for any potential risks or hazards.
4. Takeoff Procedure: Hold the remote controller with both hands and push the throttle stick (the left stick) forward gently. The Mavic Pro will start ascending into the air. Gradually increase the throttle until the drone reaches your desired altitude. Keep an eye on the drone as it climbs to ensure a stable ascent.
5. Stable Hover: Once the drone is airborne, stabilize it in a hover by centering the control sticks on the remote controller. This allows the Mavic Pro to maintain its position using its GPS and stability systems. Hovering gives you time to adjust and calibrate the drone, as well as plan your flight path.
6. Monitoring and Adjustment: As the Mavic Pro hovers, monitor its position, altitude, and surroundings to ensure there are no unexpected drifts or obstacles. Make adjustments using the control sticks to maintain a stable hover or move the drone to the desired location.
7. Landing Preparation: Determine a suitable landing area and plan your descent. Assess the wind conditions and obstacles around the landing spot. Aim for a safe and clear area, avoiding any potential hazards that could interfere with the landing process.
8. Landing Procedure: Slowly bring down the Mavic Pro by pulling the throttle stick (the left stick) downward. Gradually reduce the altitude until the drone is near the ground. As it approaches the landing area, reduce the throttle further to initiate a smooth touchdown. Ensure that the Mavic Pro lands gently to avoid damaging its components.
9. Powering Off: Once the Mavic Pro has landed and is securely on the ground, power off the drone by pressing and holding the battery power button until the indicator lights turn off.
Mastering the takeoff and landing procedures is essential for safe and controlled flights with your DJI Mavic Pro. By following these steps and practicing regularly, you’ll become more confident and proficient in maneuvering your drone and ensure a smooth transition from the ground to the sky and back again.
Understanding Flight Modes
The DJI Mavic Pro offers a range of flight modes that enhance the functionality and versatility of your drone. These flight modes provide specific features and capabilities to suit different scenarios and creative possibilities. Understanding and utilizing these flight modes will allow you to take your aerial photography and videography to the next level. Let’s explore some of the key flight modes available on the Mavic Pro.
1. GPS Mode: GPS mode is the default flight mode for the Mavic Pro. In this mode, the drone uses GPS and GLONASS satellite systems to maintain stability and accurate positioning. GPS mode provides smooth and stable flight, making it ideal for capturing cinematic shots and conducting surveys or inspections.
2. Sport Mode: Sport mode unleashes the full speed and agility of the Mavic Pro. In this mode, the drone can reach higher speeds and is more responsive to control inputs. Sport mode is perfect for capturing high-speed action shots or flying in open spaces where maneuverability is crucial.
3. Tripod Mode: Tripod mode slows down the drone’s movement and increases stability and precision. It’s ideal for capturing slow, cinematic shots that require smooth movements and precise framing. Tripod mode is especially useful for shooting in tight spaces or areas with limited maneuverability.
4. ActiveTrack: ActiveTrack allows the Mavic Pro to automatically track a subject while it’s in motion. Simply draw a bounding box around the subject on the screen, and the drone will track and follow it smoothly. ActiveTrack is excellent for capturing dynamic shots of people, animals, or vehicles in motion.
5. TapFly: TapFly allows you to easily control the flight path of the Mavic Pro by tapping on the screen. You can select a destination or a specific point of interest, and the drone will fly to that location automatically. TapFly is a convenient feature for capturing aerial footage while focusing on composing your shots.
6. Cinematic Mode: Cinematic mode adjusts various flight parameters to create smooth and cinematic movements. It reduces the drone’s sensitivity to control inputs, resulting in graceful and cinematic shots. Cinematic mode is perfect for capturing aerial footage that emulates the motions of professional cinematography.
7. Gesture Control: Gesture control allows you to command the Mavic Pro’s movements using predefined hand gestures. With this mode, you can take selfies, command the drone to follow you, or make it take off or land by simple hand gestures. Gesture control adds a fun and interactive aspect to your drone flying experience.
8. Waypoint Mode: Waypoint mode enables you to pre-program a flight path for the Mavic Pro using waypoints on the map. You can specify the altitude, speed, and actions at each waypoint. This mode is useful for complex aerial photography or videography missions that require precise and repeatable flight paths.
Understanding and utilizing these flight modes will empower you to take full advantage of the DJI Mavic Pro’s capabilities. Experiment with different modes in various scenarios to discover their potential and elevate your aerial photography and videography skills to new heights.
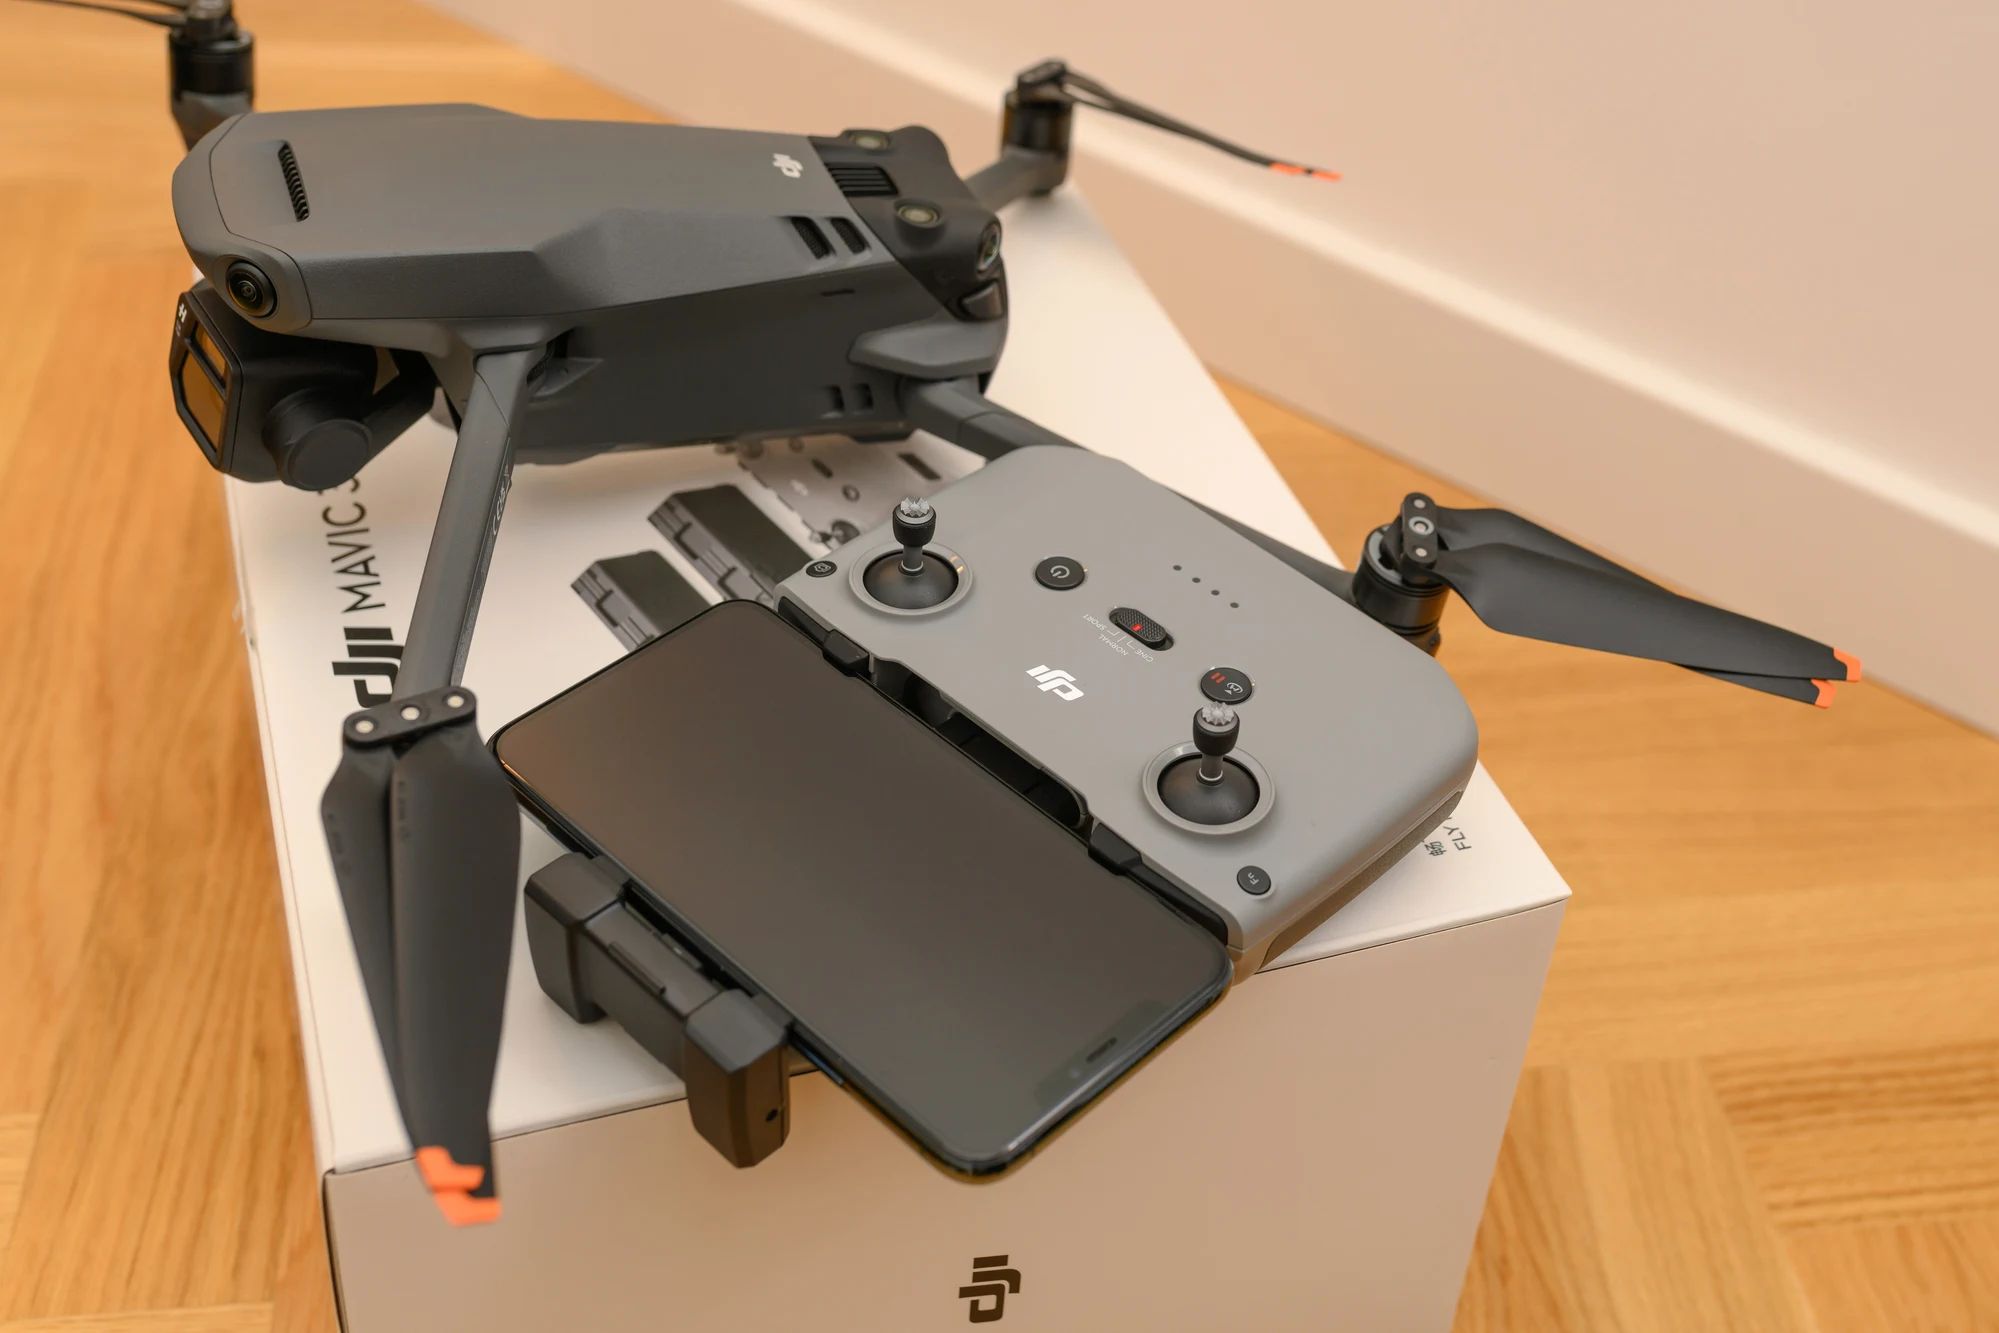
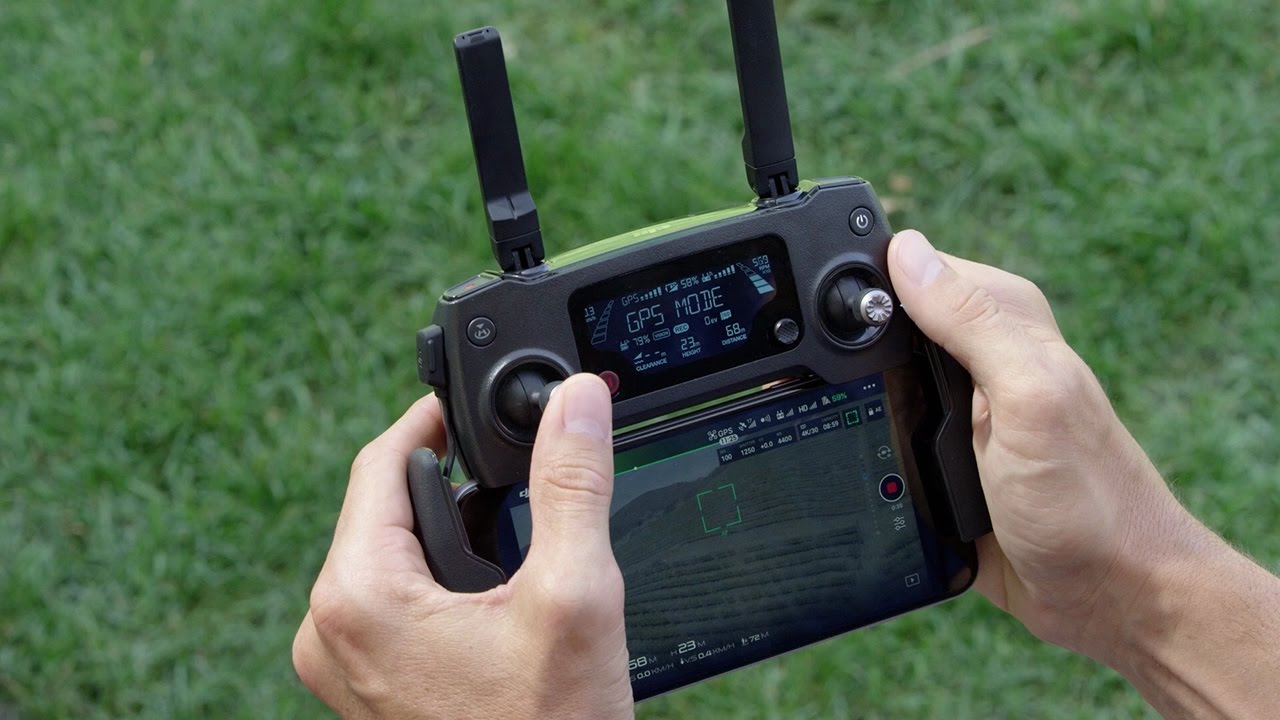
Using the Remote Controller
The remote controller is a crucial tool for controlling and navigating the DJI Mavic Pro. It allows you to fly the drone, adjust settings, and access various features to enhance your flying experience. Familiarizing yourself with the remote controller and understanding its functionalities will empower you to operate your Mavic Pro with ease. Let’s explore the key components and functions of the remote controller.
1. Powering On: To power on the remote controller, press and hold the power button located on the top of the controller. The indicator lights will start blinking, indicating that it is ready to connect to the Mavic Pro.
2. Remote Controller Layout: The remote controller of the Mavic Pro consists of several important components. The control sticks are located at the bottom of the controller and are used for maneuvering the drone in various directions. The buttons and switches on the controller provide access to different functions and flight modes.
3. Mobile Device Holder: The remote controller features an adjustable mobile device holder located at the top. This holder securely holds your smartphone or tablet, which is used to display the live feed from the Mavic Pro’s camera and provides access to the DJI Go or DJI Fly app for flight control and settings adjustments.
4. Control Sticks: The control sticks, also known as the joysticks, are used to control the movement of the Mavic Pro. The left stick, also referred to as the throttle stick, controls the ascent and descent of the drone. The right stick controls the pitch and roll movements. Practice using these sticks to familiarize yourself with precise control inputs.
5. Intelligent Flight Modes: The remote controller allows you to access and activate the intelligent flight modes available on the Mavic Pro. Using the designated buttons or switches, you can switch between GPS mode, Sport mode, Tripod mode, ActiveTrack, and more. Consult the user manual or DJI app to understand how to activate and utilize these flight modes.
6. Camera Controls: The remote controller provides easy access to camera controls. You can adjust the camera gimbal angle using the designated scroll wheel or buttons on the remote controller. This allows you to capture different perspectives and adjust the camera angle to suit your composition needs.
7. Telemetry Data: The remote controller displays important telemetry data, such as battery level, signal strength, altitude, and distance from the home point. This information helps you stay informed about the drone’s status and make informed decisions during flight. Keep an eye on this data to ensure a safe and smooth flying experience.
8. Function Customization: Some remote controllers offer customizable buttons and settings that allow you to personalize your flight experience. Depending on the model of your remote controller, you may have the ability to assign specific functions or shortcuts to certain buttons or customize flight settings according to your preferences.
9. Firmware Updates: Regularly check for firmware updates for both the Mavic Pro drone and the remote controller. Firmware updates often include performance improvements, bug fixes, and new features that enhance the capabilities of your Mavic Pro. Stay up to date to ensure optimal performance and access to the latest features.
By familiarizing yourself with the remote controller, you gain greater control and flexibility in flying your DJI Mavic Pro. Practice using the control sticks and explore the different buttons and switches to understand the functions they offer. With experience, you’ll be able to operate your drone effortlessly and utilize the full range of features available on the Mavic Pro.
Navigating with GPS and GLONASS
One of the remarkable features of the DJI Mavic Pro is its ability to navigate using GPS (Global Positioning System) and GLONASS (Global Navigation Satellite System). These satellite systems work together to provide accurate positioning, precise flight paths, and intelligent flight modes. Understanding how GPS and GLONASS function and utilizing them effectively will enhance your flying experience with the Mavic Pro. Let’s explore the benefits and considerations of navigating with GPS and GLONASS.
Benefits of GPS and GLONASS:
1. Accurate Positioning: GPS and GLONASS provide precise positioning information, allowing the Mavic Pro to determine its location with a high degree of accuracy. This accuracy is essential for stable and controlled flight, as well as enabling intelligent flight modes and safety features.
2. Stable Flight: By using GPS and GLONASS, the Mavic Pro can maintain a stable hover and resist external forces, such as wind gusts, to hold its position consistently. This stability enables smooth and steady aerial photography and videography, ensuring high-quality shots even under challenging conditions.
3. Intelligent Flight Modes: GPS and GLONASS enable intelligent flight modes such as Return-to-Home (RTH), Waypoint Mode, and ActiveTrack. These modes utilize satellite positioning to perform automated flight tasks and enhance the usability and creative potential of the Mavic Pro.
4. Precise Navigation: With GPS and GLONASS, the Mavic Pro can follow pre-programmed flight paths, accurately reach waypoints, and execute complex aerial maneuvers with ease. These capabilities enable precise navigation, making it ideal for professional applications such as aerial mapping, surveying, and inspections.
Considerations when Navigating:
1. Satellite Signal Acquisition: Before taking off, ensure that the Mavic Pro has acquired an adequate number of satellites for a strong GPS and GLONASS signal. This ensures accurate positioning and reliable navigation. Wait for the GPS and GLONASS indicators to turn green or reach a stable state before initiating flight.
2. Fly in Open Areas: For optimum GPS and GLONASS performance, fly the Mavic Pro in open areas with a clear view of the sky. This minimizes signal interference from buildings, trees, and other obstacles that could obstruct the satellite reception, ensuring a robust and reliable connection.
3. Stay Updated with Firmware: Regularly update the firmware of your Mavic Pro to benefit from improvements and bug fixes related to GPS and GLONASS functionality. Firmware updates often optimize the drone’s navigation system, providing enhanced positioning accuracy and additional features.
4. Use GPS Mode in Safe Conditions: GPS mode is recommended for general flights, especially when safety and stability are paramount. It maintains a stable hover and prevents the drone from drifting due to external factors. Utilize GPS mode when capturing precise footage or flying in challenging environments.
5. Activate Sport Mode for High-Speed Flight: While GPS mode offers stability, switching to Sport mode disables GPS positioning. This mode is ideal for high-speed flying and agile maneuvers. However, be cautious when navigating in Sport mode, as it requires more manual control and may not have obstacle detection capabilities.
Navigating with GPS and GLONASS allows you to unlock the full potential of the DJI Mavic Pro. Take advantage of the accurate positioning, stable flight, and intelligent features provided by these satellite systems. By understanding the benefits and considerations outlined above, you’ll be able to navigate with confidence and capture stunning aerial footage with your Mavic Pro.
Safety Tips for Flying the DJI Mavic Pro
Flying the DJI Mavic Pro can be an exhilarating and rewarding experience, but it’s important to prioritize safety to ensure smooth and incident-free flights. Whether you’re a beginner or an experienced drone pilot, following these safety tips will help you operate your Mavic Pro responsibly and avoid any potential mishaps. Let’s explore some essential safety guidelines to keep in mind when flying your Mavic Pro.
1. Know and Observe Local Regulations: Familiarize yourself with the local laws and regulations regarding drone operations in your area. Understand any restrictions, permits, or licensing requirements that may be in place. Always adhere to these regulations to ensure you’re flying legally and responsibly.
2. Perform Pre-flight Checks: Before every flight, conduct thorough pre-flight checks. Inspect the Mavic Pro for any damage or loose parts, check the battery level, ensure that the propellers are securely attached and in good condition, and verify that the GPS and signal connections are strong.
3. Fly in Suitable Weather Conditions: Only fly the Mavic Pro in suitable weather conditions. Avoid flying in rain, snow, or strong winds that can affect the drone’s stability and control. Adverse weather conditions can also pose a risk to the drone and compromise its performance.
4. Maintain Line of Sight: Always keep the Mavic Pro within your line of sight during flight. This allows you to have better control over the drone and helps you avoid collisions with other objects or aircraft. Having a clear line of sight also ensures that you are aware of any potential hazards in the vicinity.
5. Avoid No-fly Zones and Restricted Areas: Respect any designated no-fly zones, restricted airspace, or areas with specific flight restrictions. These areas may include airports, military installations, or sensitive locations. Adhering to these restrictions ensures the safety of manned aircraft and protects privacy or sensitive information.
6. Be Mindful of Privacy: Respect the privacy of others when flying your Mavic Pro. Avoid flying over private property without permission and always consider the privacy implications of capturing images or video in certain locations. Use your drone in a responsible and considerate manner to avoid infringing on the privacy of individuals.
7. Maintain a Safe Distance: Keep a safe distance from people, animals, and property when flying the Mavic Pro. This minimizes the risk of accidents and ensures the safety and comfort of those around you. Be mindful of your surroundings and fly with caution to prevent any unintended collisions or disturbances.
8. Practice Emergency Procedures: Familiarize yourself with emergency procedures and practice them regularly. Understand how to initiate Return-to-Home (RTH) mode, manually land the drone in case of technical issues, handle loss of signal, and take evasive actions if necessary. Being prepared for emergencies can help mitigate potential risks and prevent accidents.
9. Continuous Learning: Stay updated with the latest information, guidelines, and best practices for drone flying. Education and continuous learning are key to ensuring safe and responsible drone operations. Take advantage of online resources, attend workshops or training sessions, and connect with the drone community to expand your knowledge and skills.
By following these safety tips, you can have a rewarding and enjoyable flight experience with your DJI Mavic Pro. Prioritize safety, be responsible, and always fly with caution and respect for others. Remember, safe flying practices contribute to the positive reputation of drone enthusiasts and the longevity of the hobby.
Troubleshooting and Common Issues
While the DJI Mavic Pro is a reliable and high-performance drone, you may occasionally encounter issues or challenges during your flying adventures. Understanding common problems and having troubleshooting strategies will help you overcome these obstacles and get back in the air. Let’s explore some common issues that Mavic Pro users may encounter and potential solutions to resolve them.
1. Loss of Signal: If you experience a sudden loss of signal between the remote controller and the Mavic Pro, the drone may initiate Return-to-Home (RTH) mode. Ensure that you’re not flying in an area with heavy interference and maintain a clear line of sight between the remote controller and the drone to avoid signal interruptions.
2. Battery Issues: If you observe abnormal behavior with the battery, such as rapid discharge or inconsistent power levels, recalibrate the battery by fully charging it, then completely discharging it until it powers off. Recharge the battery to full capacity and monitor its performance. If the issue persists, consider contacting DJI support for further assistance.
3. GPS Signal Problems: If the Mavic Pro has difficulty acquiring or maintaining a GPS signal, ensure that you’re flying in an open area with a clear view of the sky. Avoid operating near tall buildings, dense trees, or other structures that may obstruct the satellite reception. Try recalibrating the drone’s compass and ensure that the firmware is up to date.
4. Propeller Issues: If the propellers become loose during flight or if you notice vibrations or abnormal sounds, stop flying immediately. Inspect the propellers for any damage or signs of wear and ensure they are securely attached. Replace any damaged propellers before resuming flight.
5. Gimbal Calibration: If you notice issues with gimbal stabilization or abnormal camera movements, perform a gimbal calibration. This can be done through the DJI Go or DJI Fly app. Follow the instructions provided by the app or consult the user manual for detailed guidance on the calibration process.
6. MicroSD Card Errors: If you encounter issues with the microSD card, such as corrupted files or errors in recording, try reformatting the card using the camera settings in the DJI app. Ensure that you’re using a high-quality microSD card with sufficient storage capacity and a fast write speed for optimal performance.
7. Firmware Updates: Regularly check for firmware updates for both the Mavic Pro and the remote controller. Firmware updates often include improvements, bug fixes, and new features that enhance the drone’s performance and resolve known issues. Follow the instructions provided by DJI to update the firmware safely and correctly.
8. Flight Log Analysis: If you encounter persistent issues with your Mavic Pro, consider analyzing the flight logs using the DJI Assistant software or the DJI Go or DJI Fly app. Analyzing flight logs can provide insights into any errors or abnormalities that occurred during flight and assist in identifying potential causes for further troubleshooting.
If you continue to experience issues with your DJI Mavic Pro, it’s advisable to reach out to DJI support for professional assistance. They can provide guidance specific to your situation and help identify any hardware or software issues that may require repair or replacement.
By being aware of common problems and having troubleshooting knowledge, you’ll be better equipped to address any issues that arise while flying your DJI Mavic Pro. Remember to troubleshoot within your skill level and always prioritize safety when attempting any fixes or adjustments.
Conclusion
Congratulations! You have now learned the essential information and skills needed to fly the DJI Mavic Pro. From the initial setup and familiarization with the drone to understanding flight controls and utilizing intelligent features, you are ready to embark on exciting aerial adventures.
Remember, safety should always be your top priority when operating the Mavic Pro. Familiarize yourself with local laws and regulations concerning drone flight and always fly responsibly and with consideration for others. Regularly perform pre-flight checks, ensure proper battery charging and installation, and stay updated with firmware upgrades to maintain optimal performance and reliability.
Take advantage of the various flight modes available on the Mavic Pro to unleash your creativity and capture stunning aerial photography and videography. Explore potential applications of your drone, whether it be for recreational purposes, professional cinematography, or specialized tasks like aerial mapping or surveying.
Continue to expand your knowledge and skills by staying engaged in the drone community, participating in workshops or training sessions, and regularly practicing your flight maneuvers. Constant learning and improvement will help you maximize the potential of your Mavic Pro and enhance your overall flying experience.
Lastly, always fly with respect for the environment and the privacy of others. Be conscious of your surroundings, maintain a safe distance, and avoid flying over private property without permission. By practicing responsible and considerate flying, you contribute to the positive image of drone enthusiasts and promote the long-term sustainability of the hobby.
Now, it’s time to confidently take to the skies with your DJI Mavic Pro and unlock the incredible possibilities that aerial photography and videography can offer. Soar high, capture amazing moments, and enjoy the thrill of flying with one of the most powerful and versatile drones on the market.