Introduction
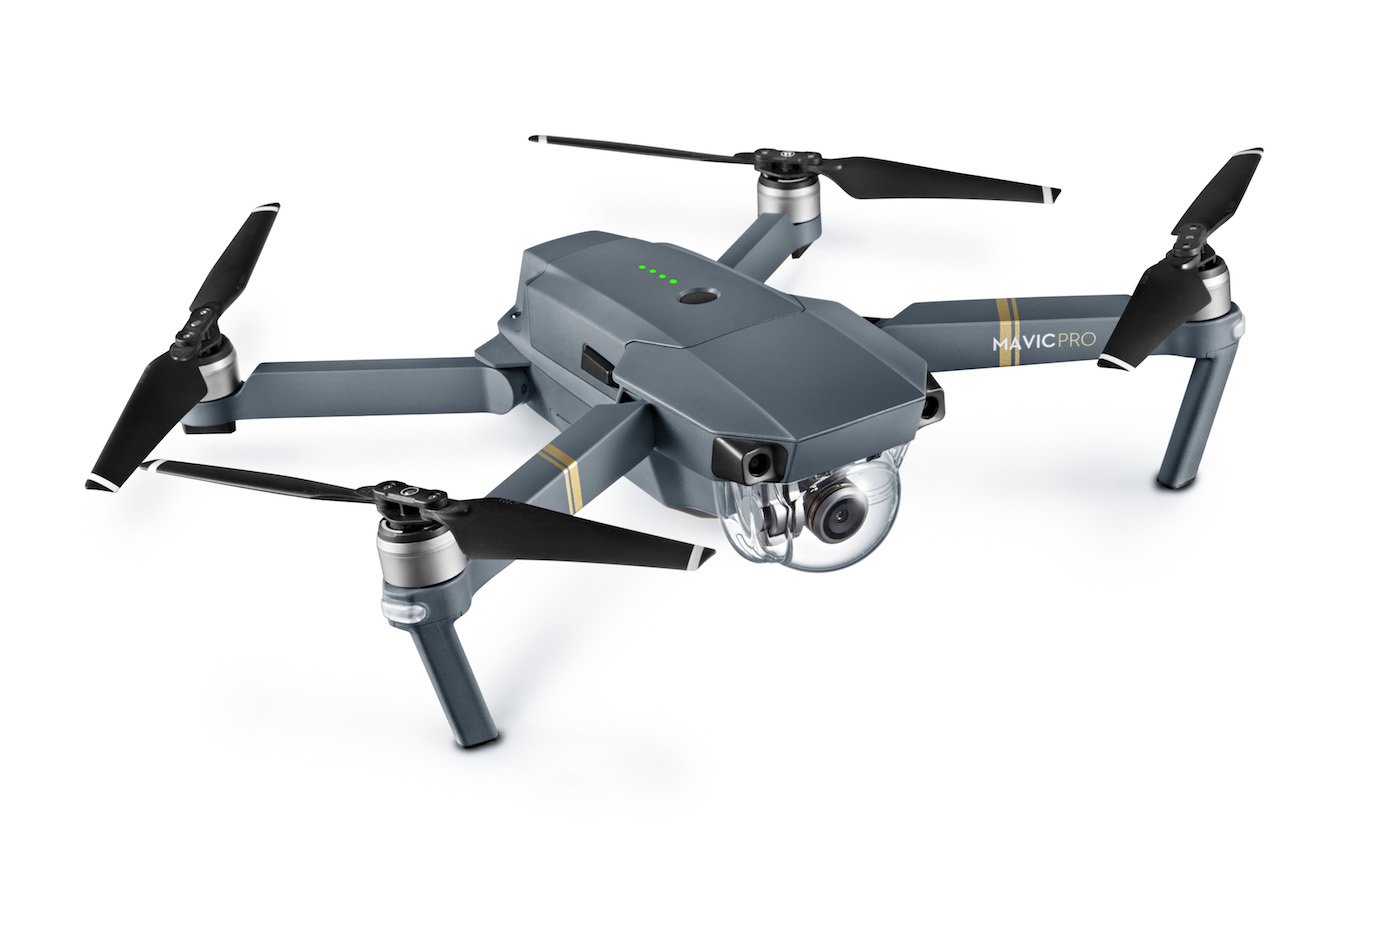
Welcome to the world of aerial photography and videography with the DJI Mavic Pro! The DJI Mavic Pro is a high-quality, compact drone that offers incredible flight performance and advanced features. Whether you’re a beginner or an experienced pilot, learning how to turn on your DJI Mavic Pro is the first step towards capturing stunning aerial shots.
In this article, we will guide you through the process of turning on your DJI Mavic Pro, from unboxing to takeoff. We’ll cover everything you need to know, including inspecting the drone, charging the battery, installing the propellers, mounting your mobile device, pairing the drone with the remote controller, calibrating the compass, and starting the motors.
Before we dive into the step-by-step instructions, let’s take a moment to marvel at the remarkable features of the DJI Mavic Pro. With its compact size and foldable design, this drone is easy to transport and can fit into a small backpack. The Mavic Pro is equipped with a 4K camera that can capture breathtaking aerial shots and record videos with outstanding clarity. Its intelligent flight modes, such as ActiveTrack and Gesture Control, allow for effortless flying and precise maneuvering.
Whether you’re planning to use the DJI Mavic Pro for recreational purposes or professional projects, understanding how to turn it on and get it ready for flight is essential. So, without further ado, let’s jump into the exciting world of the DJI Mavic Pro and learn how to power it up for your next aerial adventure.
Step 1: Unboxing and inspecting your DJI Mavic Pro
The first step in setting up your DJI Mavic Pro is unboxing and inspecting the contents. When you receive your Mavic Pro package, ensure that it is sealed and undamaged. Carefully open the box and take out all the components, including the drone, remote controller, battery, propellers, charger, cables, and any additional accessories that may be included in the package.
Inspect each component for any signs of damage or defects. Check the drone for any physical damages, such as cracks or scratches. Examine the propellers to make sure they are not warped or broken. Look for any loose or missing parts, such as screws or connectors. It’s important to thoroughly inspect everything to ensure that you have received a fully functional and intact DJI Mavic Pro.
Next, remove the gimbal cover and protective plastic film from the camera lens and other sensitive areas of the drone. This will prevent any blurring or obstructions when capturing aerial footage. Take note of the serial number located on the body of the drone. You may need this information for registration or warranty purposes.
Once you have inspected and familiarized yourself with the components, it’s time to ensure that you have all the necessary items for setting up your Mavic Pro. Check for the presence of the remote controller, mobile device holder, and the necessary cables for connecting your mobile device to the controller.
By meticulously unboxing and inspecting your DJI Mavic Pro, you’ll ensure that you begin your drone journey with all the necessary components in good condition. This step sets the foundation for a smooth and successful setup process, allowing you to fully enjoy all the features and capabilities of your DJI Mavic Pro.
Step 2: Charging the battery
To power up your DJI Mavic Pro, you’ll need to charge the battery. The battery is a critical component that provides the necessary power for the drone to fly and operate. Follow these steps to ensure proper charging of your DJI Mavic Pro battery:
1. Take out the battery from the packaging and inspect it for any physical damage. Ensure that the battery contacts are clean and free from any debris or dirt.
2. Locate the battery port on the drone and slide the battery into the designated slot. Make sure it is firmly seated and properly aligned.
3. Connect the charger to a power source and plug the other end into the charging port on the battery. The charging port is located on the side of the battery.
4. When you plug in the charger, the battery indicator lights will start flashing. Each light represents the approximate battery level. Wait for the lights to stop flashing and remain steadily lit, indicating that the battery is fully charged.
5. Charging time may vary depending on the battery level and the charger used. Generally, it takes around 60-90 minutes to fully charge the DJI Mavic Pro battery.
6. While the battery is charging, it’s a good time to prepare your mobile device. Ensure that it is fully charged and download the DJI GO app from the App Store or Google Play Store if you haven’t already done so.
7. Once the battery is fully charged, disconnect the charger from the battery and the power source. Gently remove the battery from the drone if it is still inserted.
Charging the battery is an essential step in setting up your DJI Mavic Pro. Always use the provided DJI charger and avoid using third-party chargers to prevent any potential damage to the battery. With a fully charged battery, you’ll be ready to power on your Mavic Pro and embark on your aerial adventures.
Step 3: Installing the propellers
To prepare your DJI Mavic Pro for flight, you need to properly install the propellers. The propellers are responsible for generating lift and propulsion, allowing the drone to soar through the sky. Follow these steps to ensure correct installation of the propellers:
1. Take out the propellers from the packaging and inspect them for any signs of damage or defects. Ensure that each propeller is in good condition and free from any dirt or debris.
2. Note that the DJI Mavic Pro has two types of propellers – clockwise (marked with a silver tip) and counterclockwise (marked with a black tip). It’s crucial to install each propeller in the correct position to achieve stable flight.
3. Locate the motors on the DJI Mavic Pro. The motor arms are labeled with corresponding letters “A” or “B”. Match the propellers with the correct motor arms. Clockwise propellers should be installed on motor arms marked with “A”, while counterclockwise propellers go on motor arms marked with “B”.
4. Place one propeller on a motor arm, aligning it with the motor shaft. Push the propeller down firmly until it clicks into place. Repeat this step for the remaining propellers, ensuring that each one is securely attached.
5. Verify that all the propellers are correctly installed by giving them a gentle spin. They should rotate smoothly and without any obstructions.
It’s important to remember that proper installation of the propellers ensures safe and stable flight of your DJI Mavic Pro. Always double-check that the propellers are securely attached before every flight. If you ever need to replace a damaged propeller, make sure to use the same type (clockwise or counterclockwise) for each motor arm.
With the propellers installed correctly, your DJI Mavic Pro is one step closer to taking off into the sky. In the following steps, we’ll guide you through the process of mounting your mobile device and powering on the drone.
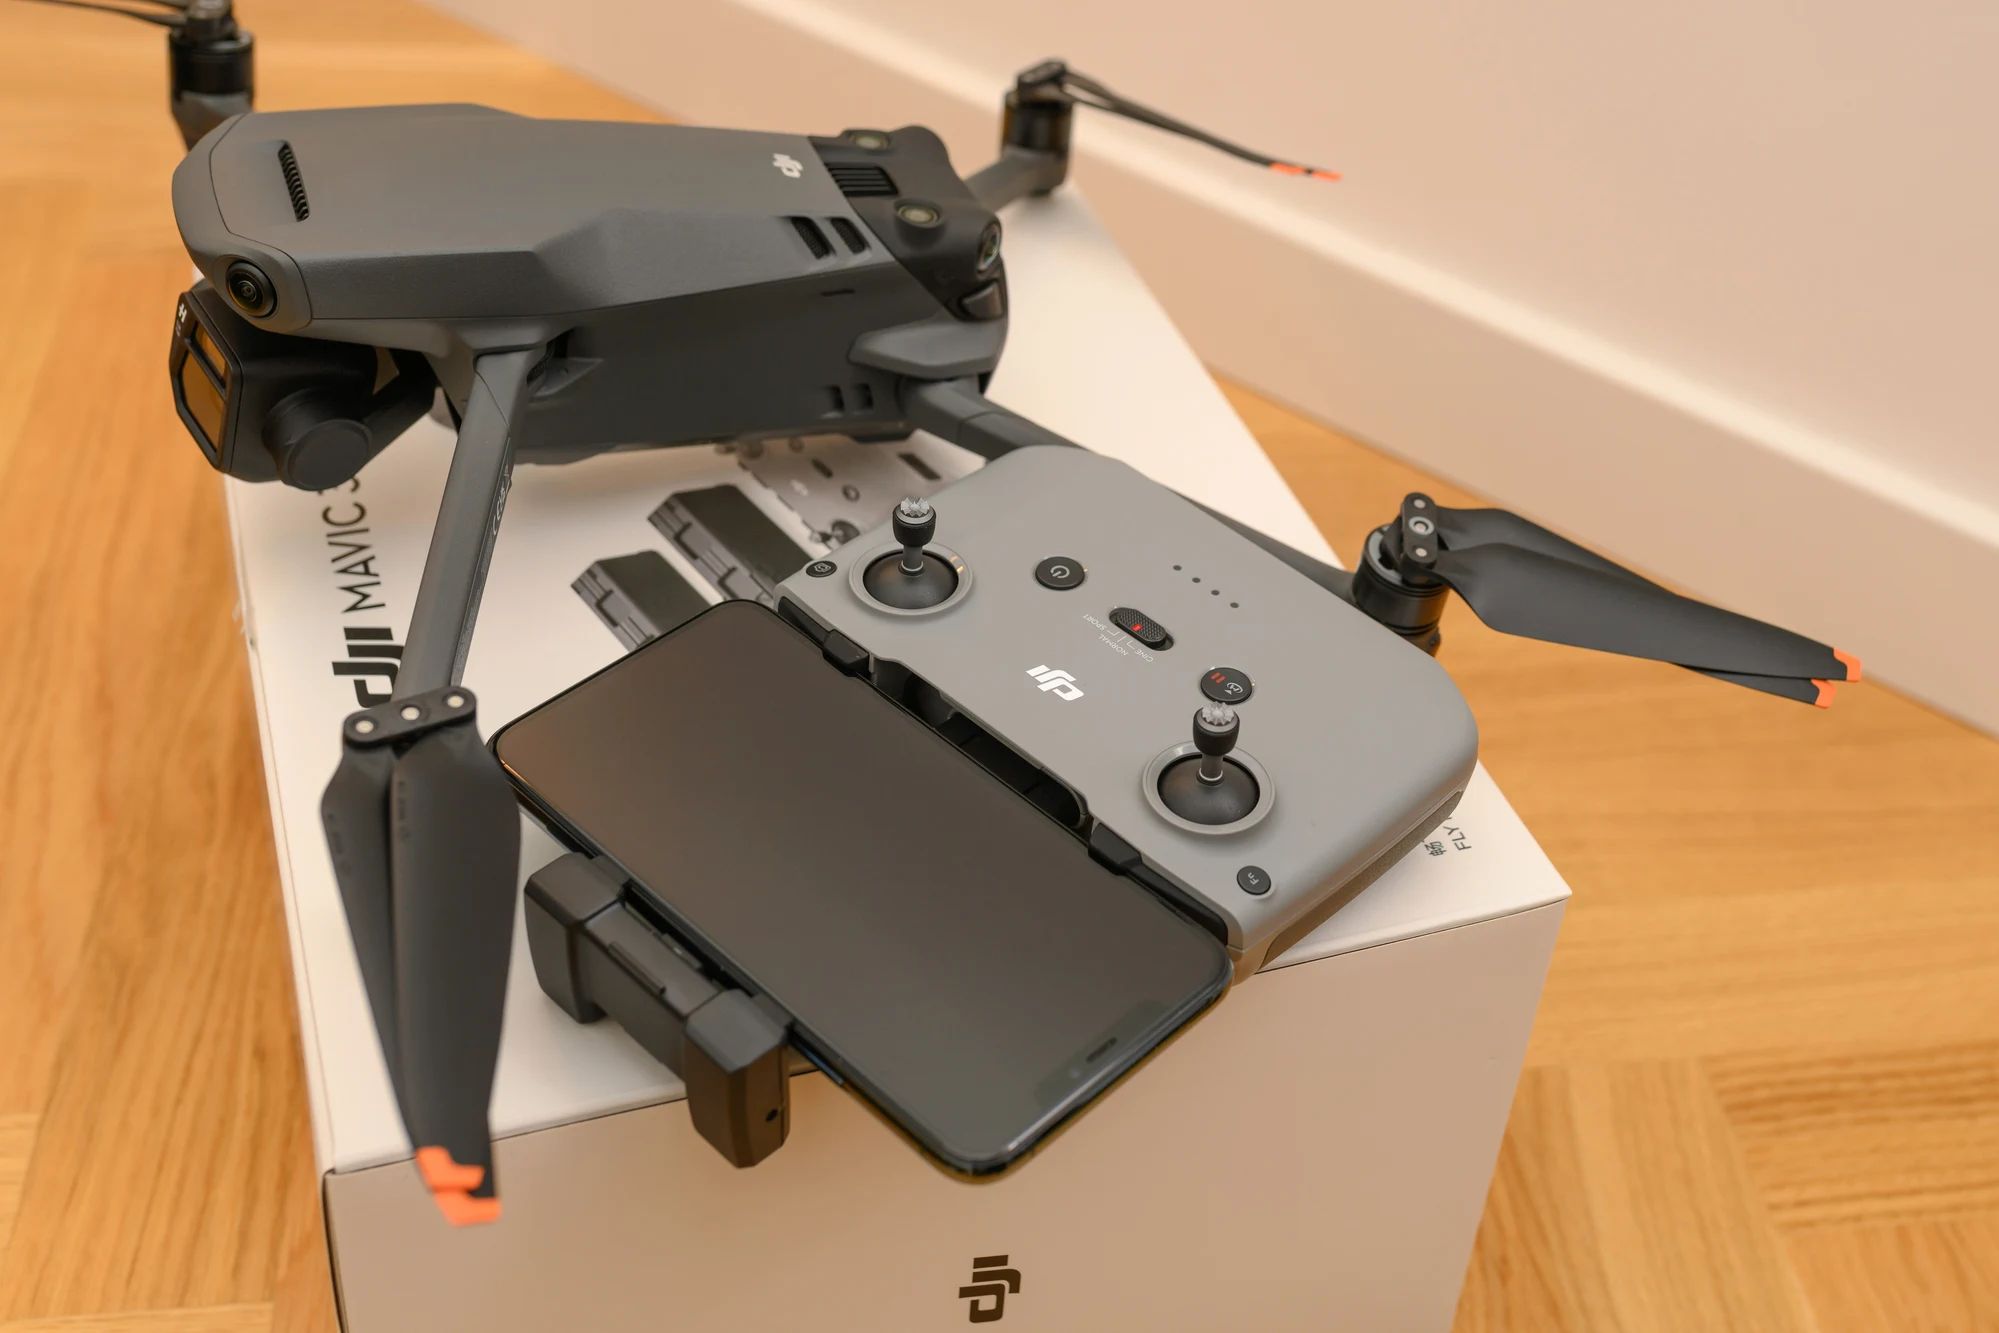
Step 4: Mounting your mobile device
To fully utilize the capabilities of your DJI Mavic Pro and access real-time video feed and flight controls, you’ll need to mount your mobile device to the remote controller. Follow these steps to securely mount your mobile device:
1. Locate the mobile device holder on the remote controller. The holder is located at the bottom, between the control sticks.
2. Gently pull out the arms of the mobile device holder to extend it fully. This will accommodate a range of different-sized mobile devices.
3. Place your mobile device horizontally into the holder. Adjust the width of the arms to fit your device securely. Ensure that your device is centered and properly aligned with the control sticks.
4. Once your mobile device is in the holder, use the adjustable clamps or straps (if available) to secure it firmly. This will prevent any accidental slips or falls during flight.
5. Adjust the angle of your mobile device to a comfortable viewing position. Most holders allow for tilting the device up and down to achieve the desired angle.
Ensure that your mobile device is fully charged and that you have installed the DJI GO app or the DJI Fly app, depending on your drone model. These apps provide access to various flight modes, camera settings, and telemetry data during your drone’s flight.
Mounting your mobile device allows you to view the live video feed from the DJI Mavic Pro camera and access all the controls and settings for a seamless flying experience. With your mobile device securely attached to the remote controller, you’re now ready to power on your DJI Mavic Pro and establish the connection between the drone and the remote controller.
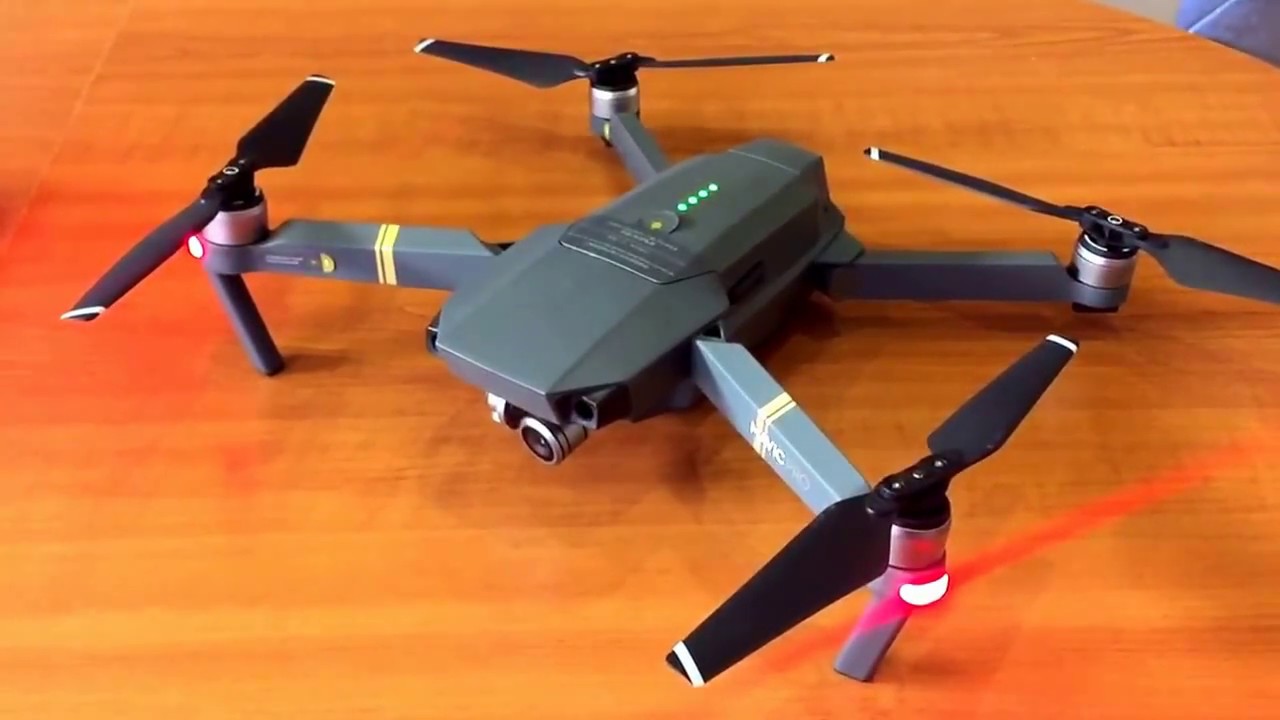
Step 5: Powering on your DJI Mavic Pro
Now that your DJI Mavic Pro is properly set up, it’s time to power it on. Follow these steps to turn on your drone:
1. Locate the power button on the battery. It is usually located on the side or near the LED indicators. Ensure that the battery is securely inserted into the drone.
2. Press and hold the power button for a few seconds until the battery LED indicators light up. This indicates that the battery is powered on and ready to be connected.
3. Once the battery is powered on, press and hold the power button on the drone itself. You will see the status lights on the DJI Mavic Pro start to illuminate, indicating that the drone is initializing.
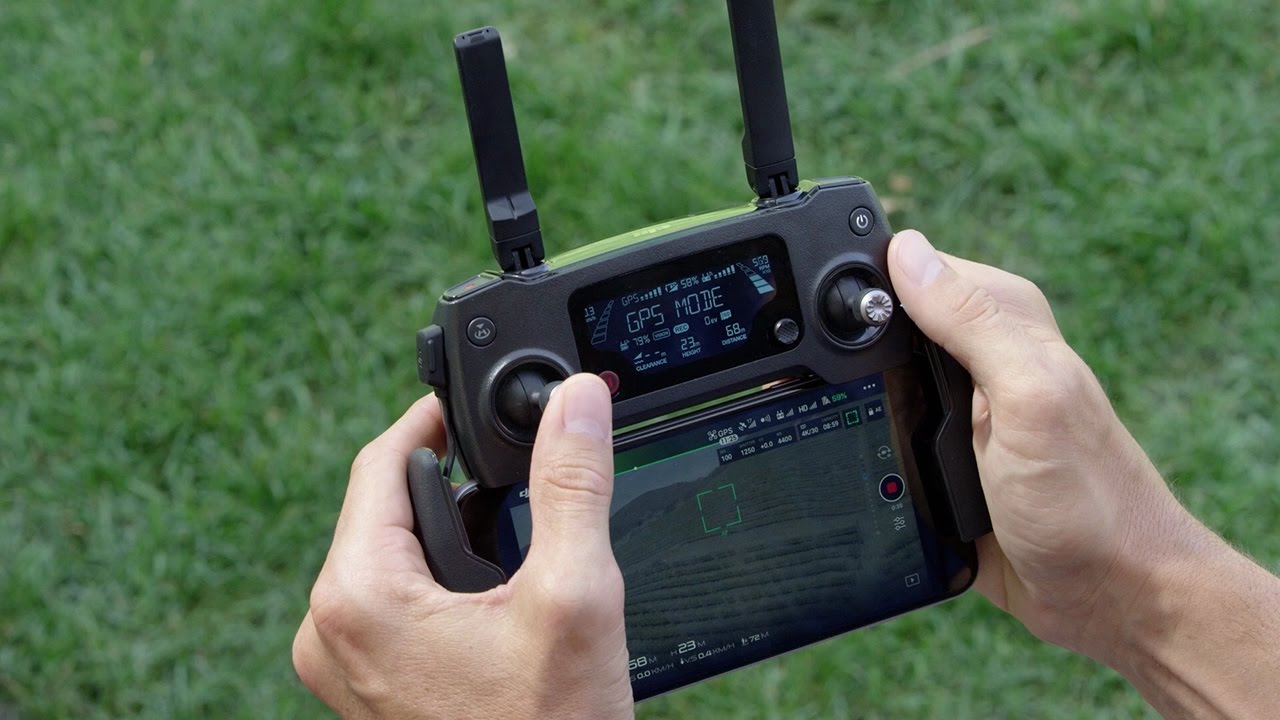
4. On your mobile device, launch the DJI GO app or the DJI Fly app, depending on your drone model. Tap on the “Connect” or “Go Fly” button to establish a connection with the Mavic Pro.
5. The remote controller will automatically connect to the DJI Mavic Pro. You will hear a series of beeps, indicating a successful connection. The status light on the remote controller will also turn solid, indicating that it is connected to the drone.
6. Once the connection is established, you will see the live video feed from the Mavic Pro camera on your mobile device screen. You’re now ready to start flying.
It’s important to note that you should always power on your DJI Mavic Pro in a safe and stable environment. Ensure that the area around the drone is clear of any obstacles, and that the drone is on a flat and level surface. Also, remember to follow the local regulations and guidelines for flying drones in your area.
By following these steps, you’ll be able to power on your DJI Mavic Pro and establish a connection between the drone and your mobile device. The next step is to calibrate the compass to ensure accurate flight and navigation.
Step 6: Pairing your DJI Mavic Pro with the remote controller
To control your DJI Mavic Pro during flight, you need to pair it with the remote controller. Follow these steps to establish a connection between the drone and the remote controller:
1. Ensure that both the drone and the remote controller are powered on and that they are within close proximity to each other.
2. On the remote controller, locate the power button and press it once, then immediately press and hold it again until the controller’s status lights start blinking rapidly. This indicates that the remote controller is in pairing mode.
3. On the DJI Mavic Pro, simultaneously press and release the power button located on the left side of the aircraft. The LED indicators on the drone will start blinking, showing that it is searching for the remote controller.
4. Wait for a few moments until the remote controller and the drone establish a connection. The LED indicators on both devices will turn solid, indicating a successful pairing.
5. Once the pairing is complete, you will hear a series of beeps from the remote controller, and the status lights on both the drone and the controller will remain solid. This indicates that the devices are connected and ready for flight.
It’s important to note that you should always pair your DJI Mavic Pro with the same remote controller that it was originally configured with. Swapping remote controllers may cause issues with connectivity and flight performance.
By successfully pairing your DJI Mavic Pro with the remote controller, you now have full control over the drone’s flight and camera functions. Ensure that the remote controller is securely held and your mobile device is properly mounted for a comfortable flying experience. The next step is to calibrate the compass before taking off into the sky.
Step 7: Calibrating the compass
Calibrating the compass of your DJI Mavic Pro is essential for accurate flight and navigation. The compass helps the drone determine its orientation and provides vital information for precise flight controls. Follow these steps to calibrate the compass:
1. Find a location that is free from any metallic objects, electromagnetic interference, and magnetic fields. It’s best to perform the compass calibration outdoors, away from power lines, construction sites, and other potential sources of magnetic interference.
2. Power on both the drone and the remote controller and ensure that they are connected. Open the DJI GO app or DJI Fly app and verify the connection between your mobile device and the drone.
3. In the app, access the settings menu and select the compass calibration option. Follow the on-screen instructions to begin the calibration process.
4. Hold the DJI Mavic Pro horizontally in your hand, making sure that it is level and stable. Rotate the aircraft slowly and steadily in a full 360-degree motion. Keep the rotation smooth and consistent.
5. As you rotate the drone, the DJI GO app will display a compass calibration progress indicator. Make sure to complete the full rotation until the progress indicator reaches 100%.
6. Once the compass calibration is complete, the app will display a message confirming the successful calibration. You can now proceed with your flight plans.
Compass calibration is an essential step to ensure accurate flight performance and precise navigation. It helps to prevent any unwanted compass errors or inaccuracies that may impact your flight experience. It is recommended to perform the compass calibration whenever you change your flight location or encounter any issues related to GPS positioning or flight stability.
With the compass calibrated, you can now confidently pilot your DJI Mavic Pro and explore the skies with precision and control. The next step is to start the motors and prepare for takeoff.
Step 8: Starting the motors
Before taking off with your DJI Mavic Pro, you need to start the motors. The motor start-up process ensures that the drone is ready for flight and all systems are functioning properly. Follow these steps to start the motors:
1. Confirm that the DJI Mavic Pro is powered on, connected to the remote controller, and the compass calibration is complete. Ensure that the drone is on a flat and level surface, away from any obstructions.
2. Locate the flight control sticks on the remote controller. Make sure both sticks are in the lowest position, indicating a neutral or idle state. This prevents any accidental motor engagement during the start-up process.
3. In the DJI GO app or DJI Fly app, check the status indicators to ensure that all systems, including the GPS and other flight sensors, are functioning correctly and ready for flight.
4. To start the motors, push both control sticks down and inward towards each other. This combination of stick movements will activate the motor start-up sequence.
5. Pay attention to the drone’s status lights. You will see the motors gradually spin up and enter the armed state. The status lights on the DJI Mavic Pro will change from solid to flashing, indicating that the motors are ready for flight.
6. Take a moment to ensure that the area around the drone is clear and free from any obstacles. With the motors started, the propellers will be spinning rapidly, creating a potential safety hazard.
Once the motors are started and the propellers are spinning, the DJI Mavic Pro is ready to take off. However, always keep in mind that responsible and safe flight practices are essential to maintaining the security of yourself, bystanders, and the equipment.
In the next step, we will cover the process of taking off and flying your DJI Mavic Pro, enabling you to explore the skies and capture stunning aerial footage.
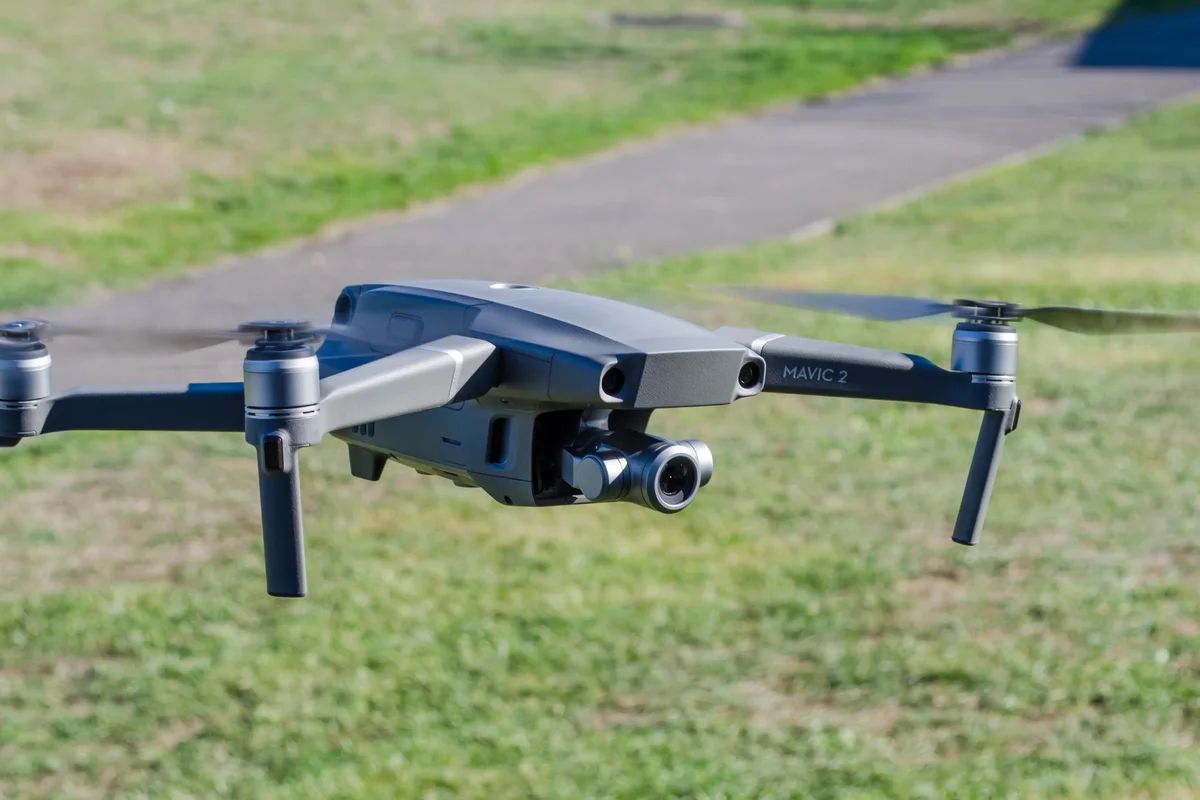
Step 9: Taking off and flying your DJI Mavic Pro
After successfully starting the motors, you are now ready to take off and experience the thrill of flying your DJI Mavic Pro. Follow these steps to safely take off and navigate your drone:
1. Ensure that the area around the drone is clear of any obstacles, people, or animals. It’s important to have a safe and open space for takeoff.
2. Once you’ve checked the surroundings, slowly push the control stick upward. This will increase the throttle and lift the drone off the ground.
3. As the drone gains altitude, keep an eye on the live video feed from the Mavic Pro camera on your mobile device. Use the control sticks on the remote controller to maneuver the drone in different directions.
4. Familiarize yourself with the remote controller’s layout and functions. Experiment with the control sticks and other buttons to navigate the drone, adjust the camera angle, and access flight modes.
5. Start with gentle movements and small adjustments to get comfortable with the drone’s responsiveness. Gradually increase your flying skills and confidence as you spend more time piloting the DJI Mavic Pro.
6. Pay attention to the drone’s battery level. The DJI GO app or DJI Fly app will display the remaining battery life. Ensure that you have sufficient battery power to safely return and land the drone.
7. It’s important to adhere to local regulations and flight guidelines while operating the DJI Mavic Pro. Respect no-fly zones, stay within visual line of sight, and maintain a safe distance from people, buildings, and aircraft.
Remember, practice makes perfect, and with time, you’ll gain more confidence and skill in flying your DJI Mavic Pro. Always prioritize safety and continue to learn and improve your flying abilities.
In this article, we have covered all the essential steps to turn on, set up, and take flight with your DJI Mavic Pro. By following these instructions, you can unlock the full potential of your drone and capture breathtaking aerial shots and videos.
Conclusion
Congratulations! You have now learned how to turn on, set up, and fly your DJI Mavic Pro. By following the step-by-step instructions outlined in this article, you have gained the necessary knowledge to get started with your aerial photography and videography adventures.
We began with the unboxing and inspection of your DJI Mavic Pro, ensuring that all components were in good condition. Then, we moved on to charging the battery, installing the propellers, and mounting your mobile device to the remote controller.
Next, we powered on the drone, paired it with the remote controller, and calibrated the compass to ensure accurate flight and navigation. Finally, we started the motors and successfully took off into the sky, experiencing the thrill of flying the DJI Mavic Pro.
Remember to always fly responsibly and adhere to local regulations and guidelines. Prioritize safety and maintain a clear and open area for takeoff and flight. Familiarize yourself with the features of the DJI GO app or DJI Fly app and take advantage of the various flight modes and camera settings to capture stunning aerial shots and videos.
As you continue to fly your DJI Mavic Pro, take the time to practice and hone your flying skills. Fly in different environments, experiment with the drone’s capabilities, and push your boundaries to explore new perspectives and creative possibilities.
With every flight, remember to respect the privacy of others and the environment. Leave no trace and be mindful of your surroundings.
We hope that this guide has provided you with the necessary information to confidently operate your DJI Mavic Pro. Embrace the excitement of aerial photography and videography, and enjoy the limitless possibilities that come with piloting your drone in the sky.