How to Connect to DJI Mavic Pro
Connecting to your DJI Mavic Pro is a crucial step before taking it for a flight. In this guide, we’ll walk you through the process to ensure a seamless connection between your drone, remote controller, and mobile device. Follow these steps to get your Mavic Pro up and running:
1. Unpacking and Checking Components: Start by carefully unpacking your DJI Mavic Pro and checking that all the essential components are included, such as the aircraft, remote controller, batteries, and propellers.
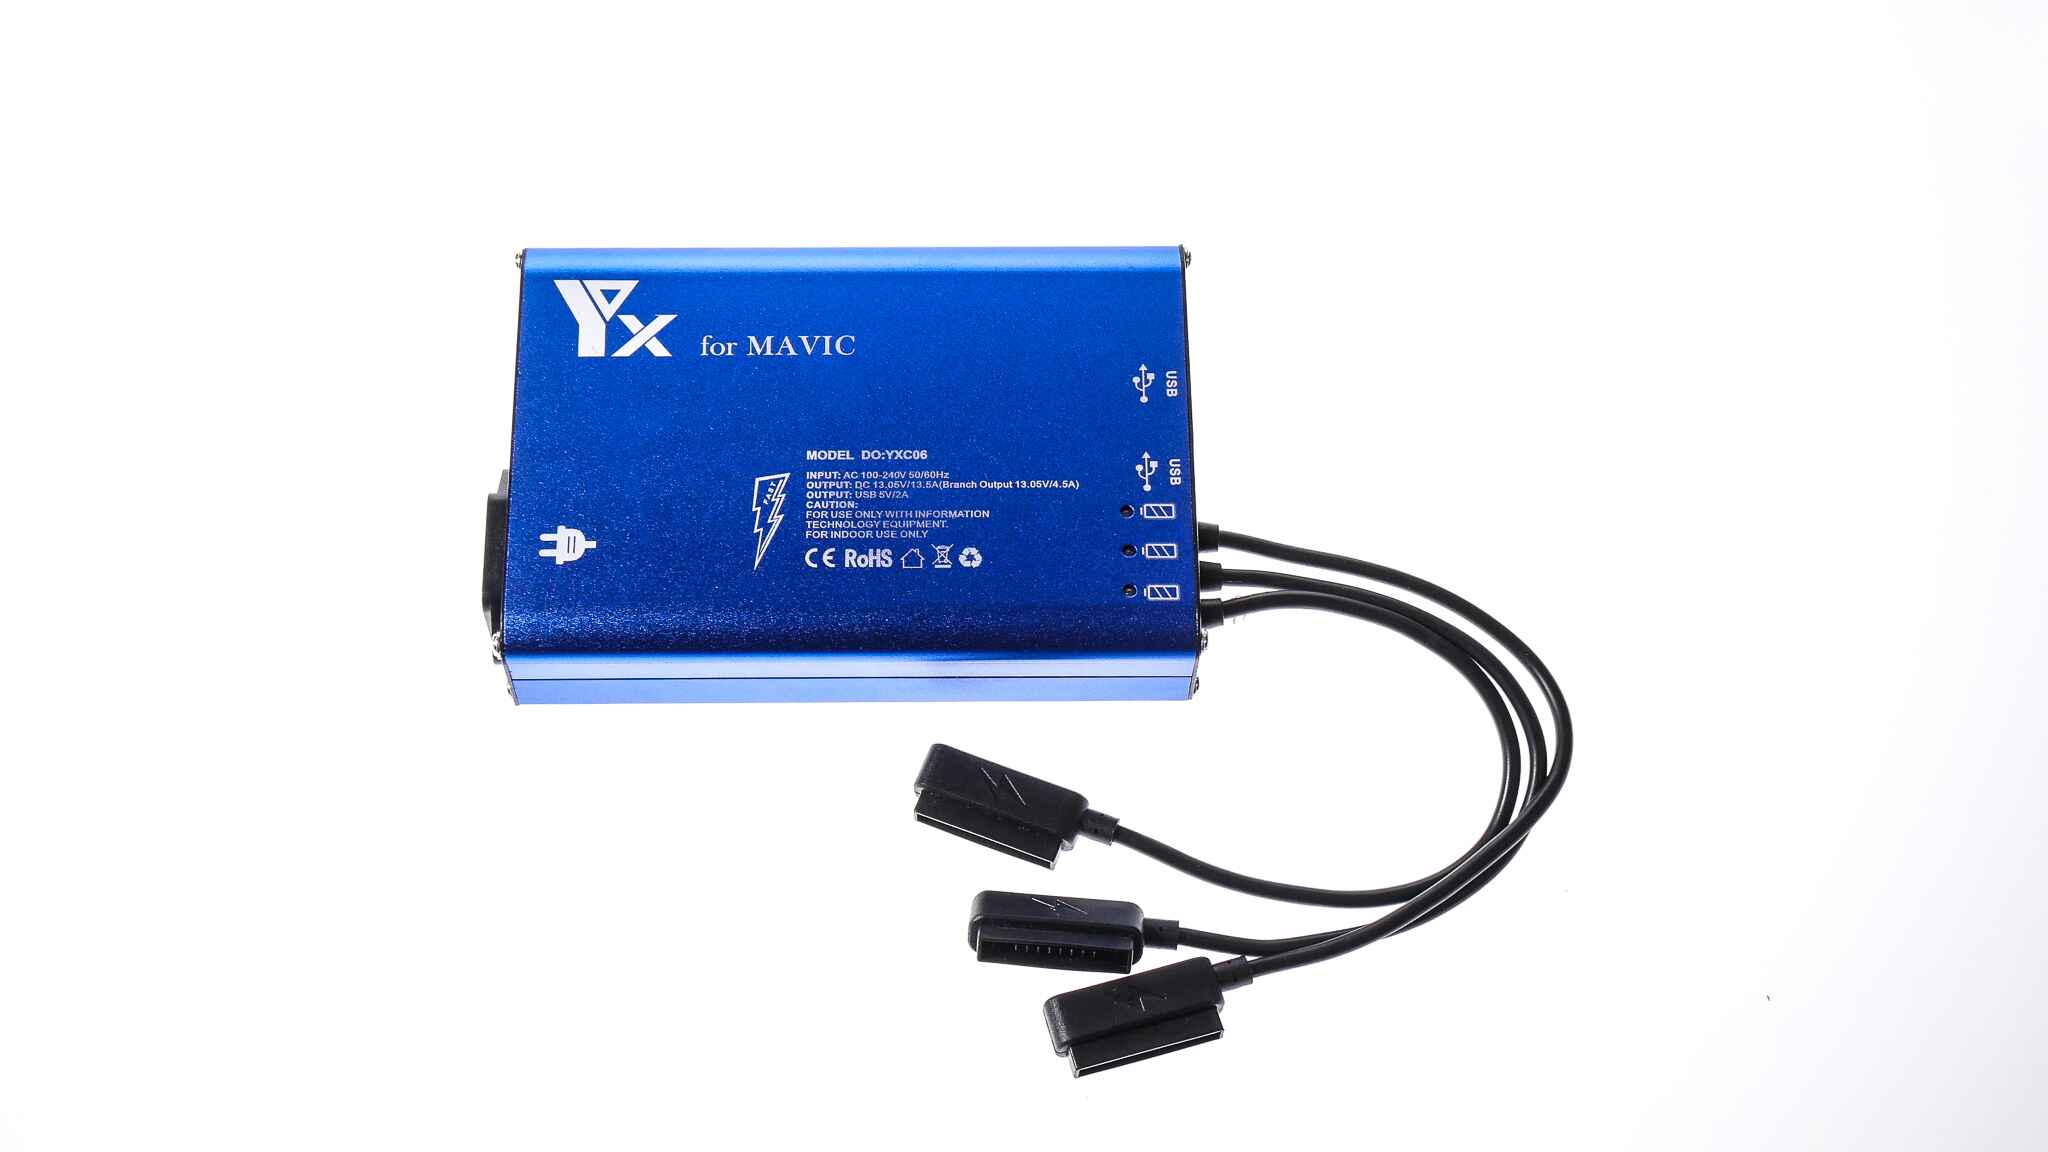
2. Charging the Batteries: Before powering on your Mavic Pro, make sure to charge the batteries fully. Connect the charger to the battery and plug it into a power source. Allow enough time for the batteries to reach their maximum charge.
3. Installing the DJI GO App: Download and install the DJI GO app on your mobile device. This app will be your primary interface for controlling the Mavic Pro and accessing its features. It’s compatible with both iOS and Android devices.
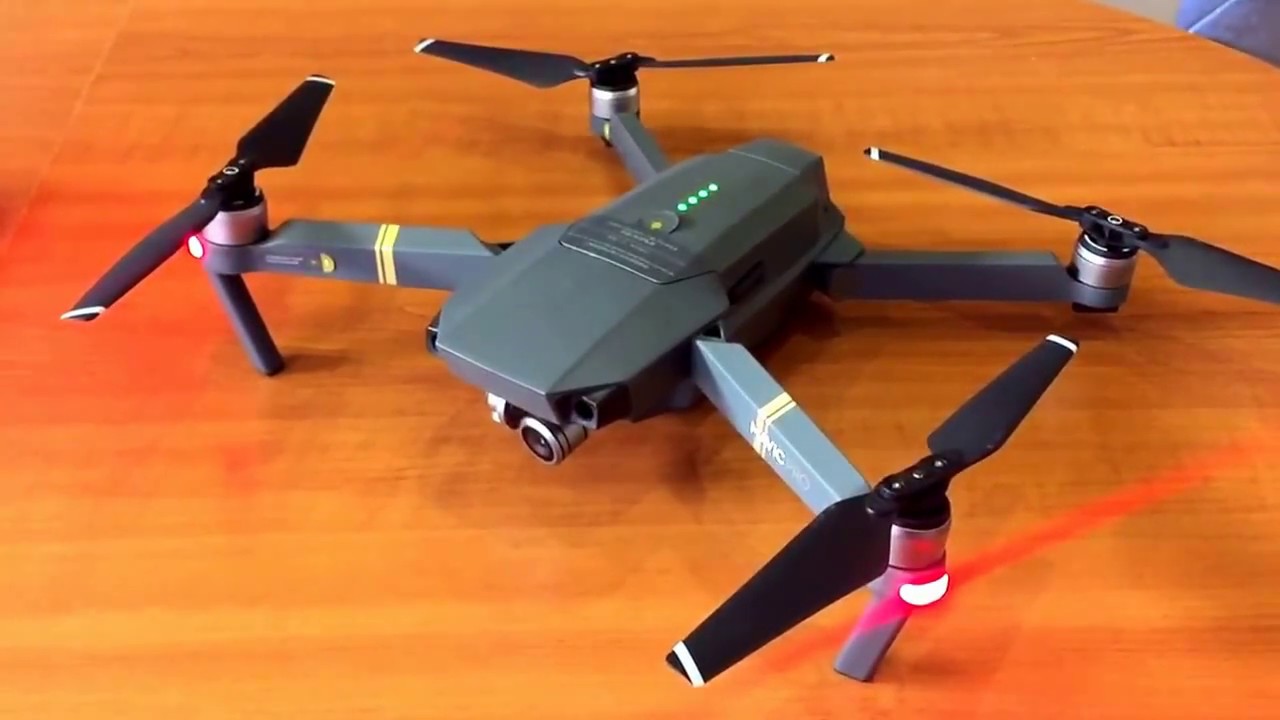
4. Powering on the DJI Mavic Pro: Press the power button located on the battery to turn on the Mavic Pro. The LED lights on the aircraft will indicate its status. Wait for the lights to stabilize before proceeding to the next step.
5. Connecting the Remote Controller: Open the arms of the remote controller and unfold the antennas. Press and hold the power button on the remote controller until the LED lights start to blink. The two devices will automatically establish a connection.
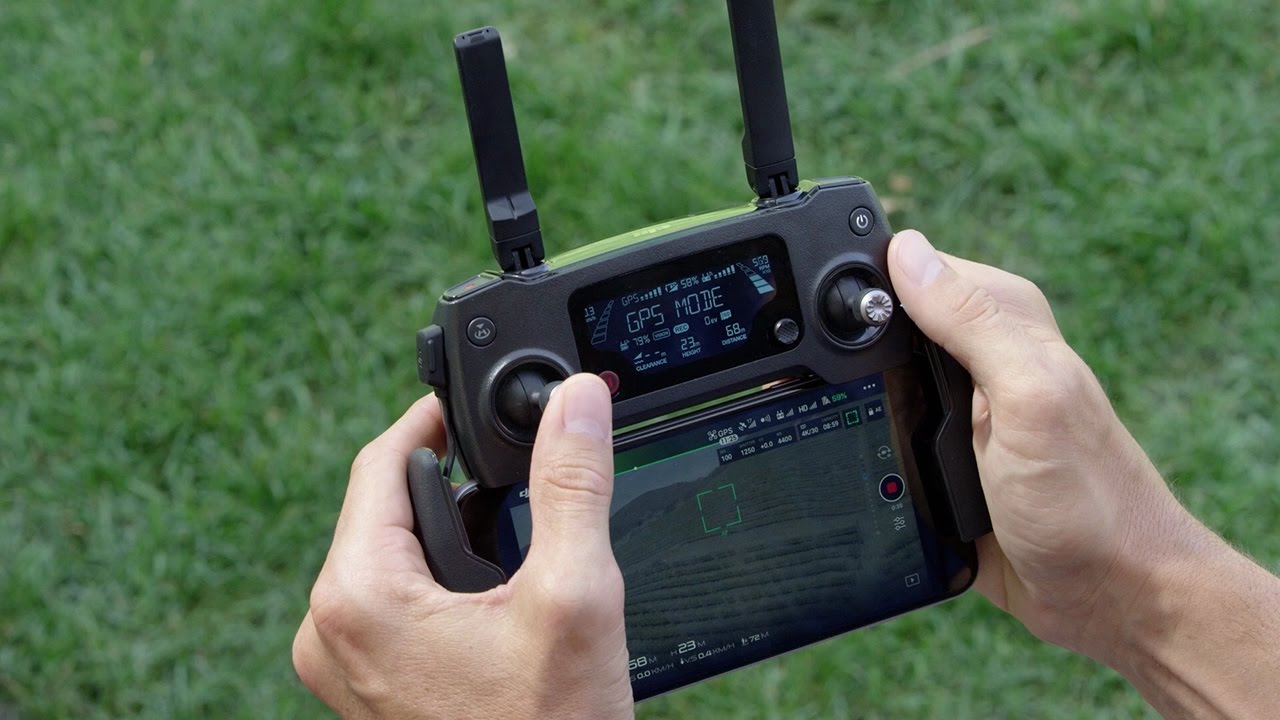
6. Connecting the Mobile Device: Launch the DJI GO app on your mobile device and connect it to the remote controller using the USB cable provided. Your mobile device should recognize the controller and establish a connection.
7. Linking the Mavic Pro and Remote Controller: In the DJI GO app, go to the settings menu and select “Remote Controller Settings.” From there, choose “Linking Remote Controller.” Follow the on-screen instructions to link the Mavic Pro and remote controller successfully.
8. Calibrating the IMU: To ensure accurate flight performance, it’s essential to calibrate the Mavic Pro’s Inertial Measurement Unit (IMU). This process can be done through the DJI GO app by going to the aircraft status menu and selecting “Calibrate IMU.”
9. Updating Firmware: Check for any available firmware updates for your Mavic Pro. It’s important to keep the drone’s firmware up to date to benefit from the latest features and improvements. Follow the prompts in the DJI GO app to update the firmware if necessary.
10. Test Flight and Final Checks: Before taking your Mavic Pro out for a full flight, perform a test flight in a safe, open area. Make sure all flight controls are responsive and the drone’s GPS signal is strong. Double-check that you have a clear understanding of the drone’s flight modes and safety features.
By following these steps, you’ll be able to connect your DJI Mavic Pro properly and prepare it for an exciting flight. Remember to always fly responsibly and adhere to local regulations and safety guidelines. Now, you’re ready to take to the skies and capture stunning aerial footage with your Mavic Pro!
Introduction
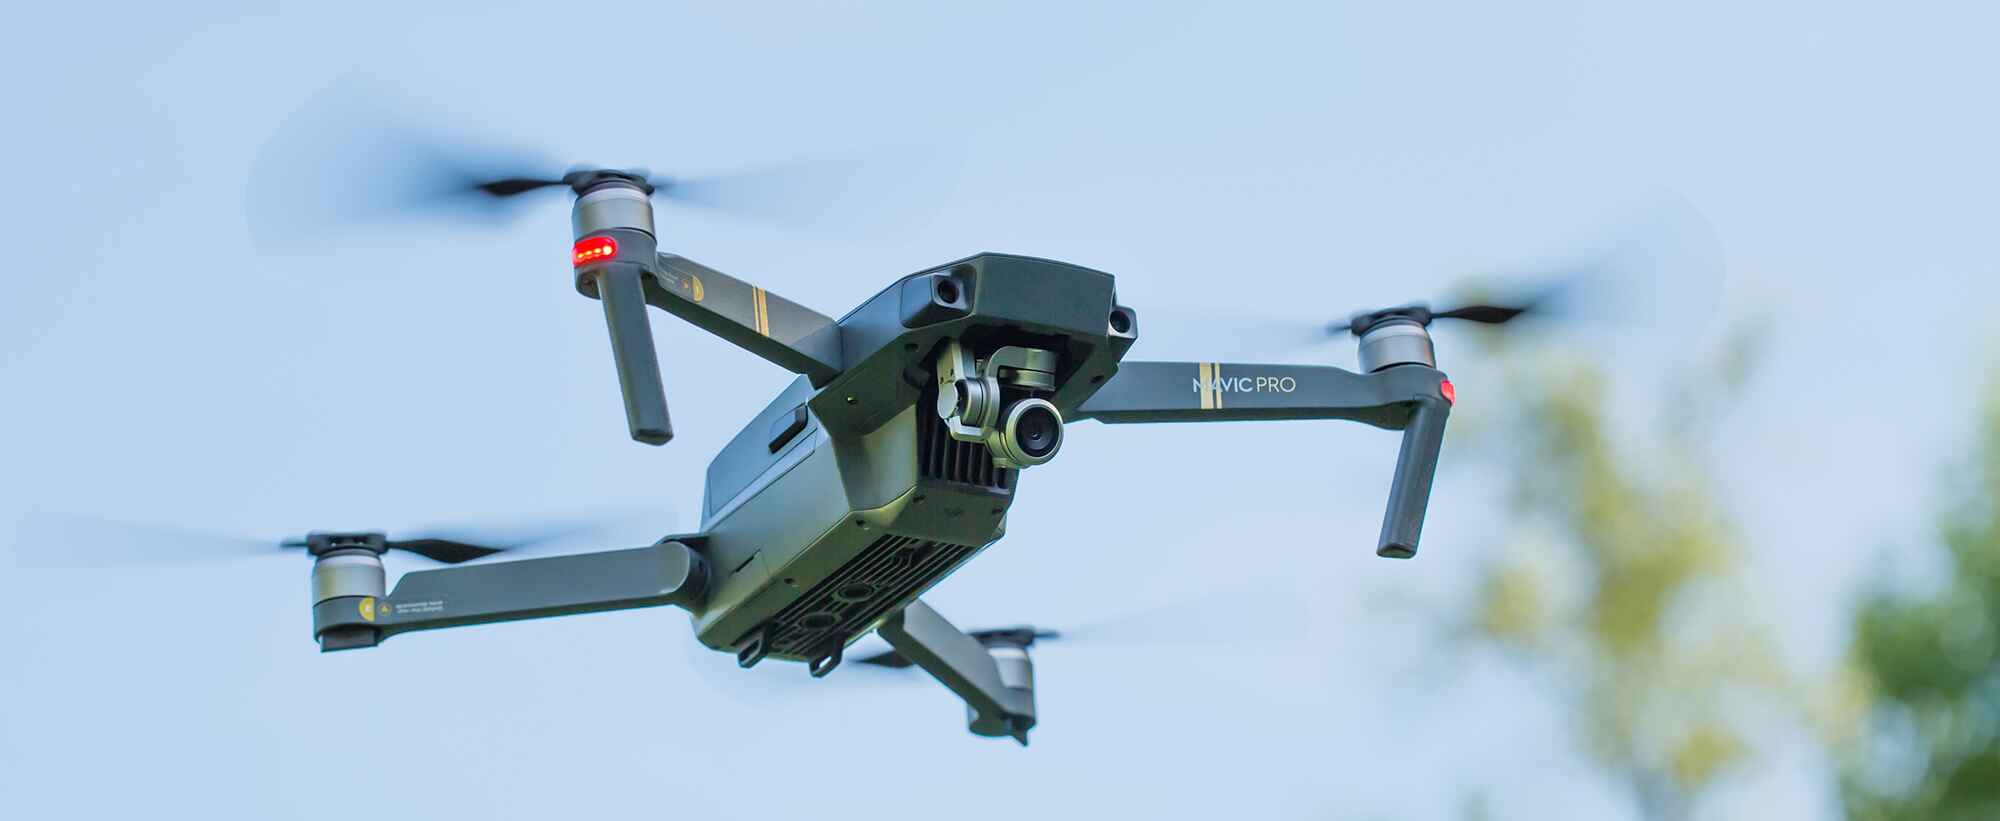
The DJI Mavic Pro is a powerful and compact drone that has revolutionized aerial photography and videography. With its advanced features and intuitive controls, it delivers exceptional flight performance and stunning image quality. Whether you’re a professional photographer, an enthusiast, or an adventure-seeker, the Mavic Pro offers a truly immersive flying experience.
Before embarking on your drone adventure, it’s essential to know how to properly connect your DJI Mavic Pro. Establishing a strong and reliable connection between the drone, remote controller, and mobile device is crucial for a smooth flight experience. This guide will walk you through the step-by-step process of connecting your Mavic Pro, ensuring that you’re ready to take to the skies with confidence.
From unpacking and checking the components to updating firmware and performing the necessary calibrations, each step in the connection process is vital to ensure optimal performance and safety. We’ll cover everything you need to know, including how to charge the batteries, install the DJI GO app on your mobile device, and link the Mavic Pro and remote controller.
Additionally, we’ll guide you through calibrating the IMU, a crucial step to ensure precise flight control and stability. We’ll also cover the importance of updating the Mavic Pro’s firmware, as DJI regularly releases updates to enhance functionality and address any potential issues.
Finally, once all the necessary connections and checks are complete, we’ll provide some tips for a successful test flight. This ensures you’re familiar with the drone’s flight modes and features, as well as confirming that the Mavic Pro is in optimal working condition before venturing into more demanding flying scenarios.
By following the steps outlined in this guide, you’ll be able to confidently connect your DJI Mavic Pro and embark on thrilling flight adventures. So, let’s get started on the journey to unleash your aerial creativity and capture awe-inspiring moments with the Mavic Pro!
Step 1: Unpacking and Checking Components
Before you begin the process of connecting your DJI Mavic Pro, it’s important to carefully unpack the drone and check all the components. Ensuring that everything is included and in good condition will set the foundation for a successful connection and subsequent flights.
Start by opening the box containing your Mavic Pro. Inside, you should find the main aircraft, the remote controller, batteries, propellers, a charging cable, and any other accessories that may have come with your specific package.
Take a moment to inspect each item closely, checking for any signs of damage or missing parts. Look for any dents, scratches, or bent propellers, as these could affect the drone’s performance and safety. If you notice any issues, contact DJI support for assistance before proceeding.
Once you have confirmed that all the components are present and in good condition, it’s time to move on to the next step. Charging the batteries is essential before powering on the Mavic Pro and connecting it to your remote controller and mobile device.
Note: It’s always a good idea to refer to the user manual that comes with the DJI Mavic Pro for any specific instructions or safety guidelines related to the components.
By taking the time to carefully unpack and check the components of your DJI Mavic Pro, you’re ensuring that everything is in working order and ready for the connection process. So, inspect your drone and its accessories before moving on to the next step of charging the batteries.
Step 2: Charging the Batteries
Before you can power on your DJI Mavic Pro, it’s crucial to ensure that the batteries are fully charged. This will provide you with the necessary power for a successful flight and help maximize your drone’s performance.
The DJI Mavic Pro typically comes with intelligent flight batteries that feature advanced technology to optimize power usage. To charge the batteries, follow these steps:
- Locate the charging cable that came with your Mavic Pro. It is usually a micro USB cable or a Type-C cable.
- Connect the charging cable to the battery and the other end to a power source. You can use a USB wall adapter or connect it directly to a USB port on your computer.
- The battery’s LED indicators will provide information on the charging status. Typically, they will turn solid red to indicate that the battery is charging.
- Allow sufficient time for the battery to charge fully. The duration will depend on the current charge level and the charging method used.
- Once the battery is fully charged, the LED indicators will turn green or solid. This indicates that the battery is ready for use.
It’s important to note that charging times may vary depending on the battery’s current level and the charging method used. DJI recommends using the official charger and cable provided with your Mavic Pro for optimal performance and safety.
While waiting for the batteries to charge, you can take the opportunity to familiarize yourself with the remote controller and the DJI GO app. Understanding the controls and features will enhance your overall flying experience.
By ensuring that your batteries are fully charged, you’re setting yourself up for an uninterrupted and enjoyable flight with your DJI Mavic Pro. So, make sure to charge the batteries before proceeding to the next step of installing the DJI GO app on your mobile device.
Step 3: Installing the DJI GO App
Installing the DJI GO app on your mobile device is a crucial step in connecting to your DJI Mavic Pro. The DJI GO app serves as the primary interface for controlling the drone, accessing its features, and capturing stunning aerial footage.
Follow these steps to install the DJI GO app:
- Open the app store on your mobile device. The DJI GO app is available for both iOS and Android platforms.
- Search for “DJI GO” in the app store’s search bar.
- Locate the official DJI GO app and select it.
- Tap the “Install” button to initiate the installation process.
- Wait for the app to download and install. This may take a few minutes depending on your internet connection.
- Once the installation is complete, locate the DJI GO app on your device’s home screen and tap to open it.
Alternatively, if you already have the DJI GO app installed on your mobile device, make sure it is updated to the latest version. Updating the app ensures compatibility with the Mavic Pro and allows you to access the latest features and improvements.
After installing or updating the DJI GO app, it’s important to connect your mobile device to the remote controller using the provided USB cable. This connection enables seamless communication between the DJI Mavic Pro and your mobile device.
By installing the DJI GO app on your mobile device, you gain access to a range of intelligent flight modes, camera controls, and live video streaming from the Mavic Pro’s camera. It’s an essential part of the overall DJI experience that enhances your ability to control and capture stunning aerial visuals.
Now that you have the DJI GO app installed on your mobile device, you’re ready to move on to the next step: powering on your DJI Mavic Pro.
Step 4: Powering on the DJI Mavic Pro
Once you have installed the DJI GO app on your mobile device, it’s time to power on your DJI Mavic Pro. This step will initialize the drone and prepare it for connection with the remote controller and mobile device.
Follow these steps to power on your DJI Mavic Pro:
- Find the battery located on the back of the Mavic Pro.
- Press and hold the power button on the battery for a few seconds.
- The LED lights on the drone will start to blink, indicating that it is powering on.
- Continue to hold the power button until the LED lights stabilize and remain solid.
Once the LED lights have stabilized, your DJI Mavic Pro is powered on and ready to be connected to the remote controller and mobile device.
It’s important to note that the Mavic Pro may require a few seconds to initialize and establish its internal connections. During this time, it’s essential to avoid any sudden movements or attempts to control the drone.
Before moving on to the next step, ensure that the batteries are sufficiently charged to avoid unexpected power loss during your flight. The DJI GO app will display the remaining battery level, giving you an idea of how much flight time you have available.
By properly powering on your DJI Mavic Pro, you’re setting the stage for a successful connection process. Now that your drone is ready, it’s time to connect the remote controller to the Mavic Pro.
Step 5: Connecting the Remote Controller
Once your DJI Mavic Pro is powered on, the next step is to connect the remote controller. The remote controller allows you to have full control over the drone’s flight and access its various functions. Follow these steps to connect the remote controller to your Mavic Pro:
- Hold the remote controller in one hand and unfold the arms, making sure they are fully extended.
- Locate the power button on the side of the remote controller and press and hold it until the LED lights start to blink.
- At the same time, locate the power button on the Mavic Pro and press it once to power it on fully.
- Wait for a few seconds until the LED lights on both the remote controller and the drone stop blinking and remain solid.
Once the LED lights have stabilized and are solid, it indicates that the remote controller and the DJI Mavic Pro have successfully established a connection.
It’s important to note that the remote controller should be within close proximity to the drone during the connection process. Maintaining a clear line of sight between the two devices can help ensure a strong and stable connection.
If the connection is not established or the LED lights continue to flash, try powering off both the remote controller and the Mavic Pro, and then repeat the steps to reconnect them. Additionally, make sure that the remote controller’s battery is sufficiently charged for a successful connection.
Once the remote controller is connected to the Mavic Pro, you’ll be able to control the drone’s flight movements and access its features, such as capturing photos and videos. However, one more step is needed to establish a connection between your mobile device and the drone, which will be covered in the next step.
By successfully connecting the remote controller to your DJI Mavic Pro, you’re one step closer to taking flight and exploring the skies with your drone. Stay tuned for the next step, which involves connecting your mobile device to the remote controller.
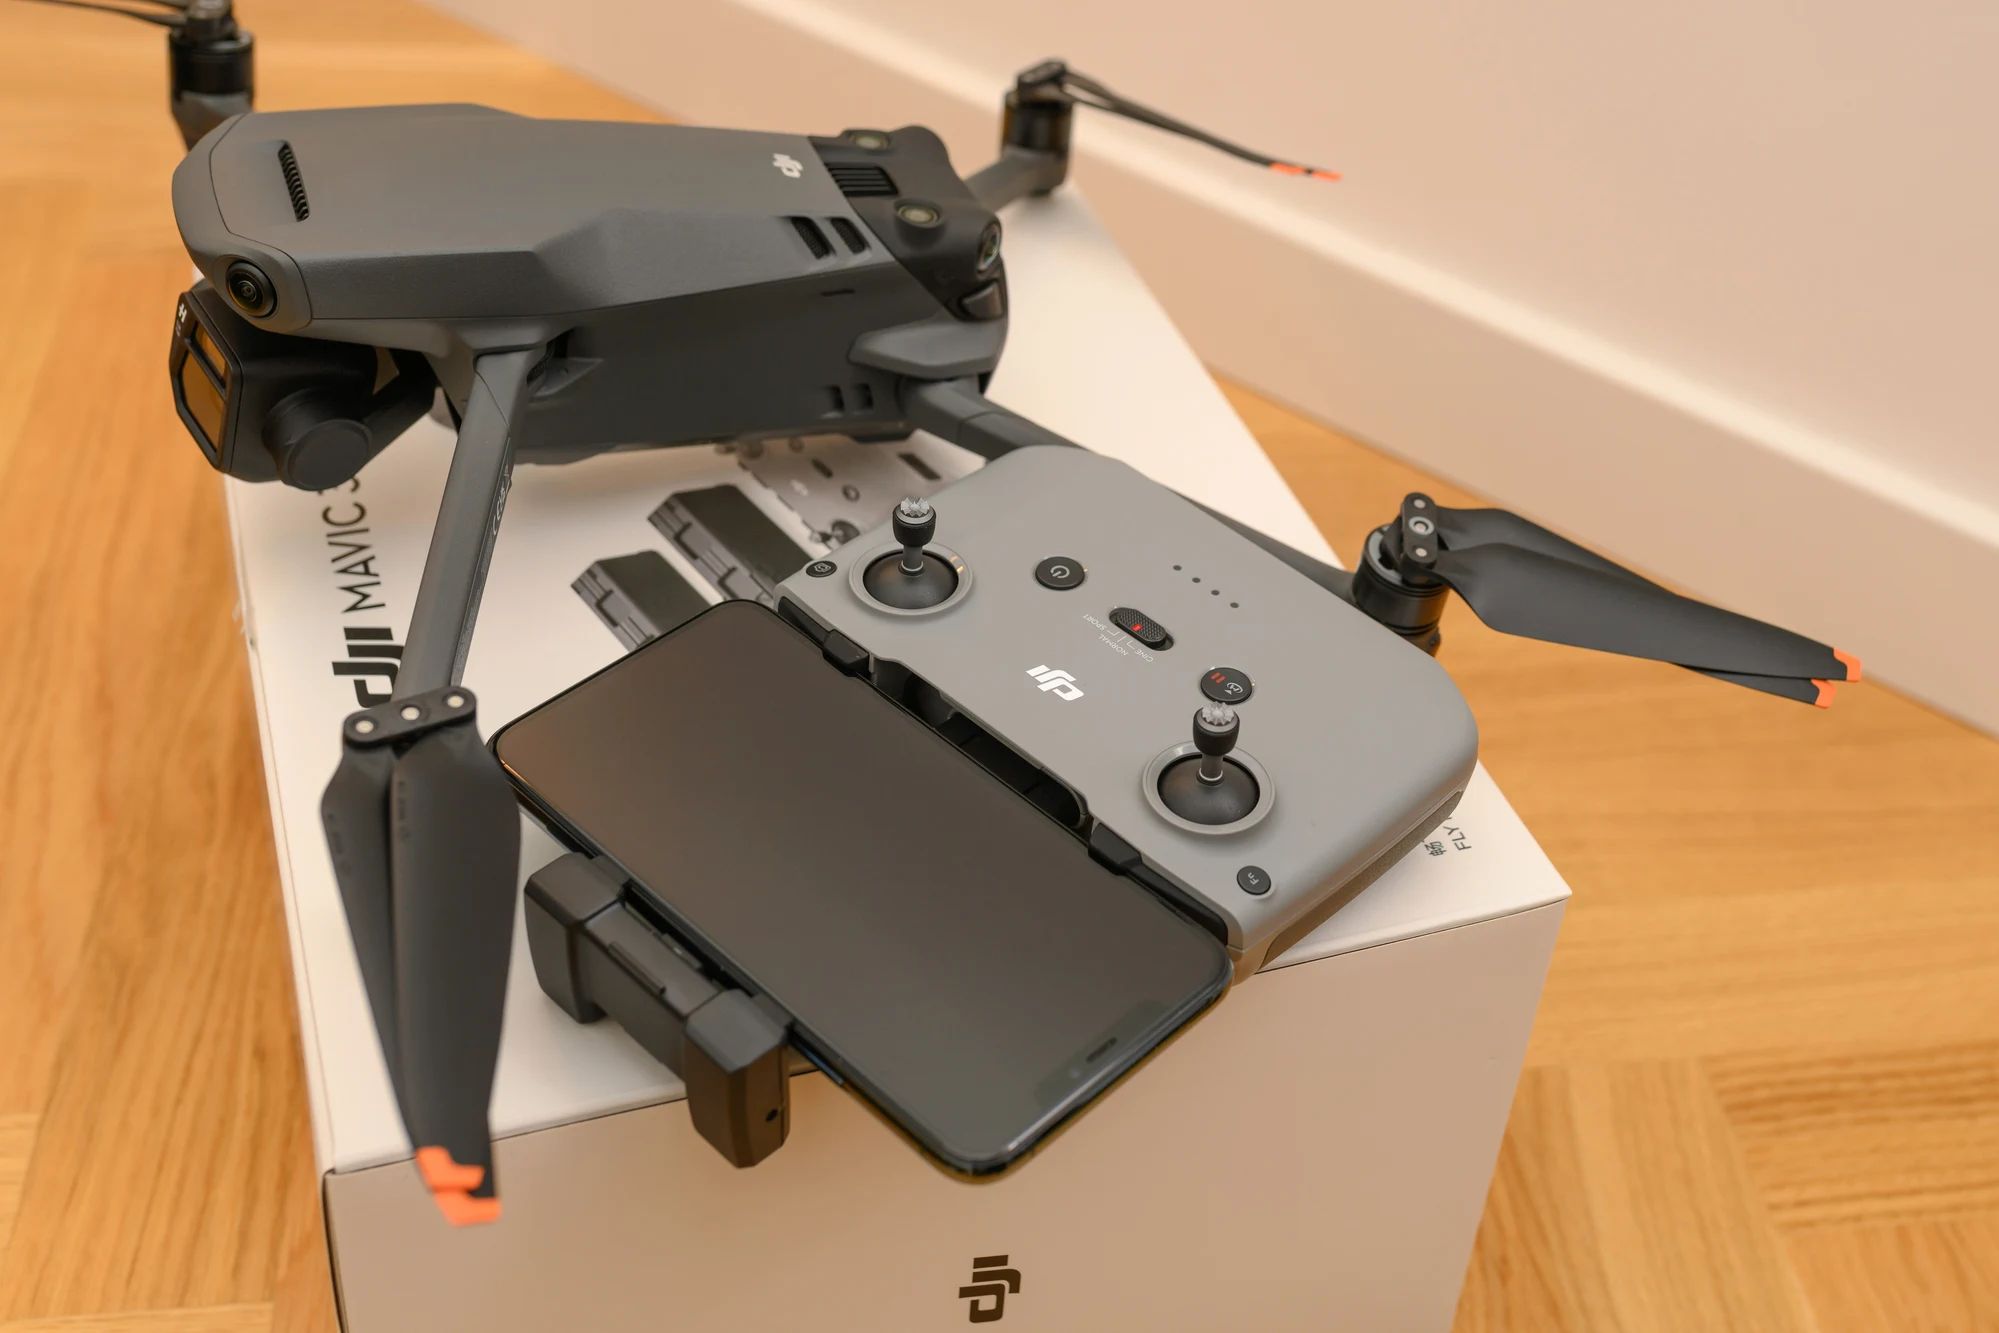
Step 6: Connecting the Mobile Device
With the remote controller connected to your DJI Mavic Pro, it’s time to establish a connection between the drone and your mobile device. This connection allows you to access the DJI GO app and control the drone’s settings, flight modes, and camera functions. Follow these steps to connect your mobile device to the remote controller:
- Launch the DJI GO app on your mobile device.
- Using the USB cable provided, connect one end to your mobile device.
- Locate the USB port on the bottom of the remote controller, and connect the other end of the cable to it.
Once the cable is properly connected, your mobile device should recognize the remote controller and establish a connection. The DJI GO app will automatically launch, providing you with access to the Mavic Pro’s settings and features.
When connecting your mobile device, it’s important to ensure that the cable is securely inserted into both the mobile device and the remote controller. A loose connection may result in a weak or intermittent connection, which can affect the performance and control of the drone.
During the connection process, make sure that your mobile device has sufficient battery life to allow for an uninterrupted flight experience. It’s also recommended to close any unnecessary apps running in the background of your device, as they may consume resources and affect the performance of the DJI GO app.
With your mobile device successfully connected to the remote controller, you’ll have access to a wealth of features, including live video streaming from the drone’s camera, real-time flight telemetry, and intelligent flight modes. This connection is essential for maximizing your control and capturing breathtaking aerial footage.
Now that your mobile device is connected, you’re ready to move on to the next step: linking the DJI Mavic Pro and the remote controller for seamless communication between the devices.
Step 7: Linking the Mavic Pro and Remote Controller
After connecting your mobile device to the remote controller, the next step is to link the DJI Mavic Pro and the remote controller. This process establishes a secure and reliable connection between the two devices, allowing for seamless communication and control during flight. Follow these steps to link your Mavic Pro and remote controller:
- Launch the DJI GO app on your mobile device.
- Tap on the menu icon or settings icon in the app to access the settings menu.
- Select “Remote Controller Settings” from the menu options.
- Choose “Linking Remote Controller” from the available options.
- Follow the on-screen instructions provided by the DJI GO app to complete the linking process.
During the linking process, it’s important to ensure that both the DJI Mavic Pro and the remote controller are powered on and within close proximity of each other. This helps facilitate a strong and stable connection between the two devices.
As the linking process progresses, the DJI GO app will provide visual cues and prompts on your mobile device’s screen. Follow these prompts carefully and perform any necessary actions, such as pressing buttons or toggling switches on the remote controller, as instructed.
Once the Mavic Pro and the remote controller are successfully linked, you’ll receive confirmation in the DJI GO app, indicating that the connection has been established. At this point, the status indicators on both the drone and the remote controller will reflect a solid and stable connection.
If the linking process encounters any issues or fails, double-check that the batteries are sufficiently charged, the devices are within range, and there are no external factors, such as interference or obstacles, hindering the connection. In case of persistent issues, consult the DJI support resources or contact their customer service for further assistance.
By successfully linking your DJI Mavic Pro and remote controller, you’ve created a secure and reliable connection between the two devices. This connection is essential for ensuring smooth and responsive control of the drone during your flight missions.
Now that your Mavic Pro and remote controller are linked, you’re ready to move on to the next step: calibrating the IMU (Inertial Measurement Unit) for optimal flight performance.
Step 8: Calibrating the IMU
Calibrating the IMU (Inertial Measurement Unit) of your DJI Mavic Pro is a crucial step to ensure precise flight control and stability. The IMU is responsible for tracking the drone’s movements and maintaining its orientation in the air. By calibrating the IMU, you can optimize the drone’s performance and enhance flight safety. Follow these steps to calibrate the IMU:
- Find a level and stable surface to place your Mavic Pro on.
- Ensure that the drone is turned off and the propellers are removed.
- Power on your Mavic Pro by pressing the power button and wait for it to initialize.
- Launch the DJI GO app on your connected mobile device.
- Tap on the “Settings” icon to access the settings menu.
- Select “Aircraft” or “Drone Settings” from the available options.
- Find and select the “Advanced Settings” or “Sensors” section.
- Choose “IMU Calibration” and follow the instructions provided by the DJI GO app.
During the IMU calibration process, it’s important to follow the on-screen instructions closely. The DJI GO app will guide you through the required steps, which may involve rotating the drone at specific angles or keeping it stationary for a certain duration.
Make sure to perform the calibration in an environment free from magnetic or electromagnetic interference, such as metal objects or electronic devices. This helps ensure accurate calibration and prevents any potential issues during flight.
After completing the IMU calibration, the DJI GO app will display a confirmation message, indicating that the calibration was successful. At this point, you can power off the drone and proceed with the next steps in your pre-flight preparations.
If you encounter any issues during the IMU calibration or continue to experience flight stability problems after calibration, consult the DJI support resources or consider reaching out to their customer service for further assistance.
By calibrating the IMU of your DJI Mavic Pro, you’re optimizing the drone’s flight performance and ensuring accurate sensor readings. This step is essential for smooth and stable flights, especially when performing complex maneuvers or flying in challenging conditions.
With the IMU successfully calibrated, you’re now ready to move on to the next step: updating the firmware on your DJI Mavic Pro.
Step 9: Updating Firmware
Keeping your DJI Mavic Pro’s firmware up to date is crucial for optimal performance, enhanced features, and improved flight safety. DJI regularly releases firmware updates to address any potential issues, introduce new functionalities, and enhance stability. To ensure you have the latest firmware version installed on your Mavic Pro, follow these steps:
- Ensure that your DJI Mavic Pro is powered on, and the remote controller is connected to the drone.
- Launch the DJI GO app on your connected mobile device.
- Tap on the “Settings” icon to access the settings menu.
- Select “Aircraft” or “Drone Settings” from the available options.
- Look for the “Firmware Update” or “Firmware Version” section.
- If an update is available, the DJI GO app will prompt you to download and install it.
- Follow the on-screen instructions to complete the firmware update process.
- Ensure that the drone remains powered on and connected to the remote controller during the update.
- Wait for the firmware update to finish. Avoid interrupting the update or turning off the drone.
- After the update is complete, restart the drone and remote controller if prompted by the app.
It’s important to note that firmware updates can take some time, depending on the size of the update and your internet connection speed. Ensure that your mobile device has enough battery life and a stable internet connection to complete the update without interruptions.
During the update process, it’s crucial to avoid any interference or disturbances that could disrupt the connection between the DJI Mavic Pro and your mobile device. Maintain a stable environment and do not power off the drone or remote controller until the update is entirely finished.
If you encounter any issues or errors during the firmware update or if the update fails to download or install, refer to the DJI support resources or contact their customer service for further assistance.
Updating the firmware of your DJI Mavic Pro is an essential step to ensure that you have access to the latest features and improvements. By keeping your firmware updated, you can fly with added confidence, knowing that your drone is operating on the most stable and optimized software version.
With the firmware successfully updated, you’re now ready to move on to the final step: performing a test flight and conducting final checks before taking your DJI Mavic Pro on a full-fledged flying adventure!
Step 10: Test Flight and Final Checks
Before taking your DJI Mavic Pro on a full flight, it’s essential to perform a test flight and conduct final checks to ensure everything is in working order and calibrated correctly. This step helps ensure a safe and successful flying experience. Follow these steps for your test flight and final checks:
- Find a suitable outdoor location that provides ample space and complies with local drone flying regulations.
- Perform a pre-flight checklist, including checking the propellers for any damage or debris and ensuring that the battery is securely connected.
- Power on your Mavic Pro, ensuring that the batteries are sufficiently charged. Wait until the drone has connected to GPS satellites for a strong and stable signal.
- Check the DJI GO app for any flight restrictions, updated flight recommendations, or airspace warnings.
- Take off and hover the Mavic Pro at a low altitude to ensure smooth and stable flight controls.
- Test out the different flight modes, including hover, ascent, descent, and basic maneuvering. Ensure that all controls respond accurately and smoothly.
- Inspect the live video feed in the DJI GO app to confirm a clear and uninterrupted video stream from the drone’s camera.
- Monitor the battery level and flight time during the test flight to gauge the drone’s endurance and plan future flights accordingly.
- During the flight, pay attention to any unusual noises, vibrations, or behavior of the Mavic Pro. If you notice anything abnormal, land the drone immediately and investigate the issue.
- After a successful test flight, power off the drone and remote controller, and perform a post-flight check to ensure everything is safely packed and ready for your next flight.
Performing a test flight and conducting final checks allows you to familiarize yourself with the flight characteristics of the DJI Mavic Pro, ensure all flight controls are responsive, and confirm the drone’s overall performance. It’s also an opportunity to identify and address any potential issues or concerns before embarking on a more challenging or longer flight.
Remember to always adhere to local regulations and guidelines when flying your DJI Mavic Pro. Respect the privacy and safety of others, and be mindful of your surroundings. Additionally, consider joining local drone communities or forums to learn from experienced pilots and stay updated with the latest best practices.
With the successful completion of the test flight and final checks, you’re now ready to enjoy the thrilling capabilities of your DJI Mavic Pro and capture stunning aerial footage in your future flights.
Conclusion
Connecting to your DJI Mavic Pro is a straightforward process that ensures a seamless flight experience and access to the drone’s powerful features. By following the step-by-step guide outlined in this article, you can confidently connect your Mavic Pro to the remote controller and your mobile device.
Throughout the process, it’s essential to ensure that all components are in good condition, batteries are fully charged, and the DJI GO app is installed and up to date. Linking the Mavic Pro and remote controller establishes a secure connection, while calibrating the IMU optimizes flight performance and stability.
Updating the firmware is crucial for accessing the latest features and improvements, and performing a test flight with final checks allows you to familiarize yourself with the drone’s controls and ensure everything is functioning correctly.
Always remember to fly responsibly and abide by local regulations and safety guidelines. Be aware of your surroundings, respect others’ privacy, and avoid flying in restricted areas.
By connecting to your DJI Mavic Pro and following best practices, you can unlock the full potential of your drone and capture breathtaking aerial footage. Enjoy the thrill and creativity that comes with drone flight, and may your adventures with the Mavic Pro be filled with unforgettable moments.