Introduction
Welcome to the world of the DJI Ronin S, a revolutionary camera stabilizer that takes your videography to the next level. Whether you’re a professional filmmaker or an aspiring content creator, the Ronin S offers unparalleled stability, flexibility, and control for capturing smooth and cinematic shots.
The DJI Ronin S is designed to support a wide range of cameras, from mirrorless to DSLRs, making it a versatile tool for capturing stunning footage in various shooting conditions. With its advanced stabilization technology and intuitive controls, the Ronin S allows you to achieve professional-level results without the need for a bulky and expensive Steadicam rig.
When it comes to film-making, stability is key. The Ronin S features a powerful 3-axis gimbal that effectively counteracts camera shake and vibrations, ensuring smooth and steady shots, even in challenging environments. Whether you’re shooting a fast-paced action scene or a slow-motion sequence, the Ronin S keeps your camera locked in place, resulting in professional-quality footage.
One of the standout features of the Ronin S is its ease of use. The intuitive design allows novice users to quickly learn the basics, while offering advanced options for experienced filmmakers. The user-friendly interface and ergonomic handle make it comfortable to operate for long periods, while the customizable settings allow you to fine-tune the stabilization according to your specific needs.
Additionally, the Ronin S offers a variety of shooting modes and creative features to enhance your videography. From time-lapse and panorama modes to motion control and automatic subject tracking, the Ronin S provides a wide range of options for capturing unique and dynamic shots. Whether you’re shooting a wedding, a documentary, or an action-packed adventure, the Ronin S empowers you to unleash your creativity and capture the perfect shot.
In this guide, we’ll take you through the various aspects of using the DJI Ronin S, from unboxing and balancing to controlling and troubleshooting. By the end of this article, you’ll have a solid understanding of how to make the most of this incredible camera stabilizer and unleash your creative potential.
Unboxing the DJI Ronin S
When you first receive your DJI Ronin S, unboxing it is an exciting experience. The package contains all the essentials you need to get started with this exceptional camera stabilizer. Let’s take a closer look at what you can expect to find inside the box.
As you open the package, you’ll find the DJI Ronin S neatly nestled in a foam padding, ensuring its safety during transportation. Alongside the Ronin S, you’ll find a set of accessories that will aid you in setting up and using the stabilizer effectively.
The box includes a robust and ergonomically designed handle, which serves as the main control unit for the Ronin S. The handle features a variety of buttons, a joystick, and a mode dial, allowing you to easily navigate through the different settings and control the movements of the stabilizer.
Inside the box, you’ll also find the battery grip, which contains the removable battery that powers the Ronin S. The grip is constructed with a comfortable and non-slip material, ensuring a secure hold during operation. The battery provides a decent runtime, allowing you to film for extended periods without interruption.
In addition to the main components, the package includes various accessories and cables to enhance your user experience. These accessories include a USB-C cable for connecting the Ronin S to your computer for firmware updates, a camera mounting plate for attaching your camera securely to the stabilizer, and a quick-release plate for fast and easy camera mounting.
Furthermore, the package also contains a user manual that provides detailed instructions on how to set up and use the DJI Ronin S. The manual offers step-by-step guidance, making it easy for beginners to understand the process and get started quickly.
Overall, the unboxing experience of the DJI Ronin S is impressive. The attention to detail in the packaging, as well as the inclusion of essential accessories and a comprehensive user manual, showcases DJI’s commitment to delivering a premium product.
Now that you’ve unboxed the DJI Ronin S, it’s time to move on to the next step – balancing the stabilizer for optimal performance. Let’s dive into the process of balancing the Ronin S and ensuring that your camera is perfectly aligned for smooth and stable shots.
Balancing the Ronin S
Properly balancing your DJI Ronin S is crucial to ensure optimal performance and stability while using the camera stabilizer. Balancing involves adjusting the various axes of the Ronin S to evenly distribute the weight of your camera and lens combination. This process may seem daunting at first, but with practice, it becomes quick and straightforward.
To begin, you’ll first need to attach the camera mounting plate to the bottom of your camera. Secure it tightly to ensure a stable connection between your camera and the Ronin S. Once the plate is attached, it’s time to mount your camera onto the Ronin S.
Start by sliding the camera onto the mounting plate, ensuring that it fits securely and aligns properly with the stabilizer. The camera should be centered and balanced horizontally on the plate. If necessary, make adjustments to the position of the camera on the plate until it is aligned correctly.
Next, you’ll need to adjust the forward/backward balance on the Ronin S. This is done using the sliding adjustment plate located on the side of the stabilizer. Loosen the knob and slide the adjustment plate forward or backward to achieve the proper balance. The goal is to position the camera so that it stays level when the Ronin S is powered on.
After adjusting the forward/backward balance, you’ll need to focus on the left/right balance. This is achieved by moving the camera left or right within the mounting plate. Again, the goal is to find the optimal position where the camera remains level when the stabilizer is powered on and in use.
The final step in balancing the Ronin S is to adjust the vertical balance. This is accomplished by moving the camera up or down on the mounting plate. The aim is to achieve a balanced position where the camera does not tilt forward or backward when in use.
Once you’ve made these adjustments, tighten all the knobs and ensure that everything is secure. Carefully check the balance of the Ronin S by powering it on and observing how the camera remains level and stable. If needed, make further small adjustments until the balance is perfect.
Properly balancing your DJI Ronin S is essential to achieve smooth and stable shots. Taking the time to go through the balancing process ensures that the stabilizer is effectively counteracting any movements and vibrations, resulting in professional-quality footage.
Now that you’ve successfully balanced your Ronin S, it’s time to move on to mounting your camera and exploring the various features and controls of this exceptional camera stabilizer.
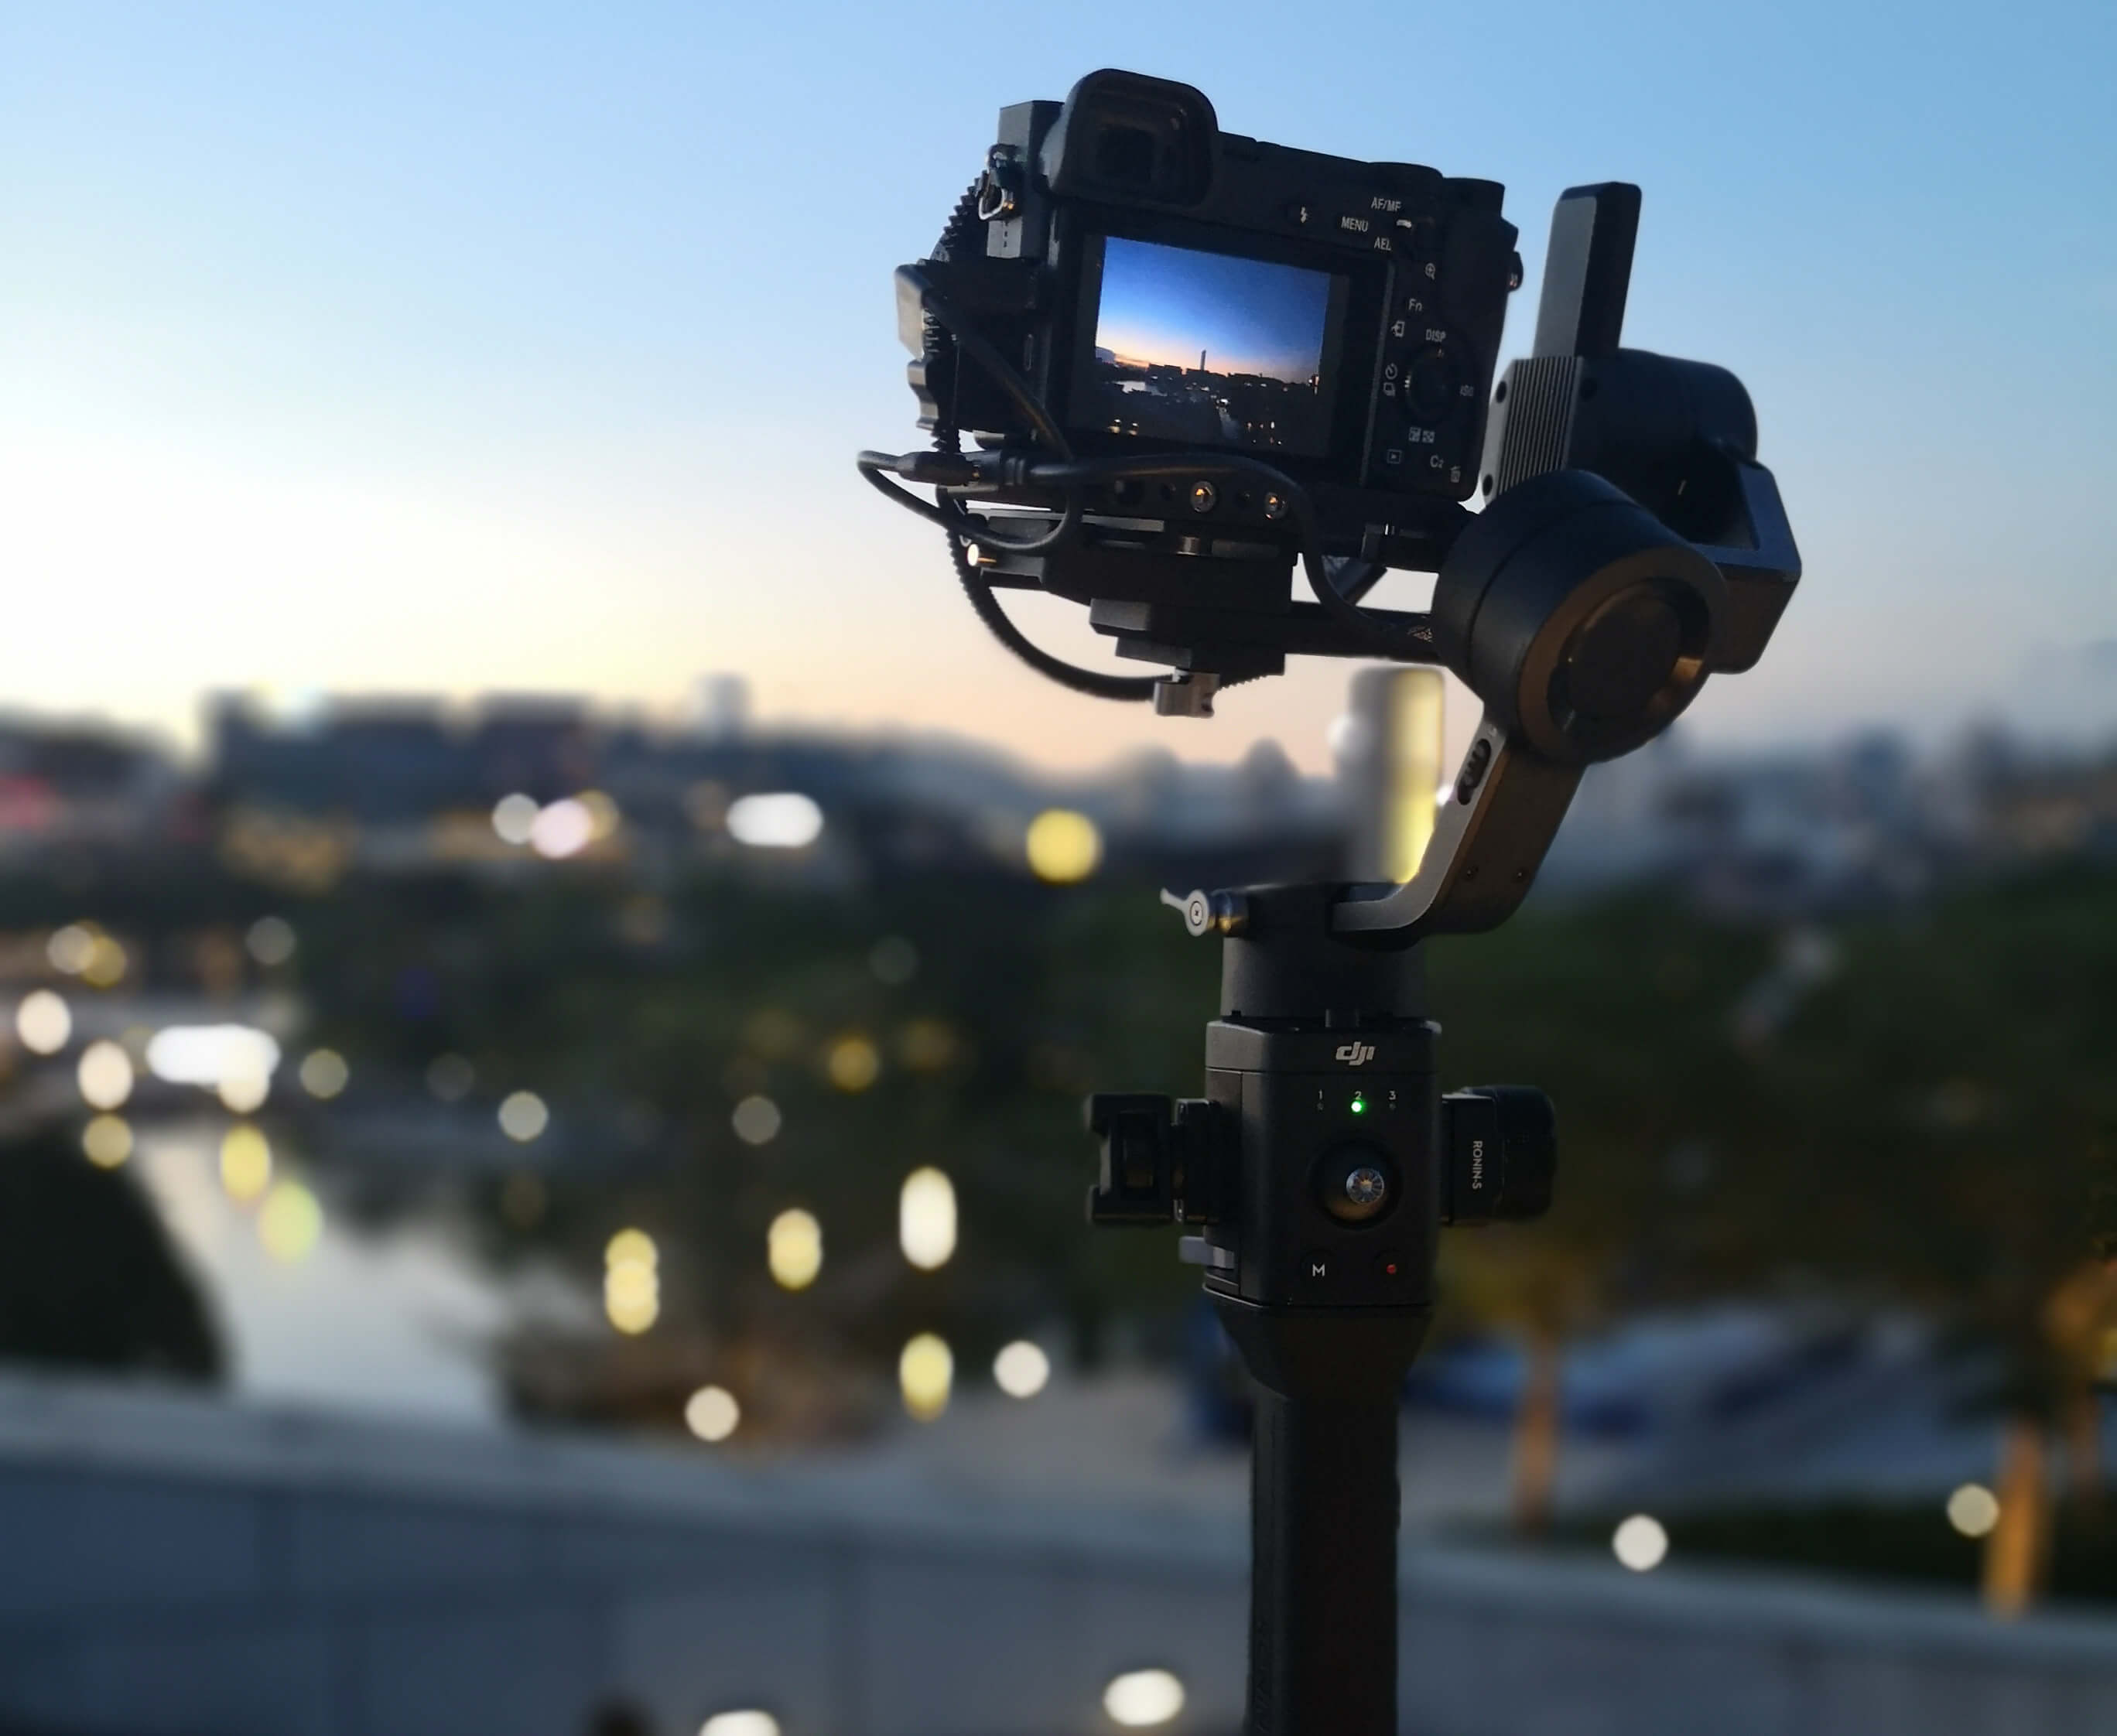
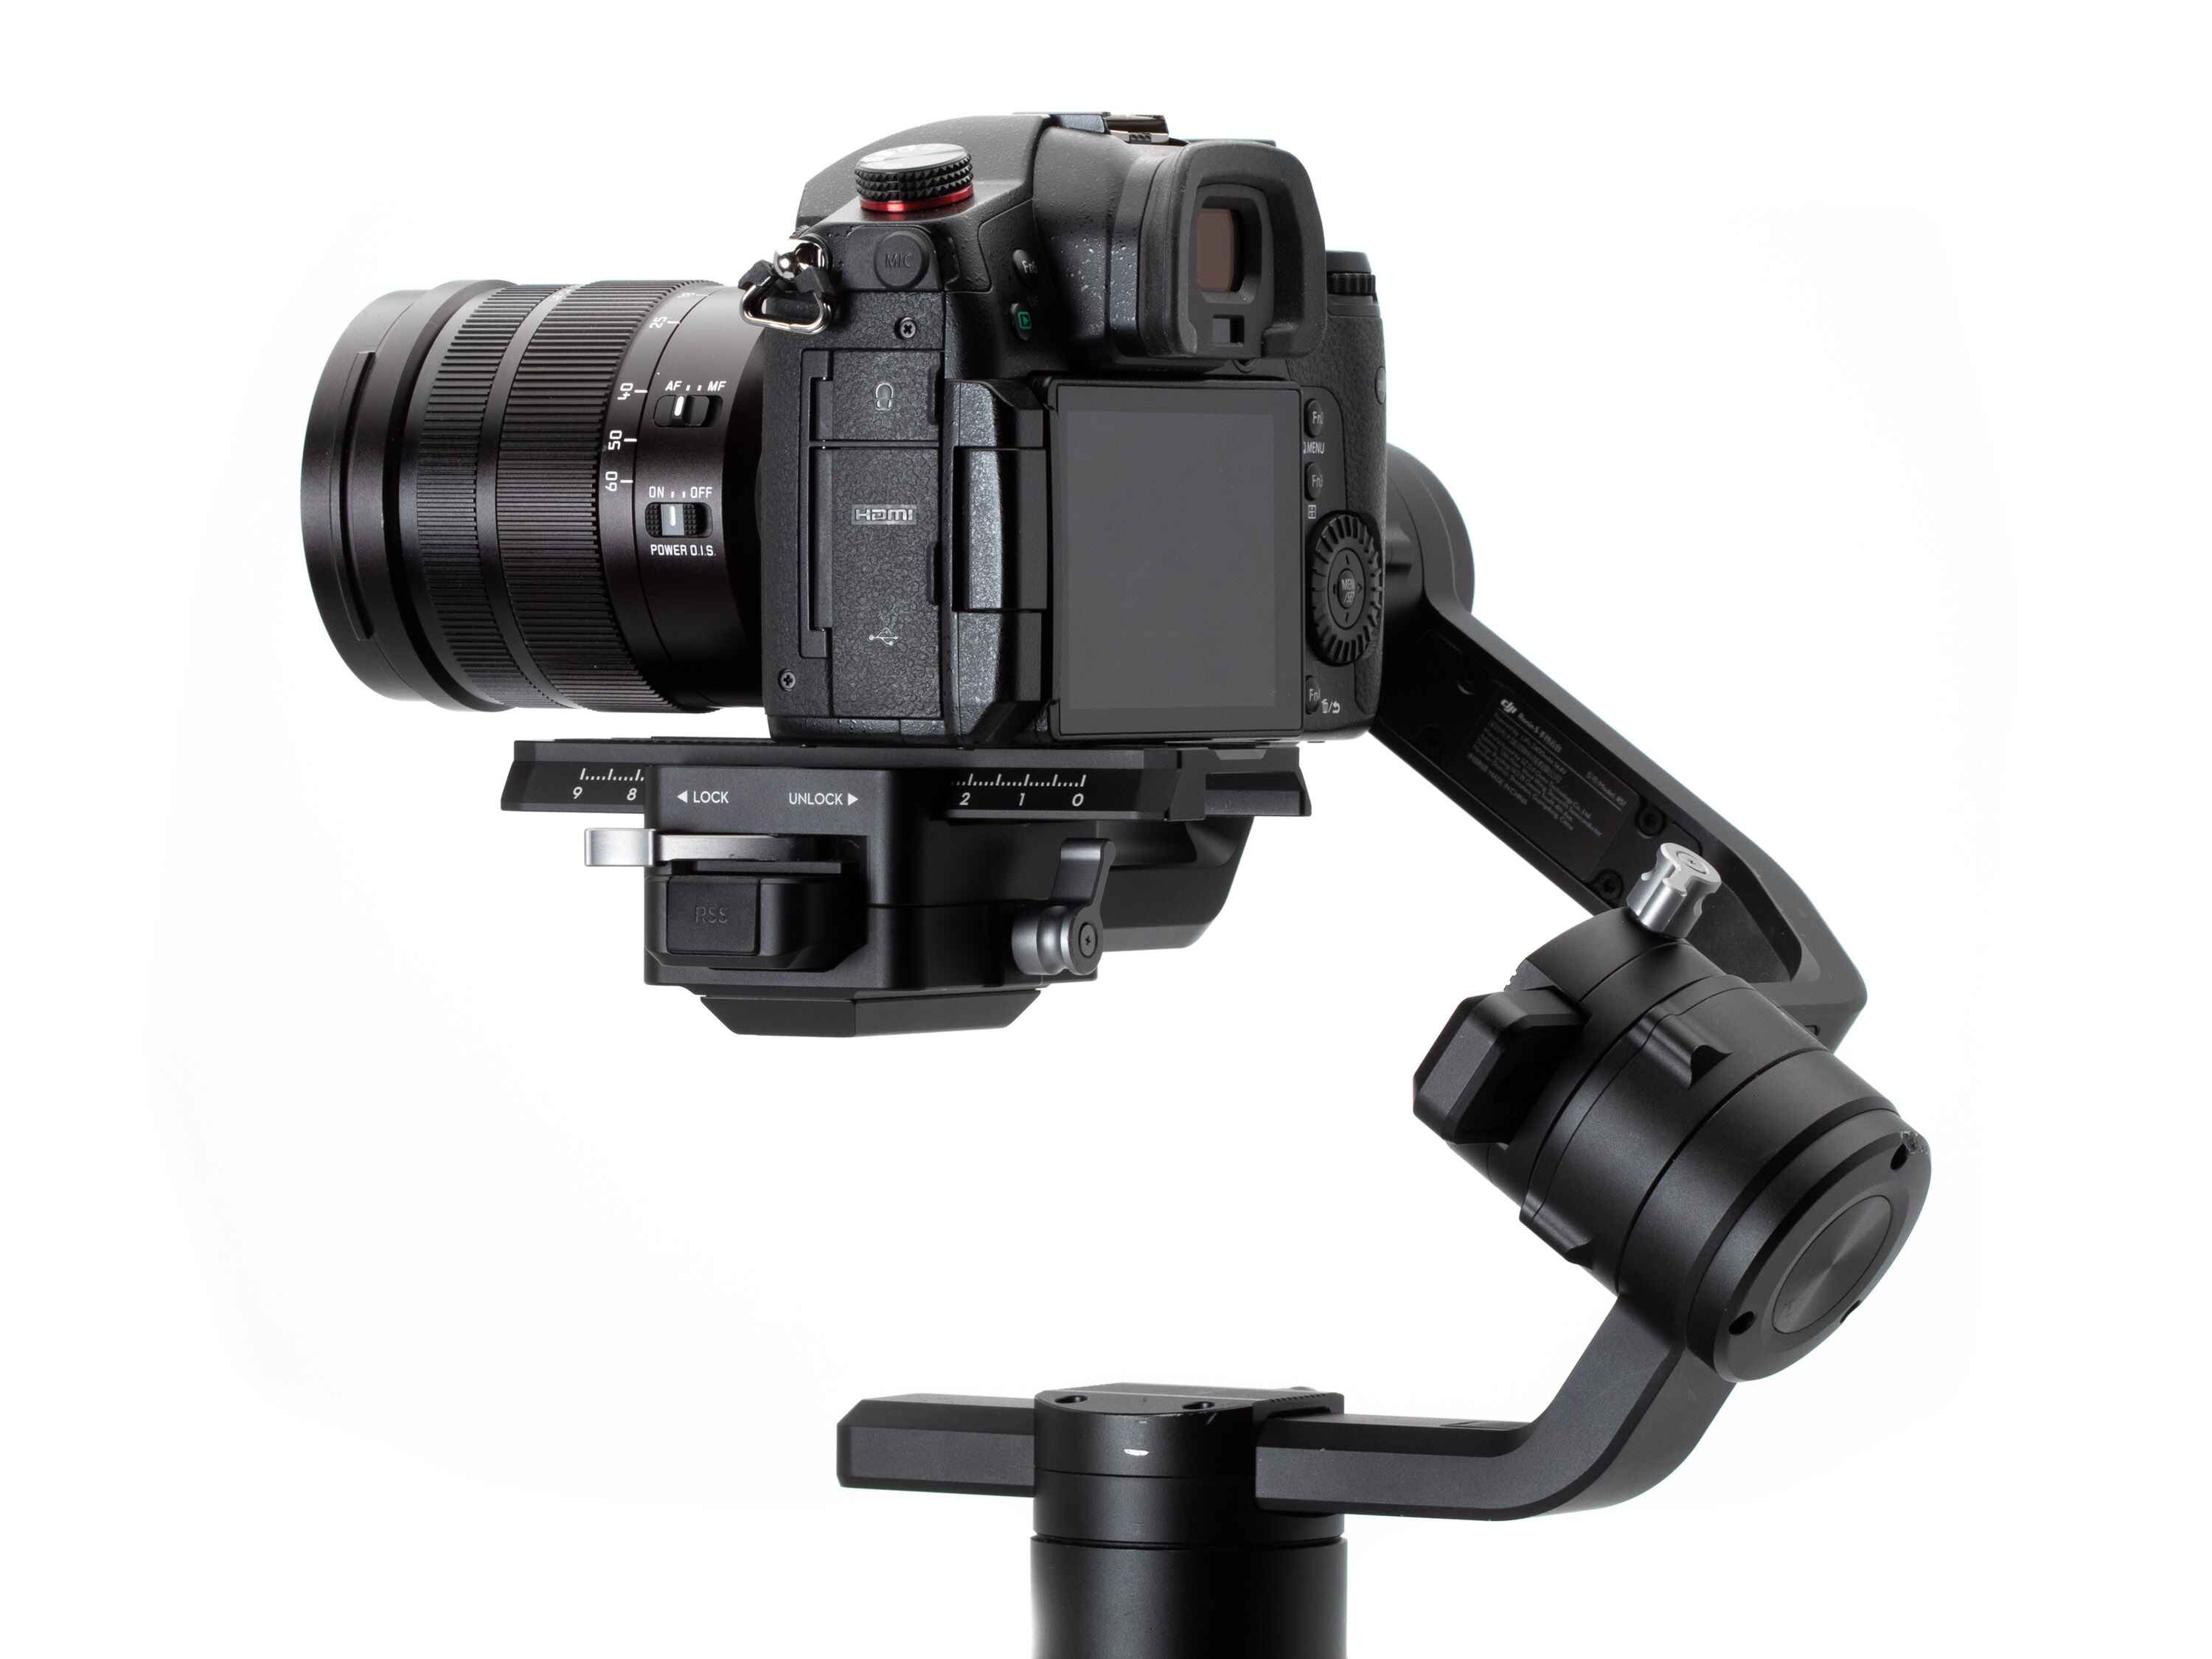
Mounting the Camera
Mounting your camera securely onto the DJI Ronin S is a crucial step in using the camera stabilizer effectively. Proper mounting ensures stability and allows you to capture smooth and steady footage. Let’s walk through the process of mounting your camera onto the Ronin S.
Start by ensuring that the Ronin S is powered off and in a stable position. This prevents any accidental movements while mounting your camera. Locate the camera mounting plate on the Ronin S and loosen the mounting screws using the provided Allen wrench or a compatible tool.
Attach the camera mounting plate to the bottom of your camera, ensuring it is securely tightened. The plate usually has a standard 1/4″ screw that fits most cameras. Align the plate with the camera’s tripod socket and tighten the screw until the camera is securely mounted.
Once your camera is securely attached to the mounting plate, you can now mount it onto the Ronin S. Align the plate’s bracket with the slots on the Ronin S, and gently slide it into place. Ensure that the camera is centered and secure within the stabilizer.
With the camera mounted on the Ronin S, tighten the mounting screws on the stabilizer to secure the camera in place. Check that the camera is firmly attached without excessive movement. Avoid overtightening the screws, as it may damage the camera or the mounting plate.
After mounting the camera, it’s important to double-check the balance of the Ronin S. Ensure that the camera remains level and stable when the stabilizer is powered on. If needed, make slight adjustments to the forward/backward, left/right, or vertical balance to achieve optimal stability.
Remember to always check the camera’s instruction manual for any specific recommendations on mounting and balancing. Different cameras may have slightly different mounting procedures, so it’s important to familiarize yourself with your specific camera’s requirements.
Now that your camera is securely mounted on the DJI Ronin S, you’re ready to power it on and start exploring the various controls and functions of this remarkable camera stabilizer.
Powering On the Ronin S
Before you can start using the DJI Ronin S, you need to power it on and ensure it is ready for operation. The Ronin S is powered by a removable battery that is included in the package. Let’s walk through the process of powering on the Ronin S.
Start by ensuring that the Ronin S is securely mounted and balanced with your camera. Double-check that all the mounting screws are tightened and that the camera remains level when the stabilizer is powered on.
Locate the battery grip on the Ronin S handle and press and hold the power button for a few seconds. The power button is usually marked with a small icon or the word “Power”. You should see the LED lights on the grip illuminate, indicating that the Ronin S is turning on.
Once the Ronin S is powered on, it will go through a brief initialization process. During this time, the stabilizer will calibrate itself and prepare for operation. Ensure that you do not move or disturb the Ronin S during this process.
Once the initialization is complete, the Ronin S will be ready for use. You can confirm the status of the stabilizer by checking the LED lights on the battery grip. A solid green light indicates that the Ronin S is powered on and functioning properly.
It’s important to note that the battery life of the Ronin S will vary depending on various factors such as the camera weight and usage. Before starting your shoot, make sure that the battery is fully charged or have spare batteries ready for extended shooting sessions.
If the Ronin S is not responding or experiencing any issues during the power-on process, refer to the user manual or consult the DJI support team for troubleshooting assistance.
Now that the Ronin S is powered on, you’re ready to take control and start exploring the various settings and features that this remarkable camera stabilizer has to offer.
Controlling the Ronin S
Controlling the DJI Ronin S is intuitive and straightforward, thanks to its user-friendly interface and ergonomic design. Understanding how to navigate the controls allows you to fully harness the capabilities of this advanced camera stabilizer. Let’s explore how to control the Ronin S and unleash its potential.
The main control unit of the Ronin S is the handle, which features buttons, a joystick, and a mode dial. The joystick controls the movement of the camera, allowing you to pan, tilt, and roll with precision. The buttons on the handle provide quick access to various functionalities and settings.
One of the essential buttons on the Ronin S handle is the record button. This button allows you to start and stop recording on your camera directly from the stabilizer, eliminating the need to touch your camera during the shoot. Simply press the record button to begin capturing footage.
The mode dial on the handle allows you to switch between different operation modes and shooting profiles. These modes include Pan Follow, Lock, Follow, and FPV (First Person View), each offering unique functionalities to adapt to different shooting scenarios.
Switching between modes is as simple as rotating the mode dial to the desired setting. Each mode provides specific control behavior, such as locking the camera position or following the movement of the handle. Experiment with different modes to find the one that suits your shooting style and creative vision.
In addition to the physical controls on the Ronin S handle, the stabilizer can also be controlled wirelessly using the DJI Ronin mobile app. By connecting your phone or tablet to the Ronin S via Bluetooth, you gain access to additional features and settings.
The DJI Ronin app allows you to adjust parameters such as motor power, sensitivity, and follow speed, giving you precise control over the stabilizer’s performance. It also provides access to advanced features such as time-lapse, panorama, and motion control, expanding the creative possibilities of your shots.
Additionally, the app offers an Active Track feature, which utilizes artificial intelligence to track and follow a subject automatically. Simply select the subject on the app, and the Ronin S will smoothly track its movements, allowing you to capture dynamic shots with ease.
Exploring and familiarizing yourself with the various controls, modes, and features of the DJI Ronin S will enable you to unleash your creativity and capture stunning footage. Take the time to experiment and find the settings that best suit your needs and style, and get ready to elevate your videography to new heights.
Using Active Track
One of the standout features of the DJI Ronin S is its Active Track capability, which allows for automatic subject tracking. With Active Track, you can effortlessly capture smooth and professional footage of moving subjects without the need for manual adjustments. Let’s dive into how to use Active Track with the Ronin S.
To begin using Active Track, you’ll need to connect your smartphone or tablet to the Ronin S using the DJI Ronin mobile app. Ensure that both devices are connected via Bluetooth and that you have a stable and reliable connection.
Launch the DJI Ronin app on your smartphone or tablet and navigate to the Active Track feature. This feature is typically found within the app’s camera settings or shooting modes section.
Within the Active Track feature, you’ll find various options and settings to customize your tracking experience. You can choose the subject you want the Ronin S to track by simply tapping on it in the app’s viewfinder. The Ronin S will then use its advanced algorithms to track the subject’s movements.
Once the subject is selected, you can adjust the tracking settings to fine-tune the tracking performance. This includes options such as tracking speed, sensitivity, and distance. Experiment with these settings to find the optimal configuration for your specific shooting scenario.
Once the settings are adjusted, you’re ready to begin tracking your subject. Simply press the start button within the Active Track feature, and the Ronin S will initiate the tracking process. The stabilizer will smoothly follow the subject’s movements, keeping it centered within the frame as you capture your footage.
During the tracking process, you can still control the movement of the Ronin S using the joystick on the handle. This allows you to create dynamic shots by combining the automated tracking with manual adjustments.
It’s important to note that while Active Track is a powerful feature, it may have limitations in certain conditions. Factors such as low lighting, fast movements, or crowded scenes could impact the tracking accuracy. Always be mindful of the shooting environment and make adjustments as necessary to ensure the best results.
Active Track opens up a world of possibilities for capturing creative and engaging footage. Whether you’re shooting a fast-paced sports event, a documentary, or a vlog, the Ronin S with Active Track allows you to focus on your subject while the stabilizer takes care of the tracking, resulting in smooth and professional-looking shots.
Now that you’re familiar with how to use Active Track, it’s time to explore the various settings and features of the DJI Ronin S to further enhance your videography skills.
Adjusting the Settings
One of the advantages of the DJI Ronin S is its customizable settings, allowing you to fine-tune the stabilizer according to your specific shooting needs. By adjusting the settings, you can optimize the performance, responsiveness, and functionality of the Ronin S. Let’s explore how to adjust the settings of this exceptional camera stabilizer.
To access the settings of the Ronin S, first, ensure that it is powered on and connected to the DJI Ronin mobile app on your smartphone or tablet. The app provides a user-friendly interface for adjusting and customizing various parameters.
Within the app, navigate to the settings section, where you’ll find a range of options to modify the Ronin S settings. These options may include motor power, joystick sensitivity, follow speed, and more, depending on the specific model of the Ronin S you’re using.
Experimenting with the motor power setting can help you find the right balance between stabilization strength and battery life. Increase the motor power if you need more stability for heavier camera setups, or decrease it for lighter setups to conserve battery power.
The joystick sensitivity setting allows you to adjust the responsiveness of the joystick on the Ronin S handle. Increase it for faster and more immediate camera movements, or decrease it for smoother and more controlled motions.
Follow speed is another important setting that determines how quickly the Ronin S responds to movements. Higher values result in faster tracking and pan/tilt speeds, while lower values provide smoother and more gradual movements. Adjust this setting based on the desired camera movement style for your specific shot.
In addition to these basic settings, the DJI Ronin app may offer advanced features such as time-lapse modes, panorama shooting modes, and the ability to save and load custom profiles. Take the time to explore these features and customize them to suit your creative vision.
As you adjust the settings, it’s important to strike a balance between responsiveness, stability, and power consumption. Fine-tuning the settings based on your specific shooting scenario and equipment can greatly enhance the performance of the Ronin S, resulting in smoother shots and more efficient operation.
Remember to refer to the user manual or consult DJI support for any specific settings or recommendations for your Ronin S model.
By taking advantage of the customizable settings of the DJI Ronin S, you can unleash its full potential and capture professional-quality footage tailored to your unique shooting style and requirements.
Now that you’re equipped with the knowledge of adjusting the settings, it’s time to dive into mastering the art of smooth camera movements with the DJI Ronin S.
Smooth Camera Movements
Achieving smooth and steady camera movements is essential for capturing professional-quality footage with the DJI Ronin S. By mastering the art of smooth camera movements, you can add a cinematic touch to your videos and create captivating visuals. Let’s explore some techniques to ensure smooth camera movements with the Ronin S.
The first key to smooth camera movements is to maintain a stable grip on the Ronin S handle. Hold the handle firmly but with a relaxed grip to avoid any unnecessary tension or shakiness. This allows the stabilizer to provide the necessary stability while giving you the freedom to smoothly control the camera’s movements.
Next, pay attention to your body posture and movements. Keep your feet shoulder-width apart to maintain a stable stance and distribute your body weight evenly. Avoid any sudden or jerky movements that may cause the camera to shake. Instead, move smoothly and gracefully, keeping your motions fluid.
When operating the Ronin S, use deliberate and controlled movements with the joystick. Be gentle with your input to create smooth pans, tilts, and rolls. Take your time to get comfortable with the joystick sensitivity settings to find the right level of responsiveness for your desired camera movements.
Incorporating gradual and planned camera movements adds a sense of elegance to your shots. Instead of abruptly starting or stopping a motion, ease into or out of it. This can be achieved by gradually increasing or decreasing the speed or smoothly transitioning between different camera positions.
Consider using the different operation modes of the Ronin S to enhance the smoothness of camera movements. The “Follow” mode, for example, allows the camera to follow your hand motions smoothly, mimicking the natural movement of your body. Experiment with the different modes to find the one that best suits your shooting style.
The Ronin S also offers advanced features such as the “SmoothTrack” functionality. This allows you to set the speed of the camera movement and create silky-smooth transitions between different subjects or scenes. Utilizing this feature can greatly enhance the overall smoothness and visual appeal of your shots.
Practice and experimentation are key to mastering smooth camera movements. Spend time honing your skills, exploring different techniques, and experimenting with various camera movements to find what works best for your specific scenario and creative vision.
By incorporating these techniques and utilizing the advanced features of the DJI Ronin S, you can elevate your videography to new heights and capture footage that is visually captivating and professional.
Now that you’re equipped with the knowledge of smooth camera movements, it’s time to explore the advanced features and functionalities of the DJI Ronin S.
Advanced Features
While the DJI Ronin S offers exceptional stabilization and control, it also comes with a range of advanced features that can elevate your videography to the next level. These features provide additional creativity and versatility, allowing you to capture unique and captivating shots. Let’s explore some of the advanced features of the DJI Ronin S.
Time-Lapse: The Ronin S offers various time-lapse modes, enabling you to create stunning time-lapse sequences with ease. You can choose from options such as motion time-lapse, time-lapse path, or long exposure time-lapse. Experiment with different settings and intervals to capture breathtaking time-lapse footage.
Panorama: With the Ronin S, you can effortlessly capture wide and immersive panoramas. The motorized movement and precision control of the stabilizer allow you to create seamless panoramic shots without the need for complicated post-processing. Simply choose the panorama mode, and the Ronin S will guide you through the process.
Motion Control: The motion control feature of the Ronin S allows you to automate camera movements with precision. Set keyframes, define the path, and adjust the speed of the camera movement. This feature enables you to create dynamic and complex camera motions, expanding your creative possibilities.
Track Focus: The Ronin S supports select cameras with autofocus capabilities, allowing you to track and maintain focus on moving subjects. This is particularly useful for capturing fast-paced action or subjects that require consistent focus throughout the shot. Check the compatibility of your camera with the Ronin S for optimal results.
Force Mobile: The Force Mobile feature allows you to control the Ronin S wirelessly using your smartphone’s gyroscope. By simply tilting and moving your phone, you can control the direction and movement of the stabilizer. This offers a unique and intuitive way to operate the Ronin S and achieve fluid and precise camera movements.
Subject Tracking: In addition to the Active Track feature, the Ronin S provides subject tracking capability within the DJI Ronin app. This allows you to select a moving subject on the app and have the stabilizer automatically track and follow it. This feature is ideal for scenarios where you want the camera to stay focused on a specific subject while it moves.
These are just a few examples of the advanced features and functionalities provided by the DJI Ronin S. Exploring and experimenting with these features enables you to unleash your creativity and capture breathtaking footage in ways that were once only possible with professional film equipment.
Refer to the user manual and explore the DJI Ronin app to fully understand and utilize these advanced features. By incorporating them into your videography, you can create visually stunning and engaging content that stands out from the crowd.
Now that you’re familiar with the advanced features, it’s time to address some common troubleshooting issues that you may encounter while using the DJI Ronin S.
Troubleshooting Common Issues
While the DJI Ronin S is a powerful and reliable camera stabilizer, you may come across occasional issues that can affect its performance. Understanding and troubleshooting these common issues will help you overcome any obstacles and ensure a smooth filming experience. Let’s discuss some common issues that you may encounter with the DJI Ronin S and how to troubleshoot them.
1. Calibrating the Ronin S: If you notice any drift or erratic behavior with the stabilization, it may be necessary to perform a calibration. Follow the instructions in the user manual or within the DJI Ronin app to calibrate the sensors and ensure accurate stabilization.
2. Power and Battery Issues: If the Ronin S is not turning on or experiencing battery-related problems, start by double-checking the battery connection. Ensure that the battery is inserted correctly and securely. If the issue persists, try using a different battery or charging the existing battery fully.
3. Gimbal Overload: If you receive an error message indicating “Gimbal Overload,” it means the Ronin S is struggling to handle the weight or balance of your camera setup. Verify that the camera and lens combination is within the recommended weight limit of the stabilizer. Additionally, ensure that the camera is correctly balanced and adjust the mounting plate or position as necessary.
4. Motor Noise: If you encounter excessive motor noise from the Ronin S, double-check the balance and stability of the camera setup. An imbalanced or loose camera can cause increased strain on the motors, resulting in noise. Make sure all mounting screws are tightened securely and the camera is balanced correctly.
5. Connection and Firmware Issues: If you experience connectivity problems between the Ronin S and the DJI Ronin mobile app, ensure that both devices are running the latest firmware. It is also helpful to restart the devices, reconnect them through Bluetooth, or reinstall the app if necessary.
6. Jerky or Inconsistent Movements: If you notice jerky or inconsistent movements when operating the Ronin S, verify that the joystick sensitivity is set appropriately. Adjust the sensitivity settings within the DJI Ronin app to find the optimal level for smooth and controlled movements.
If you encounter any other issues or difficulties with the DJI Ronin S, it is recommended to consult the user manual or reach out to DJI support for further assistance. They can provide specific guidance and troubleshooting steps based on your specific situation.
Remember, troubleshooting issues with the Ronin S is a normal part of the filming process, and with the right knowledge and support, you can overcome any challenges that may arise.
Now that you’re equipped with troubleshooting knowledge, you’re ready to unleash the full potential of the DJI Ronin S and capture stunning, stabilized footage.
Final Thoughts
The DJI Ronin S is undeniably a game-changer in the world of camera stabilizers. Its advanced stabilization technology, intuitive controls, and versatile features make it a powerful tool for capturing smooth and professional-quality footage. From filmmakers to content creators, the Ronin S offers unprecedented stability and control that can take your videography to new heights.
Throughout this guide, we’ve explored various aspects of using the DJI Ronin S, including unboxing, balancing, mounting, powering on, controlling, utilizing advanced features, and troubleshooting common issues. By following these steps and familiarizing yourself with the capabilities of the Ronin S, you can maximize its performance and capture stunning shots.
Remember, practice makes perfect. Spend time honing your skills, experimenting with different settings and techniques, and challenging your creativity. The more you use the Ronin S, the more you’ll uncover its potential and discover unique ways to incorporate it into your videography projects.
Additionally, stay up to date with firmware updates and advancements from DJI. These updates often bring new features, improvements, and fixes that can enhance the overall performance of your Ronin S, ensuring you always have the latest and greatest capabilities at your fingertips.
Lastly, enjoy the journey. The DJI Ronin S opens up a world of possibilities for your creative expression. With its stable and precise movements, you have the freedom to tell stories in visually compelling and immersive ways. Embrace the joy of capturing smooth camera movements and let your artistic vision come to life.
Now, armed with the knowledge and understanding of how to use the DJI Ronin S, it’s time to embark on your videography adventures with confidence and enthusiasm. Unleash your creativity, push your boundaries, and create incredible cinematic footage that leaves a lasting impression on your audience.
So, grab your DJI Ronin S, hit record, and let the magic begin!