Introduction
Welcome to the exciting world of DJI Om 4! Whether you are an aspiring filmmaker, a vlogger, or simply someone who loves capturing life’s special moments, the DJI Om 4 is a versatile and powerful tool that can take your videography skills to new heights.
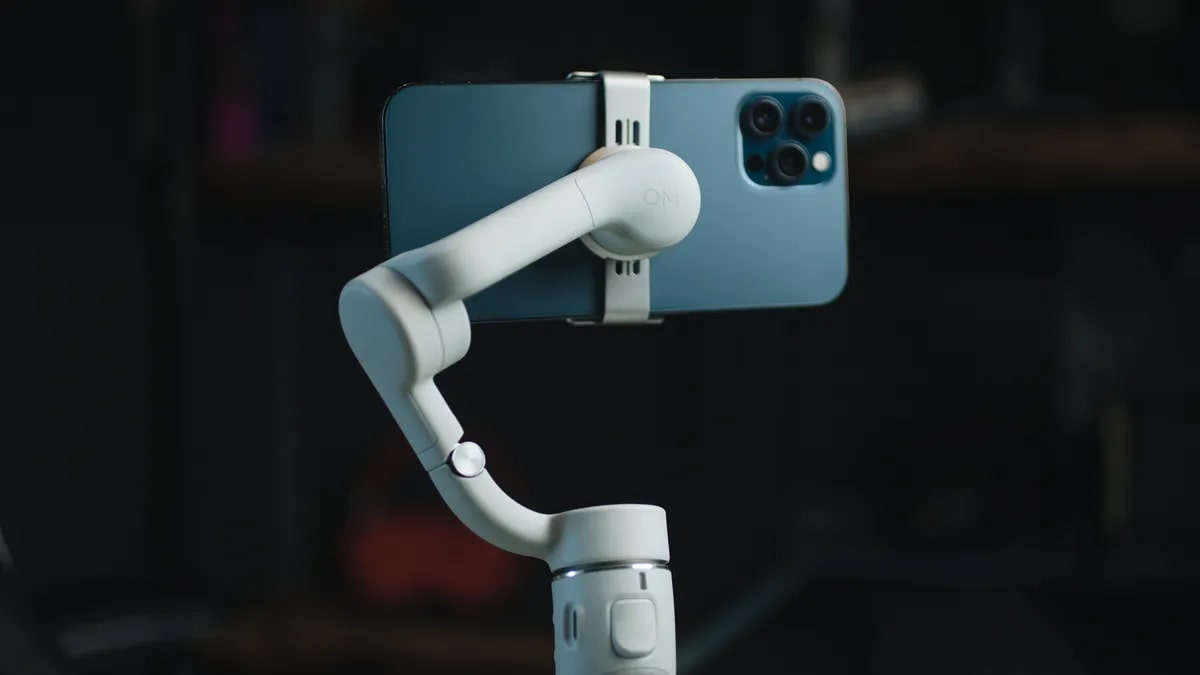
Designed for use with smartphones, the DJI Om 4 is a handheld stabilizer that helps eliminate shaky footage and allows you to create smooth and professional-looking videos. With its advanced features and intuitive controls, you can easily capture stunning visuals and unleash your creativity.
In this guide, we will walk you through the process of setting up your DJI Om 4, attaching your smartphone, and getting started with the DJI Mimo app. We will also explore the various shooting modes and intelligent features that the DJI Om 4 offers, as well as provide some advanced techniques and tips to help you capture truly captivating footage.
Whether you are a beginner or an experienced videographer, this guide has something for everyone. By the end of it, you will have a solid understanding of how to use the DJI Om 4 to its full potential and create stunning videos that will impress your audience.
So, let’s dive in and discover the amazing capabilities of the DJI Om 4!
Setting Up DJI Om 4
Before you begin using your DJI Om 4, it’s important to properly set it up to ensure smooth operation and optimal performance. Here are the steps to get you started:
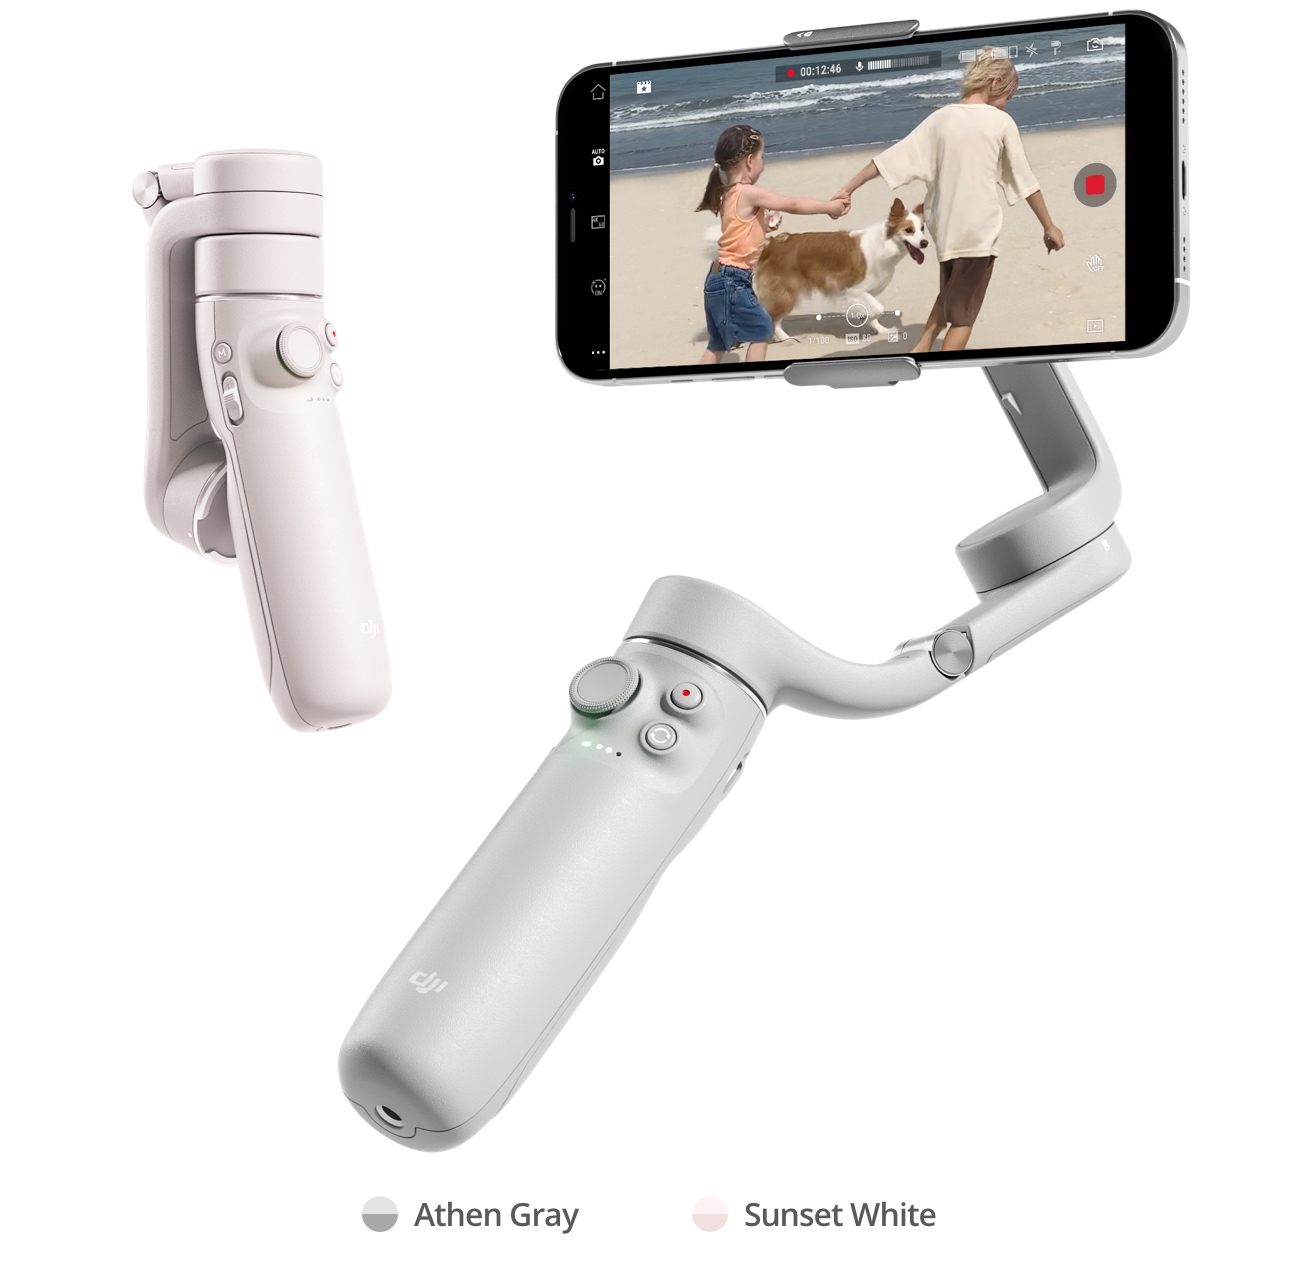
- Unboxing: Start by unboxing your DJI Om 4 and familiarize yourself with the contents of the package. Inside, you will find the DJI Om 4 stabilizer, a tripod base, a magnetic phone clamp, a USB-C cable, a wrist strap, and a storage pouch.
- Charging: Connect the DJI Om 4 to a power source using the provided USB-C cable. Allow it to charge fully before use. The LED indicator on the stabilizer will turn green once the battery is fully charged.
- Mounting the Tripod Base: Attach the tripod base to the bottom of the DJI Om 4 by aligning the threads and twisting it clockwise until secure. This will provide stability when using the stabilizer in stationary shots.
- Downloading the DJI Mimo App: Visit the App Store or Google Play Store on your smartphone and search for “DJI Mimo.” Download and install the app on your device. The DJI Mimo app is essential for controlling and accessing the full range of features of the DJI Om 4.
- Balancing: Before attaching your smartphone to the DJI Om 4, it’s crucial to balance the gimbal properly. Adjust the position of the roll arm to ensure that the gimbal remains level and stable when powered on.
- Powering On: Press and hold the power button on the DJI Om 4 until the LED indicator lights up. Once the stabilizer is powered on, it will enter the default Follow mode, ready to be connected to your smartphone.
By following these steps, you will have successfully set up your DJI Om 4 and prepared it for use. In the next section, we will guide you through the process of attaching your smartphone to the stabilizer and connecting it to the DJI Mimo app.
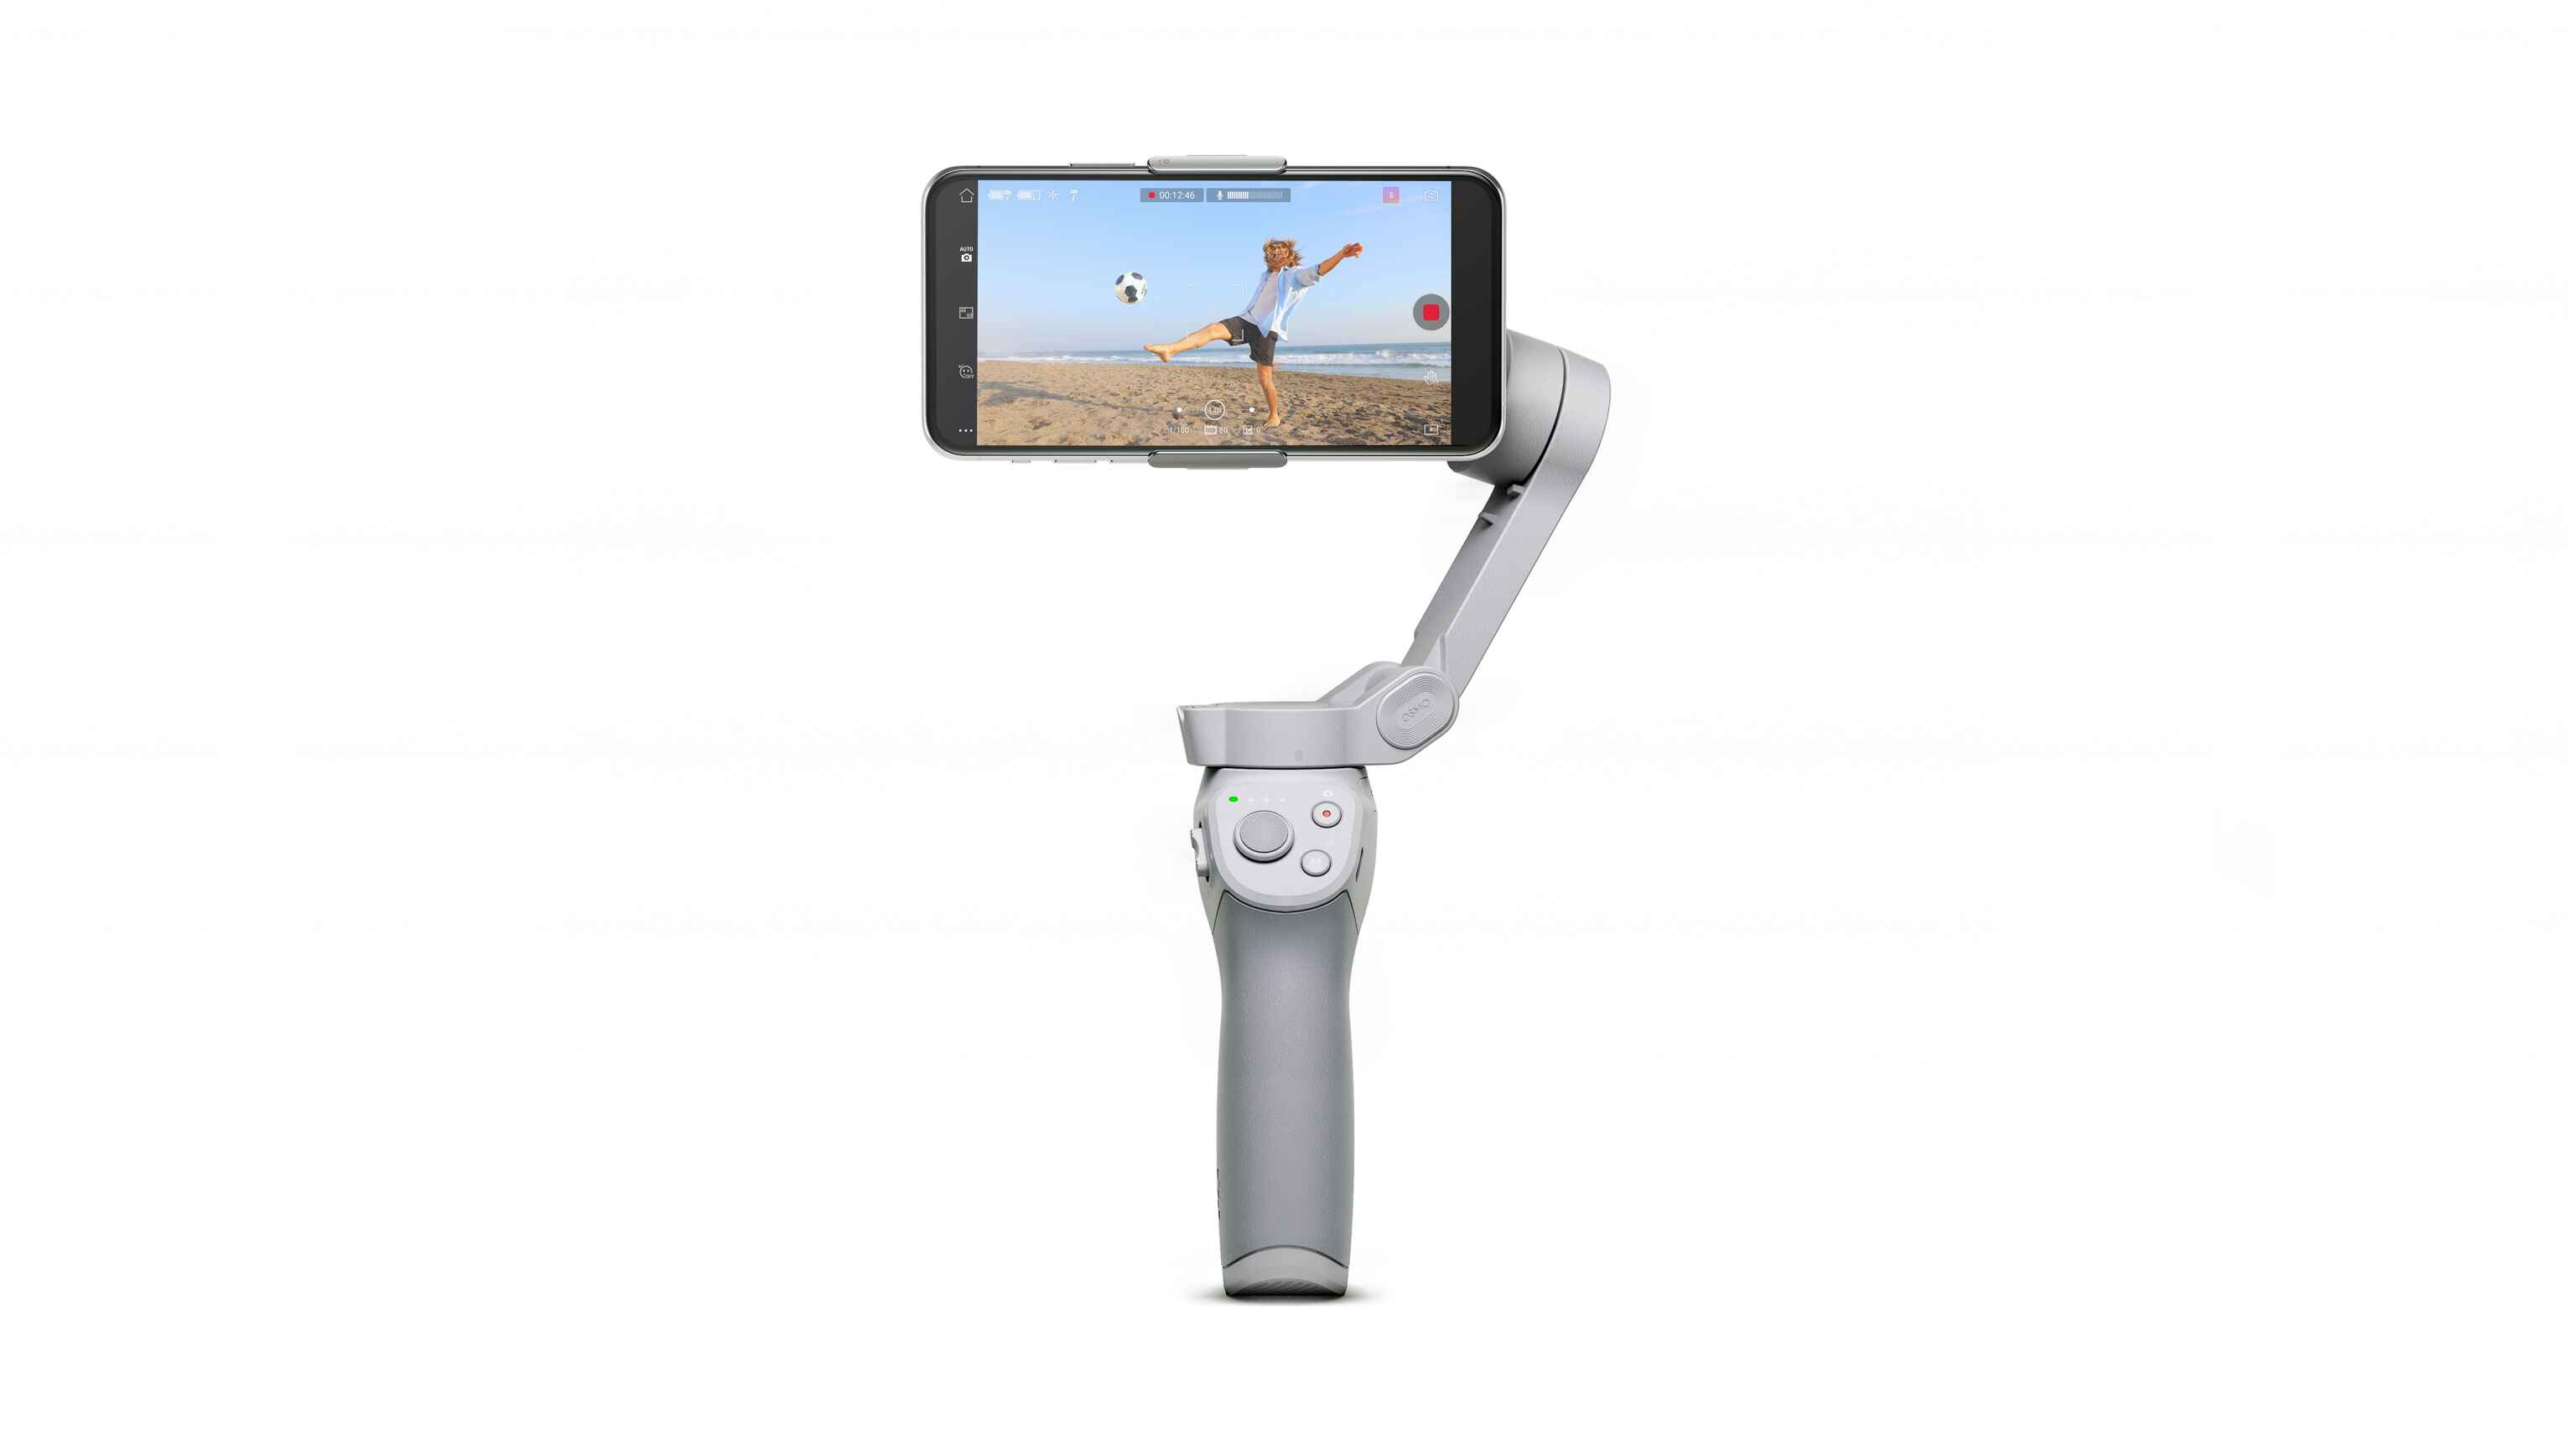
Attaching Your Smartphone to DJI Om 4
Now that you’ve set up your DJI Om 4, it’s time to attach your smartphone to the stabilizer. This will allow you to utilize its powerful features and capture stunning footage. Follow these steps to securely attach your smartphone:
- Open the Magnetic Phone Clamp: Extend the arms of the magnetic phone clamp by pulling them apart and then press the release buttons on the sides to open it fully.
- Place Your Smartphone: Position your smartphone horizontally in the phone clamp, ensuring that the bottom edge aligns with the lower magnetic pad. The clamp is designed to accommodate smartphones of different sizes.
- Adjust the Clamp Position: Move the phone clamp up or down to align the phone’s rear camera with the stabilizer’s gimbal. This will optimize the balance and ensure that you capture smooth footage.
- Secure the Smartphone: Gently press the magnetic phone clamp against the back of your smartphone until it securely attaches. Make sure it holds the device firmly in place without any wobbling or movement.
- Connect Your Smartphone: Plug the USB-C or Lightning connector from the DJI Om 4 into your smartphone’s charging port. This will establish a physical connection and allow the stabilizer to communicate with your device.
- Adjust the Phone Angle: Use the adjustable knob on the DJI Om 4 to adjust the phone angle. This will enable you to find the perfect viewing angle for your shots.
With your smartphone securely attached to the DJI Om 4, you are now ready to explore the powerful capabilities of the stabilizer. In the following section, we will guide you through the steps of using the DJI Mimo app to control and maximize the potential of your DJI Om 4.
Using the DJI Mimo App
Once your smartphone is attached to the DJI Om 4, you can harness the full potential of the stabilizer by using the DJI Mimo app. This app is designed specifically for DJI products and offers a range of features and controls to enhance your video shooting experience. Here’s how to get started with the DJI Mimo app:
- Launch the DJI Mimo App: Open the DJI Mimo app on your smartphone. If it’s your first time using the app, you will need to create an account or log in with your existing DJI account.
- Connect to DJI Om 4: Tap on the “Connect” button within the app to establish a connection between your smartphone and the DJI Om 4. Ensure that Bluetooth is enabled on your device for a seamless connection.
- Calibrate the Stabilizer: Follow the on-screen instructions to calibrate the DJI Om 4. This step ensures precise stabilization and accurate motion controls during operation.
- Explore the Shooting Modes: The DJI Mimo app offers a variety of shooting modes to suit different scenarios. Experiment with modes like Panorama, Timelapse, Hyperlapse, and Slow Motion, to capture unique and mesmerizing footage.
- Adjust Camera Settings: Utilize the DJI Mimo app to adjust camera settings such as exposure, white balance, and ISO to fine-tune your shots and achieve the desired visual effect.
- Use ActiveTrack and Gesture Control: Take advantage of the app’s intelligent features like ActiveTrack and Gesture Control to effortlessly track subjects or capture creative selfies without the need for a separate camera operator.
- Access Creative Templates: The DJI Mimo app provides a range of creative templates and filters that can be applied to your footage. Explore these options to add a unique touch to your videos.
By using the DJI Mimo app, you can unleash your creativity, control the DJI Om 4 remotely, and access a wealth of features and functions. In the next section, we will dive into the basic controls and shooting modes of the DJI Om 4 to help you capture amazing videos.
Basic Controls and Shooting Modes
Understanding the basic controls and shooting modes of the DJI Om 4 will enable you to capture professional-looking videos with ease. Let’s explore these controls and modes:
- Joystick Control: The joystick on the DJI Om 4 allows for smooth and precise control of the gimbal’s movement. Use it to adjust the camera angle, pan, tilt, and roll for dynamic shots.
- Shutter Button: The shutter button on the DJI Om 4 serves multiple functions. A single tap will start or stop recording, while a double tap will recenter the gimbal, and a triple tap will switch the camera between front and rear modes.
- Zoom Slider: The DJI Om 4 features a zoom slider that allows for an enhanced zooming experience. Use the slider to effortlessly zoom in or out while capturing footage.
- Portrait Mode: The DJI Om 4 offers a dedicated Portrait mode, allowing you to capture vertical videos. This is perfect for creating content optimized for social media platforms.
- Follow Mode: In Follow mode, the stabilizer will smoothly follow your movements, keeping the camera focused on you as you walk or run. This mode is great for vlogging or capturing dynamic action shots.
- Lock Mode: The Lock mode keeps the camera in a fixed position, regardless of the gimbal’s movements. Use this mode to capture steady shots of static subjects or to shoot panoramic footage.
- Sport Mode: Sport mode increases the responsiveness of the gimbal, allowing it to efficiently follow fast-paced movements. This mode is excellent for capturing sports events or any action-packed moments.
- Time-Lapse and Hyperlapse: With the DJI Om 4, you can easily create stunning time-lapse and hyperlapse videos. These modes enable you to capture the passage of time, showcasing beautiful transformations and mesmerizing motion.
- Slow Motion: Capture every detail in slow motion by utilizing the Slow Motion mode. This mode enhances the artistic and dramatic aspects of your videos, adding a unique touch to your footage.
By familiarizing yourself with these basic controls and shooting modes, you can unlock the full potential of the DJI Om 4. In the next section, we will explore the intelligent features of the stabilizer that can enhance your videos even further.
Enhancing Your Videos with Intelligent Features
The DJI Om 4 comes equipped with a range of intelligent features that can take your videos to the next level. These features automate certain processes and add creative elements to your footage. Let’s explore how you can enhance your videos with these intelligent features:
- ActiveTrack: The ActiveTrack feature enables the DJI Om 4 to automatically track a subject, keeping it in the frame as it moves. Simply select the subject on your smartphone screen, and the stabilizer will do the rest, allowing you to capture smooth and compelling footage.
- Gesture Control: By enabling Gesture Control, you can control the DJI Om 4 with simple hand gestures, eliminating the need for a separate remote or smartphone. This feature is great for capturing hands-free selfies or group shots.
- Timelapse Motion: With the Timelapse Motion feature, you can create captivating timelapse videos with dynamic motion. Set your start and end points, define the duration, and let the DJI Om 4 capture movement as it smoothly transitions between positions.
- Story Mode: The DJI Mimo app offers a pre-set Story Mode that provides a collection of professional templates for creating unique videos. These templates combine music, effects, and transitions to help you tell a captivating story effortlessly.
- Spin Shot: The Spin Shot feature allows you to add a rotating motion effect to your videos. Simply set the start and end points, and the DJI Om 4 will automatically rotate, adding a dynamic element to your shots.
- Dolly Zoom: With the Dolly Zoom feature, you can create a mesmerizing visual effect that distorts perspective and adds an intriguing twist to your footage. The DJI Om 4 will automatically adjust the zoom and movement to achieve this effect.
- Panorama: Capture breathtaking panoramic shots with the Panorama feature. Choose between horizontal, vertical, and 180° panoramas, and the DJI Om 4 will capture multiple images and stitch them together into a seamless panoramic image.
- Slow Motion: Unleash your creativity with the Slow Motion feature, which allows you to capture smooth and detailed slow-motion footage. This feature is perfect for emphasizing action sequences or highlighting subtle movements.
By utilizing these intelligent features, you can add a professional touch to your videos without the need for extensive post-production editing. In the next section, we will explore some advanced features and techniques that can further elevate your videography skills.
Advanced Features and Techniques
Once you’ve mastered the basic controls and intelligent features of the DJI Om 4, it’s time to dive into some advanced features and techniques to take your videography skills to the next level. Here are some advanced features and techniques that you can explore:
- Object Tracking: Take the ActiveTrack feature to another level by utilizing Object Tracking. This feature allows you to select and track specific objects or subjects in your scene, ensuring smooth and precise tracking throughout your footage.
- Motion Timelapse: Combine the Timelapse feature with motion to create captivating Motion Timelapse videos. Set up your shot, define the path and duration, and let the DJI Om 4 capture smooth motion timelapses, unveiling stunning transformations.
- Long Exposure: Experiment with long exposure shots using the DJI Om 4. By mounting your smartphone on the stabilizer and setting a longer shutter speed, you can capture breathtaking light trails or ethereal motion blur in your videos.
- Vertical Mode: Explore the Vertical Mode to optimize your video content for platforms like Instagram Stories or TikTok. This mode allows you to capture videos in a vertical orientation, ensuring your footage looks seamless and professional on vertical-oriented screens.
- Manual Control: Once you feel comfortable with the DJI Om 4’s automatic features, try experimenting with manual control. Adjust settings such as shutter speed, ISO, and white balance to fine-tune your shots and achieve the desired look and feel.
- Creative Camera Movements: Explore different camera movements to add visual interest to your videos. Experiment with panning, tilting, tracking shots, and crane movements to bring a dynamic and cinematic feel to your footage.
- Time Remapping: Take advantage of post-production techniques such as time remapping to create dramatic effects in your videos. Speed up or slow down specific sections of your footage to emphasize action or create a surreal atmosphere.
- Transition Techniques: Use creative transition techniques to enhance the flow and visual appeal of your videos. Experiment with fades, cross dissolves, whip pans, and other transition effects to seamlessly connect different shots and create a professional-looking final product.
By exploring these advanced features and techniques, you can elevate your videography skills and create stunning and captivating videos. In the next section, we will share some tips and tricks to help you capture even better shots with the DJI Om 4.
Tips and Tricks for Great Shots
To make the most out of your DJI Om 4 and capture truly outstanding footage, consider incorporating these tips and tricks into your videography workflow:
- Plan Your Shots: Before you start filming, take the time to plan your shots. Visualize the composition, consider the lighting conditions, and think about the story or message you want to convey through your footage.
- Utilize Tripod Mode: When shooting stationary scenes or time-lapse sequences, make use of the Tripod mode. This mode restricts the movement of the gimbal, resulting in ultra-stable shots with minimal vibrations.
- Experiment with Angles and Perspectives: Don’t be afraid to experiment with different angles and perspectives. Try shooting from low angles for a unique perspective or use high angles for an expansive view. Play with different camera positions to add visual interest to your footage.
- Utilize Natural Framing: Look for natural elements such as archways, windows, or tree branches to frame your subject. This technique adds depth and visual interest to your shots, drawing the viewer’s attention to the subject.
- Pace Your Movement: When utilizing the DJI Om 4’s follow mode, maintain a smooth and steady pace while moving. Avoid sudden movements or jerky camera motions to ensure your footage is fluid and visually pleasing.
- Set the Exposure Manually: In situations with challenging lighting conditions, consider setting the exposure manually. This will allow you to control the brightness and ensure your subject is well-exposed, even if the background is too bright or too dark.
- Use ND Filters: Neutral Density (ND) filters can help you achieve proper exposure in bright conditions. They reduce the amount of light entering the camera without affecting color or sharpness, allowing you to capture well-balanced footage.
- Experiment with Slow Motion: The DJI Om 4’s Slow Motion mode lets you capture stunning slow-motion footage. Try capturing fast-moving subjects or small details in slow motion to add drama and emphasize specific moments.
- Stabilize Your Footage in Post-Production: Although the DJI Om 4 provides excellent stabilization, minor shakes or vibrations can sometimes appear in footage. Use video editing software to further stabilize your footage during post-production.
- Practice Patience: Great shots often require time and patience. Take the time to wait for the perfect lighting, the right moment, or the ideal composition. The more you practice, the better you will become at capturing those remarkable shots.
By implementing these tips and tricks, you can elevate the quality of your video footage and unleash your creativity with the DJI Om 4. In the next section, we will address common troubleshooting issues that you may encounter while using the stabilizer.
Troubleshooting Common Issues
While using the DJI Om 4, you may encounter some common issues. Here are some troubleshooting tips to help resolve these issues:
- Stabilizer Not Powering On: If your DJI Om 4 does not power on, ensure that the battery is charged properly. If the battery level is low, connect it to a power source using the provided USB-C cable and allow it to charge for some time.
- Bluetooth Connection Issues: If you are experiencing difficulties in establishing a Bluetooth connection between your smartphone and the DJI Om 4, ensure that both devices have Bluetooth enabled. Try restarting both devices and reconnecting.
- Unresponsive Controls: If the controls on the DJI Om 4 are not responding, check if the stabilizer’s firmware is up to date. If not, update it using the DJI Mimo app. Also, restart the stabilizer and ensure that it is properly connected to your smartphone.
- Shaky Footage: If you notice that your footage is still shaky despite using the DJI Om 4, double-check that the gimbal is properly balanced and that your movements are smooth. Ensure that the stabilization settings on the DJI Mimo app are adjusted correctly for the shooting situation.
- Overheating: If the DJI Om 4 becomes hot during prolonged usage, it may be due to excessive operating time or environmental factors. Give the stabilizer a break to cool down and avoid using it in direct sunlight or high-temperature environments.
- Camera Jitter or Erratic Movements: If you experience camera jitter or erratic movements, make sure that there are no obstructions or loose connections. Recheck the tightness of the phone clamp and ensure that the smartphone is securely attached.
- App Crashes: If the DJI Mimo app crashes or experiences glitches, try closing and reopening the app. Update the app to the latest version if available, and ensure that your smartphone’s operating system is also up to date.
- Inaccurate Tracking: If the ActiveTrack or Object Tracking feature is not accurately following the subject, make sure that the subject is clearly defined within the frame and has sufficient contrast for the stabilizer to track. Ensure proper lighting conditions and consider adjusting the tracking settings in the DJI Mimo app.
- Poor Battery Life: If you’re experiencing poor battery performance, reduce the usage of power-intensive features such as ActiveTrack or gesture control. Lower the screen brightness on your smartphone and consider carrying spare batteries or a portable charger for extended shoots.
- Unwanted Vibrations: If you notice unwanted vibrations in your footage, check for any loose components or accessories on the DJI Om 4. Ensure that all connections and attachments are secure. Additionally, avoid using the stabilizer in strong winds or unstable environments.
If you encounter any persistent issues that cannot be resolved with the troubleshooting tips mentioned, refer to the DJI Om 4 user manual or contact DJI customer support for further assistance. With these troubleshooting strategies, you can overcome common issues and continue capturing smooth and stunning footage with your DJI Om 4.
Conclusion
Congratulations! You have now become familiar with the DJI Om 4 and its various features, controls, shooting modes, and intelligent functions. With this powerful stabilizer, you have the tools to create professional-level videos with ease.
We started by setting up the DJI Om 4 and attaching our smartphones securely. We then explored the DJI Mimo app, which unlocks a wealth of features and allows for seamless control of the stabilizer.
We learned about the basic controls and shooting modes, enabling us to capture smooth and captivating footage. Furthermore, we discovered how to enhance our videos using the intelligent features available, such as ActiveTrack and Gesture Control.
To take our videography skills to the next level, we delved into advanced features and techniques, including object tracking, slow motion, and time-lapse motion, which help us create even more compelling content.
Additionally, we provided a variety of tips and tricks to help you capture great shots and troubleshoot common issues that may arise during your DJI Om 4 journey.
Now armed with this knowledge, it’s time to go out and unleash your creativity through powerful storytelling and breathtaking visuals. Remember to practice, experiment, and keep pushing the boundaries of what you can achieve with your DJI Om 4.
So, grab your stabilizer, attach your smartphone, and let the DJI Om 4 take your videography to new heights. Happy shooting!