Introduction
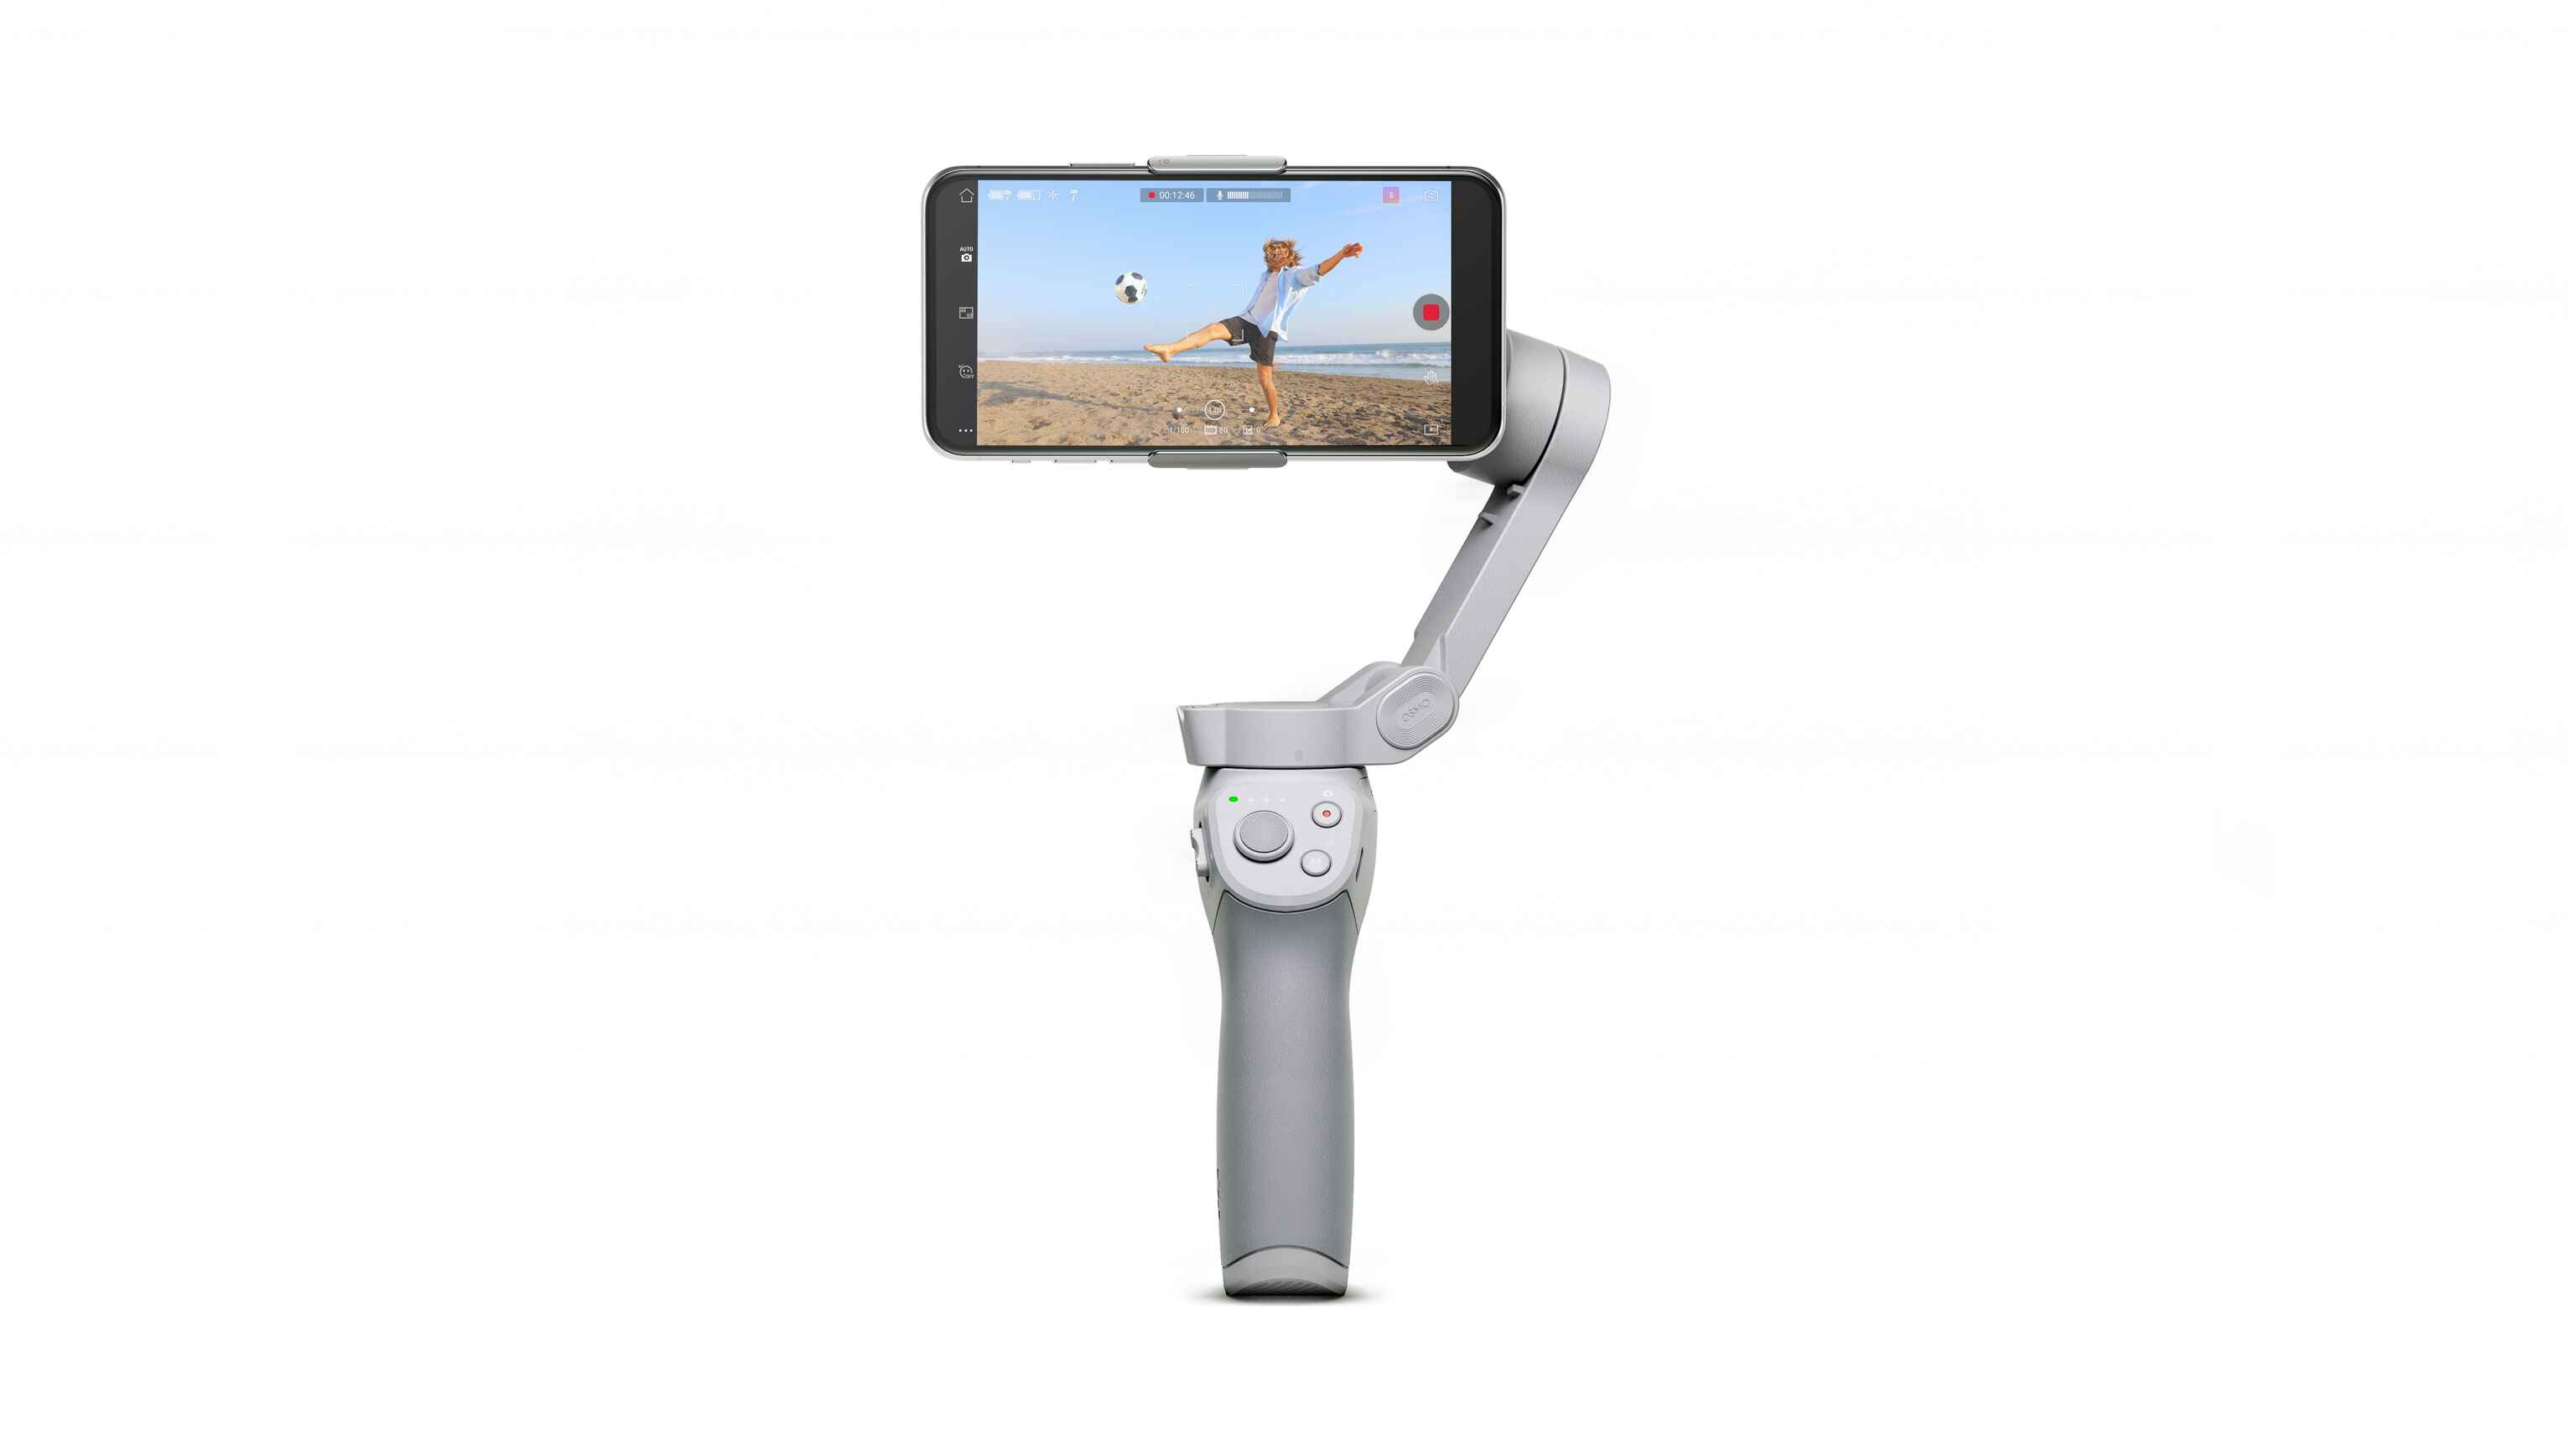
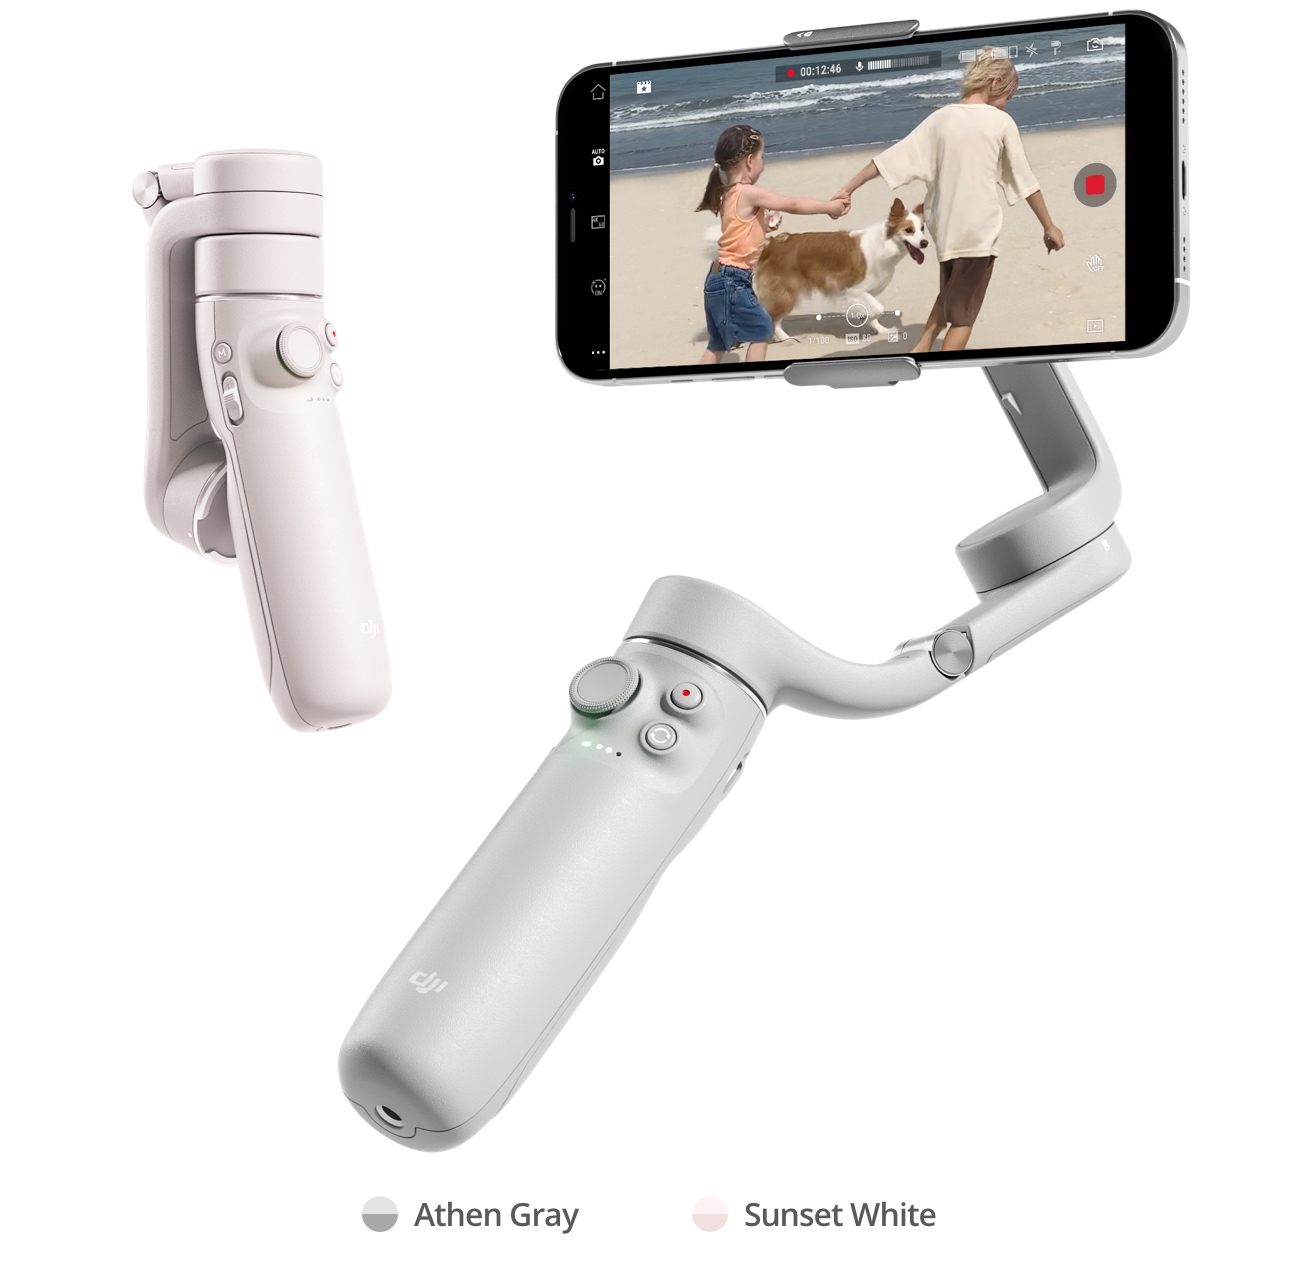
Welcome to the world of DJI OM 5 – the latest handheld smartphone gimbal designed to capture smooth and professional-looking videos. Whether you are a vlogger, content creator, or just someone who loves to document precious moments, the DJI OM 5 is here to elevate your videography game.
The DJI OM 5 combines advanced stabilization technology with user-friendly controls, making it accessible to both beginners and experienced videographers. With its compact and lightweight design, this gimbal is highly portable, allowing you to capture breathtaking footage wherever you go.
This comprehensive guide will walk you through the various features and functions of the DJI OM 5, providing you with the knowledge and tips you need to make the most out of this powerful tool. From unboxing and setting up to mastering shooting modes and advanced techniques, we’ll cover it all.
Whether you’re capturing stunning landscapes, dynamic action shots, or creating engaging vlogs, the DJI OM 5 is equipped with everything you need. So, let’s dive in and explore the exciting world of this incredible smartphone gimbal.
Disclaimer: It’s important to note that the information provided in this guide is based on the latest version of the DJI OM 5 at the time of writing. As technology evolves, firmware updates may introduce new features or changes. Therefore, it’s always recommended to check for updates and refer to the official DJI website for the most up-to-date information.
Unboxing the DJI OM 5
When you receive your DJI OM 5 package, you’ll be filled with anticipation. Unboxing this sleek gadget is the first step towards unlocking its incredible potential. Let’s delve into what you can expect to find inside the box.
1. DJI OM 5 Gimbal: The star of the show, the DJI OM 5 gimbal itself, is the perfect combination of style and functionality. It features a sturdy build and a comfortable grip, designed to keep your shots stable and your hand fatigue-free.
2. Magnetic Smartphone Clamp: The DJI OM 5 comes with a magnetic smartphone clamp that securely holds your smartphone in place. This innovative design allows for quick and easy attachment without the hassle of balancing the phone manually.
3. USB-C Charging Cable: A USB-C charging cable is included to charge the DJI OM 5’s internal battery. This cable can also be used to connect the gimbal to your smartphone for firmware upgrades and data transfer.
4. Wrist Strap: You’ll find a wrist strap in the package, which provides added security while filming or carrying the DJI OM 5 around. It ensures that even if you accidentally drop the gimbal, it won’t fall to the ground.
5. Storage Pouch: To keep your DJI OM 5 safe during transportation, a convenient storage pouch is included. It not only protects the gimbal from scratches but also provides a compact and organized solution for carrying it along with you.
6. Manuals and Documentation: Don’t forget to check out the user manual and other documentation included in the package. These resources will guide you through the setup process and provide valuable tips for using all the features of the DJI OM 5.
Now that you know what to expect when unboxing your DJI OM 5, it’s time to move on to the next section and get ready to power up your gimbal.
Charging and Powering On the DJI OM 5
Before you can start capturing amazing footage with your DJI OM 5, it’s essential to ensure that it’s properly charged and ready to go. Here’s a step-by-step guide on how to charge and power on your DJI OM 5 gimbal:
1. Connect the USB-C Cable: Take the USB-C charging cable provided with the DJI OM 5 and connect one end to the charging port on the gimbal’s handle. Make sure it’s securely plugged in.
2. Connect the Power Source: On the other end of the USB-C cable, connect it to a power source such as a wall adapter or a computer USB port. Ensure that the power source has sufficient output to charge the DJI OM 5.
3. Charging Indicator: Once the charging cable is connected, you’ll notice a small LED indicator on the gimbal’s handle. It will light up in red to show that the DJI OM 5 is currently charging.
4. Charging Time: The DJI OM 5’s battery has a decent capacity, but the actual charging time may vary depending on the power source and battery level. On average, it takes around 90 minutes to fully charge the gimbal’s battery.
5. Powering On: After the DJI OM 5 is fully charged, disconnect the charging cable from the gimbal. To power on the gimbal, press and hold the power button located on the handle for a few seconds until the LED indicator lights up in green.
6. Firmware Updates: Upon powering up the DJI OM 5 for the first time, it’s recommended to check for any available firmware updates. Connect your smartphone to the gimbal and launch the DJI Mimo app. The app will prompt you if there are any updates, which you can then proceed to install for optimal performance.
It’s important to note that the DJI OM 5 can also be used while charging, giving you the flexibility to capture footage for extended periods without worrying about battery life.
Now that your DJI OM 5 is fully charged and powered on, it’s time to pair it with your smartphone and explore its features and functionalities in the next section.
Pairing the DJI OM 5 with Your Smartphone
The DJI OM 5 is designed to work seamlessly with your smartphone, allowing you to take full advantage of its powerful features. Pairing your smartphone with the gimbal is a simple process. Here’s how to do it:
1. Download DJI Mimo App: Ensure that you have the latest version of the DJI Mimo app installed on your smartphone. The app is available for both iOS and Android devices and can be downloaded from the respective app stores.
2. Power On the DJI OM 5: Press and hold the power button on the DJI OM 5’s handle until the LED indicator lights up in green, indicating that the gimbal is powered on and ready to connect.
3. Enable Bluetooth and Wi-Fi: On your smartphone, go to the Settings menu and enable both Bluetooth and Wi-Fi. These wireless connections are crucial for establishing a connection between the DJI OM 5 and your smartphone.
4. Open DJI Mimo App: Launch the DJI Mimo app on your smartphone. You’ll be greeted with a welcome screen and prompted to create an account or log in if you already have one. Follow the on-screen instructions to set up your account.
5. Connect to DJI OM 5: Once you’re logged in to the DJI Mimo app, tap on the camera icon at the bottom of the screen to access the camera mode. The app will automatically search for nearby DJI OM 5 gimbals. Select your DJI OM 5 from the list of available devices.
6. Pairing Confirmation: After selecting your DJI OM 5, the app will display a pairing confirmation message on both your smartphone and the gimbal’s screen. Confirm the pairing by tapping “Yes” on your smartphone and pressing the shutter button on the DJI OM 5’s handle.
7. Successful Connection: Once the pairing process is complete, your smartphone and DJI OM 5 will be connected. You can now use the DJI Mimo app to control the gimbal, access various shooting modes, and unleash the full potential of your cinematic capabilities.
Remember to keep your smartphone’s Bluetooth and Wi-Fi enabled whenever you want to use the DJI OM 5 to ensure a smooth and uninterrupted connection.
With your smartphone successfully paired with the DJI OM 5, let’s explore the DJI Mimo app and its features in the next section.
Getting Familiar with the DJI Mimo App
The DJI Mimo app is an essential companion to the DJI OM 5 gimbal, providing you with full control over its features and functionalities. Familiarizing yourself with the app will enhance your shooting experience and allow you to unleash your creative potential. Let’s explore the key aspects of the DJI Mimo app:
1. User-Friendly Interface: Upon launching the DJI Mimo app, you’ll be greeted with a clean and intuitive interface. The main screen displays various shooting modes, settings, and access to the gallery. Navigation is smooth, with easily identifiable icons and menus.
2. Shooting Modes: The DJI Mimo app offers a range of shooting modes, including Standard, Portrait, Flashlight, and more. Experiment with these modes to capture different perspectives and achieve unique visual effects.
3. Intelligent Features: The app incorporates intelligent features such as ActiveTrack, which allows the gimbal to automatically track and follow a subject, and Gesture Control, which enables you to capture photos or videos with simple hand gestures. Explore these features to make your footage more dynamic and interactive.
4. Advanced Settings: Dive into the app’s settings to customize various parameters such as gimbal control, image quality, and video resolutions. Adjusting these settings will give you greater control over your footage and help you achieve the desired results.
5. Story Mode: Take advantage of the Story Mode feature, which allows you to create stunning videos with pre-set templates, transitions, and music. This feature is perfect for quickly editing and sharing your moments with a professional touch.
6. Tutorials and Community: The DJI Mimo app provides access to tutorials, tips, and tricks to help you improve your videography skills. Additionally, you can join the DJI community, connect with other creators, and share your work for inspiration and feedback.
Take some time to explore the DJI Mimo app and familiarize yourself with its features. The app offers a wide range of creative tools to enhance your videos and elevate your storytelling.
Now that you’re familiar with the DJI Mimo app, let’s move on to the next section, where we’ll delve into the basic controls and functions of the DJI OM 5 gimbal.
Basic Controls and Functions of the DJI OM 5
The DJI OM 5 gimbal provides a range of intuitive controls and functions that give you complete control over your videography. Understanding the basic controls is essential for capturing smooth and professional footage. Let’s take a closer look at the key controls and functions of the DJI OM 5:
1. Power Button: The power button, located on the handle, is used to turn the gimbal on and off. Press and hold the power button for a few seconds to power on the DJI OM 5. A quick press when the gimbal is already on will turn it off.
2. Joystick Control: The joystick, also located on the handle, allows you to control the gimbal’s movement. Pushing the joystick up, down, left, or right adjusts the orientation of the gimbal, enabling you to tilt, pan, and roll the camera smoothly.
3. Mode Button: The mode button, typically found near the joystick, is used to switch between different shooting modes. Pressing the mode button cycles through the available modes, enabling you to switch from standard mode to portrait mode, flashlight mode, and others.
4. Zoom Control: The DJI OM 5 gimbal also features a zoom control button. Depending on whether you’re using the default smartphone camera or the DJI Mimo app, pressing the zoom control button allows you to digitally zoom in or out, enhancing your composition options.
5. Record Button: Located comfortably within reach of your thumb, the record button lets you start and stop video recording with a single press. This convenient button ensures that you can capture footage effortlessly without having to rely solely on your smartphone’s screen.
6. Trigger Button: The trigger button on the back of the handle is a multifunctional control. By pressing the trigger button once, you can lock the gimbal’s orientation or re-center it if the gimbal gets off-balance. A double press switches the gimbal’s orientation from portrait to landscape or vice versa.
7. USB-C Port: The USB-C port on the side of the handle serves multiple purposes. It allows you to charge the DJI OM 5’s battery, connect the gimbal to your smartphone for a live view, and even connect accessories such as external microphones for enhanced audio recording.
By familiarizing yourself with these basic controls and functions, you’ll be able to navigate and operate the DJI OM 5 like a pro. Practice using the controls to achieve smooth and stable footage, and experiment with the different shooting modes to unleash your creativity.
In the next section, we’ll discuss the process of balancing and mounting your smartphone onto the DJI OM 5 gimbal.
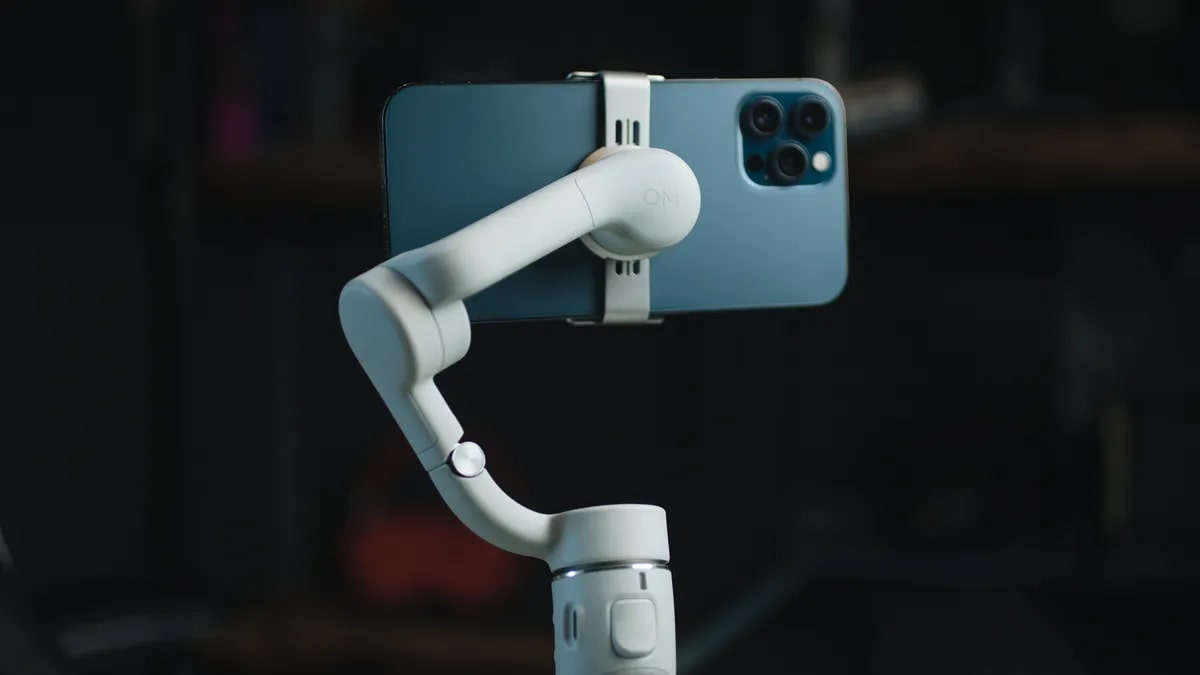
Balancing and Mounting Your Smartphone onto the DJI OM 5
Ensuring that your smartphone is properly balanced and securely mounted on the DJI OM 5 gimbal is essential for achieving stable and smooth footage. Here’s a step-by-step guide on how to balance and mount your smartphone:
1. Ensure the DJI OM 5 is Powered Off: Before mounting your smartphone, make sure the DJI OM 5 is turned off to prevent any accidental movements or damage.
2. Adjust the Clamp Position: Slide the magnetic smartphone clamp on the gimbal’s arm until it’s positioned approximately in the center. This will help with the balance when mounting your smartphone.
3. Unlock the Gimbal: Unlock the gimbal by turning the lock switch located on the side of the DJI OM 5’s arm counterclockwise. This allows the gimbal to move freely during the balancing process.
4. Attach Your Smartphone: Gently place your smartphone onto the magnetic smartphone clamp. The magnets will hold it securely in place. Be sure to align your smartphone’s camera with the gimbal’s camera lens for accurate framing.
5. Adjust the Position: While holding your smartphone, adjust its position on the clamp until the DJI OM 5 stays level without tipping to one side. The goal is to achieve a balanced and stable setup.
6. Lock the Gimbal: Once your smartphone is balanced, lock the gimbal by turning the lock switch clockwise. This secures the DJI OM 5 in a stable position and ensures that your smartphone won’t move during filming.
7. Double-Check Balance: It’s important to double-check the balance by gently moving the gimbal and release it. If your smartphone stays in the desired position without tilting, you’ve achieved proper balance.
Properly balancing and mounting your smartphone is crucial for the DJI OM 5 to operate optimally. A well-balanced setup will maximize stabilization and prevent any excessive vibrations.
With your smartphone securely mounted on the DJI OM 5, you’re now ready to explore the wide range of shooting modes and features available in the next section.
Shooting Modes and Features of the DJI OM 5
The DJI OM 5 offers a variety of shooting modes and features that allow you to capture stunning and creative videos. These modes and features provide versatility and flexibility, empowering you to unleash your storytelling skills. Let’s explore some of the key shooting modes and features of the DJI OM 5:
1. Standard Mode: The standard mode is the default shooting mode of the DJI OM 5. It provides smooth and stable footage, ideal for capturing everyday moments and essential for recording any type of video.
2. Portrait Mode: Switching to portrait mode allows you to capture vertical videos, perfect for social media platforms like Instagram and TikTok. It ensures that your footage is optimized for vertical viewing, helping you create engaging content.
3. Flashlight Mode: The flashlight mode on the DJI OM 5 flips the gimbal vertically, allowing you to capture footage while holding the gimbal upside down. This mode is handy for low-angle shots or capturing unique perspectives.
4. Pan Follow Mode: In pan follow mode, the DJI OM 5’s gimbal follows your movements horizontally, keeping the camera stable while you move. This mode is great for capturing smooth tracking shots or following a subject in motion.
5. ActiveTrack: The ActiveTrack feature enables the DJI OM 5 to automatically track and follow a subject. Simply select the subject on your smartphone screen, and the gimbal will keep it in the frame as it moves, perfect for capturing action-packed moments.
6. Timelapse and Motionlapse: With the timelapse and motionlapse features, you can create mesmerizing time-lapse videos. Set the duration and interval, and the DJI OM 5 will capture a series of photos or videos at specific time intervals, transforming hours into seconds.
7. Panorama Shots: The DJI OM 5 allows you to capture stunning panorama shots, expanding your field of view and capturing the breathtaking beauty of landscapes in a single, wide-angle photo. Simply select the panorama mode and follow the on-screen instructions to capture the perfect panoramic shot.
These are just a few of the shooting modes and features available on the DJI OM 5. Experiment with different modes and explore the DJI Mimo app to unlock even more creative possibilities for your videos.
Now that we’ve covered the various shooting modes and features, it’s time to dive into specific techniques for capturing timelapses, motionlapses, and panorama shots in the next sections.
Timelapse and Motionlapse Captures with the DJI OM 5
The DJI OM 5 offers powerful timelapse and motionlapse features that allow you to capture captivating footage by condensing time and adding a touch of motion. These features enable you to create visually stunning videos that showcase the passage of time and highlight the dynamic nature of your surroundings. Let’s explore how to make the most of timelapse and motionlapse captures with the DJI OM 5:
1. Timelapse Mode: Timelapse mode captures a series of photos or videos at set intervals and combines them into a seamless sequence. To capture a timelapse, open the DJI Mimo app, go to the camera mode, and select Timelapse. Set the duration and interval according to your desired effect and start recording. The DJI OM 5 will take care of capturing the frames, and you can create captivating timelapse videos at the touch of a button.
2. Motionlapse Mode: Motionlapse takes the timelapse concept to the next level by adding movement to the scene. In this mode, the DJI OM 5 slowly moves the gimbal along a set path while capturing the timelapse sequence, resulting in footage that showcases both the passing of time and the dynamic motion. Set the duration, interval, starting point, and endpoint in the DJI Mimo app’s Motionlapse mode, and let the DJI OM 5 create impressive motionlapse sequences that bring your videos to life.
3. Planning and Composition: Before starting a timelapse or motionlapse, consider the overall composition and the subject you want to capture. Find a vantage point that offers an interesting perspective, and ensure that the subject or scene has compelling elements that will make the footage visually engaging. Experiment with different angles, camera positions, and framing to create visually stunning timelapse and motionlapse videos.
4. Stability and Duration: Stability is crucial when capturing timelapse and motionlapse footage. Ensure that the DJI OM 5 is mounted securely and remains stable throughout the entire capture. Pay attention to factors such as wind, vibrations, and movement around the gimbal. Additionally, the duration of your timelapse or motionlapse will depend on the effect you want to achieve. Consider how long you want the final video to be and adjust the interval and duration accordingly.
5. Post-Processing and Editing: Once you have captured your timelapse or motionlapse footage with the DJI OM 5, you can further enhance it through post-processing and editing. Import the footage into your preferred video editing software and adjust variables such as speed, color grading, and adding additional effects to give your timelapse or motionlapse video a personalized touch.
By utilizing the timelapse and motionlapse features of the DJI OM 5, you can create visually stunning videos that highlight the passage of time and add a dynamic element to your footage. Experiment, plan, and unleash your creativity to capture unique timelapse and motionlapse scenes.
In the next section, we’ll delve into the process of capturing panorama shots using the DJI OM 5.
Panorama Shots with the DJI OM 5
The DJI OM 5 allows you to capture breathtaking panoramic shots, expanding the field of view and showcasing the grandeur of expansive landscapes. With its intelligent stitching algorithm and precise control, the DJI OM 5 makes it easy to capture stunning panorama shots. Let’s explore how to effectively capture panorama shots using the DJI OM 5:
1. Select Panorama Mode: Open the DJI Mimo app on your smartphone and navigate to the camera mode. Choose the Panorama mode from the available shooting modes. The DJI OM 5 will guide you through the process of capturing a panorama shot.
2. Positioning and Framing: Find a visually appealing spot or a captivating landscape where you want to capture the panorama shot. Keep in mind that panorama shots work best with wide and open spaces. Experiment with different vantage points and angles to find the best composition.
3. Start Capturing: Once you are ready, follow the on-screen instructions on the DJI Mimo app to start capturing the panorama shot. The DJI OM 5 will automatically rotate and capture a series of photos as you move the gimbal smoothly from left to right or right to left.
4. Smooth and Steady Movement: When capturing the panorama shot, maintain a smooth and steady movement. Move the DJI OM 5 slowly and consistently, keeping the camera level throughout the entire rotation. This will ensure that each frame aligns properly and results in a seamless panorama.
5. Patience and Overlapping Frames: Patience is key when capturing panorama shots. Allow the DJI OM 5 to capture the necessary frames by following the on-screen guide. Make sure there is sufficient overlap between each frame to ensure accurate stitching during post-processing.
6. Post-Processing and Editing: After capturing the panorama shot, import the images into your preferred image editing software. Use dedicated panorama stitching software or the DJI Mimo app to automatically stitch the images together and create a high-resolution panoramic image. Make adjustments to exposure, color, and other settings to enhance the final result.
7. Consider Shooting Modes: In addition to capturing standard panoramic shots, the DJI OM 5 offers various shooting modes such as wide-angle, sphere, and 180-degree panoramas. Experiment with these different modes to add variety and creativity to your panorama shots.
By utilizing the panorama feature of the DJI OM 5, you can capture stunning wide-angle vistas and panoramic landscapes. Take your time, master the technique, and experiment with different compositions to create breathtaking and immersive panorama shots.
In the next section, we’ll explore the active tracking and gesture control features of the DJI OM 5.
ActiveTrack and Gesture Control with the DJI OM 5
The DJI OM 5 comes equipped with advanced features like ActiveTrack and Gesture Control, allowing you to capture smooth footage and operate the gimbal hands-free. These features add a new level of convenience and creativity to your videography. Let’s dive into how you can utilize ActiveTrack and Gesture Control with the DJI OM 5:
1. ActiveTrack: ActiveTrack is an intelligent feature that enables the DJI OM 5 to automatically track and follow a moving subject. To use ActiveTrack, open the DJI Mimo app on your smartphone, select the subject you want to track by tapping on it, and the gimbal will keep it in the frame as it moves. This feature is particularly useful for capturing action shots, sports, or any situation where you want the gimbal to autonomously track a subject while keeping it in focus.
2. QuickSwitch Gesture Control: The DJI OM 5 provides QuickSwitch gesture control, allowing you to switch between the front and rear camera of your smartphone with just a quick hand gesture. Simply raise your palm towards the gesture sensor on the back of the gimbal, and the camera will switch instantly. This feature is great for vloggers or anyone who wants to switch cameras seamlessly while filming without touching their smartphone.
3. Basic Gesture Control: In addition to QuickSwitch, the DJI OM 5 also offers basic gesture control for capturing photos or videos. With this feature, you can use simple hand gestures to control the gimbal. For example, you can show a “peace” sign with your fingers to start recording or wave your hand to take a photo. Basic gesture control allows for hands-free operation, making it convenient when you want to be in the shot or have limited access to controls.
4. Gesture Shooting Modes: The DJI OM 5 also includes gesture shooting modes, such as PalmControl and V Gesture mode. In PalmControl mode, you can control the gimbal’s movement by holding up your palm towards the gesture sensor. When in V Gesture mode, you can form a “V” shape with your fingers to activate the gesture timer and capture a selfie or group photo. These gesture shooting modes add a fun and interactive element to your videography.
5. Practice and Experiment: To ensure smooth and accurate tracking, practice using ActiveTrack and gesture control in different scenarios and lighting conditions. Familiarize yourself with the specific hand gestures and movements required to activate different functions. This will help you master these features and capture precise shots effortlessly.
By utilizing ActiveTrack and Gesture Control with the DJI OM 5, you can capture hands-free footage, keep your subject in focus, and add a touch of interactivity to your videos. Explore these features, experiment with different gestures, and take your videography to new heights.
In the next section, we’ll provide you with some valuable tips and tricks for using the DJI OM 5 to maximize its potential.
Tips and Tricks for Using the DJI OM 5
Mastering the DJI OM 5 gimbal requires practice, creativity, and a few handy tips and tricks. These tips will help you make the most out of your DJI OM 5 and elevate your videography skills. Let’s explore some valuable tips and tricks for using the DJI OM 5:
1. Calibrate the Gimbal: It’s essential to calibrate the DJI OM 5 regularly to ensure optimal performance. Follow the instructions in the user manual or on the DJI Mimo app to perform a quick and easy calibration. This will ensure smooth operations and accurate stabilization.
2. Use the Gimbal Lock: When transporting the DJI OM 5 or not in use, use the gimbal lock to secure the gimbal and prevent unnecessary movements. The lock helps protect the motors and keeps the gimbal in a balanced position, reducing the risk of damage during transit.
3. Explore Advanced Shooting Modes: While the DJI OM 5 offers useful default shooting modes, don’t limit yourself. Dive into the DJI Mimo app and explore advanced shooting modes, such as creative filters, slow motion, or hyperlapse, to add variety and creativity to your videos.
4. Experiment with Movement: The DJI OM 5 is designed to capture smooth and stable footage, but don’t be afraid to experiment with creative movement. Experiment with different camera movements, tilts, pans, and dynamic shots to add a cinematic touch to your videos. Just remember to maintain stability and control while exploring new angles and movements.
5. Utilize Soundtrack and Sound Effects: The DJI Mimo app allows you to add a soundtrack or sound effects to your videos. Enhance the mood and storytelling of your videos by choosing music that complements the content. Be mindful of copyright restrictions and consider using royalty-free music or creating your own sound effects.
6. Take Advantage of Accessories: The DJI OM 5 is compatible with various accessories that can enhance your filming experience. Consider investing in accessories such as an external microphone for better audio quality, a tripod for stable shots, or an extension rod for capturing unique perspectives.
7. Continuous Learning: Keep up with firmware updates, tutorials, and online communities to stay informed about the latest features and techniques for the DJI OM 5. Continuous learning will help you unlock new possibilities and expand your videography skills.
Remember, practice is key to becoming proficient with the DJI OM 5. Take the time to familiarize yourself with the controls, experiment with different shooting techniques, and embrace your creativity to produce outstanding videos.
In the next section, we’ll address some common troubleshooting and frequently asked questions about the DJI OM 5.
Troubleshooting and FAQs for the DJI OM 5
While the DJI OM 5 is a robust and reliable gimbal, you may encounter some common issues or have questions about its functionality. Here are some troubleshooting tips and frequently asked questions to help you address any concerns:
1. Gimbal Not Powering On: If the DJI OM 5 is not turning on, ensure that the battery is fully charged. If the problem persists, try a different charging cable or power source. If the issue continues, contact DJI customer support for further assistance.
2. Shaky Footage: If you notice shaky footage, ensure that the gimbal is properly balanced and calibrated. Additionally, check if you’re holding the gimbal too tightly or moving too fast. Smooth and slow movements will help reduce shakiness and result in stable footage.
3. Connectivity Issues: If you’re experiencing connectivity issues between the DJI OM 5 and your smartphone, check if you have the latest version of the DJI Mimo app installed. Restart both the gimbal and your smartphone, then go through the pairing process again to establish a stable connection.
4. Battery Draining Quickly: If the battery of the DJI OM 5 is draining quickly, ensure that you’re using a compatible power source for charging. Avoid charging the gimbal with a low-quality or third-party charger, as it may not provide sufficient power. If the issue persists, contact DJI support for further assistance.
5. Error Messages: If you encounter error messages on the DJI Mimo app or the gimbal’s display, refer to the user manual or visit the DJI website for troubleshooting guidance. Error messages may indicate specific issues that require attention, such as firmware updates or hardware malfunctions.
6. Frequently Asked Questions:
- Q: Can I use the DJI OM 5 with different smartphones?
A: Yes, the DJI OM 5 is compatible with a wide range of smartphones, both iOS and Android. Ensure that your smartphone meets the minimum requirements specified by DJI. - Q: Can I charge my smartphone using the DJI OM 5?
A: No, the DJI OM 5 is not designed to charge your smartphone. Only use the USB ports on the gimbal for firmware updates or connecting accessories. - Q: Can I use the DJI OM 5 underwater or in wet conditions?
A: No, the DJI OM 5 is not waterproof. It should not be exposed to water or used in excessively wet conditions. - Q: Can I use the DJI OM 5 without the DJI Mimo app?
A: While the DJI OM 5 can still function as a gimbal without the app, it’s recommended to use the app for accessing advanced features and customizing settings.
If you encounter any issues not addressed here or have further questions, refer to the user manual, visit the DJI website, or contact DJI support for comprehensive assistance.
Now that we’ve addressed common troubleshooting and FAQs, let’s wrap up the guide and encourage readers to put their newfound knowledge to use and create stunning videos with the DJI OM 5.
Conclusion
Congratulations! You’ve reached the end of this comprehensive guide on using the DJI OM 5, a powerful smartphone gimbal that opens up endless possibilities for capturing smooth and professional videos. We’ve covered a range of topics, from unboxing the DJI OM 5 to troubleshooting common issues, giving you the knowledge and techniques needed to make the most of this innovative tool.
Throughout this guide, we began by introducing you to the DJI OM 5 and its sleek design, portability, and user-friendly controls. We then delved into the essential aspects such as charging and powering on, pairing the gimbal with your smartphone, and getting familiar with the DJI Mimo app.
We explored the basic controls and functions of the DJI OM 5, ensuring you have a solid foundation for using this hardware. We also discussed the various shooting modes and features, including timelapse, motionlapse, panorama shots, ActiveTrack, and gesture control. These features provide you with the creative tools to capture stunning and immersive videos.
Additionally, we provided you with valuable tips and tricks to enhance your DJI OM 5 experience, including calibrating the gimbal, experimenting with different shooting techniques, and utilizing accessories to further elevate your videography skills.
Lastly, we addressed common troubleshooting issues and answered some frequently asked questions to assist you in overcoming challenges that may arise during your DJI OM 5 journey.
Remember, practice and experimentation are key to mastering the DJI OM 5. Take the time to familiarize yourself with the controls, explore different shooting modes, and unleash your creativity to capture videos that truly stand out.
Now, armed with your newfound knowledge, grab your DJI OM 5, head out into the world, and start capturing breathtaking footage that tells your unique stories. Whether it’s documenting adventures, creating captivating vlogs, or capturing special moments, the DJI OM 5 is your perfect companion on your videography journey.
Enjoy your creative exploration with the DJI OM 5 and happy filming!