Introduction
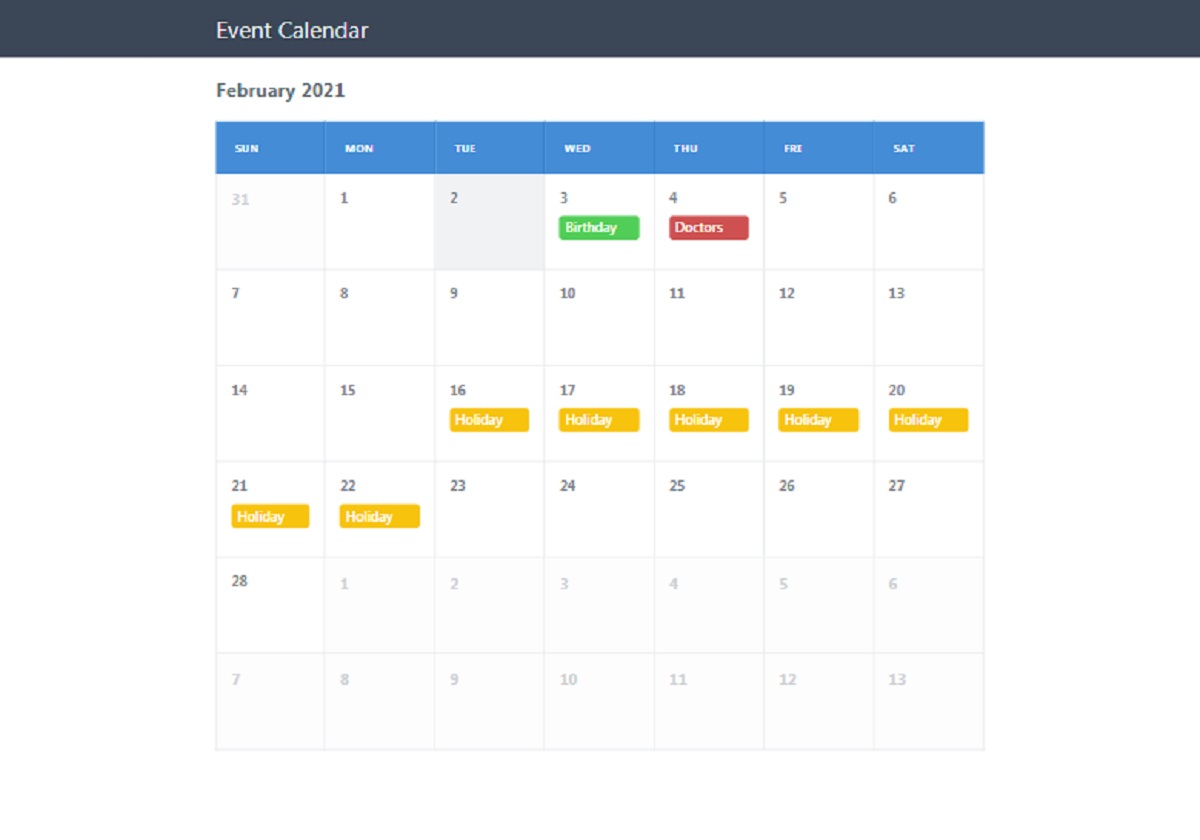
Adding a calendar function to a PHP code can be incredibly useful for managing events, scheduling appointments, or displaying important dates on a website. By incorporating a calendar into your PHP code, you can provide users with a user-friendly interface to view and interact with date-related information.
In this tutorial, we will guide you through the process of adding a calendar to your PHP code. We will explain step-by-step how to set up the PHP environment, create the necessary files, and implement the logic for displaying the calendar. Whether you are a seasoned PHP developer or just starting with PHP, this tutorial will provide a clear and easy-to-follow guide for adding a calendar feature to your PHP code.
Having a calendar in your PHP code opens up a myriad of possibilities. You can use it for creating event management systems, appointment booking systems, or simply to display important dates and upcoming events on your website. With the right implementation, a calendar function can greatly enhance the user experience and make your PHP code more dynamic and interactive.
Throughout this tutorial, we will be using HTML, CSS, and JavaScript in conjunction with PHP to create a fully functional calendar. If you are not familiar with these technologies, don’t worry! We will provide explanations and examples along the way to ensure that you can follow along and understand the code.
Are you ready to take your PHP code to the next level by adding a calendar function? Let’s get started with the first step: setting up the PHP environment.
Step 1: Set up the PHP Environment
Before we can start creating a calendar in PHP, we need to ensure that our PHP environment is properly set up. Here are the steps to get started:
- Install PHP: If you don’t have PHP installed on your system, you’ll need to download and install it. You can visit the official PHP website (php.net) and follow the instructions for your specific operating system.
- Configure PHP: Once PHP is installed, you may need to configure it to fit your requirements. This includes setting up the correct time zone, enabling the necessary PHP extensions, and adjusting PHP settings such as memory_limit and max_execution_time.
- Choose a Text Editor or Integrated Development Environment (IDE): To write and edit your PHP code, you’ll need a text editor or an IDE. Some popular options include Visual Studio Code, Sublime Text, and PhpStorm. Choose the one that you are comfortable with or try out a few to see which one suits your needs.
- Set up a Local Development Server: To view and test your PHP code locally, you’ll need a local development server. You can use software like XAMPP, WAMP, or MAMP, which provide a server environment with PHP, MySQL, and Apache installed. These tools will allow you to run PHP scripts on your local machine.
Once you have completed these steps, your PHP environment will be ready for creating the calendar in PHP. You can now move on to the next step, which involves creating a new PHP file.
Keep in mind that the steps for setting up the PHP environment may vary depending on your operating system and personal preferences. If you encounter any issues during the setup process, consult the documentation and resources available to ensure a smooth setup.
Step 2: Create a New PHP File
Now that we have our PHP environment set up, we can start creating our calendar by creating a new PHP file. Here’s how to do it:
- Open your text editor or IDE: Launch your preferred text editor or IDE. This is where you will write and edit your PHP code.
- Create a new file: Click on the “File” menu and select “New” or use the keyboard shortcut, usually Ctrl + N (Windows) or Command + N (Mac), to create a new file.
- Save the file: Save the new file with a .php extension. For example, you can name it “calendar.php”. Choose a location on your computer where you want to save the file.
Once you have created and saved the new PHP file, you are ready to start coding the calendar functionality. In the following steps, we will define the calendar class and add methods to display the calendar header and days.
Remember to save your changes periodically as you progress through the steps. This ensures that your code is safe and that you can easily revert to a previous version if needed.
Now that we have our PHP file set up, let’s move on to the next step, where we will define the calendar class.
Step 3: Define the Calendar Class
In this step, we will define the calendar class, which will hold all the necessary methods and properties for displaying the calendar. This class will handle the logic and functionality of the calendar.
Here is an example of how to define the calendar class:
php
month = $month;
$this->year = $year;
}
public function displayCalendar() {
// Code to display the calendar
}
private function getMonthName() {
// Code to return the month name
}
private function getDaysOfMonth() {
// Code to return the number of days in the month
}
}
?>
The calendar class has a constructor that takes the month and year as parameters. These values are stored in private properties for later use. The class also has three methods: `displayCalendar()`, `getMonthName()`, and `getDaysOfMonth()`.
The `displayCalendar()` method will handle the main logic for displaying the calendar. It will include code to generate and output the HTML markup for the calendar header and days.
The `getMonthName()` method will return the name of the current month based on the provided month value.
The `getDaysOfMonth()` method will calculate and return the number of days in the current month based on the provided year value.
By defining the calendar class, we have a structure in place to encapsulate the calendar functionality. Now, let’s move on to the next step, where we will add methods to display the calendar header and days.
Step 4: Add Methods to Display the Calendar Header and Days
In this step, we will add methods to our calendar class that will handle the display of the calendar header and days. These methods will generate the HTML markup needed to visually represent the calendar.
Let’s update our calendar class by adding the following methods:
php
generateCalendarHeader();
// Generate the calendar body
$calendarHTML .= $this->generateCalendarDays();
echo $calendarHTML;
}
private function generateCalendarHeader() {
// Code to generate the calendar header HTML markup
}
private function generateCalendarDays() {
// Code to generate the calendar days HTML markup
}
// …
}
?>
The `displayCalendar()` method is responsible for invoking the methods that generate the calendar header and days HTML markup. It appends the generated markup to the `$calendarHTML` variable and then echoes it.
The `generateCalendarHeader()` method is where you would write the code to generate the HTML markup for the calendar header. This typically includes the month and year information and any navigation buttons or controls.
The `generateCalendarDays()` method is responsible for generating the HTML markup for the calendar days. It should loop through the days of the month and generate the appropriate markup for each day, such as `
By adding these methods to our calendar class, we now have the foundation to generate the HTML markup for the calendar header and days. In the next step, we will implement the logic for displaying the calendar using these methods.
Step 5: Implement the Logic for Displaying the Calendar
In this step, we will implement the logic for displaying the calendar using the methods we defined in the previous step. We will utilize the `displayCalendar()` method to generate and output the HTML markup for the calendar.
Let’s update our calendar class with the following implementation:
php
generateCalendarHeader();
// Generate the calendar body
$calendarHTML .= $this->generateCalendarDays();
echo $calendarHTML;
}
// …
private function generateCalendarHeader() {
$monthName = $this->getMonthName();
$calendarHeaderHTML = “
$monthName
“;
return $calendarHeaderHTML;
}
private function generateCalendarDays() {
$daysOfMonth = $this->getDaysOfMonth();
$calendarDaysHTML = “
// Loop through the days of the month
for ($day = 1; $day <= $daysOfMonth; $day++) {
$calendarDaysHTML .= "
“;
}
$calendarDaysHTML .= “
“;
return $calendarDaysHTML;
}
// …
}
?>
In the `generateCalendarHeader()` method, we retrieve the month name using the `getMonthName()` method and include it in the calendar header HTML markup. You can customize the class or styling of the header to fit your design preferences.
In the `generateCalendarDays()` method, we retrieve the total days of the month using the `getDaysOfMonth()` method. We then use a loop to generate a `
With the logic implemented, you can now call the `displayCalendar()` method to generate and display the calendar on your website or application.
In the next step, we will test the functionality of our calendar code to ensure everything is working as expected.
Step 6: Test the Calendar Functionality
Testing the functionality of our calendar is crucial to ensure that it performs as expected and displays the correct calendar information. In this step, we will test the calendar functionality to verify its accuracy and make any necessary adjustments.
Here are the steps to test the calendar functionality:
- Create an instance of the Calendar class: Instantiate the Calendar class by passing the desired month and year as arguments. For example, you can create a new instance for the current month and year like this: `$calendar = new Calendar(date(‘m’), date(‘Y’));`
- Call the displayCalendar() method: To display the calendar on the webpage, call the `displayCalendar()` method on your Calendar object. This will generate the HTML markup for the calendar and output it.
- View the output: Open the webpage where you have added the code to display the calendar. Ensure that you can see the calendar header with the correct month name and the calendar days displayed according to the number of days in the month.
- Test different scenarios: Test the calendar functionality by changing the month and year values in the Calendar constructor. Verify that the calendar updates accordingly and displays the correct information for different months and years.
During testing, pay attention to any errors or discrepancies in the calendar display. Verify that the month name, days, and overall layout are accurate. Make any necessary corrections to the code or logic if needed.
Additionally, consider testing the calendar in different browsers and devices to ensure compatibility and responsiveness. Adjust any CSS styles or media queries as required to optimize the calendar’s appearance on different screen sizes.
By thoroughly testing the calendar functionality, you guarantee that it functions correctly and delivers the desired outcome. Once you are satisfied with the results, you can implement the calendar in your PHP project or customize it further to meet your specific requirements.
With the testing complete, you have successfully integrated and tested the calendar functionality in your PHP code. Congratulations! You can now utilize this calendar to enhance the user experience and provide an interactive date management system on your website or application.
Conclusion
Adding a calendar feature to your PHP code can greatly enhance the usability and functionality of your website or application. With the step-by-step guide provided in this tutorial, you have learned how to set up the PHP environment, create a new PHP file, define the calendar class, add methods to display the calendar header and days, implement the logic for displaying the calendar, and test the calendar functionality.
By following these steps, you now have the knowledge and tools to create a calendar in PHP that can be customized according to your specific requirements. You can use this calendar to manage events, schedule appointments, display important dates, and much more.
Remember to pay attention to coding best practices and optimize the performance of your calendar code. Consider implementing additional features such as event handling, date navigation, or user interactions to make your calendar even more powerful and user-friendly.
Continue to explore and experiment with different design styles, layouts, and functionalities to create a calendar that aligns with your project’s needs and enhances the overall user experience.
Now that you have completed this tutorial, it’s time to put your newly acquired skills into practice and integrate a calendar into your PHP code. Start small, test and iterate, and gradually expand its capabilities to suit your specific project requirements.
By incorporating a feature-rich calendar, you can provide your users with an interactive and visually appealing way to manage and view important dates, ultimately enhancing the overall functionality and user engagement of your website or application.


