Introduction
Welcome to the world of Minecraft! With its vast landscapes and imaginative creations, Minecraft has captured the hearts of millions of players worldwide. One of the many ways players can enhance their Minecraft experience is by using shaders. Shaders are powerful tools that allow you to enhance the game’s visuals, adding stunning effects like realistic lighting, shadows, and reflections.
If you’re a Minecraft player eager to dive into the immersive world of shaders, you’ve come to the right place. In this article, we will guide you on how to download and install shaders specifically for Minecraft 1.9. So, let’s get started and transform your Minecraft experience into something truly breathtaking.
Shaders are essentially graphics packs that apply visual effects to the game. They work by modifying how Minecraft renders its graphics, resulting in improved lighting, shadows, textures, and more. By using shaders, you can add a new level of realism and beauty to your Minecraft world, making it feel more immersive and visually appealing.
Now, you may be wondering where to find shaders for Minecraft 1.9. Luckily, there are several reliable sources where you can browse and download shaders specifically designed for this version of the game.
In the next section, we will explore where to find shaders suitable for Minecraft 1.9.
What are shaders?
If you’re new to the world of Minecraft, you might be wondering what exactly shaders are. Shaders are add-ons for Minecraft that enhance the game’s graphics and visuals. They essentially change the way the game looks, adding various effects such as realistic lighting, shadows, reflections, and more.
Think of shaders as a way to give your Minecraft world a visual upgrade. With shaders, you can transform the blocky and pixelated graphics into something more realistic and immersive. Whether you want your world to resemble a serene landscape with stunning sunsets or a dark and mysterious dungeon with eerie lighting, shaders can help you achieve the desired effect.
Shaders work by modifying the rendering process in Minecraft. They use shaderscripts or code to apply various graphical techniques to the game’s graphics pipeline. These techniques can range from adding dynamic lighting and shadows to implementing advanced visual effects like water reflections and motion blur.
Shaders not only enhance the visual aesthetics of Minecraft but also add a new dimension of depth and immersion to the gameplay. Imagine exploring a dense forest with sunlight filtering through the leaves, creating beautiful dappled lighting effects. Or diving into a vast ocean with realistic waves and shimmering water reflections. Shaders can truly transform your Minecraft experience into something extraordinary.
It’s important to note that shaders are not officially supported by Minecraft itself. They are created and developed by talented community members who have a passion for enhancing the game’s visuals. As a result, shaders may require a more powerful computer to run smoothly, as they can be more resource-intensive compared to the vanilla game.
Now that you have a better understanding of what shaders are, let’s move on to the next section, where we’ll discuss where to find shaders specifically tailored for Minecraft 1.9.
Where to find shaders for Minecraft 1.9
Now that you’re eager to explore the world of shaders in Minecraft 1.9, you may be wondering where exactly you can find them. Thankfully, there are several reliable sources where you can browse and download shaders specifically designed for this version of the game.
One popular website for downloading shaders is the Minecraft Forum. This online community provides a dedicated section where users can share and showcase their shaders creations. Simply visit the forum and navigate to the shaders section, where you’ll find a variety of options specifically categorized for Minecraft 1.9. Browse through the different shader packs, read user reviews, and download the ones that catch your eye.
Another fantastic resource for shaders is Planet Minecraft. This website is a hub for Minecraft content, including shaders. The shaders section allows users to upload and share their creations, making it easy to find shaders compatible with Minecraft 1.9. With a vast selection of packs available, you’re sure to find the perfect shader pack to suit your preferences.
GitHub is also an excellent platform for finding and downloading shaders. Many talented developers create and maintain their shaders on GitHub, providing frequent updates and bug fixes. Simply search for Minecraft shaders on GitHub and explore various repositories to find those compatible with Minecraft 1.9. GitHub provides a convenient way to access the latest versions and contribute to the development of shaders.
Alternatively, you can also search for shaders on popular Minecraft modding platforms like CurseForge and ModDB. These platforms host a wide range of Minecraft mods, including shaders. Simply search for Minecraft shaders and filter the results to find those compatible with version 1.9.
Remember, when downloading shaders from any source, it’s always advisable to read user reviews and check for compatibility with Minecraft 1.9. Additionally, ensure that you download from trusted sources to avoid any potential security risks.
Now that you know where to find shaders for Minecraft 1.9, let’s move on to the next section, where we’ll walk you through a step-by-step guide on how to download and install shaders in Minecraft 1.9.
Step-by-step guide to downloading shaders
Now that you’ve found the perfect shaders for Minecraft 1.9, it’s time to learn how to download and install them. Follow the step-by-step guide below to easily add shaders to your Minecraft game:
- Start by downloading the shaders pack of your choice from a trusted source. Ensure that the shaders pack is compatible with Minecraft 1.9.
- Locate the downloaded shaders pack file on your computer. It is usually saved as a .zip or .rar file.
- Extract the contents of the shaders pack file to a known location on your computer. This will create a new folder containing the shaders files.
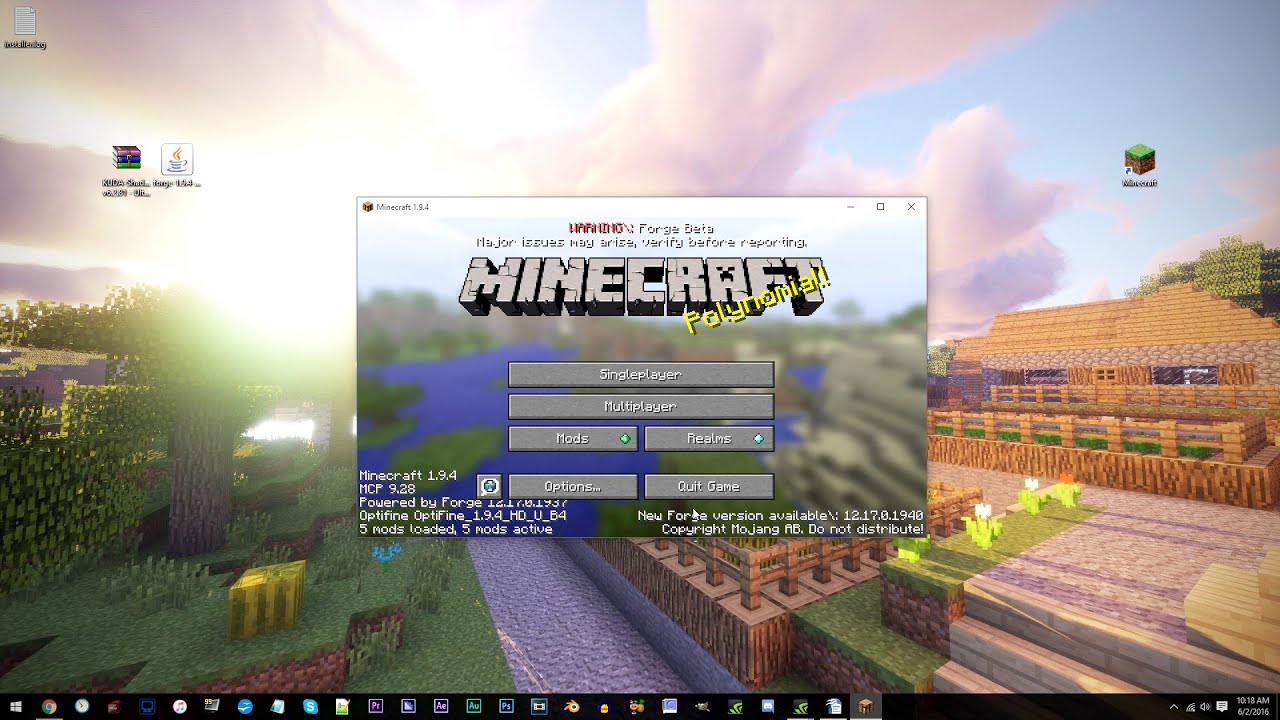
- Open the Minecraft game launcher and ensure you have selected the Minecraft 1.9 version. If not, select it from the drop-down menu and click “Play” to launch the game.
- Once the game is launched, navigate to the “Options” menu and select “Video Settings.”
- Within the Video Settings menu, click on “Shaders” to access the shader pack selection screen.
- Click on the “Shaders Folder” button, which will open the shaders folder location on your computer.
- Move or copy the extracted shaders files from step 3 into the shaders folder.
- Now, return to the shader pack selection screen within Minecraft and select the shaders pack you just added to the shaders folder.
- Click “Done” to apply the shaders pack to the game.
- Enjoy the enhanced visuals and effects of the shaders in your Minecraft 1.9 game!
It’s important to note that not all shaders are created equal, and some may require additional steps or customization. Always refer to the documentation or instructions provided with your chosen shaders pack to ensure the best installation and configuration process.
Congratulations! You have successfully downloaded and installed shaders for Minecraft 1.9. Now, get ready to immerse yourself in a whole new visual experience within the Minecraft world.
How to install shaders in Minecraft 1.9
Installing shaders in Minecraft 1.9 is a relatively simple process. Follow the steps below to install shaders and elevate your Minecraft experience:
- Download the desired shaders pack that is compatible with Minecraft 1.9 from a trusted source.
- Locate the downloaded shaders pack file on your computer. It is usually a .zip or .rar file.
- Extract the contents of the shaders pack file to a location you can easily access.
- Locate the Minecraft installation directory on your computer. The default directory for the Minecraft installation varies depending on your operating system:
- For Windows: %appdata%/.minecraft
- For Mac: ~/Library/Application Support/minecraft
- For Linux: ~/.minecraft
- Within the Minecraft installation directory, navigate to the “shaderpacks” folder. If the folder does not exist, create a new folder and name it “shaderpacks”.
- Move or copy the extracted shaders files from step 3 into the “shaderpacks” folder.
- Launch Minecraft and go to the main menu.
- Click on “Options” and then “Video Settings”.
- Within the Video Settings menu, click on “Shaders” to access the shaders selection screen.
- In the shaders selection screen, you will see a list of available shader packs. Click on the shaders pack you want to use.
- Click “Done” to apply the shader pack to Minecraft.
- Return to the main menu and start or load a new Minecraft world.
Congratulations! You have successfully installed shaders in Minecraft 1.9. You can now enjoy the enhanced visuals and breathtaking effects that shaders bring to the game.
Keep in mind that different shaders packs may have unique configurations or customization options. It’s highly recommended to read the documentation or instructions provided with the shaders pack you downloaded to fully utilize its features and make any necessary adjustments.
Now, go ahead and immerse yourself in the stunning world you’ve created with the help of shaders!
Troubleshooting common issues with shaders
While using shaders in Minecraft 1.9 can greatly enhance your gaming experience, you may encounter some common issues along the way. Don’t worry though, as many of these problems have straightforward solutions. Here are some troubleshooting tips for common issues when using shaders:
Issue 1: Lag or low FPS (Frames Per Second)
If you experience lag or low FPS when using shaders, it’s likely because shaders are resource-intensive, and your computer may struggle to handle them. To improve performance:
- Lower your Minecraft video settings, such as render distance and graphics quality.
- Optimize your computer’s performance by closing other unnecessary applications or processes running in the background.
- Consider upgrading your computer’s hardware, such as adding more RAM or upgrading your graphics card.
Issue 2: Shaders not showing up in the shaders selection screen
If the shaders you installed are not appearing in the shaders selection screen, try the following:
- Check to make sure you placed the shaders pack files in the “shaderpacks” folder located in the Minecraft installation directory.
- Ensure that the shaders pack you downloaded is compatible with Minecraft 1.9. Some shaders may only work with specific versions of the game.
- Restart Minecraft after placing the shaders pack files in the correct folder. This will refresh the shaders selection screen.
Issue 3: Glitches or graphical artifacts
Sometimes, shaders may cause visual glitches or graphical artifacts in the game. Here’s how you can address this issue:
- Update your graphics card drivers to the latest version. Outdated drivers can cause compatibility issues with shaders.
- Try a different shader pack. Some shader packs may be more stable and less prone to glitches than others.
- Adjust the shader pack’s settings. Some shader packs have configurable options that allow you to tweak the effects and minimize artifac
- Decrease the intensity of the shader effects. Some shaders have presets or options to reduce the impact of the visual effects, potentially reducing glitches.
If the issues persist even after troubleshooting, consider seeking assistance from the shader pack’s creator or reaching out to the Minecraft community for further guidance.
With these troubleshooting tips, you should be able to address common issues that may arise when using shaders in Minecraft 1.9. Now, you can fully enjoy the immersive and visually stunning Minecraft experience that shaders provide!
Conclusion
Shaders add a new dimension of beauty and immersion to the Minecraft world, allowing players to transform the game’s graphics and experience stunning visual effects. In this article, we explored the world of shaders specifically for Minecraft 1.9.
We learned that shaders are powerful tools that enhance the game’s visuals, adding effects such as realistic lighting, shadows, and reflections. They can turn the blocky Minecraft world into a visually stunning masterpiece.
Finding shaders specifically designed for Minecraft 1.9 is made easy with resources like the Minecraft Forum, Planet Minecraft, GitHub, and Minecraft modding platforms. These sources provide a wide range of shaders packs, giving you plenty of options to choose from.
We also provided a step-by-step guide on how to download and install shaders in Minecraft 1.9. By following the instructions, you can easily add shaders to your game and take your Minecraft experience to a whole new level.
Additionally, we discussed some common issues that you may encounter when using shaders and provided troubleshooting tips to help you resolve these problems.
Now that you have all the information and tools at your disposal, it’s time to unleash your creativity and explore the wonders of shaders in Minecraft 1.9. Whether you want a realistic world with vibrant colors, atmospheric lighting, or a fantasy realm with magical effects, shaders can bring your imagination to life.
So, grab your favorite shader pack, follow the steps we outlined, and get ready to embark on an awe-inspiring Minecraft adventure. Enjoy the visually stunning world you create, and may your gaming experience be filled with wonder and delight!