Introduction
Welcome to this guide on how to download shaders for Minecraft version 1.12! Minecraft is a popular sandbox game that allows players to unleash their creativity and build amazing worlds. One way to enhance the visual experience of Minecraft is by using shaders, which add stunning lighting and realistic effects to the game.
If you are tired of the default graphics in Minecraft and want to give your game a visual overhaul, shaders are the way to go. With a wide range of shader packs available, you can customize your gameplay and make it truly breathtaking. In this guide, we will take you through the step-by-step process of downloading and installing shaders for Minecraft 1.12.
Before we dive into the installation process, let’s take a moment to understand what exactly shaders are and how they can improve your Minecraft experience. Shaders are modifications to the game’s graphics engine that add visual effects such as dynamic lighting, realistic shadows, motion blur, and more. These effects make the game world more immersive and aesthetically pleasing.
Shaders are different from texture packs, which only modify the textures of blocks and items in the game. While texture packs change the way Minecraft looks, shaders go a step further by altering how the game’s lighting behaves. With shaders, you can make sunlight cast realistic shadows, add reflections to water bodies, and create stunning atmospheric effects.
Now that you understand the concept of shaders and their potential to transform your Minecraft experience, let’s get started with the process of downloading and installing shaders in Minecraft version 1.12. By the end of this guide, you’ll be able to enjoy the beauty and realism that shaders bring to the game.
What are Shaders?
Shaders are modifications to the graphics engine of Minecraft that enhance the visual quality of the game. They introduce various graphical effects that add depth, realism, and immersion to the Minecraft world. Shaders achieve this by manipulating the lighting and rendering techniques used in the game.
One of the key features of shaders is their ability to create realistic lighting effects. By simulating dynamic lighting, shaders make the game world come alive. Sunlight casts realistic shadows, torches emit a warm glow, and the moon bathes the landscape in a soft, ambient light. These lighting effects greatly enhance the atmosphere and mood of the game.
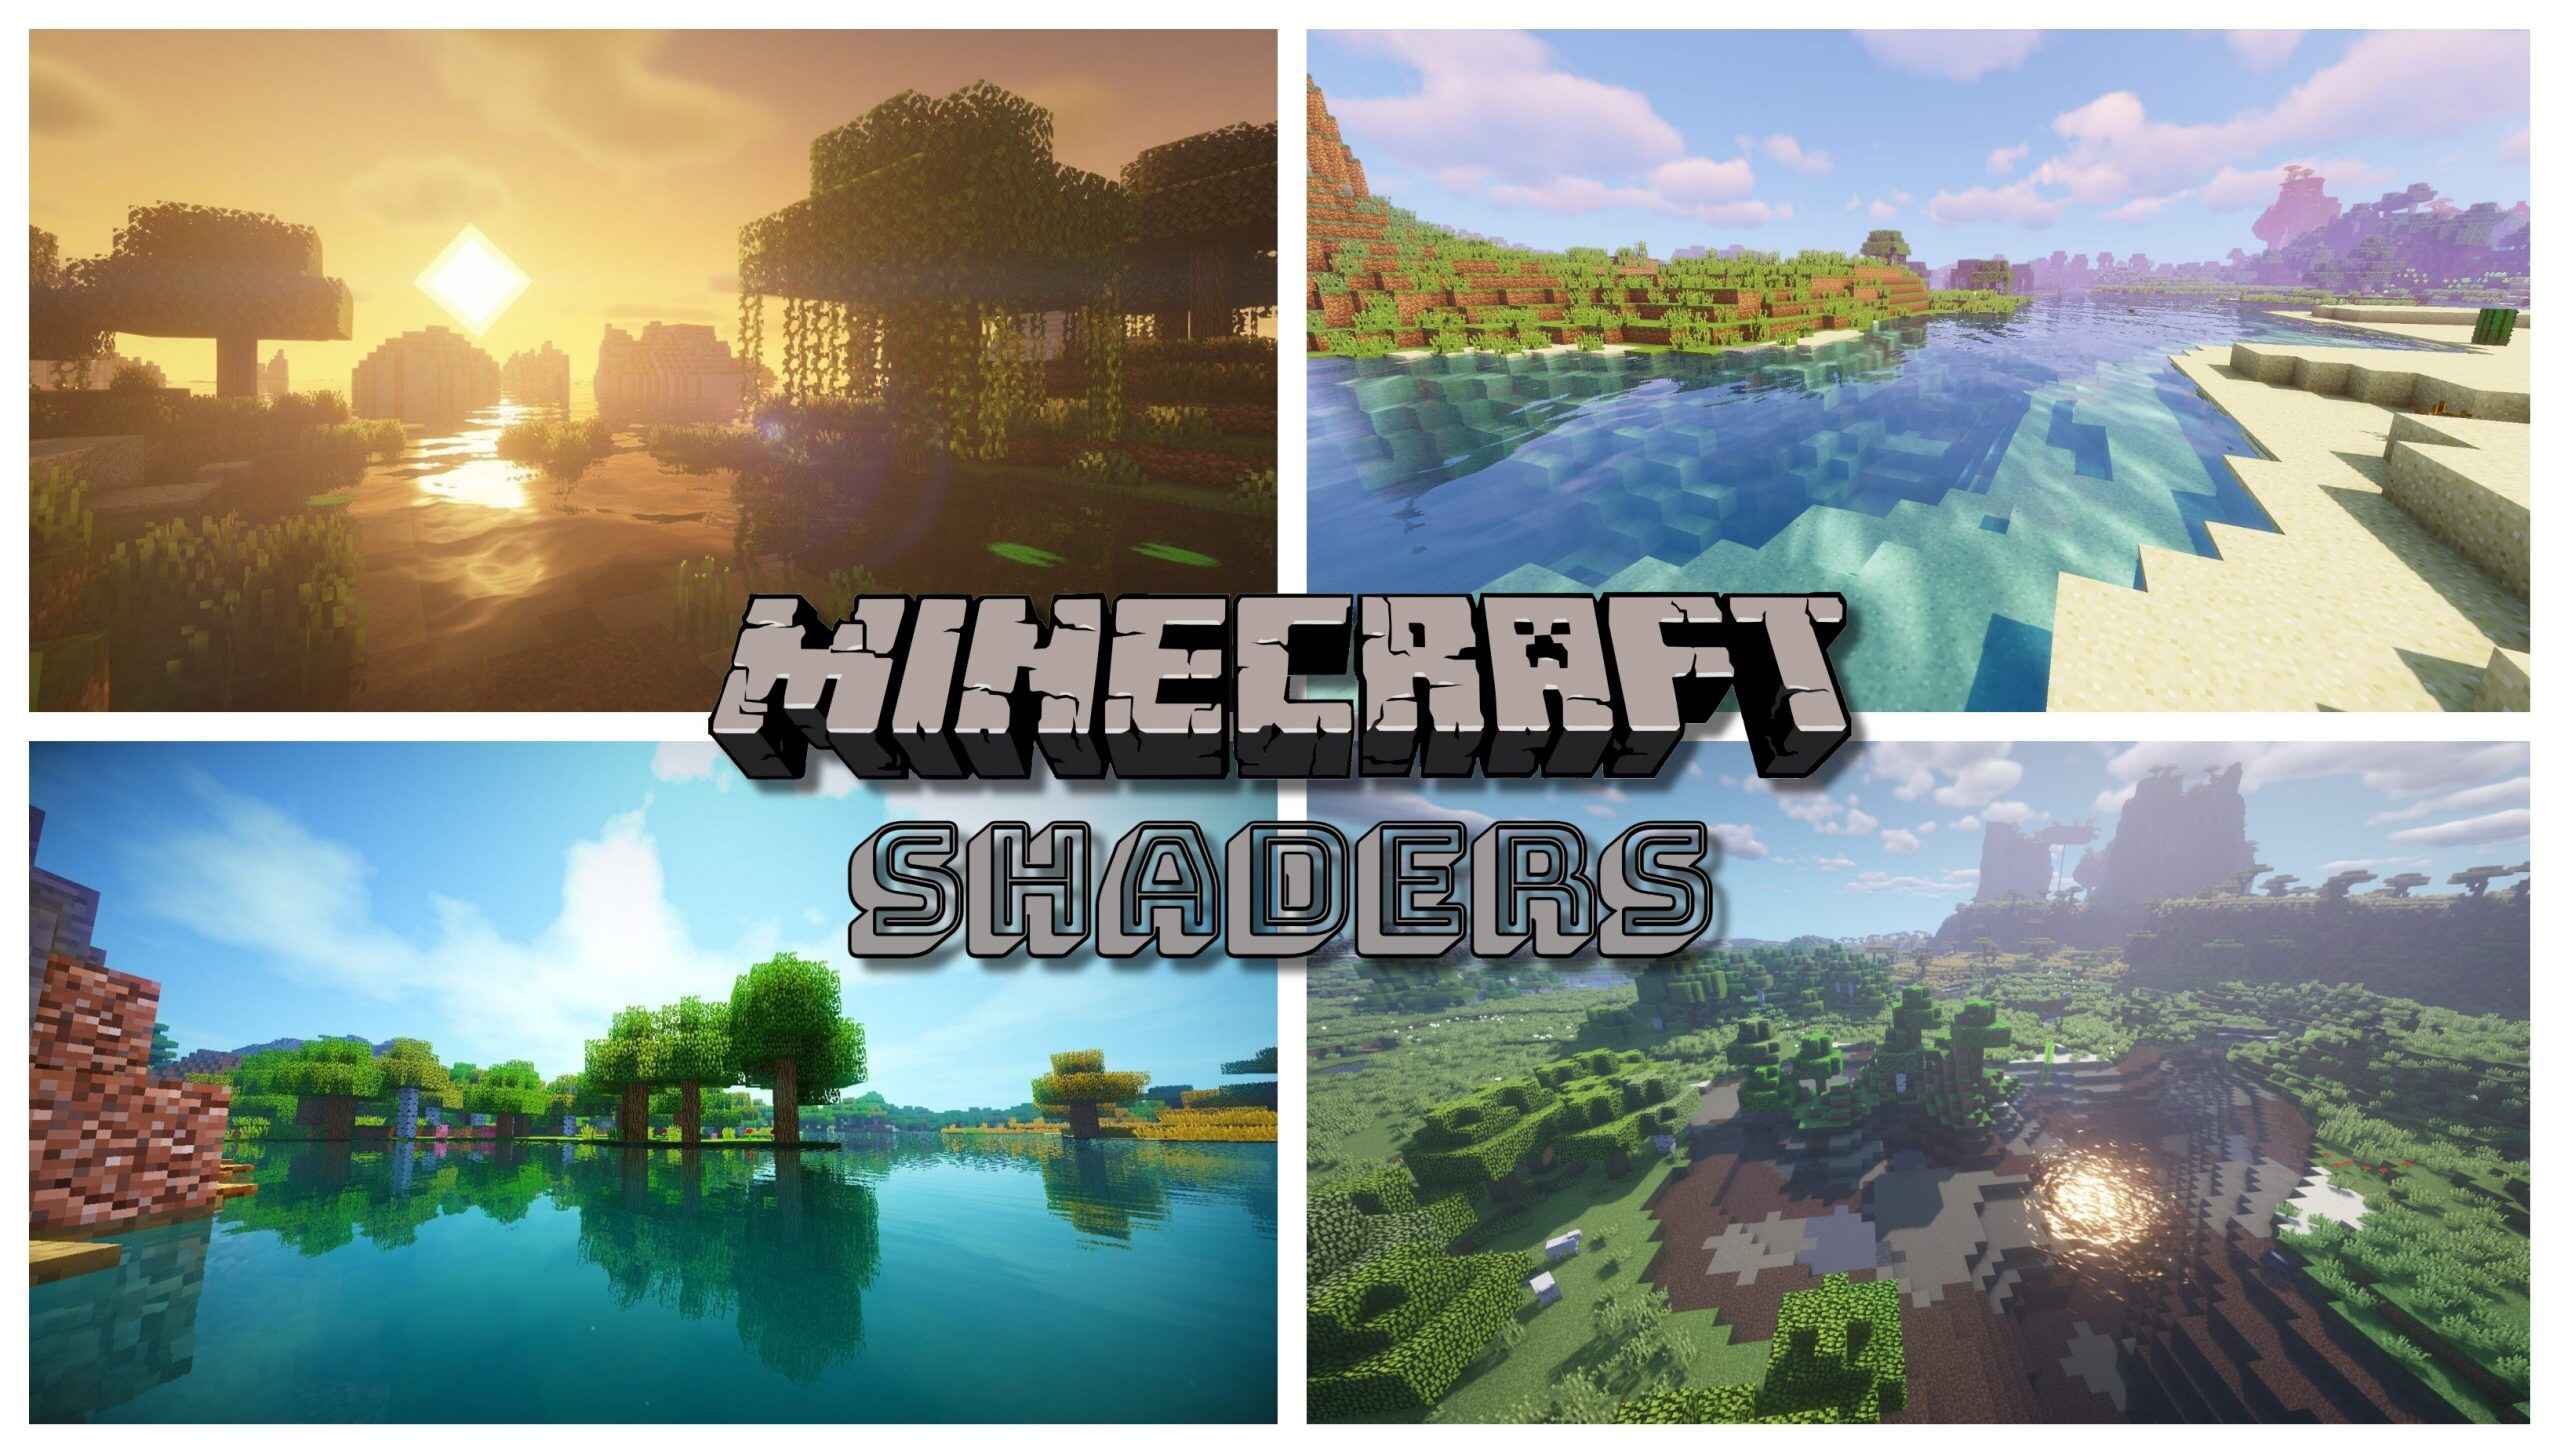
In addition to realistic lighting, shaders also introduce other graphical enhancements. These include depth of field, motion blur, dynamic water reflections, and realistic sky and cloud formations. These effects contribute to a more immersive gameplay experience, making Minecraft feel more like a living, breathing world.
Shaders come in different styles and variations, allowing players to choose the visual aesthetic that suits their preferences. Some shaders aim for vibrant and colorful visuals, while others create a more subdued and realistic atmosphere. With the wide variety of shader packs available, players can customize the look and feel of their Minecraft world to reflect their own unique vision.
It’s important to note that shaders require a strong computer to run smoothly. As they introduce a high level of graphical effects, shaders can be resource-intensive and may cause lag on lower-end systems. Players should ensure that their computer meets the recommended hardware specifications before installing and using shaders.
Now that you have a better understanding of what shaders are and the visual enhancements they bring to Minecraft, it’s time to explore how you can download and install shaders for Minecraft version 1.12. Follow the upcoming steps to transform your Minecraft world into a visually stunning and immersive experience.
Step 1: Download and Install Optifine
The first step in installing shaders for Minecraft version 1.12 is to download and install Optifine. Optifine is a mod that enhances the performance and graphics of Minecraft, making it easier to run shaders and other modifications.
To begin, visit the official Optifine website (https://www.optifine.net) and navigate to the Downloads section. Look for the version of Optifine that is compatible with Minecraft 1.12 and click on the download link. Make sure to select the correct version for your operating system (Windows, Mac, or Linux).
Once the Optifine file has finished downloading, locate it in your computer’s downloads folder or the folder where you saved the file. Double-click on the Optifine installer to open it. You may be prompted to choose an installation location or confirm the installation process – simply follow the on-screen instructions.
After the installation is complete, launch the Minecraft Launcher. In the launcher, select the Optifine profile from the drop-down menu. If you don’t see the Optifine profile, click on the Installations tab and create a new profile by clicking on the New button.
With Optifine selected as the profile, click on the Play button to start Minecraft using Optifine. This will enable Optifine’s performance enhancements and prepare your game for the installation of shaders.
Congratulations! You have successfully downloaded and installed Optifine for Minecraft version 1.12. Optifine will improve the performance and graphics of Minecraft, allowing you to fully enjoy the shaders that you will install in the next steps. Let’s move on to finding a shader pack that suits your preferences in the next section.
Step 2: Find a Shader Pack
Now that you have Optifine installed, the next step is to find a shader pack that suits your visual preferences. Shader packs come in a variety of styles and variations, each offering a unique graphical experience in Minecraft.
To find a shader pack, you can visit popular Minecraft mod websites such as CurseForge (https://www.curseforge.com/minecraft/customization/shaders), Planet Minecraft (https://www.planetminecraft.com/resources/shaders/), or Shader Packs (https://shaders.fandom.com/wiki/Shader_Packs). These websites offer a wide selection of shader packs created by the Minecraft community.
When searching for a shader pack, consider the following aspects:
- Compatibility: Ensure that the shader pack you choose is compatible with Minecraft version 1.12 and Optifine. Most shader packs will specify their compatibility in the description or title.
- Visual Style: Different shader packs offer different visual styles. Some may focus on realistic lighting and textures, while others may have a more cartoonish or stylized appearance. Browse through different packs to find the style that resonates with you.
- Performance: Take into account the performance requirements of each shader pack. Some packs may be more resource-intensive, resulting in lower frame rates or potential lag on less powerful systems. Keep in mind your computer’s hardware capabilities when selecting a shader pack.
- User Reviews: Read user reviews and ratings to gain insights into the quality and performance of a shader pack. This can help you make an informed decision and find a pack that meets your expectations.
Once you have found a shader pack that you like, download it to your computer. Make sure to remember the location where you save the shader pack file, as you’ll need it in the next step.
With the shader pack downloaded and ready, you’re one step closer to enjoying beautiful and realistic visuals in Minecraft. The next step is to learn how to install the shader pack into your Minecraft game, which we will cover in the following section.
Step 3: Download the Shader Pack
Now that you have chosen a shader pack that suits your visual preferences, it’s time to download it and prepare it for installation in Minecraft. In this step, we will guide you through the process of downloading the shader pack to your computer.
Start by locating the shader pack file that you downloaded from your chosen website. The shader pack file typically has a .zip or .jar extension. It’s important to note that you should not extract the contents of the zip file.
Next, open the Minecraft Launcher on your computer. In the launcher, click on the Installations tab and select the Optifine profile that we created earlier. This will ensure that the shader pack is installed and enabled for the Optifine version of Minecraft.
Once you have selected the Optifine profile, click on the Mod Options button next to it. In the Mod Options menu, locate the Shaders option and click on it. This will open the shaders folder where you can place the downloaded shader pack.
Now, open the folder where you saved the shader pack file. Simply drag and drop the shader pack file from its location into the shaders folder that you opened in the previous step. Alternatively, you can right-click on the shader pack file and select “Copy,” then navigate to the shaders folder and right-click again to select “Paste.”
After you have successfully copied the shader pack into the shaders folder, close all open windows and return to the Minecraft Launcher. Click on the Play button to launch Minecraft using the Optifine profile.
When Minecraft loads, click on the Options button in the main menu and select the video settings. In the video settings, you should see a new button labeled “Shaders.” Click on this button to access the shader packs that you have installed.
In the shader packs menu, you should see the shader pack that you downloaded listed as an option. Select the shader pack and click on the “Done” button to apply the shaders to your Minecraft game.
Congratulations! You have successfully downloaded the shader pack and installed it in Minecraft. The next step is to enable the shaders for your gameplay, which we will cover in the following step.
Step 4: Install the Shader Pack
Now that you have downloaded the shader pack and placed it in the appropriate folder, it’s time to install and enable the shaders in Minecraft. By following these steps, you’ll be able to enjoy the stunning visual effects that shaders bring to your Minecraft world.
Start by launching Minecraft using the Optifine profile, as we did in the previous step. Once Minecraft has loaded, click on the Options button in the main menu and select the video settings. Within the video settings menu, you should see a button labeled “Shaders.” Click on this button to access the shader packs that you have installed.
In the shader packs menu, you will see a list of available shader packs, including the one you downloaded. Select the desired shader pack from the list to apply it to your Minecraft game. You can preview each shader pack to see how it affects the visuals before making a final selection.
After selecting the shader pack, click on the “Done” button to save your changes. Minecraft will reload with the new shaders applied, and you will now experience the enhanced visuals and realistic effects while playing the game.
Take some time to explore your Minecraft world with the new shaders. Notice the improved lighting effects, the realistic reflections on water, and the enhanced atmospheric elements that shaders provide. You can also experiment with different shader packs to find the one that best suits your taste and preferences.
It’s important to note that some shader packs may offer additional customization options. If the shader pack you selected includes customizable settings, you can fine-tune them to adjust the visuals according to your liking. These settings may include options to adjust brightness, shadows, motion blur, and more.
Remember that running shaders may require a more powerful computer, so adjust the shader settings as necessary to achieve optimal performance. If you experience any performance issues or lag, you may need to lower the graphics settings or try a less resource-intensive shader pack.
Now that you have successfully installed and enabled the shader pack, you can fully enjoy the enhanced visual experience in Minecraft. The next and final step is to wrap up the process and start exploring your newly transformed Minecraft world.
Step 5: Enable Shaders in Minecraft
Now that you have installed the shader pack, the next step is to enable and configure shaders in Minecraft. By following these steps, you’ll be able to fully experience the stunning visuals and realistic effects that shaders bring to the game.
Start by launching Minecraft and selecting the Optifine profile that we created earlier. Once Minecraft has loaded, click on the Options button in the main menu and select the video settings. Within the video settings menu, you should see a button labeled “Shaders.” Click on this button to access the shader packs that you have installed.
In the shader packs menu, you’ll see a list of available shader packs. Select the desired shader pack from the list to apply it to your Minecraft game. You can preview each shader pack to see how it affects the visuals before making a final selection.
Once you have selected the shader pack, you may have the option to customize its settings. Some shader packs offer additional options that allow you to adjust various aspects of the visuals, such as brightness, shadows, motion blur, and more. Explore the settings and make adjustments according to your preferences.
After selecting or customizing the shader pack, click on the “Done” button to save your changes. Minecraft will reload with the shaders applied, and you can now experience the enhanced visuals and realistic effects while playing the game.
Take some time to explore your Minecraft world with the shaders enabled. Observe the realistic lighting and shadows, the vibrant colors, the subtle movements of water and foliage, and the atmospheric effects that shaders provide. Each shader pack offers a unique visual experience, so feel free to try different packs to find the one that best suits your taste.
It’s important to note that running shaders may require a more powerful computer. If you experience any performance issues or lag, you can adjust the shader settings to optimize performance. Simply return to the shader packs menu, select the shader pack, and adjust its settings according to your computer’s capabilities.
With shaders enabled, you can now fully immerse yourself in the enhanced visuals of Minecraft. Enjoy exploring your transformed world, building intricate structures, and embarking on new adventures with the stunning graphics that shaders provide.
Now that you have successfully enabled shaders in Minecraft, the next and final step is to conclude this guide and encourage you to indulge in your newly enhanced Minecraft experience.
Step 6: Enjoy Your Newly Installed Shaders!
Congratulations! You have successfully installed and enabled shaders in Minecraft. Now it’s time to sit back, relax, and enjoy the breathtaking visual experience that shaders bring to the game.
Explore your Minecraft world with the new shaders and take in the stunning details and realistic effects. Notice how the lighting changes throughout the day, casting beautiful shadows and illuminating the landscape in a mesmerizing way. Observe the realistic reflections on water and other surfaces, making the game world feel more immersive than ever before.
Take some time to marvel at the vibrant colors, the depth of field effects, and the subtle movements of foliage and grass as they sway in the breeze. The addition of shaders truly enhances the atmospheric elements of the game, making your Minecraft experience more engaging and visually appealing.
Use this opportunity to unleash your creativity and build even more impressive structures with the added realism and visual depth that shaders provide. Immerse yourself in the beauty of your creations and share them with others to inspire and amaze.
If you find yourself wanting to switch between different shader packs or make adjustments to the shader settings, you can always return to the shader packs menu in the video settings. Try out different packs to find the one that best suits your preferences and experiment with the settings to achieve the desired visual effects.
As you indulge in your newly installed shaders, keep in mind that shaders can be resource-intensive and may impact the performance of your computer. If you experience any lag or performance issues, consider adjusting the shader settings or trying a different shader pack that is less demanding on your system.
Now that you have completed all the necessary steps to download, install, and enjoy shaders in Minecraft, it’s time to embark on your epic adventures in a visually stunning world. Whether you’re building, exploring, or engaging in combat, the enhanced visuals provided by shaders will truly elevate your Minecraft experience to new heights.
So, grab your pickaxe, don your armor, and lose yourself in the mesmerizing beauty of Minecraft with your newly installed shaders. Enjoy the journey ahead and make the most of your enhanced gaming experience!
Conclusion
Congratulations on successfully downloading, installing, and enabling shaders for Minecraft version 1.12! With the stunning visual enhancements and realistic effects provided by shaders, your Minecraft gameplay experience will never be the same again.
Through the step-by-step guide presented in this article, you have learned how to enhance your Minecraft world by incorporating shaders. You started by downloading and installing Optifine, a mod that improves performance and graphics in Minecraft. Then, you found a shader pack that suits your style and preferences.
After downloading the shader pack, you installed it by placing the file in the correct shaders folder. Finally, you enabled the shaders within your Minecraft game to enjoy the incredible visual transformations.
With shaders enabled, you can now immerse yourself in a vibrant, realistic Minecraft world. Experience dynamic lighting, realistic shadows, vivid colors, and atmospheric effects that breathe life into the game. Shaders add depth and beauty to your Minecraft creations, allowing you to explore and build in an entirely new way.
As you delve into your Minecraft adventures with shaders, keep in mind that choosing the right shader pack for your computer’s capabilities is essential for optimal performance. You can always adjust the shader settings or try different packs to find the perfect balance between stunning visuals and a smooth gameplay experience.
Now, it’s time to unleash your imagination and embark on grand adventures in your visually enhanced Minecraft world. Whether you’re building awe-inspiring structures, exploring vast landscapes, or engaging in thrilling battles, shaders will elevate your experience and make your Minecraft journey more immersive and captivating.
Enjoy the beauty, realism, and endless possibilities that shaders offer. Let your creativity soar as you bring your Minecraft world to life with the power of shaders. Whether you choose vibrant and colorful visuals or a more realistic and subdued atmosphere, the choice is yours.
Now, it’s time to log in, pick up your tools, and embark on a remarkable journey in your newly transformed Minecraft world. Embrace the enhanced visuals, embrace the immersive atmosphere, and most importantly, embrace the fun and adventure that awaits you in Minecraft with shaders.