Introduction
Are you a Minecraft enthusiast looking to add some visual enhancements to your gaming experience? If so, you’ve come to the right place. Shaders are a popular way to enhance the graphics of Minecraft, giving the game a more realistic and immersive feel. By seamlessly integrating dynamic lighting, shadows, and various visual effects, shaders can transform the visual aesthetics of the game.
In this guide, we will walk you through the process of downloading shaders for Minecraft version 1.7.10. Whether you are a beginner or an experienced player, this step-by-step tutorial will help you understand the basics of shaders, where to find them, how to download and install the required software, and how to activate and customize shaders in Minecraft.
Understanding the world of shaders can feel overwhelming at first, but fear not! We will break it down into simple and easy-to-follow steps, ensuring that you can enjoy the mesmerizing visual effects that shaders provide.
Before delving into the download process, let’s take a moment to understand what shaders are and how they can enhance your Minecraft gameplay. Shaders are modifications that add advanced graphical features to the game, allowing players to experience improved lighting, realistic shadows, dynamic weather effects, and more. They work in conjunction with the OptiFine mod, which enhances the game’s performance and allows for greater customization options.
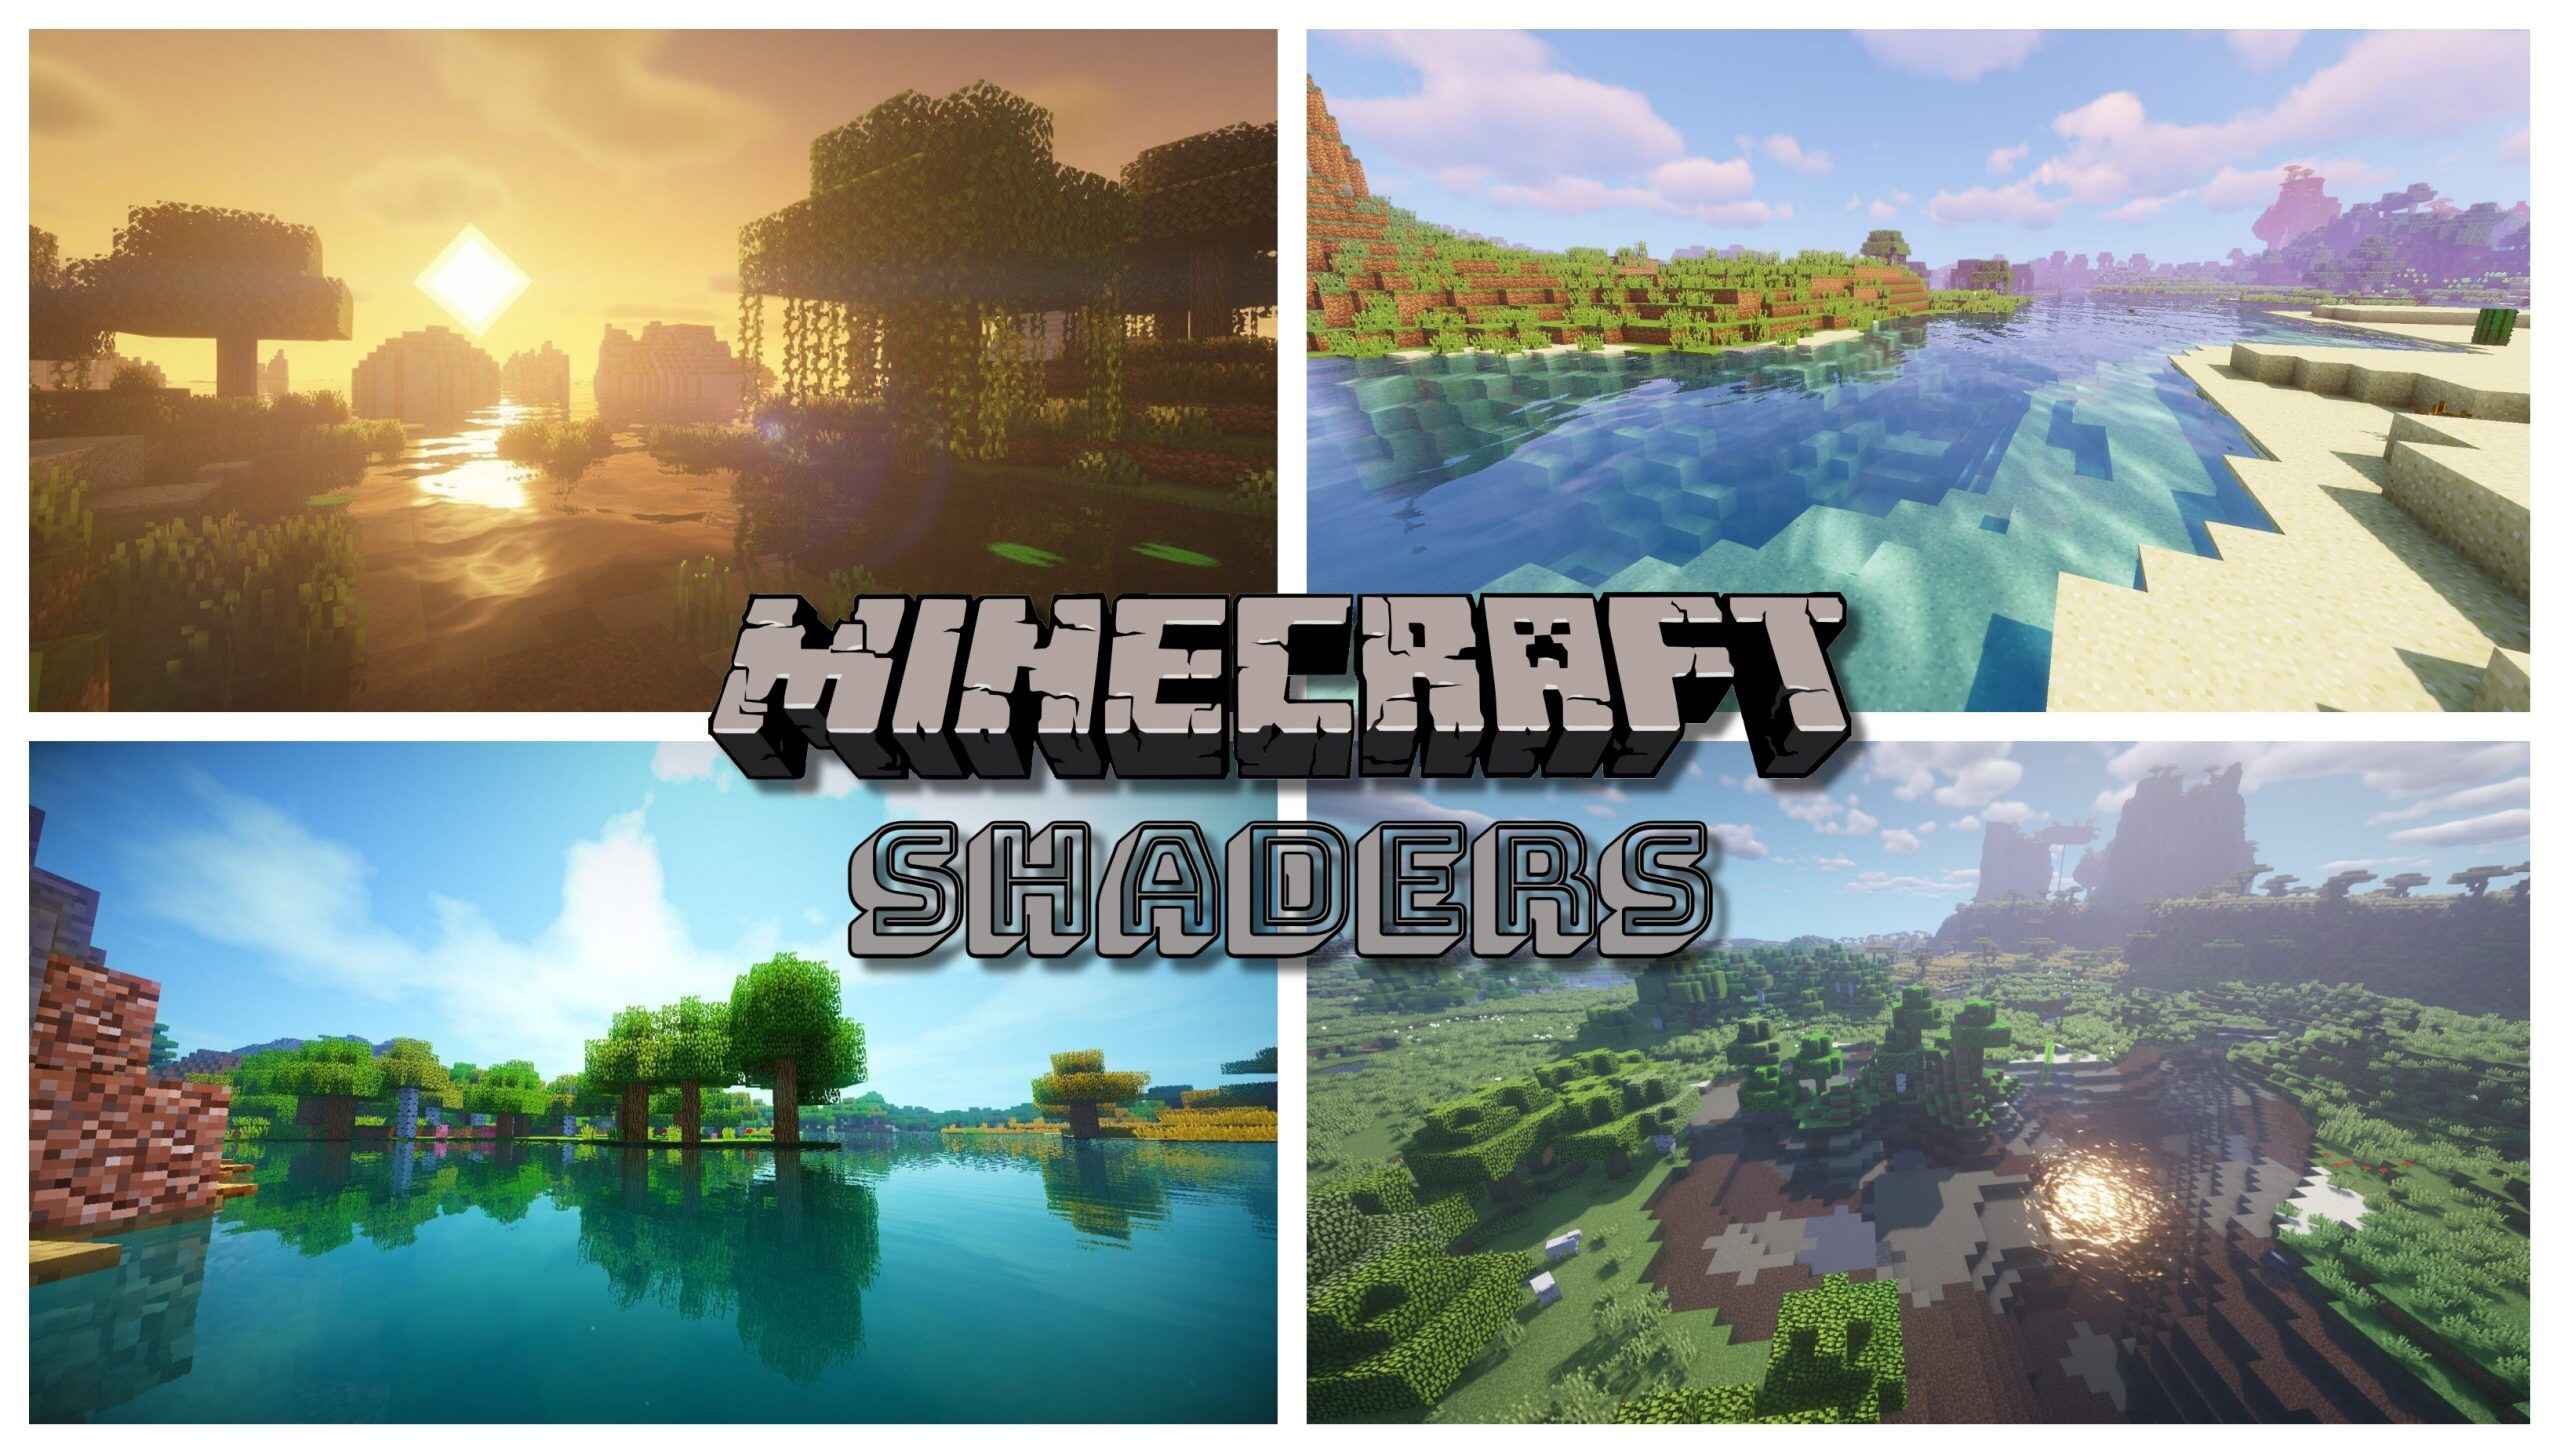
With shaders, you can turn the blocky world of Minecraft into a visually stunning landscape, with breathtaking sunsets, vibrant colors, and realistic water and foliage. Shaders bring a new level of immersion to the game, making your adventures in Minecraft feel even more lifelike.
Now that you have a basic understanding of what shaders are and the benefits they offer, let’s move on to the next step: finding a trusted source for downloading shaders.
Step 1: Understand Shaders
Before diving into the world of shaders, it’s essential to have a clear understanding of what they are and how they function. By grasping the basics, you’ll be able to navigate the shader download and installation process with ease.
In simple terms, shaders are modifications or add-ons that enhance the visual aspects of Minecraft by implementing advanced graphical effects. By altering how light interacts with the in-game environment, shaders can create stunning visual enhancements, including realistic lighting, shadows, water reflections, and more.
Shaders work by manipulating the game’s rendering engine. They modify how light is calculated and rendered, resulting in a visually striking experience. However, it’s crucial to note that shaders require a compatible shader mod, such as OptiFine, for them to work correctly. This mod not only improves the game’s performance but also unlocks additional shaders customization options.
Each shader pack comes with its own set of features and effects. Some may prioritize realistic lighting and shadows, while others might focus on enhancing the overall atmosphere with vibrant colors and atmospheric effects. It’s essential to find a shader pack that matches your preferences and the overall aesthetic you want to achieve in your Minecraft world.
As shaders are graphics-intensive, it’s important to ensure that your computer meets the system requirements to run them smoothly. High-end graphics cards and a robust CPU will greatly enhance your experience. Additionally, shaders can be demanding on system resources, so balancing visual quality with performance is essential.
To sum up, shaders are modifications that enhance the visual aspects of Minecraft by implementing advanced graphical effects. They work by altering the rendering engine and require a compatible shader mod, such as OptiFine, to function correctly. With various shader packs available, you can choose one that aligns with your desired visual experience. However, remember to consider your computer’s specifications to ensure smooth performance.
Now that you have a solid understanding of shaders, it’s time to move on to the next step: finding a trusted source to download shaders.
Step 2: Find a Trusted Source for Shaders
Now that you understand the fundamentals of shaders, the next step is to find a reliable source for downloading them. It’s crucial to use trusted platforms to ensure the safety and quality of the shader packs you download. Here’s how you can find a trusted source:
1. Minecraft Community Websites: Websites dedicated to the Minecraft community, such as Planet Minecraft and CurseForge, are excellent sources for downloading shaders. These platforms host a wide range of community-created content, including shader packs. You can browse through different packs, read reviews, and choose the one that suits your preferences. These sites are known for their extensive collection of safe and verified content, making them reliable sources for downloading shaders.
2. Minecraft Forums: The official Minecraft forums are another valuable resource for finding shader packs. Experienced players and shader creators often showcase their work and provide download links on the forums. These forums have a strong community presence, ensuring that the content is reliable and trustworthy. Exploring the relevant sections of the forums will help you discover a variety of shader packs and find reliable download links.
3. Social Media and YouTube: Social media platforms and YouTube can also be excellent sources for finding shader packs. Many Minecraft enthusiasts and content creators share their favorite shaders on platforms like Twitter, Instagram, and Reddit. Additionally, YouTube is a hub for Minecraft tutorial videos, including shader showcases and installation guides. Look for trusted creators with a large following or positive feedback to find reliable shader packs and installation instructions.
Remember, while these sources are generally reliable, it’s essential to exercise caution and ensure that you download shader packs from reputable and respected creators. Additionally, always check for community feedback and reviews to verify the quality and safety of the shader pack before downloading.
By using trusted sources, you can download shader packs that are free from malware or other harmful components. These platforms prioritize user safety and ensure a diverse collection of high-quality shader packs for the Minecraft community.
With a reliable source for shader packs at your fingertips, you’re now ready to move on to the next step: downloading and installing the required software.
Step 3: Download and Install the Required Software
Before you can start enjoying shaders in Minecraft, you need to download and install the necessary software. Here’s a step-by-step guide on how to do it:
1. Install OptiFine: Shaders require the OptiFine mod to work properly. Start by visiting the official OptiFine website and download the version that corresponds to your Minecraft version (in this case, 1.7.10). Once downloaded, double-click the .jar file to launch the installer. Follow the on-screen instructions to complete the installation process. OptiFine enhances the game’s performance and unlocks advanced graphical settings, making it an essential component for using shaders.
2. Launch Minecraft: Open the Minecraft Launcher and click on the “Installations” tab. Create a new installation by clicking the “New” button. Give it a name, select the Minecraft version (1.7.10), and make sure to choose the OptiFine version you installed in the “Add new” dropdown menu. Click “Create” to finalize the installation.
3. Run Minecraft with OptiFine: Go back to the “Play” tab and select the created installation with OptiFine. Click the “Play” button to launch Minecraft with OptiFine enabled. This step ensures that OptiFine is running correctly before proceeding to the next steps.
4. Verify OptiFine Installation: Once Minecraft has launched, click on the “Options” button in the main menu, then select “Video Settings”. If OptiFine is installed correctly, you should see additional graphical options, such as shaders, under the “Shaders” tab.
Now that you have successfully installed OptiFine, you are one step closer to experiencing shaders in Minecraft. In the next step, we will guide you on how to locate and download the desired shader pack.
Step 4: Locate and Download the Desired Shader Pack
With the necessary software installed, it’s time to find the perfect shader pack to enhance your Minecraft experience. Here’s how you can locate and download the desired shader pack:
1. Research Shader Packs: Start by researching different shader packs available for Minecraft version 1.7.10. Check out reputable Minecraft community websites, forums, and social media platforms to discover popular shader packs. Look for packs that align with your visual preferences, whether you prefer realistic lighting, vibrant colors, or a specific artistic style.
2. Choose a Shader Pack: After conducting your research, select the shader pack that catches your eye. Pay attention to the pack’s compatibility with Minecraft 1.7.10 and any additional requirements it may have. It’s also a good idea to read reviews or watch video showcases to get a better understanding of how the shader pack looks and performs in-game.
3. Download the Shader Pack: Once you have chosen a shader pack, locate the download link associated with it. Click on the provided link to initiate the download. Make sure to download the pack from a trustworthy source to ensure its authenticity and safety. It’s always a good practice to scan downloaded files with reliable antivirus software to mitigate any potential risks.
4. Save the Shader Pack: After the download is complete, save the shader pack file (.zip or .jar format) to a location on your computer where you can easily access it later. Remember the file’s location, as you will need it in the next steps.
5. Do Not Extract the Shader Pack: It’s important to note that you should not extract the shader pack file. Leave it in its original compressed format (.zip or .jar) to ensure proper installation. The shader pack needs to be loaded by Minecraft’s shader system without any modifications to the file structure.
By following these steps, you will successfully locate and download the desired shader pack for Minecraft version 1.7.10. In the next step, we will guide you through the process of installing and activating the shader pack in Minecraft.
Step 5: Install and Activate the Shader Pack
Now that you have downloaded the desired shader pack, it’s time to install and activate it in Minecraft. Follow these steps to bring the stunning visual effects of shaders to your game:
1. Launch Minecraft with OptiFine: Open the Minecraft Launcher and select the OptiFine installation you created in Step 3. Click on the “Play” button to launch Minecraft with OptiFine loaded.
2. Open Video Settings: Once Minecraft loads, click on the “Options” button in the main menu, then select “Video Settings” from the dropdown menu. This will open the video settings menu where we will activate the shader pack.
3. Navigate to the Shaders Menu: In the Video Settings menu, click on the “Shaders…” button. This will open the Shaders menu, where you can manage and activate your shader packs.
4. Locate Shader Pack Folder: In the Shaders menu, click on the “Open shaderpacks folder” button. This will open the folder on your computer where you need to place the downloaded shader pack.
5. Move the Shader Pack: Open the folder containing the downloaded shader pack that you saved in Step 4. Drag and drop the shader pack file (in its original .zip or .jar format) into the shaderpacks folder. Make sure to leave the file as-is without extracting it.
6. Activate the Shader Pack: Return to Minecraft and refresh the Shaders menu by clicking the “Refresh” button. You should now see the name of the shader pack you just added in the list of available packs. Click on the shader pack’s name to activate it. You may also need to adjust other shader-specific settings depending on the pack you’ve chosen.
7. Apply Changes and Test: Once you have activated the shader pack and made any necessary adjustments, click the “Done” button to apply the changes. Return to the game and witness the stunning visual transformation brought by the shader pack. Explore different environments and observe the enhanced lighting, shadows, and other effects.
Congratulations! You have successfully installed and activated the shader pack in Minecraft. Take some time to explore and test different shader packs to find the one that suits your preference. In the next step, we will guide you through the process of configuring and customizing shaders.
Step 6: Configure and Customize Shaders
Now that you have activated the shader pack in Minecraft, you can explore the various customization options available to fine-tune your visuals. Follow these steps to configure and customize shaders according to your preferences:
1. Access Shader Options: While in the game, press the “Options” button in the main menu, then select “Video Settings” from the dropdown menu. Click on the “Shaders…” button to access the Shaders menu.
2. Shader Pack Settings: In the Shaders menu, you will find the settings specific to the activated shader pack. Depending on the pack, you can adjust parameters such as brightness, contrast, depth of field, motion blur, and more. Experiment with these settings to achieve the desired visual style and performance balance. Keep in mind that changing certain settings may affect the shader’s performance on your system.
3. Shaders Profile: Some shader packs offer multiple profiles with different presets or configurations. You can switch between these profiles to instantly change the visual presentation of the game. Explore different profiles and see which ones align with your preferences.
4. Advanced Shader Options: Some shader packs also provide advanced options that allow for in-depth customization. These options may include tweaking specific effects, adjusting rendering distances, controlling the intensity of shadows, or modifying the colors. Spend some time exploring these advanced options to further personalize your shader experience.
5. Saving Shader Settings: Once you have configured the shader pack to your liking, click the “Done” button to save the settings. You can always come back to the Shaders menu and adjust the settings as you see fit.
Remember, each shader pack offers its own unique set of customization options. Play around with different settings to find the perfect balance between visual appeal and performance on your system.
Don’t be afraid to experiment and tweak the settings to match your personal preferences. Whether you want a more realistic look, vibrant colors, or any other specific visual effect, the customization options available will allow you to achieve your desired aesthetic.
In the next step, we will guide you on how to test and enjoy the shaders you have installed and customized.
Step 7: Test and Enjoy the Shaders
With the shaders installed, configured, and customized to your liking, it’s time to immerse yourself in the mesmerizing visual effects they provide. Follow these steps to test and enjoy the shaders in Minecraft:
1. Load a World: Launch Minecraft and select the world you want to play in or create a new one. It’s recommended to choose a world that showcases various environments and lighting conditions, allowing you to fully appreciate the shader’s effects.
2. Observe the Visual Enhancements: As you explore the Minecraft world, take a moment to observe the changes brought by the shaders. Notice the realistic lighting and shadows, the vibrant colors, and the atmospheric effects. Pay attention to how the shader pack enhances the overall ambience and immersion of the game.
3. Test Different Times of Day and Weather: Shaders often provide enhanced lighting effects during different times of the day and various weather conditions. Spend some time changing the in-game time and experiencing the visual transformations that occur. Witness the breathtaking sunsets, the soft glow of moonlight, and the dynamic weather effects like rain or snow.
4. Capture and Share Screenshots or Videos: If you come across particularly stunning or breathtaking scenes, consider taking screenshots or recording gameplay videos to showcase the beauty of your shaders-enhanced Minecraft world. Sharing these visuals with others can serve as inspiration and allow them to see the amazing effects shaders provide.
5. Fine-Tune the Settings: If you feel that certain aspects of the shader pack could be further optimized for your preferences or performance requirements, return to the Shaders menu (Options – Video Settings – Shaders…) and adjust the settings accordingly. Experiment with different combinations to achieve the desired visual experience.
By following these steps, you will be able to fully test and enjoy the shaders that you have installed, configured, and customized for your Minecraft world. Take the time to marvel at the enhanced visuals, immerse yourself in the atmosphere, and capture those stunning moments to share with others.
Remember, shaders can greatly enhance your Minecraft experience, but they can also have an impact on system performance. If you encounter any performance issues, consider adjusting the shader settings or experimenting with different shader packs to find the optimal balance between visuals and performance on your computer.
Now that you have completed all the steps, you are ready to embark on your Minecraft adventures with captivating shaders, making your gameplay more immersive and visually stunning than ever before!